Personalized Paper Napkins
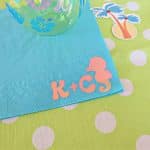
Custom napkins are another super inexpensive way to give your party an extra layer of personalization without spending a bunch of money! For this project I took my sister and my initials as well as one of the design elements (a seahorse) that I used on the cups and in the confetti. The Cricut Autopress makes batching this project super simple, but you can also use a Cricut EasyPress.
Equipment
- Cricut Maker, Cricut Explore Air or Cricut JoyCricut
- Smart Iron-On or Cricut Iron-On
- StandardGrip Cutting Mat (if not using Smart Iron-On)
- Cricut Weeding Tools
- Scissors
- Cricut AutoPress or Cricut EasyPres
- Napkins
Instructions
- Open Cricut Design Space. You can find my ocean themed napkins cut file project here. I used the font BFC Parkway for my napkins.
- Size your design to the size that you would like it to be for your napkins. I wanted my design in the corner of the napkin and sized it to 1.75 inches tall by 2.6 inches wide.
- Duplicate your design for as many napkins as you will be making.
- Click Make It. Since you will be using iron-on you will want to mirror your design. Follow the instructions on your screen to connect your Cricut to you computer or device and select your cutting material.
- If using Smart Iron-On feed your iron-on into your machine with the shiny/color side facing down. If using regular iron-on lay your iron-on on your cutting mat with the shiny/color side facing down. Load your material/mat into your machine and start cutting.
- When your design is done cutting, unload your cutting material/mat from your machine and use your weeding tools to weed your iron-on, removing the iron-on from around your design leaving just the design behind on the clear plastic backer.
- Preheat your Cricut Autopress or Cricut EasyPress using the heat settings recommended on the Cricut Heat Guide Website. If using paper napkins select cardstock as your base material. I set my Cricut Autopress to 280F and the timer to 15 seconds.
- While your heat press heats, cut your sheet of designs so that each design is on it's own plastic backer.
- Position your design where you would like it on your napkin then press using your heat press. Again we pressed at 280F for 15 seconds. Repeat until you have pressed all of your napkins.
- Once your napkins have cooled, carefully remove the plastic liners on each napkin revealing your design.