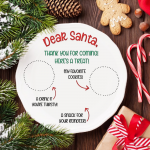
Upload our Dear Santa Snack Plate Cut File to Cricut Design Space.
Measure the surface that you will be putting your vinyl onto. Size the design accordingly. Click Make and cut your vinyl following the prompts on your screen.
Weed each color of vinyl, removing the extra vinyl from around your design, leaving just the design behind on the white paper backing.
Use transfer tape to transfer your design from the white paper backing to the snack plate. We suggest doing this one element at a time. Cut a piece of transfer tape slightly larger than the largest piece. Peel away the backing of the transfer tape and lay the tape on top of your design. Use your scraper tool to rub over top, making sure the vinyl sticks to the transfer tape. Slowly lift the transfer tape from the vinyl paper backing making sure the design is attached to the transfer tape. Lay the transfer tape where you would like the design on the transfer tape. Use your scraper tool again to rub over top of the transfer tape, making sure your vinyl sticks to your plate. Slowly lift away the transfer tape leaving your vinyl design behind.
Leave your plate for 48 hours before washing to make sure that the vinyl cures. We recommend washing your plate by hand for the longevity of the vinyl design.
