


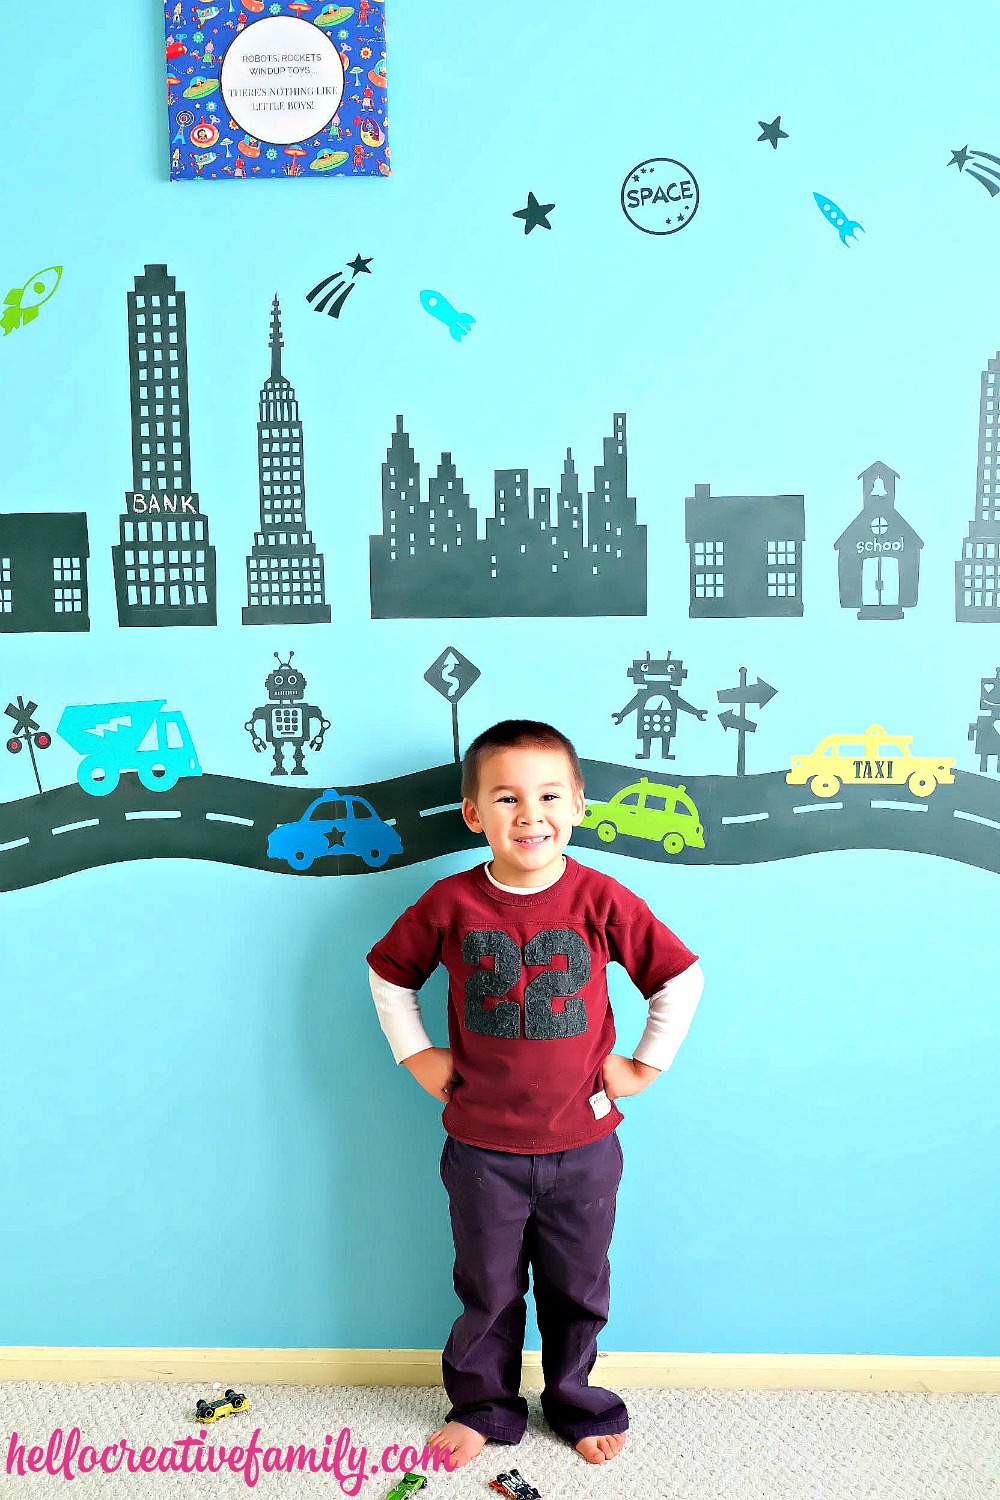
DIY Chalkboard Robot Decals Mural
This post and the photos within it may contain Amazon or other affiliate links. If you purchase something through the link, I may receive a small commission at no extra charge to you.


I remember moving into our last home. It was brand new, the walls were white and sparkling, the carpet brand new, it had that new home smell. Everywhere I looked I saw a blank canvas. Within a month I was pregnant and I eagerly started planning the baby room. It had a jungle theme, perfect for a boy or a girl. An artist friend came over and painstakingly drew large, adorable, jungle animals on the wall with pencil. A team of us spent the afternoon “coloring” them in with paint. While painting, I day dreamed about the baby that would sleep in that crib and gaze up at those walls.
In reality, my daughter ended up co-sleeping with us until she was 2 years old, and went straight from our bed to a toddler bed… but it’s fun to daydream when you’re pregnant.
When I was pregnant with my son, we decided that we needed more space and we upgraded from our small, brand new townhouse, to a bigger, 25 year old townhouse. No blank canvas in this space. Everywhere I looked there were the previous owners paint choices, dents, dings and stains.
We moved into our “new” home 1 week before my due date. To say that the nursery wasn’t a priority is an understatement. My poor son’s room has been at the very bottom of my “to do” list. Like his sister, he co-slept with us for his first 2 years. We are lucky enough to have a playroom in our house and so my son’s room has basically been a place for him to lay his head at night and store his clothes. 1 part guest room/ 1 part boy’s room.
My daughter, Bean’s room, is 100% her own. She has photos, drawings and memorabilia covering almost every single square inch of wall space in her room. Now that Turtle is getting a bit older, I can see that he finds Bean’s room more interesting than his own… so I decided it was time to do something about it.
Like most boys, Turtle loves robots, superheroes, cars and trucks. I’ve had a robot theme in mind for his bedroom for some time, and was looking for the perfect excuse to make time to turn some of the ideas into reality.
In October, while attending Blog Podium, I was introduced to DC-Fix, an incredible line of self adhesive materials that can be used to transform your home, and just about everything within it that has a smooth surface. I stood at their booth, lusting over their collections.
DC-Fix has self adhesive faux wood and marble that would be AMAZING for resurfacing tables, countertops or to use for photo backdrops! They have self adhesive and static cling glass finishes that can be put on any window, mirror or piece of glass to add texture, visual interest or privacy (my mind is spinning with ideas for their stained glass rolls.) I’m also crazy for their decor line of self adhesives that would be wonderful for a number of home decor projects including recovering the fronts of drawers or the back of a bookshelf.
As I was standing at the booth, I started thinking of all the great projects you could make with their product using the Cricut, including making a Robot Town Wall with their chalkboard adhesive for Turtle’s room!
And so I decided to do just that! Read on to learn how I transformed Turtle’s room with a 5 foot by 3 foot chalkboard mural made up of robot decals and how you can make one too! Plus enter to win our AWESOME GIVEAWAY from DC-Fix and Cricut!
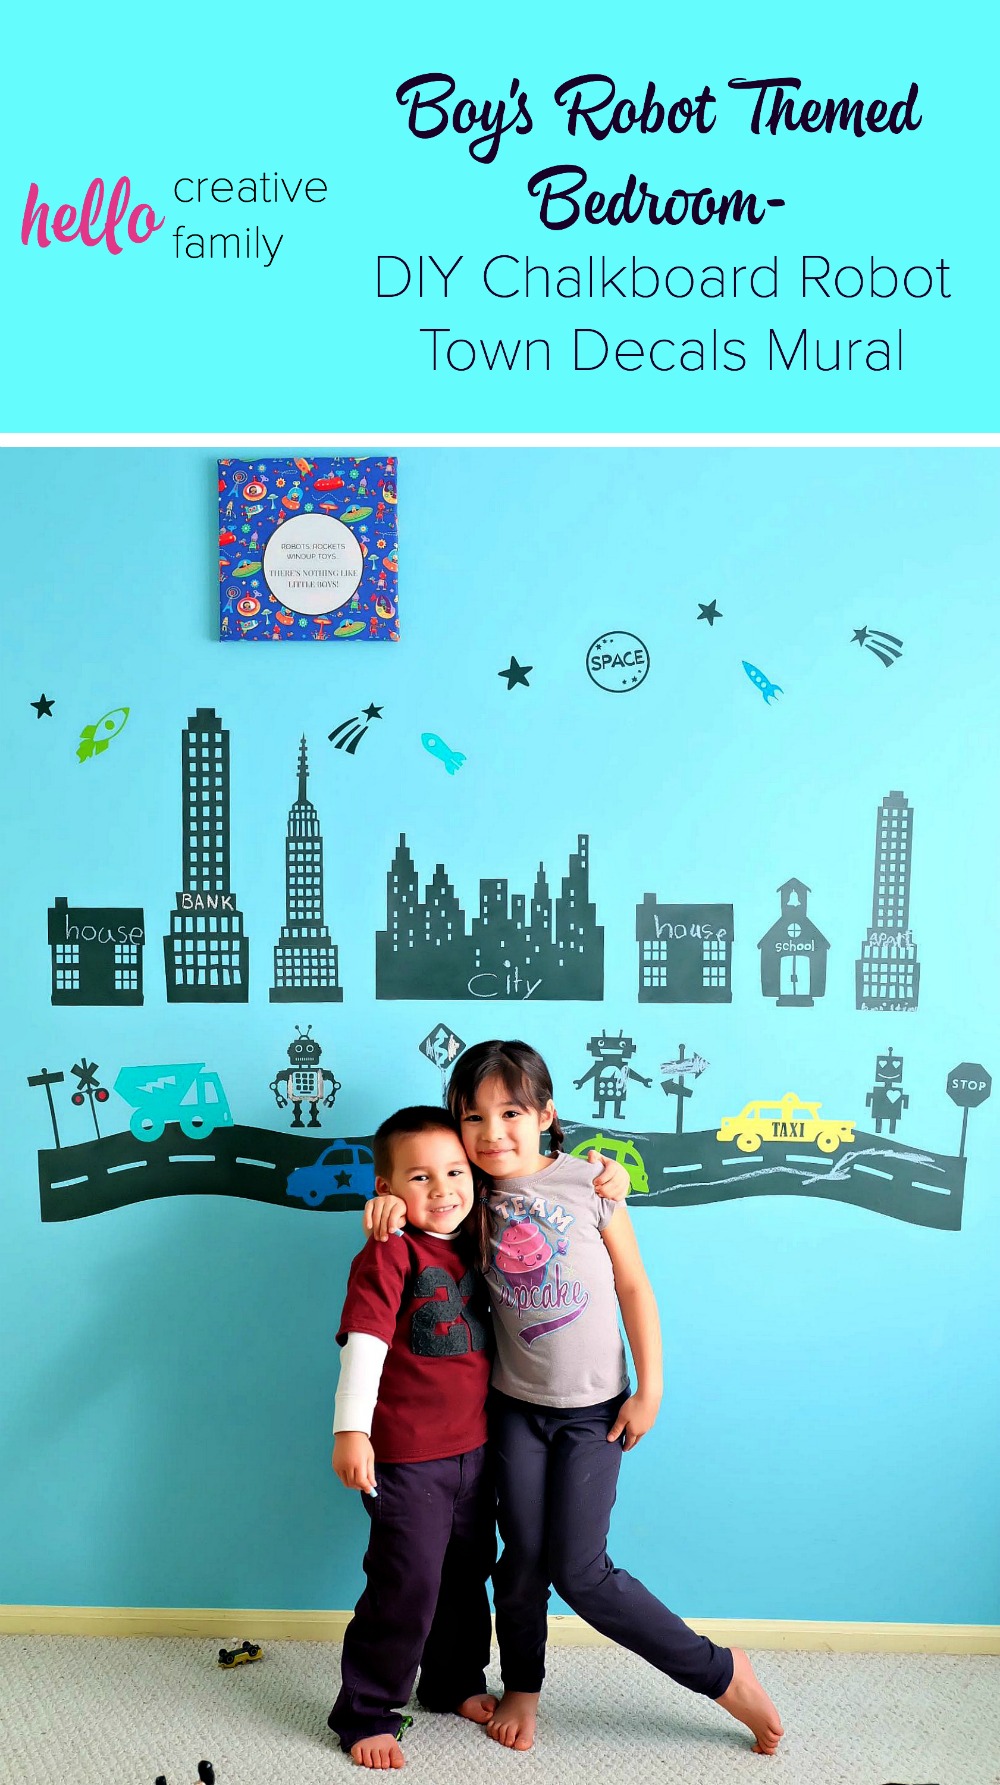
Boy’s Robot Themed Bedroom- DIY Chalkboard Robot Decals Mural
Materials:
-2 Rolls DC Fix Chalkboard (Find it here)
-1 Cricut Explore (Find it here)
-1 (or more) 12×24″ Cricut cutting mat (Find it here)
-Robot Town Cut File (Find it here)
-Cricut Design Space Subscription (Find it here, alternatively each element of the design is available to purchase from Cricut without a subscription.)
-Optional: I wanted to add a few pops of color by doing the cars and rockets in different colors. I used Cricut vinyl for those pieces. (Find it here.)
Directions:

1. Open my Robot Town Cut File in Cricut Design Space. The file has been sized for a mural that measures approximately 5 feet long and 3 feet tall. (With the way I spaced it on the wall the end mural was 5 feet 7 inches wide by 3 feet 7 inches tall.) The tallest building is 20 inches tall. Resize as necessary.
2. Cut your rolls of DC Fix chalkboard so that they are 12 inches wide (so they fit on your Cricut cutting mat.)
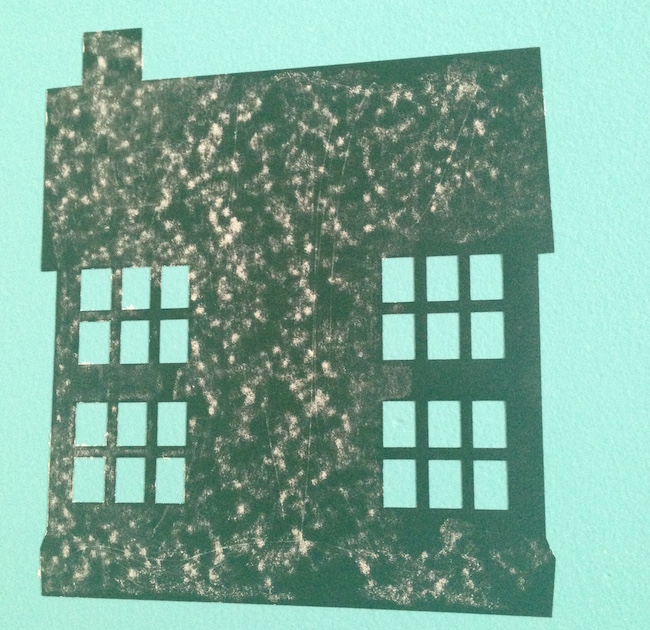
3. Using a piece you trimmed off, do a sample cut to see what setting you need to cut on. I skipped this step and cut it on the vinyl setting. The chalkboard is thicker than vinyl and proved challenging (but not impossible) to weed. I think next time I’d set it to a deeper cut like Iron On+.
4. Stick the DC Fix Chalkboard to your 12×24 inch cutting mat. I didn’t cut my roll of chalkboard. Instead I left the leftover part of the roll hanging off of the mat and cut after the machine was done cutting to get the most out of each roll.
5. Cut out all of your pieces.
6. Weed your pieces removing all parts of the chalkboard/vinyl that won’t be stuck to the wall. (This part is time intensive, so turn on Netflix, find a good movie, and settle in for awhile).
7. Install! DC-Fix is really easy to work with. Because it’s so thick I was able to position it without any transfer tape. I think my favorite thing about the product is that it’s re-positionable. The first time I laid down the road, it was slightly crooked and I was easily able to peel it up and lay it down again. I also didn’t like my building spacing so I peeled it back up and re-positioned. Step back and admire your adorable robot decals!
8. Before setting your little one loose on the chalkboard mural, cure your chalkboard. I didn’t notice this in the DC-Fix instructions (though The Hubs claims I don’t read directions), but I think it’s always better to be safe than sorry when it comes to chalkboard surfaces. Cure your chalkboard by rubbing chalk all over the mural and then wipe it away with a cloth.
9. Set your little ones loose and watch the fun that ensues!
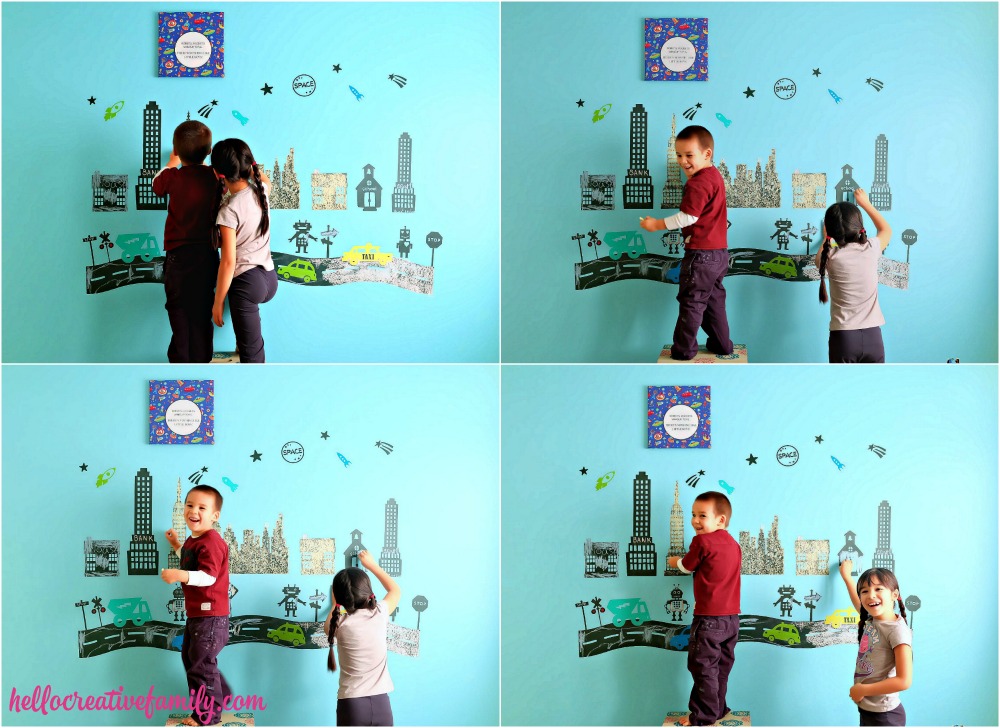
Did Turtle like his new bedroom design and his adorable robot decals???
What do you think?
Giveaway Alert!
Want to make a DIY Chalkboard Robot Decals of your own? We have a great prize pack for you! DC-Fix is giving one reader 2 rolls of DC-Fix Chalkboard and Cricut is giving that reader a 1 year subscription to Cricut Design Space! Enter below for your chance to win!
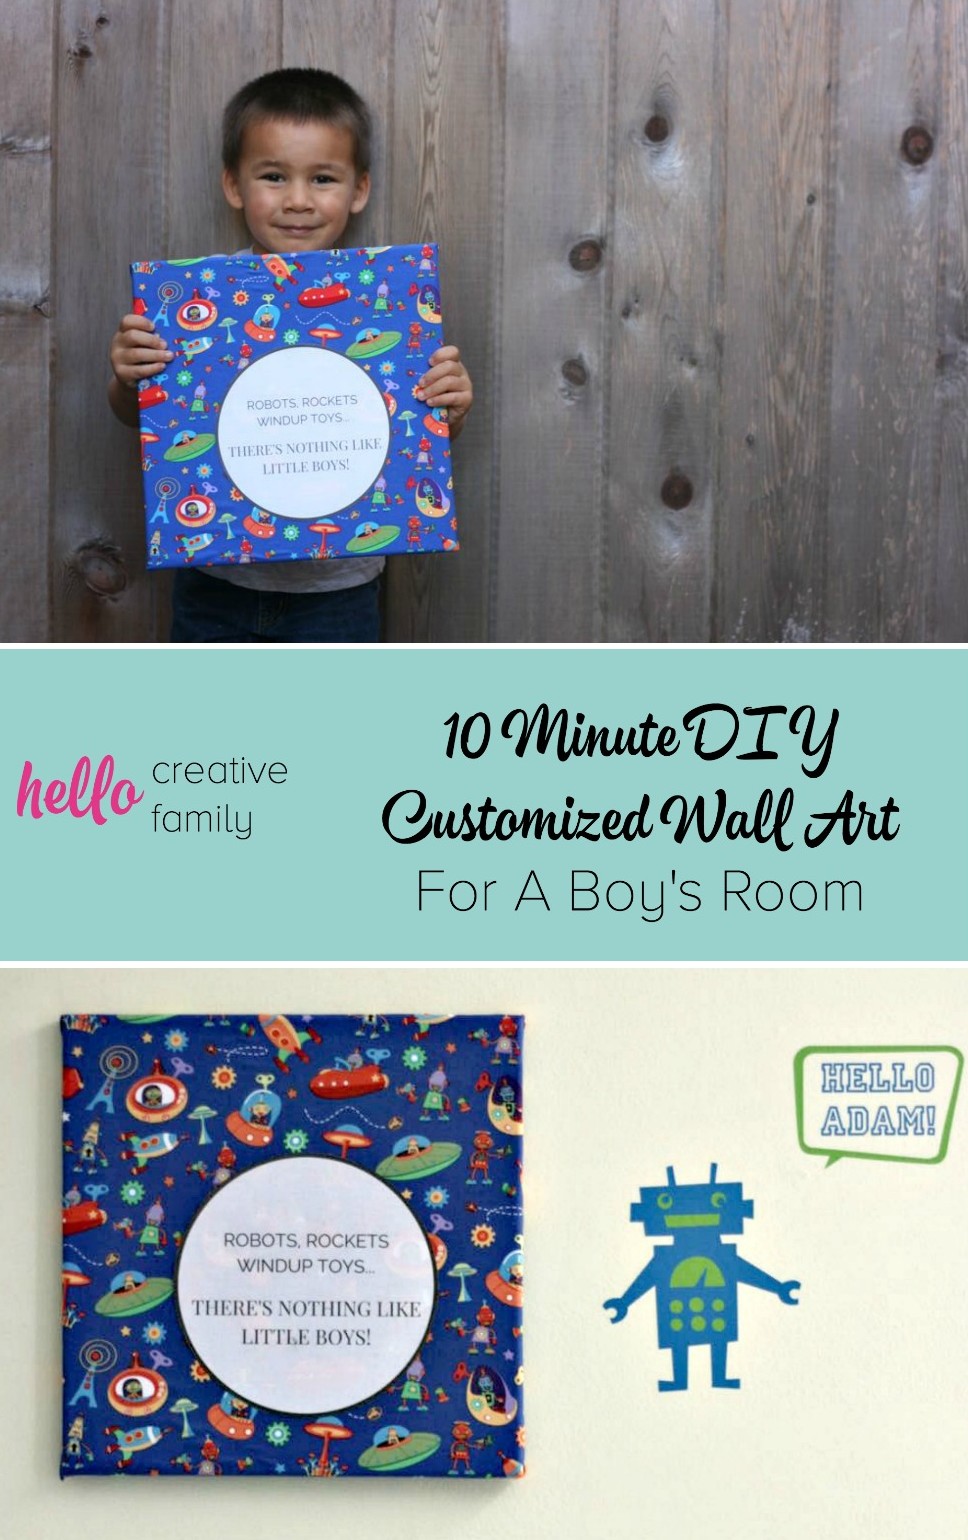
Have a little boy who loves Robots? Check out our matching Robot Wall Art!
Make sure to follow DC Fix on Facebook, Instagram and Twitter!
Tell us… What theme is your child’s bedroom and what kind of decals would you make if you won?
Disclosure: Thank you for DC Fix for working with us on this project. As with all articles on Hello Creative Family, all thoughts and opinions are 100% our own.
Contest open to those with a US or Canadian shipping address only.


My son’s bedroom is Pokémon. I would make some kind of Pokémon creature decals..
E are switching my sons room over to a construction themed for his big boy room. I would prob do some cars
Thee sky’s the limit with these great products
We have a superhero theme for our son’s room!
Animal theme so it will probably be some animal shapes
My daughters theme is Paris, therefore, I would make an Eiffel Tower.
My boys love their cars and trucks so I would probrably try a race track.
My daughters room is a princess room for sure! So we would make pretty much anything related to that: Crowns, Slippers, Wands, Sparkles, everything like that 🙂 <3
What a great idea for a kid’s room! My grandson would just love this. Thanks for sharing at Merry Monday.