


Turquoise Kitchen Remodel Part 3: The Reveal + 20 Tips For A Smooth Renovation Process
This post and the photos within it may contain Amazon or other affiliate links. If you purchase something through the link, I may receive a small commission at no extra charge to you.

It’s reveal time! We’re sharing our DIY turquoise kitchen remodel which includes a colorful island and other smart features.

Thank you to Sunrise Kitchens, Blanco and Sherwin-Williams for sponsoring parts of our turquoise kitchen remodel. All thoughts and opinions are our own.
Have you been following along with our Turquoise Kitchen Remodel series? You can find Part 1 where we show the before photos here and Part 2 where we talk about color selection here.
Today it’s time for the big reveal!
I’m very lucky to have a dad who has worked in the construction industry for over 40 years. When The Hubs and I decided we wanted to do a kitchen remodel for our 40th birthdays the very first thing we did was call my dad and talk to him about it.
My dad helped us :
- Set a budget
- Recommend an order that we contact and book trades
- Look at building plans and help us figure out what was possible with the space that we have and with what was hidden behind the drywall, and in the floor and ceilings
- Be our expert who we could bounce ideas and questions off of
- He and Rob also did the remodel together and did all the work that we did not hire out to trades.
The Hubs and I both learned a ton from my dad, and also from the process of doing a kitchen remodel, so we wanted to share those with you in the hopes that they make your future renovation go smoothly.
20 Tips You Need To Know For A Smooth Home Renovation Project:

- Plan as far in advance as possible- We started the “dreaming” phase of our kitchen remodel one year before we started the project and started meeting with contractors for quotes 7 months in advance. In all honesty we probably could have had even more time to have avoided some stress, though I don’t think our project suffered at all with that timeline.
- Think about what time of year would work best to do your project in- We decided that it would be best to have the kids out of the house while we were doing our kitchen renovation so we had the demolition start 2 days after their last day at school. Doing the renovation during the summer meant that the kids and I could go camping and then go stay at my mom’s house. The nice weather also worked well for The Hubs and my dad because they were able to use our back deck as their dining room and do all of their cooking on the bbq.
- Ask contractors about their timeline and create your own timeline- Make sure you ask every person who you get a quote from what their schedule looks like, how far in advance they need to be booked, when contracts need to be signed/ deposits placed to ensure materials are available and at what point during the project they should be brought in (for example does your flooring happen before or after your cabinets are put in). Create your own pre-renovation timeline as well as a renovation timeline.
- Keep a master binder– Our master binder went with us to every single appointment that we went to that had anything to do with our remodel. Inside the binder we kept quotes, contact info for all trades, business cards, lists, timelines, budgets, receipts, a notebook to take notes, pens, paint chips, material samples and more. We never had to scramble to find paperwork because we always knew where it would be. It was also really helpful for giving the contractors who we met with a complete look at our project.
- Make lists- My husband is a big planner, where I’m more of a “fly by the seat of your pants” type of girl. He made multiple lists to help him stay organized through the planning and construction period. He had lists of questions to ask contractors, tools that we would need for the project and where we would get the tools from (tools we owned, tools we would borrow from my dad, tools we would rent, tools we would buy, etc), supplies that needed to be purchased, the order that things needed to be done in and even easy meal idea lists. It helped us stay very organized through the process.
- Ask friends for suggestions of tradespeople– Our kitchen renovation came up in a lot of conversations during the planning stages. Many of our contractors we ended up booking because of a recommendation from a friend. If your friends don’t have suggestions ask for recommendations in neighborhood facebook groups.
- Get at least 3 quotes- There can be a HUGE range of prices that you’ll see in quotes, so it’s always a good idea to get at least 3 of them. We had one company give us a quote that was 5 times higher than what we ended up paying and I think it was because the job was too small for them so they quoted high. Remember though that the lowest quote doesn’t mean it’s the best quote. Trust your gut, ask for references and check out other work done by the contractor you are hiring.
- Make sure you can work with the people you hire– This is my dad’s tip from having worked in construction for 40+ years, and it ended up proving to be true for us. You’re going to be spending a lot of time with your contractors so you want them to be people that you enjoy being with, that are trustworthy and that you feel comfortable having in your home. If you don’t like them or don’t get the best vibe from them when you are meeting for a quote (when they are trying to sell themselves and get your business), then you probably won’t like them by the end of your time working together either.
- Ask your contractors if they do the work themselves or if they sub out- Examples of your suppliers who might sub out are cabinets and countertops. For example your cabinet makers might make the cabinets themselves in house but subcontract the installation. If they subcontract you might want to ask questions like: How many companies do you subcontract installation work to? How long have you been working with the company who will be doing our installation? If issues arise on the job site who should I be taking them up with, you or the subcontractor? Hopefully if you bring up subcontractors ahead of time, the company you are working with will send out the very best of their subcontractors for your job. If the company you want to work with subcontracts installation you might want to ask if they will have a representative from the company there for installation to supervise the quality of work that is being done.
- Get things in writing- Make sure that everyone is on the same page and that there is no confusion or misunderstandings by getting things in writing. It might take a bit more time at the beginning but avoids a headache in the future.
- Ask for contractor pricing- Stores like Lowes and Home Depot will often have contractor cards that you can apply for if you you are doing a large project. It never hurts to ask if there is a discount available when shopping, and it can end up saving you a ton of money.
- Get a credit card that has good rewards for buying your materials- Often credit cards will let you earn a higher percentage during the first few months of use. There are also cards that earn you a higher percentage at home renovation stores. Time getting a new card with when your construction bills will be coming in so that you either end up with a nice cash back bonus at the end of your project or points for a vacation!
- Know when to hire a professional and when you can do it yourself- Because we had my dad’s help, our project had a lot of DIY elements to it. There were quite a few things though that my dad suggested we hire out. If it’s not something you enjoy doing, or that you are confident that you can do well then it is probably best to leave it to the professionals.
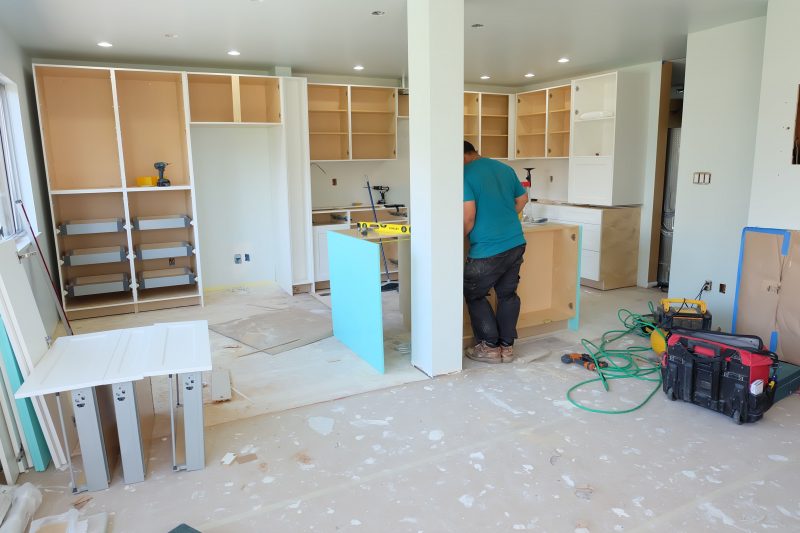
- Prepare your space- Try to imagine each phase of construction and what it will look like. Chances are if you are demoing and doing drywall that there will be a lot of dust, so make sure to put up plastic to block of bedrooms and cover things. Clear out extra rooms as much as possible so that you have empty space to move everything from your construction zone into. Make space in your garage and driveway for cutting, painting, staining and more. Also designate a space to be your “kitchen” for preparing meals and your dishwashing station for cleaning up afterwards.
- Think about other things that need to be done in your home and have it done at the same time- A project as big as a kitchen renovation can be overwhelming, but if you have other things in your house that need to be done, it makes a lot of sense to do it while your house is already a construction zone. It may also be less expensive to have your contractors work on two projects at one time then to come back at a later date for a second project.
- Make sure everything is ready for your contractors before they come in- This is important for two reasons– time and money. Having your space and materials prepped and clean will cut down on the amount of work that your contractors have to do. You can also suggest that you do the cleanup when they are finished too. If you are paying hourly, doing the cleanup yourself will save you money. Some contractors may even offer you a discount at the end of the project if it took them a lot less time than they quoted for because you did the grunt work yourself.
- Clean as you go- Speaking of cleaning up… I was surprised by how many contractors didn’t clean up when they were done (even things like their own drink cups and fast food wrappers!). Make it easy for them by leaving garbage cans out and handy, but also do a site sweep at the end of the day and spend 15 minutes cleaning up. Cleaning up a bit each day is so much easier than doing it all at the end of the project.
- Expect for it to take way longer than you think it will take- Everyone told me this but I didn’t believe it would happen to us. When we did up our timeline I thought that we would easily be done in a month, but you never know when you are going to run into delays or what you are going to discover when you open up a wall! Our unexpected delays included a water leak, floors that were extremely uneven, a counter company that walked off the job and a vent that was 4 inches too small! Our project started on July 1st and the final deficiencies were fixed at the end of October which is way longer than I would ever have expected.
- Check in with your trades people leading up to the project and then during the project- Communication, communication, communication! We were very good about staying in contact with our contractors leading up to the project, and getting them in to do the project when they were supposed to, what we weren’t as good about was staying on top of them about coming back to fix deficiencies. We didn’t want to be nags and our project was so front and center in our minds that we assumed that it was also front and center in each of our contractors minds. What we didn’t necessarily understand is that we were one of many jobs that some of our contractors had on their plates and that once they completed the majority of the job, the smaller deficiencies became less of a priority to them… which brings me to my final point… Point 20.
- Use a general contractor– Since my dad has worked as a general contractor for 40+ years we opted to not hire a general contractor and to be our own project manager (with him helping us throughout the project). Having his expertise and construction know how was invaluable. We never could have GC’d our own project without his help, however even with his help I can see where we would have valued from having a general contractor. The Hubs and I are both “nice people”. We like to be the good guys, the ones everyone likes. A general contractor gets to be the bad guy for you, and can nip problems in the bud right from the get go. Because of their expertise they will notice things that a layman wouldn’t notice and have it corrected before it becomes an issue. If a problem arises they will know if the contractors solution is a good one, or if it’s the lazy man’s way out. They will call your contractors every single day and stay on them to get deficiencies fixed. Most importantly because your contractors want repeat business they will get the problem fixed quickly and to the GC’s expectations because if they don’t it means your general contractor won’t hire them again and loss of future income.
Now that you have our tips for a smooth home renovation, who wants to see our finished kitchen?!?!?
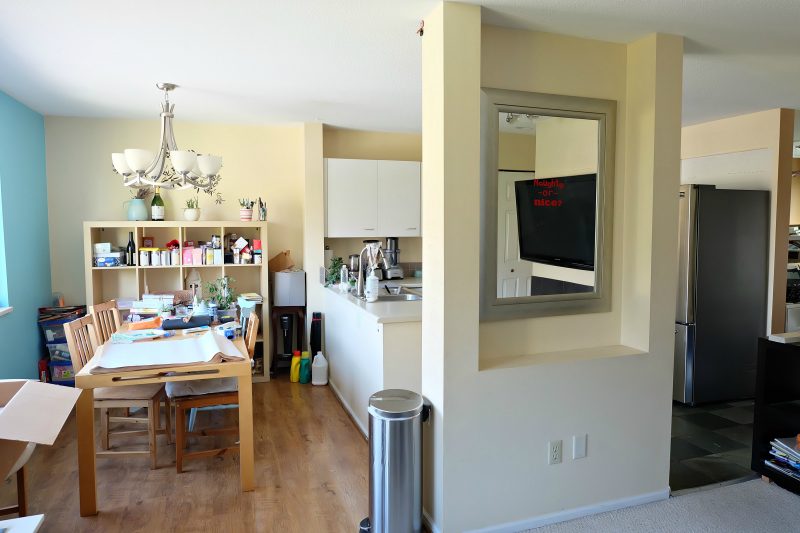
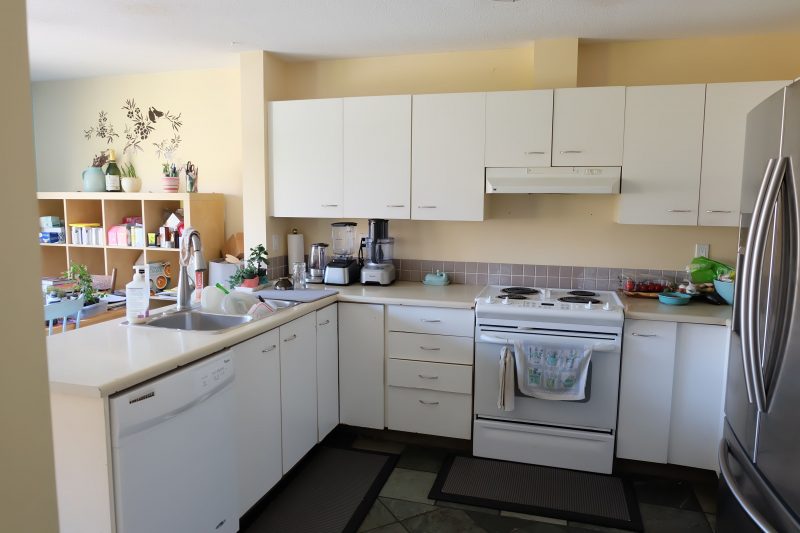
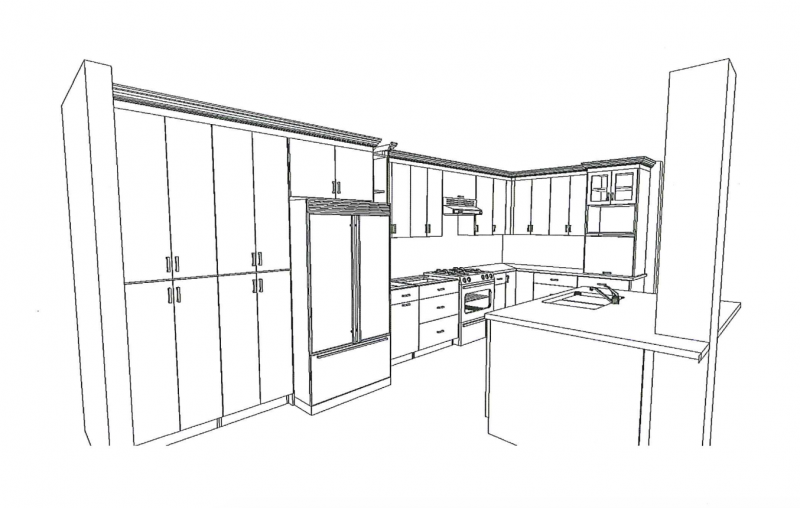
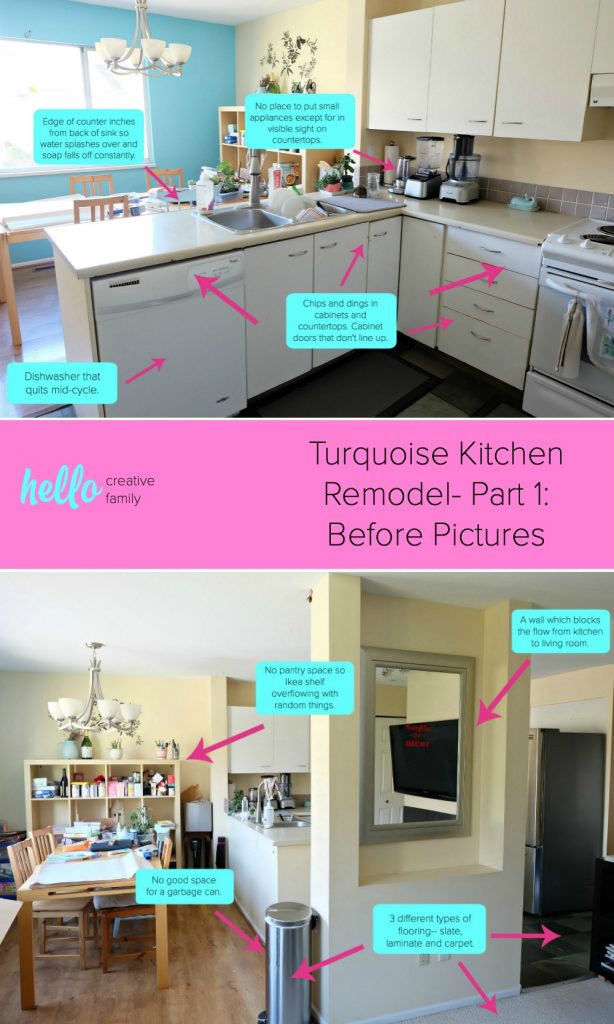
As a reminder, here is the before:
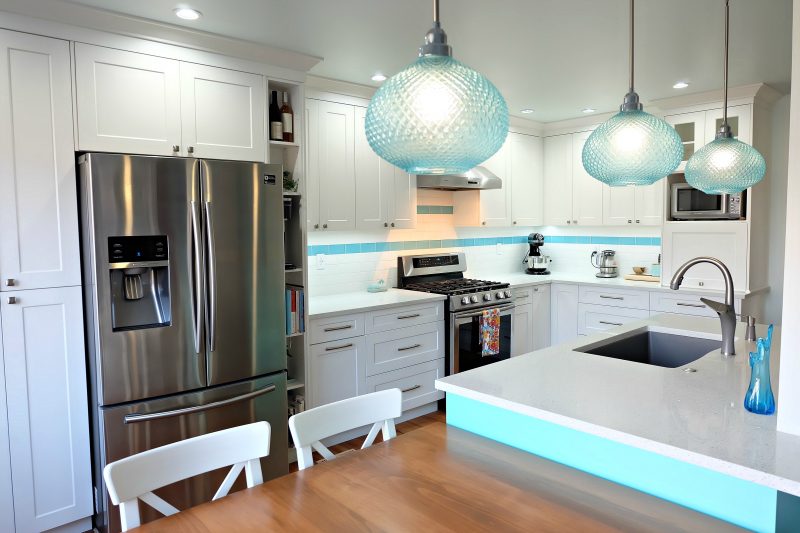
And here is the after!!!

My main role in our kitchen remodel was as designer. I shared in Part 2 where I got some of my color inspiration from. For kitchen layout I also got a lot of my ideas from Pinterest. I spent a lot of time watching kitchen “walk throughs” where people walked you through their kitchen space and shared why they made different decisions, what they loved and what they would do differently next time.

Besides coming up with the color palette, my favorite part of the kitchen renovation was working with the cabinet designers at Sunrise Kitchen. Our kitchen consultant was Simran. We told him from the beginning that not only did we want a kitchen that was aesthetically pleasing but a kitchen that was very functional. I love to cook and bake and I love having my kids in the kitchen with me. I also felt like we had a serious lack of storage. Simran really helped us think through how we use our kitchen and what changes we could make to the layout to make it more functional.
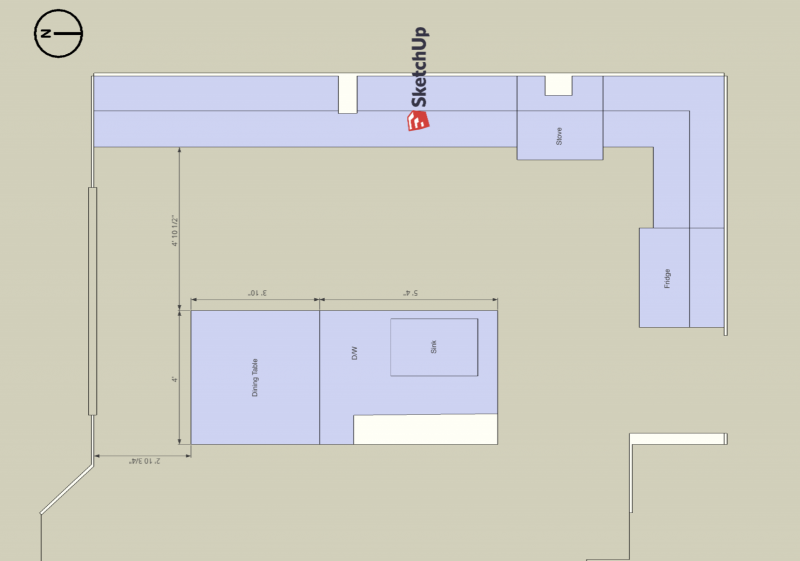
In the design that my husband and I originally created (above) we envisioned countertops running along the entire length of the wall all the way to the windows. Simran helped us see that the majority of the space that you use when cooking forms a triangle around your stove. He suggested that we move the location of our fridge and have countertops to the left and right of the stove and to use the space closest to the windows as pantry space instead. This solved our lack of storage space, along with giving us plenty of counterspace to the left and right of the stove as well as at the island for food preparation.
The four things I love the most about my kitchen is:
- How bright it is and how well the color palette came together (because of the Sherwin-Williams Glimmer paint, the Tantalizing Teal island, Chantilly White cabinets and the Metallic Grey Blanco Kitchen Sink)
- How warm it feels with the cherry luxury vinyl plank
- How open it is with the wall being torn down
- That everywhere I look I see things that my Dad and Rob DIY’d together and design elements that I picked out

We weren’t able to remove all of the wall, we had to leave a post up because it was load bearing, but it did so much to open up the room that I don’t mind the post.
I have a lot of favorite things about my new turquoise kitchen, but here are some of my favorites:
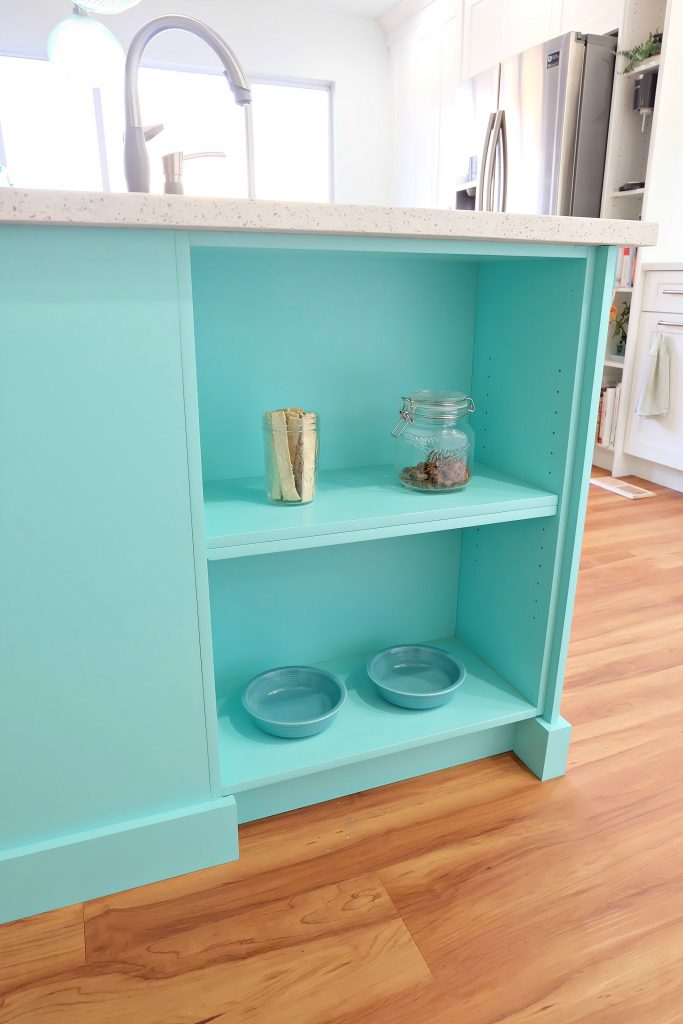
In our old kitchen our dog’s water and food dishes were constantly getting kicked and spilled. I requested that we have a custom pet feeding station built at the end of our island where our dogs could eat and their food and water could be stored safely and away from feet. Also can we please discuss how pretty that Sherwin-Williams Tantalizing Teal is?
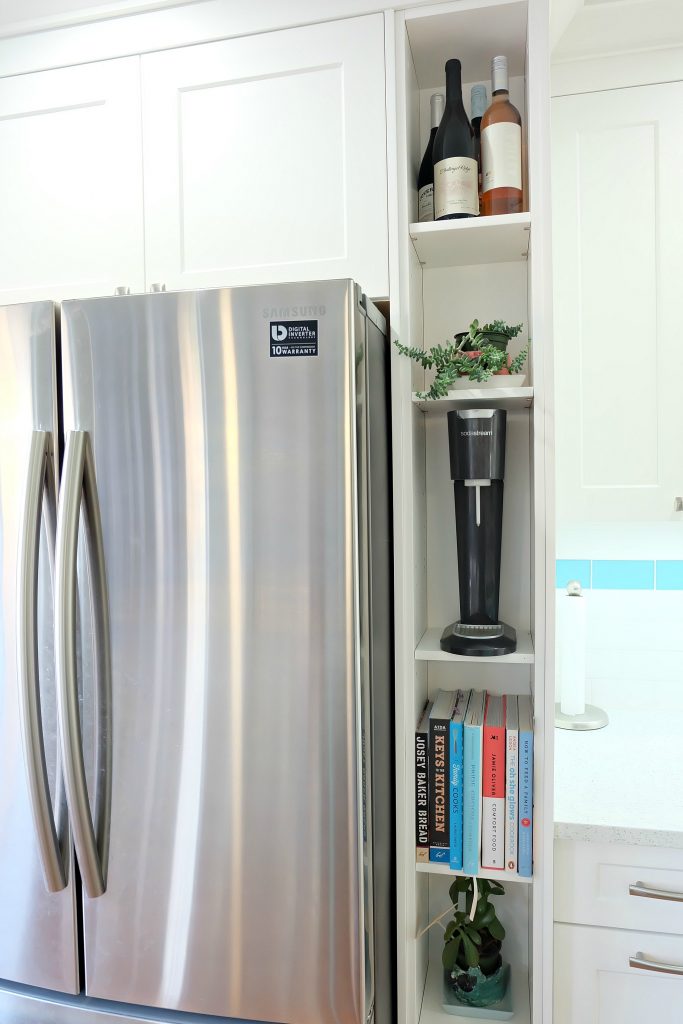
In our old kitchen we had a weird little jut out (you can see it in the before photos above at the end of the cabinets) that has pipes hidden behind it. We went back and forth for awhile on the best way to hide this wall and finally settled on a custom shelf that can fit cookbooks, our soda stream, wine bottles and plants.
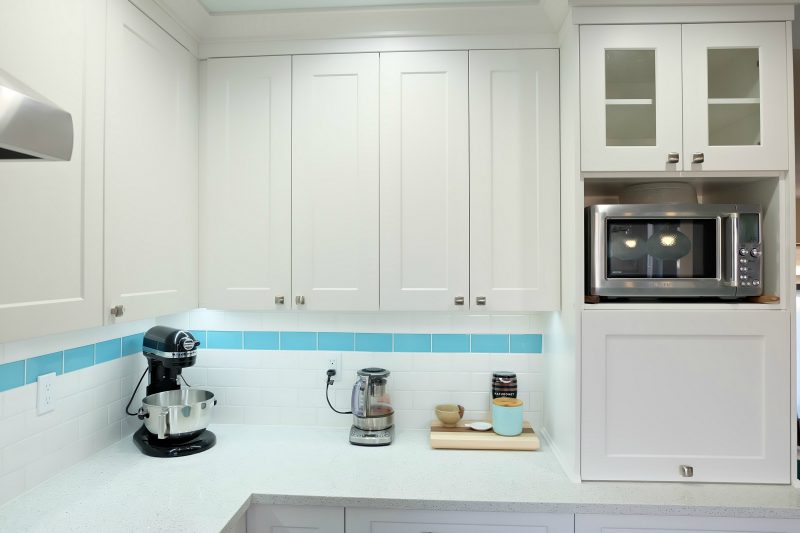
I wanted to have our toaster oven hidden away and we were able to do that with an appliance garage. I love that it’s one less thing out in plain view on my counter. We also have a ton of drawer space beneath the counter where the appliance garage is to house other small appliances that don’t need to be stored on the countertop.

I also love that the microwave up off of the counter on it’s own shelf above the appliance garage. The lack of counter clutter makes me really happy and lets our pretty quartz countertops really shine!
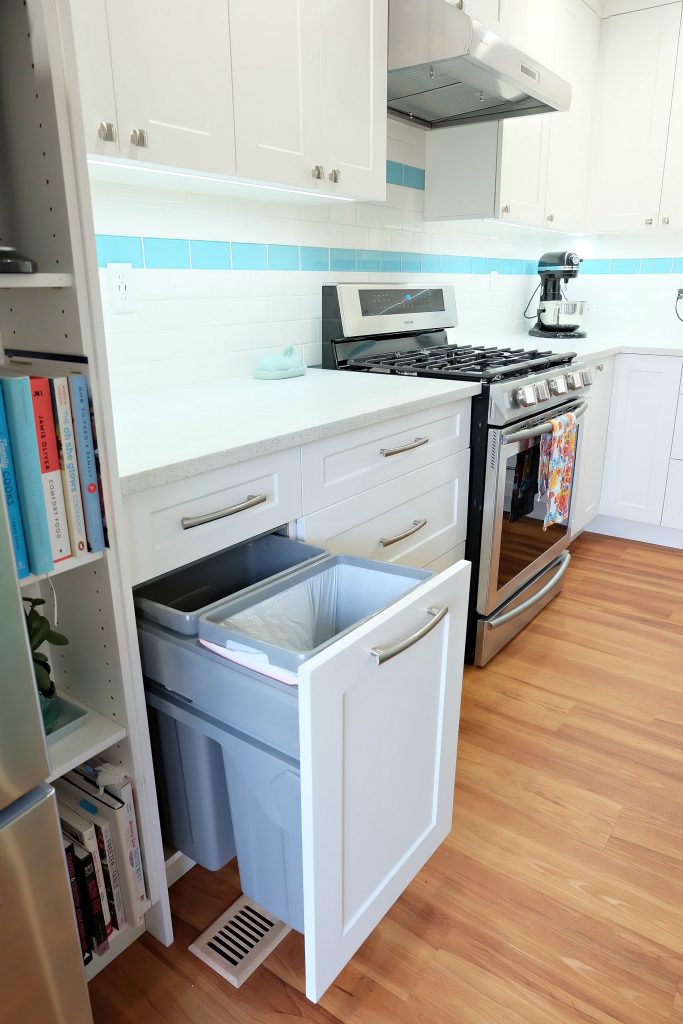
If you read Part 1 of my turquoise kitchen renovation series you’ll remember that our garbage didn’t have a proper place and that it drove me batty. In our new kitchen we have a built in garbage and recycling station. My one regret is that they also had a garbage and recycling station that had more receptacles in it. We still have to keep our compost and our paper recycling under the sink which isn’t optimal, but this setup is so much better than our previous one.

Speaking of sinks, check out this beauty! I wanted something that felt a bit more luxurious than a stainless steel sink and fell in love with Blanco’s Silgranit sinks. I wanted a neutral color that tied into our stainless steel appliances so I chose the Blanco Silgranit Diamond U 2 Low Divide sink in Metallic Grey. We decided to pair it with a Blanco Artona Kitchen Faucet in Metallic Grey and the matching soap dispenser. More on the sink in Part 4 of our kitchen remodel series.
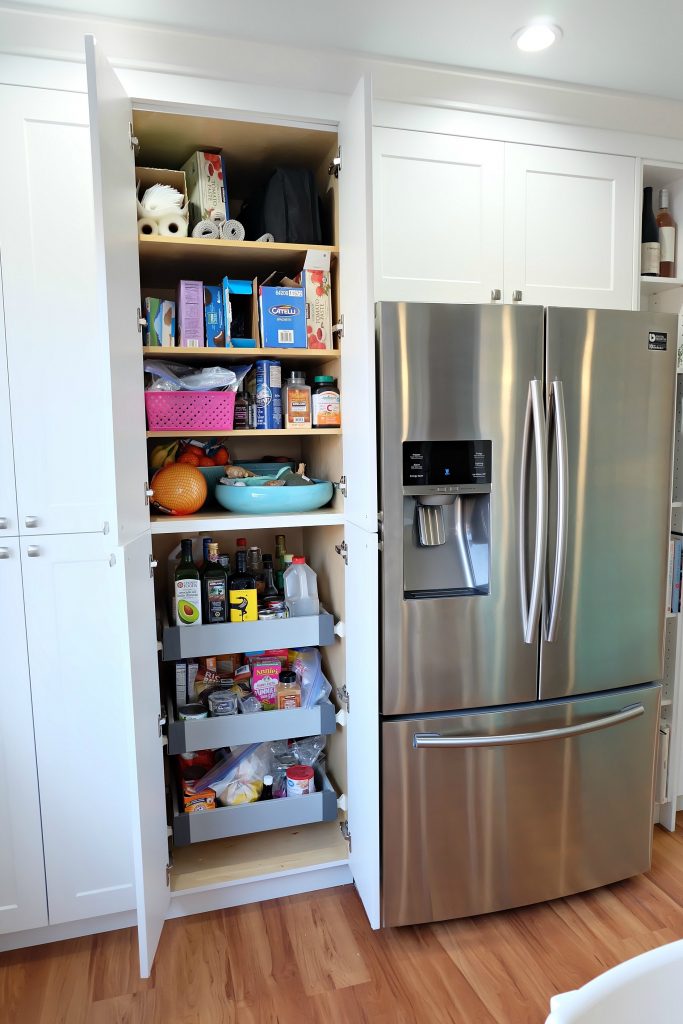
My pantry is already chock a block full, but it really is one of my favorite parts of my kitchen renovation. The bottom has three rolling shelves and the tops are comprised of stationary shelves.
And there you have my beautiful new turquoise kitchen. I love it so much and am so happy with it. The Tantalizing Teal island makes my heart super happy, and I love the quality of our cabinets from Sunrise Kitchens.
Make sure you check out all the posts in our kitchen renovations series! Find links below.
Tell me… What do you think of our new turquoise kitchen? Do you like the idea of adding a bright and bold pop of color into your living space? What are some of your favorite things about your kitchen?
A big thank you to our sponsors for our turquoise kitchen renovation:
As with every article on Hello Creative Family, all thoughts and opinions are 100% our own.
Like our turquoise kitchen remodel? We’d love for you to pin it for later!
Turquoise Kitchen Remodel- Part 1: Before Pictures
Check out the other parts of our kitchen renovation project here:
Turquoise Kitchen Remodel- Part 1: Before Pictures
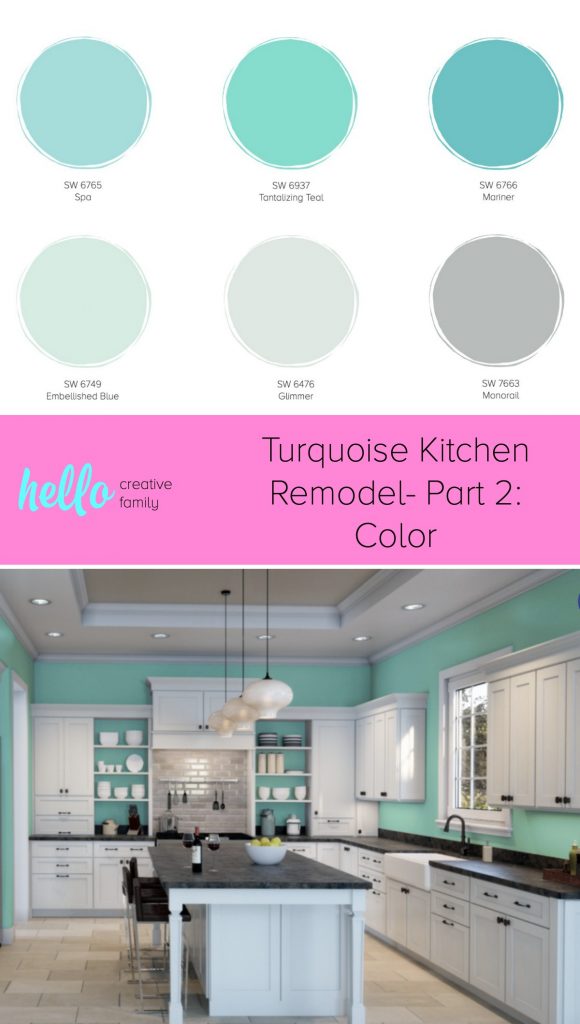
Turquoise Kitchen Remodel- Part 2: Color
Turquoise Kitchen Renovation Part 3: The Reveal
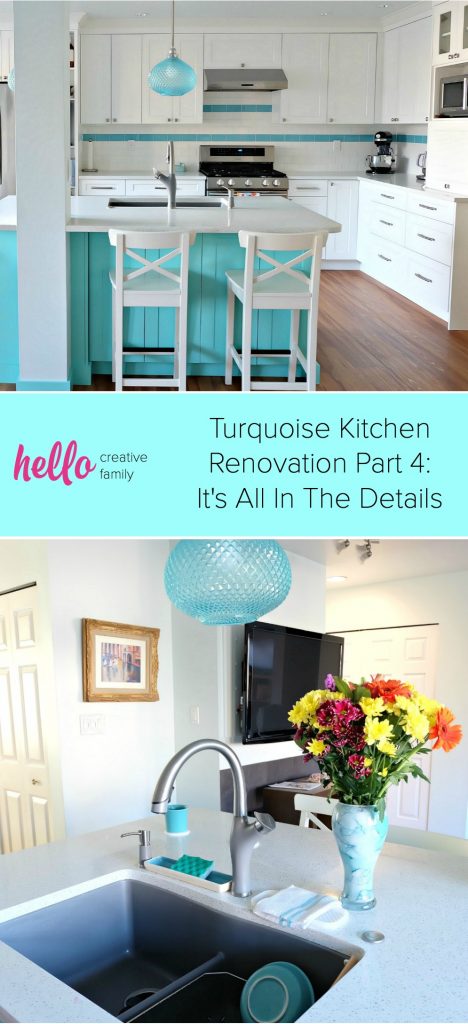
Turquoise Kitchen Renovation Part 4: It’s All In The Details
Planning a renovation? Make sure you check out this too!


Absolutely love this ! you have some great tips here too . I dream of one day being able to reno my kitchen .
Gorgeous! I love love love those pendant lights and the new layout looks so open and functional!
I love the open look and the white and beautiful turquoise color. The lights are gorgeous. I like the closed pantry cabinets and the movement of the refrigerator to it’s new location. I think having the table beside the island looks awkward but I am sure it is functional to have it separate for family uses. Overall it is gorgeous..
Beautiful! I love seeing the before and after photos!
Your new kitchen is beautiful! I love the contrast of the white & turquoise, the lighting, and the tile backsplash.
Gorgeous! What type of Sherwin Williams Paint did you use to paint the cabinets the teal?