


Back To Basics- How To Make Homemade Pumpkin Puree
This post and the photos within it may contain Amazon or other affiliate links. If you purchase something through the link, I may receive a small commission at no extra charge to you.

Tis the season for pumpkins, and all the delicious baked goods and foods that come with pureed pumpkins! Pumpkin pie, pumpkin loaf, pumpkin soup, pumpkin ravioli, pumpkin ice cream, pumpkin pancakes… do you want me to go on? Seeing that it’s pumpkin season, I thought today I’d share with you another Back To Basics post, this time on how to make homemade pumpkin puree!
I don’t know how it is where you live, but at this time of year it’s quite common to see big bins of sugar pumpkins (sometimes also known as pie pumpkins) at the grocery store. Sugar pumpkins are about half to 1/3 the size of your traditional “jack o lantern pumpkin” and are known for having a sweeter flavor and a firmer flesh (aka less watery) which makes them great for baking with.
Around this time of year I like to stock up on sugar pumpkins, roast them, puree them, measure them out in freezer bags and freeze them for instant pumpkin all year long. One of the things that I love about making my own puree is that I know every single ingredient that is going into it– pumpkin, water and maybe a bit of coconut oil. It has no filler or preservatives and that’s something that I’m trying to reduce as much as possible in my family’s diet.
I also love how convenient it is.The active time of making pureed pumpkin is minimal, and it makes your house smell like fall! I’ll usually do a couple pumpkins at one time, pre-measure the puree and freeze it. It’s so convenient to be able to reach into the freezer and grab out a bag of pumpkin when I’m craving a bowl of warm, curried pumpkin soup. I know I never kept cans of pumpkin on hand in my pantry so this convenience is a big win for me.
In my experience you get about 4 cups of pumpkin puree from 1 sugar pumpkin. I can usually find them here for 3 for $5.00. I’ll be honest, I’ve never bought canned pumpkin before, so I don’t know how much it runs, but 12 cups of pure pumpkin puree for $5.00 seems like a great deal to me.
So let’s get to it and teach you our Back To Basics How To Make Pureed Pumpkin recipe! Read on!
Back To Basics- How To Make Pureed Pumpkin recipe
Ingredients:
-1 sugar pumpkin
-1 tablespoon melted coconut oil (optional)
Directions:
1. Preheat oven to 400F.
2. Wash pumpkin well, then cut in half and scoop out pumpkin seeds and pumpkin “guts”.
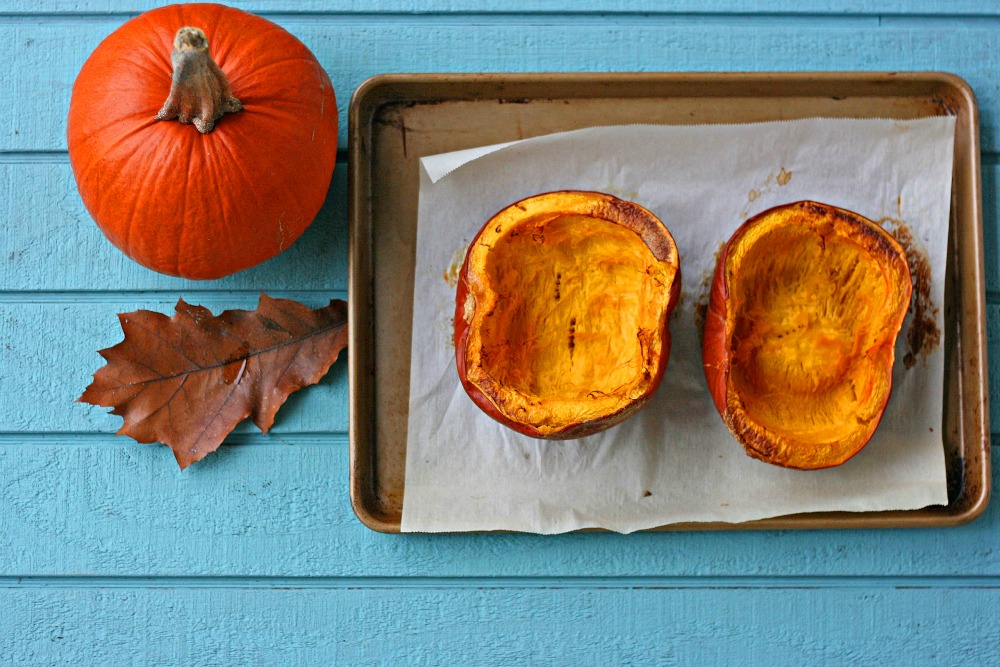
3. Lay pumpkin, flesh side down, on a parchment or foil lined baking sheet.

4. Bake for 30 minutes.
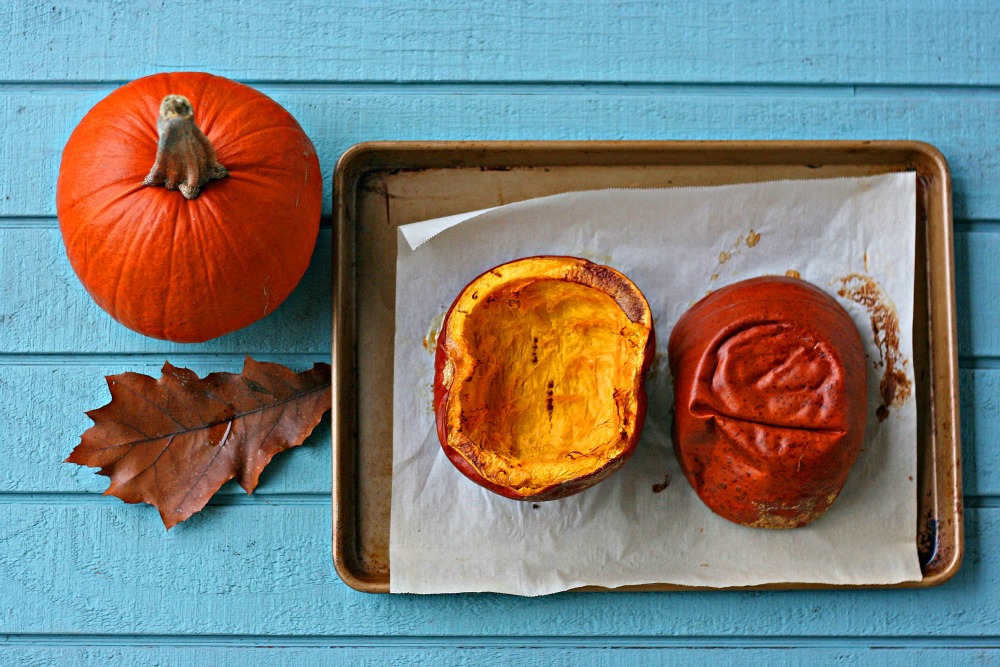
5. Remove tray from oven. Check that the pumpkin skin is a beautiful burnt orange color and can easily be pierced with a knife. Flip pumpkins so they are skin side down and baste with melted coconut oil.
6. Cook for another 30 minutes or until pumpkin flesh is soft and can easily be scooped from the skin.
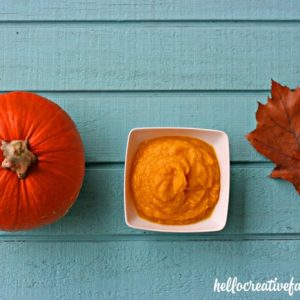
7. Allow the pumpkin to cool, scoop out the flesh and put in your blender (we use a Blentec in my house). Add 2 tablespoons of water and blend, stopping blender to scrape down sides as needed.
8. Use in your favorite recipes and/or portion into freezer bags and freeze for upcoming months.
Print or save for later:
Back To Basics- How To Make Pureed Pumpkin recipe
Ingredients
- -1 sugar pumpkin
- -1 tablespoon melted coconut oil optional
Instructions
- Preheat oven to 400F.
- Wash pumpkin well, then cut in half and scoop out pumpkin seeds and pumpkin “guts”.
- Lay pumpkin, flesh side down, on a parchment or foil lined baking sheet.
- Bake for 30 minutes.
- Remove tray from oven. Check that the pumpkin skin is a beautiful burnt orange color and can easily be pierced with a knife. Flip pumpkins so they are skin side down and baste with melted coconut oil.
- Cook for another 30 minutes or until pumpkin flesh is soft and can easily be scooped from the skin.
- Allow the pumpkin to cool, scoop out the flesh and put in your blender (we use a Blentec in my house). Add 2 tablespoons of water and blend, stopping blender to scrape down sides as needed.
- Use in your favorite recipes and/or portion into freezer bags and freeze for upcoming months.
Check back next week when I’ll share my super moist and delicious pumpkin bread recipe using this pureed pumpkin!
Don’t forget to check out our other fabulous Back To Basics Recipes!
Now that you know how to make homemade pumpkin puree, head on over and learn how to make homemade chocolate chip pumpkin muffins and bread!


This is so amazingly simple! I will never buy canned pumpkin again! (I promise) lol Thanks for this, very much!
How simple is this!! I could actually try this and now go in scared I’ll mess up LOL Thanks for sharing!
Thanks, Crystal. I and my daughter have just made it yesterday.
Thank you so much for taking the time to comment and let me know you used the recipe Ann! You made my day! You should try some of these pumpkin muffins/bread with the puree! They are so yummy!
https://hellocreativefamily.com/building-on-basics-gluten-free-pumpkin-bread-recipe-also-makes-great-mini-pumpkin-muffins/
Best Wishes,
Crystal
If you skip the coconut oil you can spread the puree onto dehydrator teflon tray liners and dehydrate. Make it very thin. Once very dry and crisp. return to blender and turn into powder. I can fit three or four butternut squash or pumpkins into a quart size canning jar. Vacuum seal if you can and the shelf life is better than 20 years. Rehydrate using 1/2c powder to one cup hot water.