


How To Build a Lighted DIY Star Shelf Thats Perfect For Ornaments
This post and the photos within it may contain Amazon or other affiliate links. If you purchase something through the link, I may receive a small commission at no extra charge to you.

Last month, Hello Creative Family took part in a handmade gift idea blogger challenge. The Hubs and I paired up and created this fun DIY Growler Carrier with DIY Dry Erase Labels together. This month, we received another challenge, this time from Home Depot Canada and our blogger friends Shannon from at AKA Designs, Krista at The Happy Housie and Colleen at Lemon and Thistle. The Hubs and I decided to team up again to make this DIY Star Shelf!
The challenge came in on a day that The Hubs was off work, and the kids were at school and daycare, so we decided to make a date of it and head to our favorite handpulled noodle and dumpling house to have lunch and brainstorm ideas. I mentioned in the last post, that The Hubs and I haven’t been having as much out of the house date time as we would like to, so we’ve been making up for it by having home date nights, once the kids have gone to bed, where we work on a creative project together.
Home Depot’s challenge was simple, make something beautiful for home, using Martha Stewart Battery Operated Christmas Lights.
When we sat down for lunch the first thing that popped out of my mouth was “What if we made a star shaped wood shelf? We could string the lights around the outside and use it for Christmas ornaments during the holidays and put it in Bean’s room during the rest of the year as a cool night light/shelf!”
We came up with a few other ideas at lunch that day, but I kept on going back to the star shelf. I could see it in my mind. Finally The Hubs said to me, “I’m pretty sure that you have your mind set on the star shelf, so we should probably go with that.” LOL. He knows me so well.
I’ll be honest, when I found out that the other bloggers taking part in the challenge were Shannon, Krista and Colleen I was a bit intimidated. They have BEAUTIFUL design aesthetic on their sites. They are decor queens and come up with the most beautiful projects. My Christmas tree would never be featured in a magazine or on a design companies website, my Christmas tree is not beautiful, but it’s packed full of memories. Ornaments that were my parents and grandparents, decorations that my kids made at school, and little trinkets that remind us of favorite movies, books and milestones in our lives. Our Christmas decorating definitely isn’t showroom beautiful, but it is packed full of memories.
My grandma passed away before I was born, but I’ve always felt a special connection with her. We have the same birthday and I’ve always considered her to be my special angel. When I was younger my mom gave me a set of vintage Christmas angels that used to be my grandmas along with a picture in a vintage frame of my grandma in her 30’s. I have always hung the photo near the top of my Christmas tree and considered it the angel at the top of my tree.
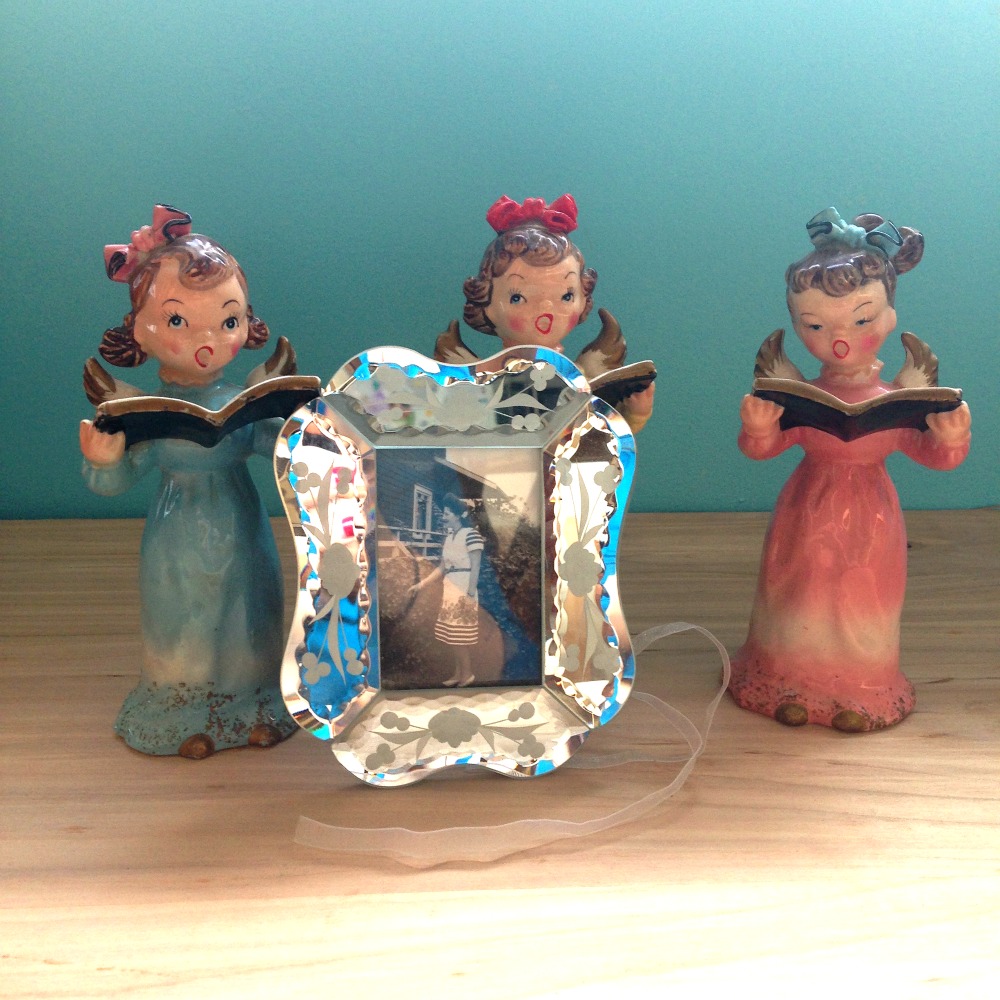
I thought it would be a really nice idea to have a special shelf that my grandmas ornaments went on at Christmas, and so the star shelf seemed like the perfect idea.
Love the idea? You can build a star shaped DIY lighted Christmas ornament shelf too!
As usual, The Hubs brought my idea to life and created the structure, and then I decorated it. Check out our instructions below.
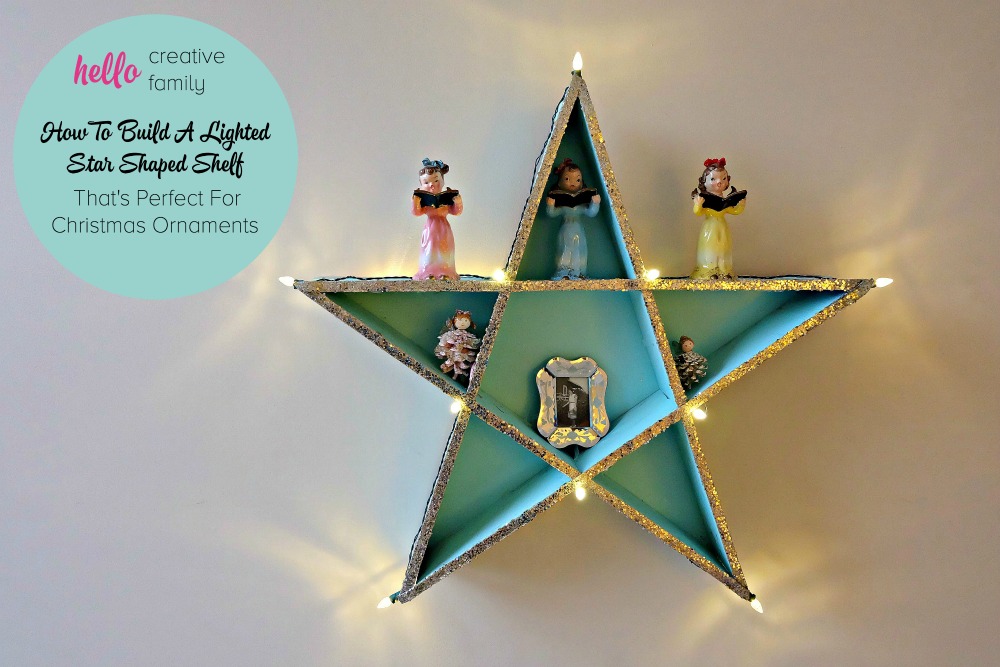
How To Build a Lighted DIY Star Shelf Thats Perfect For Ornaments
Tools
- Pry bar (if using a reclaimed pallet. Check out this pry bar)
- Measuring Tape (like this)
- Square (like this)
- Saw: preferable table saw but in a pinch a hand saw or circular saw will do
- Jig saw or scroll saw
- Hammer (like this)
- Rubber mallet
- Staple gun (like this)
- Utility knife (like this)
- Safety Equipment: Safety goggles, work gloves, respirator, ear protection.
- Glue gun
- Wood boards (either purchased or reclaimed from a pallet our boards measured 1/4” by 3 1/2” by 25 1/8”)
- Hard board, big enough for the back of your star (this is what we used)
- Picture Hanging wire
- Two nails or D-ring hangers
- Spray paint (We used Rust-oleum’s Painter’s Touch in Ocean Mist)
- Martha Stewart Living Glitter Garland (like this)
- Martha Stewart Living Battery Operated Christmas Lights (like this)
- Try to ensure you do not split the boards you are going to use as it’s important that they are solid and sound.
- You can either use a pry bar to do this or, in my case, I cut across the stringer board (the boards under the top deck boards that lie perpendicular to the top boards we want to use) and then used a combination of a chisel, mallet, and hammer to remove nails and the scrap pieces of stringer board still connect to the top deck boards.
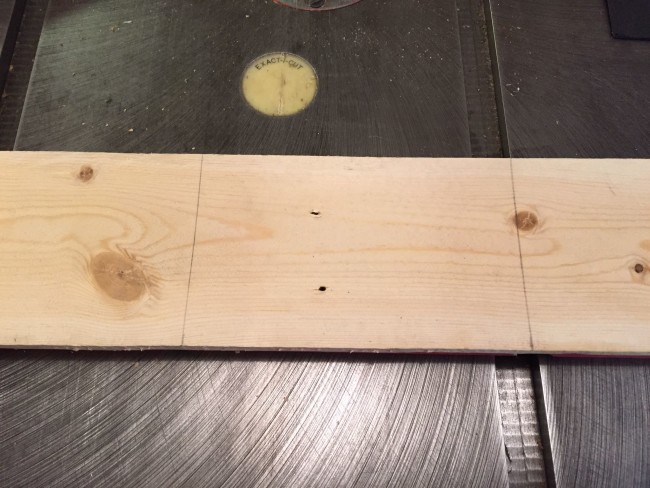
- The final length of the boards are really up to you depending on how big a star you want. As above, the boards off my pallet were 25 1/8” which were roughly in line with my desired star dimensions of 24” a side. As long as all the sides are exactly the same length, you don’t really need to be cut them down to a specific length unless you want to (it does make the math a bit easier with nice whole numbers).
2. Determine the exact distance to the intersections where the boards meet for the star.
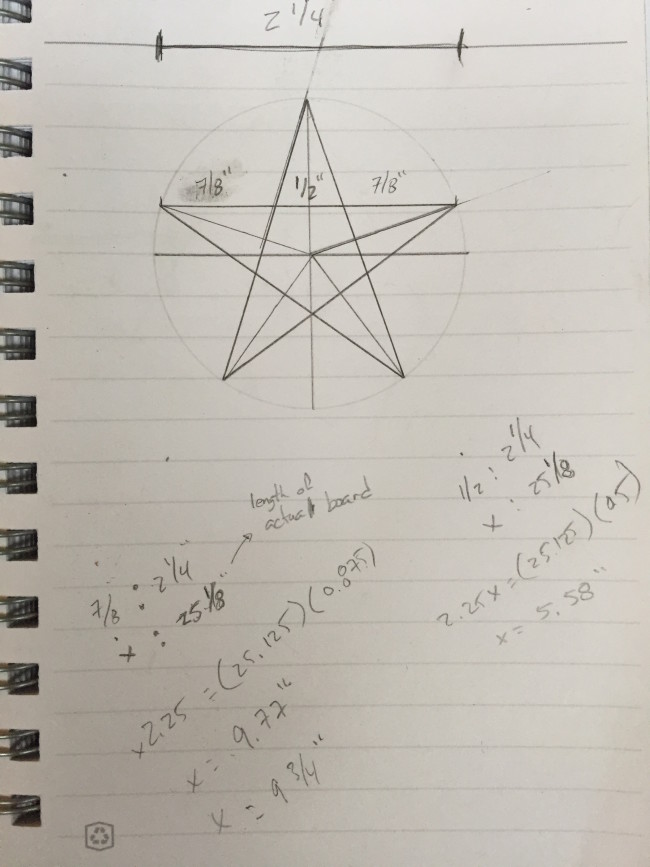
- Either draw a scale size drawing of your star, find one on the internet or use my drawing. The drawing should be as accurate as you can make it (use a compass drawing tool and protractor, this site will make drawing your own star easier, I used method 2).
- Do a little math to scale up the distances for your star based on the dimensions of your boards.
- Mark the intersections points.
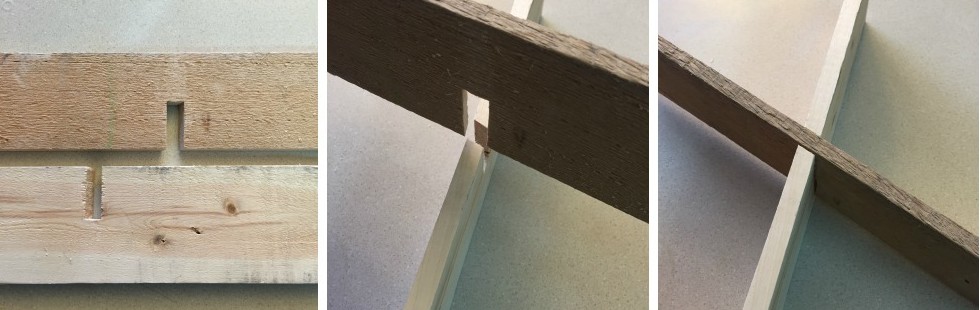
- The boards are joined together using half-lap joints at each of the intersection points. A half-lap joint consists of two pieces of wood where half of each board being joined is removed so the boards join flush to each other. In other words, a slot half as deep as the boards is cut out of each wood being joined and then the two pieces slide to join together.
- This is why the boards need to solid and sound. Any splits in the boards will cause them to fall apart with you are making the slots.
- Take a board and stand it on edge in front of you. This will be your top horizontal board.
- Take two other boards and make a triangle shape with them. Place them edge to edge along the edge of the horizontal board and match the intersection marks on each board at the intersection marks on the first board. These will form the top point of the star and will give you an idea of the angle the slots. Mark the angles on the top board edge as well as on the two triangle boards.
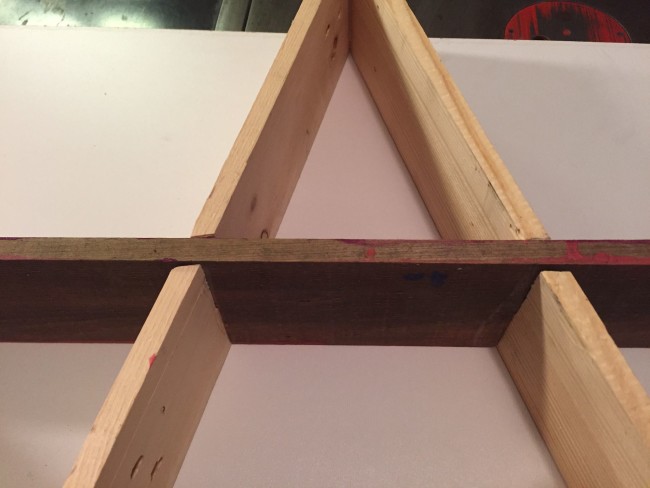
- Find the centre point of the boards. In my case, it’s 1 3/4” as my boards are 3 1/2” wide.
- Adjust the angle of your jigsaw or scroll saw to match the angle you just marked. Carefully cut out the pieces up to the centre point of the board. You should now have two slots on the left and right at the intersection point.
- Take the left board and cut out the corresponding slot, again only going half way across the board.
- Take the right board and cut out the corresponding slot.
- Now slide the three pieces together. Make the necessary adjustments and small cuts to ensure they fit snug and flush. Use your rubber mallet to gently tap down into place.
- Take a fourth board and fit it to create the left point, again matching up the intersection marks on the boards. Mark the angle and cut out a slot on both boards (two slots, one on each board). Slide together.
- Take the last board and fit it to create the right point. Match up intersection marks and mark the angles on each board. Cut out the slot pieces (four slots). Slide together.
- This part takes some patience and small adjustments to ensure they slide nicely together. After cutting out the slots, make very small adjustments to make them fit nicely together. Test that everything works by measuring symmetrical parts to see if they match. Stand up your piece and place a level on the top horizontal board. Don’t worry if things are a little out of level and that the slots don’t line up exactly. Mine didn’t. The paint and sparkle edging hide much of the imperfections. Also, you’ll know from my previous projects, I like small imperfections as they lend to a more rustic DIY feel.
4. Make and attach the back
- Lay the star flat on the hard board and trace out the shape of the star.
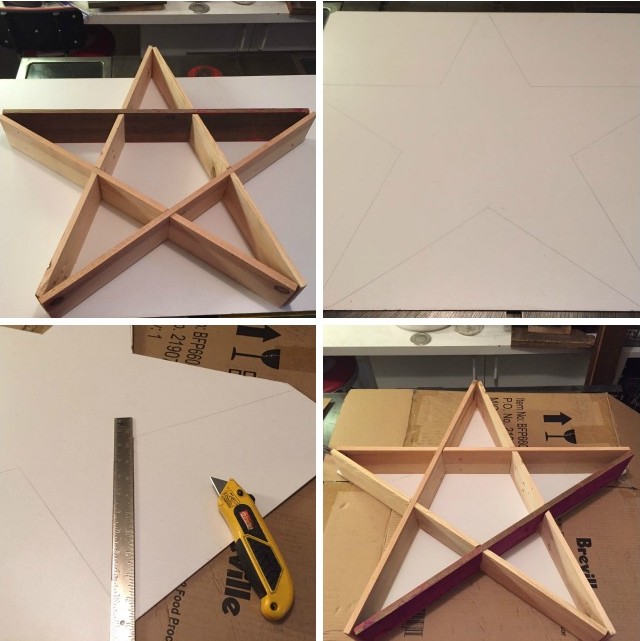
- Using a sharp utility knife and a metal straight edge, carefully cut along the lines.
- Don’t try to cut through in one go. Use light to moderate pressure and do multiple passes. This will take time but is a lot safer than pressing hard and potentially slipping and cutting cutting yourself.
- Also, put a few layers of cardboard underneath for when you do cut through. This will save your blade and protect the surface underneath.
- Once it is cut out, secure the back to the star using your staple gun.
5. Decorating
- In a well ventilated area, while wearing a ventilator mask, spray paint your star. Allow to dry and then apply a second coat of paint. Allow to dry again.
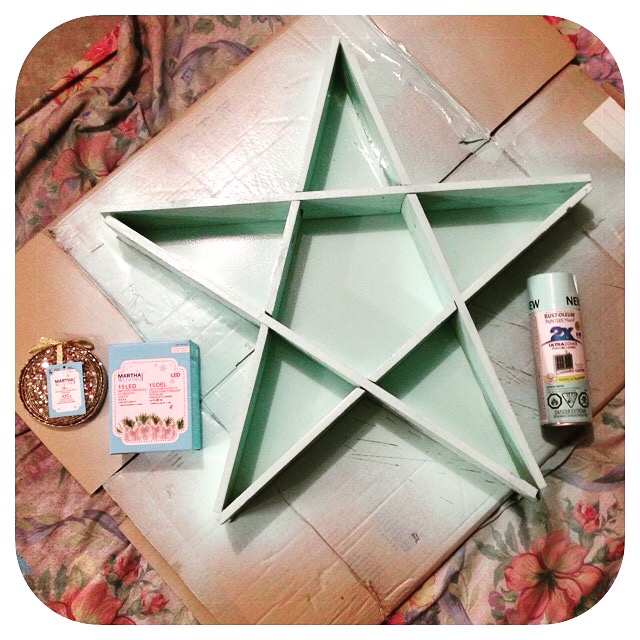
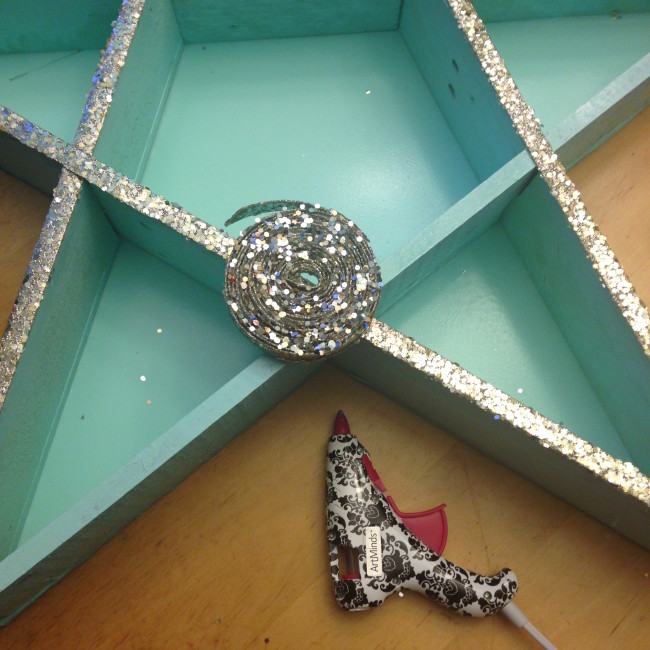
- Heat your glue gun, and apply your glitter garland to the front edges of the star. Work slowly in sections approximately 1-2 inches, pressing down firmly as you go.
- Put batteries in your lights, and string them along the outside edges of your star, using a staple gun to secure them. I used a drop of hot glue at each tip to make the lights point nicely. I love the way you can tuck the little battery pack behind the star and have the shelf be free floating with no wires hanging down. The possibilities for the Martha Stewart Living Battery Powered Lights are really endless!
- Use nails or d-rings to attach the hanging wire to the back, following manufacturers instructions.
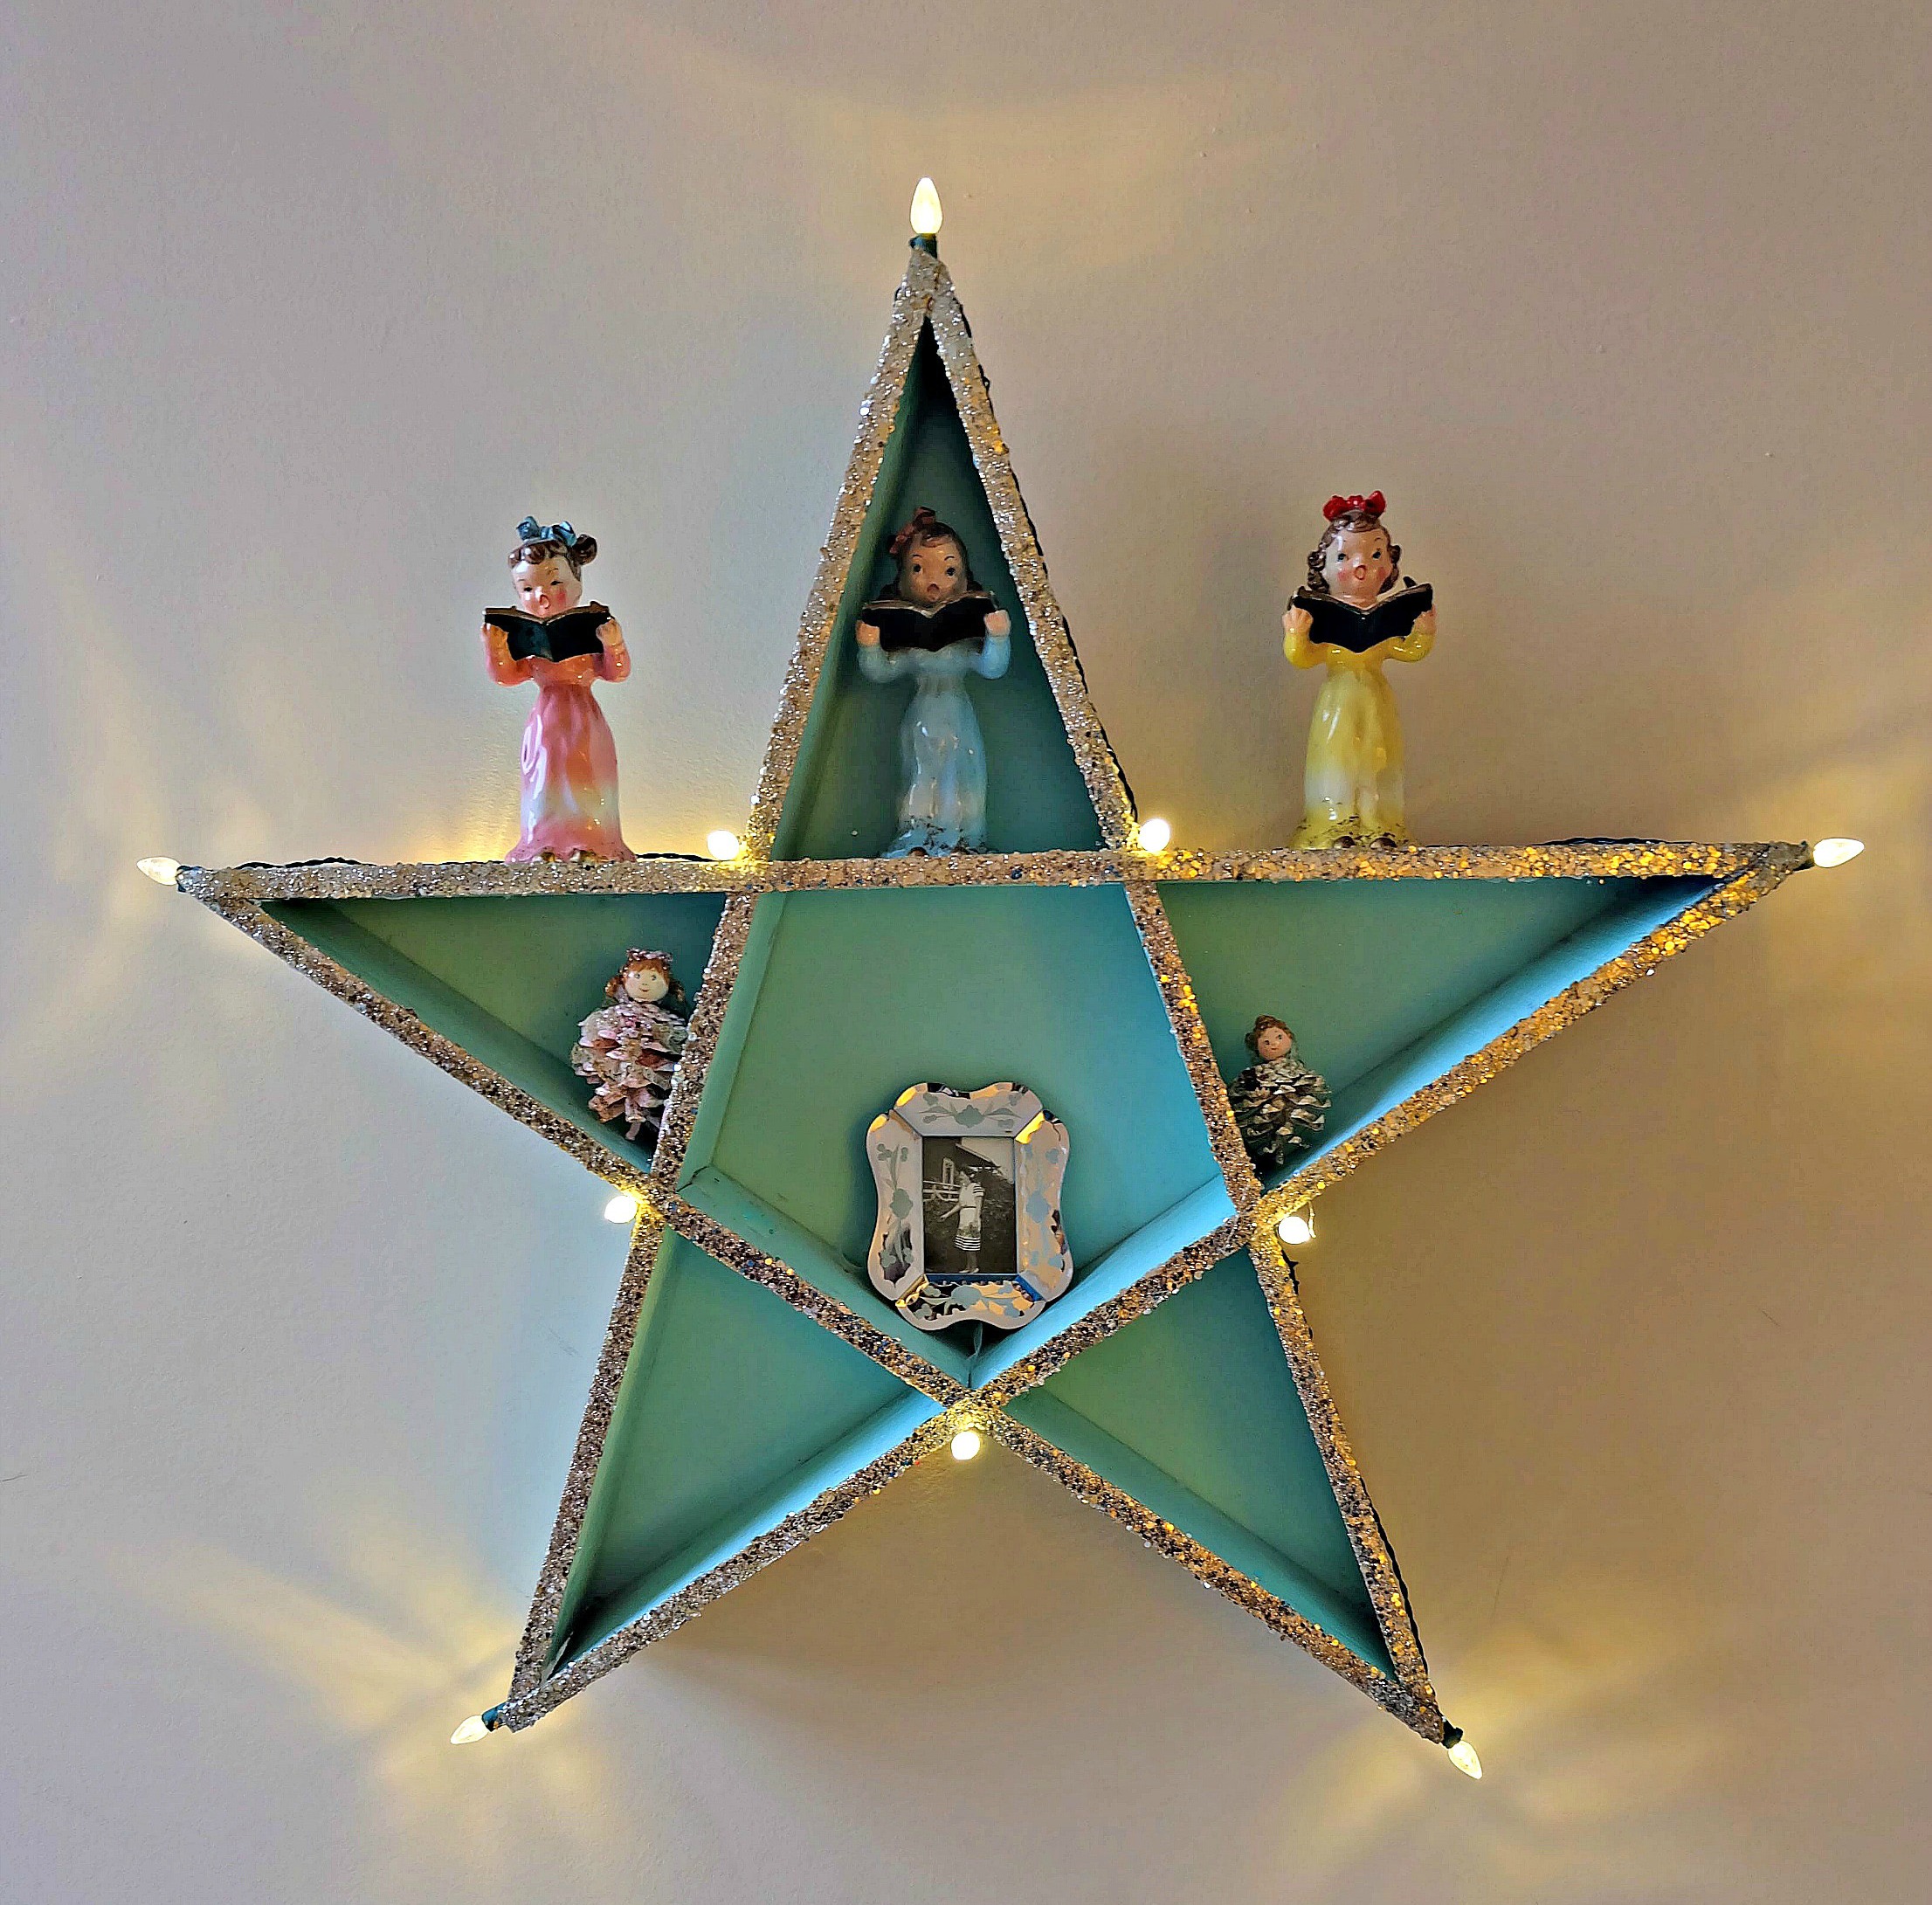
I love the way that our “date night”/Home Depot DIY Decor Challenge turned out. I think my grandma would love it too. Don’t her ornaments look pretty on it?
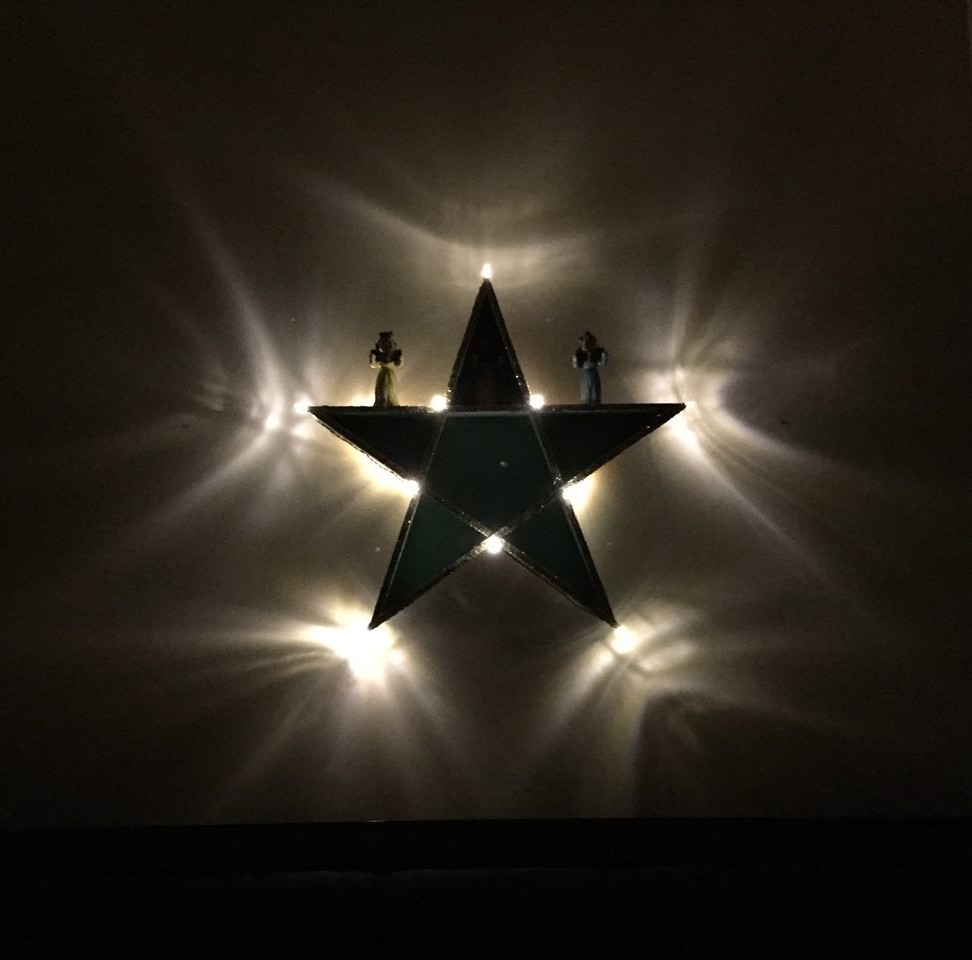
I think that it looks beautiful in the dark as a night light too! I can’t wait to put it in Bean’s room once Christmas is over!
Tell us… What is your favorite Christmas Ornament? Also what is your Christmas style? Beautifully coordinated or mishmash of memories?
Disclosure: Thank you to Home Depot Canada for working with us on this project. As with all articles on Hello Creative Family, all thoughts and opinions are 100% our own.


This is so cute, I would keep it up all year!
This is so pretty! I’m not sure I could make it with my arthritic hands, but I know my hubby could! Thanks!
I agree with Pamela. If mine looked that good, I think I’d keep it up all year.
This is so cute!! Looks easy enough for me to make lol
I love this. Not easy but so worth the time. Fantastic finished product and I can totally see myself changing it up for the seasons.
that’s a pretty cool project
This is a sweet design. I have some wee ornaments that are just too precious to hang on the tree and having something like this would be perfect.
Great idea! Yours is so pretty painted turquoise and blinged up!