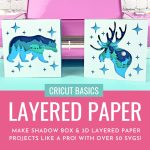
Step By Step Tutorial for a Cricut 3D Shadow Box Project - Recipe Card
Servings: 0
Equipment
- Cricut Maker or Cricut Explore
- Cricut FineGrip Mat
- Cricut Fine Point Blade
- Cricut Brayer Tool
- Cricut Scraper Tool
- Adhesive of choice (check out my suggestions in the supplies section above)
- Cardstock
Instructions
- Upload your design to Design Space or choose a design from within Design Space. Insert onto your canvas.
- Size your design by clicking on the design and then using the arrows that appear in the bottom right hand corner or by using the sizing tool in the toolbar.
- Click "Make It". Mirror each cutting mat (if following Vera from Chipolla's tip above). In the dropdown menu under each cutting mat select the size of paper you are using. Click continue and then select the type of paper you are using.
- Load your paper onto your FineGrip cutting mat. Roll your brayer overtop to push it onto your cutting mat.
- Load your cutting mat into your Cricut. Follow the instructions on the screen to cut each color/layer of your design. Remove the cardstock from the cutting mat by rolling/gently bending your mat so that the paper pops off instead of pulling the cardstock off of the mat. This avoids the cardstock from curling.
- Lay out your layers on your cutting mat so that they are all lined up in the correct order.
- Attach each layer of your project to the next layer using the adhesive of your choice. Make sure that each layer is properly aligned.
- Once all of your layers are attached to each other, pop it in a shadowbox or display it in your choice of ways!