


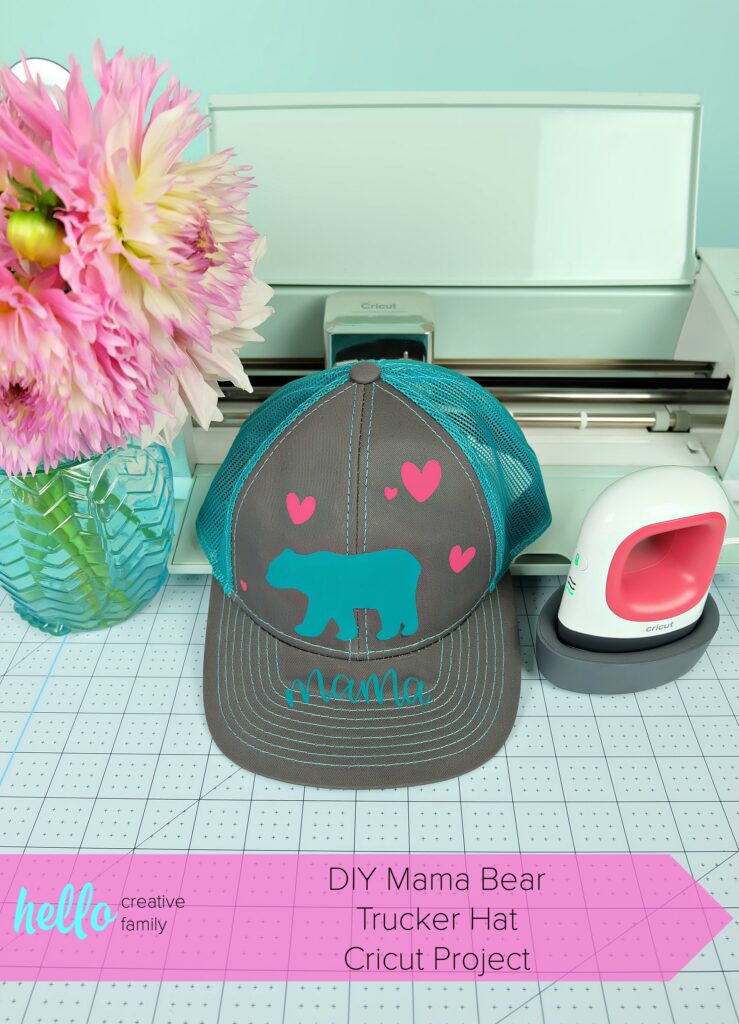
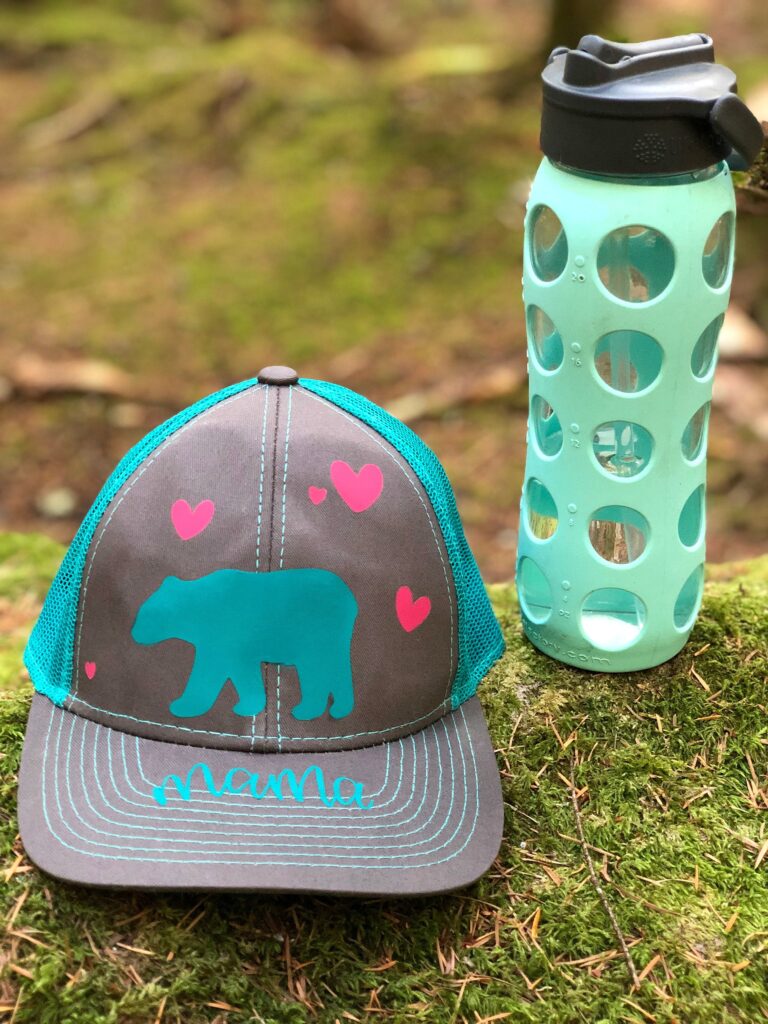
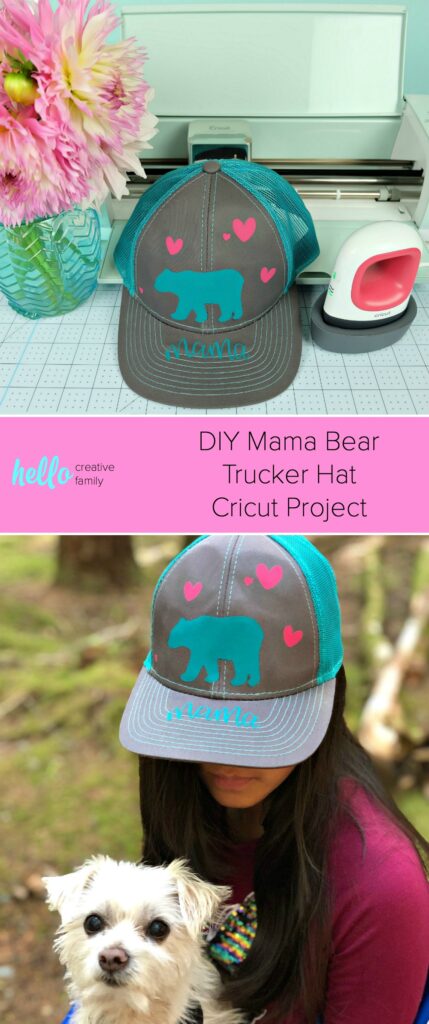
DIY Mama Bear Trucker Hat Cricut Project
This post and the photos within it may contain Amazon or other affiliate links. If you purchase something through the link, I may receive a small commission at no extra charge to you.
Make a DIY Mama Bear Trucker Hat using your Cricut with our easy step by step instructions! The perfect handmade gift for new mamas! The perfect camping accessory!

This is a sponsored conversation written by me on behalf of Cricut. The opinions and text are all mine.
Hi friends! I’m so excited to share today’s project with you! It’s a DIY that I had so much fun making partly because I got to play with the new Cricut EasyPress Mini!
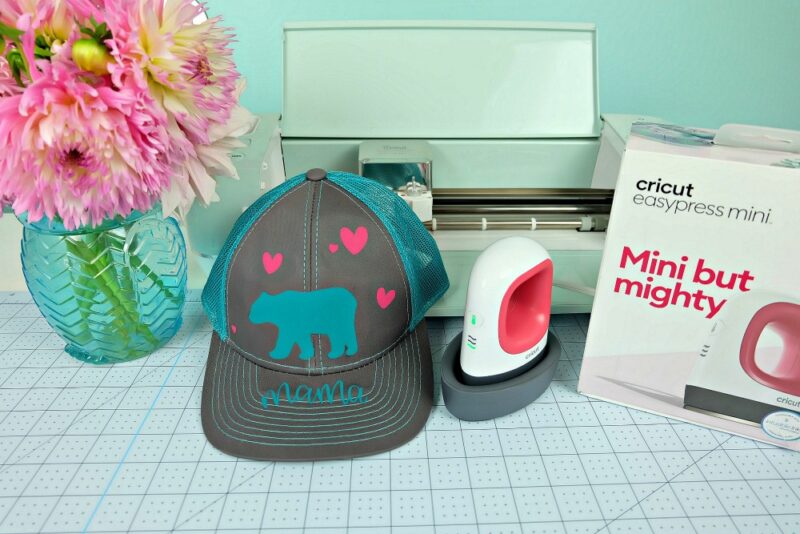
The Cricut EasyPress Mini is the newest addition to the Cricut family. I’ve spent the last few weeks joking on social media that Cricut had a new baby and that it is the cutest thing ever. Yes, this little heat press is ADORABLE but it’s also super practical!
5 Reasons I Love The Cricut EasyPress Mini:
- It’s tiny, and when I say tiny I mean tiny enough to go in your purse! You can easily transport this little guy around with you for crafting on the go.
- It’s functional! With three heat settings this EasyPress can do all the things it’s “older siblings” can! Iron-On? Check! Infusible Ink? Check! Press the collar of your son’s shirt so he doesn’t look disheveled in his first day of school photos? Check!
- Speaking of ironing… The Cricut EasyPress Mini has a pointed tip! It’s fantastic for pressing seams, or paper piecing and applique projects and because if it’s small size it’s convenient to heat up and keep next to your sewing machine as you work!
- It’s perfect for all those awkwardly shaped projects. Have you ever tried applying htv to a baseball hat, shoes or stuffed animals? Let me tell you it’s not easy! Because of the EasyPress Mini’s small size it’s easy to maneuver it into those hard to press places to get perfect adhering every time!
- It has the same incredible technology as the EasyPress 2 in a smaller size! I remember the days before I had an EasyPress and had to apply HTV with an iron. Those were dark days my friend. Everything changed when I got my EasyPress and discovered how miraculous it is to have an even heat plate. The EasyPress Mini heats evenly across the entire heat plate so you don’t have any extra hot and cold places– which is amazing.
I decided to put my EasyPress Mini to the test by personalizing a hat– something that I have never dared to do before because of all of the curves and seams in a hat.
I’ve been wanting a new hat for awhile now, but it’s so hard to find a cute hat that fits me. I know I’m not the only mama out there who has a big head! Big headed mamas you can confirm, it’s just so hard finding large hats with a cute design! I’ll go shopping, see an adorable hat, be hopeful and then try it on and it looks like I’ve put a toddlers hat on my head. I’ve been able to find hats for men that fit… but trust me… they aren’t cute!
Know what is easy to find? Blank hats in large sizes! As soon as my EasyPress Mini arrived at my door, I hopped on Amazon and ordered myself a super cute hat.
I’ve been wanting a cute DIY Mama Bear hat for awhile so that’s where my mind went immediately when my hat arrived.
Read on to learn how I made my DIY Mama Bear trucker hat using my Cricut and my Cricut EasyPress Mini!
DIY Mama Bear Trucker Hat Cricut Project
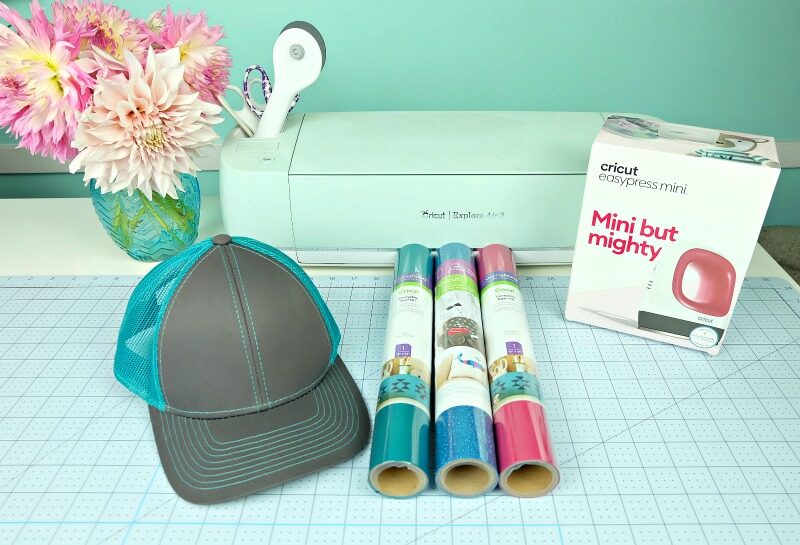
Materials:
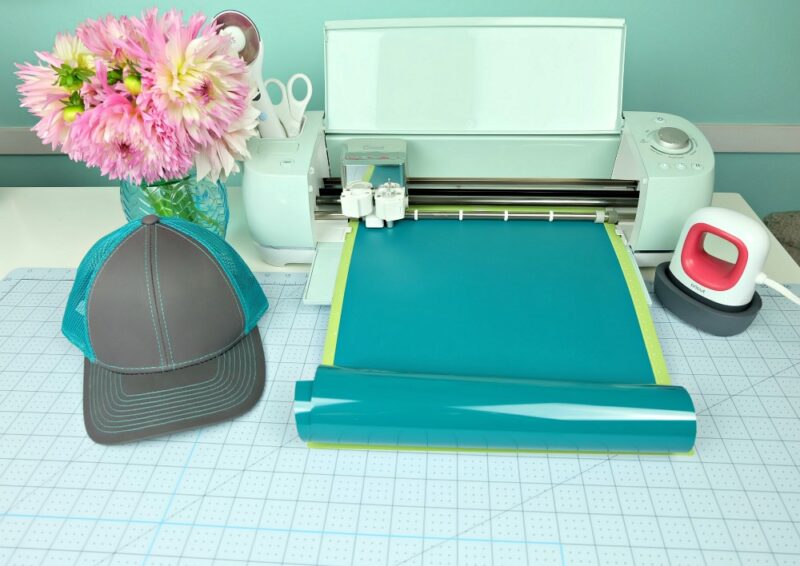
–Cricut Maker or Cricut Explore Air 2
-Cricut Iron-On (This mini sampler has raspberry, teal and gray iron-on and is perfect for small projects!)
-Trucker Hat (this is the one I bought)
Optional: Oven Mitt
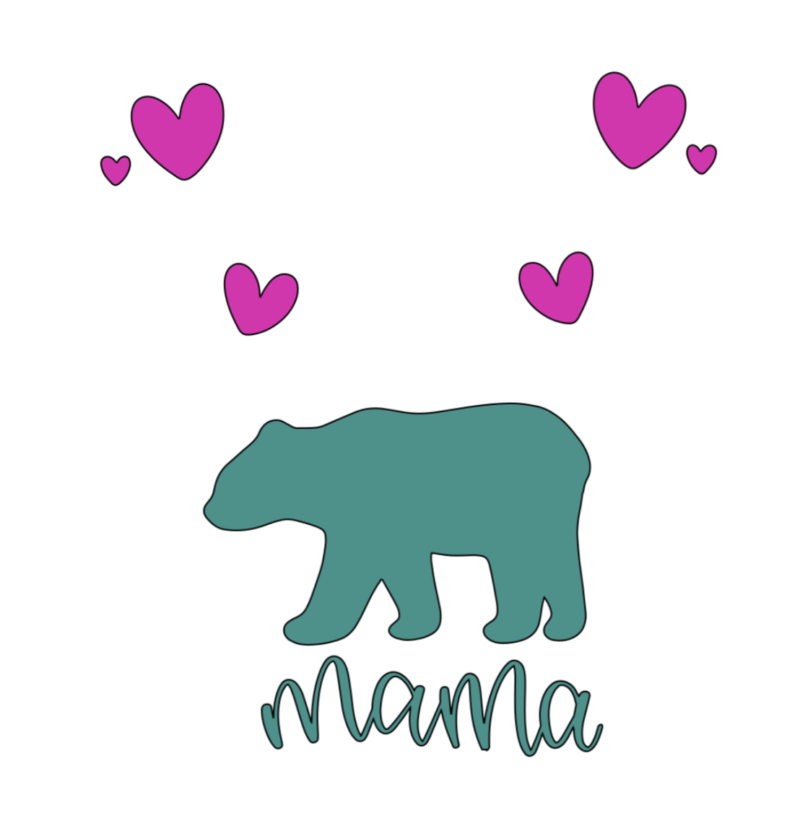
Step 1: Log into Cricut Design Space and then open my Mama Bear Cut File. Measure your hat to decide what size you want your design and size the image accordingly.
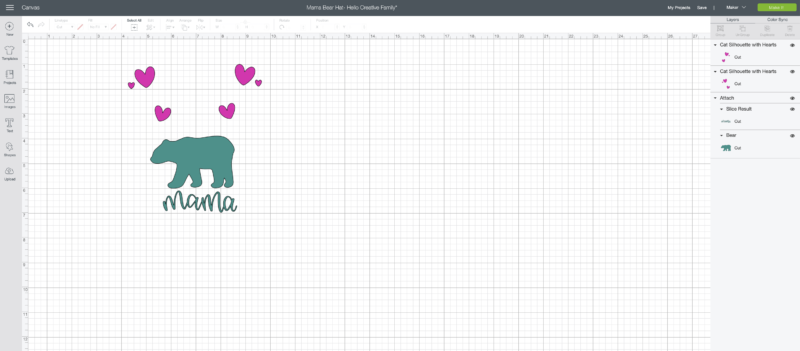
Click “Make It” and then click the mirror button under each cutting mat on the left hand side of the screen.
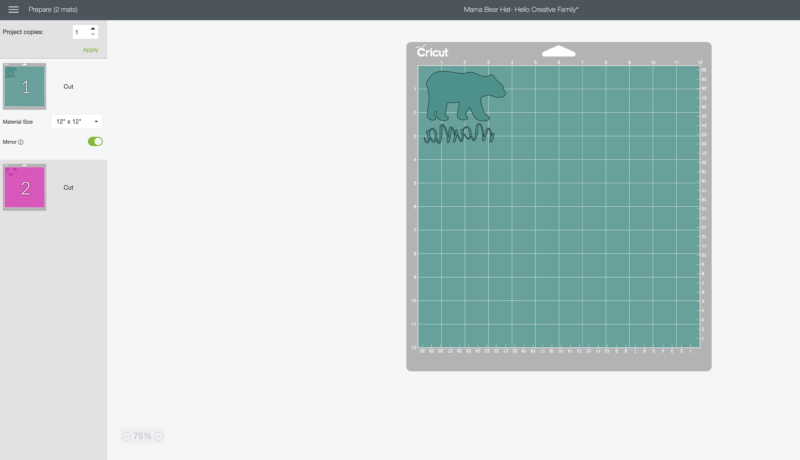
Click “continue”, select your Cricut machine and the type of iron-on you are using, load your cutting mat with the iron-on (shiny side down), load it into the machine and press the Cricut C to cut.
Step 2: Use your weeding tools to weed your design, removing the excess iron-on and leaving just your design behind on the clear plastic backing.
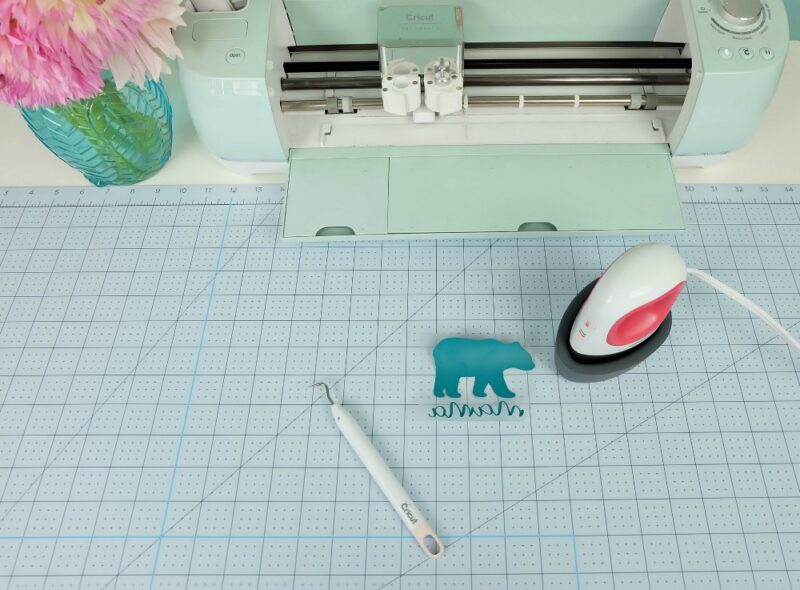
Step 3: Now it’s time to use your EasyPress Mini! I decided to put my “Mama” on the brim of my hat, and my bear and hearts on the front. Heat your Cricut EasyPress Mini on the middle heat setting.
I found that applying the “mama” to the brim of the hat was really easy. I pre-heated the brim of the hat for 15 seconds, laid down my design and then heated for 30 seconds.

Applying the bear to the front of the hat was a bit more challenging because of the curve of the hat and the size of the design. Small designs are much easier to apply. I used an oven mitt and stuck my hand inside the hat to create a hard back behind my design. I pre-heated the hat for 15 seconds and then used my EasyPress Mini to apply the bear design one side at a time. There were some areas that had a harder time sticking then others. With the regular EasyPress I usually suggest to not move the press around too much and instead to apply a steady even heat, however with the mini on a curved section I found that using the pointed tip of the EasyPress to really push stubborn areas down was so helpful.
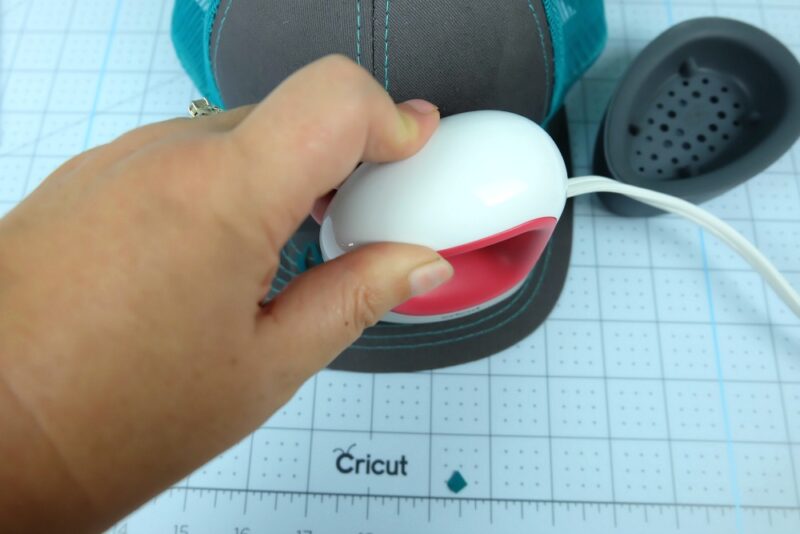
Repeat this process with the hearts.
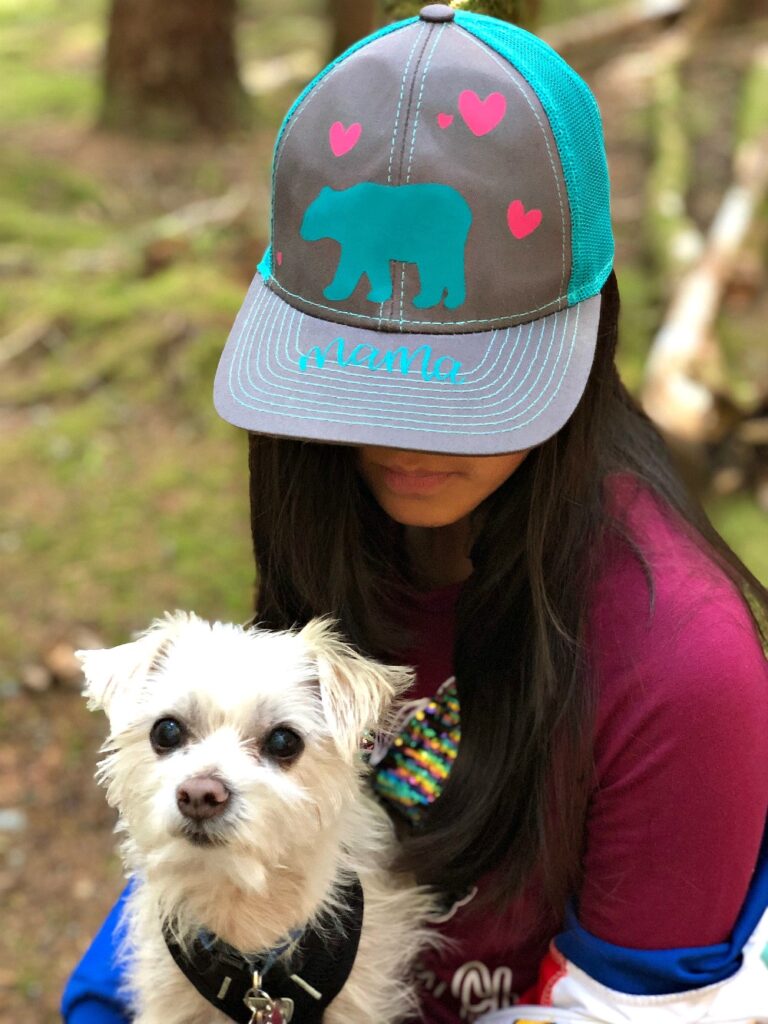
Once your design has cooled remove the clear plastic and you are left with a gorgeous design.
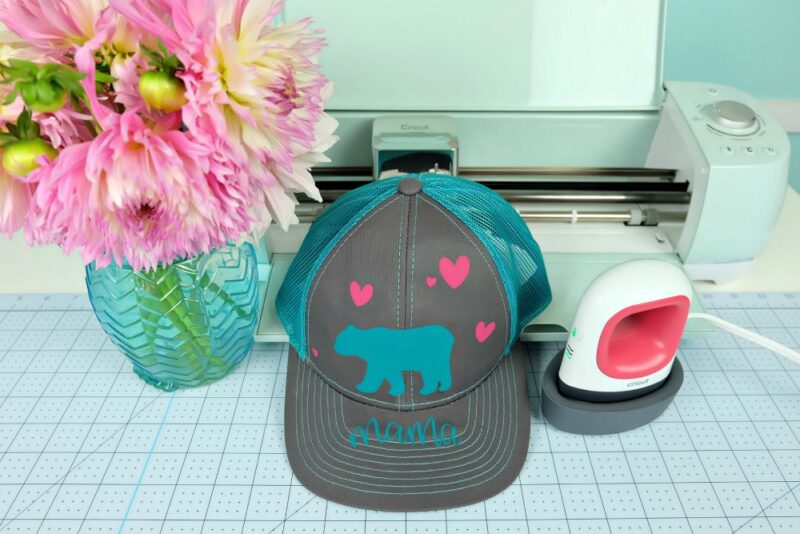
I took my DIY Mama Bear hat camping with me over the Labor Day Weekend and loved having a fun (and cute) hat to cover my camping hair and shade my face from the sun!
I can’t wait to see all of the fun things I make with my Cricut EasyPress Mini! Next up… shoes!
Disclosure: Thank you so much to Canadian Turkey for working with us on this post. As with all articles on Hello Creative Family all thoughts and opinions are 100% our own. We only share things we love and we certainly love Canadian Turkey!
Tell me… Do you have a Cricut cutting machine? What are some of the reasons that you love your Cricut?
Like this post? We’d love for you to pin it for later!
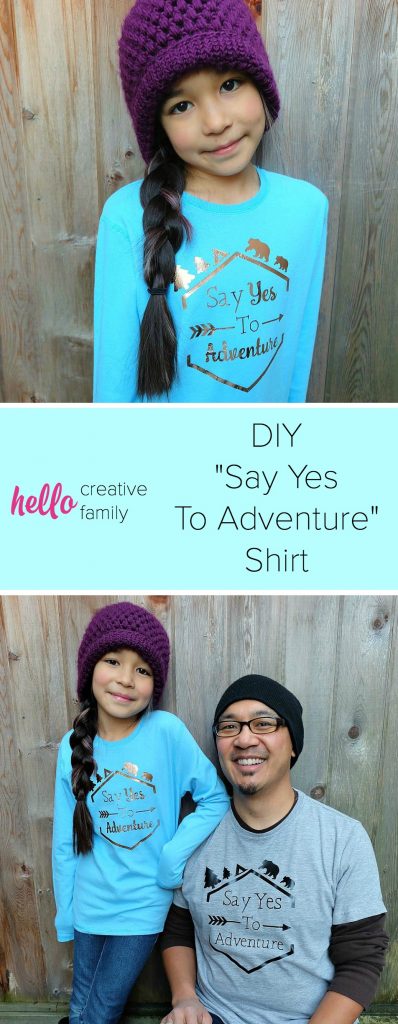
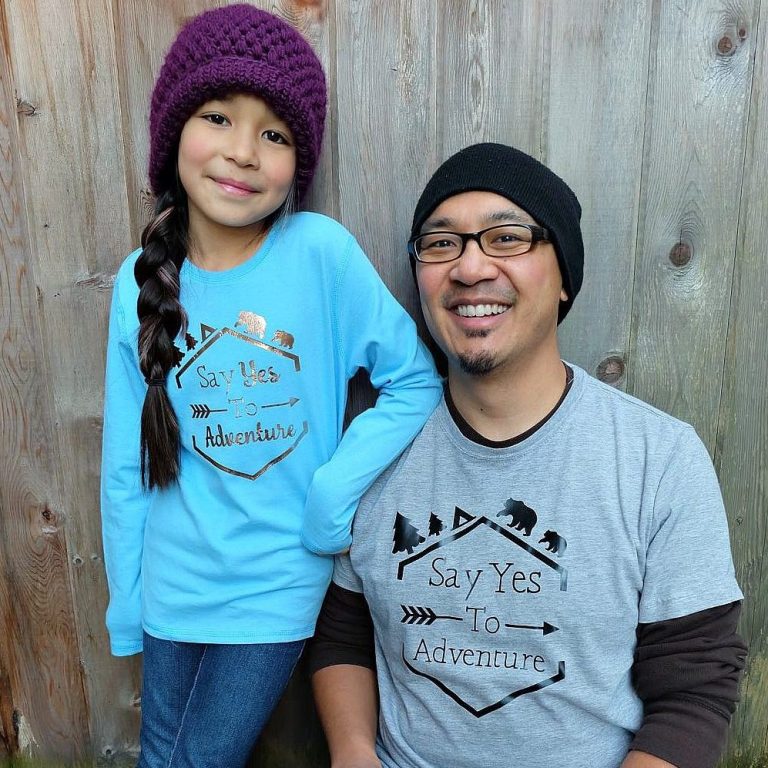
Looking for another cute Cricut project that’s perfect for camping? Check out our Say Yes To Adventure shirt!
Looking for even more Cricut Ideas? We have them all in one handy place for your convenience! Find our Cricut Section Here.


Great post, I love my Cricut
Really cute! I am dying to get a Cricut EasyPress Mini!