


Easy DIY Easter Shirts Made With The Cricut
This post and the photos within it may contain Amazon or other affiliate links. If you purchase something through the link, I may receive a small commission at no extra charge to you.

When I was a child, Easter was one of my favorite holidays. My grandpa, who lived about an hour and a half away from us, would make his annual trip to stay with us. It meant that I had to give up my bed for a few nights, but spending time with my Popa for a few days was well worth it. It wasn’t like we didn’t see my Popa very often, we went to visit him at his house every couple of months, but there was something so special about having him come to our house for a “sleepover”. I see the same excitement in my kids’ eyes when their grandparents come to visit us. I remember dying Easter eggs with my Popa, playing endless games of cards, and waiting in anticipation for him to wake up from his naps (Popa liked to take a lot of naps).
On Easter day my aunt, uncle and cousins would arrive to spend the day. My aunt and uncle have two sets of twins– girls who are 10 years older than me, and boys who are the same age as me. I remember wanting to dress up and wear something special at Easter, so that I’d look nice for my family, but nothing too nice, because I knew that once the boys arrived we’d be disappearing into the forest for hours to run around, create imaginary worlds and play.
Easter now is a bit calmer. We go down to my parent’s house and the Easter Bunny finds us there. While my kids don’t spend much time tearing through the forest, we do go for our annual Easter walk and visit a pond near my parents’ house to catch the first glimpses of the newly hatched baby ducks.

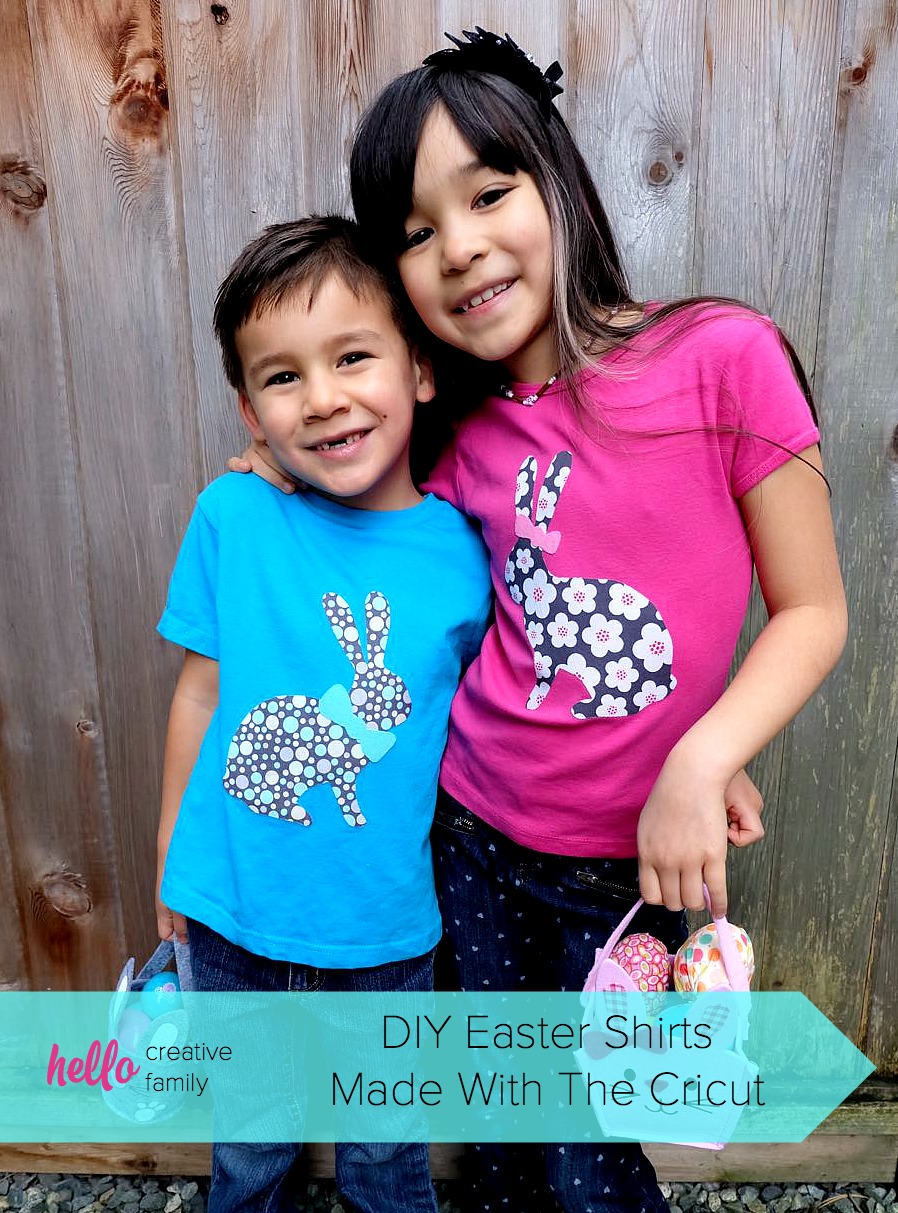
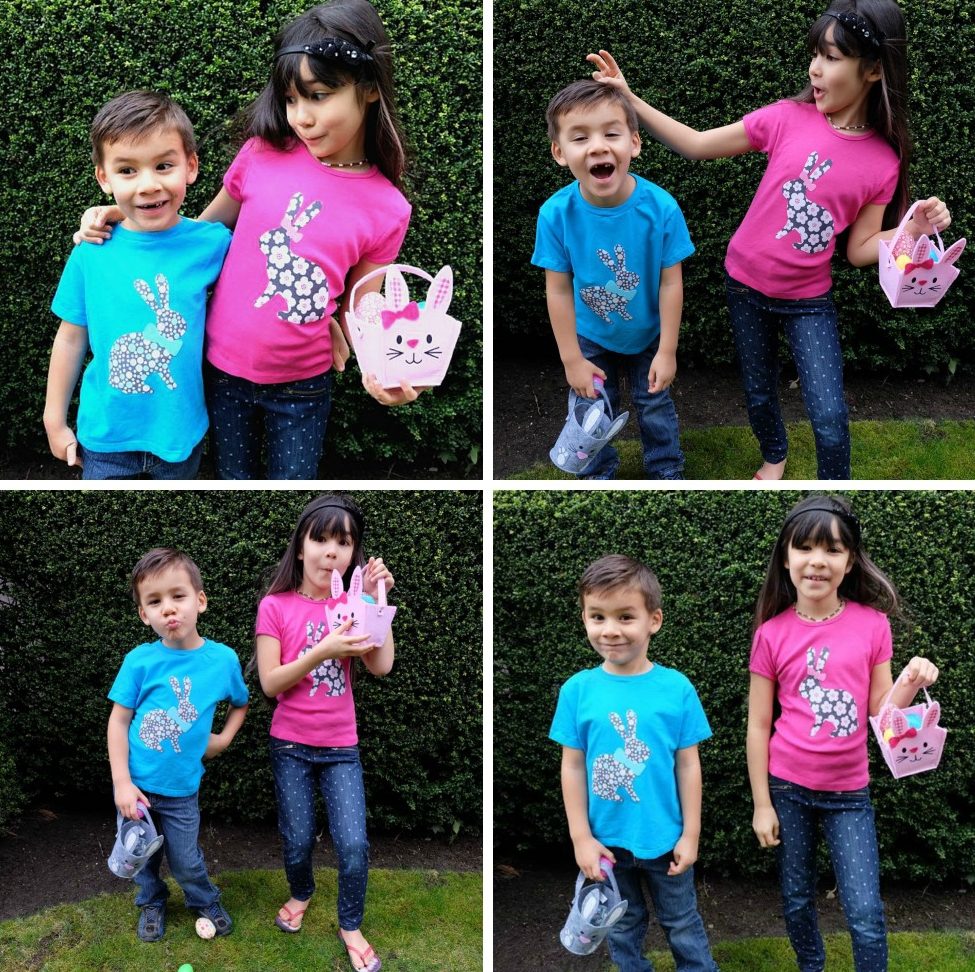
I don’t tend to dress my kids too fancy for Easter, but I do love for them to have a special Easter outfit. This year, I decided to make them “His and Her” coordinating Easter shirts.
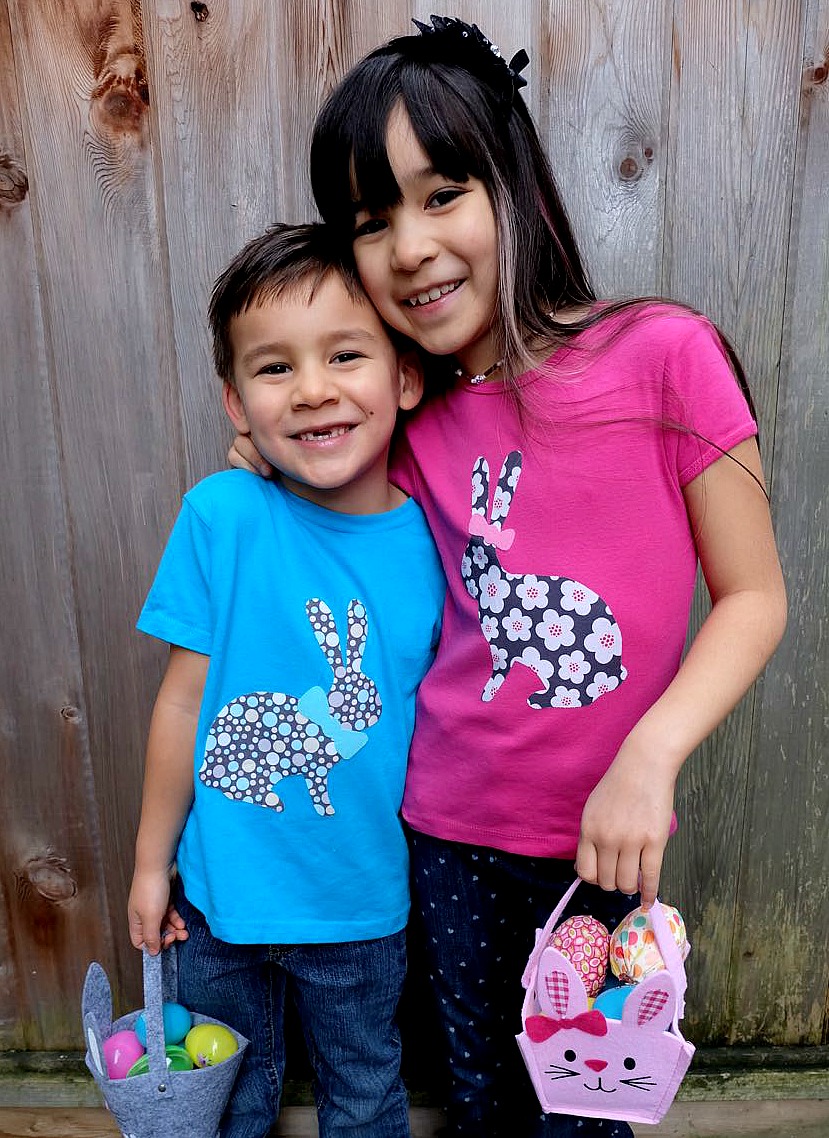
Before I had my blog, I ran an Etsy store called Lilikoi Lane. The main thing that I sold in my shop was appliquéd shirts for kids. One of my bestsellers was a bunny design that would always reach it’s peak selling time around Easter. I decided to replicate that idea with my March Cricut Shirt of the Month. I’ve owned my Cricut for a few years now, but I’ve never tried cutting fabric with it before!!! I have a ton of fabric from my Lilikoi Lane shirt making days, and this seemed like a perfect opportunity to pull out some of my favorite “His and Her” fabrics. I decided to add little bows made of coordinating colored flannel to each rabbit to fancy them up a bit. I made the bunny on my son’s shirt wear a bowtie, and the bunny on my daughter’s shirt wear a bow by her ear.
Read on for my “Cricut Question of the Month” and instructions and the cut file to make my DIY Easter Shirts Made On The Cricut!
Cricut Question Of The Month: What is the Cricut machine and what can I do with it?
Short answer: What is the Cricut Machine? One of my very favorite tools in my craft room. What can I do with it? The real question is what can’t you do with it??? LOL.
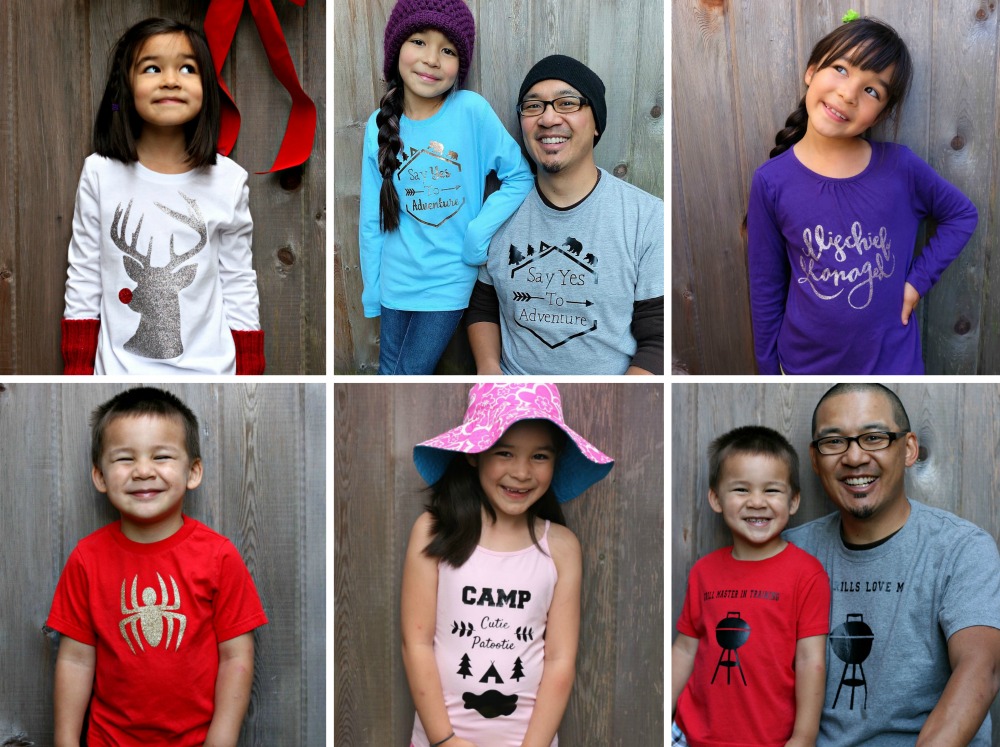
Long answer: At Cricut they like to say “The Possibilities Are Endless!” I’d have to agree with that statement. The Cricut is a cutting machine that can cut over 100 different materials. I have used my Cricut to make children’s and adult clothes, planner stickers, planner stencils, planner folders, wedding bouquets, Christmas ornaments, advent calendars, pillows, jewelry, stencils, laptop decals, iphone decals, tote bags gift tags, signs, wall murals, purses, bookmarks, hostess gifts, party decor, birthday party favors, paper crafts, home decor items and much more! You can see some of those Cricut projects here.
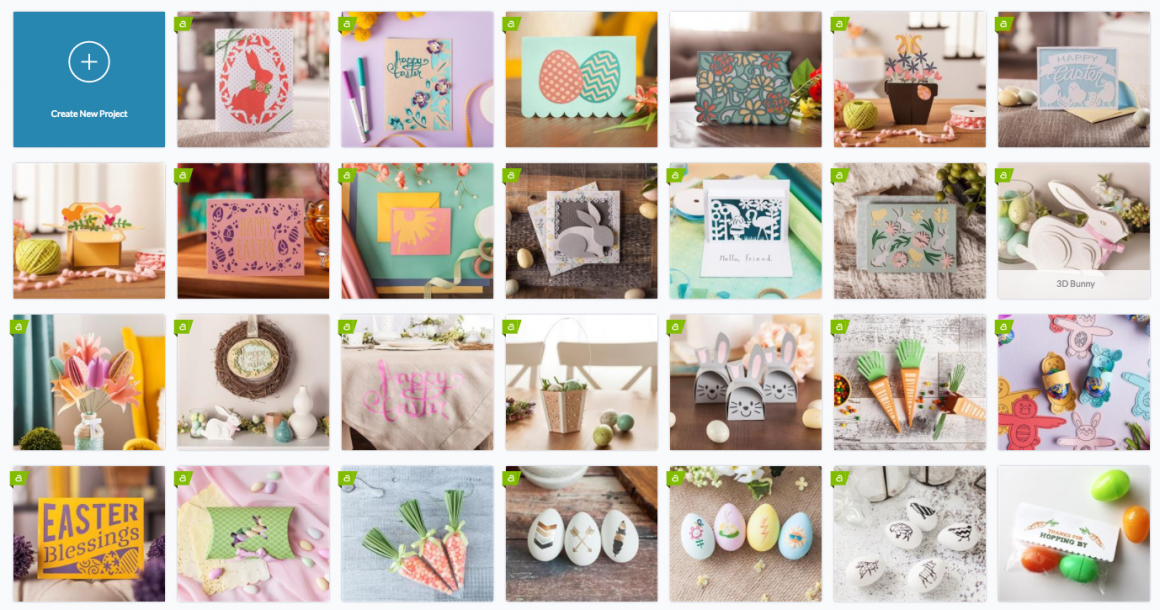
With the Cricut machine you can either upload your own images and fonts, or select from over 30,000 images and 370+ fonts in Cricut Access. Cricut also has hundreds (if not thousands) of Make It Now projects. These are craft projects created by artists and bloggers that are designed and ready to cut. You just need to insert your materials, cut and assemble following their easy instructions.
Here are some of the adorable “Make it Now” projects that are currently featured.
To cut on a Cricut you select a cutting mat that’s either 12X12 or 12X24, insert the mat into the machine, stick whatever you are cutting on top of it, select what material you are cutting and press go. The Cricut does the rest.
The other think that I love about my Cricut is that you can insert a pen so that the Cricut can draw or write on your project and it also has a Print and Cut function where you can print on materials using your home printer then insert them into your Cricut and the Cricut will cut around the part that you have printed. I’ve been using this function a lot lately to make my own Happy Planner Stickers.
The next things I want to try using my Cricut are making stencils to create wood signs (you can find the planner stencils I made here), and to experiment with glass etching. I’ve seen people etch on glass to make customized casserole dishes and wine glasses that I think would make such a sweet housewarming or hostess gift!
I’m always happy to answer Cricut questions, so if you have them, drop them in the comments or send me an email at crystal@hellofamilymedia.com. In the meantime, let’s get started on this months t-shirt design!
Easy DIY Easter Shirts Made With The Cricut
Materials:
- Cricut
- Strong Grip Cutting Mat (you can also do this with a standard grip mat but make sure it’s a newer one and still very sticky)
- Regular Cutting Blade (make sure it’s clean and free of past cutting materials)
- Fabric for the rabbits
- Flannel (or coordinating fabric) for the bows
- Heat’n Bond Ultra Hold Iron On Adhesive
- Iron
- Shirt
- My Easter Bunny Shirt Design File
Directions:

Step 1: Open my Easter Bunny Shirt Design File in Cricut Design Space. Measure the shirt you’ll be putting the bunny on and decide what size you want the bunnies you cut to be.
Step 2: Cut out a piece of fabric for your bunny and the bow that are slightly bigger than the design. I like to add on at least 2 inches to the height and width of the design that I’m cutting to make sure that I have enough room. Having your design cut outside of your cut material is no fun!
Step 3: Lay your fabric on top of you Heat’n Bond and cut the Heat’n Bond so that it is the same size. Following the instructions on the package, iron the Heat’n Bond to the wrong side of the fabric (the side without the design).
Step 4: Lay your fabric on the cutting mat with the fabric design facing up and run your hands over the fabric, pressing down to make sure it’s firmly adhered to the mat. Click “Go”. Make any adjustments you need to where your design are going to be placed on your cutting mat and Click “Go” again.
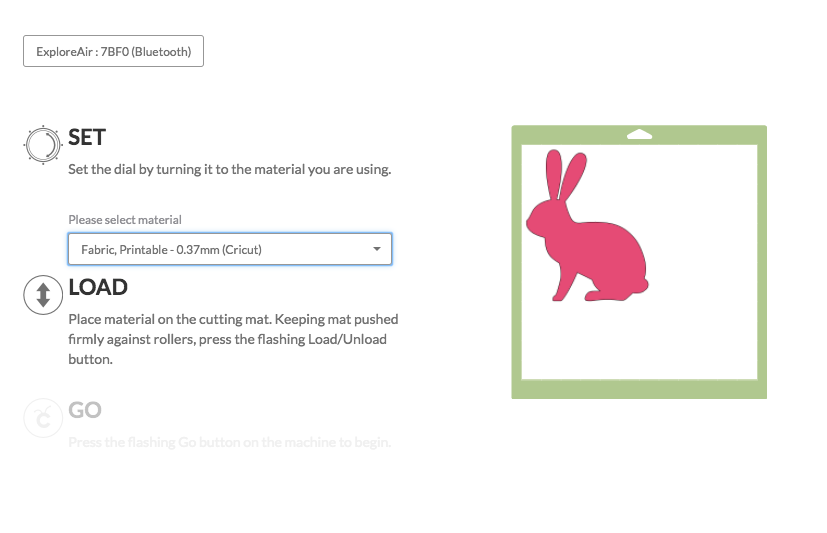
Step 5: Turn your setting dial to Custom and from the drop down menu select your cutting material. I usually use the “Printable Fabric” option. Insert your cutting mat, click the flashing Cricut button and watch your material cut! Before I remove my mat from my Cricut I usually double check that the fabric has cut all the way through. If it hasn’t you can press the Cricut C on your machine to repeat the same cut.
Repeat this process for the other other pieces that you are cutting.
Step 6: Remove the paper backing from the Heatn’ Bond and iron your design onto your shirt until it is firmly adhered.
Viola! You have adorable DIY Easter shirts that you can customize with different fabric for each kiddo in your family! If you want a more decorative look you can also stitch around the design using a decorative stitch on your sewing machine, but it’s not necessary to keep the design attached to the shirt. I wash these shirts inside out on delicate (when I remember) and they hold up extremely well.
Tell me… What Cricut questions do you have? What kind of shirt designs would you like to see in the future?
PS… Here are a couple of outtakes from our photo shoot. These kids slay me, especially the one on the left. 😉
Make sure to pin this post for later!
Like this post? Make sure to check out our other Cricut shirt designs!
Disclosure: This is a sponsored conversation written by me on behalf of Cricut. The opinions and text are all mine. Comments submitted may be displayed on other websites owned by the sponsoring brand.


Those shirts look super cute! I wish I thought of that!