


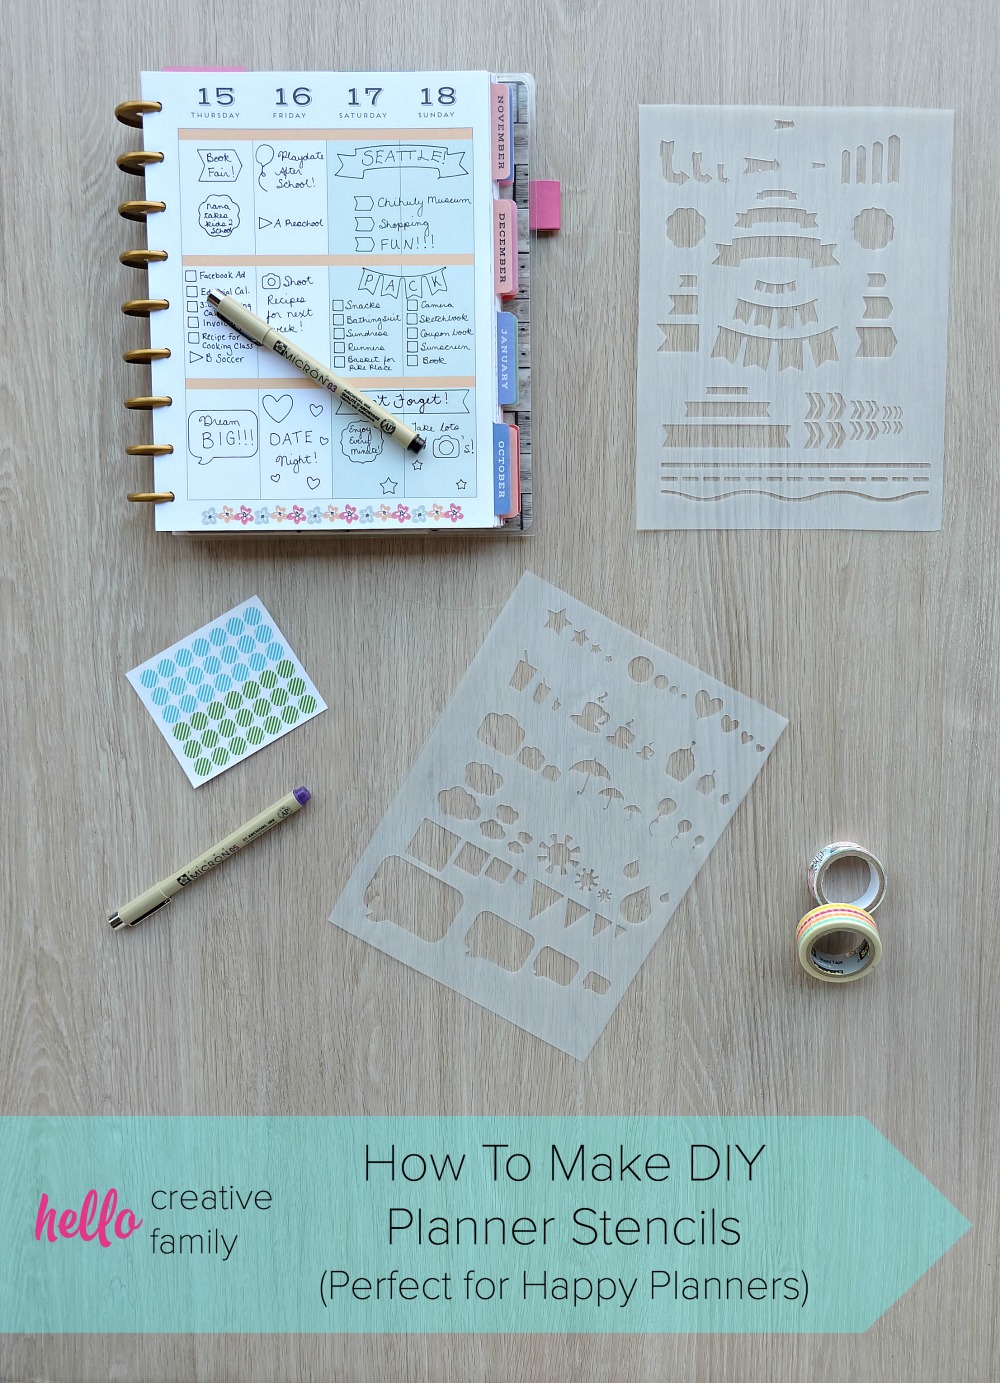
How To Make DIY Planner Stencils (Perfect for Happy Planners)
This post and the photos within it may contain Amazon or other affiliate links. If you purchase something through the link, I may receive a small commission at no extra charge to you.

Last spring, when I was at SNAP, I fell in love with Happy Planners! Have you seen them before? They are GORGEOUS! They are made by Create 365 and come in a bunch of beautiful designs. You could literally spend an hour standing at Michael’s in the Happy Planner aisle trying to figure out which planner fits your personality the best. (Ask me how I know this.)
The Happy Planner that ended up coming home to live with me is the Fresh Floral Happy Planner.
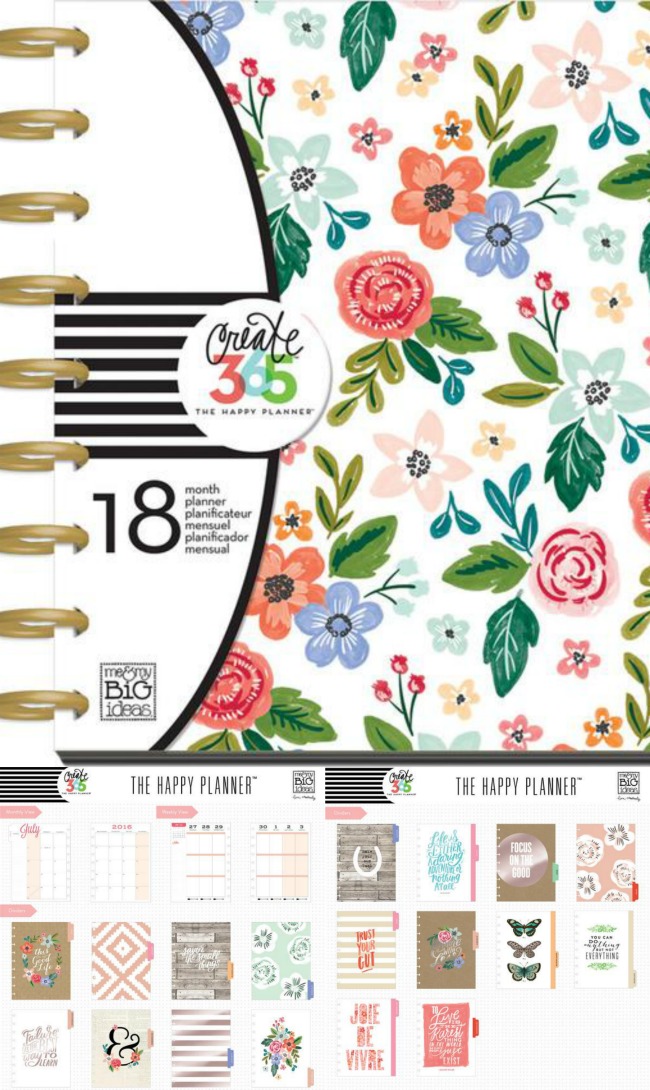
Isn’t it pretty? I love it SO MUCH!!!
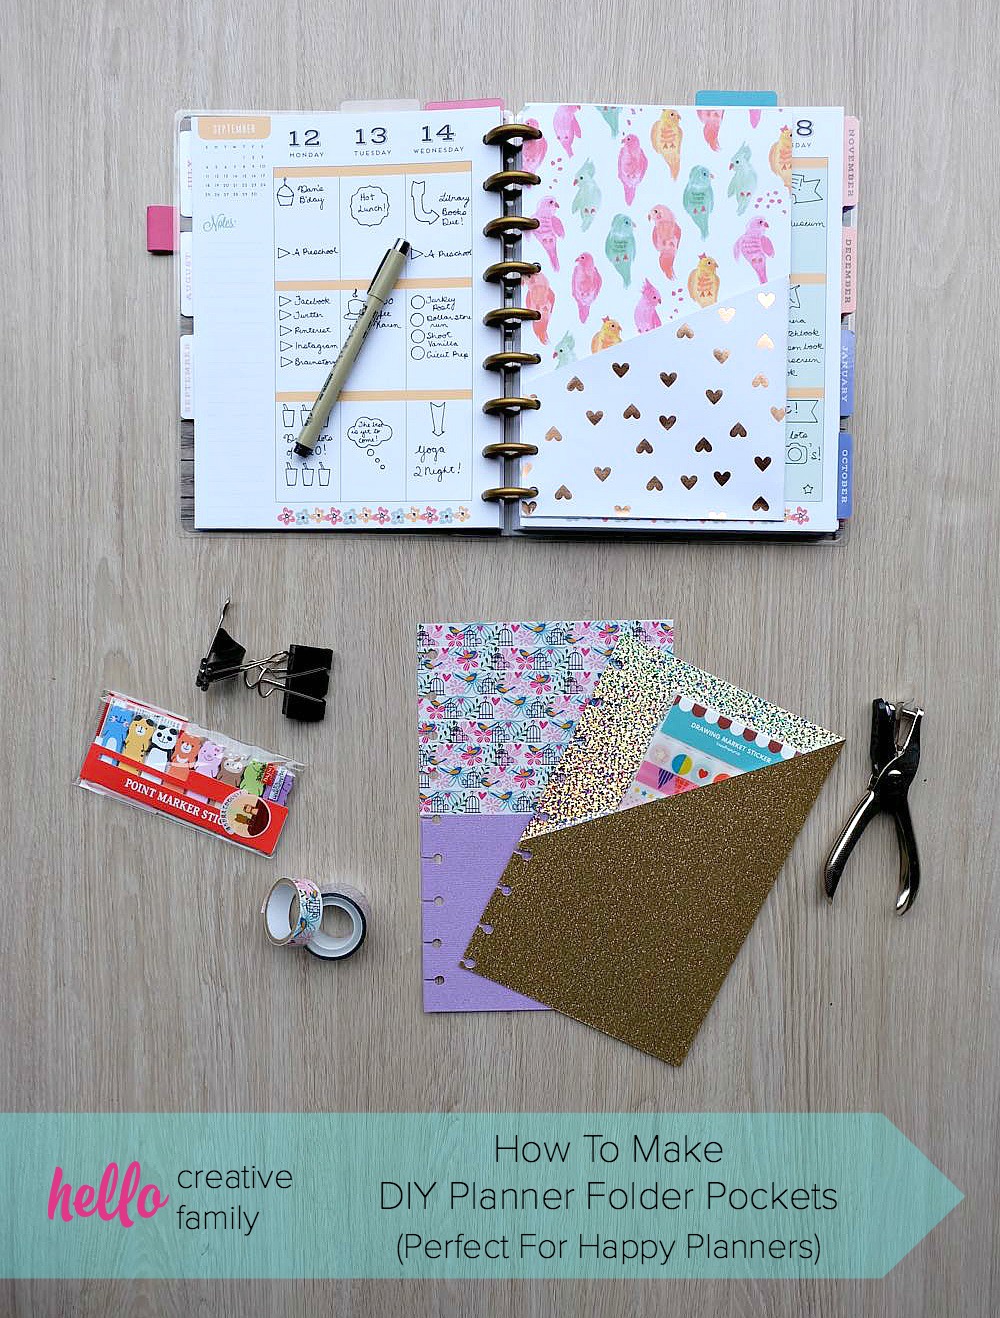
There are a ton of fun accessories you can buy for your Happy Planner from a pen holder attachment, to stickers and sticky notes, to folders to hold papers to a hole punch to add your own pages. Happy Planner also sells themed inserts that they call extension packs for your planner with the themes of fitness, recipes, wedding planning and home.
People turn their Happy Planners into serious works of art. Just check out the #HappyPlanner hashtag on Instagram and be prepared to be blown away! I’ll be honest, the planner is so pretty and people make them into such works of art, that I was a little bit intimidated to use mine.
I decided to create some of my own stencils to use in my happy planner to get me inspired and to help me make my planner a little bit prettier. These stencils could be used with any planner. I hope that you like them, that you decide to make them for your planner, and that they inspire you to create some pretty planner pages.
Read on for my instructions on how to make DIY Planner Stencils.
How To Make DIY Planner Stencils (Perfect For The Happy Planner)

Materials:
–Cricut Explore
-Plastic Poster Board or stencil plastic (I found this with the poster board at Michaels. It came in a big sheet like poster board and said poster board on it, but it was made of a plastic material that is perfect for stencils)
-Hello Creative Family Stencil Design in Cricut Design Space (You can find it here. You will want a membership to Cricut Design Space to cut these stencils because then you’ll be able to cut it for free. A one month membership is $9.99 or a 1 year membership is $95.)
–Cricut Strong Grip Cutting Mat
Directions:
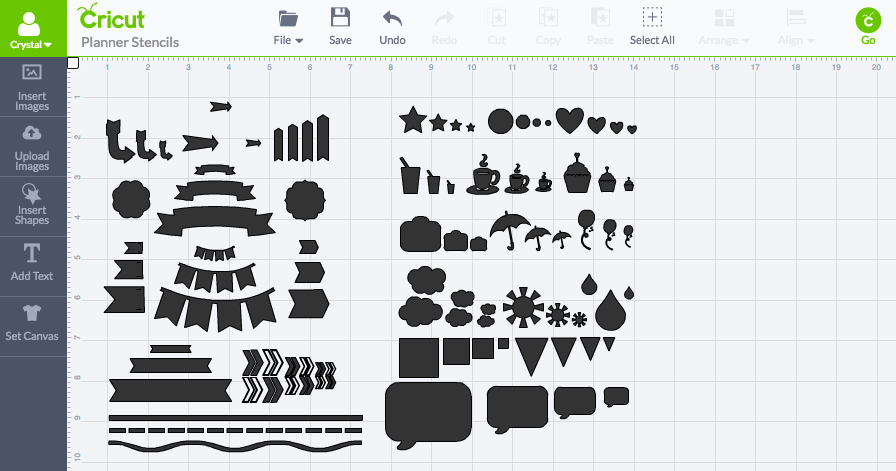
Step 1: Open the file for the Hello Creative Family Stencil Design in Cricut Design Space.
Step 2: Click “Go”
Step 3: Cut your plastic poster board into 9 inch by 7 inch pieces and stick to them to the cutting mat.
Step 4: Set your Cricut dial to Poster Board+ and cut.
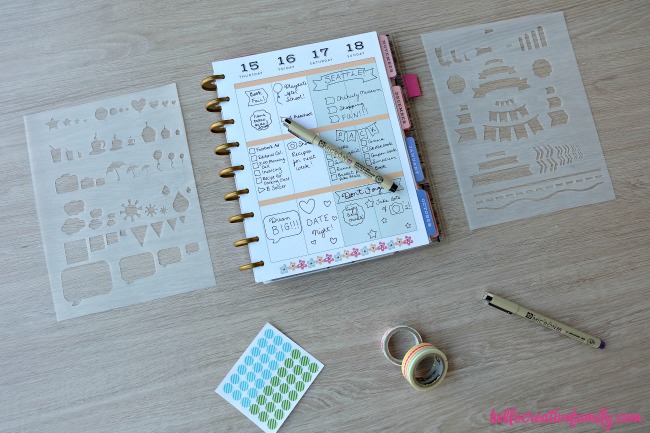
Step 5: Remove stencil from cutting mat and weed out any pieces that didn’t fall out on their own.
Enjoy your new planner stencils!
Tell me: Do you write in a planner? What kind of planner do you use? Is your planner more pretty, functional, or a mix of both?
Disclosure: This post contains affiliate links. That means that if you purchase something from one of the sites we link to, we will get a small percentage of your sale in commission from the company. As with every post on Hello Creative Family, we only recommend products that we love!
Like this post? Make sure you check out our tutorial on how to make DIY Planner Folders!


What a neat idea!! I bought my first Happy Planner this summer and I love it—but I’ve never thought of making my own stencils to use to embellish it! Thanks for linking up with Merry Monday this week!
I like the idea of stencils because I hate when I try to draw a design on the fly and mess it up. And I personally like the look of a mix of pen and stickers versus lots of stickers. I got my first Happy Planner this year, the same design as you!
I LOVE my Happy Planner. I have the black on with the gold heart that says “MY LIFE” on the front! It’s from last year, and it’s almost done….I’ll be getting a new one soon though <3
You've just made me want a cricut EVEN MORE though LOL. I love finding things like this 😀
Lovely tutorial, thanks! Mine is a mix of both but it doesn’t look as good as this one. 🙂
Brilliant! Thank you for the great idea.
Did you use the regular blade on the cricut? Thanks!!! What a great idea
Hi Susie,
Great question! I used the regular blade. 🙂
Best Wishes,
Crystal
I really like your stencil and would like to create it on my Cricut. I clicked the link you provided but cannot open it in Cricut Design Space. Can you please email the link to me so I can try to open it that way?
Thanks for the design. I actually made a set for myself for a personal size planner and then the 5.5×8.5 size for my niece. These will be great additions to our planners. A couple of notes:
Plastic ‘poster board’ was nowhere to be found. I substituted plastic tab dividers. I don’t think this is much thicker than the plastic board you used, but I had to use a deep-cut blade on the “heavy leather” custom setting.
Several images are on Cricut cartridges that are not part of Access subscription. Expect to pay about $7.
Even downloaded on a computer and working on the iPad, expect to have trouble cutting it in the app. I never got it to cut and also had trouble buying the images.
Unable to open your link from DS. Please send me a new link for the planner stencil
I was so excited to try it! I saved the file to my design space but when I went to “Go” it crashed my plug-in. Can you send me another file please?
Hi Carol,
Thank you so much for visiting. Unfortunately that is the only file I have. Maybe try restarting your computer or try it in a different browser?
Best Wishes,
Crystal
may I get this stencil file for design space. How do I download it?
Hi Jacqueline!
You should be able to access my design file here: https://design.cricut.com/#/design/45176513
Thank you so much for visiting!
Best Wishes,
Crystal
I know you posted this several years ago, but I just recently came across it and used your tutorial, with a few tweaks. I made mine bookmark sized with holes on the side so that I can put it into my happy planner mini. I just have to say… It… is… PERFECT! Thank you so much for the tutorial and for telling everyone about the plastic poster board. I did have to drive a little farther than I normally would, because the Michael’s closest to me doesn’t carry it, but I was fine with that. I even had a coupon at the time for 50% off regular priced items, in the end I’d easily make that drive again (and plan to!). Now I can make a bunch of Disney-themed stencils in different sizes. <3 <3 <3
I know this post is from a couple of years ago, but I would love to try to make this stencil! Is the stencil design still available? I tried to follow the link provided but it says that the project is private and I am unable to access it 🙁
Hi Lina,
I’m sorry for the inconvenience. Because of a recent change to Cricut Design Space all old links are now invalid. I have just been able to get a new link for this project and have updated it in the post.
Best Wishes,
Crystal