How To Make Cricut Luggage Tags and Passport Holders
This post and the photos within it may contain Amazon or other affiliate links. If you purchase something through the link, I may receive a small commission at no extra charge to you.

Unleash your creativity and make custom Cricut luggage tags and passport holders effortlessly! Join the crafting adventure now and let your luggage stand out on the luggage carousel by creating one of a kind travel gear with a personalized touch!

Disclosure: Thank you to Cricut for working with me on this sponsored post. As with all content on Hello Creative Family, all thoughts and opinions are 100% my own.
Hi Crafty Friends! I recently had the opportunity to take a trip from Vancouver to Salt Lake City for the launch of the Cricut Venture! I spent 3 super fun days hanging out with Cricut blogger friends, Cricut staff and members of the Cricut Contributing Artist Team!
Not only did I get to attend the launch of the Cricut Venture, I also got to spend the day at Cricut Head Office where we discussed the future of Cricut (they have BIG plans in the works for the next few years!), met with department heads to share “wish list” features for Design Space and tour the incredible Cricut facilities.

Whenever I am travel for an event, I always secretly wonder if everyone around me is also traveling to go to that event too.
Cricut people are my favorite people and even though I’m usually an introvert, I could talk for HOURS about Cricut cutting machines.
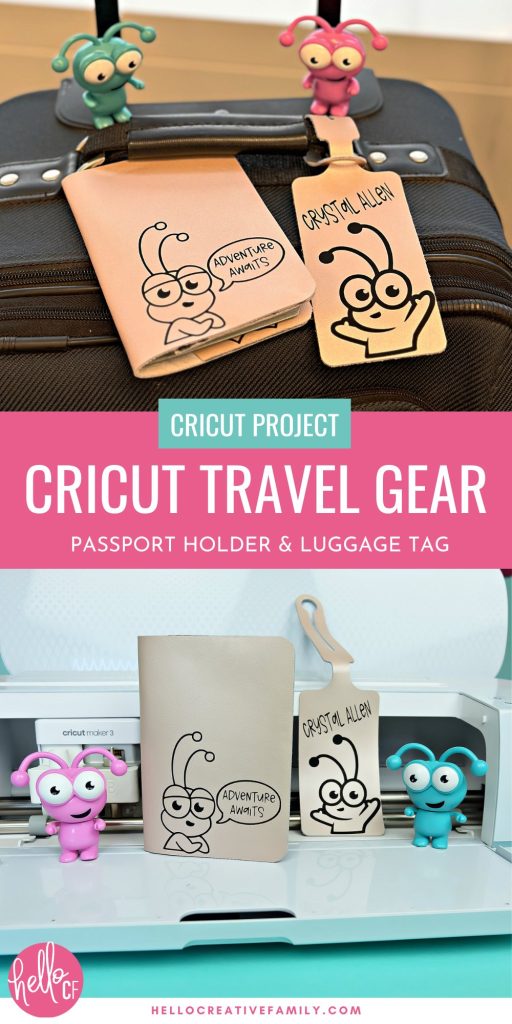
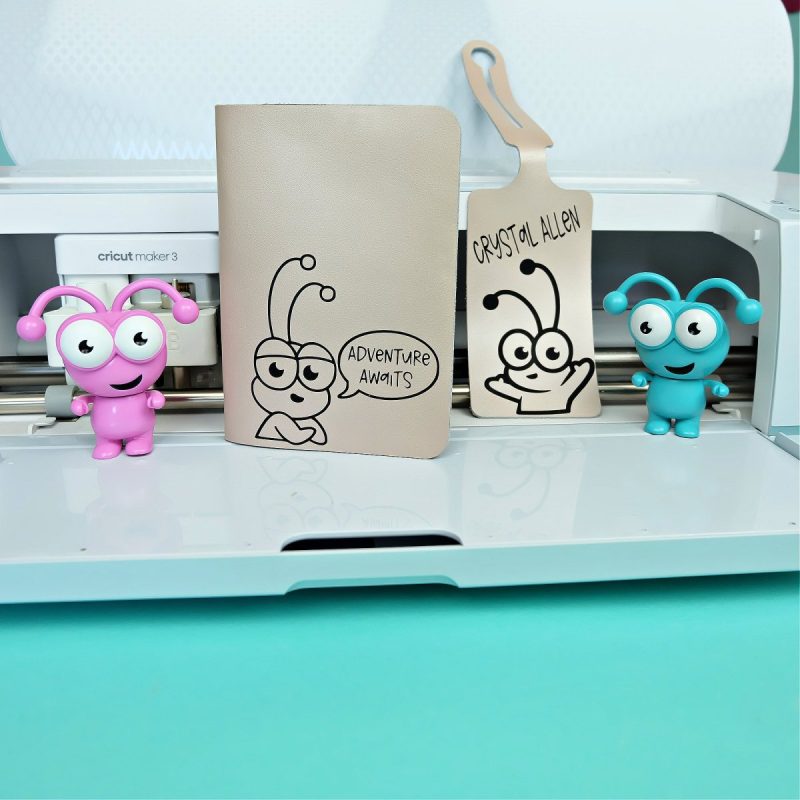
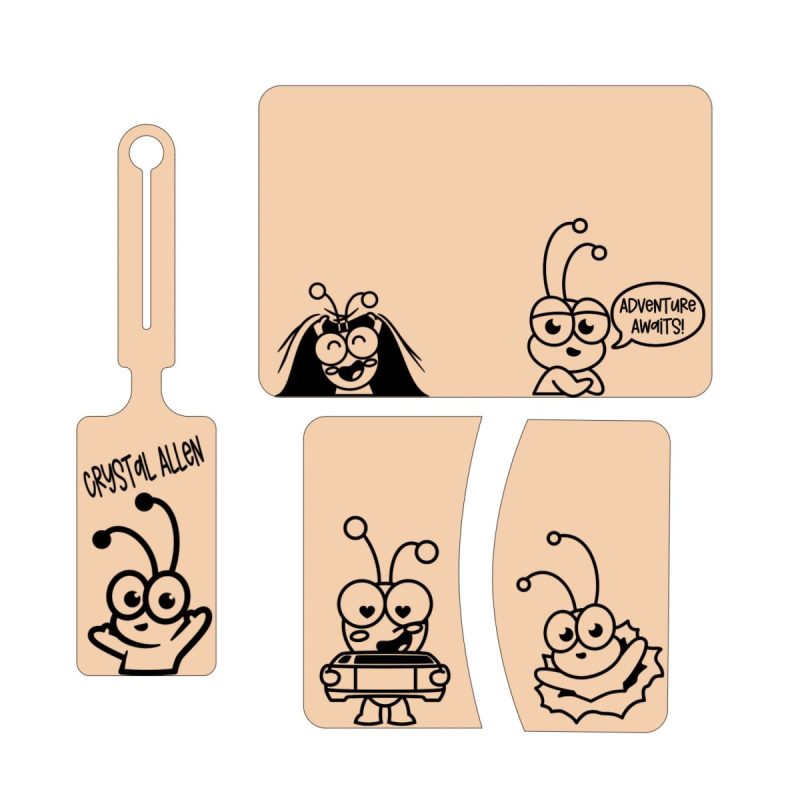
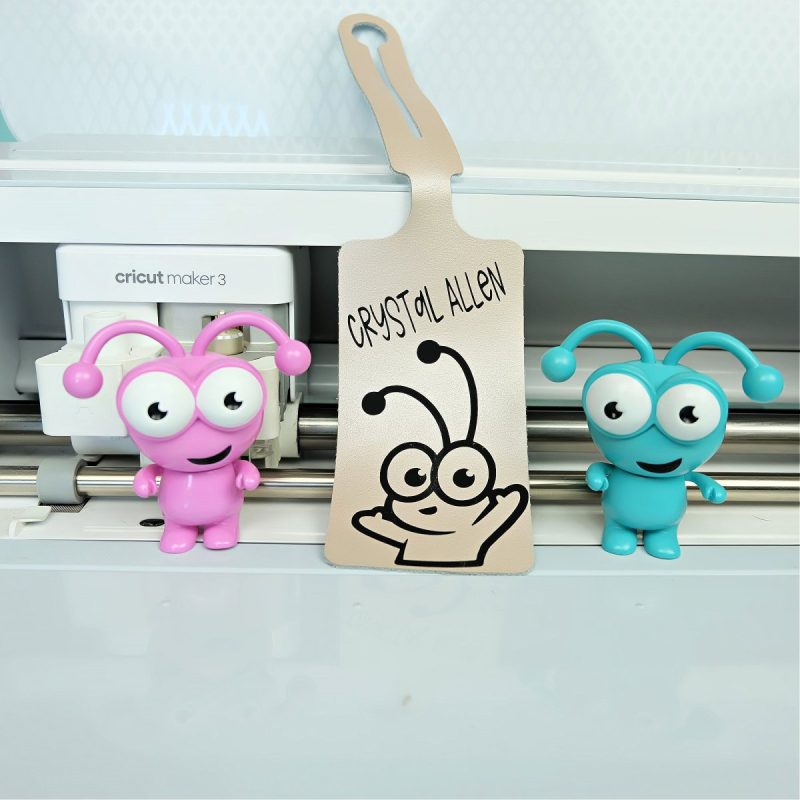
I decided to wear my love for Cricut on my sleeve (or more specifically my suitcase) and create a Cricut Luggage Tag and Passport Holder by using my Cricut Maker 3, leather and HTV.
Customize Your Passport Holder and Luggage Tag
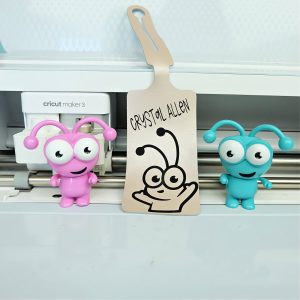
This project was so fun and easy! I of course covered my luggage tag and passport holder with Cricut Cuties (if you know, you know) but you could customize your travel items with so many different themes!
You could choose designs that go with your:
- Profession
- Hobbies
- Place Your Travelling To
- Favorite TV shows, movies or charachters
- Sport teams you follow or sports you play
- Favorite quotes
- So much more!
I love that my Cricut lets me personalize things and make them 100% my own!
The Cricut Design Space Library has over 500,000 images and fonts with plans to expand to over 1 million images in the near future!
If you don’t have a Cricut Access subscription yet, I highly suggest considering getting one. The Cricut Artist Program has really helped to increase the amount of images available through Cricut Access as well as the quality!
What would you put on your passport holder or luggage tag?
How To Make A Cricut Luggage Tag
My Cricut Maker 3 helps me take items from my imagination and turn them into reality in minutes!
Whether you want to create a project 100% from scratch, get a bit of inspiration from others, or have a pre-designed project that is ready to cut, Cricut Design Space will make the process easy.
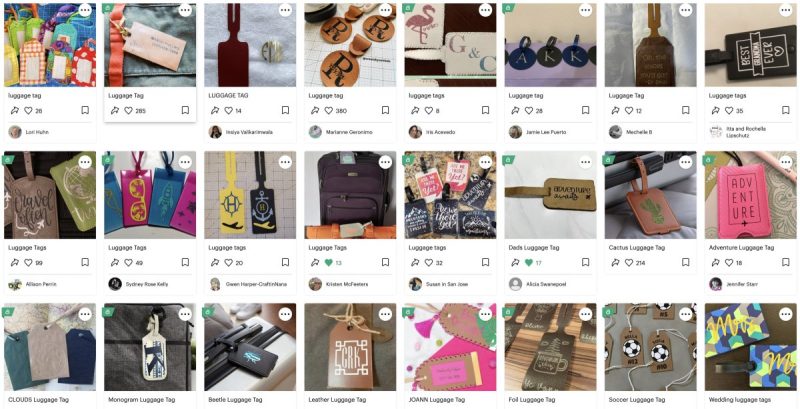
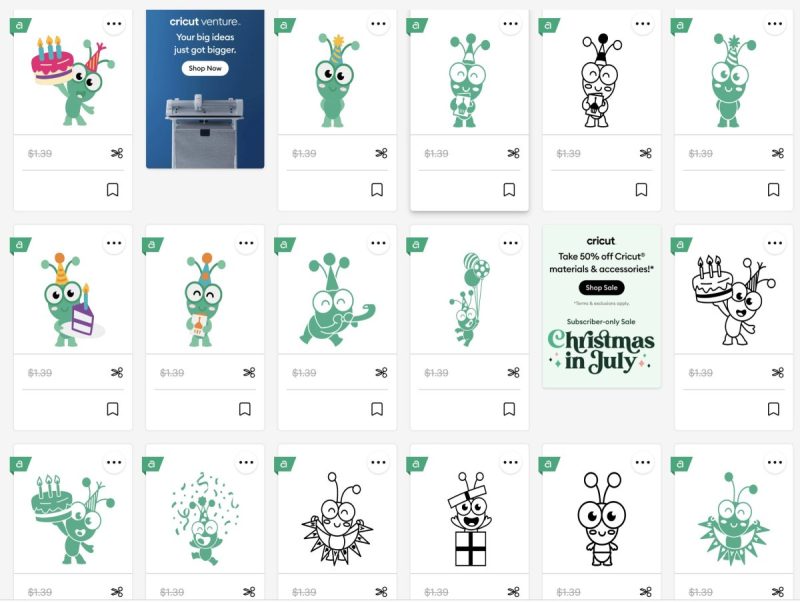
When you search “Luggage Tags” under Community Projects in Design Space you’ll find a plethora of ideas to make!
Here are just a few:
You can find my travel gear project here! Here are the supplies and step by step tutorial you’ll need to create this fun and easy DIY with your Cricut Machine!
Materials For Making Cricut DIY Luggage Tags:
- Cricut Maker 3, Cricut Maker, Cricut Explore Air 3 or Cricut Explore Air 2
- Strong Grip Cutting Mat
- Regular Grip Cutting Mat
- Deep Point Blade
- Fine Tip Blade
- Cricut Iron-On
- Cricut Leather (you can also use Cricut Faux Leather for this project)
- Cricut Brayer
- Weeding Tools
- Cricut EasyPress, Cricut AutoPress, Heat Press or Iron
Directions For Making A Cricut Luggage Tag:
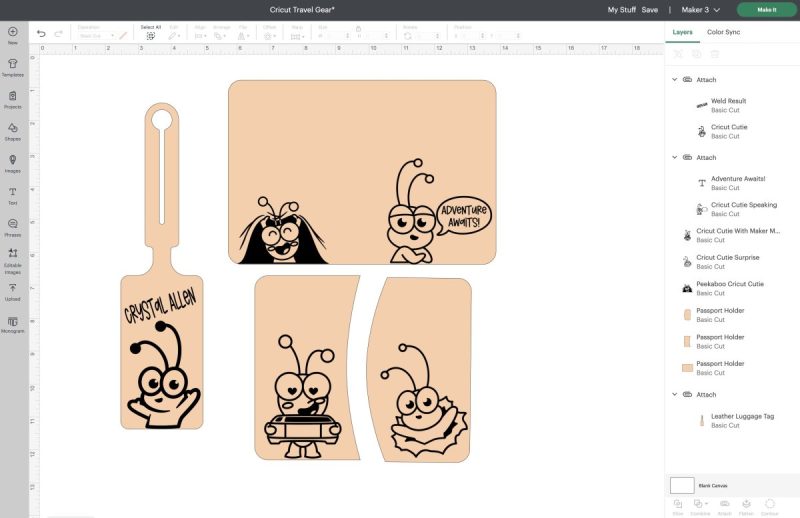
- Open my Cricut Travel Gear Cricut Canvas.
- Customize the project as you would like and then click “Make It”.
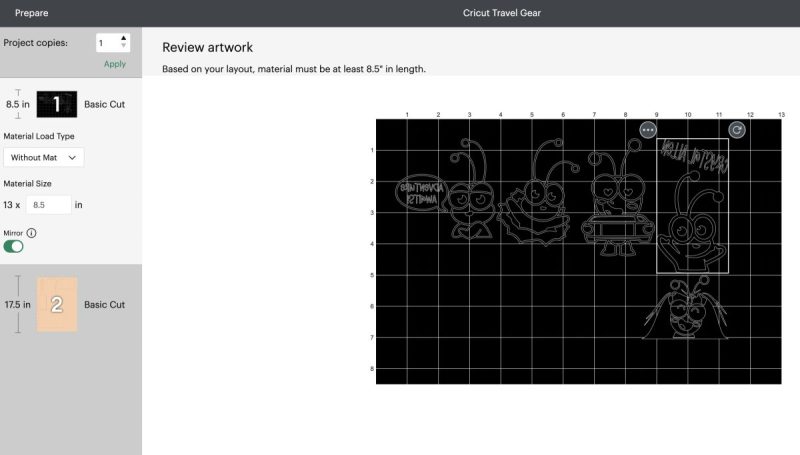
- Follow the instructions on the screen to connect Design Space to your Cricut and select your material. Mirror the cutting mat with your iron-on designs.
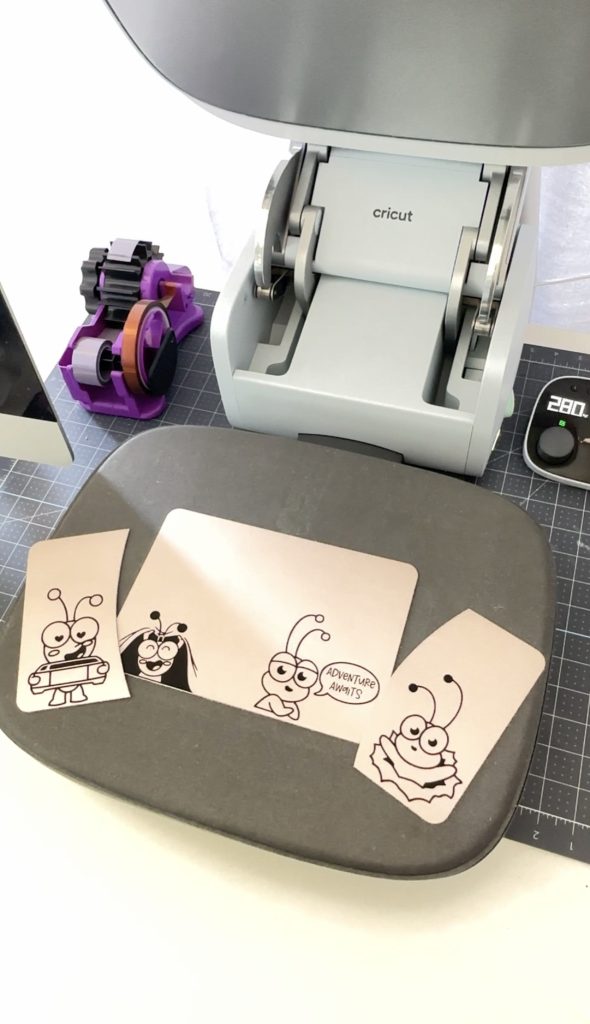
- For your leather pieces, cut on a strong grip mat with the color/shiny side of your leather facing down. Use a deep point blade and make sure to move your star wheels all the way to the right hand side of your machine.
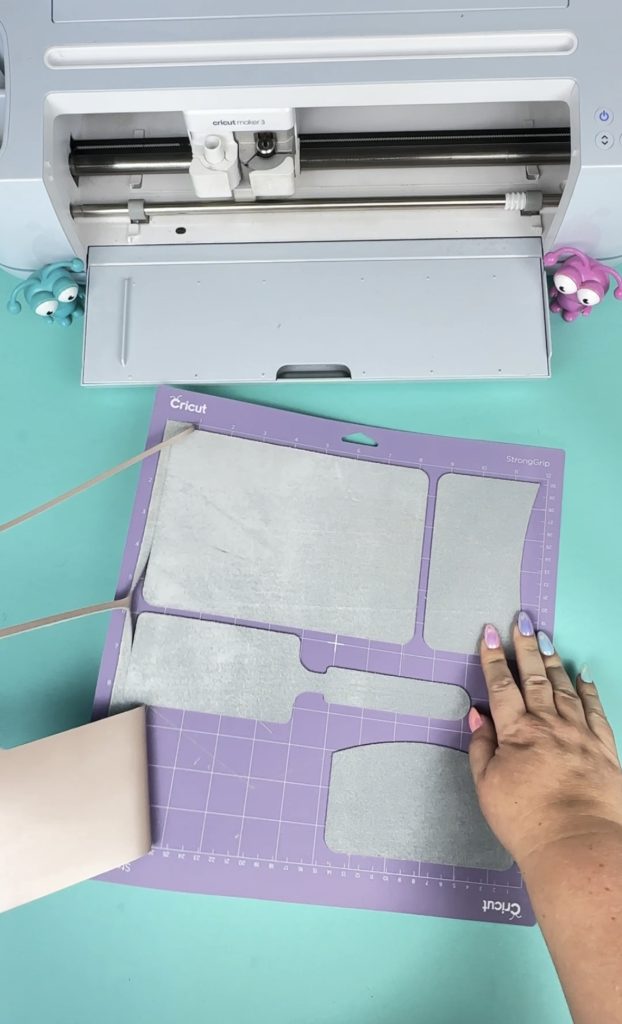
For the iron-on vinyl, cut on a regular grip mat with the color/shiny side of your iron-on facing down. Cut with a fine-point blade.
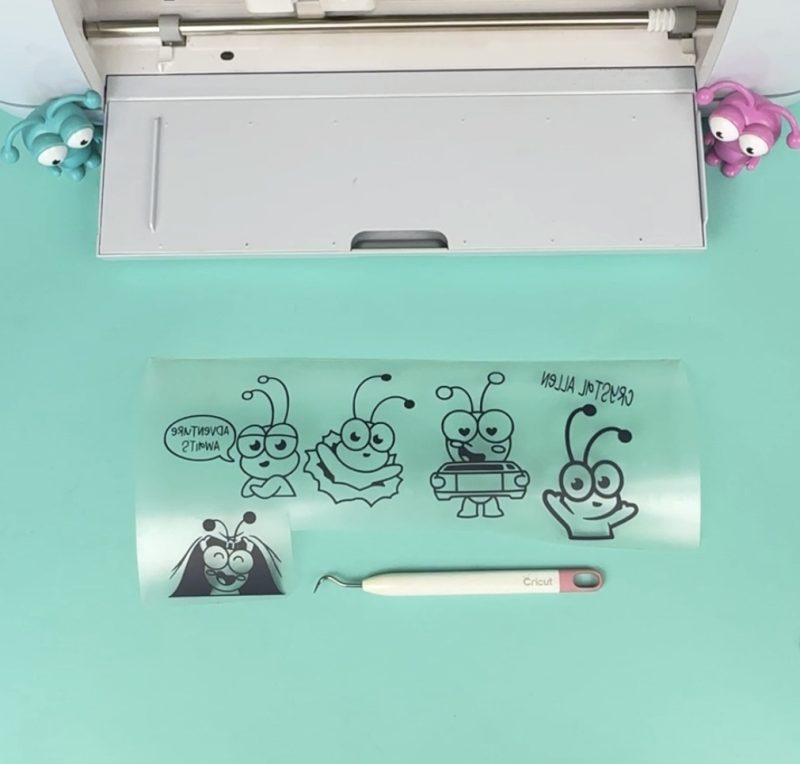
- Weed your iron-on using your weeding tool, removing the excess iron-on from around and inside your design.
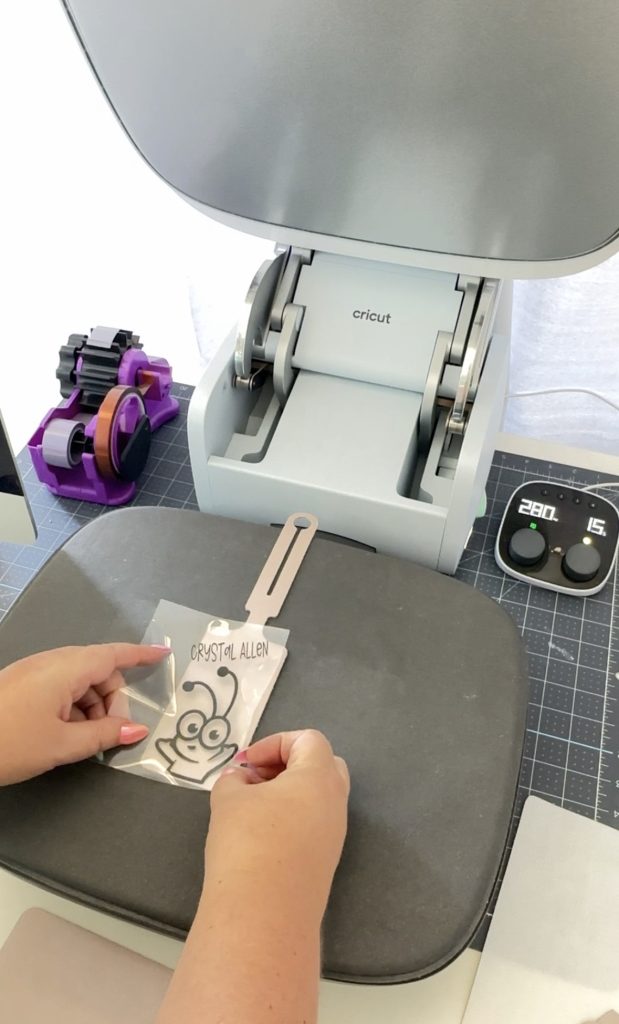
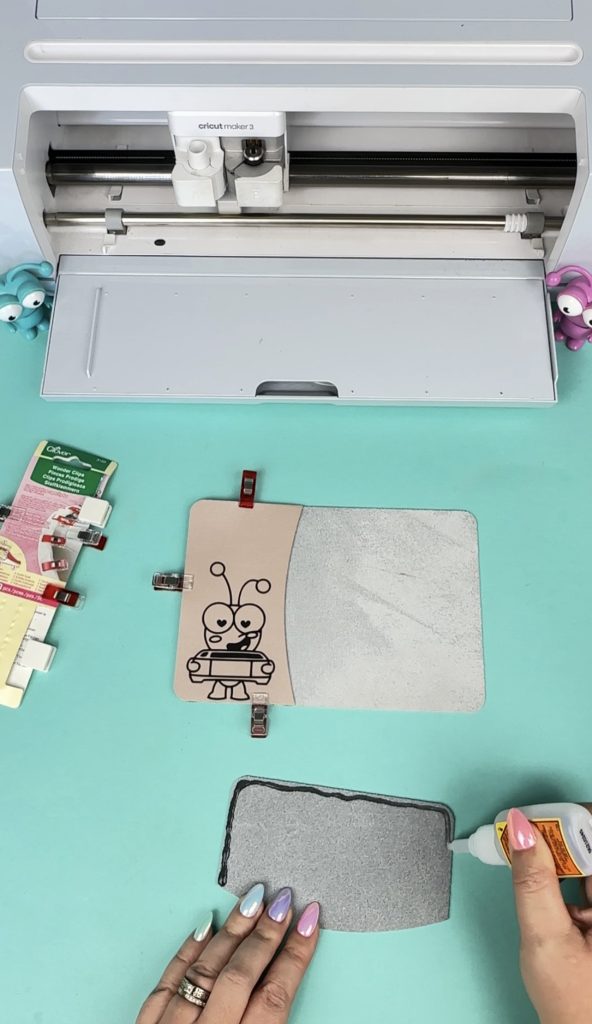
- Apply your iron-on to your leather. Use the Cricut Temperature Guide to determine the ideal temperature settings for your project.
Enjoy your custom DIY leather luggage tags!
How To Make A Cricut Passport Holder

A few years back I made each of my family members a Passport Holder using my Cricut Maker and fabric. You can see that project here.
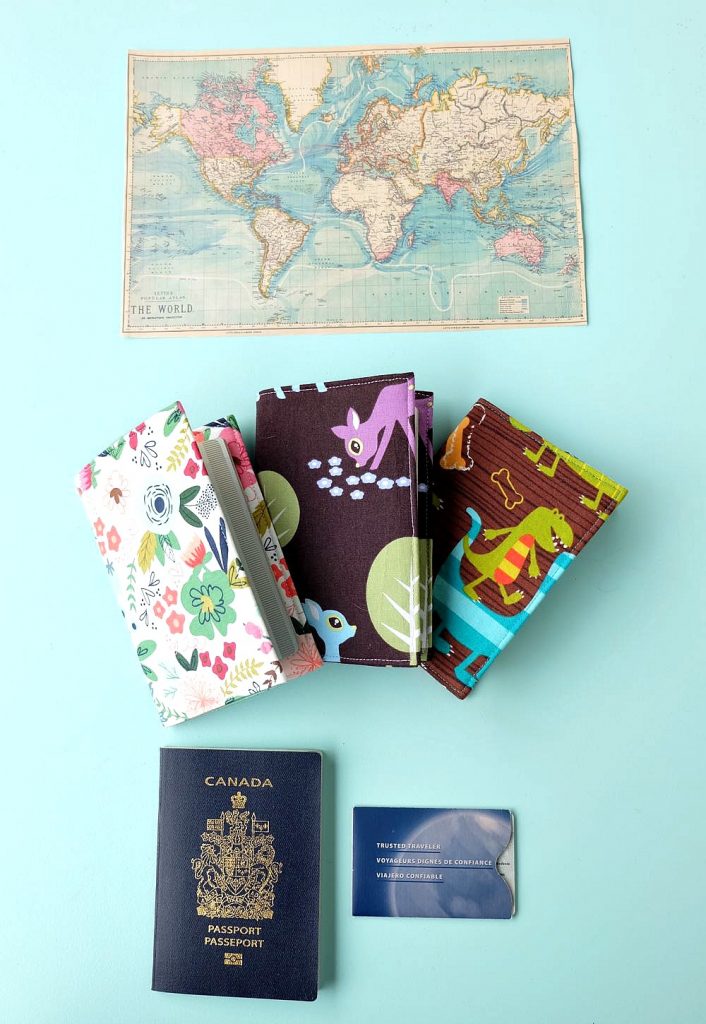
My kids and I recently received our US passports in addition to our Canadian passports so it seemed like a good time to experiment making a new passport holder!
This time around I decided to use some pretty Rose Gold Leather that I’ve had sitting around for awhile to make my project with.
I searched Cricut Design Space for Cricut Cuties and oh my goodness they had so many adorable designs to choose from! And all of them are included with a Cricut Access subscription!
You can find my travel gear project here! Here are the supplies and directions you’ll need to create this project!
Materials For Making A Cricut Passport Holder:
- Cricut Maker 3, Cricut Maker, Cricut Explore Air 3 or Cricut Explore Air 2
- Strong Grip Cutting Mat
- Regular Grip Cutting Mat
- Deep Point Blade
- Fine Tip Blade
- Cricut Iron-On
- Cricut Leather (you can also use Cricut Faux Leather for this project)
- Cricut Brayer
- Weeding Tools
- Cricut EasyPress, Cricut AutoPress or Iron
- Gorilla Glue, leather glue or a sewing machine with a needle that can penetrate leather
Directions For Making A Cricut Passport Holder:
- Open my Cricut Travel Gear Cricut Canvas.
- Customize the project as you would like and then click “Make It”.
- Follow the instructions on the screen to connect Design Space to your Cricut and select your material. Mirror the cutting mat with your iron-on designs.
- For your leather pieces, cut on a strong grip mat with the color/shiny side of your leather facing down. Use a deep point blade and make sure to move your star wheels all the way to the right hand side of your machine.
For the iron-on, cut on a regular grip mat with the color/shiny side of your iron-on facing down. Cut with a fine tip blade.
- Weed your iron-on, removing the excess iron-on from around and inside your design.
- Apply your iron-on to your leather. Use the Cricut Temperature Guide to determine the ideal temperature settings for your project.
- Use Gorilla Glue, Leather Glue or a sewing machine to attach the inside pocket flaps to the inside of your passport holder. Place under a heavy object or use craft clips to hold the pieces in place until dry.
Enjoy your new passport holder!
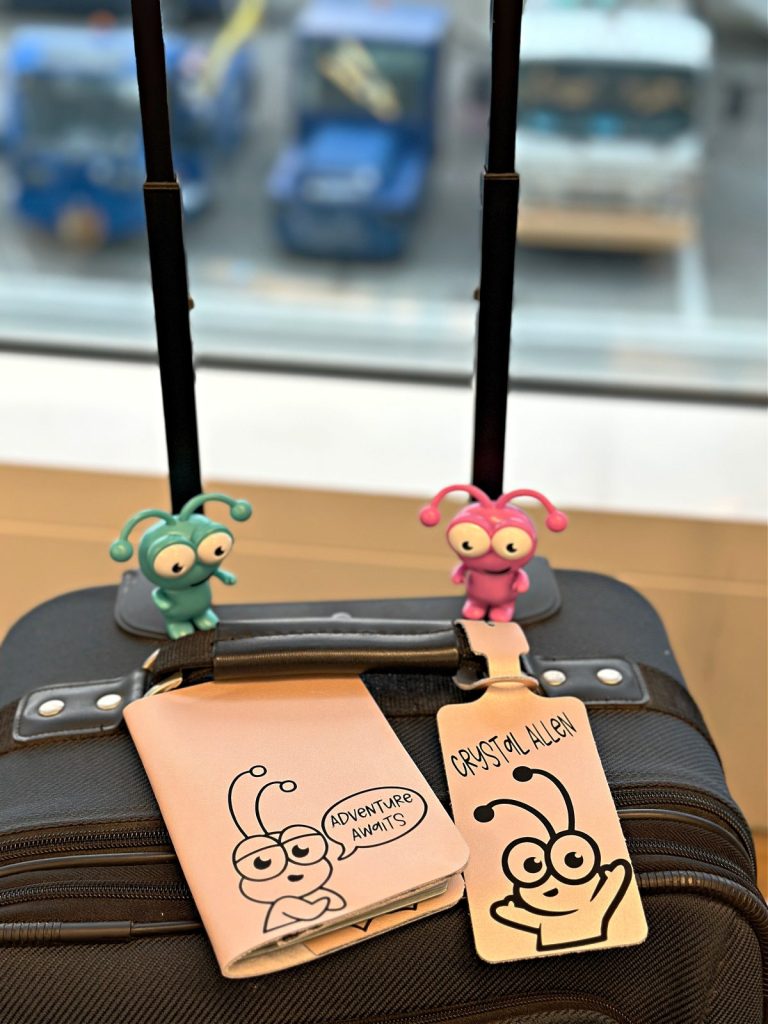
I hope that you enjoyed these projects and that they help add some extra happiness to your next trip! Who knows– someone may see them, feel an instant connection and you might make a new crafty friend!
Print the instructions for these Cricut Travel Projects for later!
How To Make Cricut Luggage Tags and Passport Holders
Materials
- Cricut Maker 3, Cricut Maker, Cricut Explore Air 3 or Cricut Explore Air 2
- Strong Grip Cutting Mat
- Regular Grip Cutting Mat
- Deep Point Blade
- Fine Tip Blade
- Cricut Iron-On
- Cricut Leather
- Cricut Brayer
- Weeding Tools
- Cricut EasyPress, Cricut AutoPress or Iron
- Gorilla Glue, leather glue or a sewing machine with a needle that can penetrate leather
Instructions
- Open my Cricut Travel Gear Cricut Canvas.
- Customize the project as you would like and then click “Make It”.
- Follow the instructions on the screen to connect Design Space to your Cricut and select your material. Mirror the cutting mat with your iron-on designs.
- For your leather pieces, cut on a strong grip mat with the color/shiny side of your leather facing down. Use a deep point blade and make sure to move your star wheels all the way to the right hand side of your machine.
- For the iron-on, cut on a regular grip mat with the color/shiny side of your iron-on facing down. Cut with a fine tip blade.
- Weed your iron-on, removing the excess iron-on from around and inside your design.
- Apply your iron-on to your leather. Use the Cricut Temperature Guide to determine the ideal temperature settings for your project.
- To assemble your passport holder, use Gorilla Glue, Leather Glue or a sewing machine to attach the inside pocket flaps to the inside of your passport holder. Place under a heavy object or use craft clips to hold the pieces in place until dry.
More Cricut Vacation Ideas
Looking for more Cricut projects for your next vacation? Check out these fun ideas!


If you like this Cricut travel gear project, I would love for you to pin it for later! It helps others discover our content so we can continue creating it!