


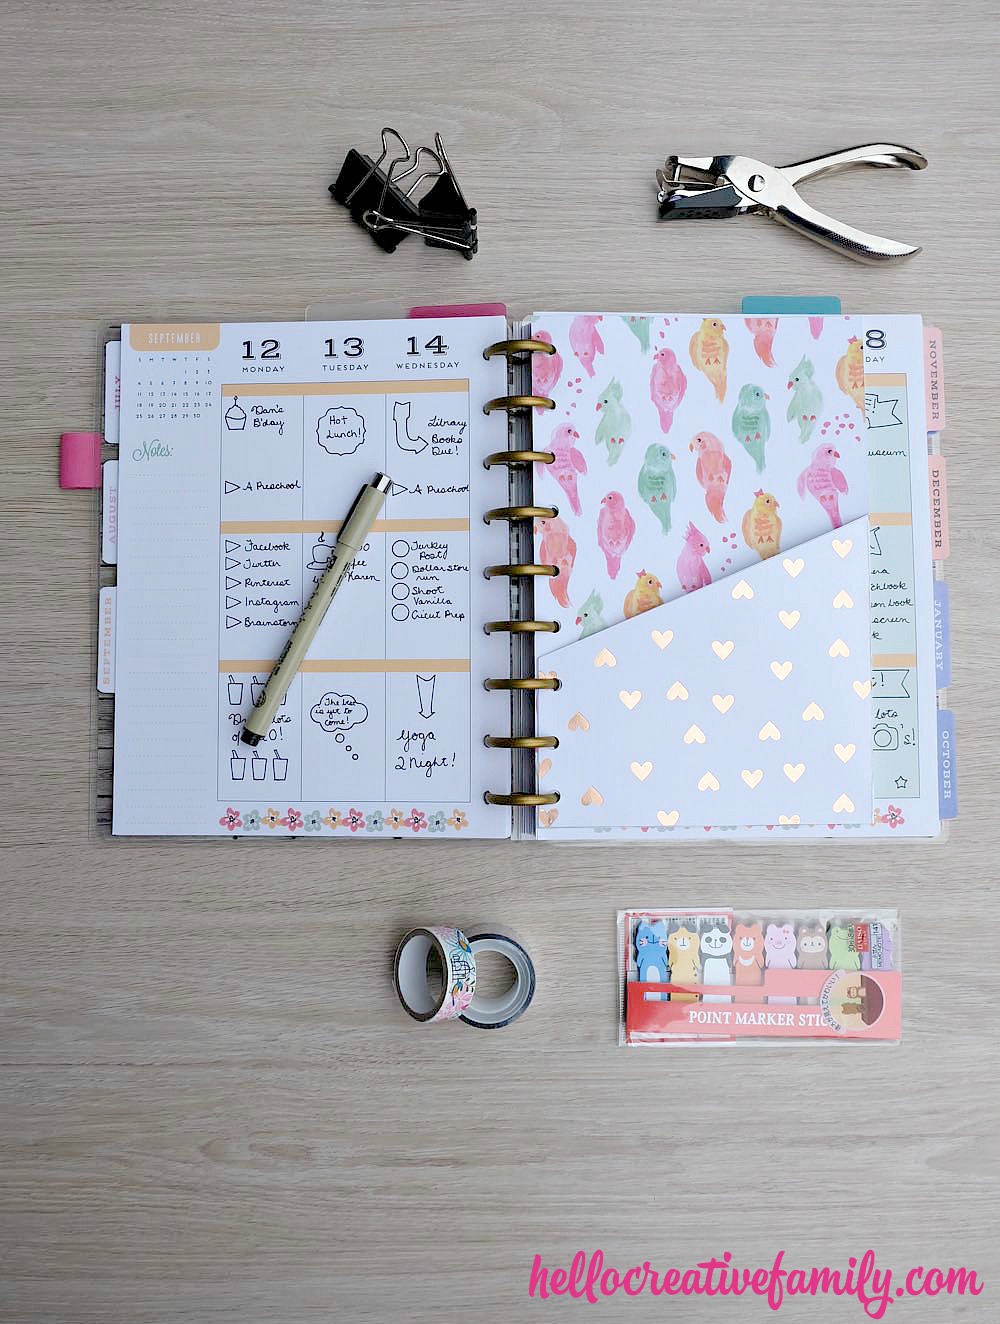
How To Make DIY Planner Folder Pockets (Perfect For Happy Planners)
This post and the photos within it may contain Amazon or other affiliate links. If you purchase something through the link, I may receive a small commission at no extra charge to you.
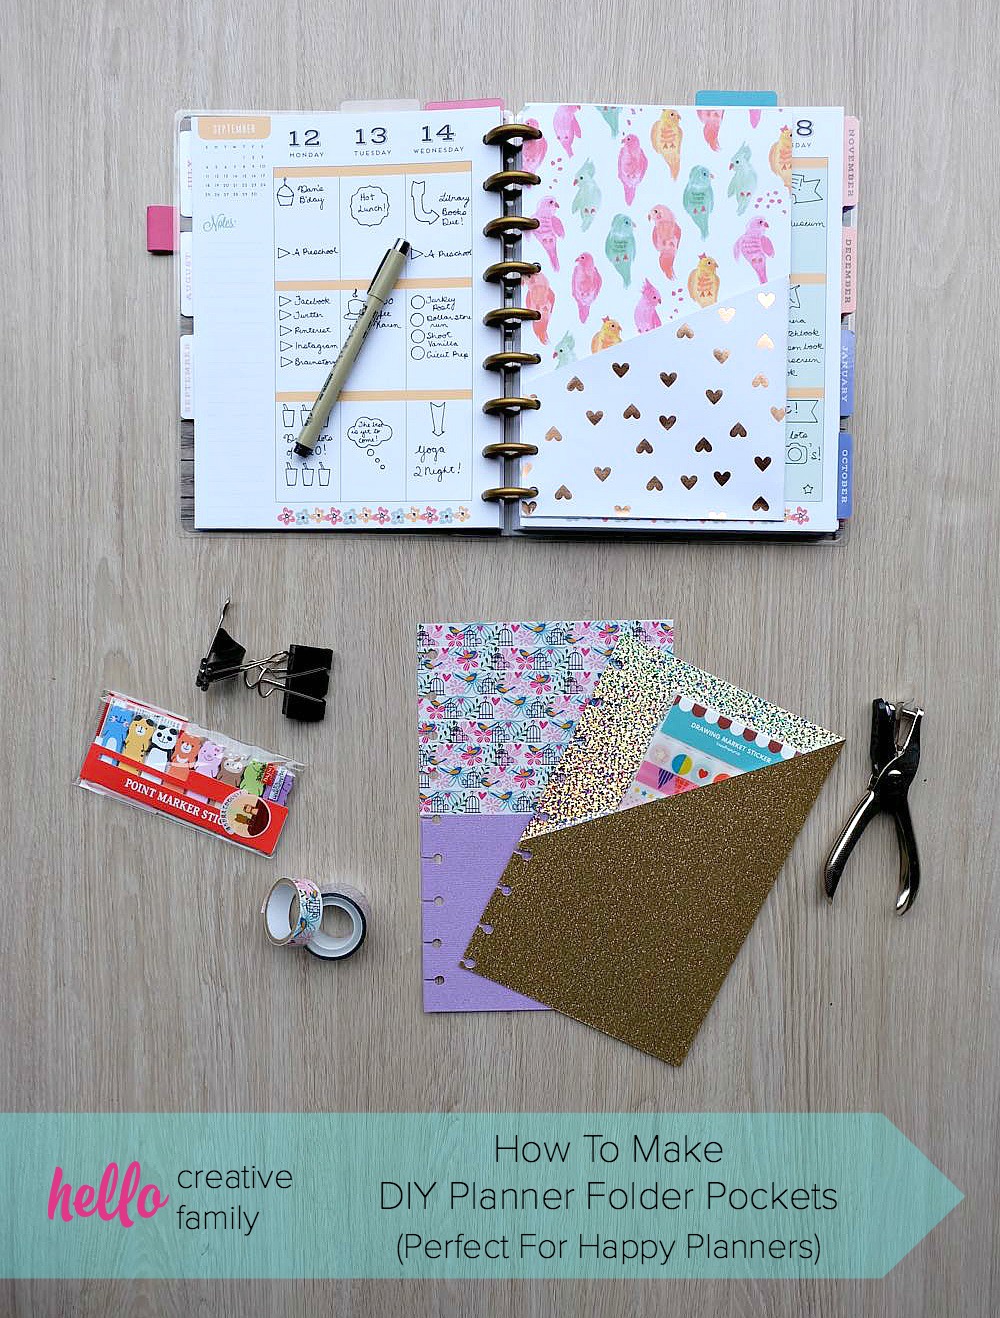
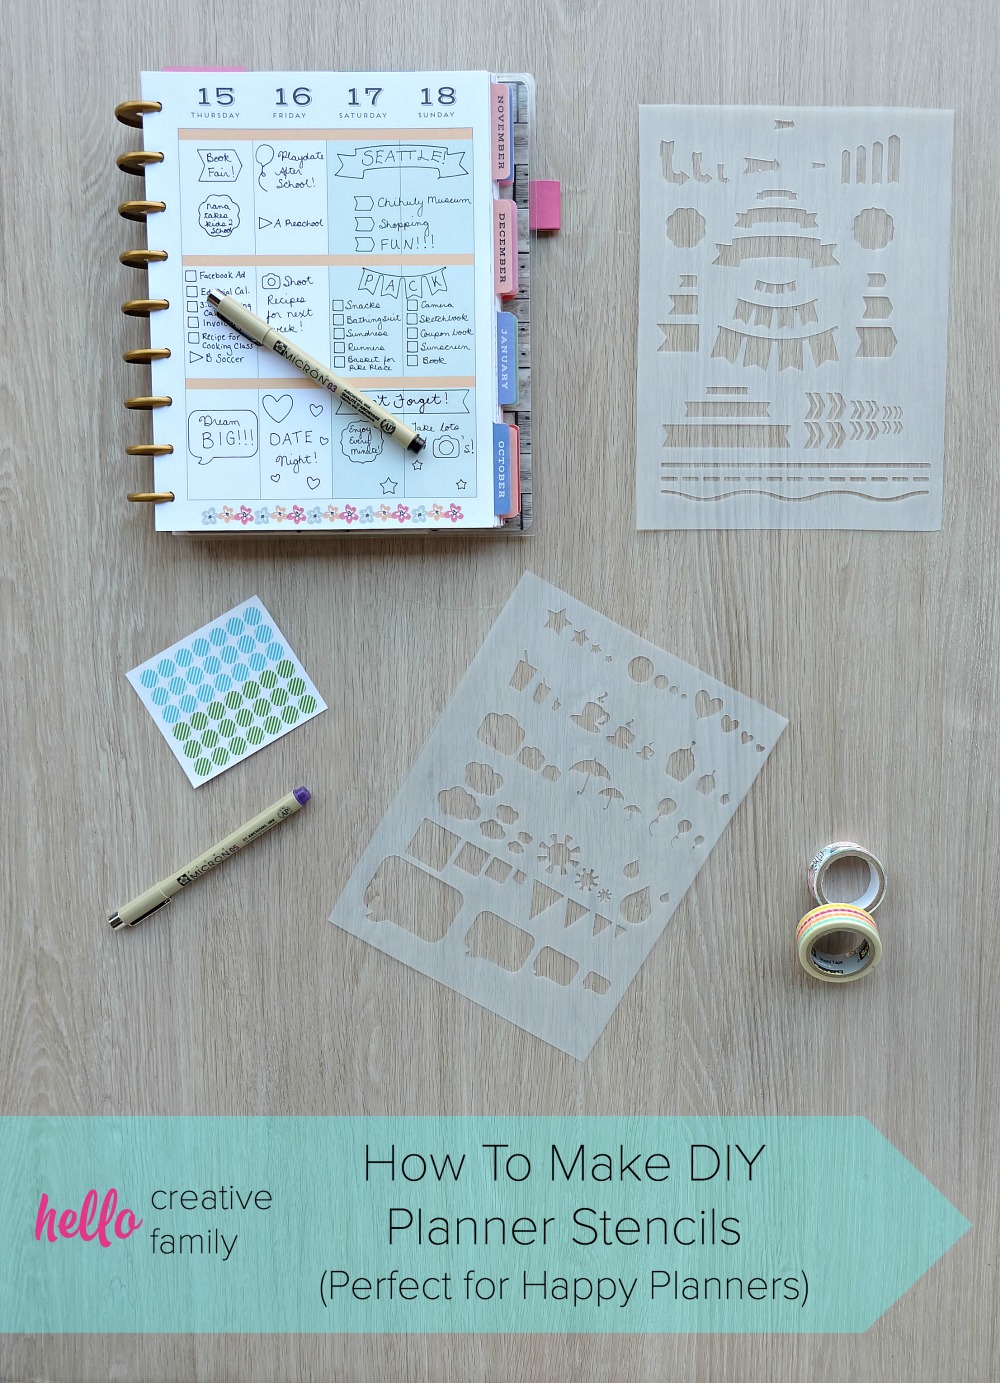
For years I’ve tried to use a planner, but have never stuck with it. I’d feel inspired to use it for a week or two and then would lose interest. For some reason, all of that has changed for me since I got my Happy Planner. A few weeks ago I showed you how to make DIY Planner Stencils and today I’m going to share with you how to make DIY Planner Folder Pockets.
It took me awhile to start using my Happy Planner. The planner is so pretty, and I had looked at so much Happy Planner inspiration from other Happy Planner users that I felt super intimidated to write anything inside of it. I was afraid that it wouldn’t be pretty enough! After I made my stencils though, I got over that intimidation and decided that my planner didn’t need to be as pretty as everyone else’s, I just needed to have fun with it and USE IT!!!
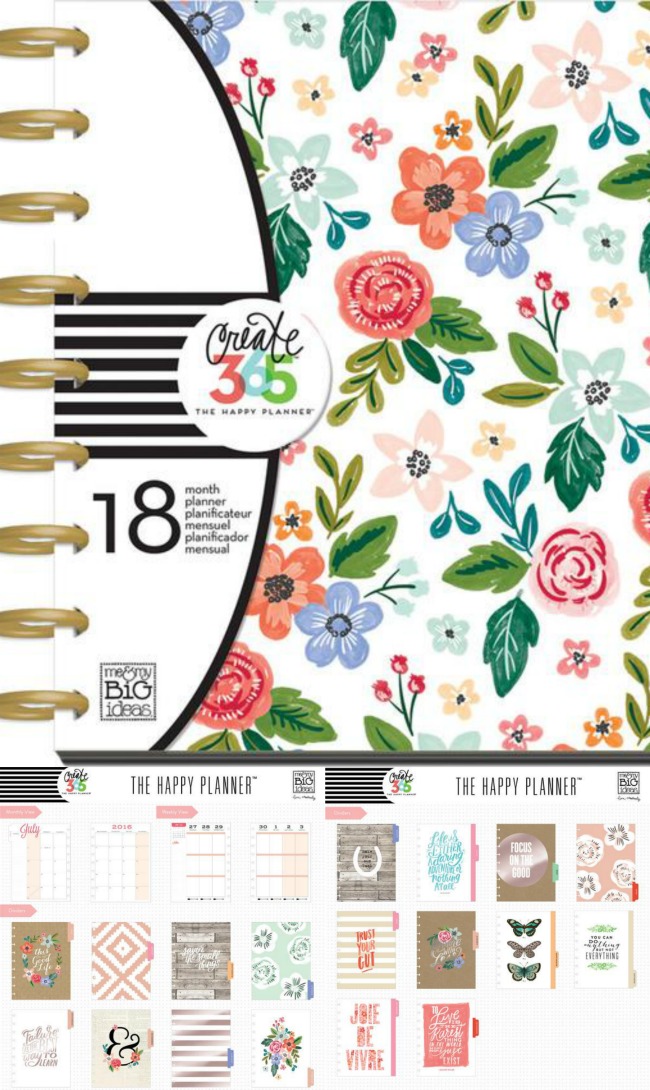
My Happy Planner is the Fresh Floral Happy Planner. They make so many pretty Happy Planners that it’s hard to pick which one you want to buy. They also have a ZILLION beautiful accessories to go with your planner. Every time I go to Michaels (which is weekly) I spend about 10 minutes standing in the Happy Planner section looking at all of the pretty accessories. Pretty much every week I end up buying something new (like these awesome Happy Planner Pen Holders) but it’s also fun to DIY things for my Happy Planner.
The other day when I was cleaning up my craft room, I came across some planner stickers that I had been gifted at a conference a couple of years ago. I was so excited to find them (I had forgotten about them) and immediately brought them over to stick in my planner. The problem is, I don’t have any pockets for my Happy Planner, so I decided to get to work and DIY some of my own.
I fired up Cricut Design Space and got to work designing them. Today I’m going to share with you my free design file, and share with you the tutorial for how to make one of your own. Read on to learn how to make DIY Planner Folder Pockets!
How To Make DIY Planner Folder Pockets!
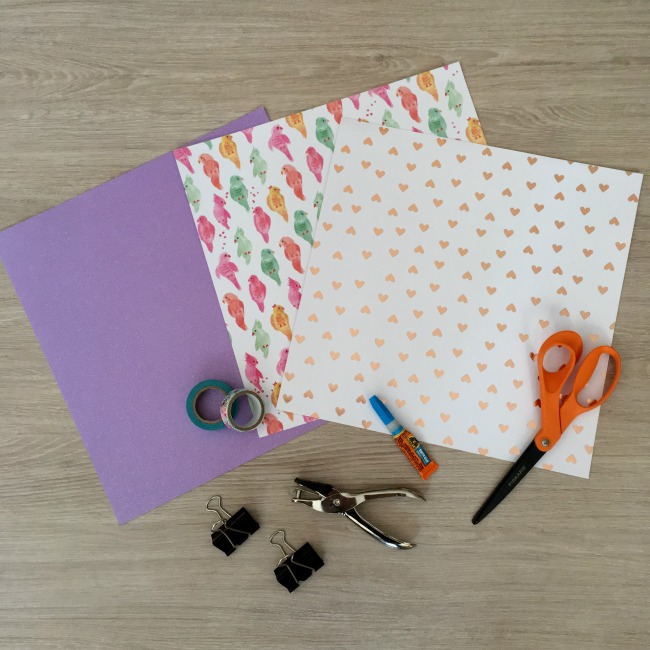
Materials:
–Cricut Explore, Cricut Explore Air or Cricut Explore Air 2
–Cricut Cutting Mat
–Cricut Scoring Stylus
-Thick Card Stock (I used Cricut Gold Glitter Card Stock for one folder and Mambi Sheets Baby Girl Card Stock for the other)
-Glue
-Binder Clips
-Single Hole Punch (or Happy Planner Arc Punch)
-Scissors (these are the ones I use)
-Pen
-Optional: Washi Tape or a second piece of card stock depending if you want your folder to be lined with washi tape or another piece of card stock. (Alternatively you could use a two sided card stock.)
–My Planner Folder Pocket Design File
Directions:
Step 1: Open my Planner Folder Pocket Design File and decide which folder shape you want to make.
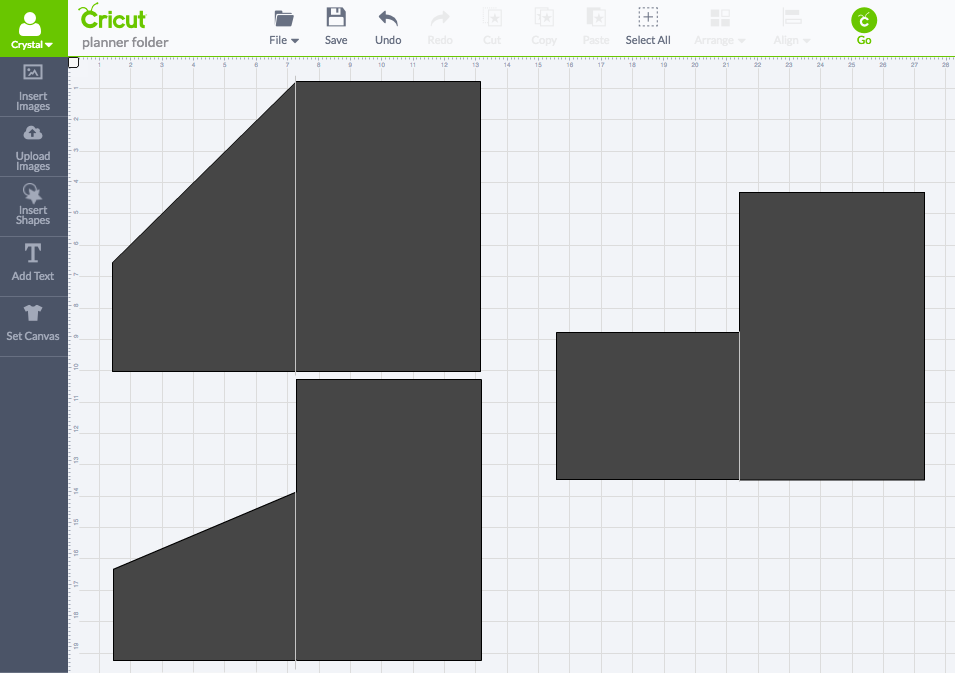
Step 2: Decide how you want to line your folder pocket. If you are lining your planner pocket with washi tape, you will only need to cut one folder pocket. If you are lining your folder pocket with a second piece of card stock you will need to cut 2 folder pocket, one regular and one done in mirror image.
Size your planner folder pockets to the appropriate size. Since the card stock I buy is 12×12, I size my planner pockets at 11.75 inches in width and 9.25 inches in height.
Step 3: Press Go, turn your dial to card stock or custom for glitter cardstock and cut out your planner pockets.
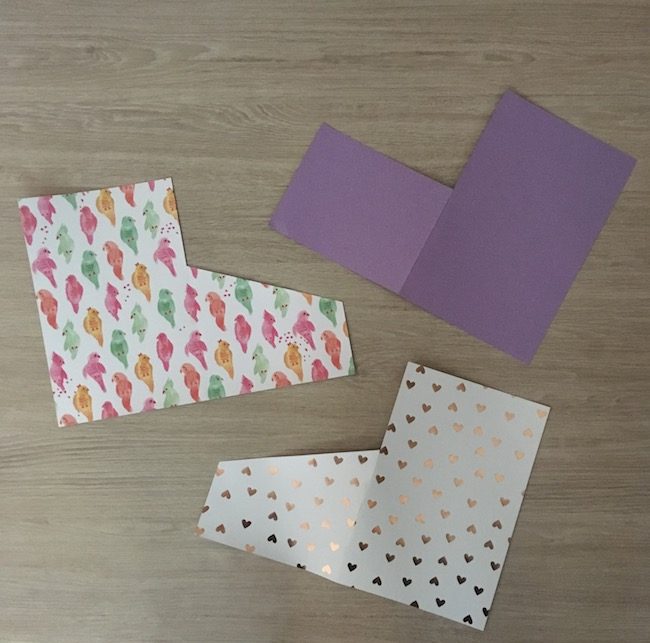
Step 4: If you are making double sided card stock planner pockets, glue the two pieces together, right side facing out. I usually just use a glue stick for this part.
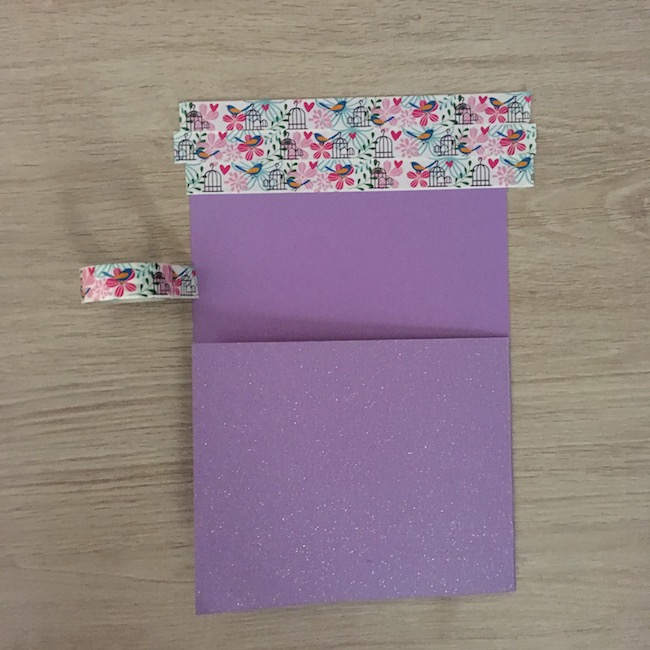
If you are making the washi tape lined planner pocket, lay washi tape over the areas that will be showing when your planner pocket is folded closed. I usually lay the washi tape a bit farther out than the card stock goes, and then trim the washi tape afterwards with a pair of scissors or an utility knife (this is the one I use) to make sure that everything lines up nicely.
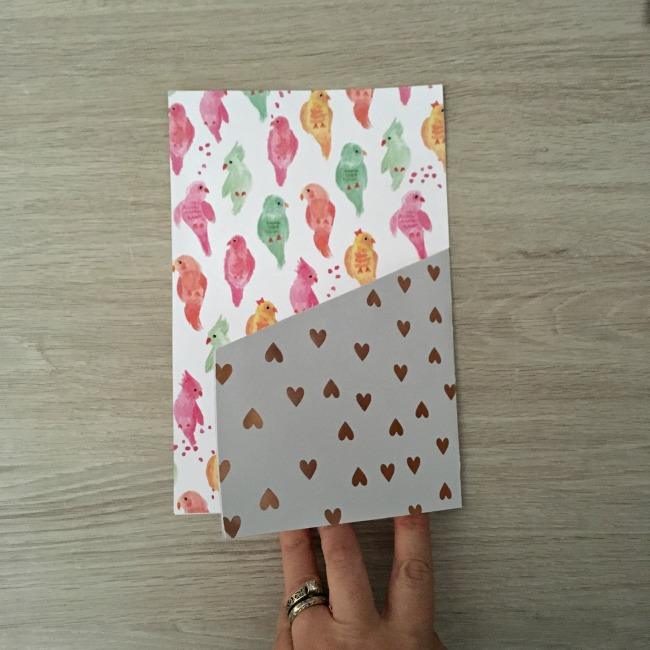
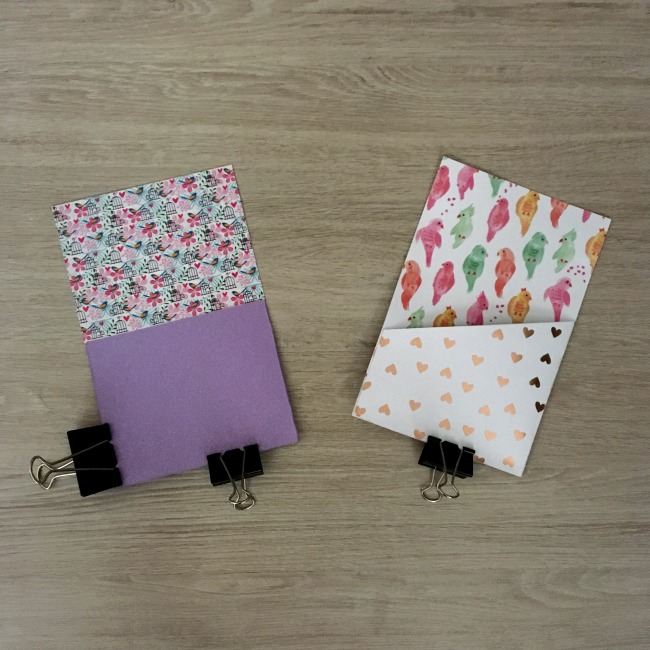
Step 5: Fold your planner folder pocket closed and glue along the outside edge and the bottom edge. I usually use Gorilla Glue for this step because I love how tough it is and that it will never pop open. After I glue I hold the planner pocket closed for 30-60 seconds and then secure with binder clips for 10 minutes or so, until I know the glue is dry.
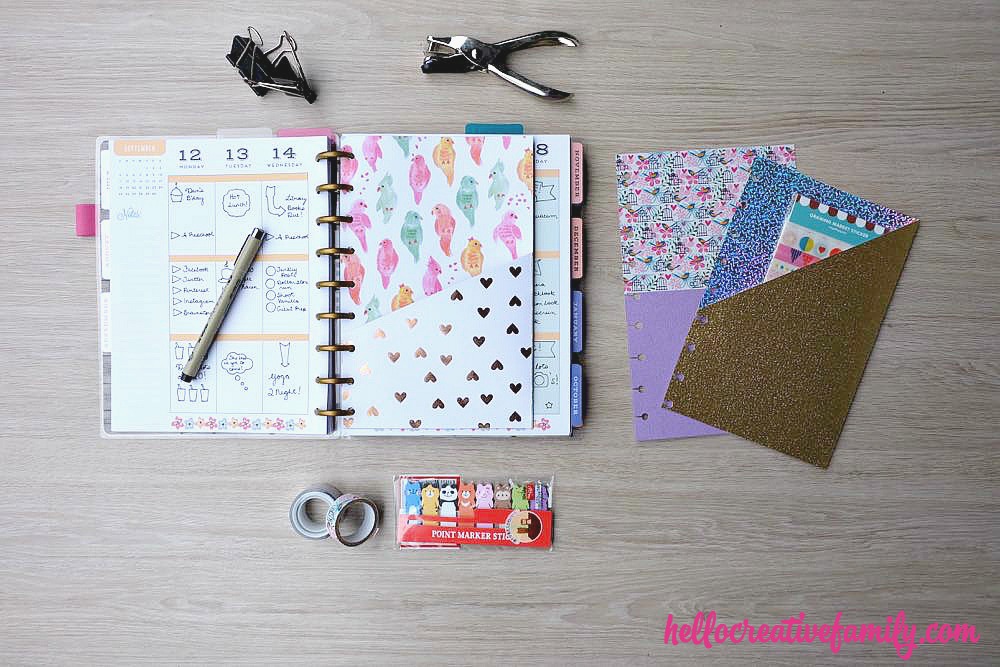
Step 6: Here is where you want to make the holes for your planner pocket. If you have the Happy Planner Arc Punch then you can go ahead and punch away. If you don’t, here is my trick for making the holes yourself!
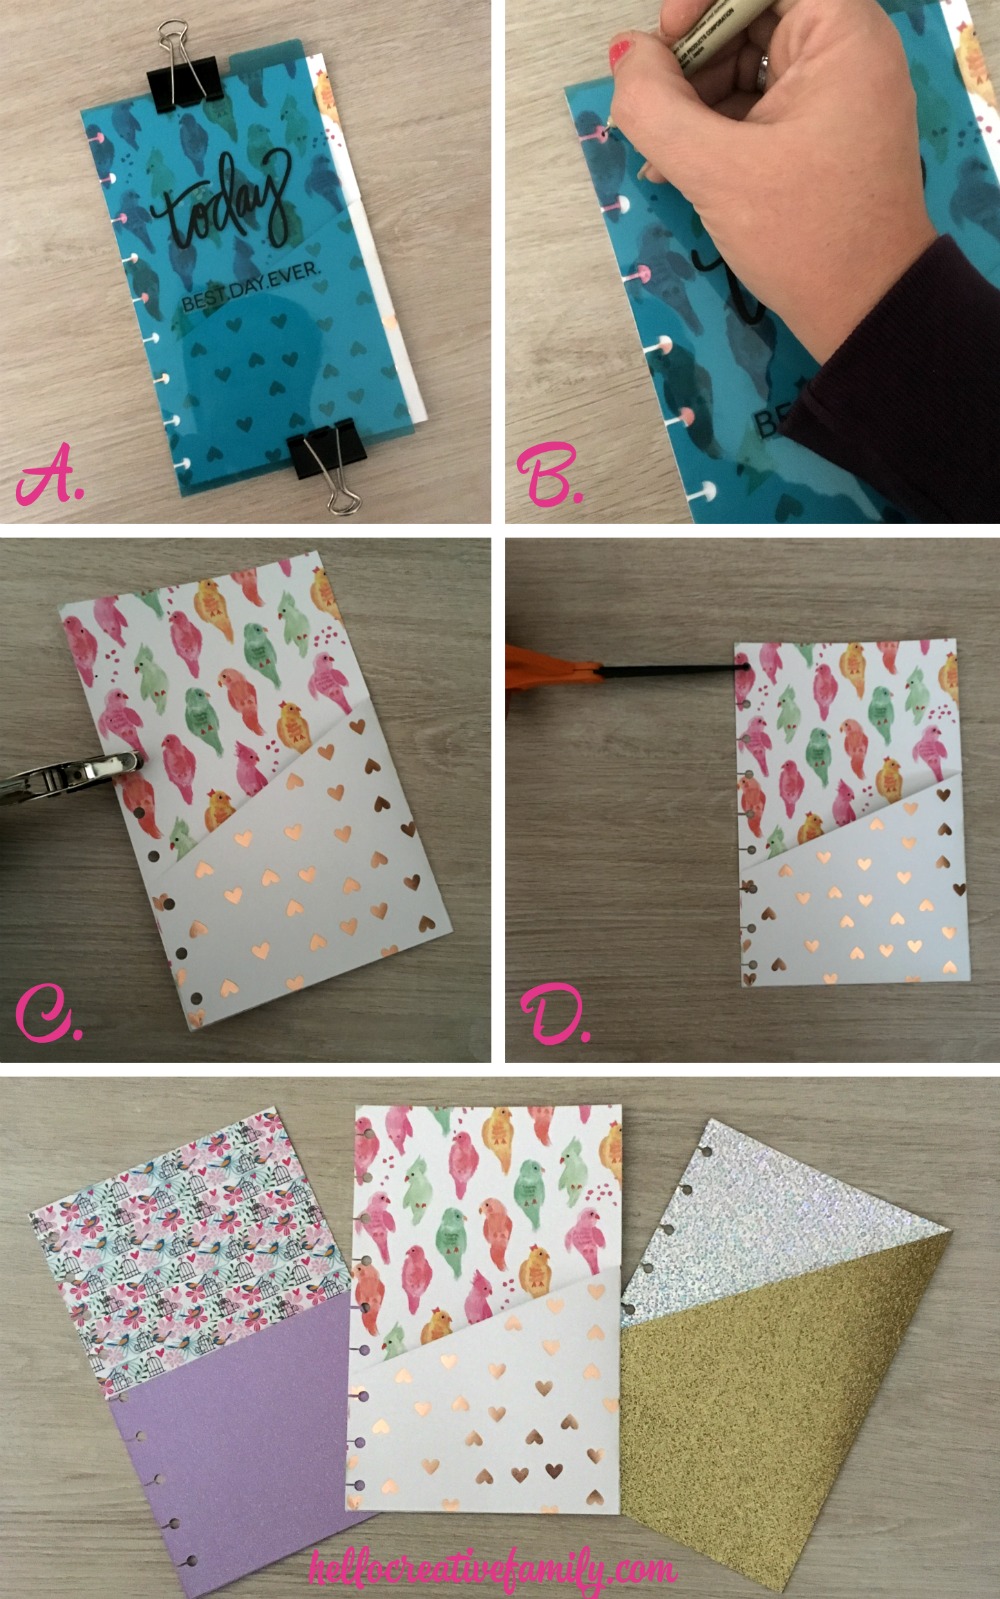
A. Take something out of your planner that has the holes in it. I usually take out one of my Happy Planner Dashboard Pages. Place the planner item with holes on top of your planner folder. Clip with binder clips if you want a little extra security that it will stay lined up.
B. Using a pen, put a dot on your planner folder pocket through each of the holes, I put my dot in the center of the hole, towards the top.
C. Take the binder clips off, remove the item that already has holes, and punch holes in your planner folder pocket.
D. Once you have each of your holes punched, go back with a pair of scissors and do two small snips between the edge of the planner pocket and each hole. This will give your planner folder pocket room to “snap” onto the Happy Planner Rings.
Voila! You can use this method to add holes to anything you’d like to add to your Happy Planner.
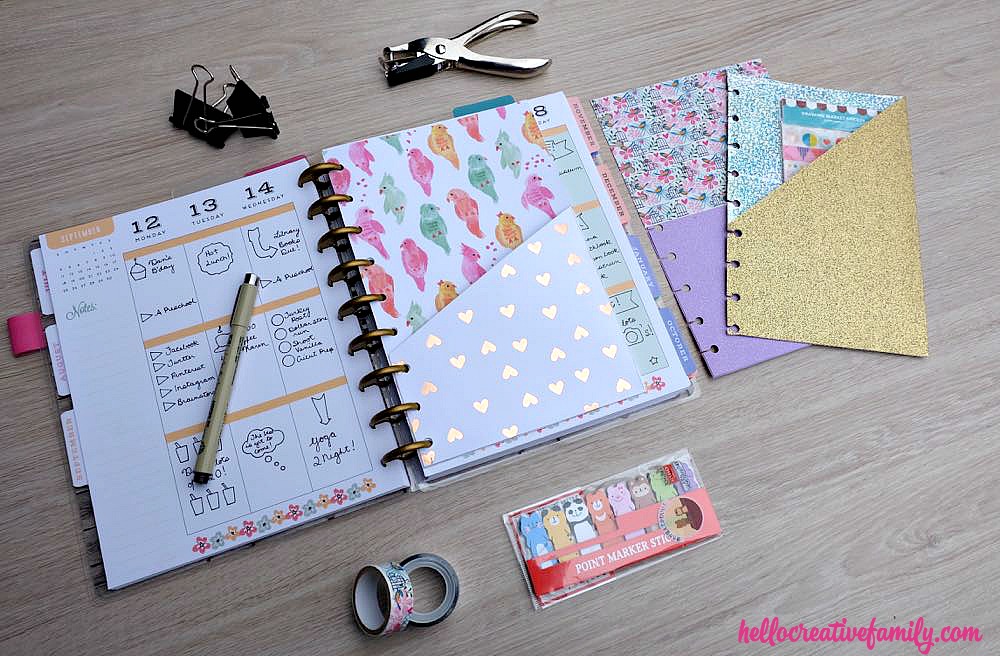
Step 7: Snap your planner pocket into your Happy Planner. Fill it with gorgeous things and enjoy!
Like this post? We’d love for you to pin it for later!
Tell me… Do you use a planner? What kind do you use? Do you DIY fun accessories for your planner?
Like this post? Make sure to check out our DIY Planner Stencils post too!


Great tutorial! I have a Cricut but have not used it yet, but this idea looks awesome for my planner. Pinning!
Hi Raquel,
Thank you so much for taking the time to comment! Get started using your Cricut!!! You will love it. 🙂 I’d love to see your first project. What kind of planner do you use?
Best Wishes,
Crystal
thanks so much for sharing I love my planner and this will make it even funner by adding personality
come see us at http://shopannies.blogspot.com
Hi Angie,
Thank you so much for visiting! I love that it’s one more way to personalize your journal too. I’d love to see the paper you choose if you end up make one!
Best Wishes,
Crystal
Love these, and your planner is so cute! Thanks for sharing this. I’d love to do something similar in my bullet journal.
Thank you so much for visiting Amber! You definitely should make some for your bullet journal!
Best Wishes,
Crystal
Thank you so much! I love my cricut but am terrible at measurements!! This file is amazing because the possibilities are endless with this. I kinda want to print a monthly calendar on the folded part and use it for coupons.
Hi Cherie,
Thank you so much for your comment! I love the idea of making a monthly calendar coupon one! If you make it I’d love to see pictures!
Best Wishes,
Crystal
I do use a planner — but mine are so plain compared to yours!
So happy I found this! I’ve been wanting pocket since for my planner but don’t LOVE the ones at Michaels! Can’t wait to make them tonight.
I have been trying to find a cricut file for planner pockets forever. I’m so glad I found your tutorial, it’s been a great help and the file is invaluable. Do you use two sided paper for your pockets? If you do, where do you get it? The big books of card stock I get from Michael’s are all one-sided so would make this hard to use
Hi Tanya,
Great question. In step 2 I cover this a bit. For the bird and heart planner folder, the paper was 1 sided, so I cut out two pieces as mirror images and then glued them together. The gold glitter planner folder is lined with washi tape. 🙂 I hope that answers your question. I’d love to see your planner folders when you finish them!
Best Wishes,
Crystal
Loved this tutorial!! I just started a blog and shared my creation with a link to your blog. Thanks for sharing.
Hi Danitra,
Your folders turned out so cute! I love the princess “wasabi” tape. 😉 Thank you so much for visiting Hello Creative Family, trying one of our projects and linking back to us on your site.
Best Wishes,
Crystal
Inspiring tutorial!
May I know the name of the gold/chocolate binder rings? I need that to make a diy planner. Thanks in advance
Hi Ninda,
Thank you so much for visiting Hello Creative Family. Those are the disks that my Happy Planner came with, but you can buy the disks on their own as well. I believe that the ones on my Happy Planner are like these ones: http://amzn.to/2Czx0Xh
Best Wishes,
Crystal
Absolutely LOVE your way of doing things in your planner! AND how easily you make it for us to do the same! Thank-you! M <.
Hi the design is no longer available any other options?
Hi Charmaine,
Thank you so much for visiting. It should still be there. Make sure you are logged in to design space before you try clicking the link. If that doesn’t work, try this link: https://design.cricut.com/#/design/47004406
Best Wishes,
Crystal
Is there anyway possible to use a Silhouette cameo 3? I desperately need this but I don’t have a cricut! 🙁
Hi Jeanniene,
Thank you so much for visiting. I recently created an SVG file for planner folders! You can find it here: https://hellocreativefamily.com/free-pocket-planner-folder-cut-file-planner-themed-svgs/
I hope that helps!
Best Wishes,
Crystal
Hi Crystal!! My name is Liz and I’m absolutely in LOVE with these cute pocket/folders for your planner. I have a cricut machine and I’m logged into design space. Unfortunately the link isn’t working for me either. Do you think it’s because I’m trying to do it on my phone? Also, can this design work for an A5 size planner? Cause I don’t have a happy planner. Here is my email-elizabethfrieszell@gmail.com, in case you have any ides or tips for this design.
Thank you in advance,
Liz R.
Hi Liz,
I think that the problem may be that you are using your phone. I would suggest trying it on a computer and then saving it to your cut files so that you can access it on your phone. You can definitely change the size of the folders so that it works with whatever size planner you have. I hope this helps.
Best Wishes,
Crystal
ty so much you are very generous
Thanks for sharing. I tried to find “how to make a pocket folder on my cricut, but couldn’t find it. I will try again.
Hi Constance,
Thank you so much for visiting. Are you saying that you are having a hard time finding the cut file? If so, you can find it here: https://design.cricut.com/#/design/47004406
I hope that helps!
Best Wishes,
Crystal
Great Tutorial! Too bad you can only use the cut file if you have a Cricut. Cameo users are out of luck. 🙁
Hi Monika,
Thank you so much for visiting. I unfortunately don’t own a Cameo, and do own a Cricut so that’s why I gave the instructions on how to make it with a Cricut. I created these folder shapes in Cricut Design Space by just welding together some simple shapes like squares and triangles, I believe that it should be fairly easy to replicate in the Silhouette software. 🙂 That being said, this post is a couple of years old and I recently purchased an ipad and Apple pencil so when I have a bit of extra time, I’ll try to create an SVG of these files and share them in this post.
Thank you again for taking the time to visit and leave a comment.
Best Wishes,
Crystal
Hi! I love this idea and want to use it in my planner! However, I can’t seem to get the link to the file to work. It just opens a blank project in Design Space.
I’m so sorry, it appears that Cricut has removed this image file from their database, so unfortunately it is no longer available. You can however try the same steps using a different image!
Best Wishes,
Crystal
Beatuful and great idwas. I really like it. 😉😉