


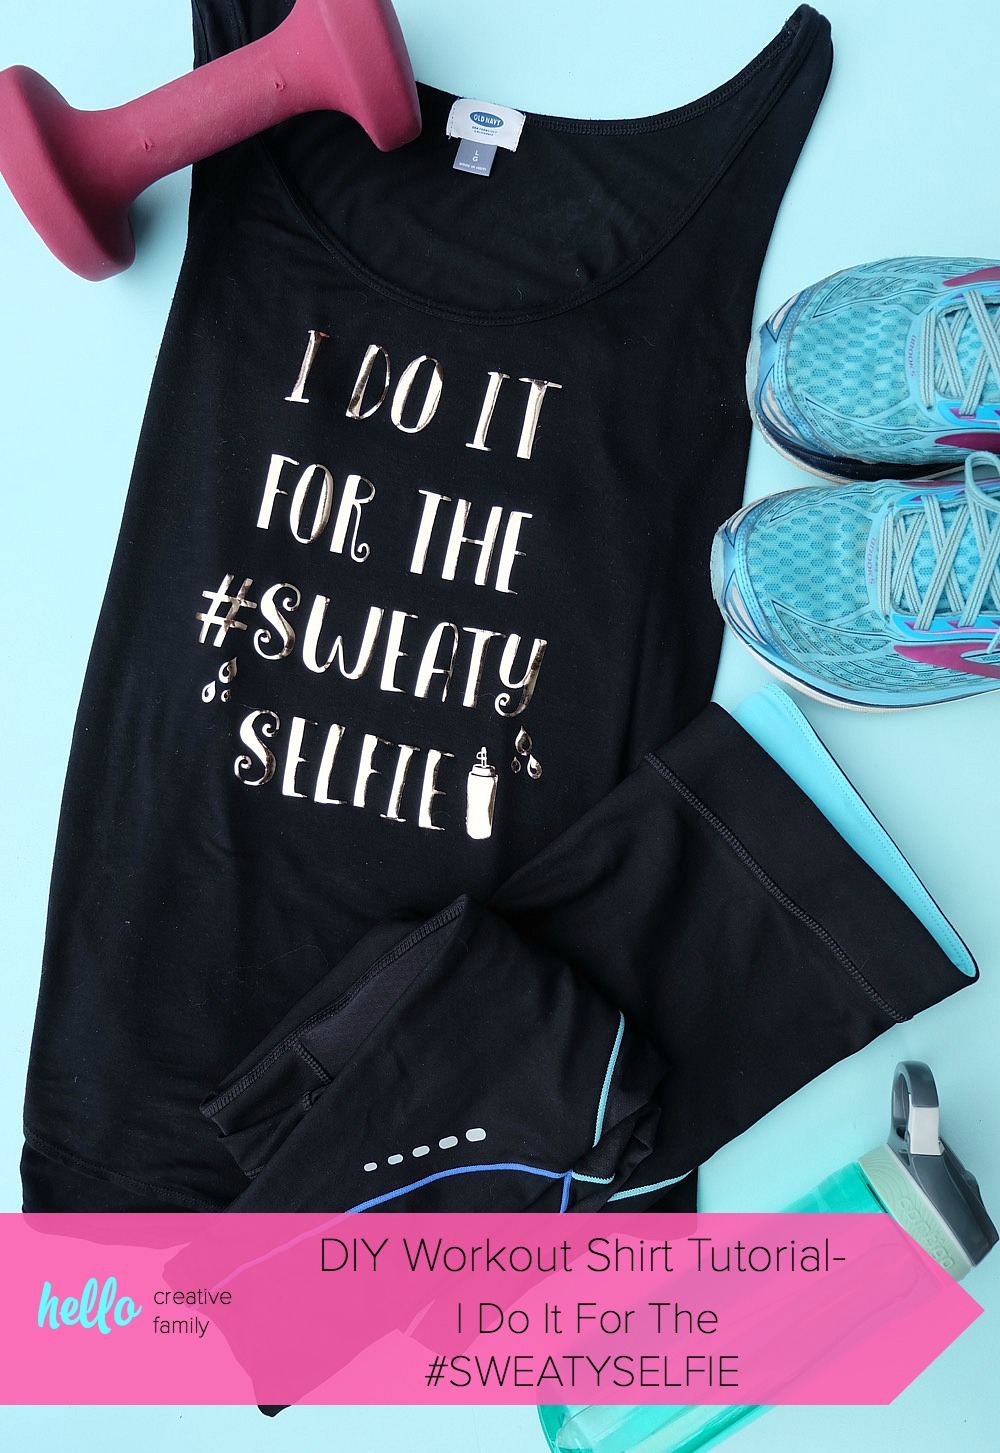
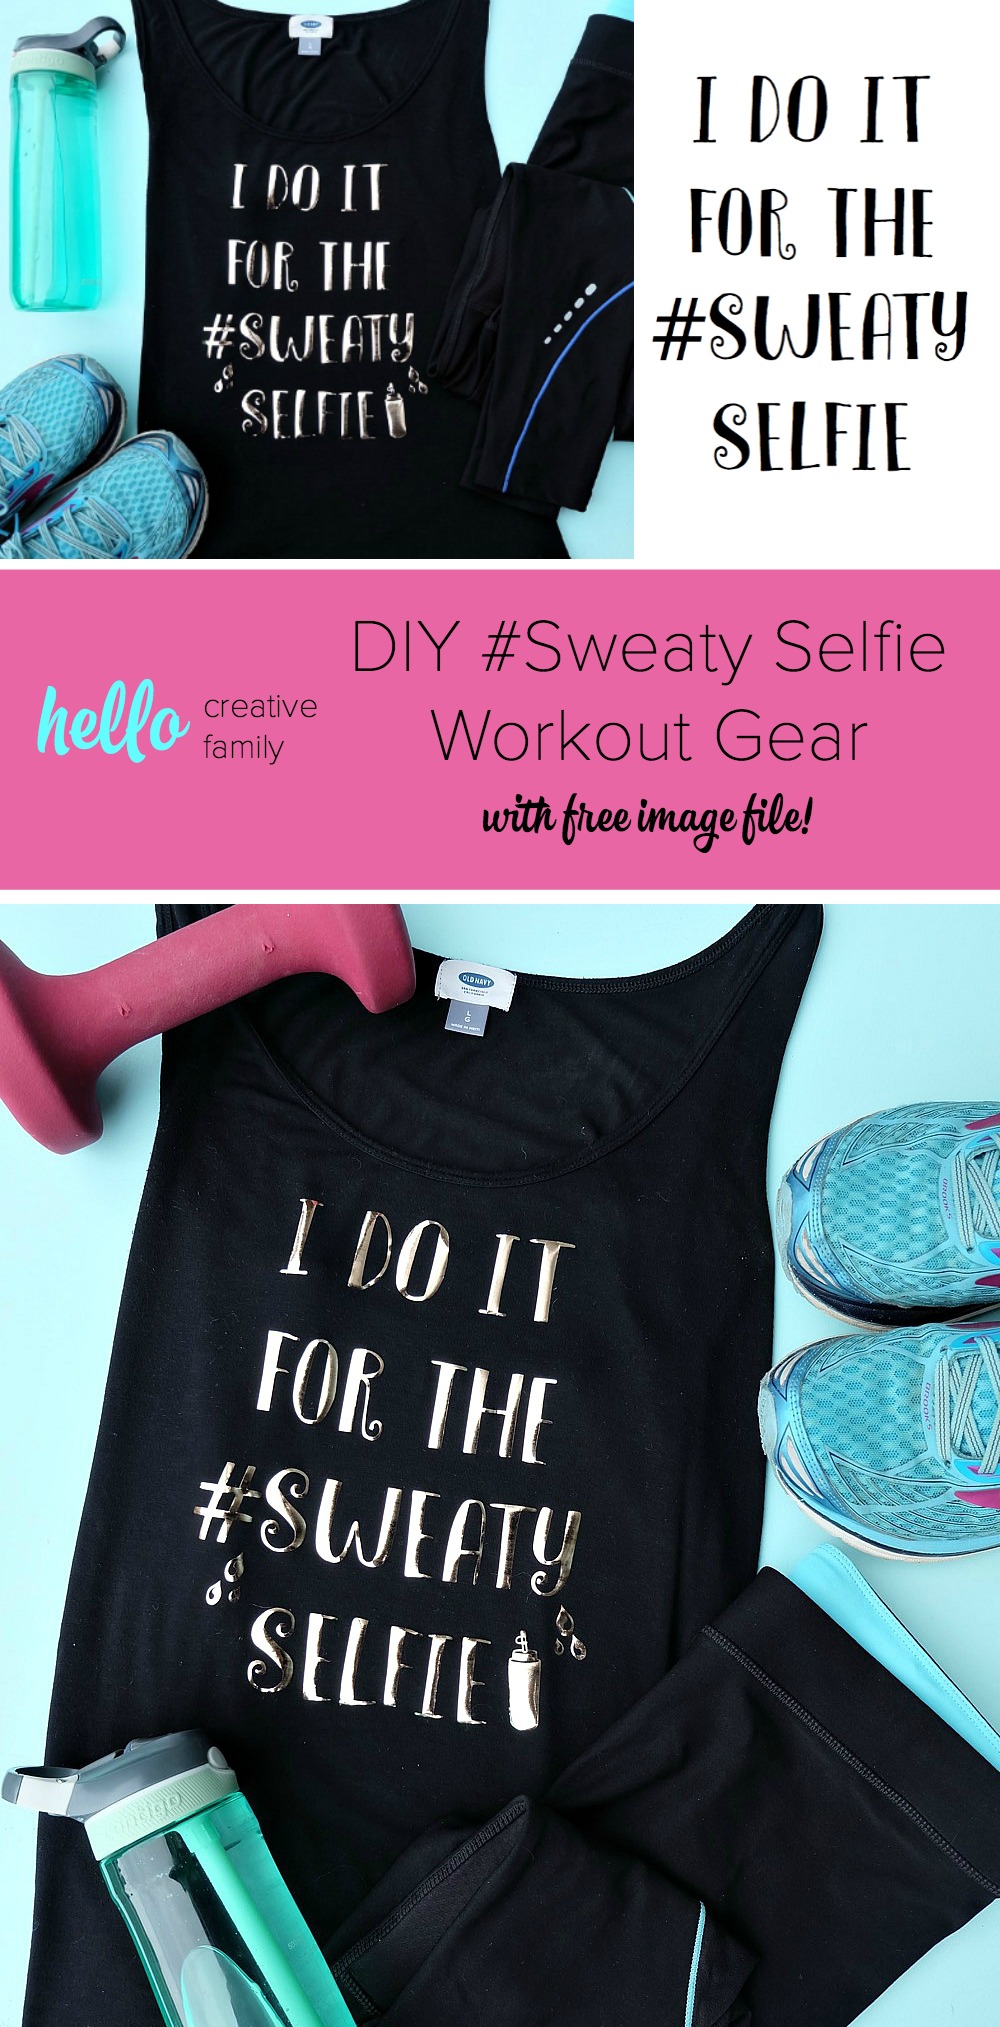
DIY Workout Shirt Tutorial- I Do It For The #SWEATYSELFIE
This post and the photos within it may contain Amazon or other affiliate links. If you purchase something through the link, I may receive a small commission at no extra charge to you.
Having cute workout gear makes it even more fun to workout! Create this adorable DIY Workout Shirt that says “I do it for the #SweatySelfie” to keep you motivated at the gym!

Last week I shared a post about how I’m on a quest to love the skin I’m in and embrace my body with it’s stretch marks, mommy belly, curves and all. I wrote about an epiphany moment that I had and how working out for 20-30 minutes a day, 6 days a week with Bikini Body Mommy workouts have helped me get to that place.
Today I am on day 45 of a 90 day workout challenge and I’m starting to feel like working out every day is becoming a habit instead of something that I’m forcing myself to do. Most days I look forward to the endorphin rush that follows each workout. That combined with knowing that I’m doing something great for my body is usually enough to tell myself “there’s no excuse not to work out for 20 minutes” and for me to get moving.
Some days though, the endorphin rush is not enough. It can be hard to find your motivation when you’re sick, tired or just have too much on your plate!
I’ve decided that this year, fitness is going to be one of my priorities so I add “workout” to my to do list each day and won’t go to bed until it’s crossed off. That helps keep my motivated, but another thing that keeps me motivated is having people that I’m being held accountable to.
If you are trying to live a healthier life and add new healthy habits into your life I HIGHLY recommend finding an accountability group. I know that a lot of people find an accountability partner, but I always find that if my accountability partner stops working out, that I stop working out too. Finding a group of people that you are held accountable to really works for me because then there are multiple people there, cheering you on and sharing in your journey.
Facebook is a fabulous place to find like minded groups of people who are sharing a similar journey to yours. You can find Facebook groups for just about every healthy way of living– Bikini Body Mommy accountability, keto, paleo, mom’s shedding the baby weight, etc.
I also love seeing people I follow on instagram (find me here) checking in after their workouts with their gorgeous “glowing” faces. I find it super inspiring. In fact, Salma from The Write Balance’s instagram stories was one of the things that really inspired me to find a fitness routine I love that I can stick with.
I have found that on my down days, when the last thing I want to do is work out, that checking in with my tribe and sharing that I got my workout done is a great way to get me motivated.
Which brings me to today’s craft project. In my Bikini Body Accountability Group we often share Bikini Body Mommy Sweaty Selfies with the group. I was taking my post workout selfie the other day and I joked with my husband that the reason I work out is for the sweaty selfie. Later when I posted my photo to the group I said “I do it for the #SweatySelfie”.
I kind of loved the line so I decided to create a design out of it and put it on my workout tank top.
Love it too? Read on for my DIY Workout Shirt Tutorial- I Do It For The #SWEATYSELFIE!
DIY Workout Shirt Tutorial- I Do It For The #SWEATYSELFIE

Materials:
-Tank Top or workout shirt
–Foil iron on or your favorite iron on material (I used rose gold foil iron on)
–Cricut Maker or Cricut Explore
-Iron or Cricut Easy Press
-Measuring tape (I used the one from the Cricut Sewing Kit)
Optional: Cricut Bright Pad for weeding, Cricut Iron On Protective Sheet, Cricut Brayer Tool
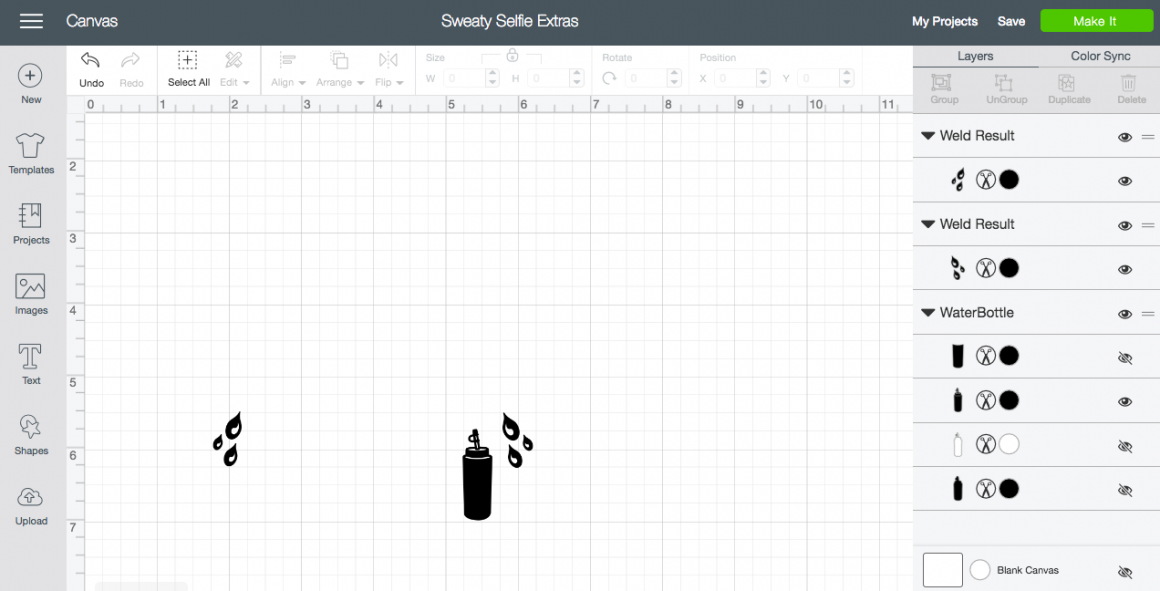
If you would like to add the “sweat drops” and water bottle you can find them here.
Directions
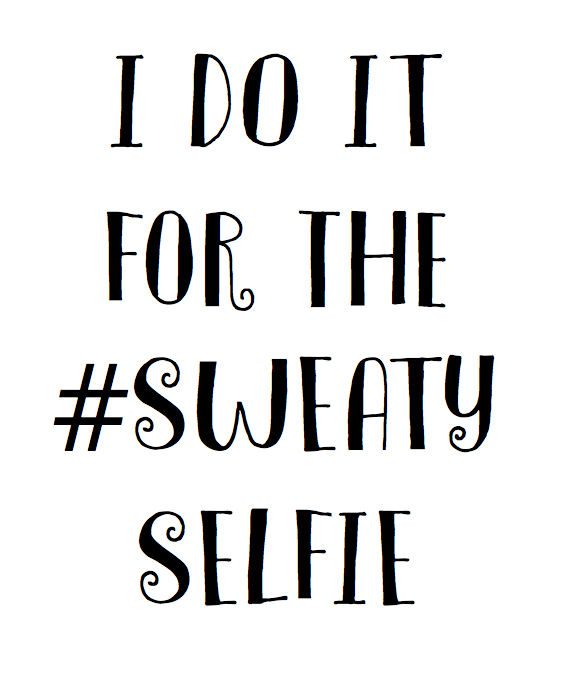
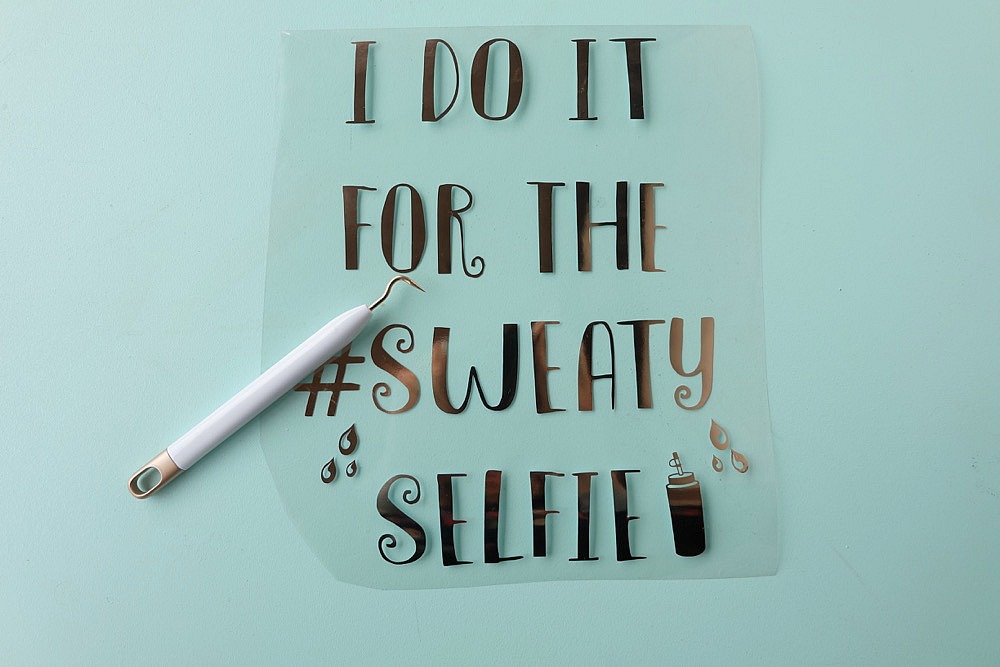
Step 1: Save my “I Do It For The #SweatySelfie” image by right clicking on the image below and saving it to your computer.
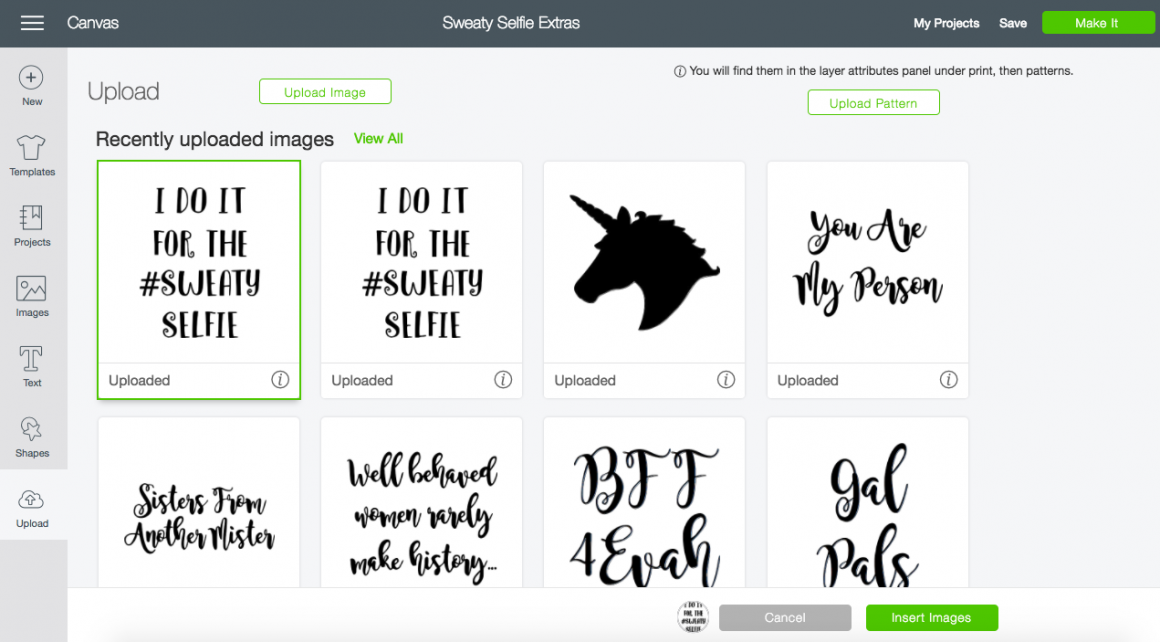
Step 2: Open Cricut Design Space. If you would like to add the water bottle and sweat drops use my “SweatySelfie Extras” link here.
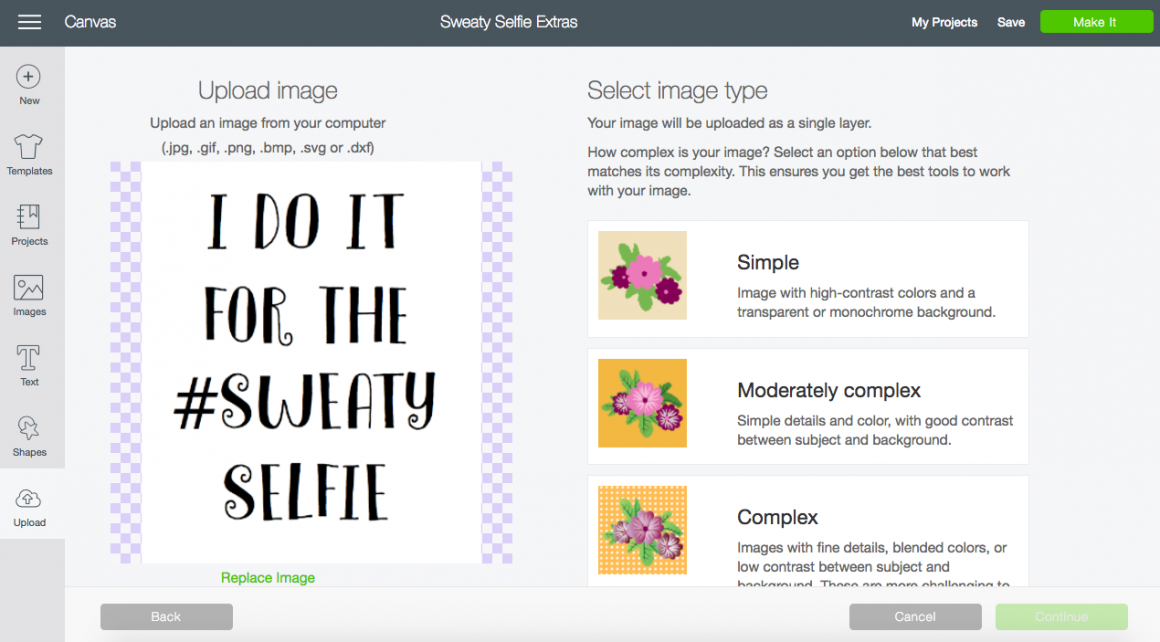
Step 3: Click “upload” (located in the tool bar on the left in the bottom corner). On the next screen click “upload image”. Select the SweatySelfie image from your computer and upload it. On the next screen you will see your image and then different options on the right hand side of the screen. Select “simple” and then click “continue”.
Step 4: On the next screen you want to click on the areas of the image you want to remove. AKA anywhere where it is grey.

Once you click on the grey areas it will turn into a blue checkerboard pattern. Don’t forget to click on the inside of letters and in the center of the hashtag.
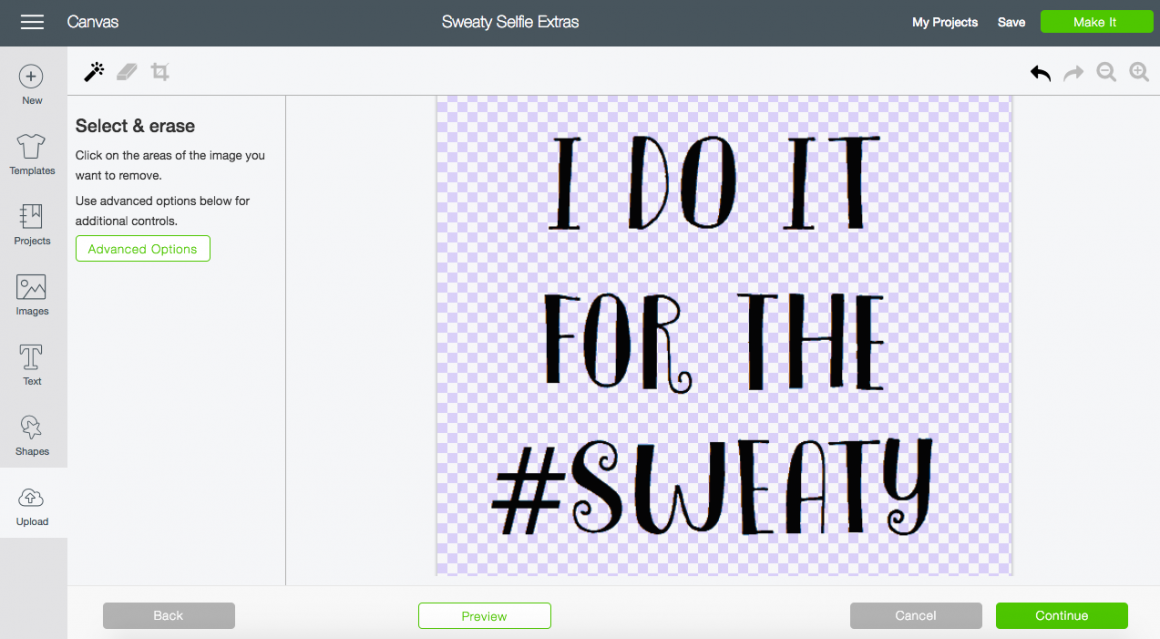
Click “continue” save your image as a cut file and then select your image and click “insert images”.
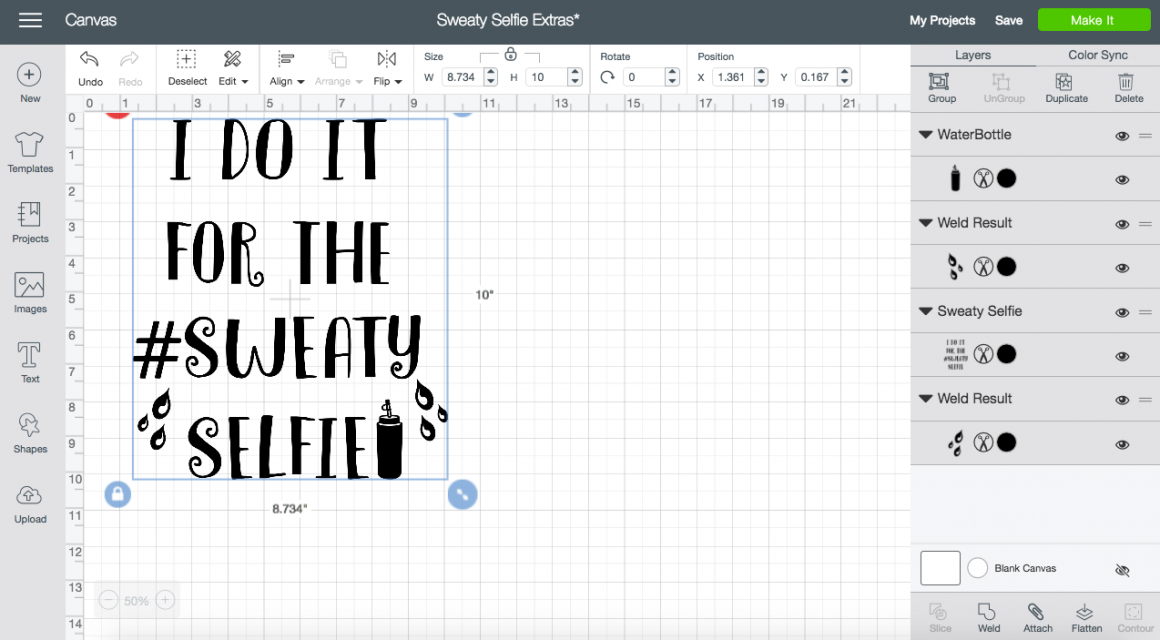
Step 5: Measure your tank top or shirt and figure out how large you would like your design to be. Size the image to the appropriate size either by dragging it’s corners or using the size box in the upper toolbar.
If using the water bottle and sweat drops in your design you will want to attach all of your images together so that they cut as one piece. Do this by clicking on each of the pieces in the right hand toolbar while holding down your command key and then clicking the “attach” button in the lower right hand corner of the screen.
Step 6: Click “Make It” in the upper right hand corner. On your next screen you will want to mirror the image. Do this by clicking the “mirror” button on the left hand side of the screen.
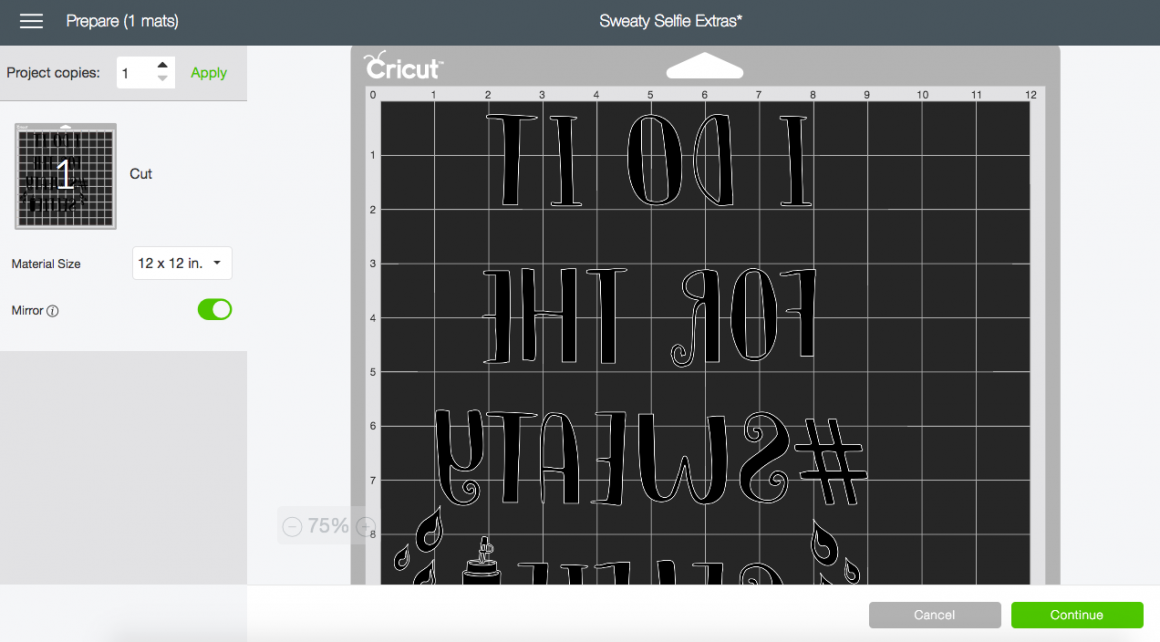
Step 7: Click continue, select your Cricut from the drop down menu and choose the material you are cutting. Lay your iron on material onto your cutting mat with the colored side facing down. Load your mat into the machine and have your Cricut cut your design. One your design is done cutting, weed away the iron on that you don’t want on your shirt, leaving behind on the plastic sheet just your design.
Step 8: Set your Cricut Easy Press or iron to the appropriate temperature for the iron on material you are using and attach your design to your shirt.
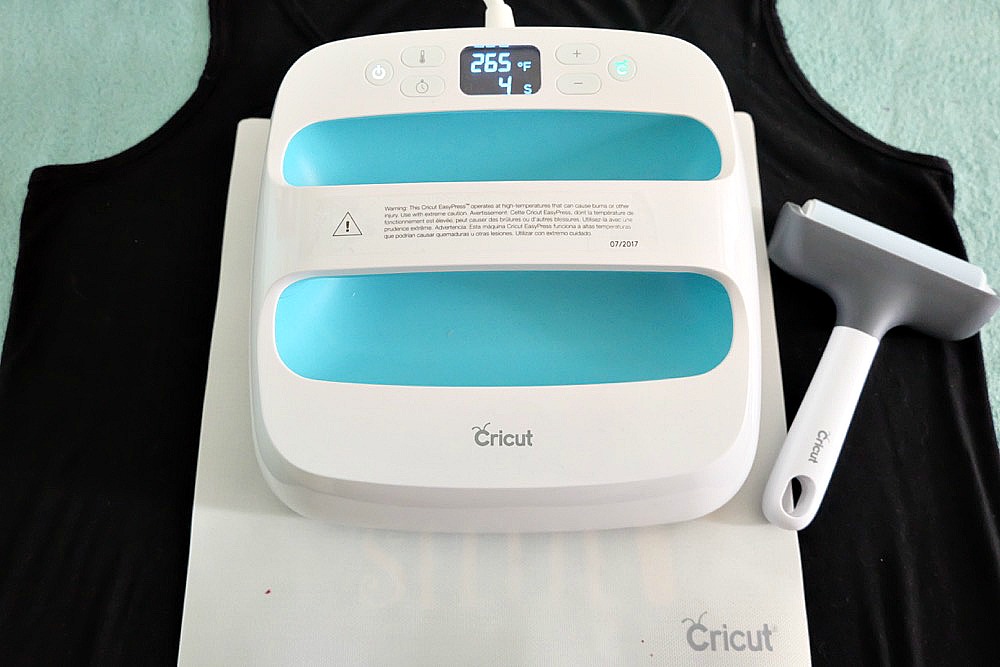
I love using my Cricut Easy Press, Cricut Iron On Protective Sheet and Cricut Brayer Tool for this process. I preheat my shirt using my Easy Press, position my design on the shirt and then use my Brayer Tool to really press the design into the shirt. Next I lay my Iron On Protective Sheet on top of the design and press on the front using the Easy Press. When it’s done pressing I run my Brayer Tool over the Iron On Protective Sheet really pushing my design into the shirt, then I flip the shirt over and repeat this process on the back of the shirt.

Check to make sure that your design is firmly adhered to the shirt.
If using foil iron on: I can’t encourage you enough to let your shirt thoroughly cool before peeling back your plastic sheet. I’ve tried peeling away the protective sheet when the foil is still warm before and you end up with little bubbles and lines in your design. Walk away from your shirt. Do something else. Wait a few minutes, come back and remove. Then you will have flawless results!
Peel away the clear protective layer and….

Viola you have a gorgeous workout tank top! I hope that your new “I Do It For The #SweatySelfie” tank top inspires you each and every time you wear it!
[hr gap=”30″]Tell me… Can you relate to my lifelong struggle to love the skin your in? Do you have a regular workout routine and/or an accountability friend or group to help keep you on track? What shirt design would you like for us to make next?[hr gap=”30″]
Like this post? We’d love for you to pin it for later!
If you like this post, we’d love for you to check out our other Cricut projects! Find our Cricut category here or by clicking the photo above.

Disclosure: This post contains affiliate links. That means that if you buy something using one of our links, we get a small percentage of the sale at no extra cost to you. Rest assured, I only share things I love. Cricut gifted me with my machine and it’s my favorite thing in my craft room. Thank you for helping to supporting our site.


I’m glad I’m not the only one who doesn’t feel like working out some days :-). I call it stretching. Not exactly yoga, but in the last year, I’ve started just basic stretch’s. Like we used to do in p.e. class. Just stretching my arms up has helped so much. I realized that I don’t move around alot so it was no wonder I was gaining weight. I even stretch while folding laundry. I incorporate it in everything I can daily. A couple minutes here, a couple minutes there. It actually works. You’re doing great. Your shirt is cool!
what size did you make yours?
Hi Chrissy,
I made my design approximately 10 inches tall. 🙂
Thank you so much for visiting! If you make a shirt of your own I’d love to see a picture.
Best Wishes,
Crystal