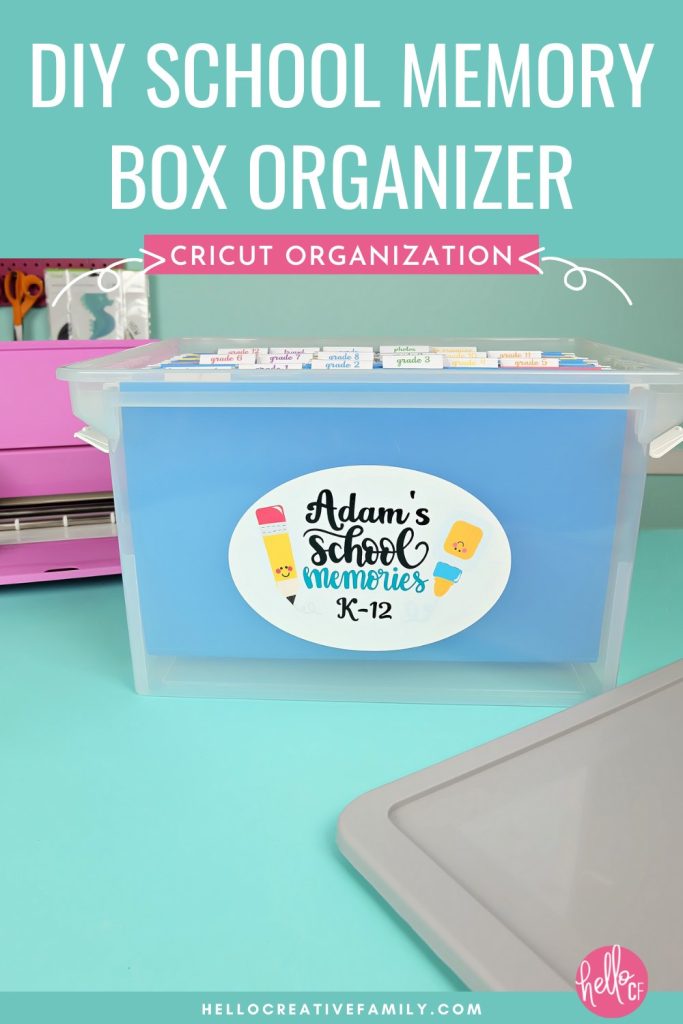
How To Make A DIY Cricut School Memory Box Organizer
This post and the photos within it may contain Amazon or other affiliate links. If you purchase something through the link, I may receive a small commission at no extra charge to you.
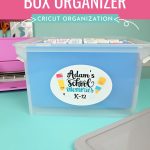
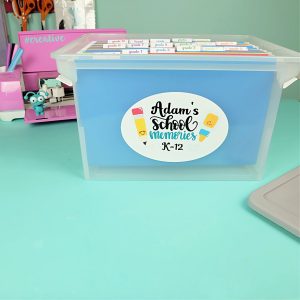
Get rid of the clutter and organize the precious mementoes that your children bring home from school with this DIY Cricut Memory Box Organizer! Hold onto and organize your childrens’ special crafty keepsakes throughout their years. Includes the Cricut cut file for making this project with your Cricut Explore or Cricut Maker.
Disclosure: Thank you to Cricut for sponsoring this project and post. As is with every article on Hello Creative Family, all thoughts and opinions are 100% our own.
Hi Crafty Friends!
The end of the school year is upon us and you know what that means– soon, vast amounts of school work that have been collecting in the classrooms all year long are going to start coming home.
Ask my mom, dad, sister, husband and kids– Organization does not come naturally to me. My desk often appears to be absolute chaos to anyone other than me– but I know where everything is. To others it looks like chaos, but I have a method to my madness.
Organization When You Have A Chaotic Mind
My husband loves to tell the story of the first time he came to my house. We were 21 years old. I had just been promoted to a manager position at the bookstore where we worked. I had recently moved to a new apartment and with a little bit of extra cash in my pocket I headed to Ikea with my work friend, Rob (who is now my husband) to pick up some new furniture.
We got back to my apartment with a new bookshelf and entertainment unit. I felt confident about assembling them myself, but I knew that I wasn’t going to be able to manuever them out of the car, into the building, to the elevator, down the long hallway and into my apartment. So I asked him if he could help.
On the drive home I said to him “You can help me bring the boxes upstairs but you have to close your eyes when you are in my apartment. It’s kind of a mess right now.”
Now whenever my husband bugs me about my mess I always say to him “Hey, I was honest with you from day 1 that I’m messy! You knew what you were getting into. It’s not like I hid it from you!”
This is all to say, that since organization doesn’t come naturally to me, I definitely need to put systems into place to stay organized.
Organizing School Papers and Mementoes
Paper is one of those things that I find can quickly overwhelm a home. My husband and I are both memento savers and have the hardest time putting “memories” into the recycling bin. Especially when those memories are work that our children have poured their heart and soul into.
There are always so many pages of school memorabilia collected by the last day of school and it can get overwhelming!
Our past organization system for our children’s school work/memories was a two part system. We had one box in their closet where the kids would put any drawing, art, or school work that they wanted to keep. They added to the box over the course of the school year.
At the end of the school year it was purging time. They would go through the box again, figure out which things they were most proud of and recycle the rest. Those pieces would go into another box that was a collection of all their school work from previous years.
I liked this system, and didn’t like it.
The thing that I liked was that the work was collected over the course of the year, and then the kids went through it at the end of the school year again to see which pieces they really wanted to keep.
It gave the kids some distance from their work and made it easier for them to really decide if it was something they wanted to keep or not.
The thing that I didn’t like was that all the work just got put in a box where it wasn’t organized at all. It was hard to keep track of what was from each year.
I incorporated my likes and dislikes of my current system, into the School Memory Box Organizer that I’m sharing today.
My School Memories Organization System
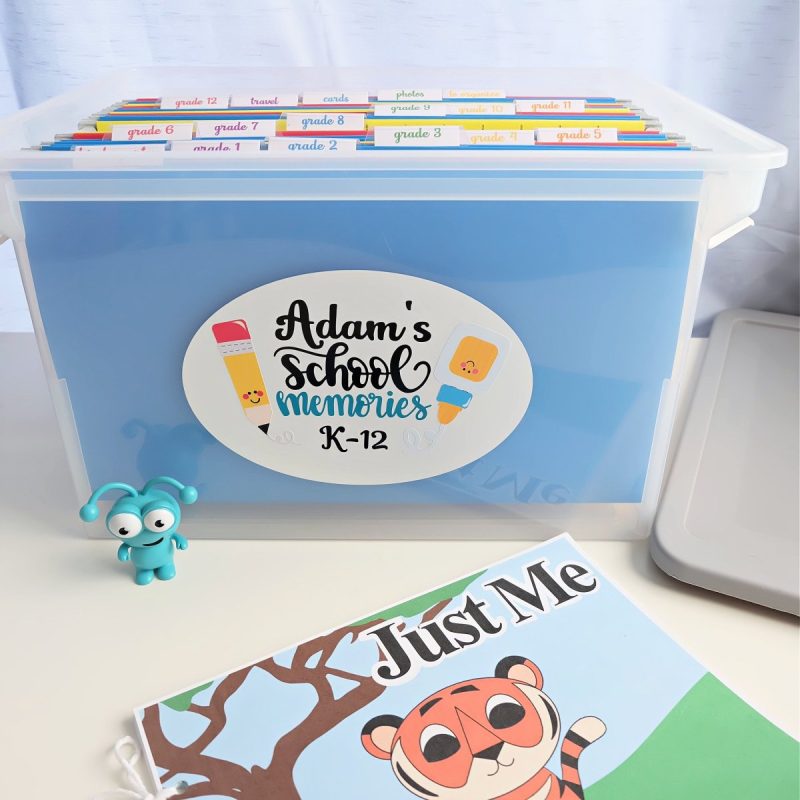
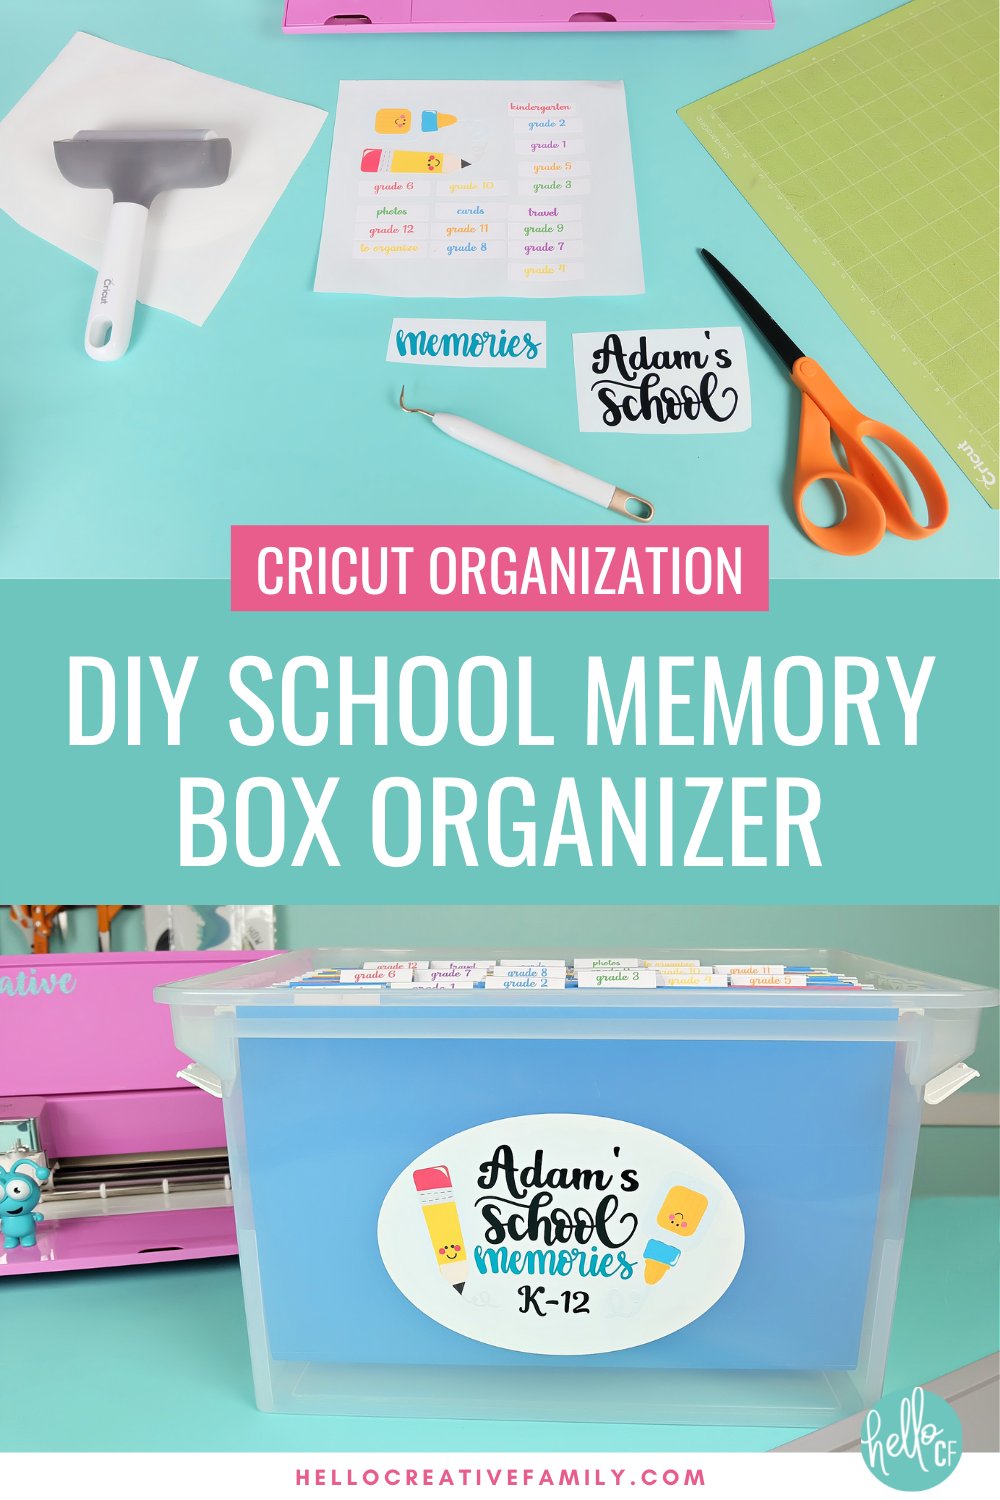
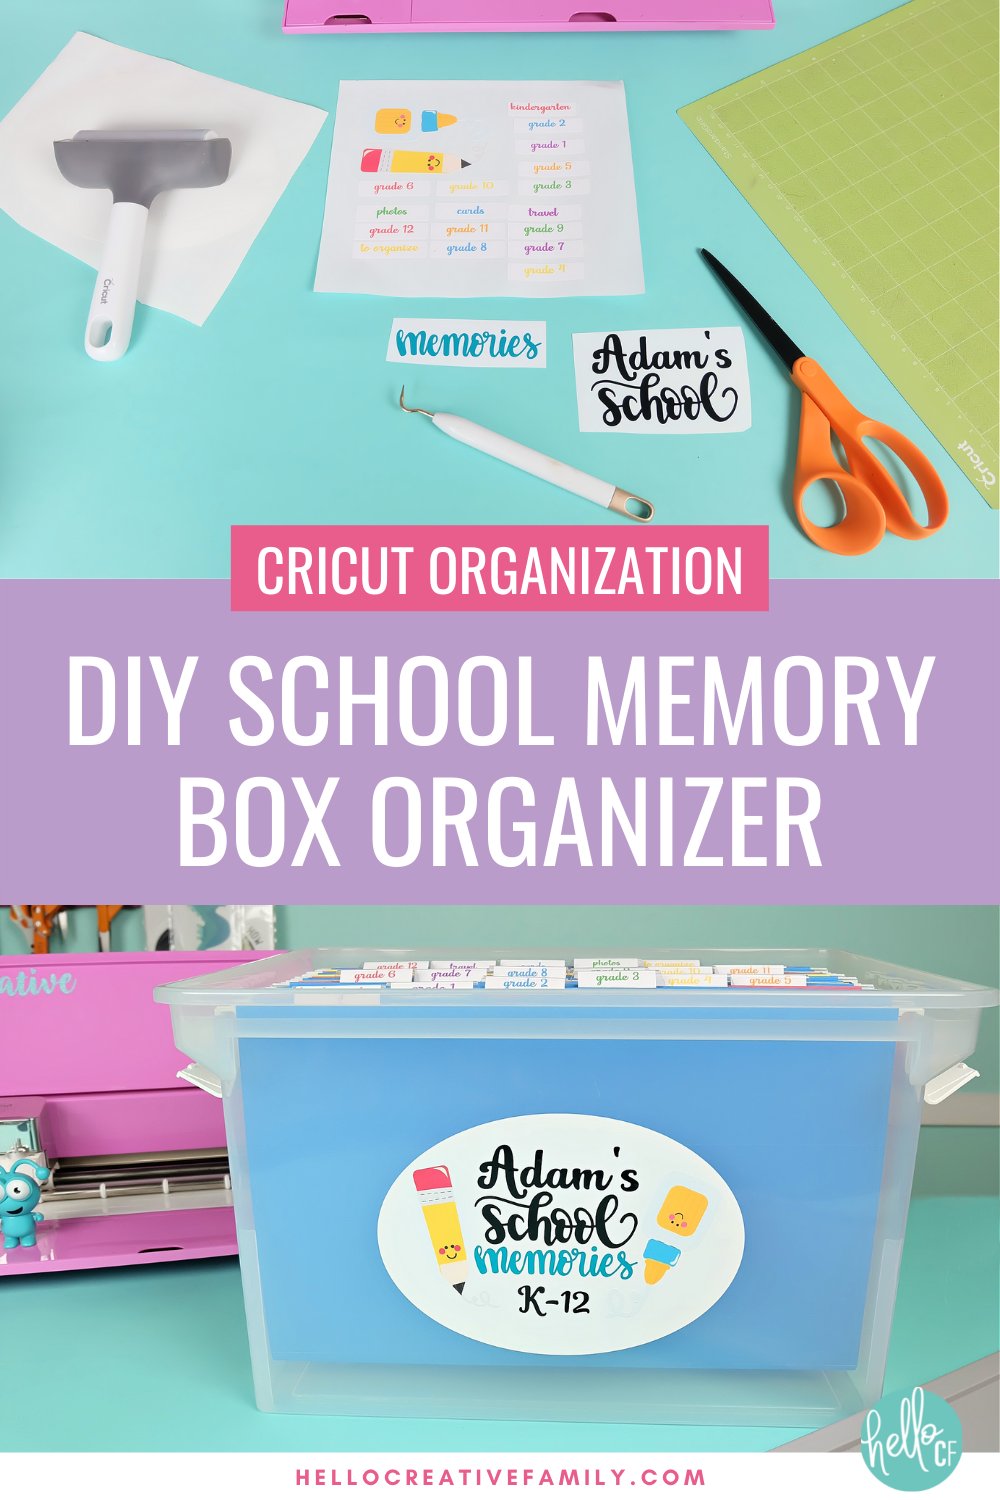
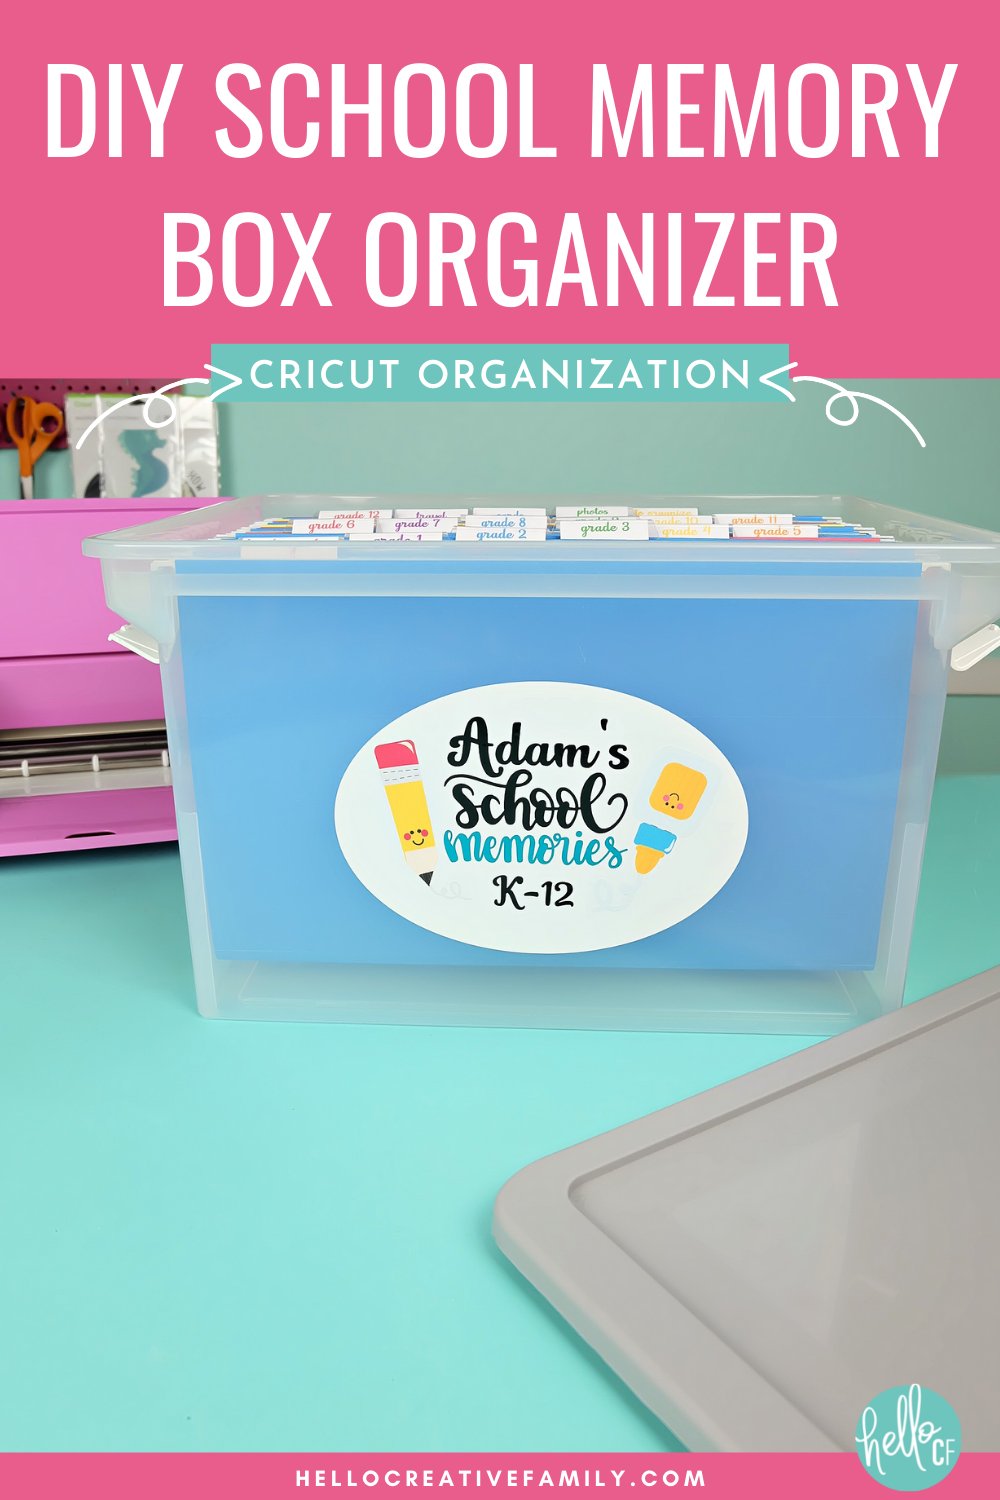
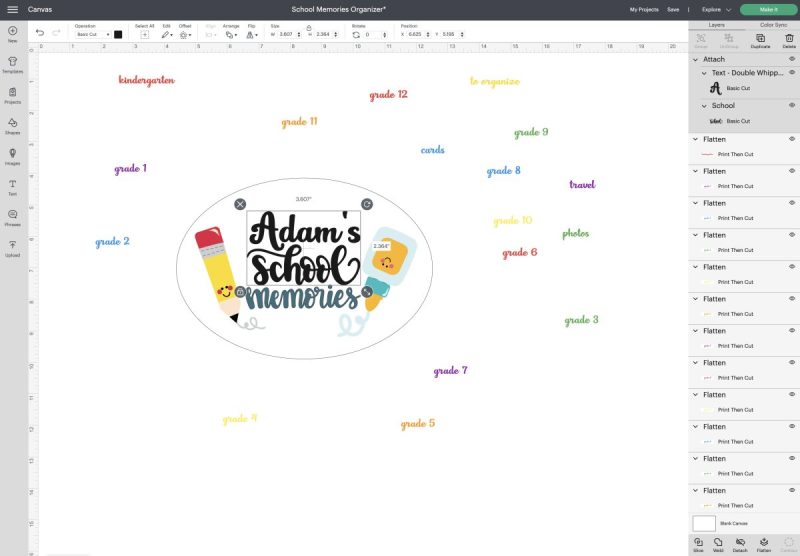
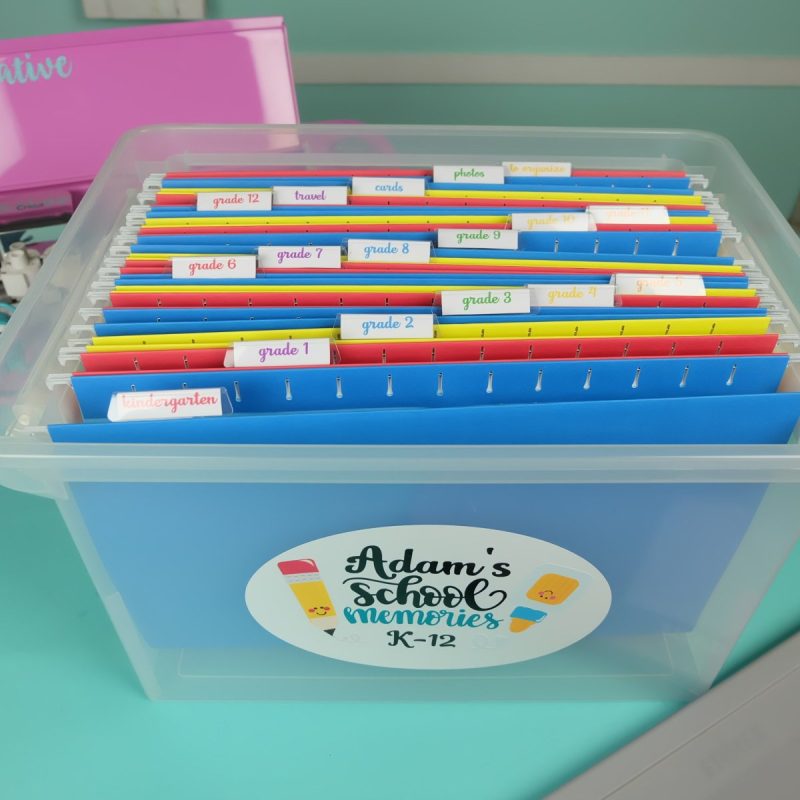
The organization box has 17 folders– One for each grade– Kindergarten through Grade 12 (You could also add a folder for each year before they start school too if you have a toddler or little one in preschool). Then I have four additional folders– Travel, Photos, Cards and To Organize.
The”To Organize” folder is where you can put everything that you are the kids think you want to keep throughout the year, then at the end of the school year, you and the kids can sort through everything in the folder, decide what you are keeping and put it into the folder marked for that school year.
It’s all housed in a plastic file box tote. It’s such a great organization system, and I just wish that I had made them when my kids were younger!
Fill them full of your kid’s artwork, special school projects, certificates, report cards, photos and so much more.
Bonus points– this organizer literally could not be easier to make, thanks to my Cricut cutting machine! I love that I can use my Cricut in such a wide variety of ways from organizing my life, to making one of a kind gifts, to helping my kids craft projects for school.
The Cricut cutting machine can be used to cut hundreds of materials. Find a full list in my post What Materials Can Your Cricut Cut.

I was able to order everything that I needed for it to be delivered straight to my door, and once I had created the design file for it in Cricut Design Space, it took me less than half an hour to put together!
And to save you from having to do the work all over again, I’m sharing the design file with you! All you have to do is open my project file in Design Space. Add your child’s name, and click Make it!
There are so many cute school themed designs in Cricut Access and I just love the pencil and glue that I picked out for this design! In fact there are thousands of fonts and images available in Design Space with a Cricut Access membership!
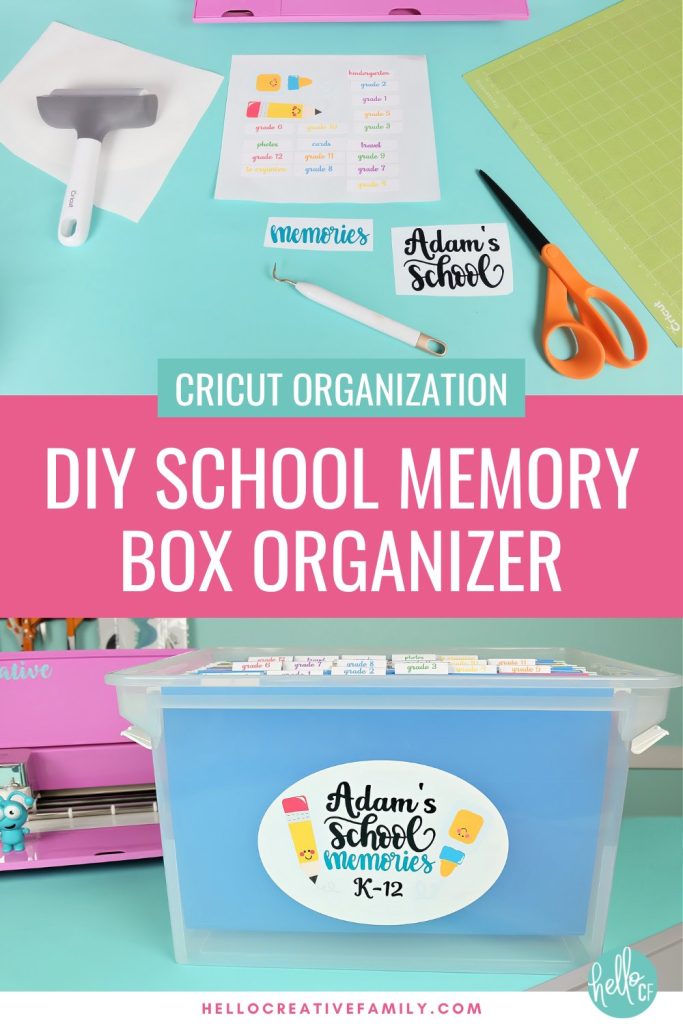
I’m going to walk you through how to make this DIY School Memory Box Organizer step by step below!
Ready to get started? Read on!
How To Make A DIY School Memory Box Organizer With Your Cricut
Materials:
- Cricut Maker or Cricut Explore
- Standard Grip Cutting Mat
- Measuring Tape
- Printer
- Printable Vinyl
- Cricut Vinyl In Your Choice Of Colors (I used black, white and teal)
- Weeding Tools
- Cricut Transfer Tape
- Letter/Legal File Tote
- Legal Hanging File Folders
- Hanging File Folder Tabs
- Optional: Hello Creative Family School Memory Box Design File (or you can create your own)
Directions:
Step 1: Open my Hello Creative Family School Memory Box Design File in Cricut Design Space.
Step 2: Add your child’s name to the canvas. I used the Cricut font Double Whipped.
Step 3: If cutting your child’s name and the word “School” from the same color of vinyl you will want to attach the name and the word to each other. To do this, select the name and school at the same time and click attach.
Note: The pieces that we are using Print Then Cut for (the glue, pencil and folder tabs) have already been flattened to tell your Cricut to Print Then Cut them. To do this, for the crayon and the pencil I selected the design and then clicked flatten.
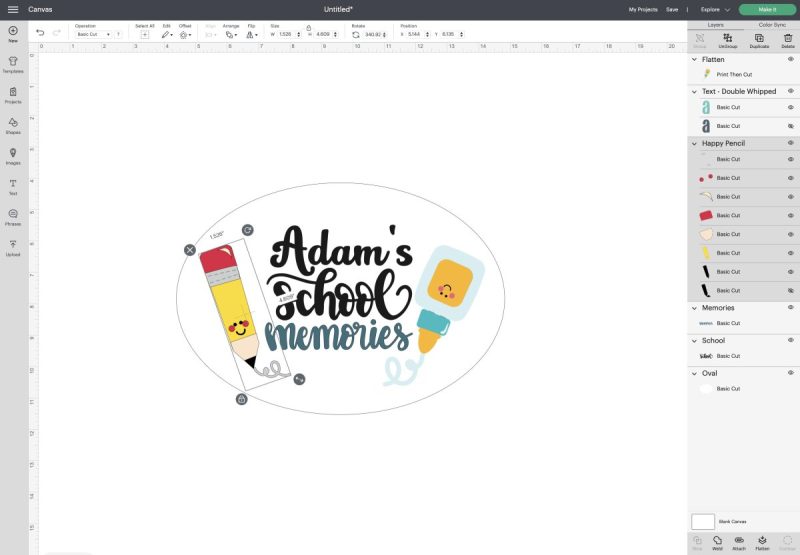
For the file tabs I created a rectangle the size I wanted my label to be. Then I typed the word, aligned it in the center of the rectangle, selected both pieces and clicked flatten.
The flatten function tells your Cricut that the design is a Print Then Cut Image. For more information on how to use each of the buttons in Cricut Design Space visit my Cricut Design Space 101 post.
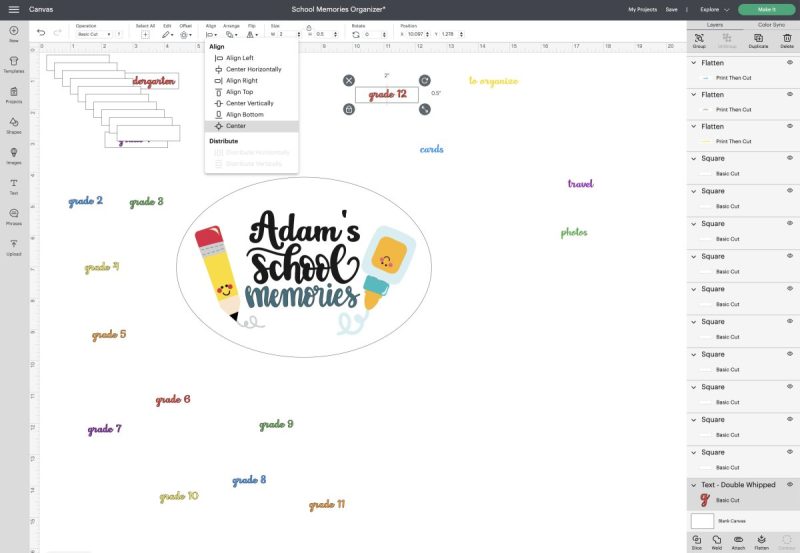
Step 4: Measure the front of the box and size the design for the front of the tote to your desired size. Do this by making sure you have all the pieces selected and either using the arrow button that appears in the bottom right hand corner or the size box in the upper toolbar.

Step 5: Measure the tabs of your folders and size the folder labels to the correct size.
Step 6: Click Make It. You are going to use the Print Then Cut feature to print the pencil, glue and folder labels from white Cricut Printable Vinyl. You will use vinyl to cut the name, school memories and the oval for behind the design. Follow the directions on your screen to connect your machine, select your cutting material and cut your design.
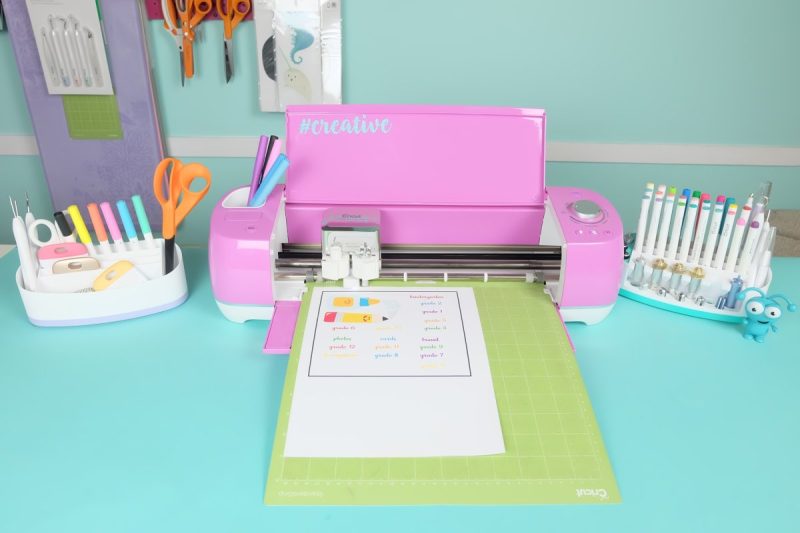
Step 7: Weed your design removing the excess vinyl from around your design. Don’t forget the centers of your letters!

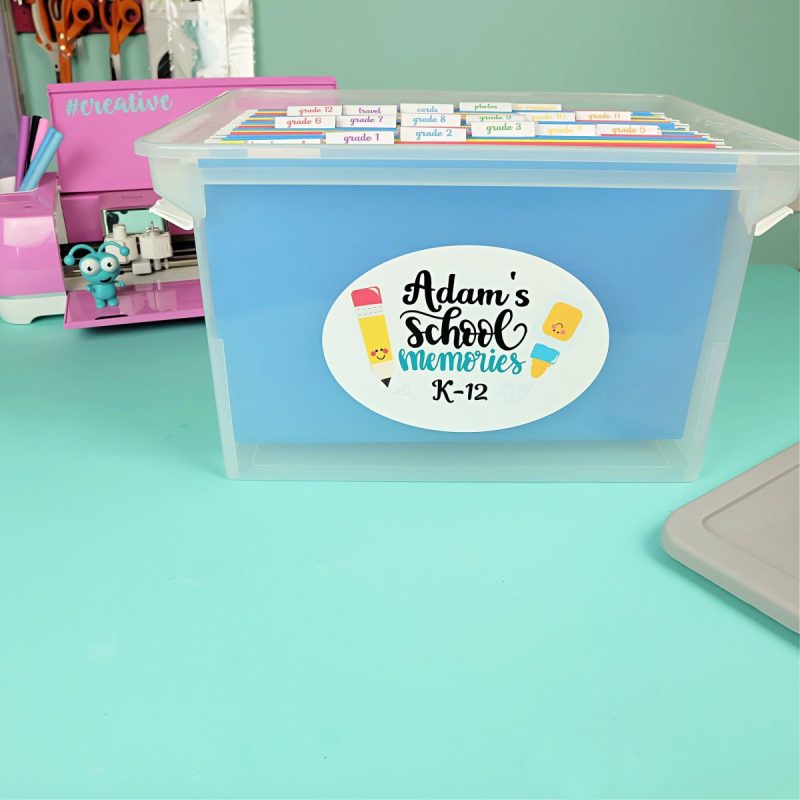
Step 8: Transfer the oval to your bin. You may want to use your measuring tape to make sure it is centered. Next cut a piece of transfer tape, slightly larger than your design. Peel away the backing and lay the transfer tape sticky side down on top of your vinyl. Use your scraper to firmly rub over the transfer tape, pushing the vinyl onto your transfer tape. Peel up the transfer tape and the vinyl of the paper vinyl backing.
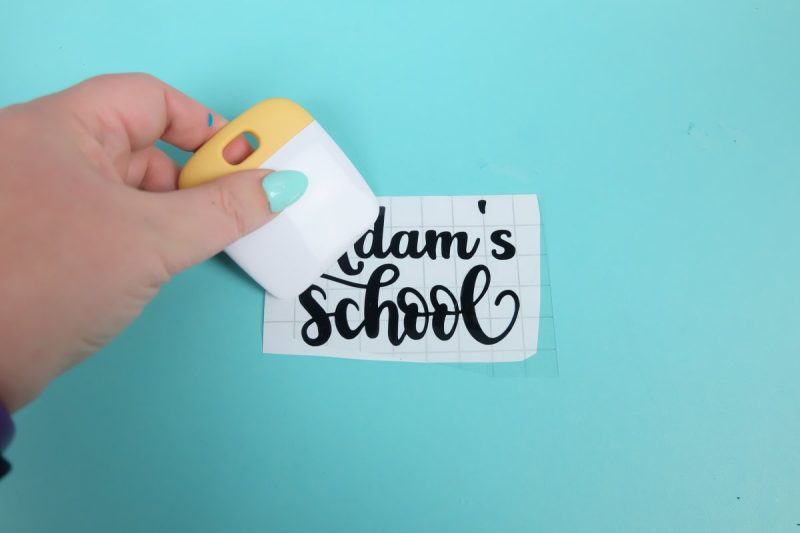
Position your design where you would like it on the oval. Rub your scraper over the transfer tape, pushing the vinyl onto your tote.

Repeat with the other pieces of your design. Note: I transferred the Print Then Cut Designs by hand so that I didn’t mess up the ink with the transfer tape.
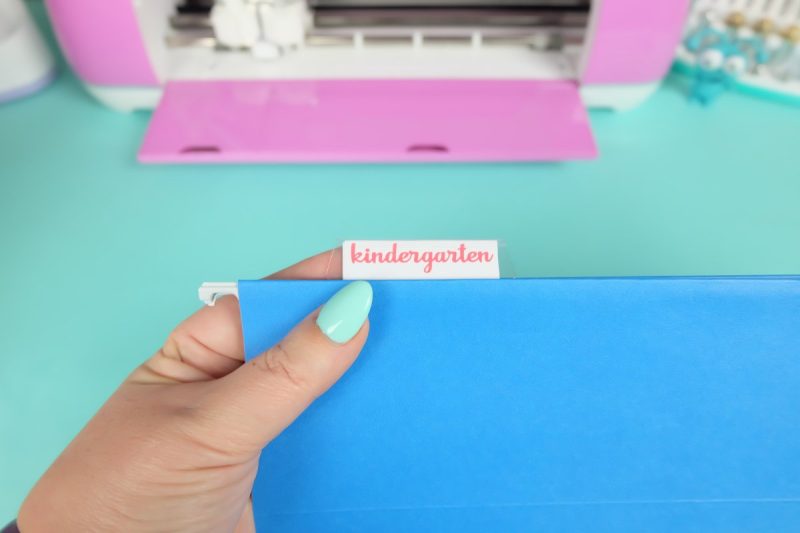
Step 10: Next, label each of your folders using the grade, “travel”, “photos”, “cards” and “to organize” labels.
Step 11: Hang each of your hanging folders in the file tote in order of grade.
Use your school keepsake box to organize all your child’s school papers and cherished school mementoes!
And there you have it! One more awesome Cricut project to keep your organized! My Cricut made a task that was daunting to me like organization simple, and I couldn’t be happier!
Print me for later!
How To Make A DIY Cricut School Memory Box Organizer
Instructions
- Open my Hello Creative Family School Memory Box Design File in Cricut Design Space.
- Add your child’s name to the canvas. I used the Cricut font Double Whipped.
- If cutting your child’s name and the word “School” from the same color of vinyl you will want to attach the name and the word to each other. To do this, select the name and school at the same time and click attach.
- The pieces that we are using Print Then Cut for (the glue, pencil and folder tabs) have already been flattened to tell your Cricut to Print Then Cut them. To do this, for the crayon and the pencil I selected the design and then clicked flatten.
- For the file tabs I created a rectangle the size I wanted my label to be. Then I typed the word, aligned it in the center of the rectangle, selected both pieces and clicked flatten. The flatten function tells your Cricut that the design is a Print Then Cut Image. For more information on how to use each of the buttons in Cricut Design Space visit my Cricut Design Space 101 post.
- Measure your tote and size the design for the front of the tote to your desired size. Do this by making sure you have all the pieces selected and either using the arrow button that appears in the bottom right hand corner or the size box in the upper toolbar.
- Measure the tabs of your folders and size the folder labels to the correct size.
- Click Make It. You are going to use the Print Then Cut feature to print the pencil, glue and folder labels from white Cricut Printable Vinyl. You will use vinyl to cut the name, school memories and the oval for behind the design. Follow the directions on your screen to connect your machine, select your cutting material and cut your design.
- Weed your design removing the excess vinyl from around your design. Don’t forget the centers of your letters!
- Transfer the oval to your bin. You may want to use your measuring tape to make sure it is centered. Next cut a piece of transfer tape, slightly larger than your design. Peel away the backing and lay the transfer tape sticky side down on top of your vinyl. Use your scraper to firmly rub over the transfer tape, pushing the vinyl onto your transfer tape. Peel up the transfer tape and the vinyl of the paper vinyl backing.
- Position your design where you would like it on the oval. Rub your scraper over the transfer tape, pushing the vinyl onto your tote. Repeat with the other pieces of your design. Note: I transferred the Print Then Cut Designs by hand so that I didn’t mess up the ink with the transfer tape.
- Next, label each of your folders using the grade, “travel”, “photos”, “cards” and “to organize” label
- Hang each of your folders in the file tote in order of grade. Use your school memories box to organize all your child’s cherished school mementoes!
Equipment
- Cricut Vinyl In Your Choice Of Colors (I used black, white and teal)
- Letter/Legal File Tote
- Legal Hanging File Folders
- Hanging File Folder Tabs
- Optional: Hello Creative Family School Memory Box Design File (or you can create your own)
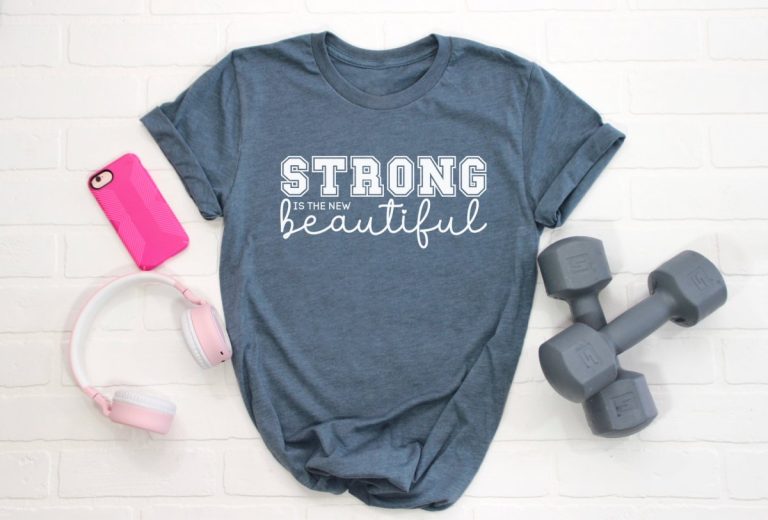
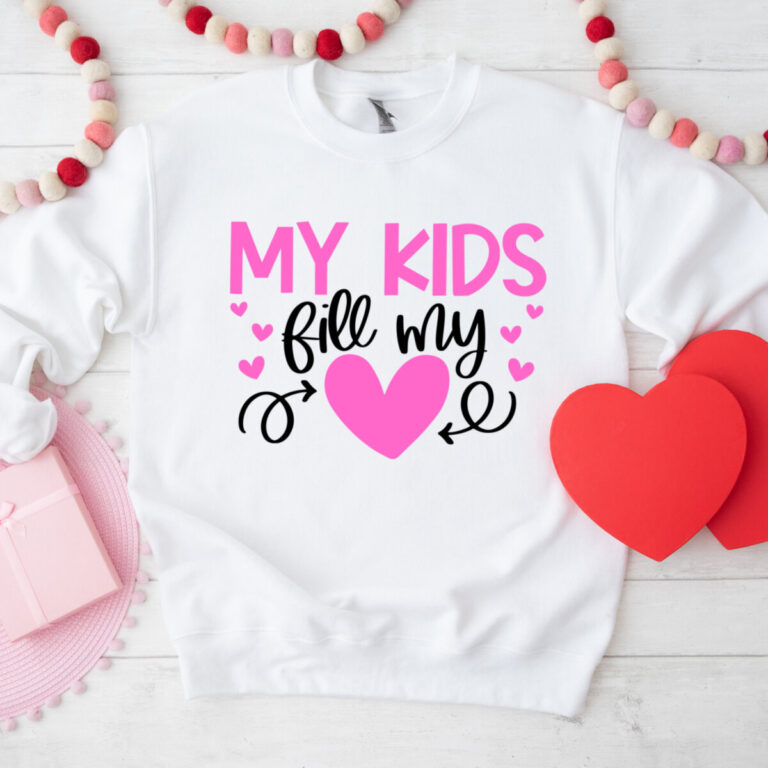
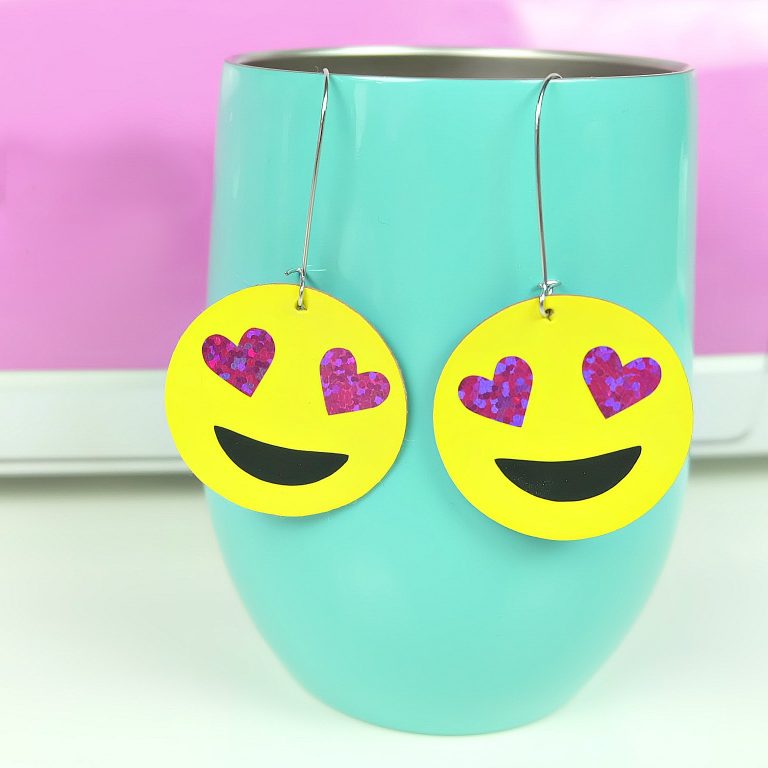
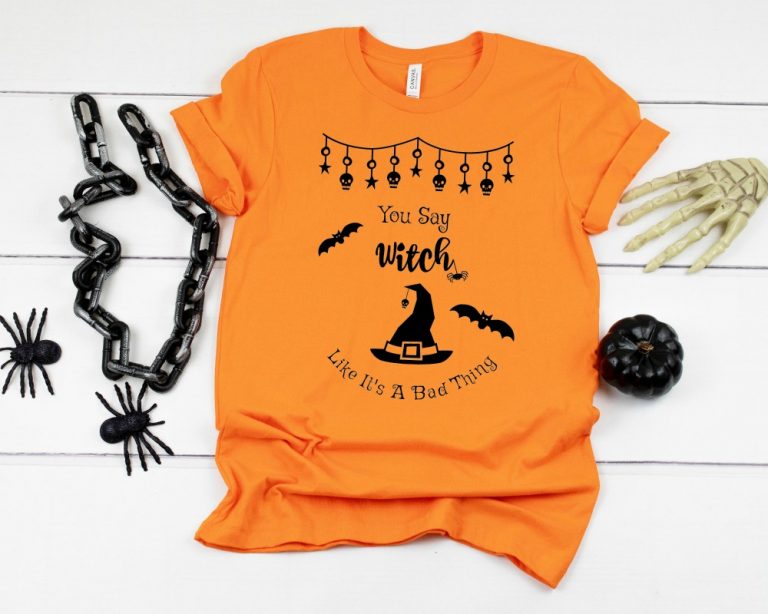
Looking for more Cricut Inspiration? Check out our Cricut Crafts section and SVG section for a ton of project inspiration! Here are a few you may like. Click on the post to visit it!


If you like this School Memory Box I would love for you to pin it! It helps others discover our content which helps us bring you more awesome content like this!