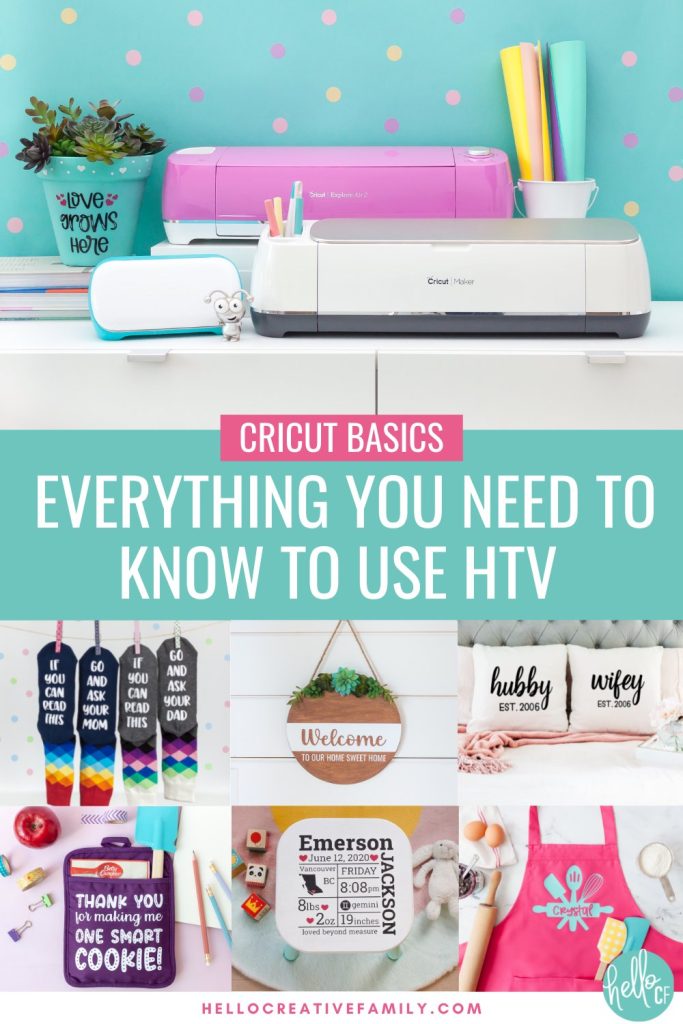
Cricut Basics- Everything You Need To Know About HTV Vinyl
This post and the photos within it may contain Amazon or other affiliate links. If you purchase something through the link, I may receive a small commission at no extra charge to you.

Wondering “What is HTV vinyl”? Learn about heat transfer vinyl and why HTV is great for customizing shirts, onesies, wood signs, tote bags and more with your Cricut Joy, Cricut Explore Air or Cricut Maker! We’re giving you all the info you need to know to use HTV like a pro! These tips are great for Silhouette Cameo users too!
Hi crafty friends! Today we are going to talk all about HTV! I’ll confess—HTV is my very favorite cutting material. Many people consult with me when trying to decide if they will use their Cricut enough for it to be worth the cost. In my mind, being able to make your own custom shirts makes the price of a Cricut well worth it! HTV can be applied to so much more than just shirts, though!
Today we are going to cover everything that you could possibly want to know about HTV Vinyl! Are you ready to get started? Let’s go!
What is HTV Vinyl?
First up, what is HTV? HTV is an acronym for Heat Transfer Vinyl, which makes saying HTV Vinyl repetitive, but hey, it seems to be how most people search for HTV on google.
Heat transfer vinyl, HTV, iron-on—they’re all different words for the same material! The terms can be used interchangeably, so don’t get confused if you hear a crafter hopping from one term to another.
Basically HTV is a type of vinyl that needs heat to adhere it to the surface that you are applying it to.
The most popular heat sources that you will see crafters use are a heat press, the Cricut EasyPress or an iron.
What Can You Adhere HTV To?

When most people think of HTV they think of applying a design to clothing, but the truth is that there are so many household and specialty materials that you can apply HTV to!
Here are a few of my favorite surfaces to apply HTV to:
- Clothing
- Hats
- Swimwear
- Neoprene
- Paper
- Cardstock
- Burlap
- Mesh
- Muslin
- Wood
- Fabric
- Canvas
- Chipboard
- Corkboard
- Faux Leather
- Leather
- Linen
- Nylon
- 100% Cotton
- Silk
- Cotton Poly Blends
- Felt
- Wool
- And more!
What Kinds Of HTV Are There?
HTV comes in a wide selection of colors, styles, patterns, and finishes.
Some of my favorites are:
- Everyday Iron-On
- Holographic Iron-On
- Foil Iron-On
- Flocked Iron-On
- Glow-in-the-Dark Iron-On
- SportsFlex Iron-On
- Patterned Iron-On
- Mesh Iron-On
- Mosaic Iron-On
- Glitter Iron-On
- Glitter Patterned Iron-On
What Supplies Do I Need For Using HTV That I Cut With My Cricut?
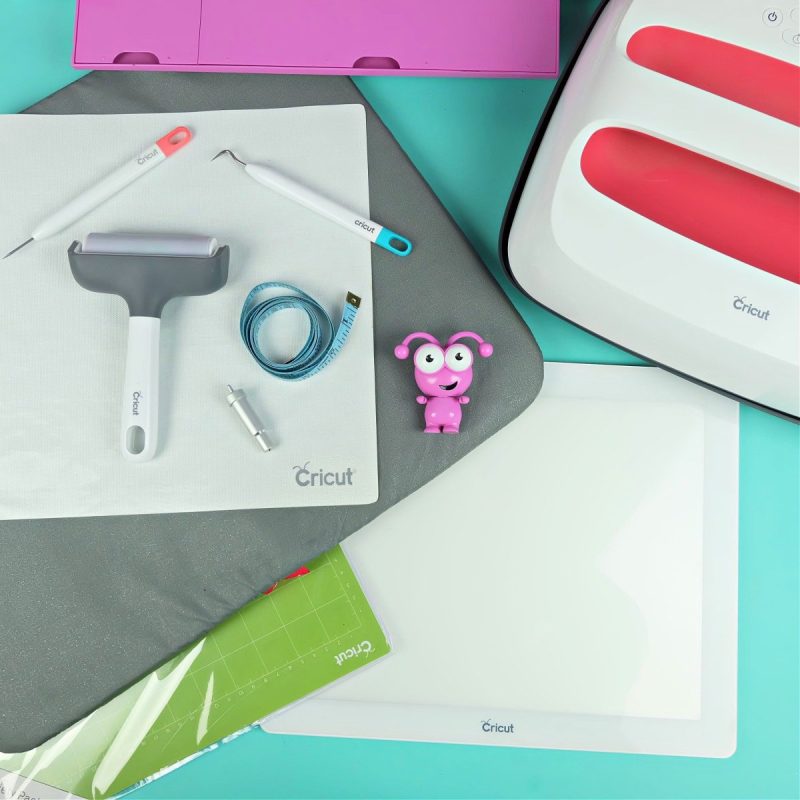
You have your HTV, you are all ready to cut it using your Cricut machine or other electronic cutting machine. What other supplies do you need? Great question! Here are a few things I recommend:
- Fine-tip cutting blade: This is your go-to blade for cutting HTV and most regular materials like vinyl, cardstock, scrapbook paper, and more.
- Regular grip cutting mat: A regular grip cutting mat has the perfect grip for keeping your HTV secure while cutting.
- Weeding tools: Weeding tools help you remove the “negative space” HTV from in and around your design. It’s especially helpful when weeding small letters and intricate designs. You also use weeding tools with vinyl and paper.
- Cricut Bright Pad: This one isn’t an absolute must, but if your eyes aren’t what they once were, then a Cricut Bright Pad is a big help. It looks like a large iPad with a variety of light settings. Lay your HTV over the top of the Bright Pad and your cut lines will become illuminated, making weeding much easier.
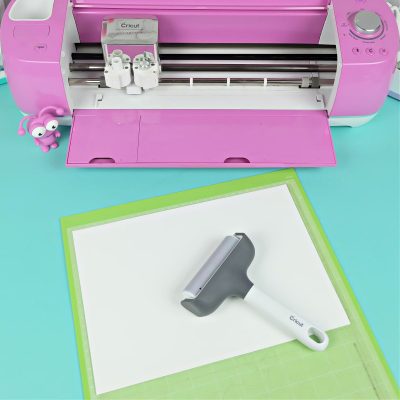
- Brayer tool: Having a brayer tool is especially handy when working with HTV. I love rolling my brayer over the top of my design between each press. I find that it really helps ensure that my HTV is pressed into and sticking to the fibers of whatever I’m adhering it to.
- Iron-On Protective Sheet: Made with a nonstick surface, iron-on protective sheets help protect your HTV from getting damaged by heat. They also help distribute the heat from your EasyPress, heat press, or iron more evenly.
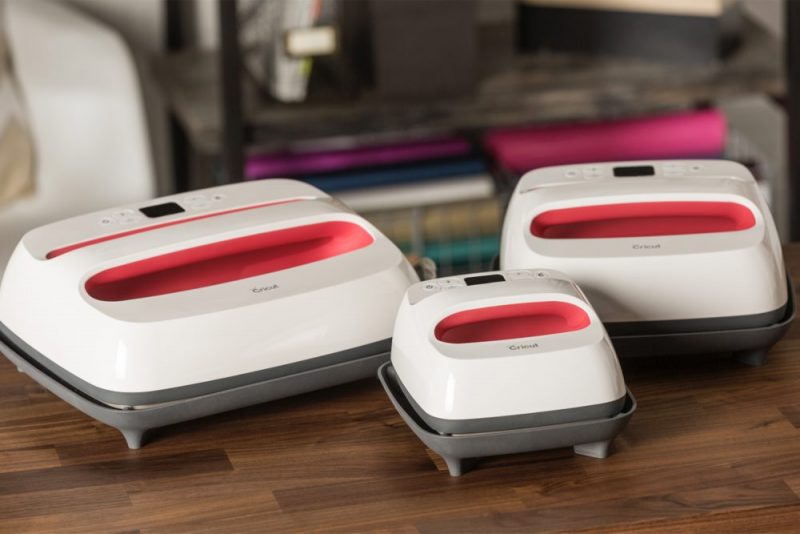
- Cricut EasyPress or Heat Press: The Cricut EasyPress is available in four sizes, all the way from an itty bitty EasyPress Mini to a 12 x 10–inch press that’s perfect for larger designs. Heat presses and EasyPresses have even heat signatures, precise temperature control, and an even pressure that helps you get flawless results. I definitely recommend and EasyPress or a heat press over an iron. Unfortunately a regular household iron doesn’t have the even heat signatures and exact temperature control that really work best for long lasting results. They can be used, but it usually takes longer and the results don’t hold up for as long.
- EasyPress Mat: This handy little mat isn’t just for protecting your work surface from heat (though it does that, too!). It has a special inner liner that wicks moisture to deliver clean, dry heat and a foil membrane that reflects heat to your project. The soft protec- tive barrier bottom also helps seal layers together for beautiful HTV results!
- Measuring tape: This one isn’t 100% required, but I love having a measuring tape on hand while using HTV so that I can measure to see what size I should cut my design, and then can make sure the designs is properly placed when I apply it.
- Pair of scissors and/or paper trimmer: This helps you trim your HTV down to the size you need it so that you aren’t throwing away excess materials.
HTV Lingo and Definitions


Curious about the different terms people throw around when talking about Cricut Crafts? I’ve got you covered!
Weeding: The process of removing the negative space around your design. So, for example, if you have your Cricut cut an “O,” you would need to remove the excess material from the part of the design around the outside of your O and the inside of your O, leaving just the letter itself on the plastic backing.
Mirror: To flip or reverse an image. You do this when cutting a design out of heat transfer vinyl (HTV) because you cut the HTV with the back side facing up on your cutting mat.
Kiss cut: To cut through just the first layer of a material, not all the way through. A kiss cut is used with HTV and vinyl. It means that your machine will just cut the HTV and not the plastic backing. This is something that your Cricut will do automatically for you when set to the correct material setting.
Heat Press: A machine used to heat your HTV and make it adhere to the material you’re attaching it to.
Carrier/Transfer Sheet: The clear plastic sheet that most HTV comes attached to (see more about this in the How To Transfer HTV That Doesn’t Come On A Carrier Sheet section below). You cut your HTV attached to the carrier sheet (shiny plastic side down) and iron your HTV to the surface you are applying it to with the carrier sheet in place. After the HTV is adhered the carrier sheet is removed.
Cold Peel/ Warm Peel/ Hot Peel: The temperature that your HTV should have cooled to before peeling away the clear plastic carrier sheet. Cold peel means you should allow it to cool completely before peeling away the clear plastic carrier sheet. Warm peel means you should allow it to cool to the point where it’s comfortable to touch before peeling away the clear plastic carrier sheet. Hot peel means you should peel away your carrier sheet while the HTV is still hot.
What’s the difference between HTV and Adhesive Vinyl
What’s the difference between HTV and regular vinyl? Great question.
HTV is a type of vinyl that needs heat to activate the adhesive and make it stick to the surface that you are applying it to.
Vinyl is more like a sticker or decal. It has the color or patterned side, then the opposite side is sticky so that it sticks to the surface that you are applying it to, no heat required.
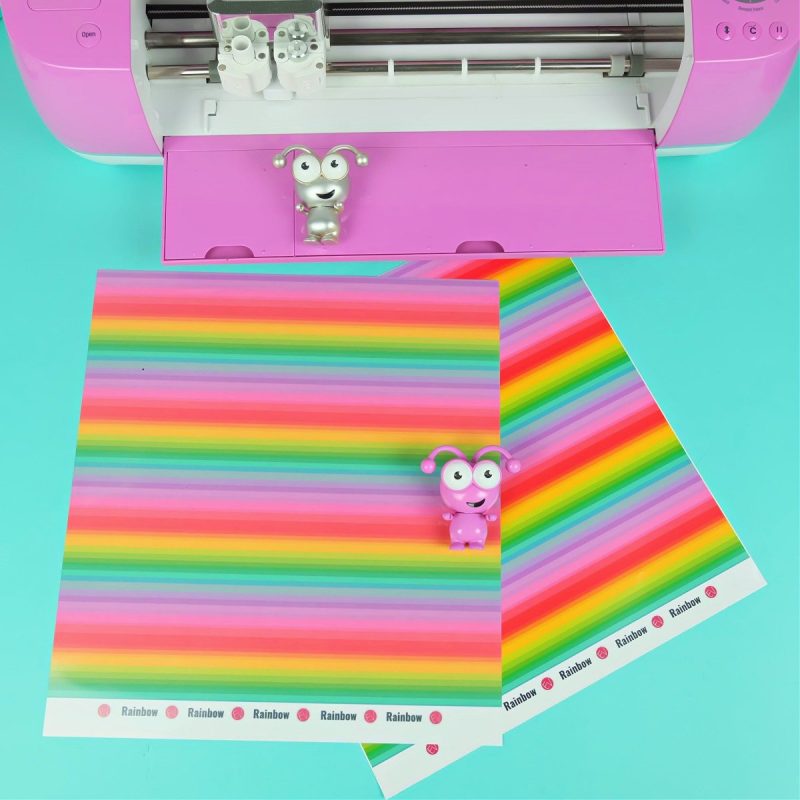
Sometimes they can be hard to tell apart at first glance. In the photo above I have Rainbow HTV from Expressions Vinyl (left) and Rainbow Vinyl from Expressions Vinyl (right). The HTV has a thin clear plastic layer (aka clear carrier sheet) on top of the HTV, and the vinyl has a paper backing like a sticker.
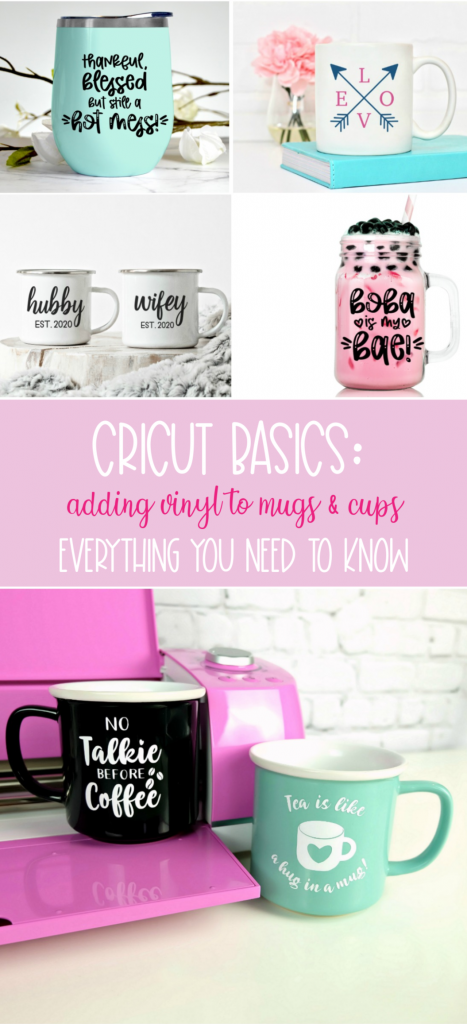
Want to read more about vinyl including how to cut vinyl decals and apply them? Check out my post on Applying Vinyl To Mugs, Cups and other Hard Surfaces.
How To Cut HTV On A Cricut Cutting Machine
Now that you have a great overview on what HTV is and what you can apply it to, let’s learn how to cut it and apply it to a surface!
Scan to the bottom of this blog post for a printable version of this tutorial.
Materials
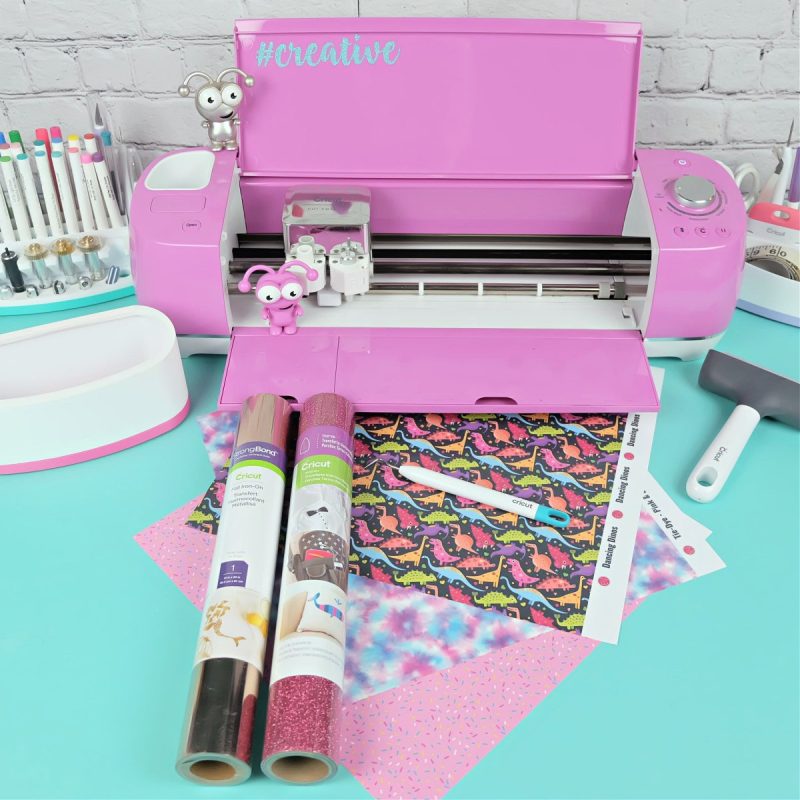
- Cricut Joy, Cricut Explore or Cricut Maker
- Cut file
- Measuring tape
- Surface that you are applying your HTV to
- HTV
- Regular Grip Cutting Mat
- Fine-tip cutting blade
- Weeding tools
- Cricut EasyPress, heat press or iron if you’re in a pinch
- EasyPress Mat or a towel to protect your work surface
- Optional: Brayer tool and iron-on protective sheet
Note: While this tutorial is specifically for Cricut Design Space and Cricut craft cutters, the process would be very similar for other machines and design software including Silhouette Studio.
Directions
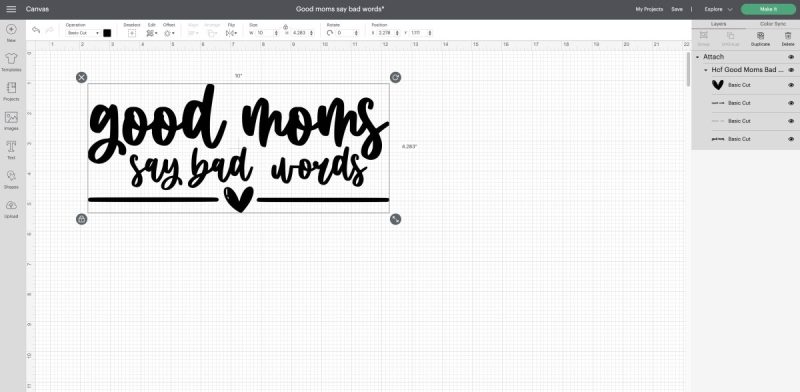
Step 1: Log into Cricut Design Space. Either select an image from the image library, or upload a cut file to Design Space. See my instructions on how to upload a cut file to Cricut Design Space here.
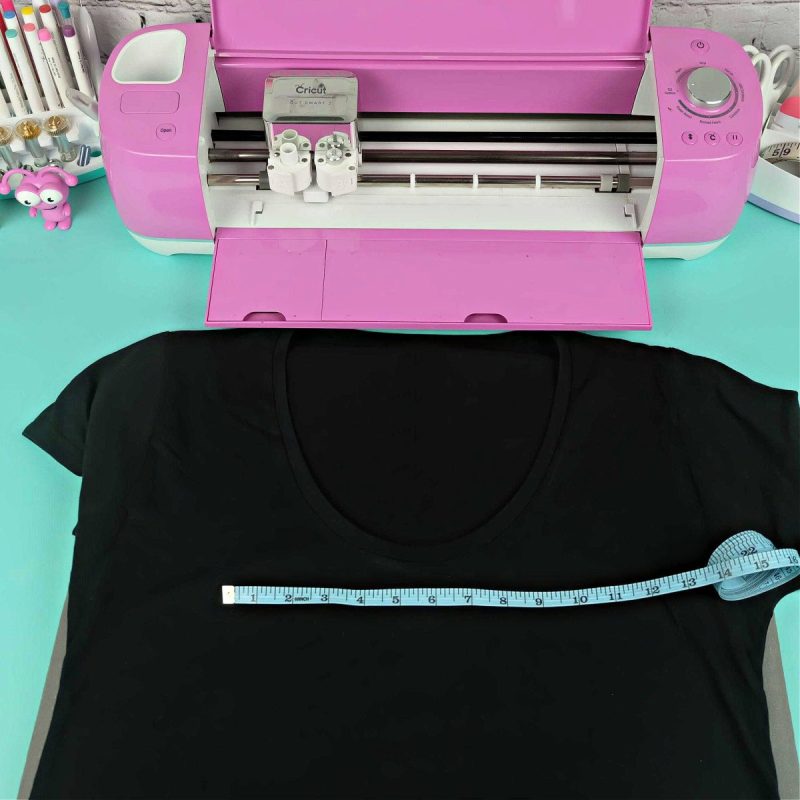
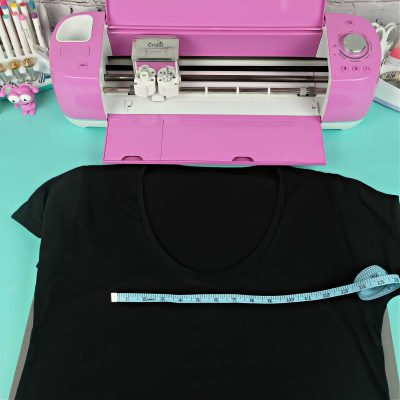
Step 2: Measure the area where you will be applying your design using your measuring tape. Size your design by clicking on it and using either the arrow that appears in the bottom right-hand corner of the design or the Size tool in the top toolbar.
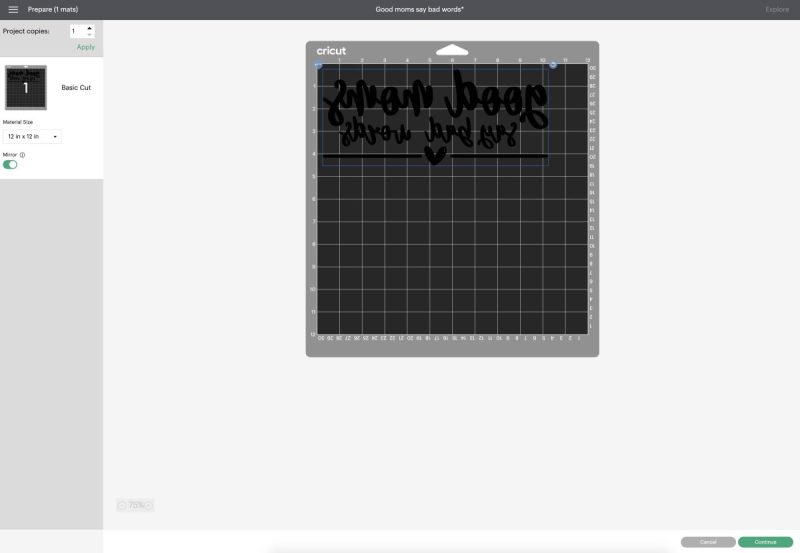
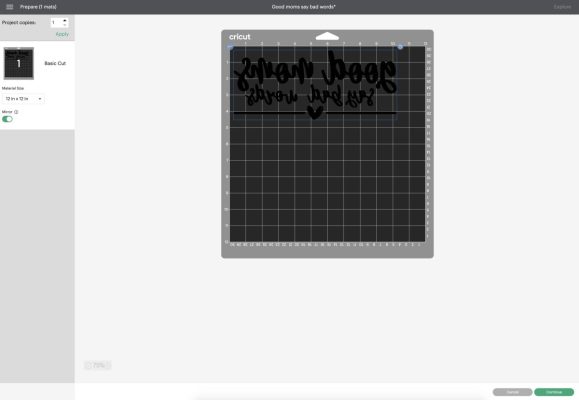
Step 3: Click Make It in the right corner of the screen. Click the mirror slider under each cutting mat on the left-hand side of the screen. Then follow the steps on the screen to connect your Cricut, choose your cutting material and other cut settings. I always keep my smart set dial set to Custom on my Explore machine so that I can choose the exact type of material that I am using.
Note: When using a type of HTV that you haven’t used before you might want to do a test cut before cutting the entire design to test that you have the correct settings for that type of HTV.
Step 4: Lay your iron-on with the color/shiny side down on the cutting mat and the dull side up.

Step 5: Load your cutting mat into the machine using the arrow on the right-hand side of your Cricut. Once your mat is loaded, look for the Cricut C to start flashing, press the button, and your machine will start cutting. When your machine finished cutting, press the arrow again and your mat will unload. Repeat with each color of HTV until your design is finished cutting.
Step 6: Weed your HTV using your weeding tool, removing the excess vinyl from around your design, leaving just the design on the clear plastic backing.

Step 7: Lay your HTV on the surface you are applying it to with the shiny plastic facing up, and your weeded HTV against the surface you are applying it to. Follow the instructions for applying the type of HTV you’re using to the material that you are applying it to. I like using the Cricut Heat Guide for this.

Step 8: Carefully peel up the clear plastic liner and just like magic reveal your beautiful design below (make sure you check if the HTV you are using requires a cold peel, warm peel or hot peel).

Want to make your own t-shirt? Get our free Good Moms Say Bad Words SVG file here.

Want more free cut files? Make sure you check out our Free SVG Files Category along with this post on 75+ Places to get free SVG files!
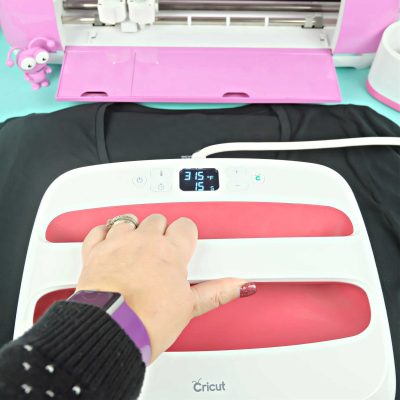
How Do You Know What Temperature To Heat HTV At?
Different brands and types of HTV have different temperature and time settings for applying it. To make things even more confusing sometimes your temperature and time settings are different depending on what kind of surface you are applying it to– for example applying Cricut Everyday Iron-On to a shirt, has different settings from applying it to wood, which has different settings than applying it to paper.
My suggestion is to always check the packaging and/or visit the manufacturer’s site to figure out what temperature you should be heating your heat press to, and how long you should press for.
I also love using Cricut’s Temperature Guide, which lets you pick the type of iron-on you are using, what you are applying it to, and what kind of work surface you are using. It then gives you custom instructions for pre-heating, temperature, press time and if you should cold peel or warm peel.
You can find the Cricut Temperature Guide here.
How To Transfer HTV That Doesn’t Come On A Carrier Sheet
99% of the HTV on the market will arrive to you on a carrier sheet that you cut mirrored and then apply to your surface with the plastic acting as a barrier between the design and your heat source. But what about the HTV that doesn’t come on a carrier sheet?
I’ve actually never encountered any HTV that doesn’t come on a carrier sheet, but they do exist. When you find them the colored or patterned part of the HTV will be facing up, and the plastic sheet is on the back. In most cases this plastic sheet is not sticky, and the HTV is stuck to it with static cling. So what do you do?
- DO NOT mirror your design.
- Put your HTV on the mat with the pattern or color facing up.
- Cut and weed your HTV
- Cut a piece of Easy Mask or another carrier sheet slightly larger than your design.
- Lay the Easy Mask on top of your design with the sticky side against your design. Rub a scraper tool all over the Easy Mask, burnishing it to your design.
- Peel up your Easy Mask making sure the design lifts off the plastic it was originally attached to.
- Lay the Easy Mask onto the surface that you are adhering it to. Follow the heat and time instructions for applying it to the surface you are applying it to.
- Peel away your carrier sheet leaving the design behind.
How To Remove HTV From A Shirt Or Other Surface
You have applied your HTV to your surface and you hate it. Now what?
It happens to the best of us, and it can be so frustrating. Luckily you have two different options.
- Sometimes you can get your HTV to release from the surface you adhered it to by overheating it. Work slowly and a bit at a time to heat your HTV and try to peel it up. It doesn’t work every time, but I have had some success with it on both wood and fabric. One thing to note is that you will usually have adhesive stain left behind, so you’ll want to make sure that you redo your HTV and cover it.
- There is a chemical called VLR Vinyl Liftoff Remover that can be used on fabric to remove HTV from the surface. You can find it here.
Where To Buy HTV/ My Favorite Brands of HTV
I have three types of HTV that I tend to use the most:
- Cricut Iron-On: This is my go to for Cricut Everyday Iron On and Glitter Iron On. It’s easy to find at most craft stores, and you can get great deals on it on the Cricut website. It’s available in a wide variety of color options.
- Expressions Vinyl: This is my go to for patterned HTV. They always have the most amazing collection of fun patterns and speciality vinyl. I have a subscription to their Mystery Box, where they ship a collection of HTV and Vinyl every few months and they give you project ideas and free cut files that you can make with the collection they send you.
- Poli-tape HTV- Cricut used to have a flocked HTV that I absolutely loved, but they discontinued it. The flocked vinyl takes me right back to the 80’s. It’s so soft and fuzzy. Poli-tape sells flocked HTV along with other fun HTV.
And there you have it, everything that you need to know to cut HTV with your Cricut Joy, Cricut Explore or Cricut Maker! Have a question? Pop it in the comments and I’ll answer and add your question to this post!
If you like Hello Creative Family and this post, you will also love my Cricut books. I teach how to use a wide variety of materials in a ton of different ways to make beautiful one-of-a-kind projects! Plus they include free cut files!
If you like this Cricut Basics- Everything You Need To Know About HTV Vinyl post on I would love for you to pin it to Pinterest! It helps others discover our site which helps us bring you more awesome content like this!
Want more Cricut Basics? Check out our Cricut Basics section and these awesome Cricut posts.


How To Cut HTV On A Cricut Cutting Machine
Instructions
- Log into Cricut Design Space. Either select an image from the image library, or upload a cut file to Design Space.

- Measure the area where you will be applying your design using your measuring tape. Size your design by clicking on it and using either the arrow that appears in the bottom right-hand corner of the design or the Size tool in the top toolbar.

- Click Make It in the right corner of the screen. Click the mirror slider under each cutting mat on the left-hand side of the screen. Then follow the steps on the screen to connect your Cricut, choose your cutting material and other cut settings. I always keep my smart set dial set to Custom on my Explore machine so that I can choose the exact type of material that I am using.Note: When using a type of HTV that you haven’t used before you might want to do a test cut before cutting the entire design to test that you have the correct settings for that type of HTV.

- Lay your iron-on with the color/shiny side down on the cutting mat and the dull side up.
- Load your cutting mat into the machine using the arrow on the right-hand side of your Cricut. Once your mat is loaded, look for the Cricut C to start flashing, press the button, and your machine will start cutting. When your machine finished cutting, press the arrow again and your mat will unload. Repeat with each color of HTV until your design is finished cutting.
- Weed your HTV using your weeding tool, removing the excess vinyl from around your design, leaving just the design on the clear plastic backing.
- Lay your HTV on the surface you are applying it to with the shiny plastic facing up, and your weeded HTV against the surface you are applying it to.
- Follow the instructions for applying the type of HTV you’re using to the material that you are applying it to. I like using the Cricut Easy Press Temperature Guide for this.
- Carefully peel up the clear plastic liner and just like magic reveal your beautiful design below (make sure you check if the HTV you are using requires a cold peel, warm peel or hot peel).


Notes
Equipment
- Cut file
- Surface that you are applying your HTV to
- HTV
- Fine-tip cutting blade
- Cricut EasyPress, heat press or iron if you’re in a pinch
- EasyPress Mat or a towel to protect your work surface