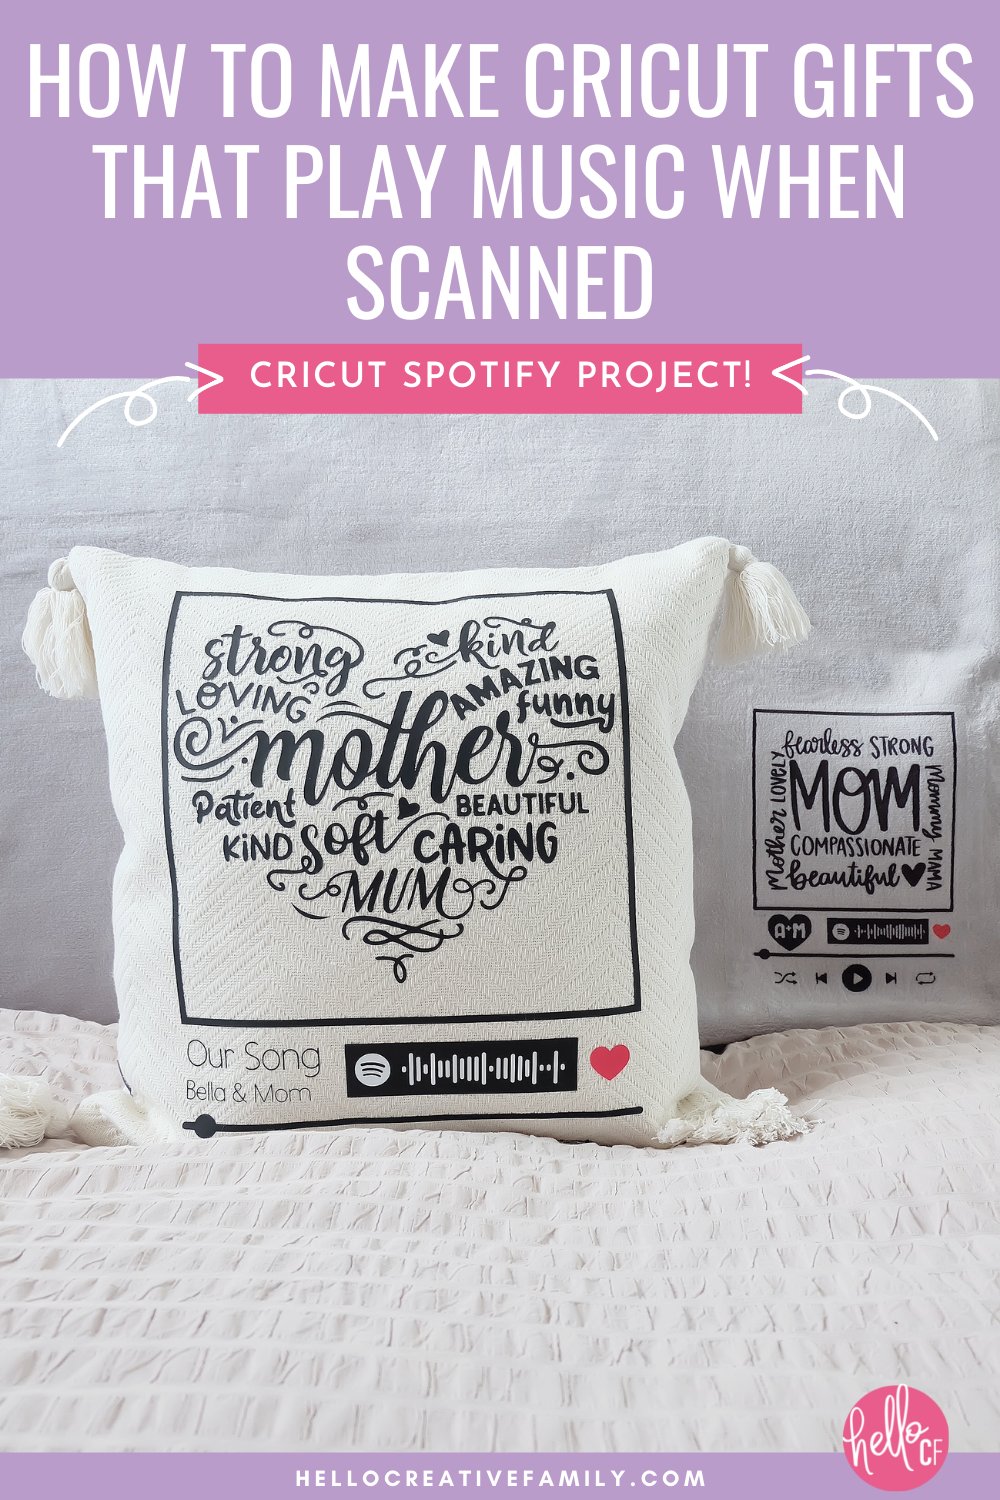
How To Make Gifts That Play Music When Scanned- Spotify Cricut Project
This post and the photos within it may contain Amazon or other affiliate links. If you purchase something through the link, I may receive a small commission at no extra charge to you.

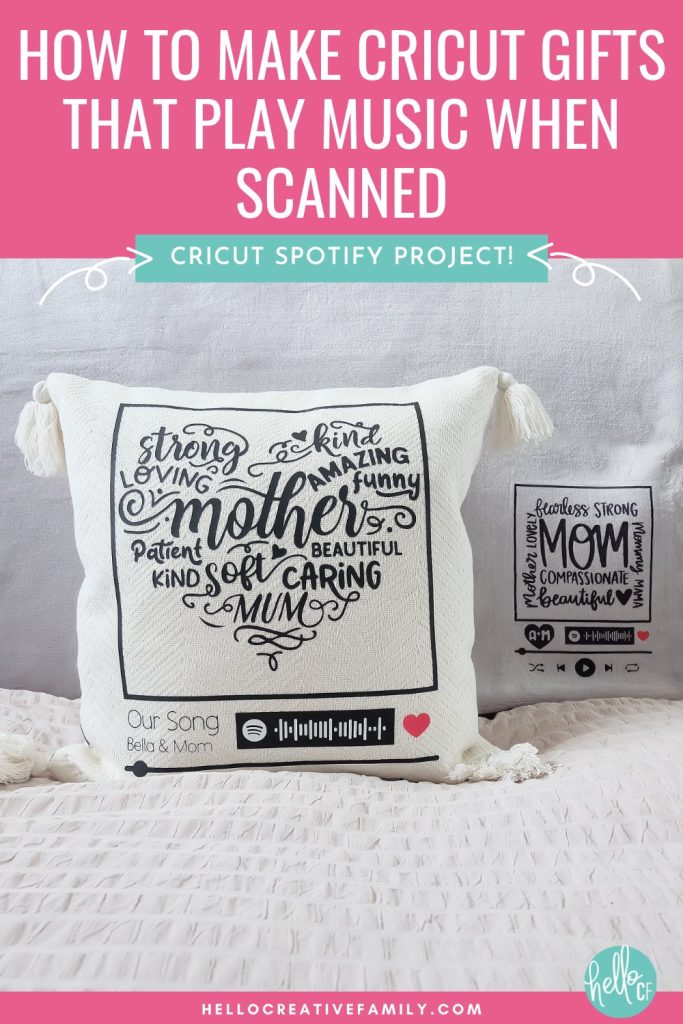
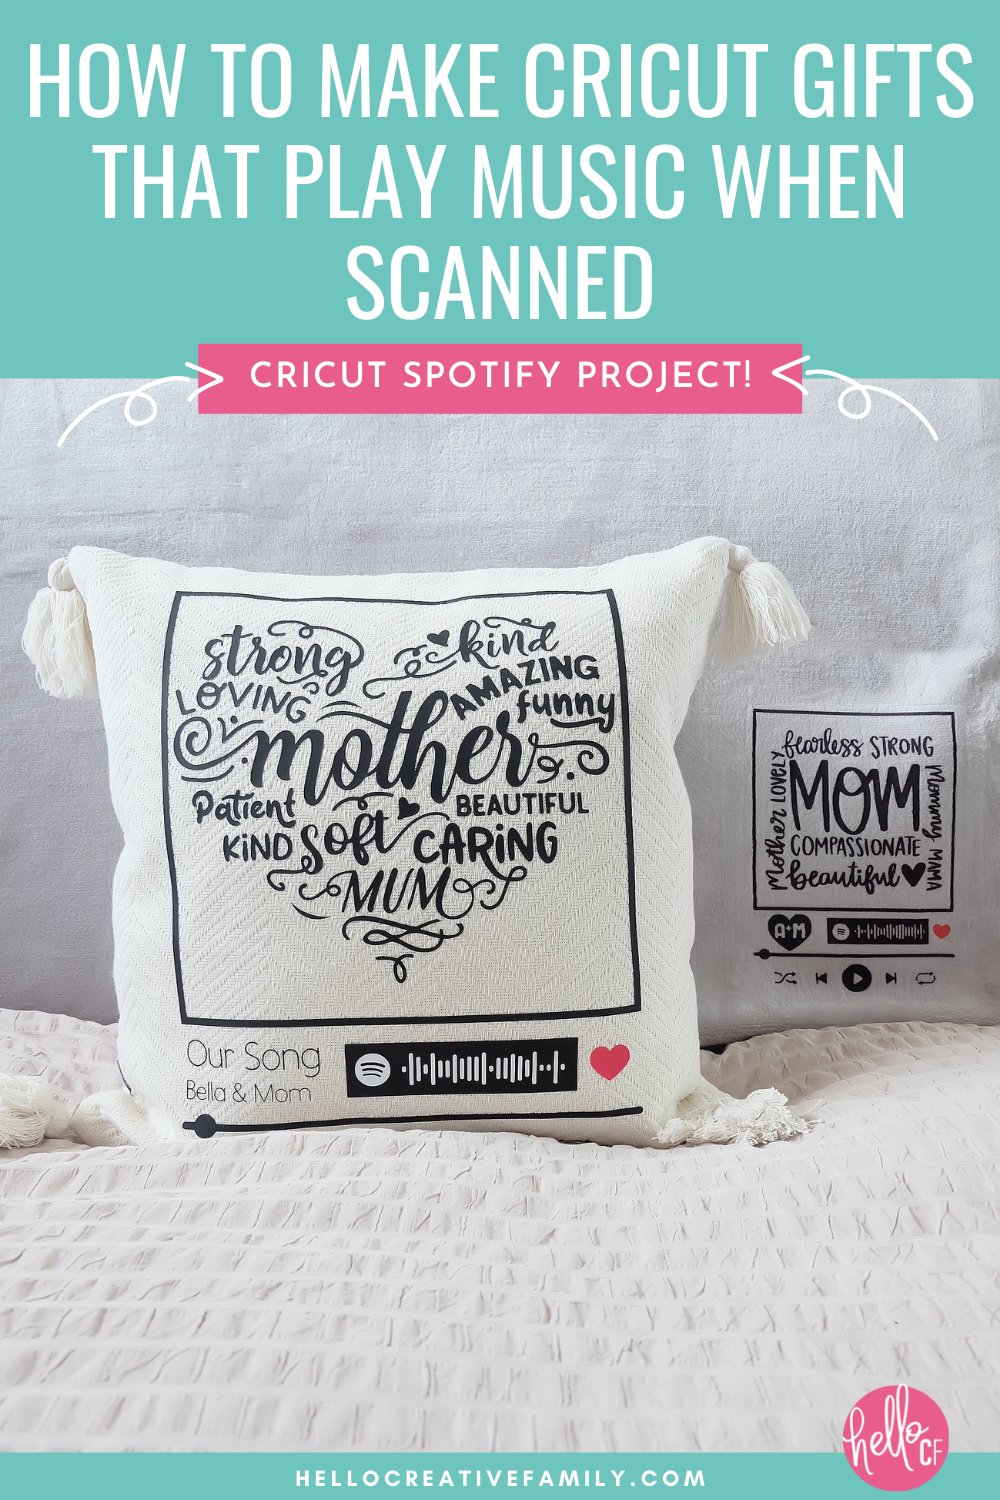
Learn how to make a DIY pillow and blanket that plays a special song when scanned using your Cricut and Spotify! Learn how to make this special project step-by-step including creating a Spotify scan bar, selecting the perfect pillow or blanket, setting up your design and cutting and applying it using either Infusible Ink or HTV. The perfect handmade gift for Mother’s Day, Weddings and Anniversaries!
Disclosure: Thank you to Cricut for sponsoring this project and post. As is with every article on Hello Creative Family, all thoughts and opinions are 100% our own.
Hi Crafty Friends!
I come from a long line of music lovers. When I think back to my childhood, I hear a soundtrack of music playing in my head.
Bill Withers and his song, Lovely Day, playing on Sunday morning as my dad flips pancakes in the kitchen.
Dire Straights blasting in the car as my mom drove the twists and turns around Lake Whatcom taking us to and from our summer day camps.
Singing along loudly to Paul Simon’s Graceland album and Bonnie Raitt’s Nick of Time album as we drove off the ferry and headed to the cabin each August.
Though I have no memory of it, my parents have even told me that the very first thing that they did when bringing me home from the hospital was put Stevie Wonder’s Isn’t She Lovely on the record player as they took a moment to breath and take in every inch of me.
Music has always been a part of my life and is now a big part of my children’s life as well. It’s one of my great joys that my kids love and sing along to the music that I grew up listening. That’s why I’m so excited to share today’s Cricut project with you.
Gifts For Mom With Thought Put Into It
Cricut asked me to create a Mother’s Day gift and share it with all of you. I sat down and had a serious think about what kind of Mother’s Day gift I would like to receive. My husband is always asking me “what I want” for birthdays, Christmas and Mother’s Day and I often draw a blank.
I’ve gotten to the point in my life, that if there is something that I want from the store I will buy it myself. The gifts that mean the most to me, are gifts that truly show me that the person knows me and was really thinking about me.
One year I wept beneath the Christmas tree because my husband bought me a set of vintage Pyrex bowls. My mom said “They are really nice, but why are you crying?”
I told her that I had broken my vintage Pyrex bowl a year before. It had gutted me. The bowl had reminded me of one of my grandma’s treasured mixing bowls, and had taken me the longest time to find. I had only owned it for a year or so and was so upset with myself for dropping it.
The bowl had slipped from my soapy fingers and smashed on the floor. I cried when it happened and kept running it over and over and over again in my head. My husband had told me to let it go and move on.
9 months later, in preparation for Christmas, my husband had found a man who had his own little thrift shop in his basement. In his Craigslist ad, one of the things he listed having was vintage Pyrex. My husband, without my knowledge, went to this man’s house, combed through his basement, and found a beautiful set of bowls for me.
It’s not often that someone in my family is able to surprise me, and this gift was one that had so much thought, emotion and love poured into it. Those are the types of gifts I love to give and receive.
DIY Pillow And Blanket That Plays Music When Scanned
When I started brainstorming ideas for my Cricut Mother’s Day Gift, I wanted to find a gift that was a more than a gift.
I wanted to come up with a gift that was love, emotion and thoughtfulness all rolled into one.
A gift that really let mom know that you know her and had put thought into her present.
I think I came up with the perfect idea.
My family loves snuggling on the couch together, listening to music, reading books, sipping tea and spending quiet time in each other’s company.
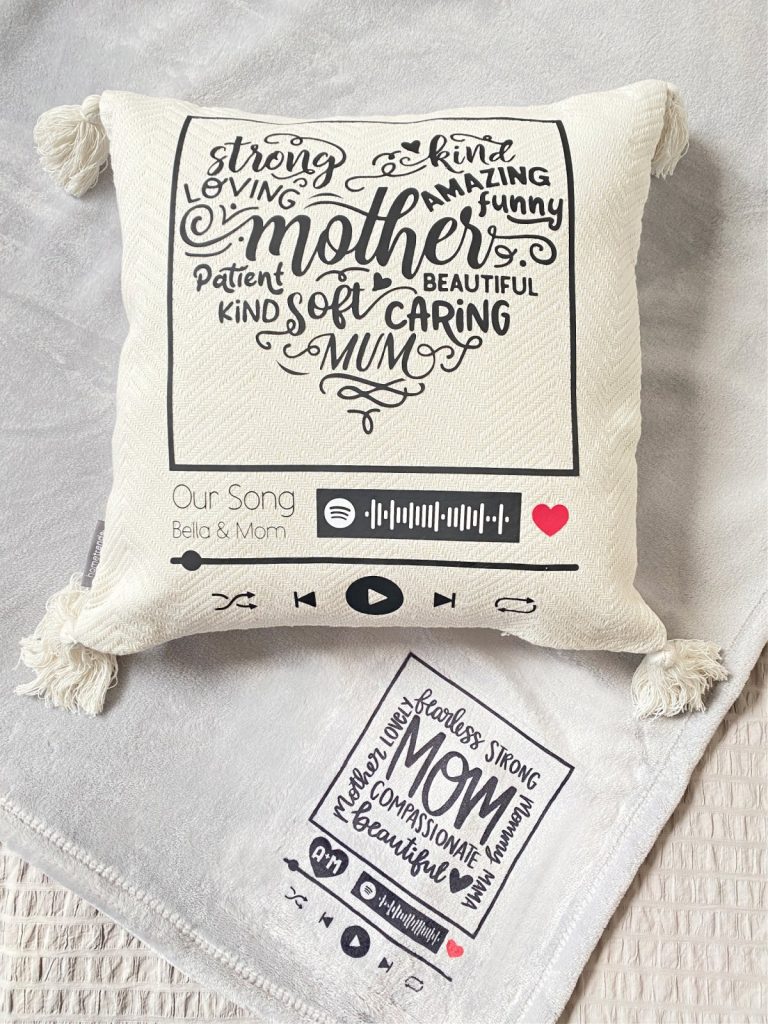
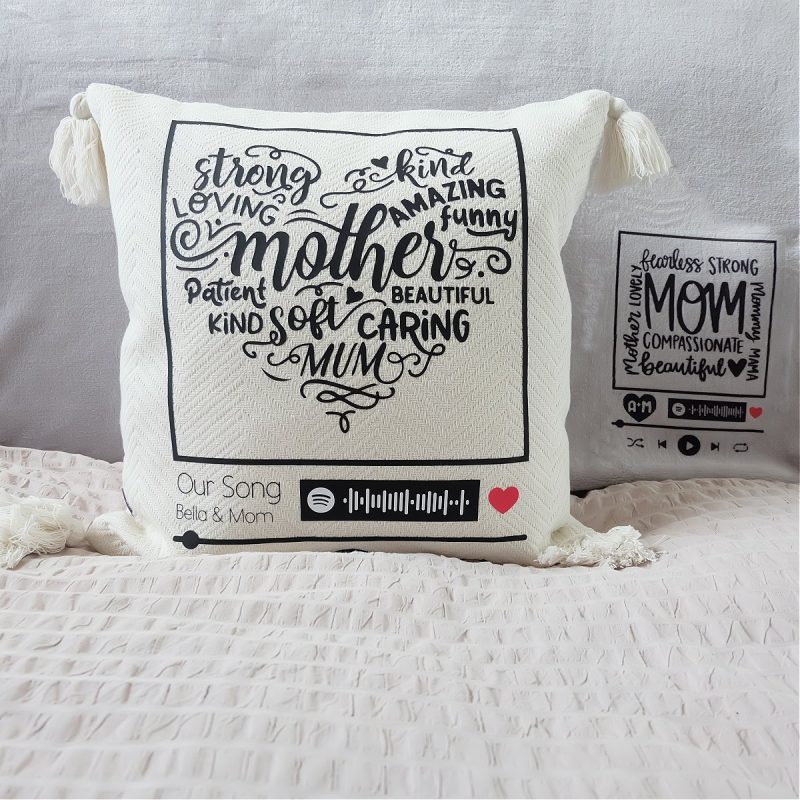
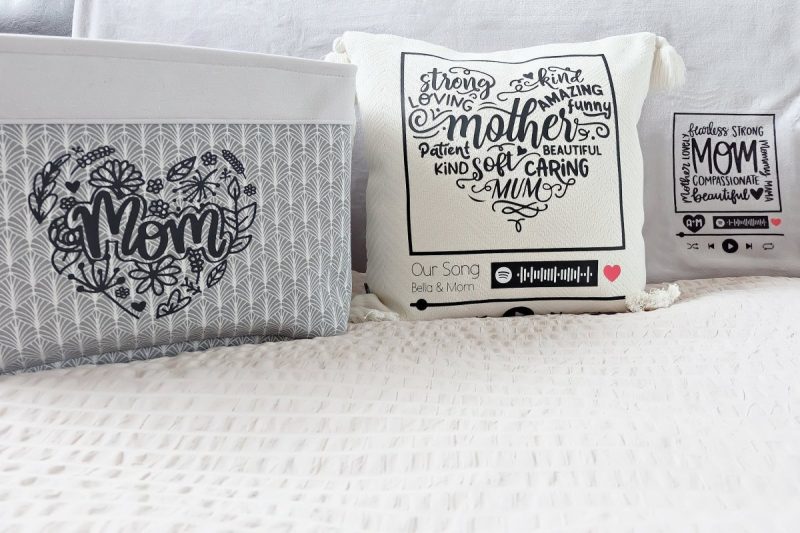
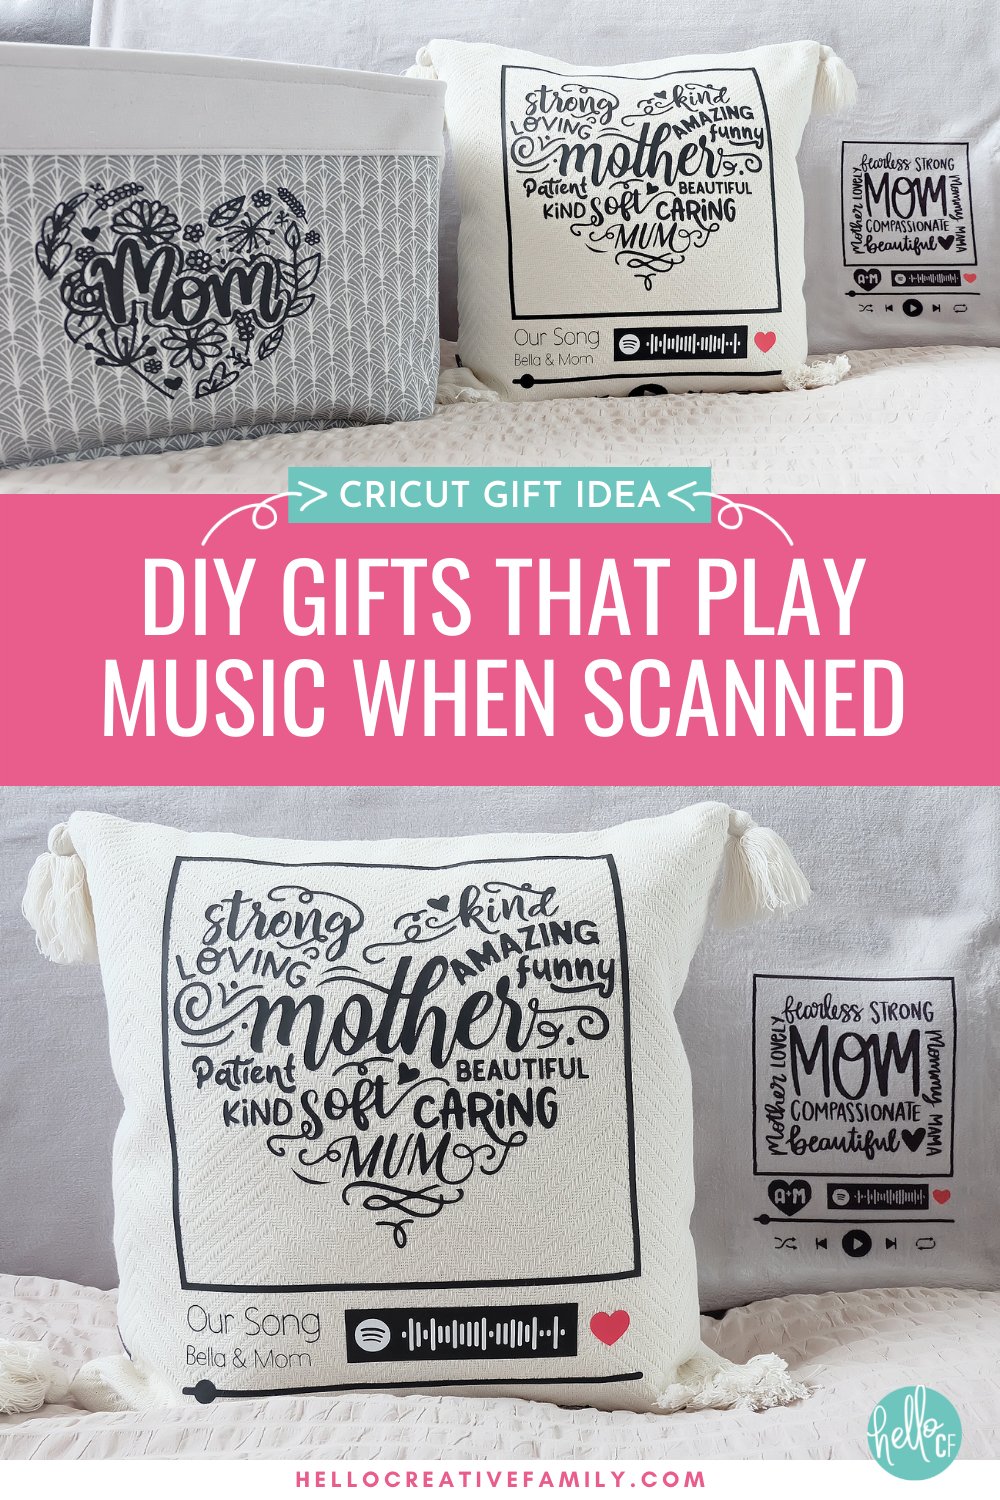
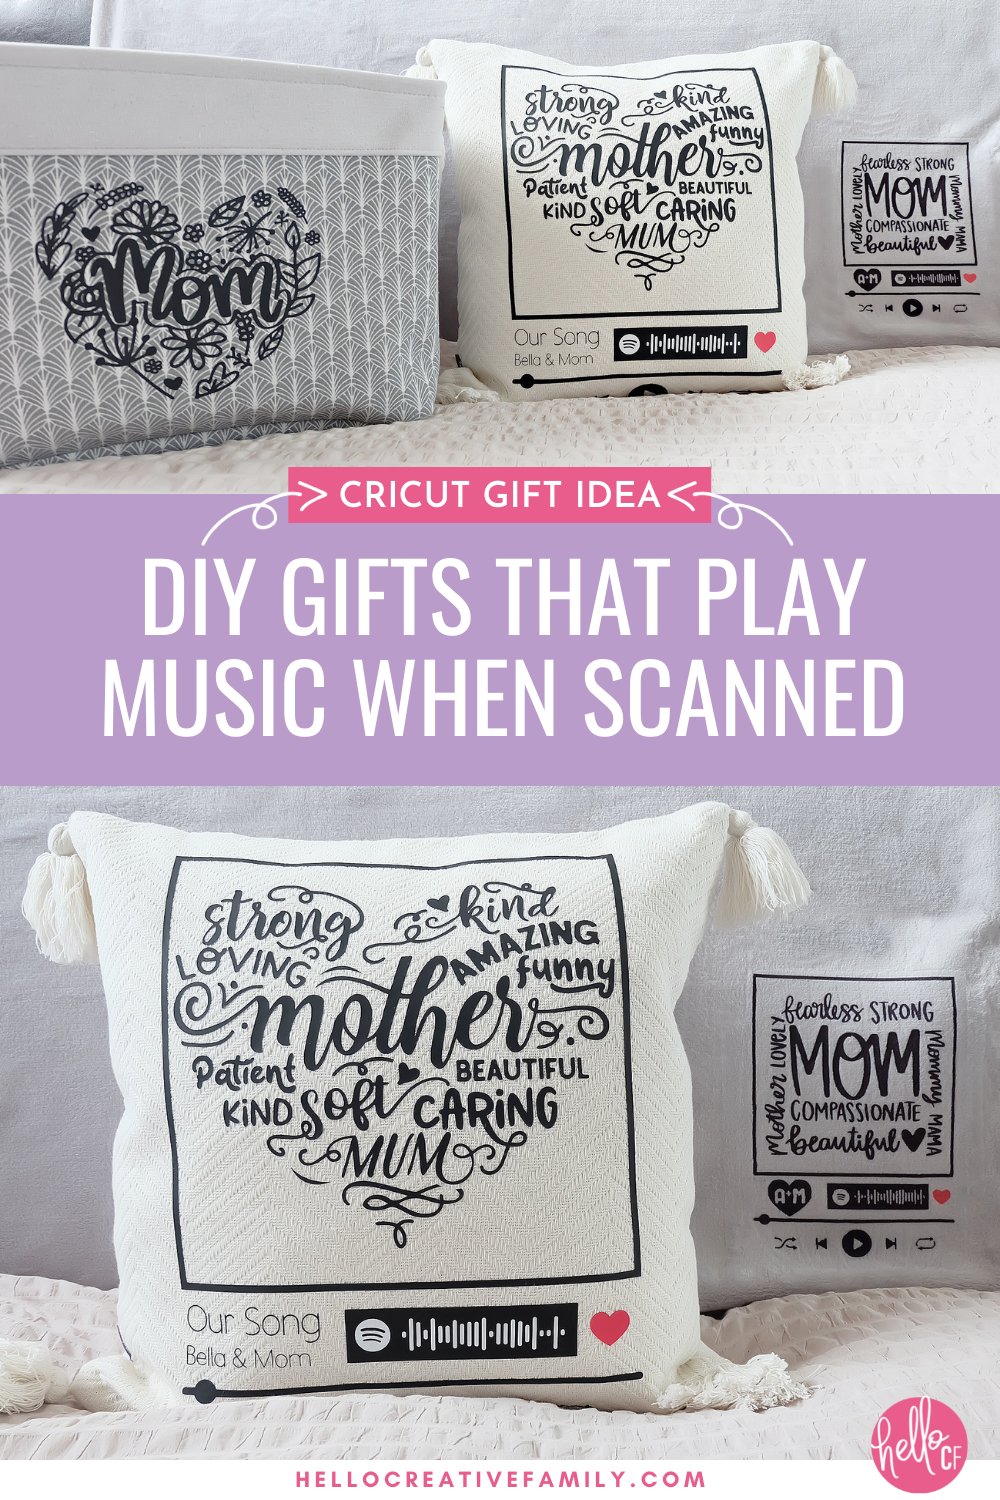
I decided to create a beautiful pillow and throw blanket for mom, with a bar code that she can scan with her phone that will play a song or playlist that her children have selected for her.
The barcode is included with a beautiful design all about moms and why we love them so much. This project speaks to my heart, and I certainly hope it speaks to yours too! It would also make such a good wedding or anniversary present!
Where To Buy Cricut Blanks and Supplies
One of the questions I get asked a ton in my Cricut Facebook Group is where I buy my blanks from. It can be hard answering that question when I have readers all over North America and frankly the world!
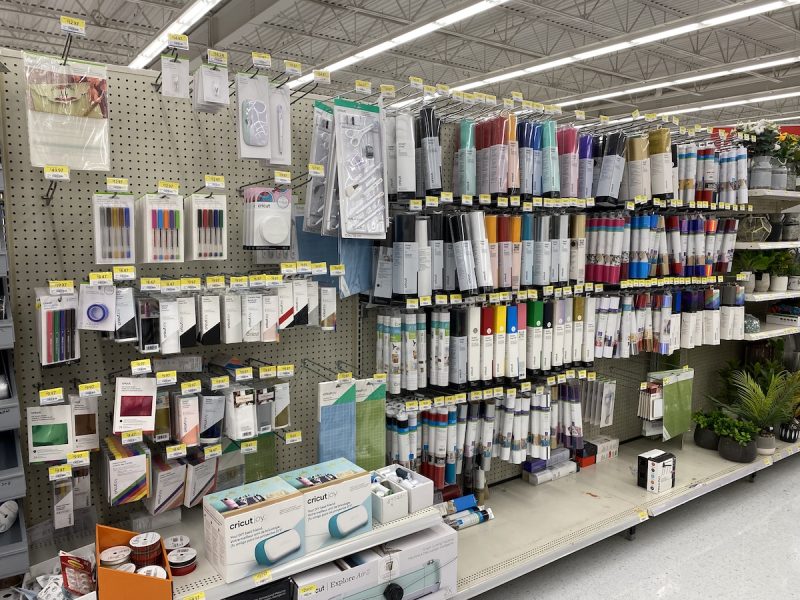
Lucky for my readers, one of my favorite places to shop for blanks to Cricut on can me found all across North America and even the UK– Walmart! (UK readers will know Walmart as ASDA.)
One of my favorite things to do when I’m doing “kid free shopping” is browse the aisles, looking for fun things to Cricut on.
I hit up almost all the sections at Walmart– The home decor section for pillows, blankets, baskets and more. The clothing sections for t-shirts, hoodies and sweatshirts (in particular I love the George brand.) The kitchen section for mugs, cups, tumblers, dishtowels and pantry canisters. The seasonal section for adorable holiday themed items. And let’s not forget the Cricut aisle to stock up on iron-on, vinyl, Infusible Ink and the latest and greatest Cricut accessories!
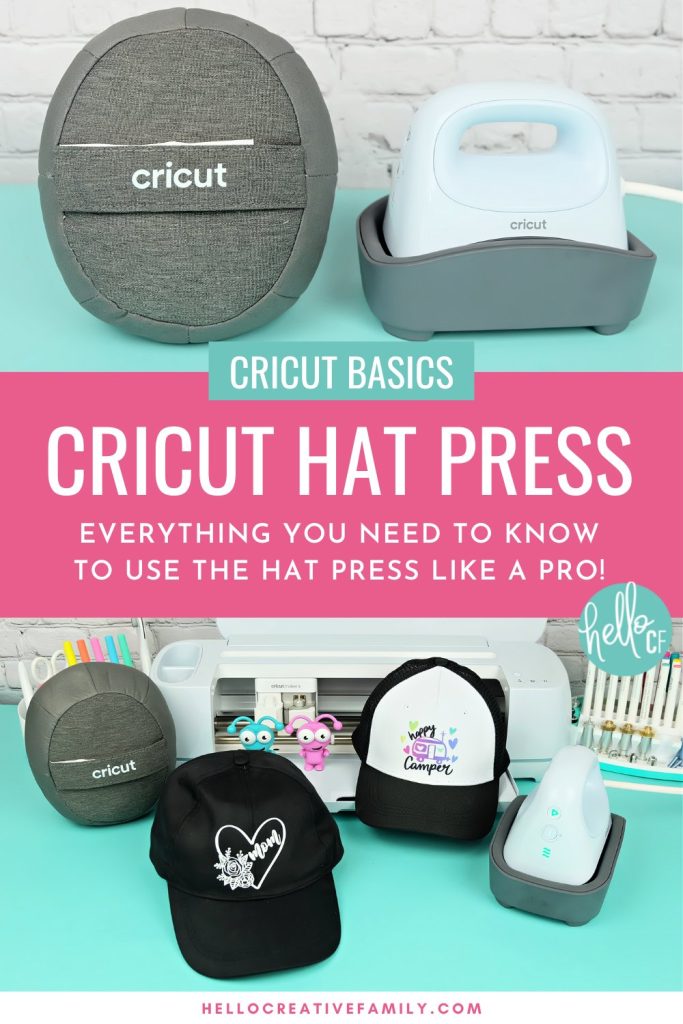
Speaking of accessories– on my last trip I stopped in the women’s and kids accessories section and found some amazing hats that I used to make Mommy and Me hats for the kids and I using the Cricut Hat Press!
Read about the Cricut Hat Press here.
All of the supplies and materials I used in today’s post including my Cricut Maker 3, Cricut EasyPress, Infusible Ink, iron-on, weeding tools, blanket, pillow and basket can be purchased at Walmart. They have a huge variety of Cricut machines, materials, supplies and things to Cricut on in store and online!
Visit the Walmart Cricut page here.
Ready to learn how to make this heartfelt gift idea with a step by step tutorial? Read on!
How To Make A Spotify Song Code To Cut With Your Cricut
The first thing you will need for this project is to get your Spotify Code SVG.
To obtain this, first open the Spotify app on your computer or smart phone. Use the search bar to look for the song name, artist name or playlist that you would like to use for your project. Once you have found it, click the three dots that look like “…” and look for the “Share” option. Click share and then “Copy Song Link”.
From there visit the Spotify Codes Website Here. Enter your song link, then you’ll be given an option to select the color for your bar in the background color code field, the color for your code in the bar color field and what file you would like to download your code in the format section (you have the option of jpeg, png or SVG. You’ll want to choose SVG.)
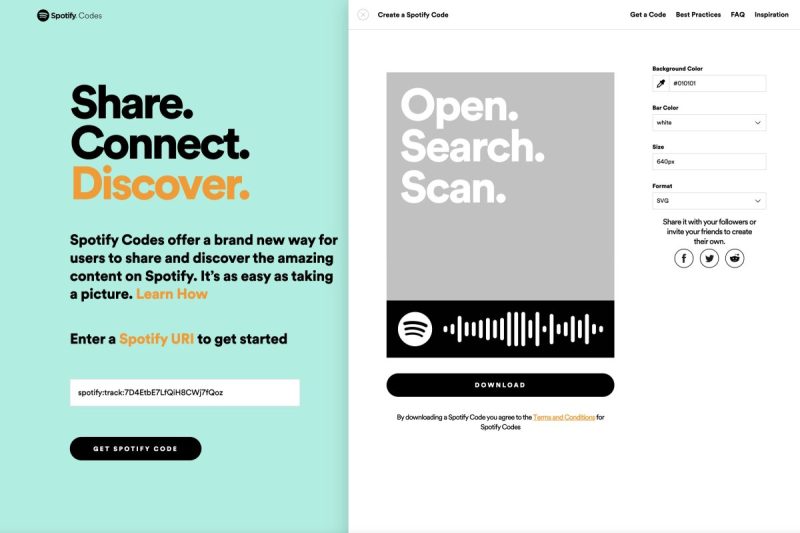
I selected black for my bar, white for my code and SVG for my file type. Download your SVG and then upload it to Cricut Design Space.
For more information about how to upload an image to Design Space see this post.
Note: The SVGs that you download from Spotify are for personal use only. They should not be sold, because you don’t have permission from the musical artist to profit from their work. I also chose not to use the album cover or Spotify artwork for this reason.
Personalizing Your Project Using Cricut Access
Next you will want to choose the images that you use for your pillow and blanket. All of the images that I use in this project (with the exception of the Spotify code) or available for free with a Cricut Access Subscription or you can pay for each image individually.
For more information on my thoughts about Cricut Access read this post.
I love that Cricut Access gives you thousands and thousands of images to use without having to purchase them all individually. The possibilities really are endless, especially if you use Cricut Access the way I do. It’s like you have an endless free resource library at your fingertips!
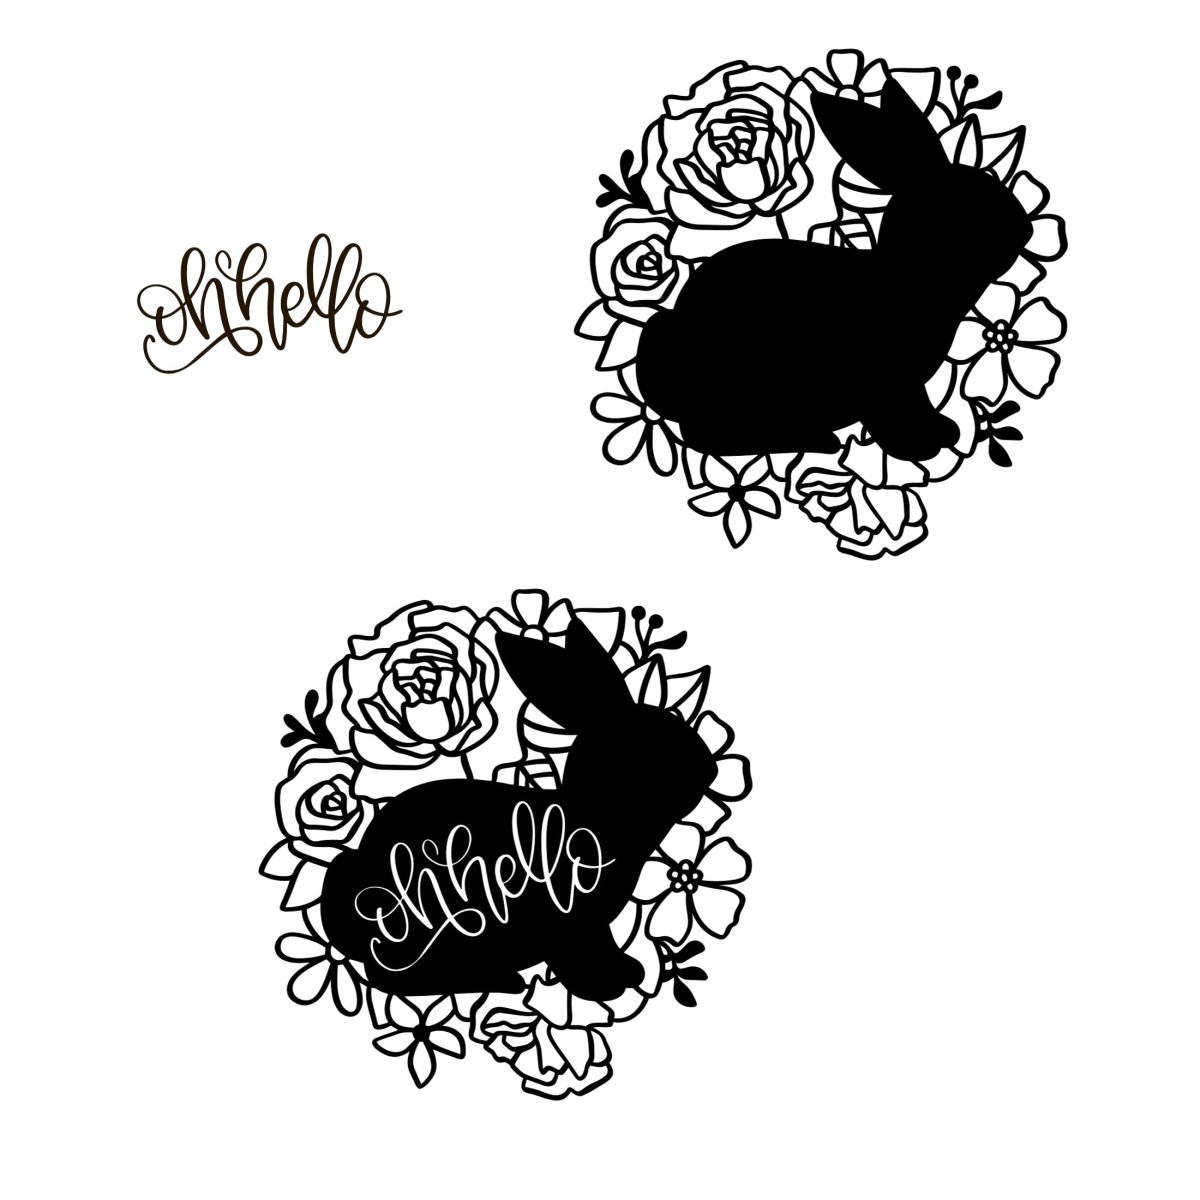
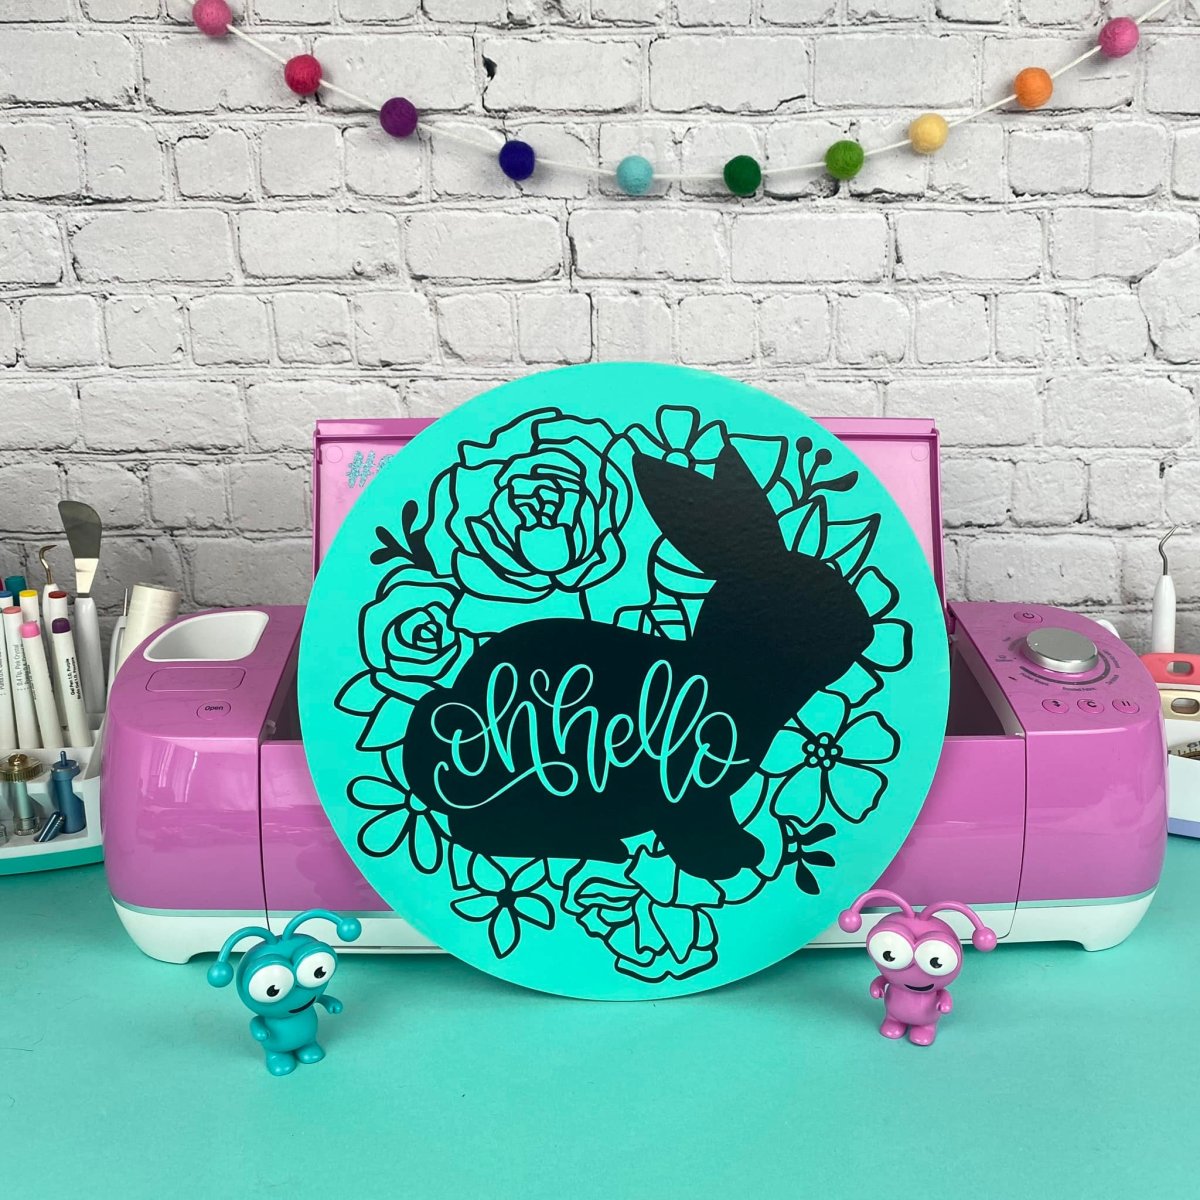
I love taking different elements and combining them together to make a one of a kind project. Like I did for this project, and with my recent Oh Hello Bunny Front Door Sign. Where I took an “Oh Hello” design and a floral bunny design and used the slice button to turn it into one image.
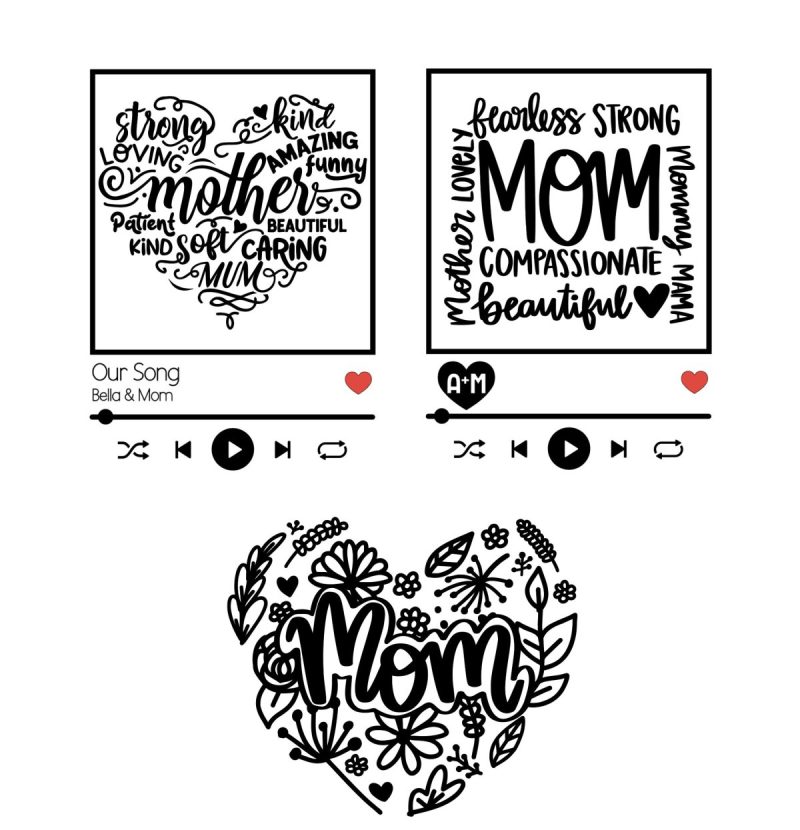
For my blanket and pillow projects, the names of the cut files and fonts I used from Cricut Access are as follows:
- Font for A&M: Agent Q
- Font For Our Song and Bella & Mom: Dear John
- Mom Design For Blanket: Mom Word Art Collage:
- Mom Design For Pillow: Words To Describe Mum
- Mom Design For Basket: Mom
- Music Player Designs With Play Button, Square Frames, Music Bar and Love Button: Music Player Song Template
You can find my Cricut canvas here that you can customize to make your own.
How To Use Infusible Ink To Make Mother’s Day Blanket
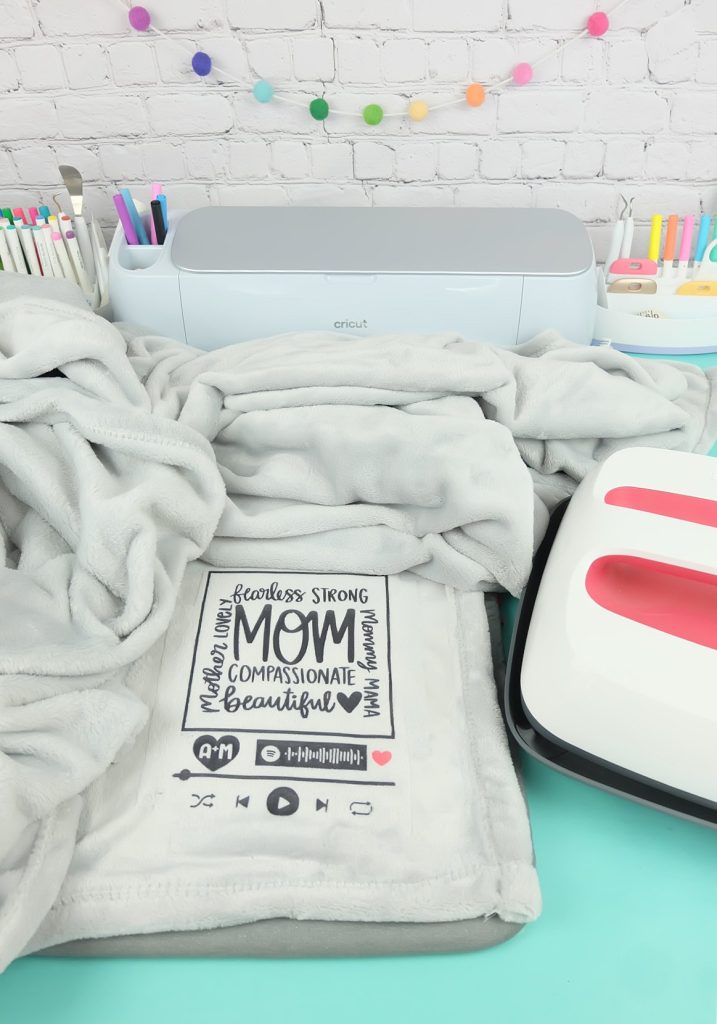
I always love to visit the clearance section when I’m at Walmart. There are often so many good end of the season finds in that section. I was so excited to find a gorgeous, faux fur blanket when I visited the clearance area in the home decor section. When I looked at the tag, I realized that the blanket had a high polyester count which means that it is Infusible Ink friendly!!!
Why Infusible Ink?
Cricut Infusible Ink infuses directly into the fabric that you are applying it to, rather than sitting on top like HTV/iron-on. For a fabric like faux fur where the fibers are flexible and move around, Infusible Ink is a great choice. Since it infuses into the fabric, you never have to worry about peeling and it’s washing machine safe!
When using Infusible Ink on fabric, you want to aim for a polyester count of 85% or higher.
When I got my blanket home I made sure to do a test in an indiscrete area to make sure that 1- The material wouldn’t melt and 2- That the fabric would absorb the Infusible Ink.
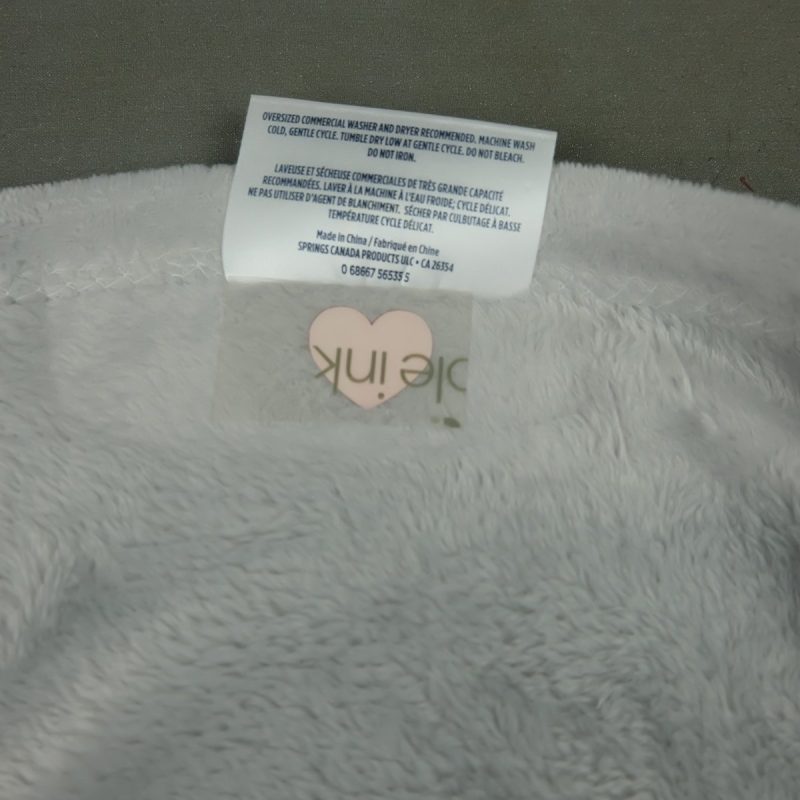
To test, I cut a small heart out of Infusible Ink and applied it underneath the tag of the blanket. I always suggest doing a small patch test when working with a new material. You don’t want to end up with any unpleasant surprises.
Materials Used For This Project:
- Blanket that is 85% polyester or more (You could also make a pillow using a Cricut Infusible Ink Pillow Case if you want to make a pillow instead)
- Measuring Tape
- Cricut Maker 3, Cricut Maker, Cricut Explore Air 3 or Cricut Explore Air 2
- Cricut Cutting Mat
- Infusible Ink Transfer Sheets (I used black and red)
- Weeding Tools
- Cricut Heat Resistant Tape
- Cricut EasyPress
- Cricut EasyPress Mat
- Plain cardstock
- Butcher Paper
Grab your supplies in store or on the Walmart Cricut site here.
Note: The Cricut EasyPress is my absolute favorite tool to use for Infusible Ink and HTV. It allows you to set the exact temperature for the type of material you are using, along with what you are applying it to. It also has a timer button that you can set to the exact press time for each project. The engineering that went into creating this product makes it have an even heat plate from corner to corner which you will never find with an iron. It is also compact and tucks away easily if you have a filled to the brim craft room like I do! You will not be disappointed by this purchase.
Directions:
Step 1: Open my Cricut Mother’s Day Project or make one of your own, and customize with the initials of yourself and the recipient.
Note: The Dear John font was too thin to cut from Infusible Ink, so I chose to do initials using the Agent Q font and then slice them from the heart.
Step 2: Follow my instructions above for creating your Spotify Code SVG. Upload to Cricut Design Space.
Step 3: Select your Spotify SVG and then click “detach”. Select all the white pieces of your Spotify design and click “weld” to turn them into one piece. Lay the white Spotify barcode on top of the black Spotify Bar. Select both pieces and click slice. This will slice your barcode out of the bar so that it cuts as one piece, the black bar with the blanket showing through the design where the barcode is.
Step 4: Select all the pieces that you are cutting from the black Infusible Ink and click “attach”. This will make your Cricut cut all of the black pieces laid out the way you see them on your screen.
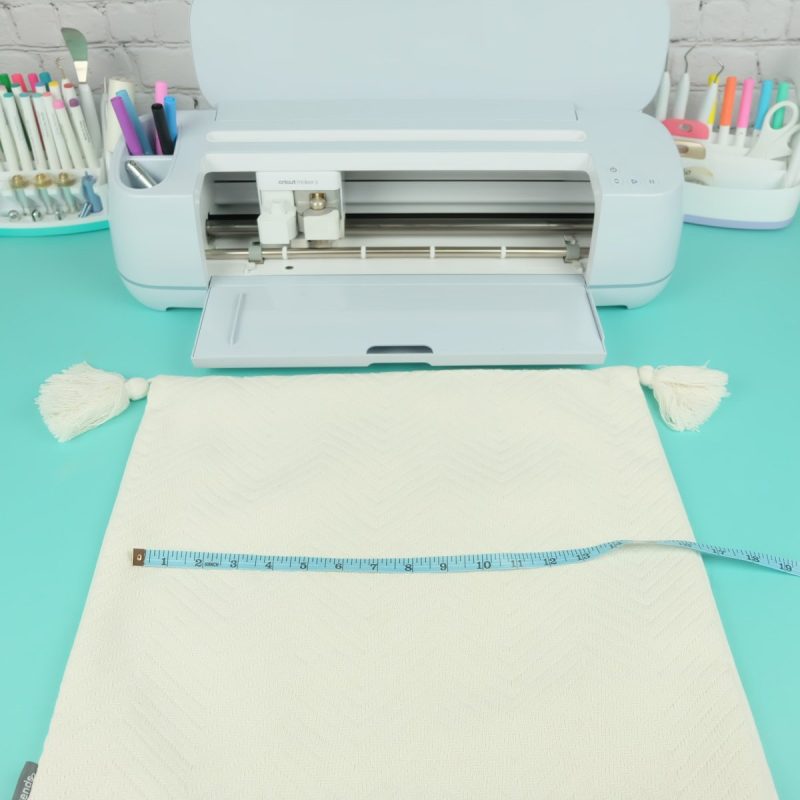
Step 5: Measure your blanket and size your design to the size you would like it by clicking on it and using the arrow button that appears in the bottom right hand corner of the box, or by using the size box in the upper toolbar.
Step 6: Click Make It. Click the “mirror slider” to mirror your design. Follow the steps on your screen to connect to your Cricut cutting machine and select your cutting material.
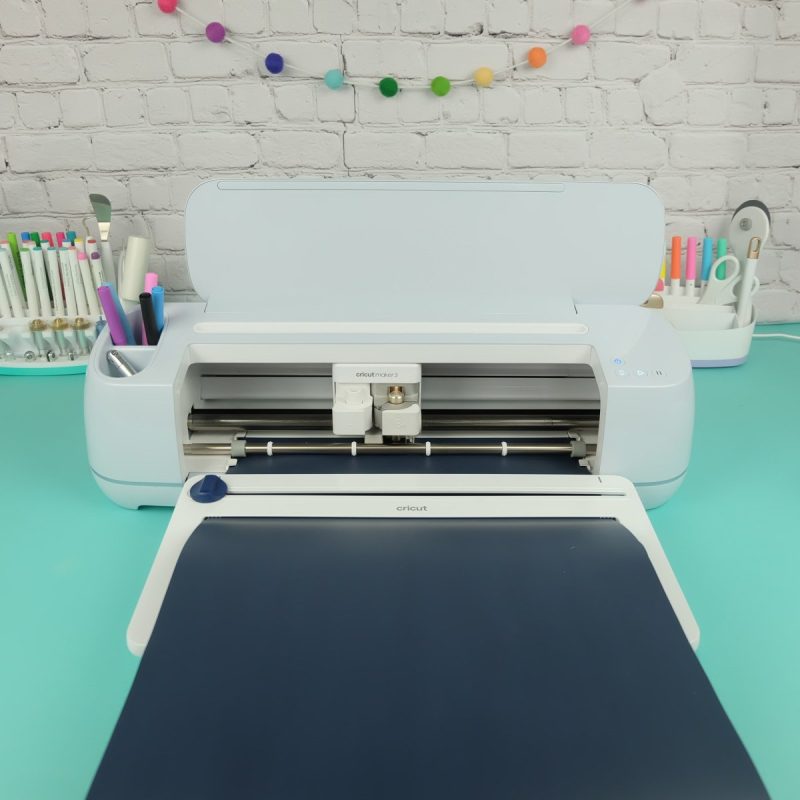
Step 7: Lay your Infusible Ink on your cutting mat with the color side facing up. Load it into your machine and cut. Repeat for each color.
Step 8: Once your Infusible Ink is done cutting, weed your design, removing the Infusible Ink from around your design, leaving just the design behind on clear plastic backing. Remove the red heart from the plastic backing and lay it on the plastic backing of the larger black design where you would like it. Make sure you place it with the red side facing up.
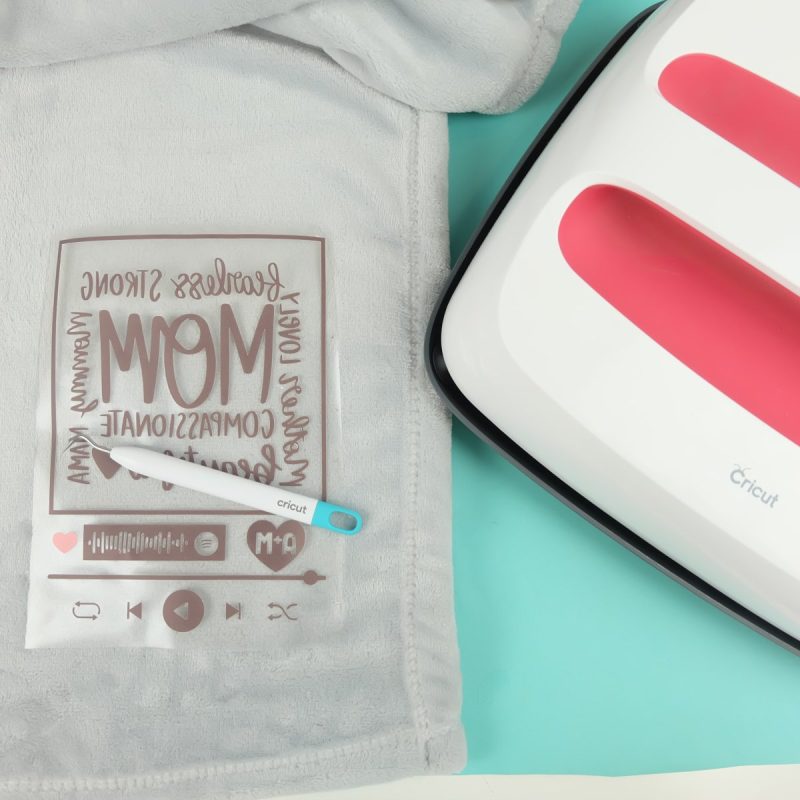
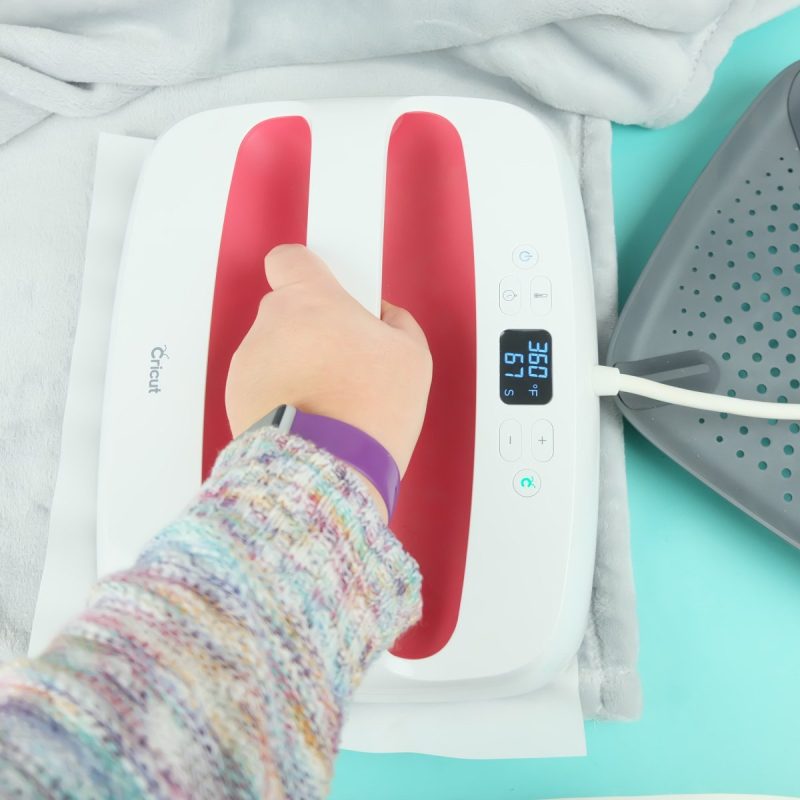
Step 9: Lay the section of the blanket where you are applying your design on your Cricut EasyPress Mat. Put a piece of cardstock beneath in case any Infusible Ink bleeds through the fabric. Heat your Cricut EasyPress to 360F, then preheat your blanket for 15 second to remove any moisture from the material.
Pro-Crafter Tip: Bookmark the Cricut Heat Guide which makes it so easy to know exactly what temperature to set your EasyPress to and how long to set the timer button depending on what material you are using and what you are pressing it onto.
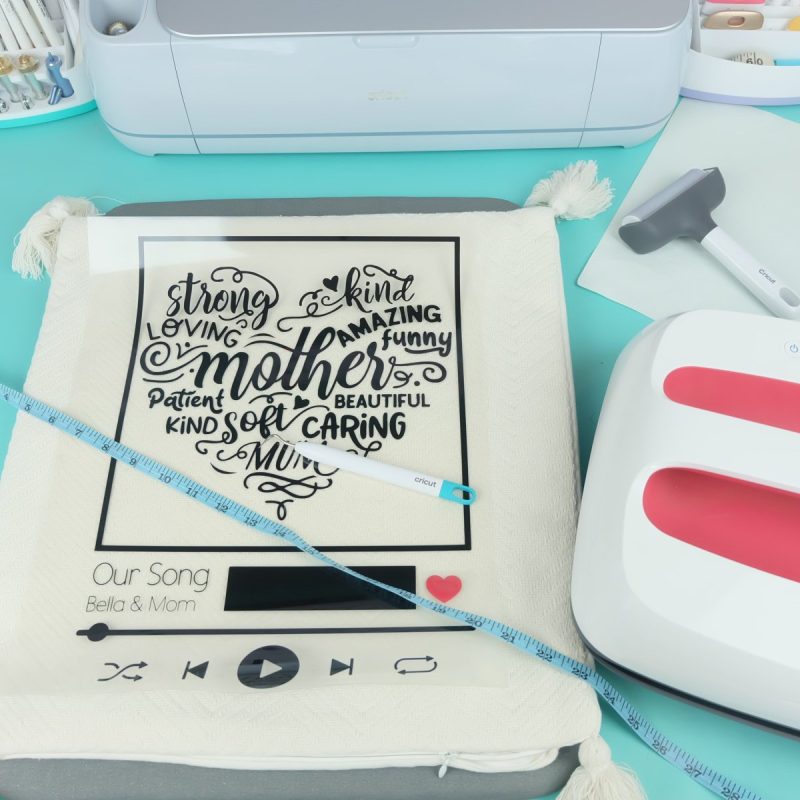
Step 10: Push all of the fibers of your blanket in one direction and then place your design on your blanket with the Infusible Ink facing down. Tape into place using heat resistant tape.

Step 11: Lay a piece of butcher paper over your design and heat using your Cricut EasyPress for 120 seconds at 360F. Apply firm, even pressure and make sure not to move your EasyPress around. The Cricut EasyPress timer makes it so easy to get the perfect press time, every time!
When time is up, place your EasyPress back in the cradle and leave your blanket untouched to cool. Do not move butcher paper or Infusible Ink Transfer Sheet while the blanket is cooling.
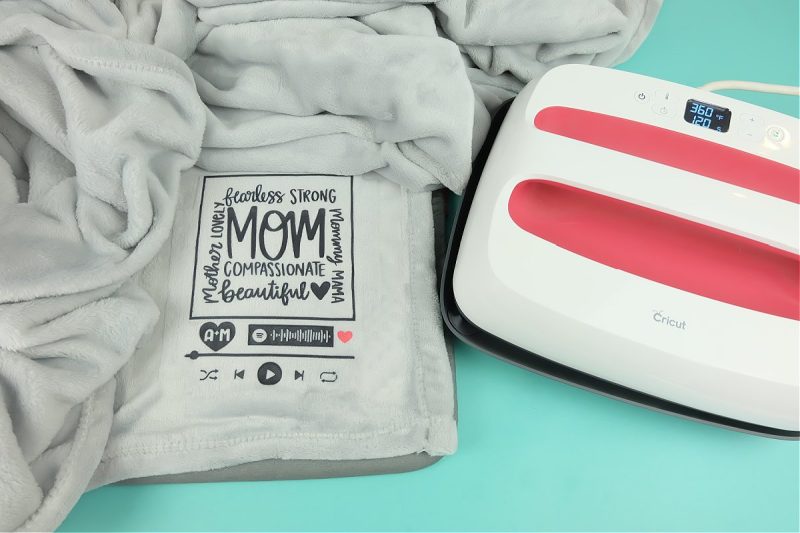
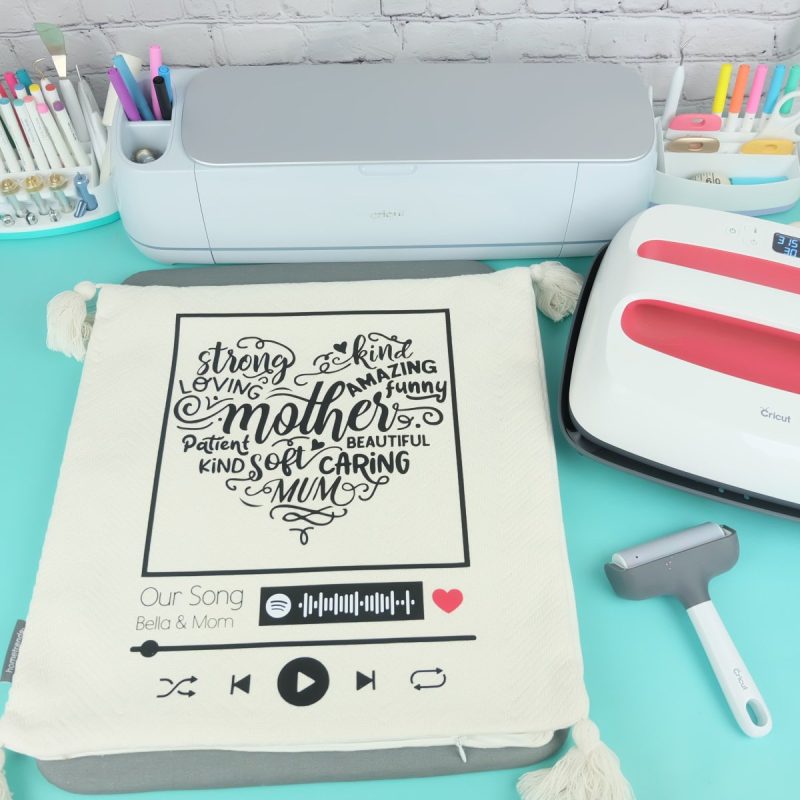
Step 12: Once your blanket has cooled, carefully peel up the Infusible Ink Transfer Sheet revealing your design beneath!
How To Use HTV To Make A Mother’s Day Throw Pillow
I have a thing for throw pillows. My husband says I have too many, I say there is no such thing. Walmart has a wonderful selection of throw pillows to choose from. I love finding the plain throw pillows and personalizing them myself.
Pro-crafter tip: Make sure when you are exploring the home decor section that you flip over pillows that already have designs on them. Some pillows have the same material as used on the front, on the back but left blank without a design. I love making my own reversible pillows this way with a store bought design on one side, and my own design on the other.
Materials Used For This Project:
- Throw pillow (Cricut also makes there own Infusible Ink Throw Pillow Cases that you can use with Infusible Ink or Iron-On)
- Measuring Tape
- Cricut Maker 3, Cricut Maker, Cricut Explore Air 3 or Cricut Explore Air 2
- Cricut Cutting Mat
- Cricut Iron-on (I used black, red and white)
- Weeding Tools
- Cricut EasyPress
- Cricut EasyPress Mat
- Optional: Iron-on protective sheet and brayer tool
Grab your supplies in store or on the Walmart Cricut site here.
Note: The Cricut EasyPress is my absolute favorite tool to use for Infusible Ink and HTV. It allows you to set the exact temperature for the type of material you are using, along with what you are applying it to. It also has a timer button that you can set to the exact press time for each project. The engineering that went into creating this product makes it have an even heat plate from corner to corner which you will never find with an iron. It is also compact and tucks away easily if you have a filled to the brim craft room like I do! You will not be disappointed by this purchase.
Directions:
Step 1: Open my Cricut Mother’s Day Project and customize with the name of yourself and the recipient.
Step 2: Follow my instructions above for creating your Spotify Code SVG. Upload to Cricut Design Space.
Step 3: Select your Spotify SVG and then click “detach”. Select all the pieces that you are cutting from the black iron-on and click “attach”. Click all the pieces you are cutting from white iron-on and click “attach”. This will make your Cricut cut all of the black pieces laid out the way you see them on your screen, and all the white pieces as you see them on the screen.
Step 4: Measure your pillow and size your design to the size you would like it by clicking on it and using the arrow button that appears in the bottom right hand corner of the box, or by using the size box in the upper toolbar.
Step 5: Click Make It. Click the “mirror slider” to mirror your design. Follow the steps on your screen to connect to your Cricut cutting machine and select your cutting material.
Step 6: Lay your iron-on on your cutting mat with the shiny side facing down. Load it into your machine and cut. Repeat for each color.
Step 7: Once your iron-on is done cutting, weed your design, removing the iron-on material from around your design, leaving just the design behind on clear plastic backing.
Note: I cut the plastic backing on my heart piece small and laid where I wanted the heart to be on the plastic backing of my black design, making sure that the plastic wasn’t covering any of the black pieces of HTV and that the red iron-on was facing in the same direction as the black iron on. This allowed me to press both colors at once so that my iron-on didn’t overheat.
Step 8: Remove the pillow from the throw pillow case. Lay the pillow case on your Cricut EasyPress Mat. Heat your Cricut EasyPress to 315F, then preheat your pillow case for 15 second to remove any moisture from the material.
Pro-Crafter Tip: Bookmark the Cricut Heat Guide which makes it so easy to know exactly what temperature to set your EasyPress to and how long to set the timer button depending on what material you are using and what you are pressing it onto.
Step 9: Place your design where you would like it on your pillow with the design facing down, and the clear plastic facing up. You may want to use a measuring tape to measure that your design is centered. I like to lay my iron-on protective sheet over my design. Heat using your Cricut EasyPress for 30 seconds at 360F applying firm, even pressure. Flip and then heat for another 15 seconds from the back. The Cricut EasyPress timer makes it so easy to get the perfect press time, every time!
Note: I like to run my brayer tool over the design between each press to really push the iron-on into the fabric of the pillow.
Step 10: Allow your pillow to cool. Carefully peel up plastic leaving the design on the pillow, and then lay down your white Spotify barcode part of the design on top of the black bar. Cover the entire design with your iron-on protective sheet or the clear plastic sheet from your black iron-on and press for another 10 seconds. Make sure your EasyPress doesn’t have direct contact with the iron-on in any areas. Allow to cool and then remove the plastic revealing your design beneath!
Step 11:
I also found a cute basket in the home decor section which I added a design to using iron-on following the same steps as for my pillow. I think the blanket and pillow look so pretty inside it, and it makes the ultimate, thoughtful gift for mom!
I hope you love this project idea! There are so many fun variations that you could make it in! For example you could use adhesive vinyl, transfer tape and a picture frame or plaque to make Spotify glass art! You could also put your design on acrylic keychains to make a Spotify code keychain with your favorite song!
Print These Spotify Cricut Projects For Later
Want to save these projects for later? Pin them to Pinterest and/or print them for later!

How To Use Infusible Ink To Make Mother’s Day Blanket
Instructions
Note:
Making Your Blanket
- Open my Cricut Mother's Day Project or make one of your own, and customize with the initials of yourself and the recipient.
- Follow my instructions from above for creating your Spotify Code SVG. Upload to Cricut Design Space.
- Select your Spotify SVG and then click "detach". Select all the white pieces of your Spotify design and click "weld" to turn them into one piece. Lay the white Spotify barcode on top of the black Spotify Bar. Select both pieces and click slice. This will slice your barcode out of the bar so that it cuts as one piece, the black bar with the blanket showing through the design where the barcode is.
- Select all the pieces that you are cutting from the black Infusible Ink and click "attach". This will make your Cricut cut all of the black pieces laid out the way you see them on your screen.
- Measure your blanket and size your design to the size you would like it by clicking on it and using the arrow button that appears in the bottom right hand corner of the box, or by using the size box in the upper toolbar.
- Click Make It. Click the "mirror slider" to mirror your design. Follow the steps on your screen to connect to your Cricut cutting machine and select your cutting material.
- Lay your Infusible Ink on your cutting mat with the color side facing up. Load it into your machine and cut. Repeat for each color.
- Once your Infusible Ink is done cutting, weed your design, removing the Infusible Ink from around your design, leaving just the design behind on clear plastic backing. Remove the red heart from the plastic backing and lay it on the plastic backing of the larger black design where you would like it. Make sure you place it with the red side facing up.
- Lay the section of the blanket where you are applying your design on your Cricut EasyPress Mat. Put a piece of cardstock beneath in case any Infusible Ink bleeds through the fabric. Heat your Cricut EasyPress to 360F, then preheat your blanket for 15 second to remove any moisture from the material.
- Place your design on your blanket with the Infusible Ink facing down. Tape into place using heat resistant tape.
- Lay a piece of butcher paper over your design and heat using your Cricut EasyPress for 120 seconds at 360F. Apply firm, even pressure and make sure not to move your EasyPress around. When time is up, place your EasyPress back in the cradle and leave your blanket untouched to cool. Do not move butcher paper or Infusible Ink Transfer Sheet while the blanket is cooling.
- Once your blanket has cooled, carefully peel up the Infusible Ink Transfer Sheet revealing your design beneath!
Equipment
- Blanket that is 85% polyester or more
- Infusible Ink Transfer Sheets In Red and Black
- Plain cardstock
- Butcher Paper
How To Use HTV To Make A Mother’s Day Throw Pillow
Instructions
- Open my Cricut Mother's Day Project and customize with the name of yourself and the recipient.
- Follow my instructions above for creating your Spotify Code SVG. Upload to Cricut Design Space.
- Select your Spotify SVG and then click "detach". Select all the pieces that you are cutting from the black iron-on and click "attach". Click all the pieces you are cutting from white iron-on and click "attach". This will make your Cricut cut all of the black pieces laid out the way you see them on your screen, and all the white pieces as you see them on the screen.
- Measure your pillow and size your design to the size you would like it by clicking on it and using the arrow button that appears in the bottom right hand corner of the box, or by using the size box in the upper toolbar.
- Click Make It. Click the "mirror slider" to mirror your design. Follow the steps on your screen to connect to your Cricut cutting machine and select your cutting material.
- Lay your iron-on on your cutting mat with the shiny side facing down. Load it into your machine and cut. Repeat for each color.
- Once your iron-on is done cutting, weed your design, removing the iron-on material from around your design, leaving just the design behind on clear plastic backing.
- Note: I cut the plastic backing on my heart piece small and laid where I wanted the heart to be on the plastic backing of my black design, making sure that the plastic wasn’t covering any of the black pieces of HTV and that the red iron-on was facing in the same direction as the black iron on. This allowed me to press both colors at once so that my iron-on didn’t overheat.
- Remove the pillow from the throw pillow case. Lay the pillow case on your Cricut EasyPress Mat. Heat your Cricut EasyPress to 315F, then preheat your pillow case for 15 second to remove any moisture from the material.
- Place your design where you would like it on your pillow with the design facing down, and the clear plastic facing up. I like to lay my iron-on protective sheet over my design. Heat using your Cricut EasyPress for 30 seconds at 360F applying firm, even pressure. Flip and then heat for another 15 seconds from the back. Note: I like to run my brayer tool over the design between each press to really push the iron-on into the fabric of the pillow.
- Allow your pillow to cool. Carefully peel up plastic leaving the design on the pillow, and then lay down your white Spotify barcode part of the design on top of the black bar. Cover the entire design with your iron-on protective sheet or the clear plastic sheet from your black iron-on and press for another 10 seconds. Make sure your EasyPress doesn't have direct contact with the iron-on in any areas. Allow to cool and then remove the plastic revealing your design beneath!
- Put your pillow back in your pillow case and it's ready to give to mom!
Equipment
- Throw pillow
- Cricut Iron-on in red, black and white
- Cricut EasyPress
- Optional: Iron-on protective sheet and brayer tool
More Cricut Crafts, Tutorials and Inspiration
If you like this post, make sure you join our Cricut Facebook group.
You’ll also want to check our Cricut section. We have Cricut tutorials with step-by-step instructions, Cricut basics posts that will teach you how to use your machine like a pro (they are terrific for beginners!!!) and tons of free SVG files!
Here are a few posts you might like!


Sign Up For My Cricut Newsletter Here!