


Cricut Design Space 101- Everything You Need To Know To Be A Pro + Free SVG
This post and the photos within it may contain Amazon or other affiliate links. If you purchase something through the link, I may receive a small commission at no extra charge to you.
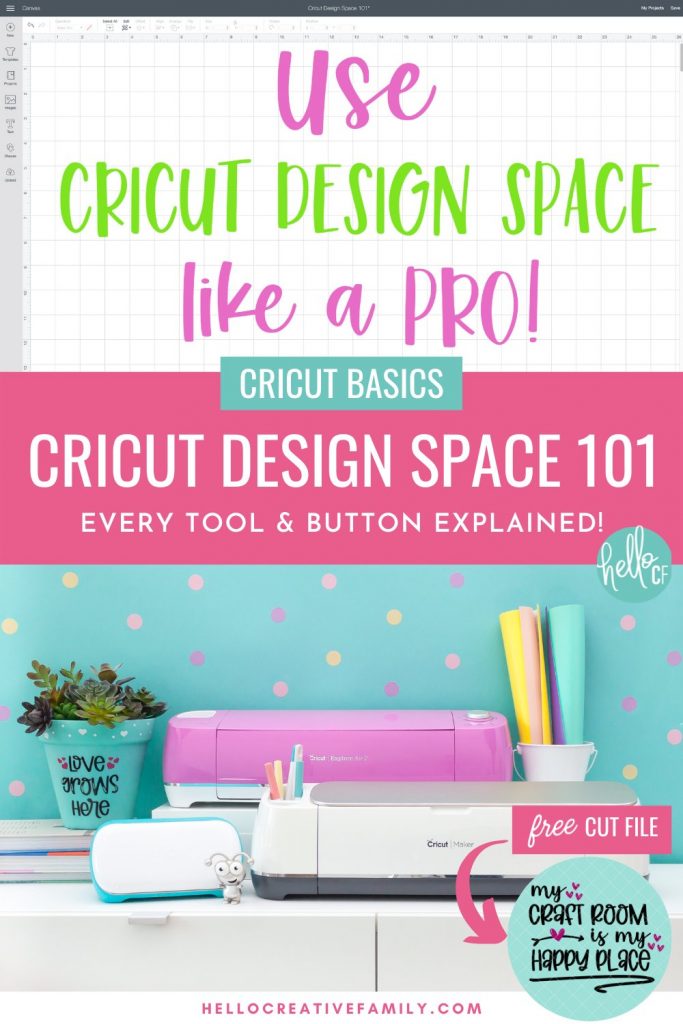
In this Free Cricut Design Space 101 Lesson, you’ll learn everything you need to know to use Cricut Design Space like a pro. Every button and tool in Design Space is covered with photos and examples of how to use it. A must read for beginners and advanced Cricut machine users alike. Also includes a free My Craft Room Is My Happy Place SVG file. Perfect for new owners of the Cricut Maker, Cricut Explore Air 2, and Cricut Joy.
Disclosure: Thank you to Cricut for working with us on this Cricut Design Space 101 sponsored post. As with every article on Hello Creative Family all thoughts and opinions are 100% my own.
Hi Crafty Friends! I’m back with a brand new instalment in our Cricut Basics series! Today we are going to be learning all about Cricut Design Space! This post walks you through every single button and tool in Design Space. It truly is Cricut Design Space 101. I think just about everyone will learn something from this post!
Does this sound like you– You bought a new Cricut Maker, Cricut Explore Air 2 or Cricut Joy. You have seen all the amazing things online that you can make with it, you can’t wait to get started but… Design Space seems so intimidating!
If this sounds like you, you definitely are not alone. I am a technophobe and the thought of learning a new program was so intimidating. Lucky for us both, Cricut Design Space is very user friendly and with me (or rather this Cricut Design Space 101 post) by your side, you’ll be using Design Space like a pro in no time!

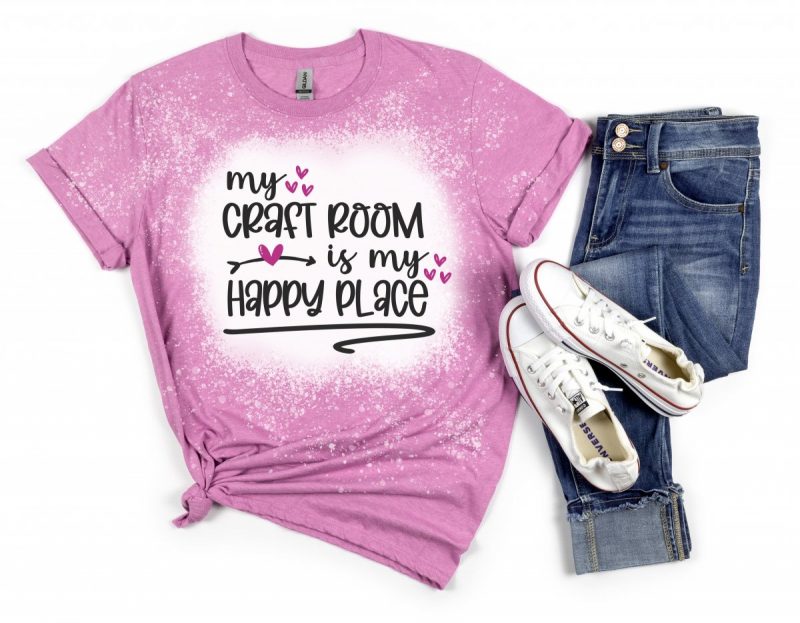
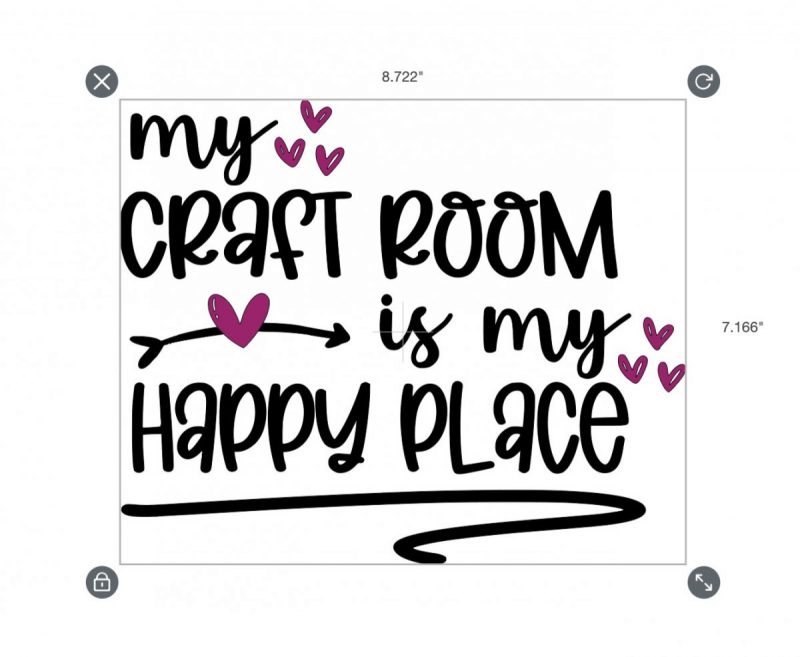
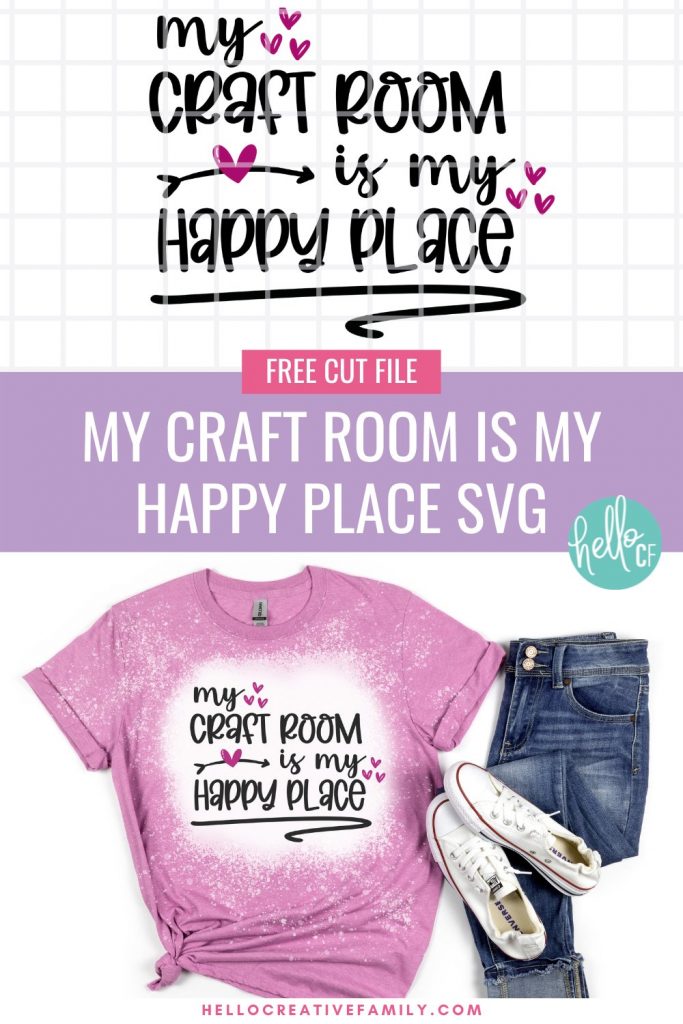
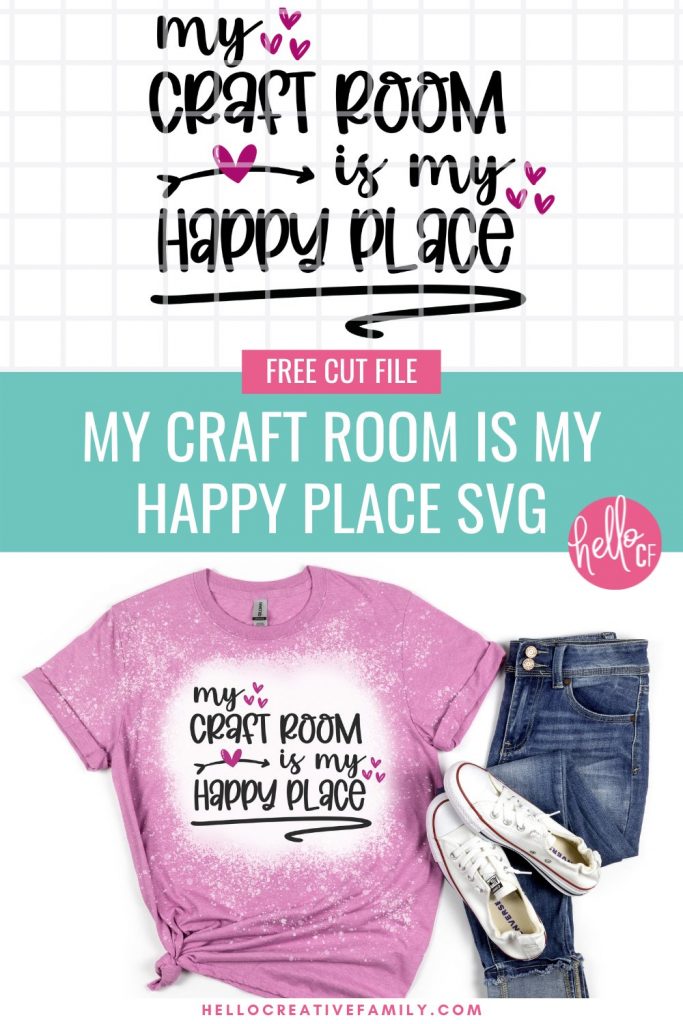
Today I’m giving you a brand new cut file that I’ll be using to demonstrate how to use Design Space. You all know that my craft room is my happy place, and I bet that your craft room is your happy place too (or at least it will be once you learn how to use Design Space! So this design seems pretty fitting.
Want to grab it?
Enter your name and email address below and I’ll send the cut file immediately straight to your inbox. Accessing this free cut file will register you up for my e-newsletter and you’ll be notified when I release new free SVG files. Don’t worry if you are already subscribed to our enewsletter. You will only be subscribed once.
- This cut file is for personal use only.
- This file can be used in part or in whole for your personal projects.
- Digital reselling, sharing, redistributing of the files is NOT allowed. If you would like to share, please direct friends to the original blog post where you found this cut file.
What is Cricut Design Space?
The first thing that we should cover in Cricut Design Space 101 is– What is it?
Cricut Design Space is Cricut’s proprietary software that is used with all Cricut cutting machines.
Whether your design idea is extremely simple, or intricate and complex, you can’t cut a project using your Cricut cutting machine without using Cricut Design Space!
In Design Space you have the ability to design what you want to cut, access images from Cricut Access, size images and so much more. Perhaps most importantly though, Cricut Design Space is what tells your Cricut cutting machine what it needs to cut, and what material it’s cutting it out of so that it uses the right blade and pressure.
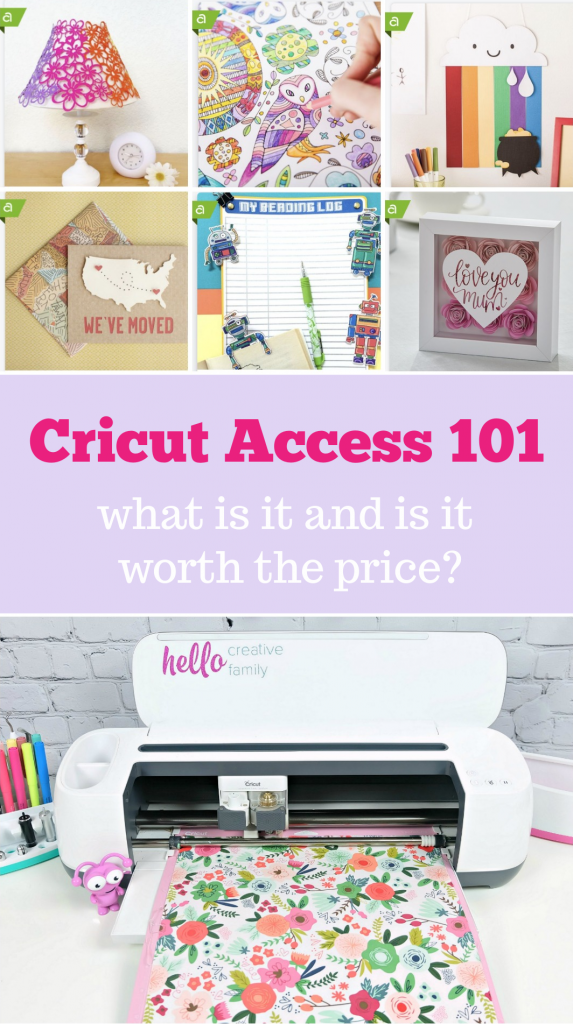
Cricut Design Space is a free program but there is a paid subscription you can add onto it called Cricut Access. Cricut Access gives you access to thousands of images and fonts. You can read more about Cricut Access here. You also have the option to purchase cut files and fonts individually from Cricut as well as to upload your own images and use fonts you already have installed on your computer.
Cricut automatically prompts you to download Design Space during your new machine setup. You can download it to many devices including your desktop computer, laptop, ios smart phone, android smart phone or tablet. Once it’s downloaded, all you have to do is click on the Cricut C application icon to open the program! Ready? Let’s get started!
When You First Open Cricut Design Space
Note: In this post I’m going to be showing you how to use Cricut Design Space on a computer. Using Design Space on a tablet or smart phone is quite similar (all the functions do the same things) you might just find them in a slightly different place on the screen than you do on a computer.
When you open Cricut Design Space, you’ll be brought to a home screen with lots of options for things you can do.
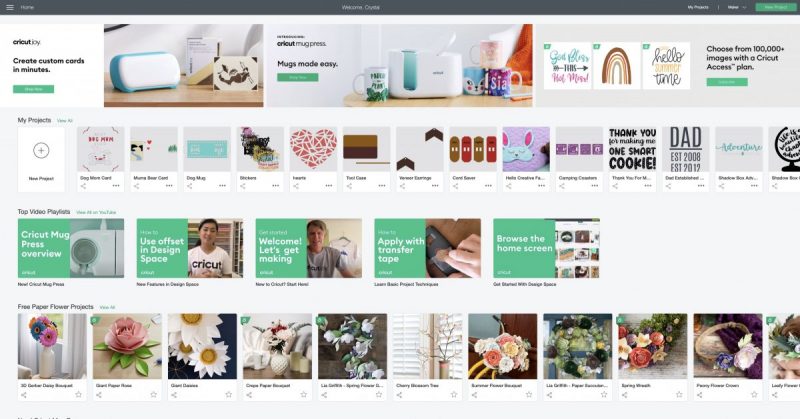
Along the top of the screen, you’ll see clickable photos of featured machines and supplies you can buy from Cricut.com. You’ll probably also see an advertisement for Cricut Access (read more about that here).
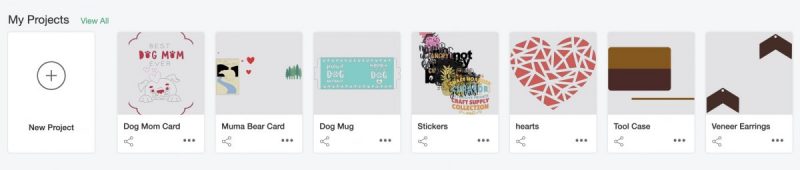
Below the advertisements, you’ll see a category called My Projects, with a box that has a + sign within a circle that says New Project.
Next you will see video tutorials available from Cricut teaching you how to use different machines and learn new techniques.
Finally, you’ll see different categories of ready-to-make projects. These are projects created by Cricut, Cricut brand partners, and Cricut Community Members that have already been designed and can be cut with the push of a button. These selections change depending on what holidays or seasons are coming up, or what kind of craft trends Cricut sees coming. For example as I’m writing this, spring has just arrived so Cricut has a bunch of really beautiful paper flowers.
On some of the photos, you will see a green A. The green A is a symbol for Cricut Access and lets you know that if you have a Cricut Access membership, this cut file is free for you to use.
Creating A Blank Canvas In Cricut Design Space
In the main home screen look for the “My Projects” section near the top. Click on the + sign to start a new project.
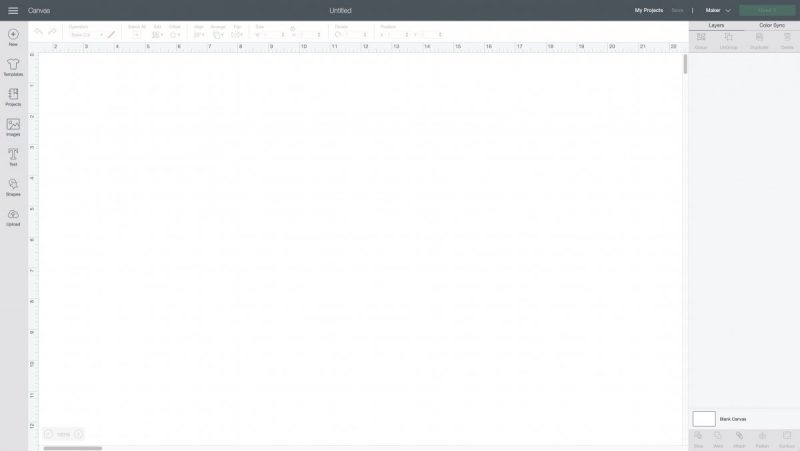
When you click on the New Project button, you’ll be brought to a blank Cricut canvas.
At the top left side of the screen, you’ll see three lines stacked on top of each other. When you click here, it will bring up a menu.
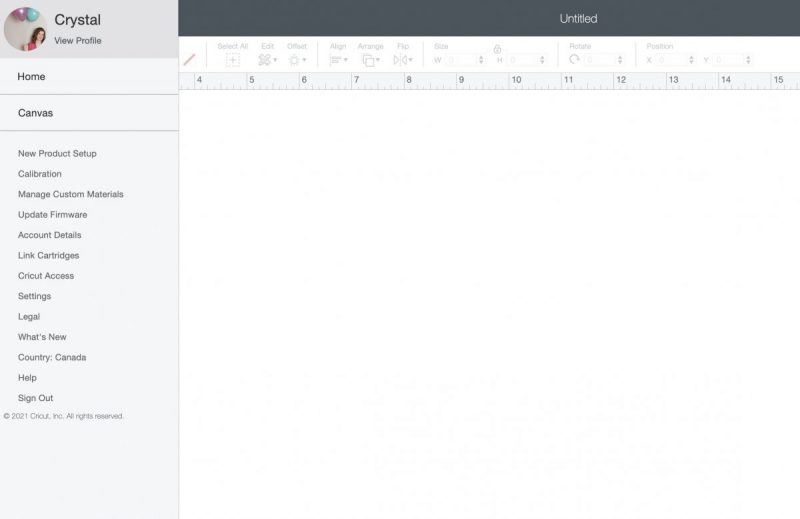
Under the main menu you will find:
- Home
- Canvas
- New Product Setup
- Calibration
- Manage Custom Materials
- Update Firmware
- Account Details
- Link Cartridges
- Cricut Access
- Settings
- Legal
- What’s New
- The Country You Live In
- Help
- Sign in/Sign Out
If you ever navigate away from your canvas and can’t figure out how to get back, simply click on this menu and select Canvas to return to the canvas area you were working on.
The other categories you should know under this menu include:
Calibration: Use this function to calibrate your machine’s blade for more accurate cuts when using the Print Then Cut function as well as the Cricut Maker Knife Blade.
Link Cartridge: Your average Cricut user probably won’t need to use this menu option; however, if you’re the lucky owner of any old Cricut cartridges, you’ll want to know this one! Click this button, enter your cartridge details, and you’re now able to use the images from the cartridge within Cricut Design Space.
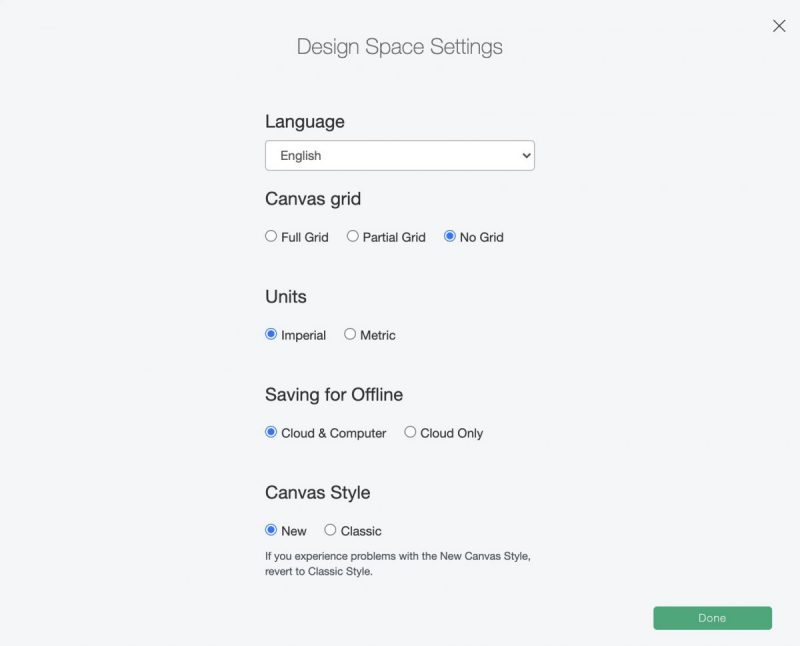
Settings: Under this menu item, you can choose whether your canvas has a full grid, partial grid, or no grid. You can also select if your measurements are shown in metric or imperial and where you would like your work saved for offline use.
Exploring Your Toolbars
Exploring the Left-Side Toolbar In Cricut Design Space
The left-side toolbar is where all the big stuff happens. It’s broken down into seven buttons.

New: Click this button whenever you would like to create a new canvas. Cricut only lets you work on one canvas per window at a time, so make sure you save your current canvas before creating a new one. If you would like to work on multiple canvases at one time you can now do so on your computer by opening multiple windows within Design Space. Do so by clicking File then New Window.
Templates: Sometimes you have a project idea that seems great in your head, but you just don’t know how it will look once implemented. Enter Cricut templates!
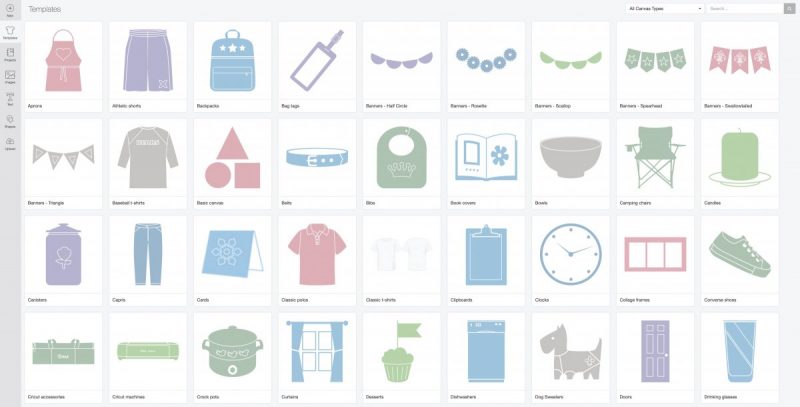
Cricut has created drawings of some of the most popular “blanks” for Cricuting on. Pick a blank, lay your design over the top, and get a sneak peek of what the finished product will look like. Here is an example of what the cut file I’m giving you today looks like on an apron.
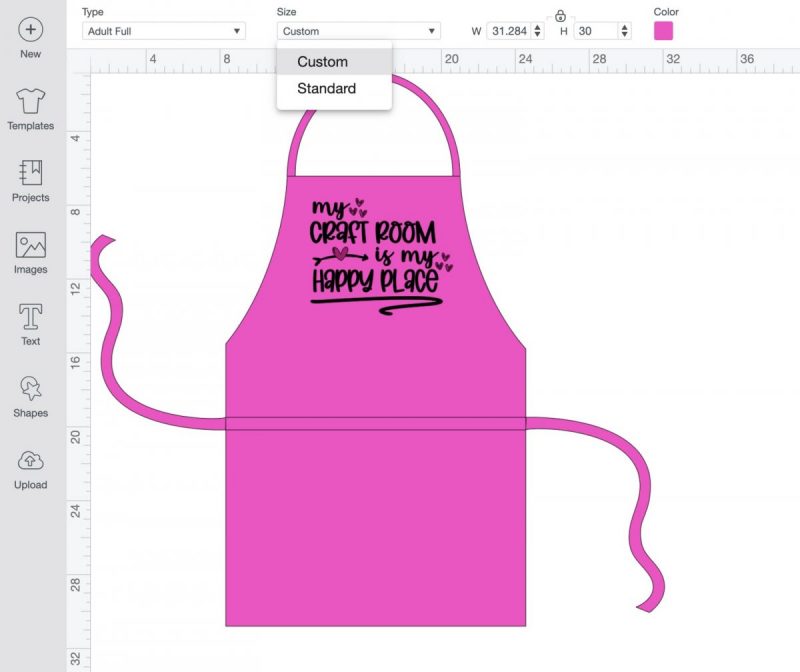
While templates are an excellent way to get an idea of how something will look on your blank, I always suggest that you measure your blank with a tape measure and then use the custom-size option in the top toolbar to size your template on screen to the same dimensions. This will give you a much more accurate view of what your finished project will look like.
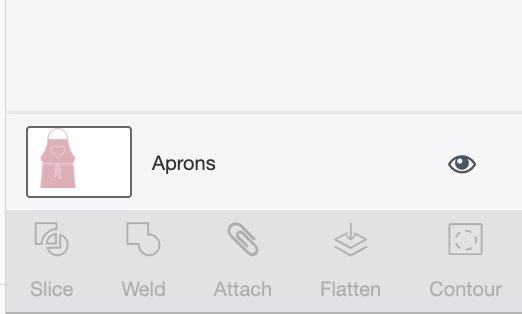
If you aren’t seeing the options to customize your template in the top toolbar, just click on your template in the bottom right hand toolbar and once selected the customization options will appear.
Projects: This button brings up a variety of ready-to-make projects. Use the Category and Search boxes in the upper right-hand toolbar to narrow down the type of projects you’re looking for.
Images: This section is where you find every single image available in Cricut Designs Space, including images available to purchase, images included with Cricut Access, and images you have uploaded.
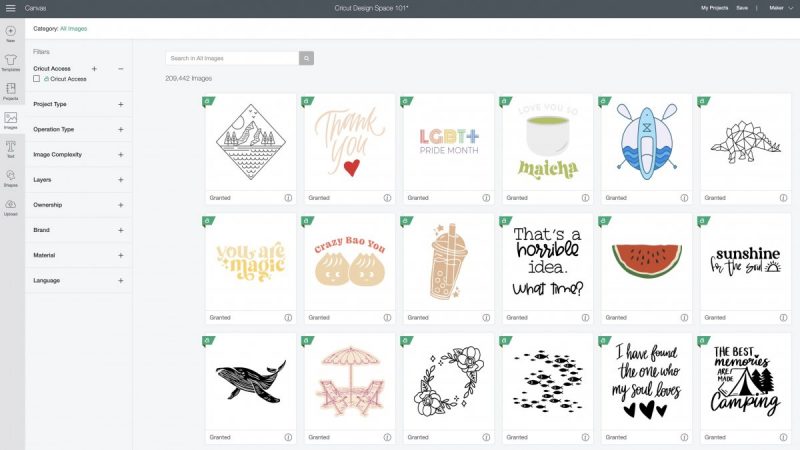
There is a search bar that you can use to search for specific types of images you are looking for, or you can use the filter options along the left hand side which include:
- Cricut Access (images included for free with a subscription)
- Project Type
- Operation Type
- Image Complexity
- Layers
- Ownership
- Brand
- Material
- Language
Select the image you would like to use by clicking on it and then insert it onto your Design Space canvas.
Text: When you want to add words to your canvas, clicking Text is the place to start! You’ll want to fine-tune your text with a bit of help from your top toolbar. Read all about that in the text toolbar section!
Shapes: Cricut provides its users with 10 basic shapes that are 100 percent free to use. They include a square, circle, triangle, diamond, pentagon, hexagon, star, octagon, heart, and score line. You can access these basic shapes under the Shapes menu. If you’re looking for these shapes with a bit more style or pizzazz, you can also find additional hearts, stars, squares, etc. under the Shapes menu included in Cricut Access or available for a one-time fee.
Upload: In my opinion, the Upload button is one of the most important buttons in all of Design Space. If you ever want to cut your own artwork or cut files that you find outside of Design Space, you’ll need to know how to use this function. I have a post that covers how to upload different image types to Cricut Design Space that you can find here. You are able to upload png, jpg, gif, bmp, svg or dxf files to Cricut Design Space.
Exploring the Top Toolbar In Cricut Design Space

I said earlier in this post that the left-side toolbar is where all the big stuff happens. Well, the top and right toolbars are where all the fine-tuning magic happens. These are the tools that will help you become a Cricut master.
Undo and Redo Arrows: Use these buttons to undo and redo changes you’ve made to the images on your canvas.

Operation: Use this box to select what you want your Cricut to do with each of your shapes/images. When you’re using the Cricut Explore, your options will be Cut—Basic, Draw—Pen, Foil, Score, Print Then Cut—Standard.
For the Cricut Maker, your options at this time are Cut—Basic, Wavy, Perorate. Draw—Pen, Foil, Scoe, Deboss, Engrave. Print Then Cut—Standard. As more Adaptive Tools are released, this list will grow.
For the Cricut Joy, your options will be Cut—Basic. Draw—Pen.
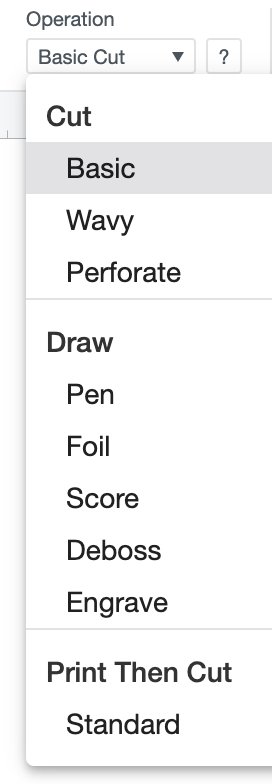
Next to the Operation tool you will see a box. Depending on what operation you have selected, this box will change. This will be where you will select your material color for basic cuts, your pen color and size when drawing, your foil color when foiling and your color or pattern when doing print then cut.
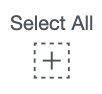
Select/Deselect: Quickly select and deselect all the cut elements on your canvas using this button. Another way to select a cut element is to click and hold down your mouse on one corner of your screen and drag a box over all the elements you want to select. You can also click on each cut element you would like to select in the right-hand toolbar while holding down the Shift button on your keyboard to select.
Edit: Under the Edit box, you will find options for Cut, Copy, and Paste.

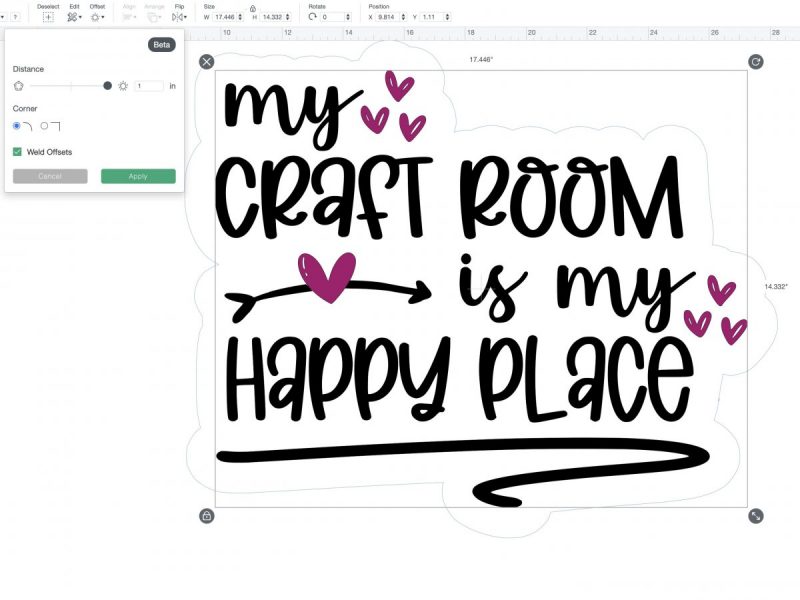
Offset: I’m so excited to be able to include this in Cricut Design Space 101, because this was one of Cricut’s most requested features and it finally arrived this year! This is a feature allows you to create an outline around your images or text. It’s especially useful for creating stickers. You can play with the distance around your image that you want your offset to extend, whether you want rounded or squared corners and if you want to weld your offsets together. In the image below I have the distance of my offset set as quite high, but if it was smaller each piece/word might be outlined on it’s own. If the weld offsets wasn’t selected each piece would move on it’s own. When it’s selected each piece is invisibly connected and moves/ can be sized as one big piece.
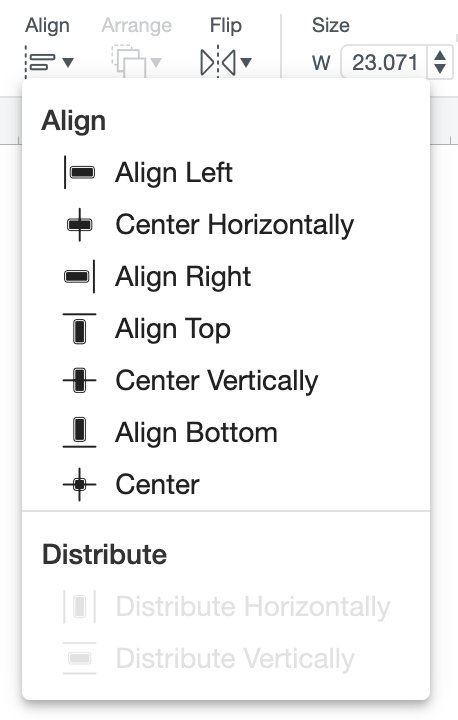
Align: To use the Align tool, you’ll need to select two or more cut elements from your canvas. With this tool, you can align elements left, center horizontally, align right, align top, center vertically, align bottom, center, distribute horizontally, and distribute vertically. I use this tool frequently immediately before attaching, welding, or slicing pieces.
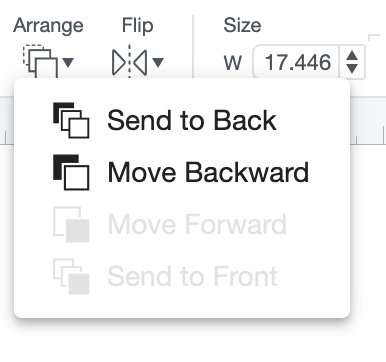
Arrange: Design Space works in layers. The first element you add to your canvas will be on the bottom layer, and everything you add after will layer on top. Sometimes you will want an element to be sitting at a higher level than where it’s at. Use the Arrange button to move elements all the way to the back, back one layer, forward one layer, or all the way to the front by using the Send to Back, Move Backward, Move Forward, and Send to Front options. This is another tool that I use frequently immediately before attaching, welding, or slicing pieces.
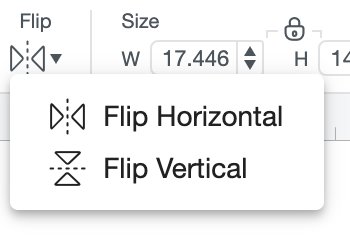
Flip: This tool allows you to flip your images horizontally and vertically. I will often use the Flip Horizontal option to mirror an image if not everything on the entire cutting mat needs to be mirrored.
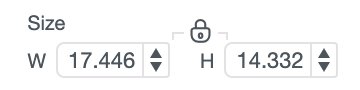
Size: Resize your cut element using this block by changing the width and height boxes. The default is for your image to stay proportional; however, if you would like to change that, you can click the Lock button that sits over the “H” to unlock proportions.
You can also size an image by clicking on the image and using the arrow box that appears in the bottom right-hand corner of your image. To unlock the proportions when sizing this way, click the Lock that appears in the bottom left-hand corner of the image when it is selected.
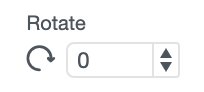
Rotate: Use this button to rotate your image. I use this button frequently when adding score lines to a project.
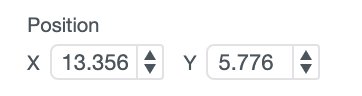
Position: Move your image to exactly where you want it on your canvas by using the Position box. Positioning your image at 1X, 1Y will put your image 1 inch down and 1 inch over on your canvas. This number, however, does not correlate to where your image will be cut on your cutting mat. Positioning your image on the cutting mat can be done after you click Make It when you’re editing your mat.
Exploring the Text Toolbar In Cricut Design Space
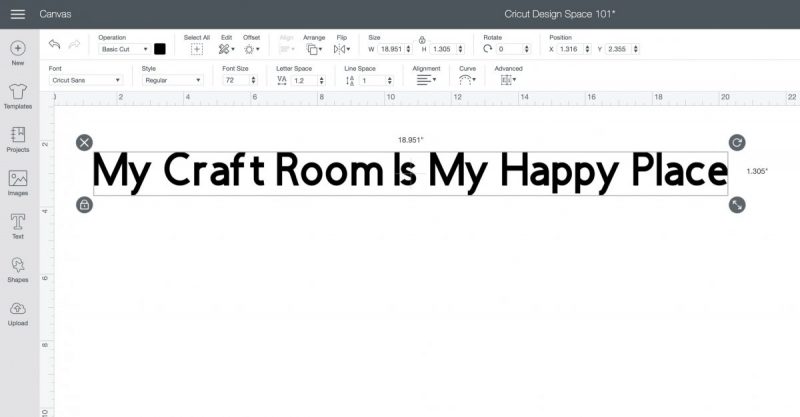
Once you have added text to your canvas, a text toolbar will appear below your top toolbar. (Note: You will only see it when your text is selected.) The tools included in this toolbar are:
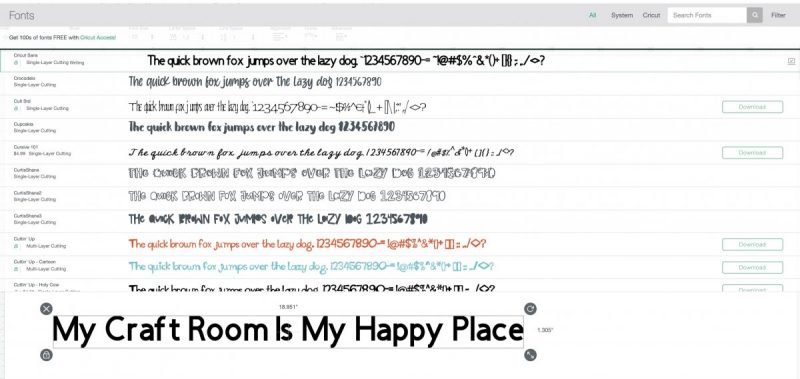
Font: When you press this button, it pulls up every font available for you to use, including Cricut fonts and fonts from your computer. You’re able to sort fonts that you own versus fonts that are owned by Cricut by clicking the All, System, and Cricut buttons. There is also a box to search fonts by name as well as a filter box where you can filter fonts by categories that include My Fonts, Multi- Layer, Single Layer, Writing, and Saved For Offline.
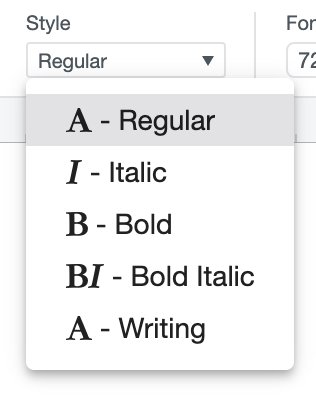
Style: Under the Style menu, you can make your font bold, italic, bold italic, writing, and back to regular again.
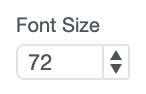
Font Size: Use the font size box to change the numerical value of the size of your font.
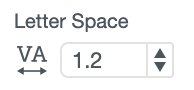
Letter Space: Use this function to move your letters closer together or further apart.
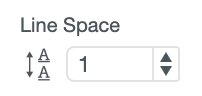
Line Spacing: Make the spaces between words stacked on top of each other closer together or farther apart.
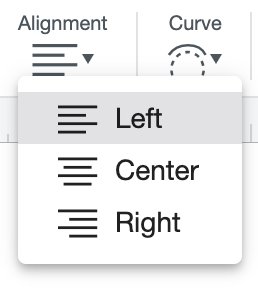
Alignment: Change your font so that it is centered, left aligned, or right aligned.
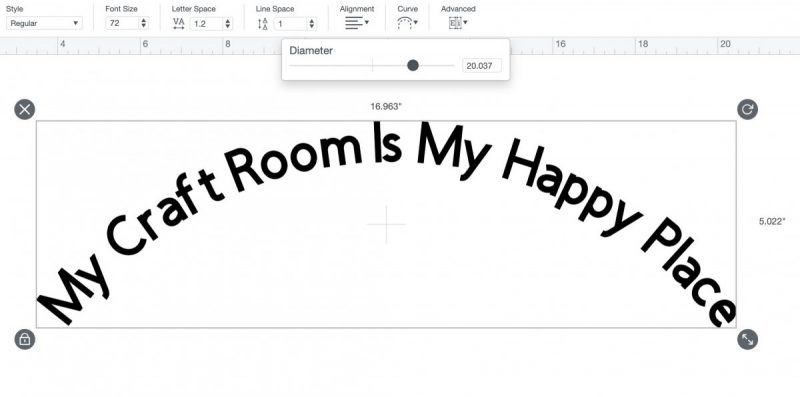
Curve: I’m so excited to be able to include this in Cricut Design Space 101, because this was one of Cricut’s most requested features and it finally arrived this year! Play with the slider under this box to quickly and easily give your words an arc.
Advanced: Under this menu, you’re able to ungroup your words, making it easier to play with the spacing of both letters and lines. This tool is especially popular for people using script fonts to help connect letters. The three options available under this menu are Ungroup to Letters, Ungroup to Lines (helpful if you have text with multiple lines), and Ungroup to Layers (helpful if using fonts with multiple layers).

Exploring the Top Right Header Toolbar In Cricut Design Space

My Projects: Click on this button to be brought to a list of all of the projects that you have saved in Design Space. To return to your canvas from this screen, click Canvas on the left-hand side of the screen.
Save: Make sure you can revisit your project on another day by clicking the Save button and creating a project name. Cricut now lets you create folders to save your designs to to help keep you organized.
If you’re only using elements from within Cricut Design Space, you will be allowed to save your file as public so that you can share the cut file with friends. If you’re using any fonts or images that you have uploaded, you will only be allowed to save the file for personal use.
Machine Button: Pick the type of machine you’re using (Cricut Maker, Cricut Explore, or Cricut Joy) from this dropdown menu to access features exclusive to that machine.
Make It: If you only know one button in Design Space, this is the button! Click Make It whenever you are ready to start cutting your project.
Exploring the Right Side Toolbar In Cricut Design Space
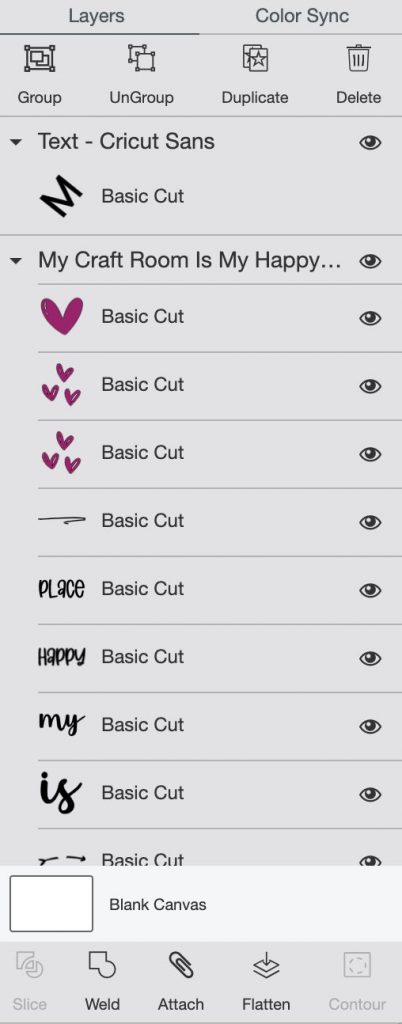
Last but not least, we have the right corner-side toolbar. Knowing how to properly use these tools will make designing in Design Space so much easier. The tools in this section include:
Group: Select two or more images in your project from your layers panel and press the Group button to group them together. Why would you want to do this? It’s easier to move grouped images together on your canvas. Also, once you have the proportions figured out for your design, if your images are grouped together, when you resize one image it will automatically resize the other images it’s grouped with, keeping it in the same proportions. When you upload a design file to Cricut Design Space it will be grouped together.
Ungroup: Use this button to ungroup a set of images that have been grouped together. For example if you want to edit, resize, or move around specific pieces of our “My Craft Room Is My Happy Place” cut file you would want to ungroup it firs.
Duplicate: Duplicate whatever design element you have selected by pressing this button.
Delete: Delete whatever design element you have selected by pressing this button.
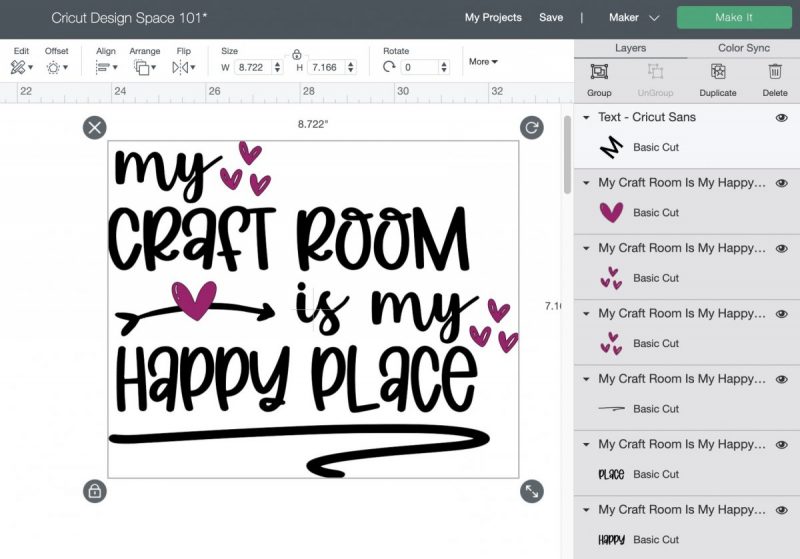
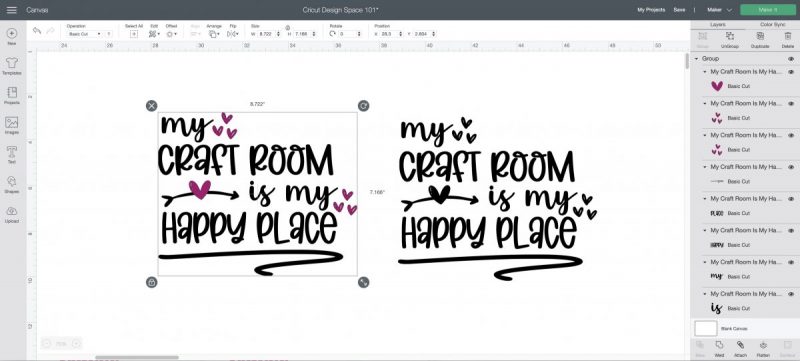
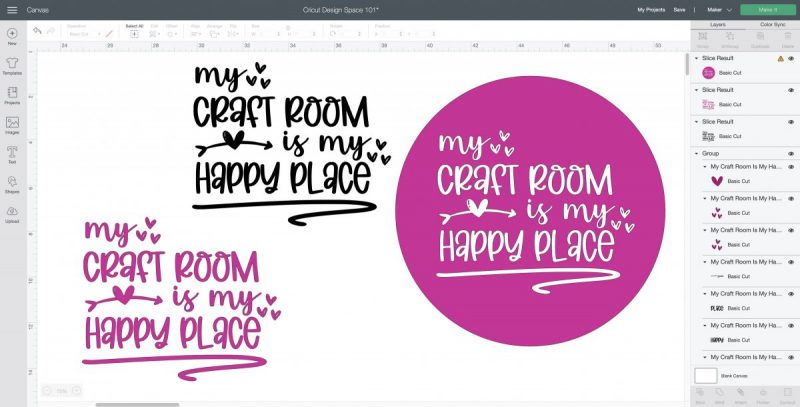
Weld: Slice and Weld are two of my very favorite functions within Design Space. In my mind Slice is like a cookie cutter and Weld is like glue. Easily connect two or more design elements into one seamless piece by using the Weld button. For example, in the below photo I have welded the design “My Craft Room Is My Happy Place” in the design on the right hand side of the screen. It makes it so that the design is now all on one single layer, where the design on the left is multiple layers.
One of my very favorite ways to use Weld is with script fonts. When you type your words using the text function in Design Space it spaces your letters out. With a script font, you want your letters to be touching. To fix this, type your word out (top line in image below) and then click Ungroup. Space your letters the way you would like them (second line in image below), now if you were to cut it like this, each of your letters would still be cut out individually, so what you want to do is select all of the letters and then click weld (bottom line in image below). Then your Cricut will cut the design out all in one big piece.

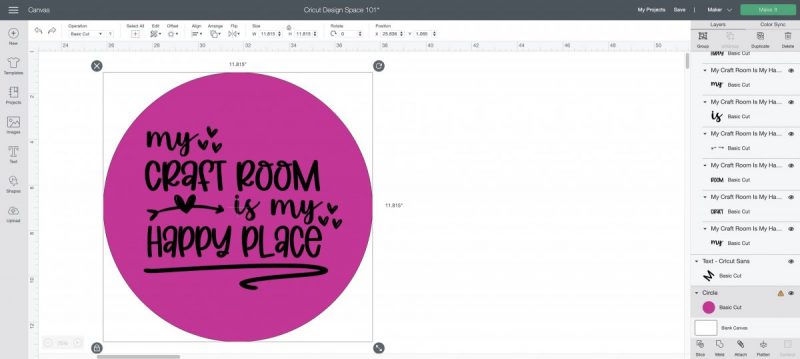
Slice: Think of Slice like a cookie cutter. Lay one design element on top of another, select both pieces, select Slice, and Design Space will cut the top design out of the bottom design. For example, in this series of photos, I have laid the welded “My Craft Room Is My Happy Place” cut file on top of a circle. I then selected both pieces, pressed Slice, and I am left with a circle with “My Craft Room Is My Happy Place” cut out of it, along with my original “cookie cutter” and the pink words that have been cut out of the circle.
Attach: This button is used to group items of the same color so that they will cut the way you have them laid out on your cutting mat. You only want to attach pieces that you are cutting from the same sheet of material. If you press attach on a design that is being cut out of multiple colors of material, it will change all the layers to one color, because you are telling your Cricut you want them to all cut on one mat, laid out the way you have your design.
For this example we are going to go back to the “My Craft Room Is My Happy Place Design”. If you were to click “Make It” without doing anything to the design file, it’s going to cut your design so that each design element is right next to each other to make the most effective use of your cutting material. See below.
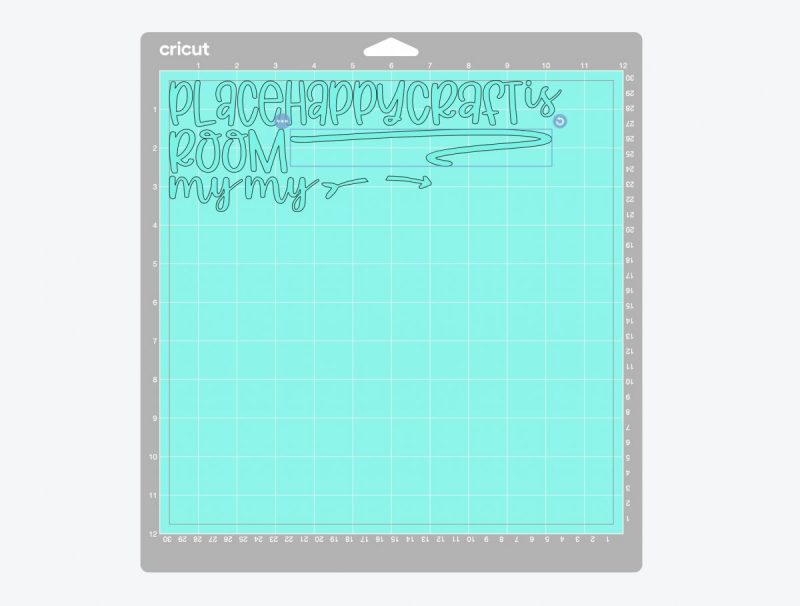
However, if you take all the colors of the design that are the same and click Attach, it attaches those pieces to each other, and cuts them as one big piece. Like below. Notice that the heart pieces are not in the design. That’s because those pieces are all being cut out of pink vinyl, and I have them attached together separately.
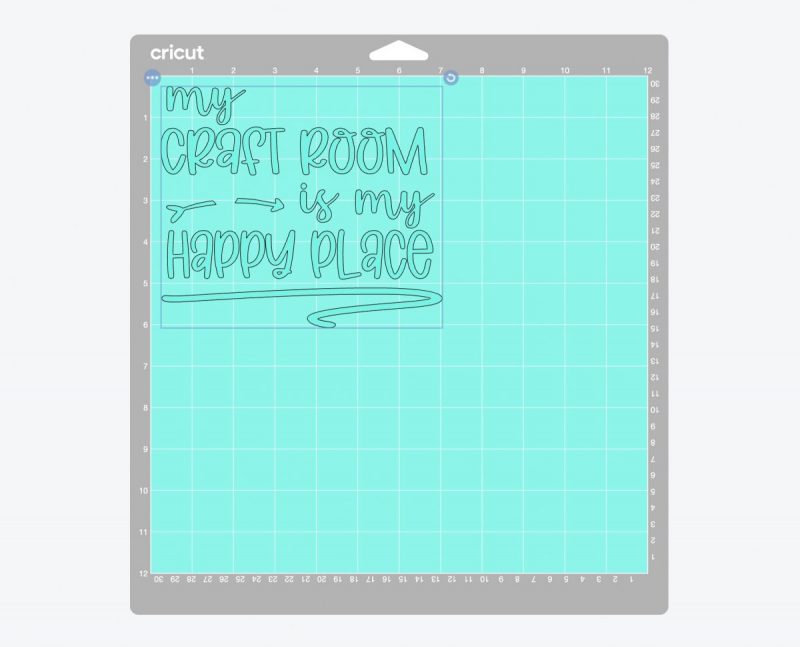
Having your images cut from the cutting mat the same way they’re laid out on my canvas makes it much easier to transfer to your project when you are using materials like vinyl and HTV. For materials like paper, felt or fabric that aren’t being transferred to something in one piece it makes the most sense to cut the design unattached to make the most out of your material.
Detach: Once you have attached cut elements together, when you click on them, you’ll see a Detach button appear where the Attach used to be. Press this button to detach your attached pieces.
Flatten: This button is used to turn elements into a Print Then Cut image. We’re going to use it to make stickers out of our “My Craft Room Is My Happy Place” cut file. First I use the offset button to make a “bubble” around my design. Then with both layers selected I click flatten. The flatten button takes whatever layers you have selected and puts them into one layer that you will print using your printer, and then the Cricut will cut around.
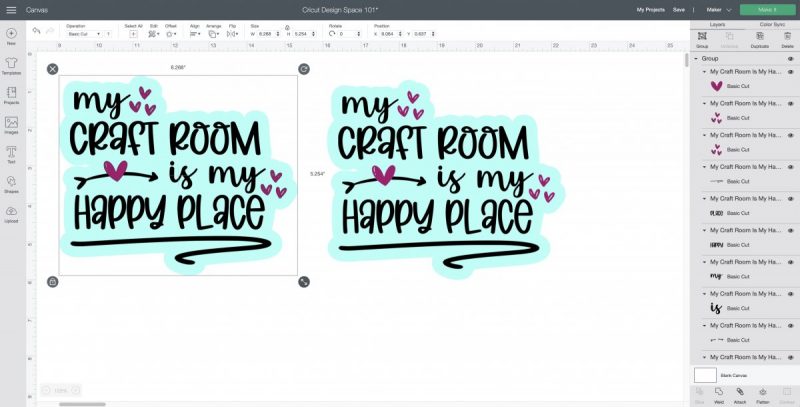
After flattening my images I sized them to the size I want for my stickers, clicked “Make It” and now Cricut Design Space will connect to my printer, which I will load with printable vinyl, print out this design and then I’ll load it on my cutting mat, load it into my Cricut Explore or Cricut Maker and the machine will cut around each of the stickers.
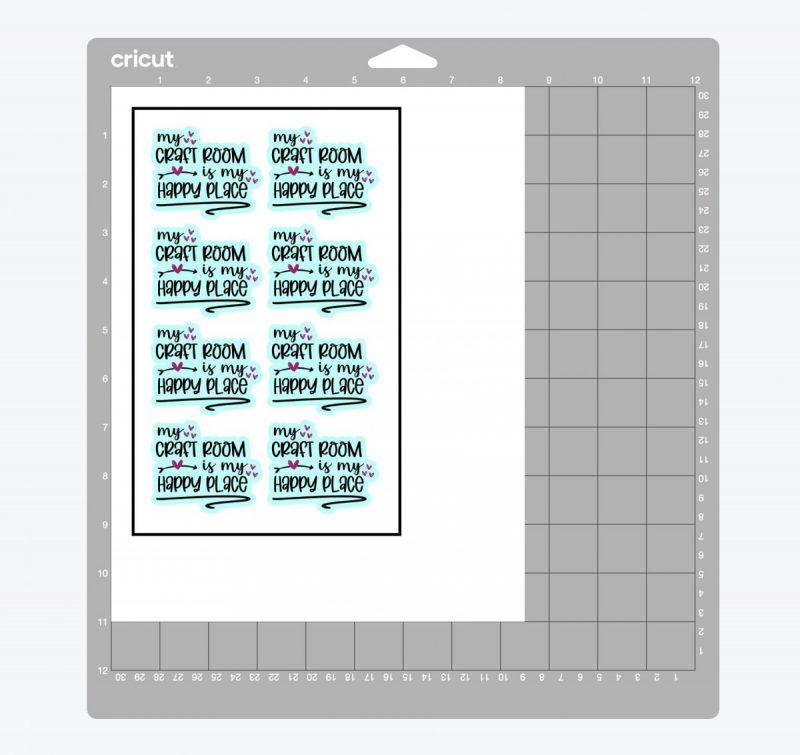
Note: The maximum cut size for Print Then Cut is 6.75 inches by 9.25 inches.
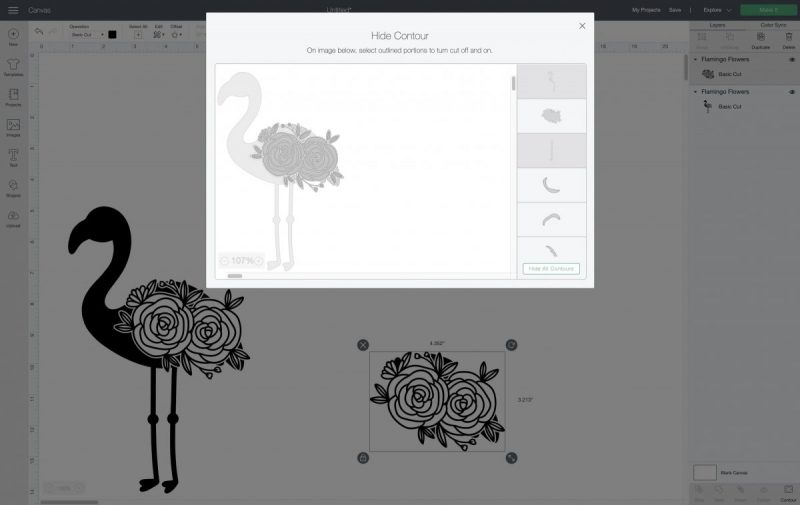
Contour: This button allows you to take any design and select the pieces from it that you want to keep or hide. For example, in this image, you’ll see that on the left hand there is a flamingo design with a flower. It’s a single layer, flat design. Let’s say you really like the flower and would like to use it in another project, but you don’t want the flamingo. You can click Contour, and see all of the individual pieces that make up that design. Then you can click each piece that is part of the flamingo, hide it, and you are left with just the flower.
After You Click Make It
We’ve covered all the design tools in in Cricut Design Space 101, but what happens after you click Make It? Let’s walk through the basic steps for getting your project to cut.
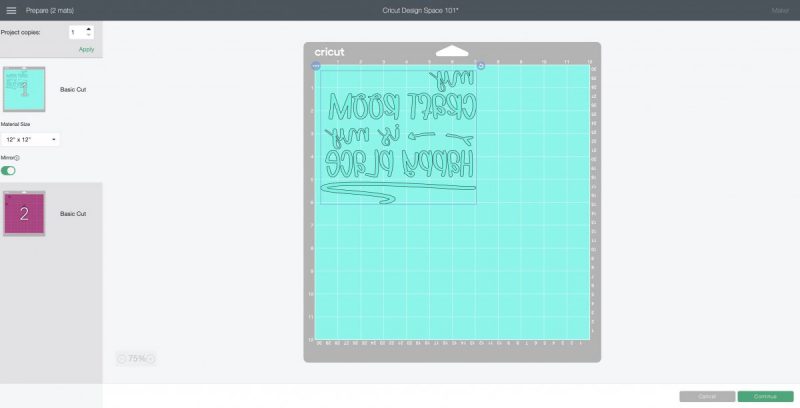
Once you click Make It, you will be taken to a screen that shows each of your cutting mats on the left-hand side of the screen. The first cutting mat will also be shown large on the screen.
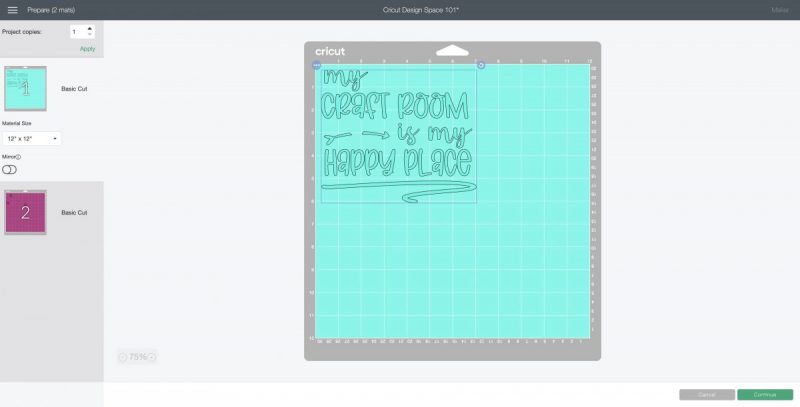
Under each mat in the left-hand toolbar you will have two options:
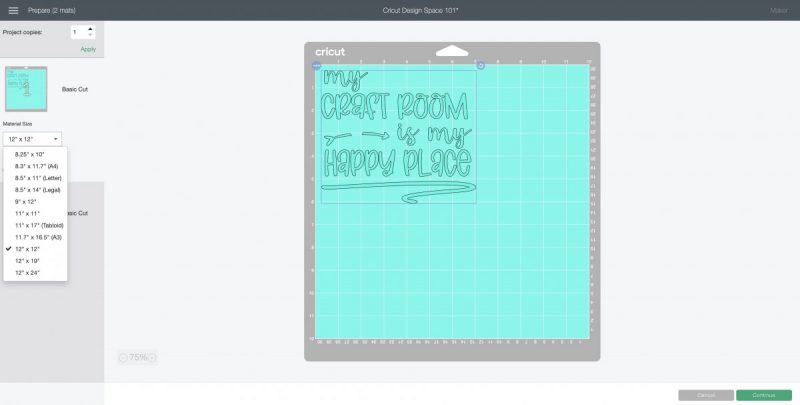
- You can choose your material size from a dropdown list.
2. You can click the mirror slider to mirror your image. Mirroring is an important step to take when working with materials that cut with the correct side facing down on the mat like iron-on and Infusible Ink. If you don’t mirror these materials, once you apply them to your blank, the images/words will be in reverse.
When you have a cutting mat selected, you also have the option of moving your design around anywhere you would like it to be on the mat. This feature comes in handy when you’re using scrap pieces of cutting material, or when you’re using your engraving tip to engrave on metal. (Read about how to engrave jewelry with your Cricut Maker here.)
When you click on a design element on your cutting mat, you’ll see a box appear around it with two different options:
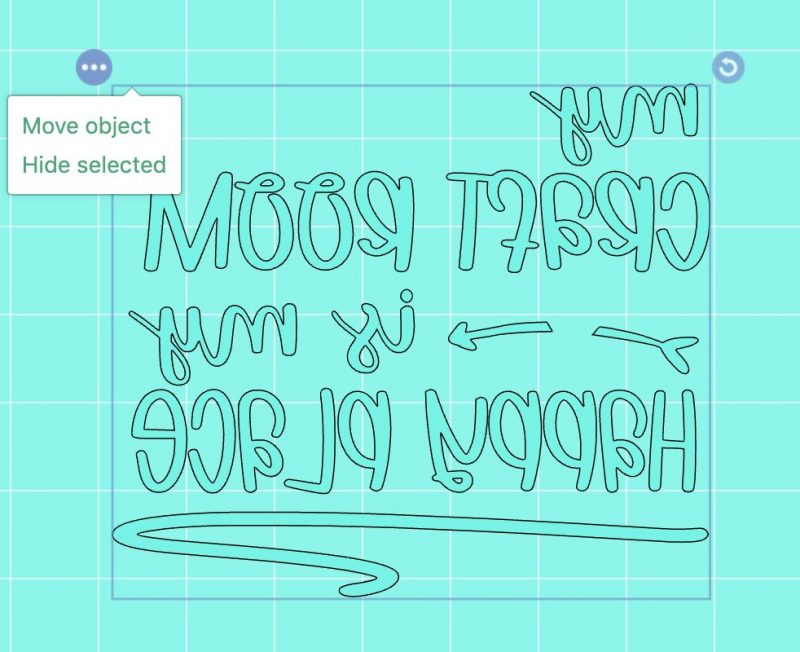
- Three dots (…) in the left hand corner: When you click on the “…” two options will come up. Move Object and Hide Object. When you click on the Move Object, it will give you the option to move your design to a different cutting mat. This can come in handy when you really want to make the most of your cutting material and pack as many cuts as possible into one mat. When you click Hide Object, that design will become hidden so that it no longer cuts.
- Circle arrow in the right hand corner: The circle arrow will allow you to rotate your design. This feature comes in handy when you’re trying to use up every last square inch of your cutting material.
Once you have your designs placed on the cutting mat where you want it, you can click Continue. You will then be taken to a screen where you select your cutting machine and cutting material.
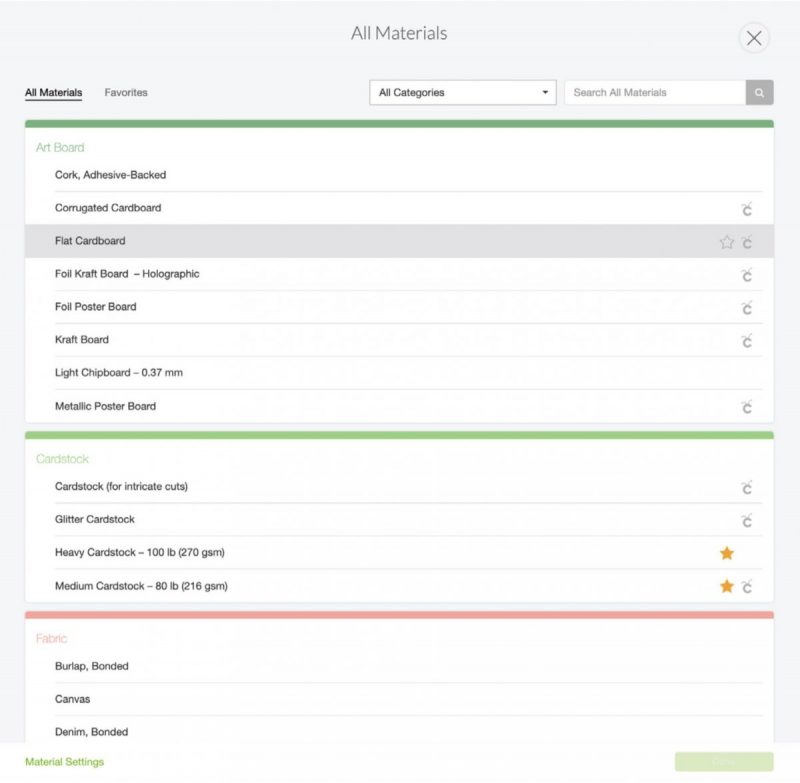
Your favorite cutting materials will appear on the screen. If you would like to pick a cutting material that is not shown, click Browse Materials. This will pull up a full list of cutting materials grouped by category. There is also a search box to make finding the material you’re looking for easy.
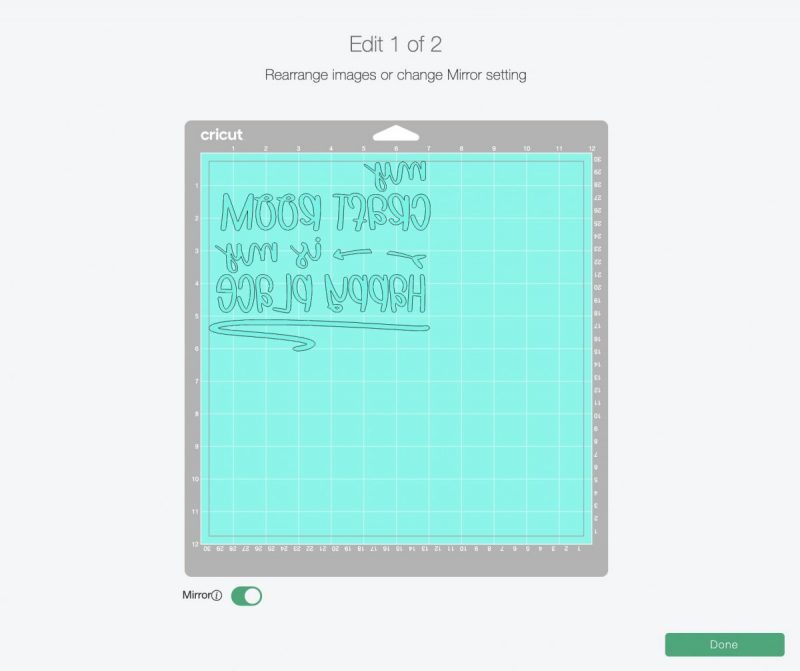
If you discover once you get to this screen that you would like your design set on a different spot on the mat, or that you forgot to mirror your design, you can click on the Edit button under the cutting mat you would like to edit in the left-hand toolbar. It will pop up a larger view of your mat that you can rearrange. There is also a mirror slider at the bottom of this box so you can switch your design to be mirrored.
Once you have selected your cutting material, you’ll be prompted to load any special blades, tools, or pens into your Cricut and to load your cutting mat into your machine.
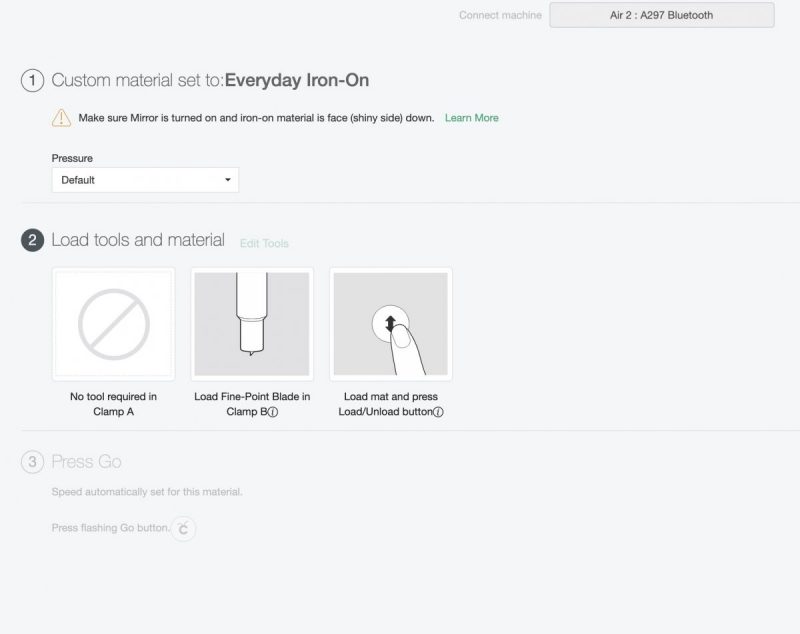
If you ever need to change the cutting material you have selected, simply click on the area that says “Custom Material Set To” and it will pull up the box where you can select a new cutting material.
And there you have it! Cricut Design Space 101! I hope that this served as a great walkthrough for you and that you learned about a tool or button or two you didn’t know about in the past. The more you use Design Space, the more instinctual it will become, and before you know it, you’ll be designing projects like a pro!
If you like Cricut Design Space 101, make sure you also check out:
- Cricut Basics section
- Cricut Crafts section
- Free SVG section
- Everything Cricut related from our site in one place
Here’s some more Cricut posts I think you might like:


Tell me… Do you have Cricut Design Space questions that you would like me to add to this Cricut Design Space 101 post? Leave them in the comments and I will create a reader questions section in this post with the answer!
If you like this Cricut Design Space 101 lesson and the free crafting SVG, I would love for you to pin it! It helps others discover our site which helps us bring you more awesome content like this!

I hope you enjoyed Cricut Design Space 101! What would you like to see next?


Once or twice I have attached my items ready to make it and the colors all change to one solid color. What am I doing wrong and how can I fix it? I love your web site. it is wonderful and has helped me so much. A huge thank you ! Awesome. Mary
Hi Mary,
Thanks so much for visiting and for asking such a great question.
Attach is used to attach pieces that you all want cut together on a cutting mat. The reason why they are all turning one solid color is that Design Space thinks that you want it to all cut together on one cutting mat.
What you probably are wanting to do is use the Group button. This makes it so that all the pieces one your canvas are in one block so that you can size them and move them around together. Within that group you can attach any of the pieces that are the same color, if you want them to cut the grouped together the way you see them on the screen.
Does that help/make sense? Group is mostly used for on the Design Space Canvas, where Attach is a function that is used for on the cutting mat so that everything cuts together the way you see it on screen (as opposed to making the most efficient use of your cutting material).
Best Wishes,
Crystal
Thank you. You are amazing and so easy to understand. Does your book have the same info in it? Thanks again Mary
Hi Crystal, I would like to have a hard copy- printed version- of your info about Cricut Design Space 101 – Everything You Need To Know to be a pro. So I can refer to it as I earn to navigate Design Space. I tried to print it off but none of the examples print – it just leaves a blank page.
How can I access a print version of this tutorial?
Regards
Lee Halstead
Leehalsteadcraft@gmail.com
Hi Lee,
Thank you so much for visiting. I’m so happy you enjoyed this post. A very similar (but more comprehensive) guide to Cricut Design Space is in my book The Unofficial Book of Cricut Crafts. That would be the best bet if you want a hard copy. It’s available as both a book and an ebook (which I’m guessing you could print.) You can find it here: https://amzn.to/3fWmFKK
Best Wishes,
Crystal
Thank you so much, your instructions are easy to understand. I just bought a Cricut Maker and can’t wait to start using it.
Thank you
Janet