


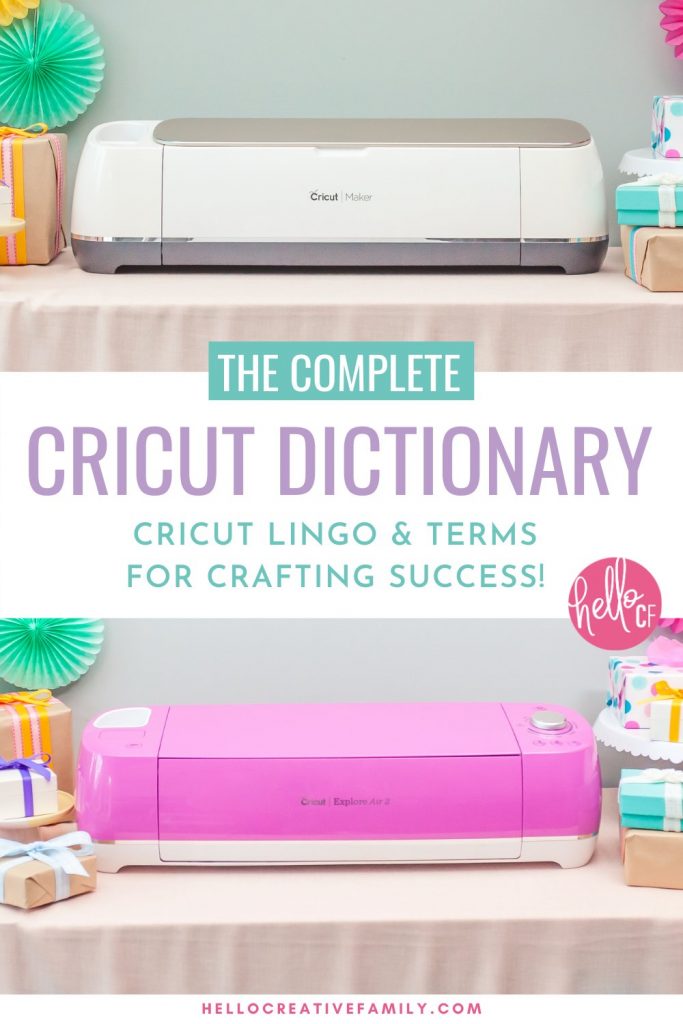
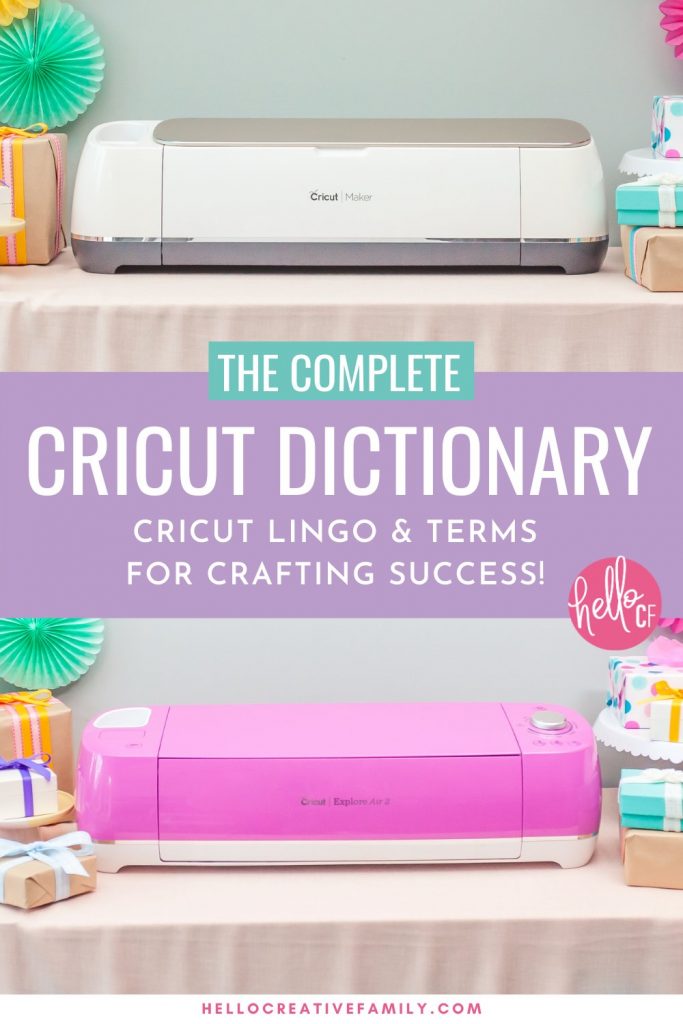
The Complete Cricut Dictionary: Cricut Lingo and Terms You Need To Know For Crafting Success!
This post and the photos within it may contain Amazon or other affiliate links. If you purchase something through the link, I may receive a small commission at no extra charge to you.
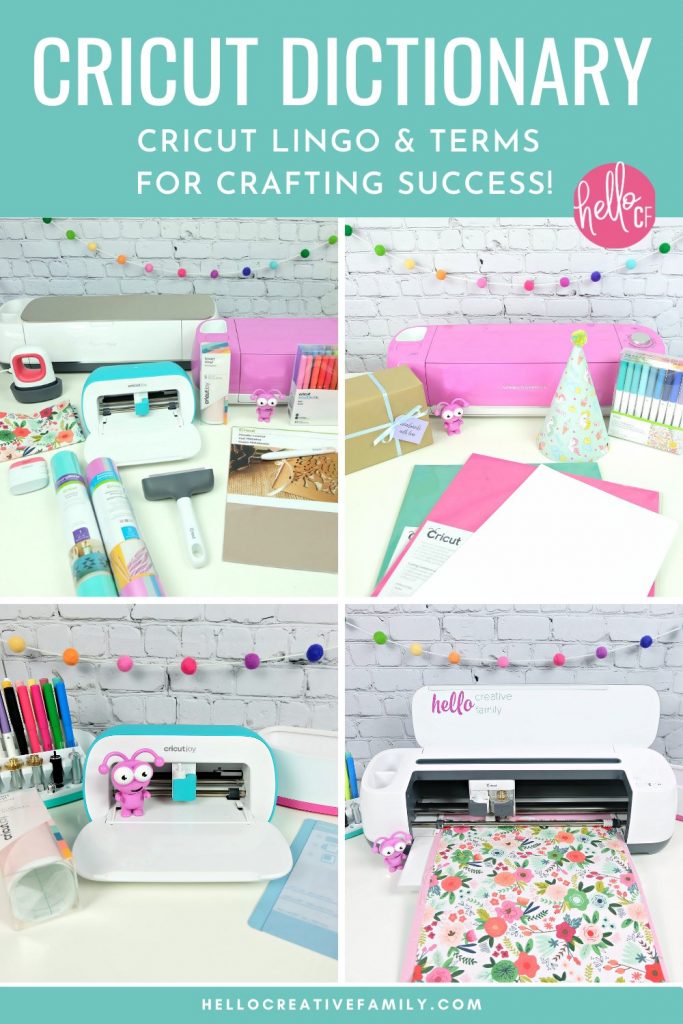
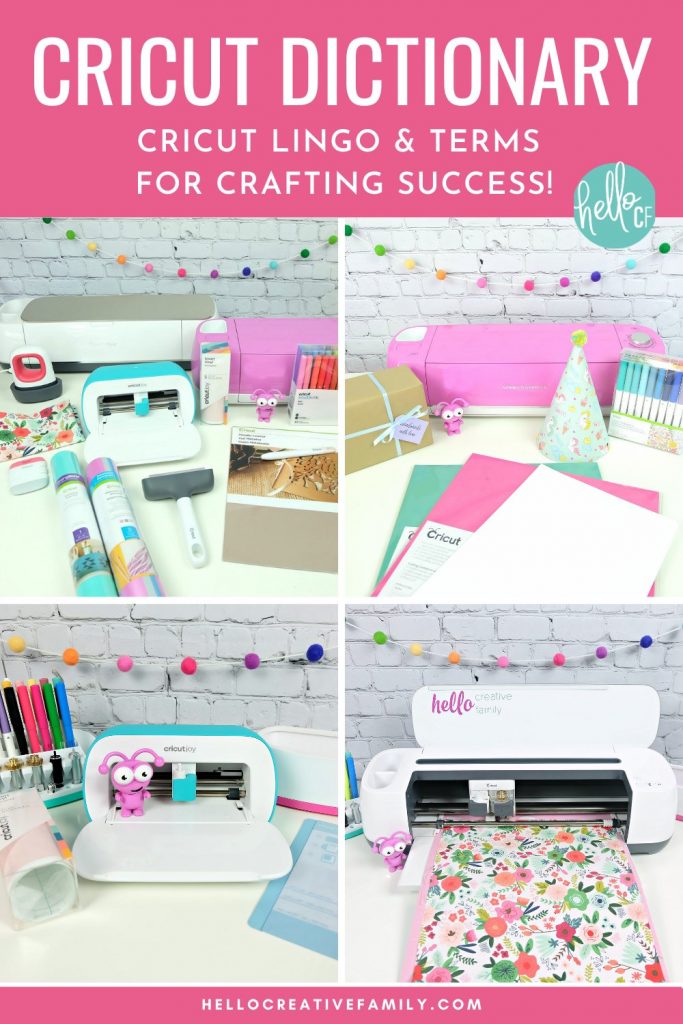
Do Cricut tutorials feel like a foreign language? The Complete Cricut Dictionary is full of Cricut Lingo and Terms for Cricut beginners that will help build Cricut crafting confidence and success!
Disclosure: Thank you to Cricut for working with us on this post, as with all articles on Hello Creative Family all thoughts and opinions are 100% our own.
Hi Crafty Friends! I’m back with a brand new addition to our Cricut Basics series– The Complete Cricut Dictionary! Today we’re going to be chatting all about Cricut terms you need to know for crafting success!
You all know how much I love my Cricut cutting machines! They are by far my favorite things in my craft room. I love to chat all about Cricut crafting with anyone who will listen, but sometimes I forget that us Cricut crafters have our own lingo.
Let me share a hypothetical situation with you– You bought a brand new Cricut and are so excited to get it out of the box and start crafting. You’ve visited some blogs, checked out Pinterest and have a list of projects you can’t wait to try. Then you start reading the instructions– Weed? Slice? Weld? Offset? HTV? Iron-on? What the heck do all these words mean? It almost feels like your cutting machine should come with a Cricut dictionary! Can you relate?
If you have ever felt that way, you are not alone. That’s why today I’m bringing you a Cricut dictionary! I’m taking my years of Cricut crafting experience and rolling all of the lingo into one helpful post. I’m sharing with you the 411 on all the words that you need to know for Cricut crafting success! Ready to get started? Read on!
The Complete Cricut Dictionary

Adaptive Tool System-
First up in our Cricut Dictionary– The Adaptive Tool System is a technology unique to the Cricut Maker. It allows you to use blades and tips that use more pressure and that have a unique 360 degree steering system.
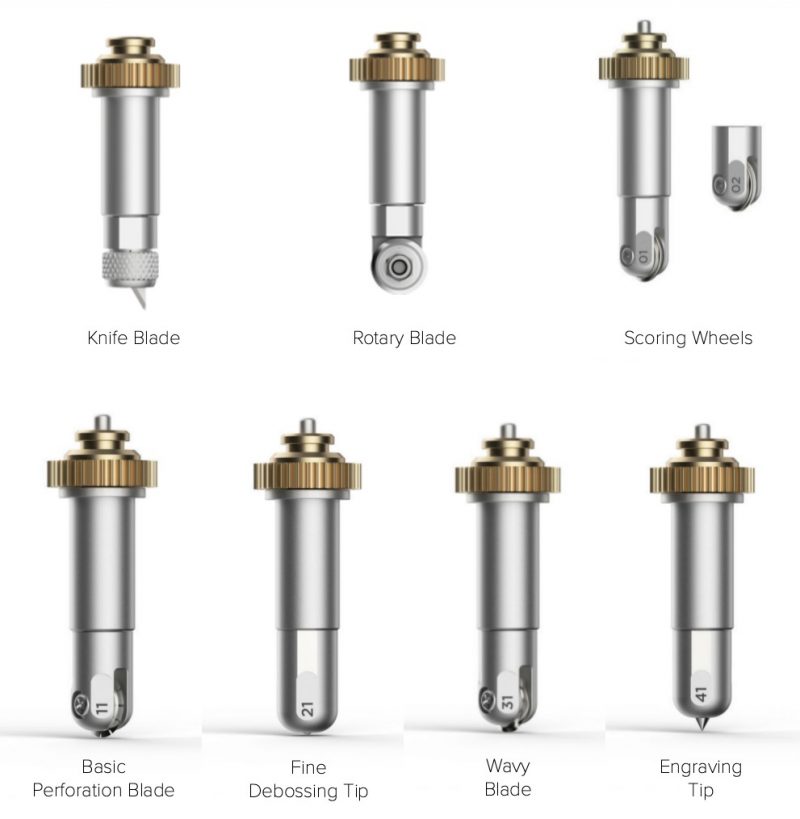
Cricut Adaptive Tools include:
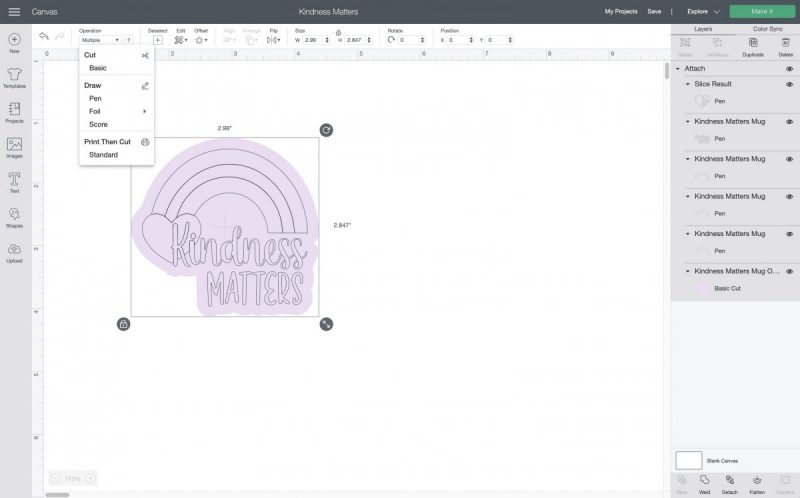
Attach-
The attach button is used to group items of the same color in Cricut Design Space so that they will cut the way you have them laid out on your cutting mat. This makes them easier to transfer to a project. You will also use the attach button for functions you would like for your Cricut tools to do. For example, if you want your Cricut to draw, foil, engrave, score or perforate you will use the Attach button to show your Cricut where you would like for it to perform this operation. See below how I attached my pen marks to my background, so that my Cricut will cut around the outside, and then draw the lines on top of the design. You will find the attach button in your toolbar.
Burnish-
The act of using a scraper or brayer tool to rub transfer tape that is laid over top of vinyl to help the vinyl stick to the surface.
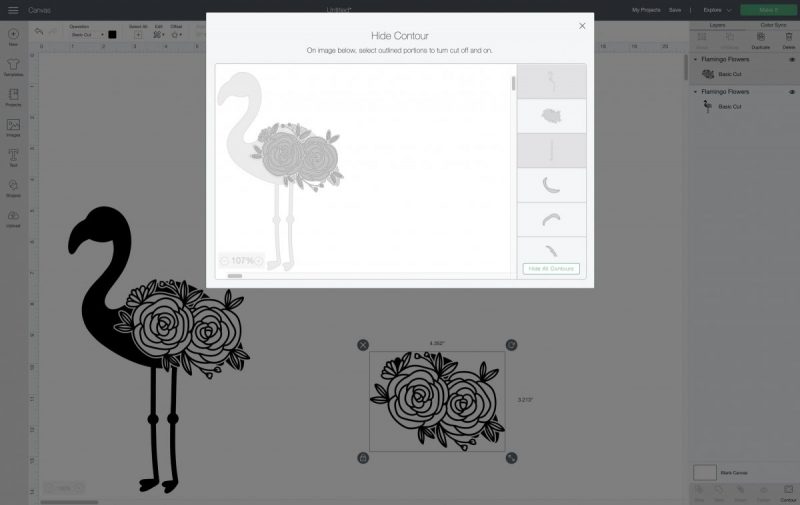
Contour-
Contour is a function available in Cricut Design Space. It allows you to take any design and select the pieces from it that you want to keep or hide. So for example, below on the left hand side you see a flamingo design with a flower. It’s a single layer, flat design. Let’s say I really like the flower and would like to use it in another project, but I don’t want the flamingo. I can click Contour, and see all of the individual pieces that make up that design. I can click on each piece that is part of the flamingo, hide it, and I’m left with just the flower. This is the Cricut tool that I use the least, and every time I do use it, I wonder why I don’t use it all the time!
Cricut Access-
Cricut Access is a subscription service offered by Cricut where members get access to over 100,000 images, cut files, projects and fonts that can be cut using the Cricut Maker, Cricut Explore Air 2 or Cricut Joy. Cricut Access members also enjoy additional perks including discounts on purchases from Cricut.com. Read our post about Cricut Access here.
Cricut Design Space-
Cricut’s free design software that is used for designing and cutting projects. Easy to use and filled with all kinds of awesome design features that you will love.
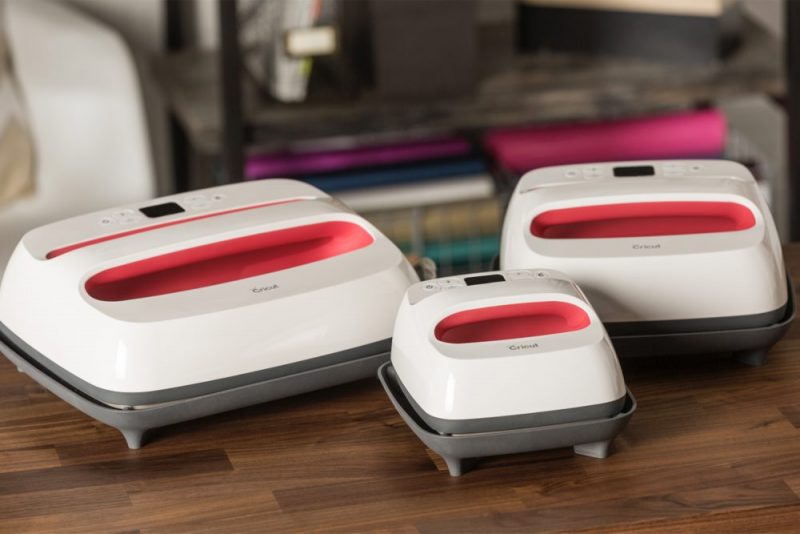
Cricut EasyPress-
The Cricut EasyPress is Cricut’s craft room space friendly version of a heat press. It’s available in four sizes all the way from an itty bitty EasyPress Mini to a 12×10 inch press that’s perfect for larger designs. Heat presses and EasyPresses have even heat signatures, precise temperature control and an even pressure that helps you get flawless results.
This handy little mat isn’t just for protecting your work surface from heat (though it does that too!) It has a special inner liner that wicks moisture to deliver clean dry heat and a foil membrane that reflects heat to your project. The soft protective barrier bottom also helps to seal layers together for beautiful results!
Cricut Maker, Cricut Explore and Cricut Joy-
Cricut’s three different electronic cutting machines. For more information on what a Cricut is and what each machine does visit our Cricut Basics: What Is A Cricut post.
Cutting Mat-
The Cricut Maker, Cricut Explore Air 2 and Cricut Joy all use cutting mats (the Cricut Joy also has the ability to do matless cutting). Cutting mats have a stick surface to hold your material in place while your Cricut is cutting.
Cricut cutting mats come in:
StandardGrip Mat– Available in 12″ x 12″ and 12″ x 24″ and 4.5″ x 12″. StandardGrip mats are used to cut heavy cardstock, iron-on, vinyl, htv, Infusible Ink and more. This is the mat that I use the most often
LightGrip Mat– Available in 12″ x 12″ and 12″ x 24″ and 4.5″ x 12″. LightGrip mats are used to cut paper, light cardstock, vellum, and more.
StrongGrip Mat– Available in 12″ x 12″ and 12″ x 24″. StrongGrip mats are used to cut chipboard, basswood, veneer, leather and more.
FabricGrip Mat– Available in 12″ x 12″ and 12″ x 24″. FabricGrip Mats are used with the Cricut Maker or Cricut Explore Air with the Bonded-Fabric Blade or in the Cricut Maker with the Rotary Blade. It is used to cut fabric.
Cricut Joy Card Mat– Available in 4.5″ x 6.25″. The Cricut Joy Card mat is used to cut Cricut Joy Insert Cards.
Flatten-
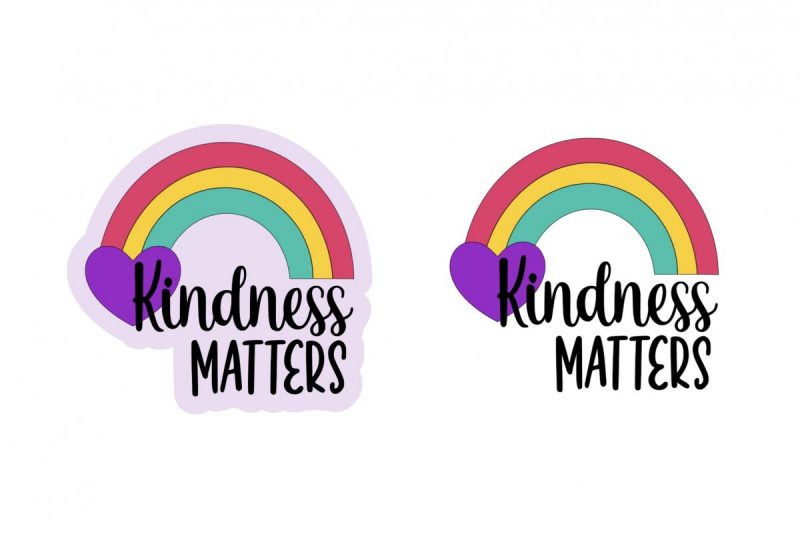
If you want to use the Print and Cut function on your Cricut then the Flatten button will become your best friend. Flatten allows you to take a design that is multiple layers, and compress it down into one layer that you can print out on your printer, then your Cricut cutting machine will cut out the design for you. You can see my flattened image below. The image on the left is flattened (wouldn’t it be an excellent sticker? Download the cut file for free here), the image on the right is multiple layers (perfect for cutting from vinyl, HTV or paper!)
Group-
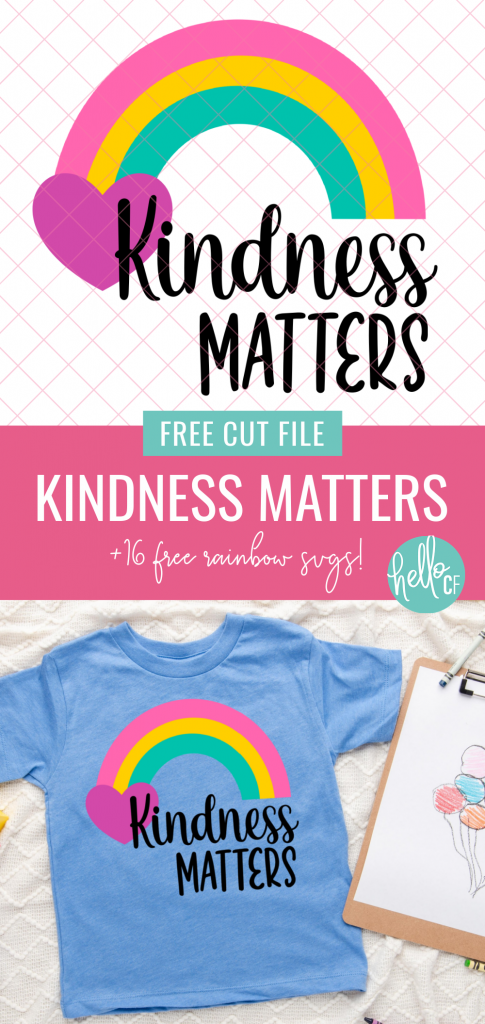
A function in Cricut Design Space that allows you to select two or more images in your project and group them together, making it easier to move, size and manipulate the multiple layers together. Going back to my Kindness Matters Rainbow SVG above, my design on the right is all grouped which allows me to move the entire design at once or resize it so that all pieces are resized at once and remain proportionate to each other.
Heat Press–
A machine used to heat your HTV and make it adhere to the material you are attaching it to, or to heat your Infusible Ink to infuse it into the material you are applying it to. Known for having even heat signatures, precise temperature control and an even pressure that helps you get flawless results. I use a Cricut EasyPress for my heat press.
HTV-
An acronym for heat transfer vinyl, which is vinyl that needs a heat source to permanently adhere to what you are applying it to. Read more about this under VINYL below. Also referred to as iron-on.
Infusible Ink-
Infusible Ink is similar to sublimation, but is Cricut’s crafter friendly version that doesn’t require a special printer. Cricut Infusible Ink comes in two formats– Infusible Ink Transfer Sheets and Infusible Ink Pens. Unlike an iron-on transfer or vinyl application, where artwork is attached on top of a compatible material using adhesive, an Infusible Ink heat transfer becomes one with the material itself.

Iron-on-
Another word for heat transfer vinyl, which is vinyl that needs a heat source to permanently adhere to what you are applying it to. Read more about this under VINYL below. Also referred to as HTV.
Iron-On Protective Sheet-
Made with a non-stick surface, iron-on protective sheets help to protect your HTV from getting damaged by heat. They also help distribute the heat from your EasyPress, heat press or iron more evenly.
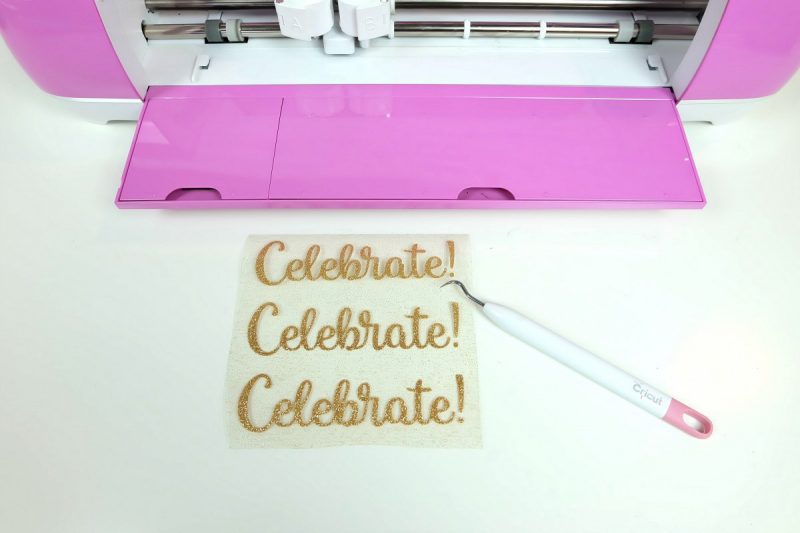
Kiss cut-
To cut through just the first layer of a material, not all the way through. A kiss cut is used with vinyl, HTV and Infusible Ink. It means that your machine will just cut the material and not the backing. This is something that your Cricut will do automatically for you when set to the correct material setting. The words “Celebrate” below were cut using a kiss cut, so it cut through the glitter iron-on but not the clear plastic backing.
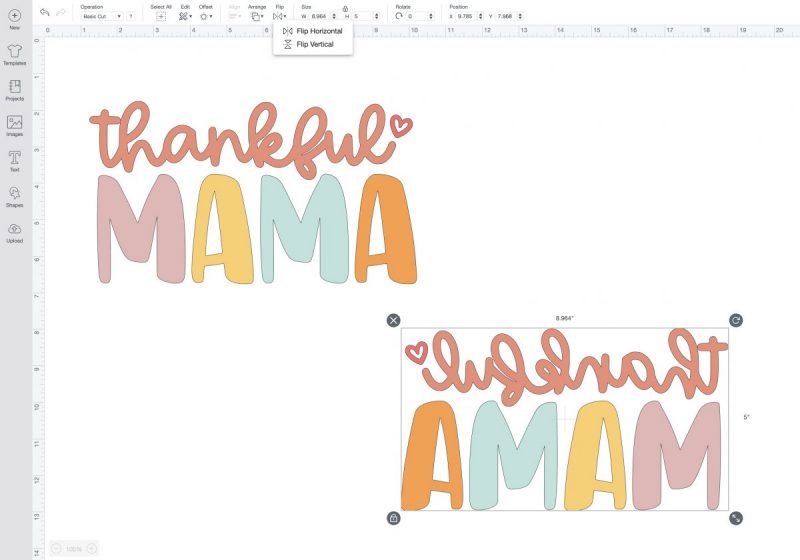
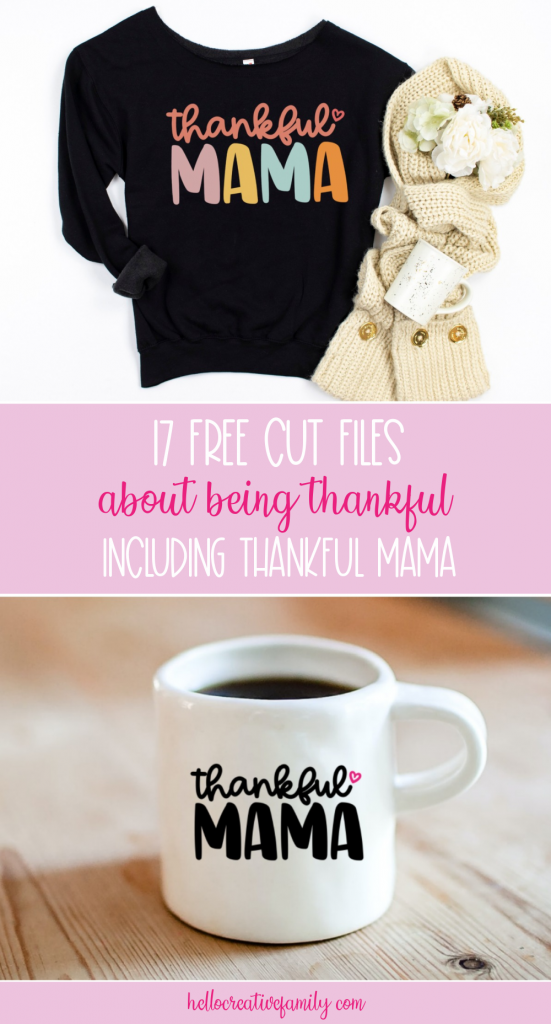
Mirror-
To flip or reverse an image. You do this when cutting a design out of heat transfer vinyl and Infusible Ink. You can do this in Cricut Design Space for individual designs by clicking the Flip button, or to your entire cutting mat by clicking the mirror button under each cutting mat in the screen that appears after you click Make It. You can see the bottom right design of my Thankful Mama cut file mirrored below, so that it is ready to apply to a shirt. Find my Thankful Mama cut file here.
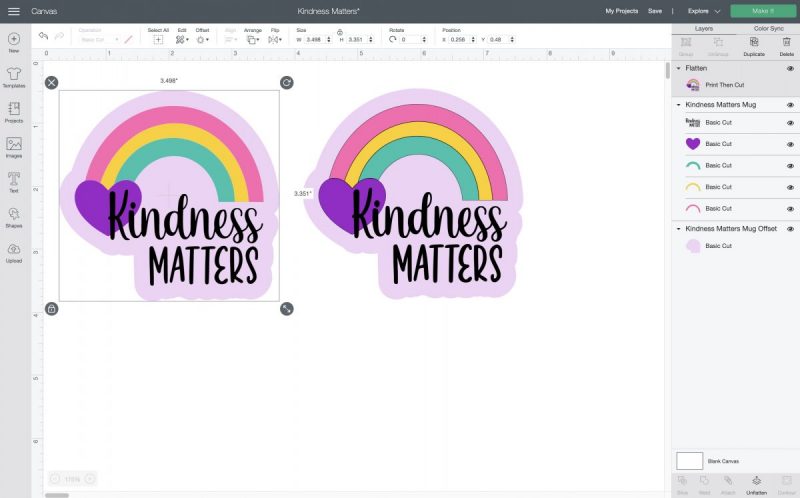
Offset-
I may just be a little bit excited about this one… because I’m a child of the 80’s and what do children of the 80’s all have in common? We love stickers! Offset is Cricut’s AWESOME new feature that allows you to create a filled in border layer around your design. You can see how I used this feature below to create a border layer around my rainbow. This isn’t just great for stickers, it can also be used for designs for shirts, cake toppers, banners, and so much more! Find the offset button in your toolbar in Cricut Design Space.
Paper Weight-
When cutting cardstock with your Cricut you’ll have to choose which weight of paper you are using. Paper weight refers to how much 500 sheets of the paper in their original, uncut form (before it’s cut to 8.5X11 or 12×12) weigh.
Print and Cut-
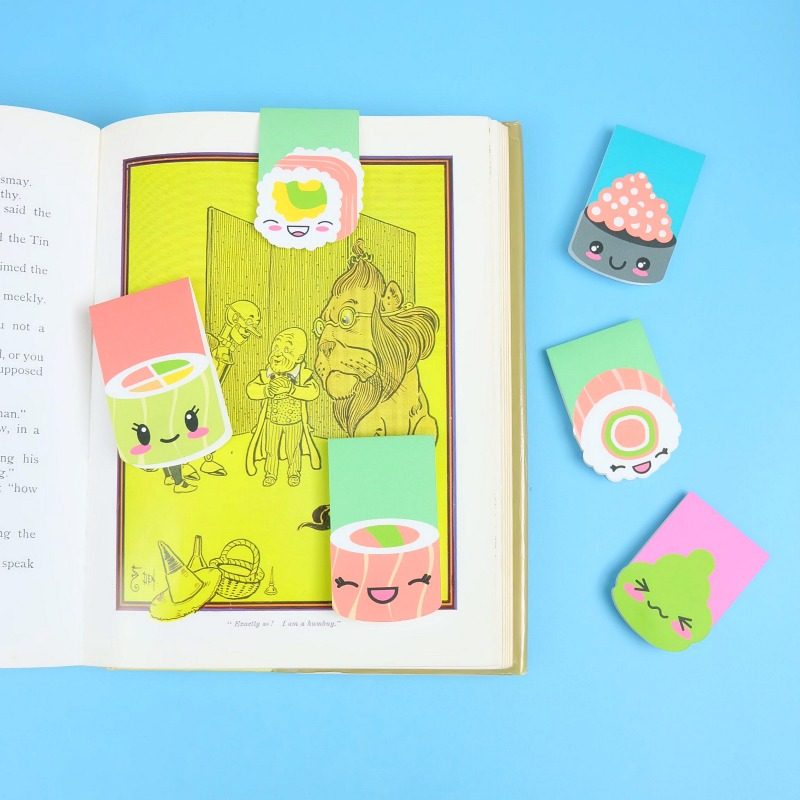
A feature available in Cricut Design Space where you print a design using your home printer and then your Cricut cuts out the design for you. I love using this feature with printable vinyl to make stickers, printable HTV for making shirts and with cardstock to make cards and other paper crafts like the Magnetic Sushi Bookmarks below.
Quilling-
Winding paper around a quill to create a coil shape. Often used for making paper flowers with your Cricut like the paper wedding bouquet below.

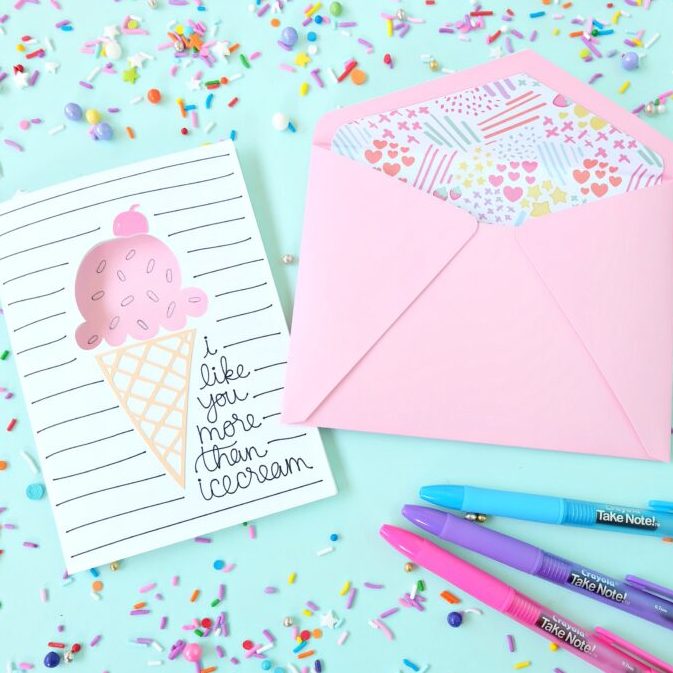
Scoring-
Creating an indentation in the paper, usually in the form of a line, so that your paper will fold cleanly and easily along the crease. You can do this by insterting a Scoring Stylus into the pen holder of your Cricut Maker or Cricut Explore, or with the Scoring Wheels with your Cricut Maker. The scoring feature is particularly wonderful for making cards and envelopes like the ice cream card set below.
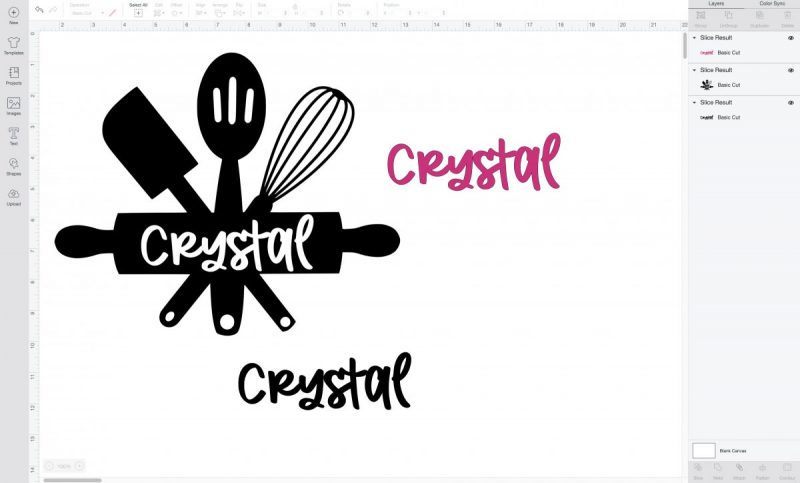
Slice-
Think of the Slice button in Cricut Design Space like a cookie cutter. Lay one design element on top of another, select both pieces, select slice and Design Space will cut the top design out of the bottom design. The slice tool was used to slice my name out of the utensils design below. You can find the free cut file for the design here.
Transfer Tape-
Transfer tape is used to transfer vinyl designs from the paper backing to the surface that you are applying it to. I like to purchase transfer tape that is clear and has lines so that you can easily see the positioning of where you are placing something and make sure it is nicely lined up.
QuickSwap Toolset-
Part of Cricut’s Adaptive Tool System, the QuickSwap Toolset means you only need one housing and can change the tool tip with a push of a button. To change the tool tips you simply press the button at the top of the housing which releases the tip and allows you to put on a new one!
The tools that are part of the QuickSwap Toolset are:
Sublimation Printing–
This is a term you may hear often when talking to others about Infusible Ink. Sublimation is a chemical process where a solid turns into a gas without going through a liquid stage. Sublimation printing is a method of transferring images onto different materials like t-shirts and bags. Sublimation printing involves a chemical reaction and a special printer and Ink. Infusible Ink is Cricut’s version of sublimation printing that was created to make the process easier for your average crafter.
Vinyl–
If you loved stickers when you were a kid, then vinyl is the craft material for you! Think of a roll of vinyl as a big long sticker sheet that you can cut into any shape to stick to just about anything– mugs, cars, signs, paper, walls…. really the list could go on and on.
Vinyl comes in all different colors, patterns and textures. There’s glitter, holographic, matte, glossy, chalkboard, dry erase and even glow in the dark!
Vinyl comes in four basic categories:
- Permanent vinyl– Use this on anything that is going to be getting wet– whether that means being washed with your dishes, or being outside in the elements. (Note: You can also get permanent outdoor vinyl which is probably best to use for projects that will be exposed to rain, sun and snow.) Perfect for glassware, mugs, shower doors and more.
- Removable vinyl– Removes without residue for up to 2 years after being applied. I like to use removable vinyl on anything that isn’t getting washed. Removable vinyl still has staying power, but if you need to peel it up for any reason you can. It’s fabulous for wall decals, indoor signs, decorating notebooks, putting quotes on mirrors, decorating your Cricut and more.
- Printable vinyl– Use Cricut’s print and cut function combined with your home printer to print designs and then have your Cricut cut them. I love it for planner stickers, party decor, quick and easy custom crafts and more. You can find one of my printable vinyl project under in the “special materials” section.
- Heat transfer vinyl (also known as htv or iron-on)- Apply heat to this vinyl to get it to permanently adhere to fabric, paper, wood and more.
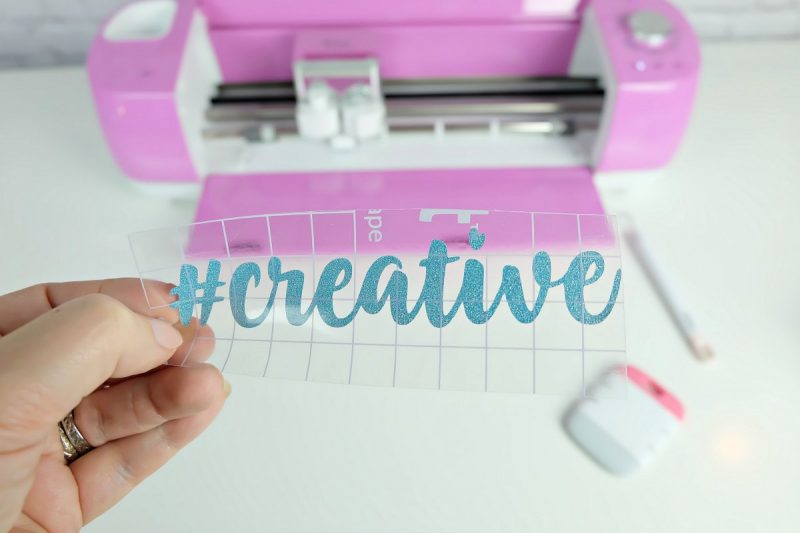
Weeding–
The process of removing the negative space from around your design. For example in the image below we removed the HTV from the areas all the way around each letter, as well as inside the holes in the letter (for example the hole in the letter A.) You can find this free Crafty cut file here.
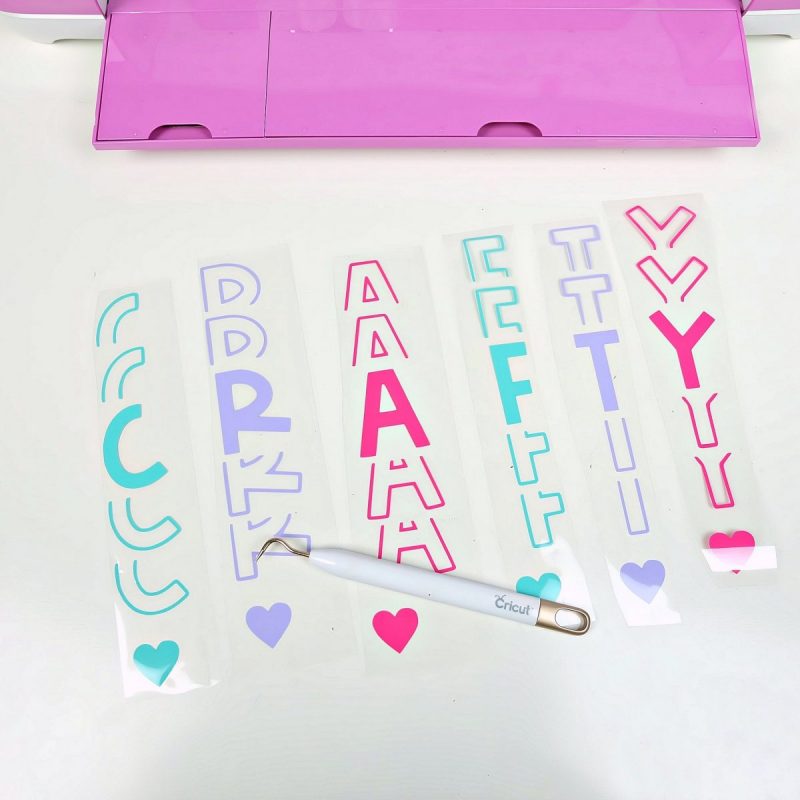
Weeding tools:
Weeding tools come in a variety of shapes for different types of projects you are working on. They help you when you’re weeding vinyl and HTV. They are especially helpful when weeding small letters and intricate designs.
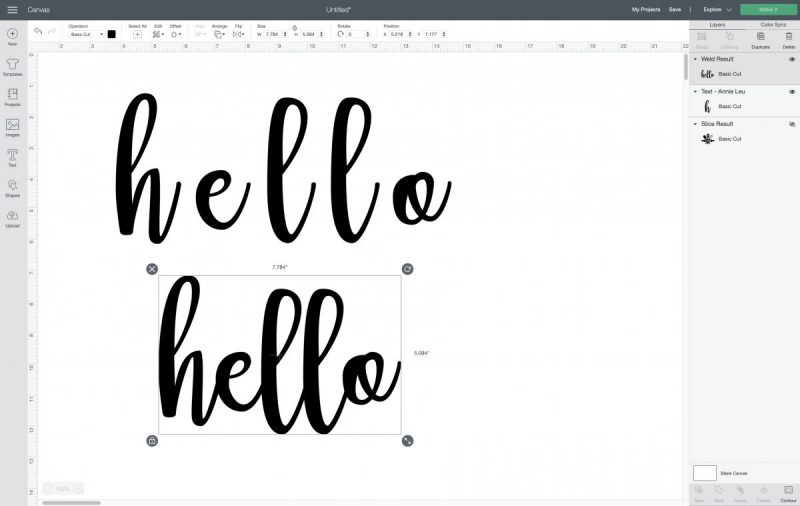
Weld-
If “Slice” is like a cookie cutter, then weld is like glue. Easily connect two or more design elements into one solid seamless piece by using the weld button. I especially love weld for when I’m designing within Cricut Design Space. It’s particularly helpful when you are using the text function with a script style font. In the below photo you can see what it looks like when I type hello with the Annie Leu font. I ungrouped the letters, moved them so that the letters were all connected, selected all 5 letters and then clicked weld. It “glued” it all together so that when I click “Make It” my Cricut will cut the word in one big piece, instead of cutting each letter individually.
I hope that this Cricut Dictionary helped you better understand the lingo used in the Cricut crafting world. Have a word that you’re confused about? Leave us a comment and we’ll add it to our Cricut Dictionary!
Need supplies to make all your amazing Cricut creations? Click here for the best prices on Cricut cutting machines, bundles, iron-On, vinyl, cardstock and more!
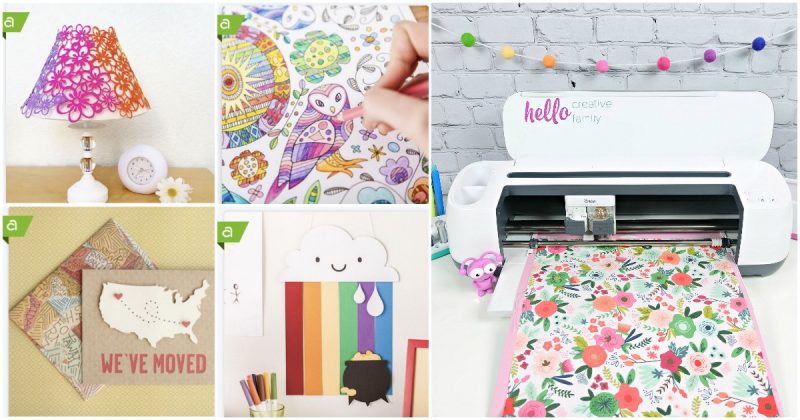
If you enjoyed our Cricut Dictionary, make sure you check out our Free SVG and Cricut Crafts sections! Here are some posts you may enjoy!

Tell me… What Cricut lingo should we add to our dictionary?


Is there a printable circuit dictionary.