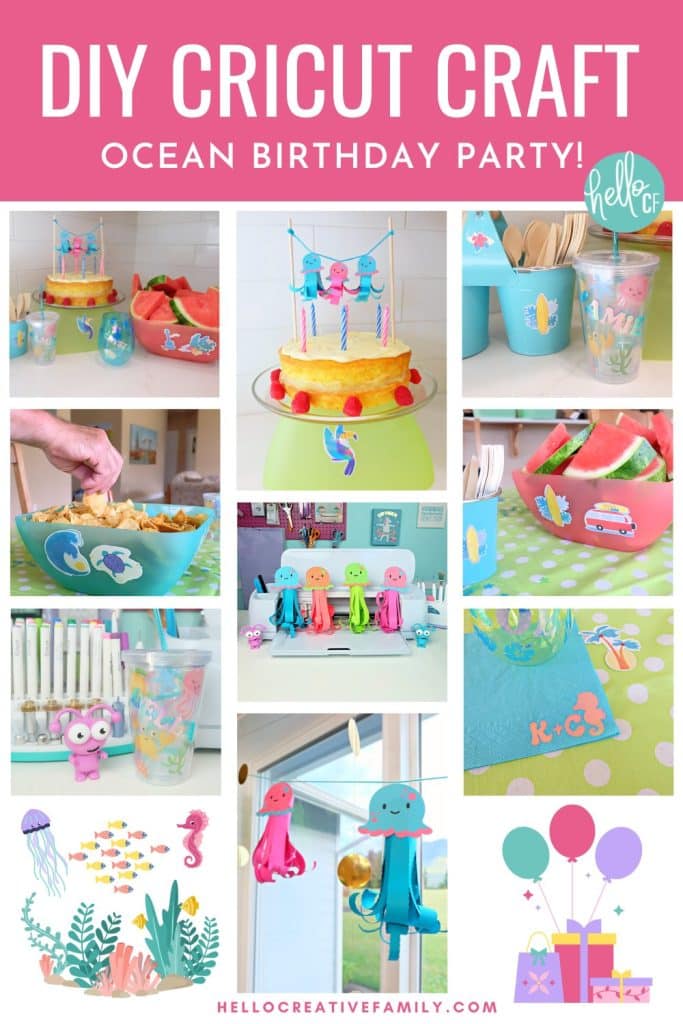
DIY Cricut Tropical Ocean Birthday Party
This post and the photos within it may contain Amazon or other affiliate links. If you purchase something through the link, I may receive a small commission at no extra charge to you.
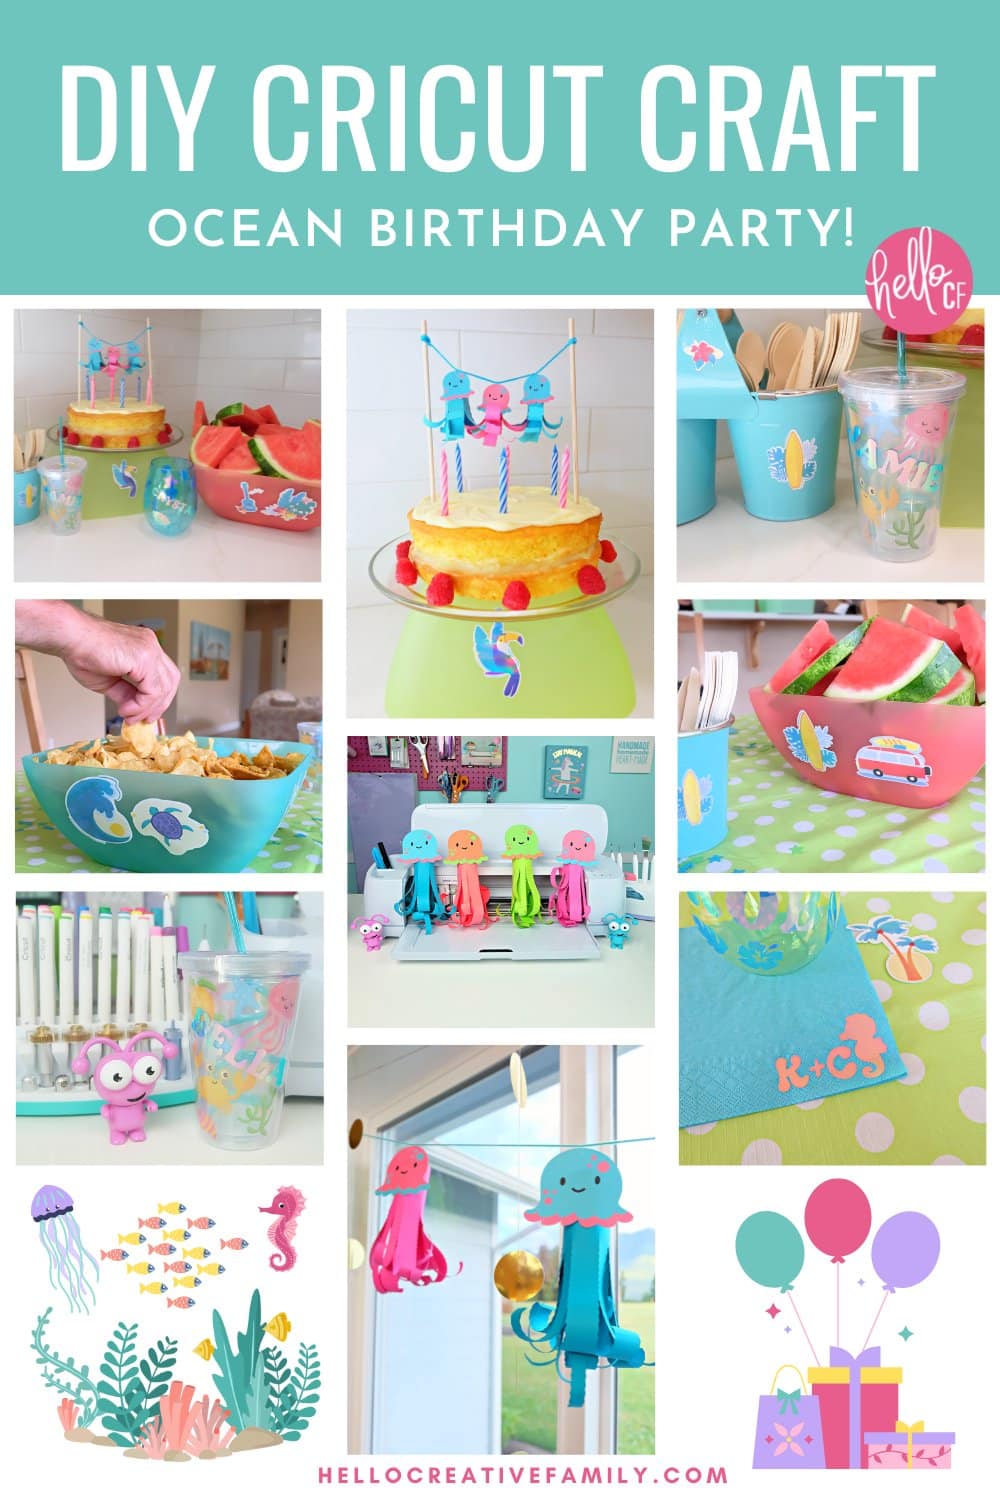
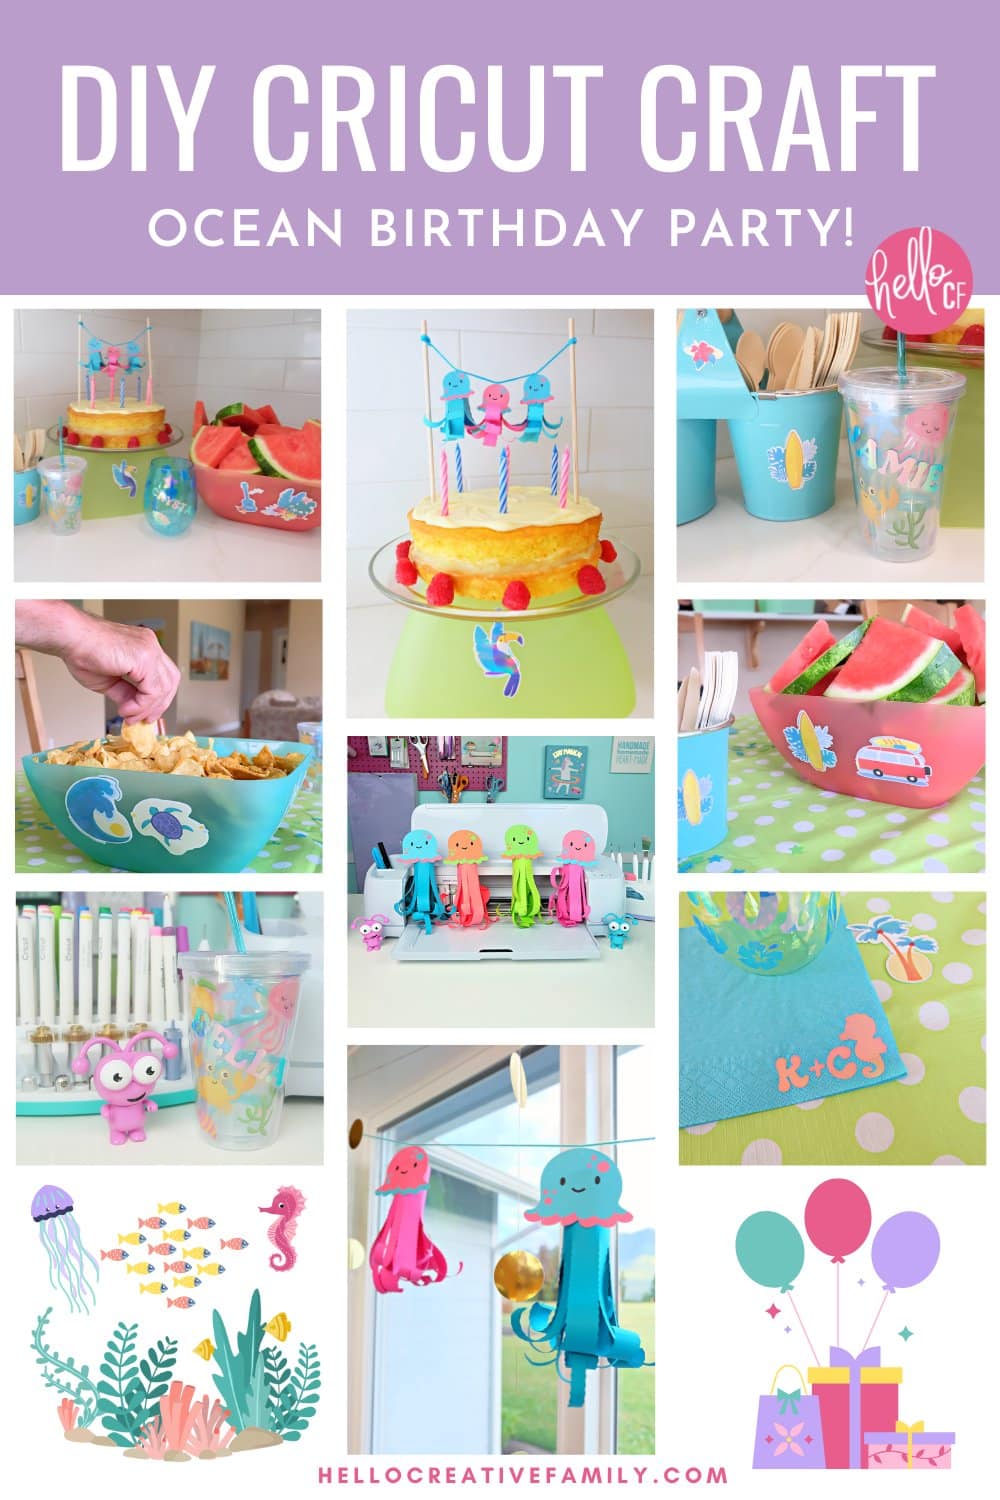
Creating one of a kind party decor is a breeze with a Cricut cutting machine! Learn how to make five tropical ocean birthday party projects including custom cups, confetti, a jellyfish cake topper with matching party garland, custom napkins and holographic stickers! With step by step tutorials! Take these ideas and transfer them to any party theme!
Disclosure: Thank you to Cricut Canada for sponsoring this project and post. As is with every article on Hello Creative Family, all thoughts and opinions are 100% our own.
Hi Crafty Friends!
The summertime is a huge time for fun and exciting events in my family! I feel like everyone I know has a summer birthday.
The festivities kick off with Father’s Day. Then comes my son’s birthday, my birthday, my sister’s birthday, my sister in law’s birthday, my husband’s birthday, my father in law’s birthday, my husband and my anniversary and my daughter’s birthday! Phew! We also have a ton of aunt, uncle and cousin birthdays in July and August– so it’s a very busy few months for us!
Summers definitely mean a ton of celebrating for us and I love adding handmade touches to all of our birthday parties.
Since each of us has our own personalities, hobbies, likes and loves it means that no two birthday parties are the same! Our summers are filled with one fun theme after another and you know I can’t help but take part in all the decorating fun!
It makes me so happy to come up with a theme, search Cricut Design Space for the perfect images to fit that theme, and then use my Cricut to come up with one of a kind decorations and party supplies.
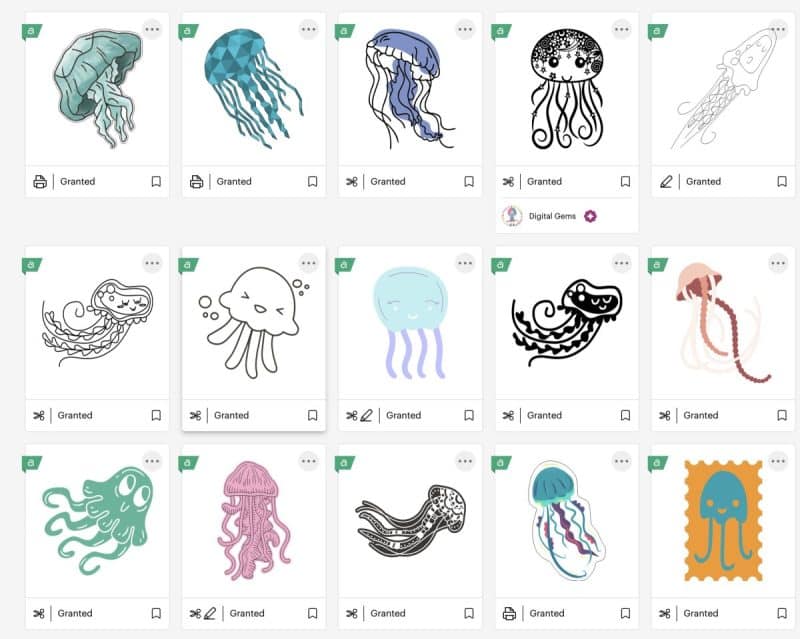
With a subscription to Cricut Access you get access to over 200,000 images and 700 fonts for free which makes my pocketbook very happy. I could literally craft for the rest of my life and never make a dent in all of the images that Cricut Access has to offer! Even if you don’t consider yourself a creative person, your Cricut will bring out your inner craft goddess!
Once you have an idea in mind, the Cricut Maker 3 makes bringing the projects from your mind to fruition so fun and easy! From Print Then Cut, to the variety of blades to cut, score, cut wavy legs (hello jellyfish!) and more– creating decorations for special occasions in your life couldn’t be easier!
Not only does making your own party supplies help you create a one of a kind festive look for your party, it’s also easy to do on a budget!
- Add a cute iron-on design, initials or monogram to a package of dollar store napkins
- Cut the guests’ names and cute designs that fit the theme out of vinyl and add them to dollar store glasses that guests can use at the party and bring home as a favor
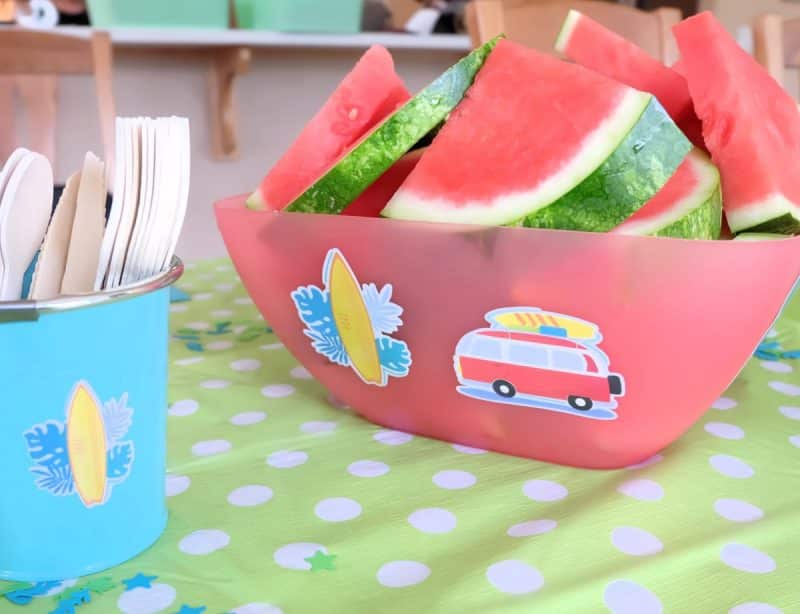
- Create waterproof stickers in designs that fit your theme to add to dollar store bowls that you fill with chips, watermelon and other party snacks
- DIY your own confetti using cardstock that you sprinkle on the tables and other party surfaces
- Craft your very own party banners, signs and cake toppers to take your party theme to the next level
You can even make save the dates, invitations and thank you cards for your party using your Cricut!
Tropical Ocean Birthday Party
My sister and my birthdays are only 5 days apart and we love to celebrate together.
Given that both of our horoscope signs are Cancer and we grew up in the Pacific Northwest, we both have always had an affinity for the ocean so I decided we should have a tropical ocean party!
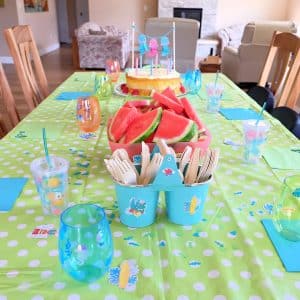
This year my sister and I got together to celebrate our birthdays (our first time in 3 years because of Covid), and I knew I had to add some special handmade touches to our party! It was so much fun to celebrate our birthday surrounded by family and to get to see the cousins playing together again!
The seasonal aisle of the dollar store was a great starting point for grabbing blanks that I could embellish to fit my theme. I found glasses, bowls, cutlery holders, paper napkins and a table cloth that were in coordinating colors that would go so nicely with my theme.
Then it was off to the craft store to stock up on holographic vinyl, holographic iron-on, cardstock and Cricut printable vinyl for making all of my design embellishments!


Today I’m going to show you how to make:
- Custom napkins using holographic iron-on
- The cutest drinking glasses with names and the cutest embellishments to fit your theme
- Water resistant stickers for decorating “all the things”
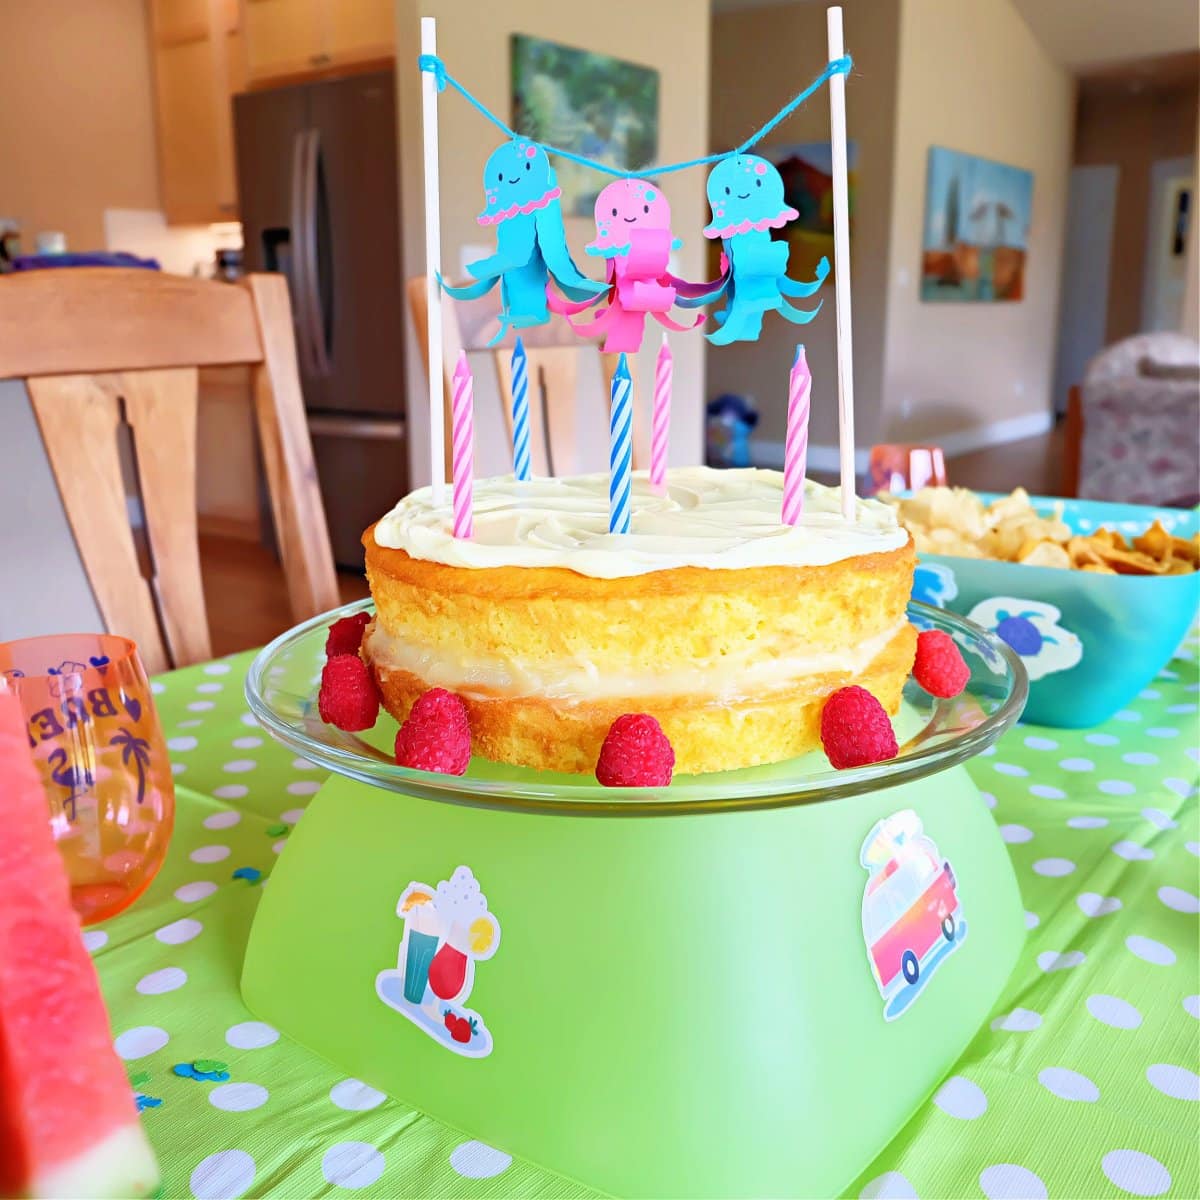
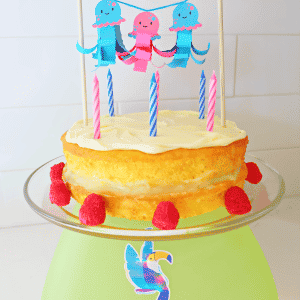
- Adorable paper jellyfish to use to make a garland or cake topper for your birthday dessert (they also make insanely cute finger puppets!
- Bonus confetti to sprinkle on the table
Ready to get started? Let’s go!
Personalized Paper Napkins
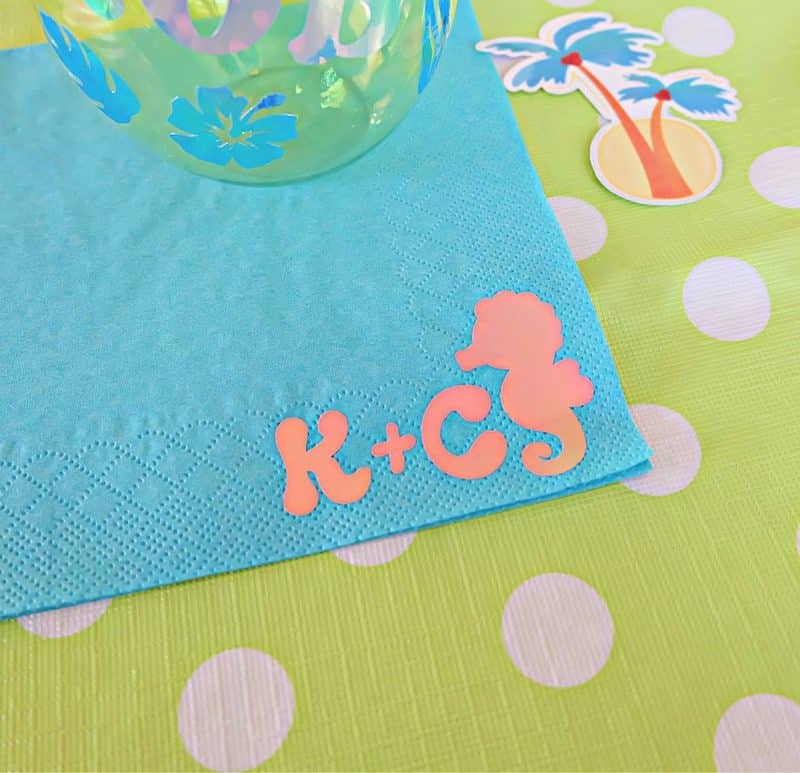
Custom napkins are another super inexpensive way to give your party an extra layer of personalization without spending a bunch of money! For this project I took my sister and my initials as well as one of the design elements (a seahorse) that I used on the cups and in the confetti.
The Cricut Autopress makes batching this project super simple, but you can also use a Cricut EasyPress.
Materials:
- Cricut Maker, Cricut Explore Air or Cricut Joy
- Cricut Smart Iron-On or Cricut Iron-On in your favorite color. I used Smart Iron-On in Holographic Blue
- StandardGrip Cutting Mat if not using Smart Iron-On
- Cricut Weeding Tools
- Scissors
- Cricut AutoPress or Cricut EasyPress
- Napkins
Directions:
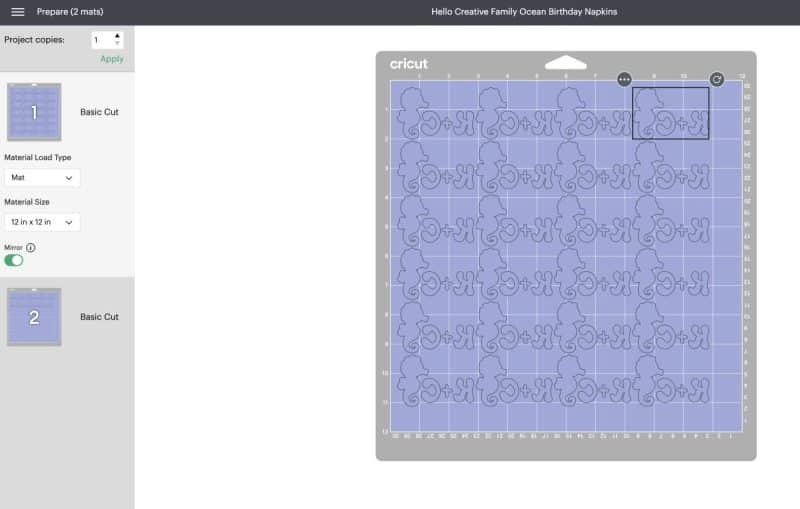
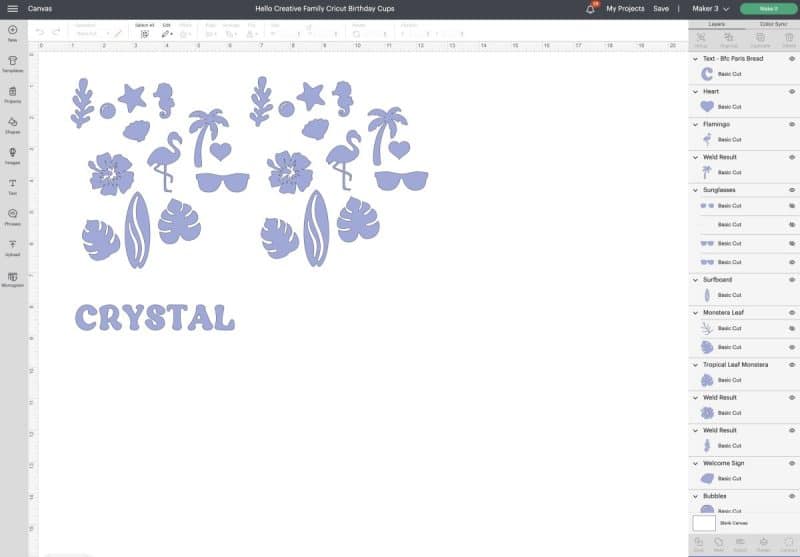
Step 1: Open Cricut Design Space. You can find my ocean themed napkins cut file project here. I used the font BFC Parkway for my napkins which is available in Cricut Design Space.
Step 2: Size your design to the size that you would like it to be for your napkins. I wanted my design in the corner of the napkin and sized it to 1.75 inches tall by 2.6 inches wide.

Step 3: Duplicate your design for as many napkins as you will be making.
Step 4: Click Make It. Since you will be using iron-on you will want to mirror your design. Follow the instructions on your screen to connect your Cricut to you computer or device and select your cutting material.
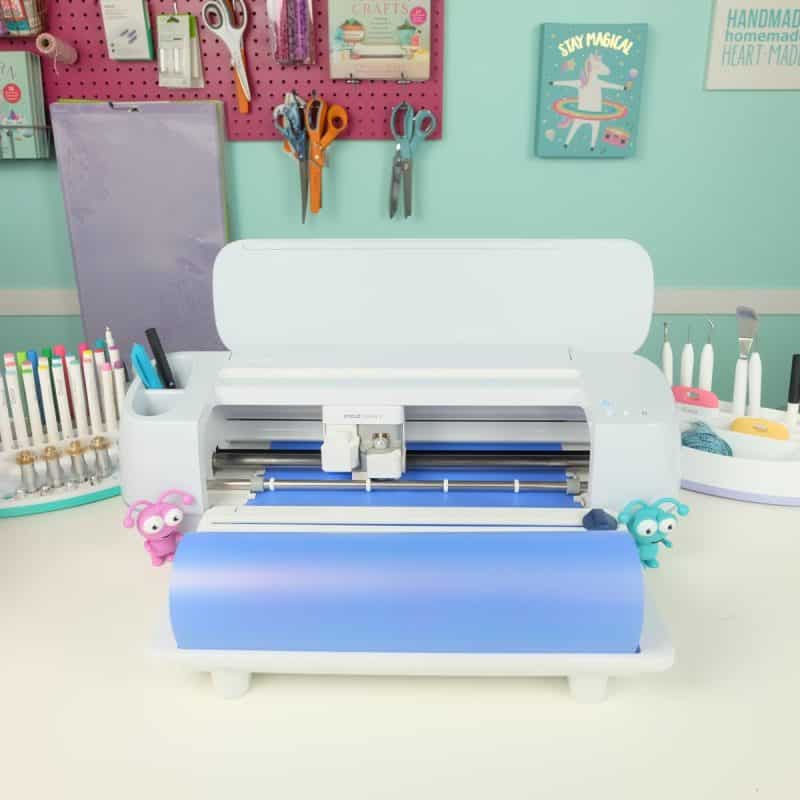
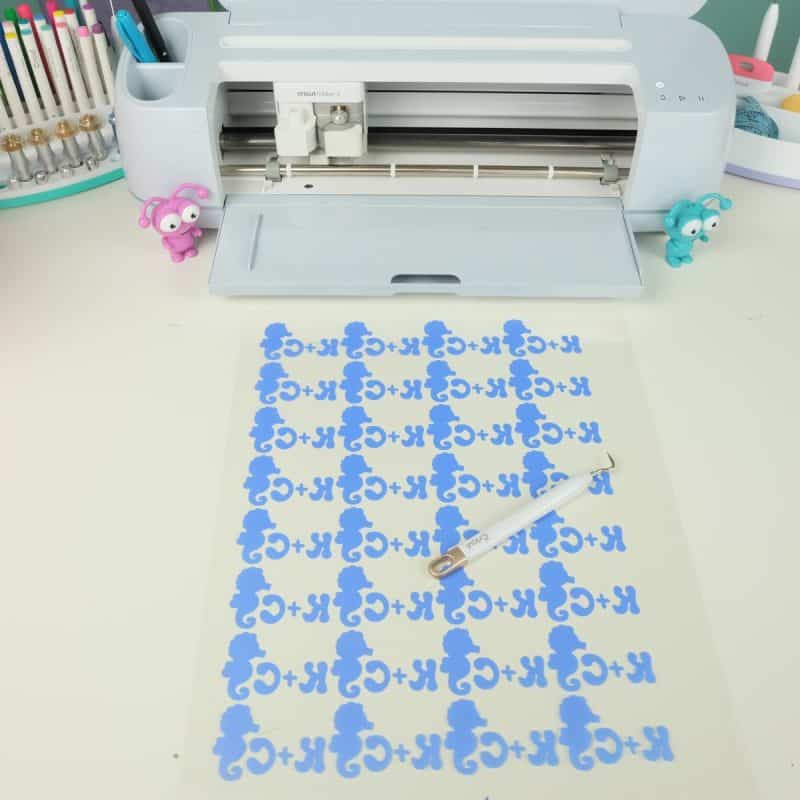
Step 5: If using Smart Iron-On feed your iron-on into your machine with the shiny/color side facing down. If using regular iron-on lay your iron-on on your cutting mat with the shiny/color side facing down. Load your material/mat into your machine and start cutting.
Step 6: When your design is done cutting, unload your cutting material/mat from your machine and use your weeding tools to weed your iron-on, removing the iron-on from around your design leaving just the design behind on the clear plastic backer.
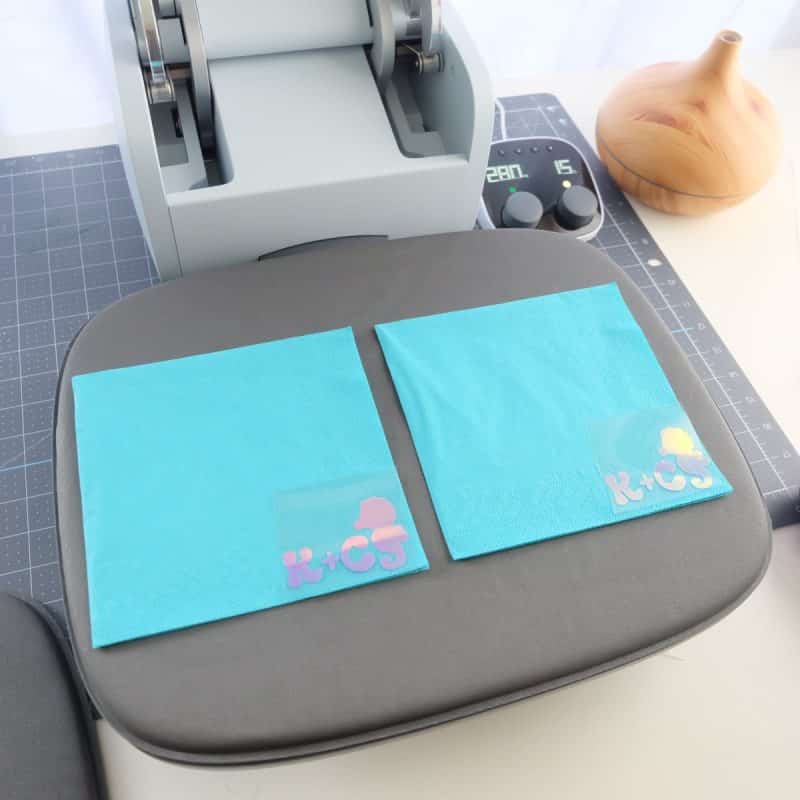
Step 7: Preheat your Cricut Autopress or Cricut EasyPress using the heat settings recommended on the Cricut Heat Guide Website. If using paper napkins select cardstock as your base material. I set my Cricut Autopress to 280F and the timer to 15 seconds.
Step 8: While your heat press heats, cut your sheet of designs so that each design is on it’s own plastic backer.
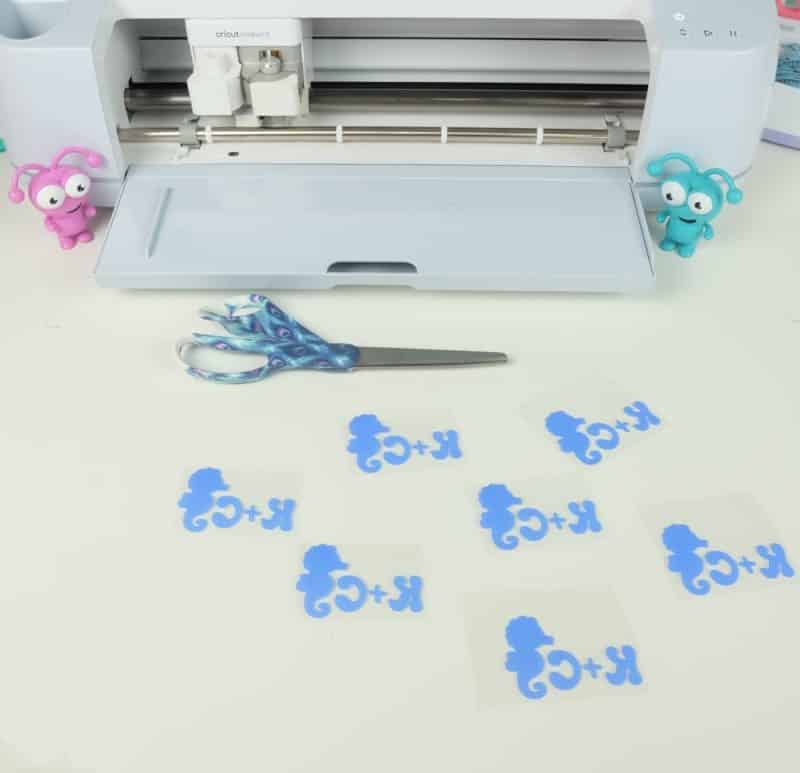
Step 9: Position your design where you would like it on your napkin then press using your heat press. Again we pressed at 280F for 15 seconds. Repeat until you have pressed all of your napkins.
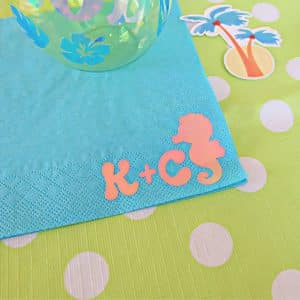
Step 10: Once your napkins have cooled, carefully remove the plastic liners on each napkin revealing your design.
Personalized Paper Napkins
Instructions
- Open Cricut Design Space. You can find my ocean themed napkins cut file project here. I used the font BFC Parkway for my napkins.
- Size your design to the size that you would like it to be for your napkins. I wanted my design in the corner of the napkin and sized it to 1.75 inches tall by 2.6 inches wide.
- Duplicate your design for as many napkins as you will be making.
- Click Make It. Since you will be using iron-on you will want to mirror your design. Follow the instructions on your screen to connect your Cricut to you computer or device and select your cutting material.
- If using Smart Iron-On feed your iron-on into your machine with the shiny/color side facing down. If using regular iron-on lay your iron-on on your cutting mat with the shiny/color side facing down. Load your material/mat into your machine and start cutting.
- When your design is done cutting, unload your cutting material/mat from your machine and use your weeding tools to weed your iron-on, removing the iron-on from around your design leaving just the design behind on the clear plastic backer.
- Preheat your Cricut Autopress or Cricut EasyPress using the heat settings recommended on the Cricut Heat Guide Website. If using paper napkins select cardstock as your base material. I set my Cricut Autopress to 280F and the timer to 15 seconds.
- While your heat press heats, cut your sheet of designs so that each design is on it’s own plastic backer.
- Position your design where you would like it on your napkin then press using your heat press. Again we pressed at 280F for 15 seconds. Repeat until you have pressed all of your napkins.
- Once your napkins have cooled, carefully remove the plastic liners on each napkin revealing your design.
Equipment
- Cricut Maker, Cricut Explore Air or Cricut JoyCricut
- StandardGrip Cutting Mat (if not using Smart Iron-On)
- Scissors
- Cricut AutoPress or Cricut EasyPres
- Napkins
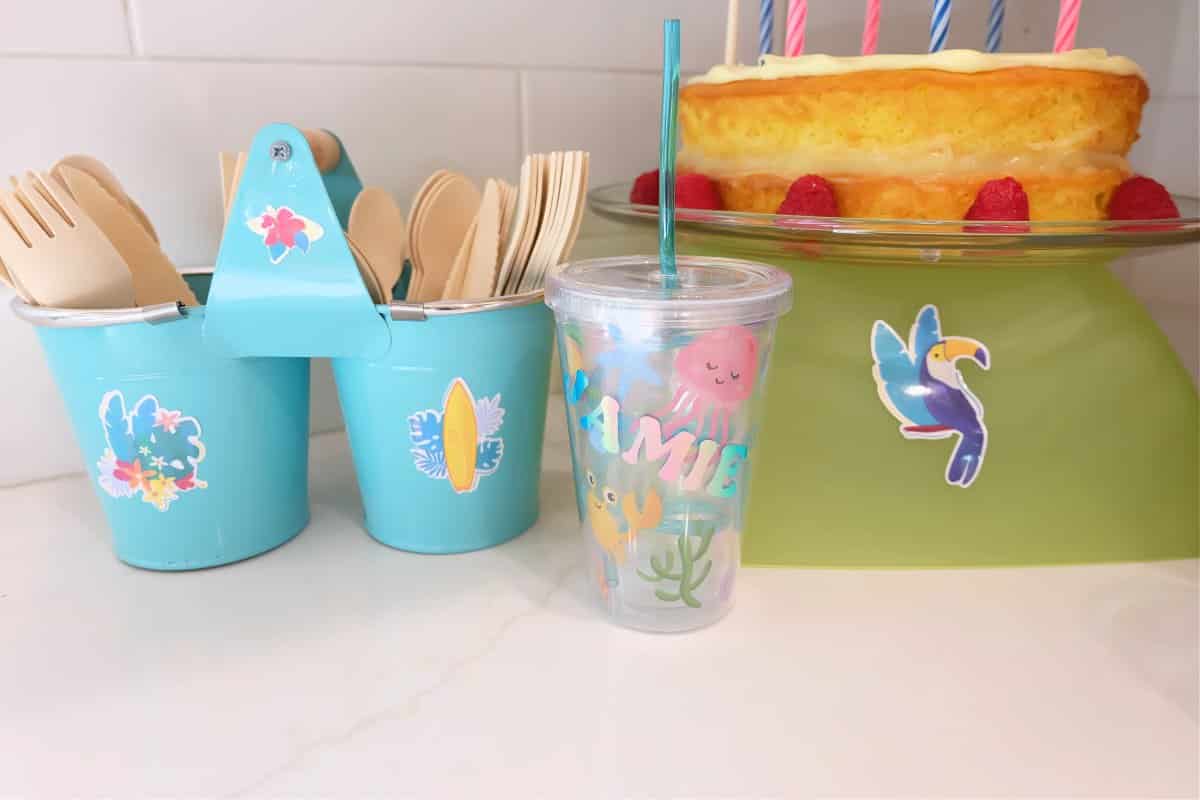
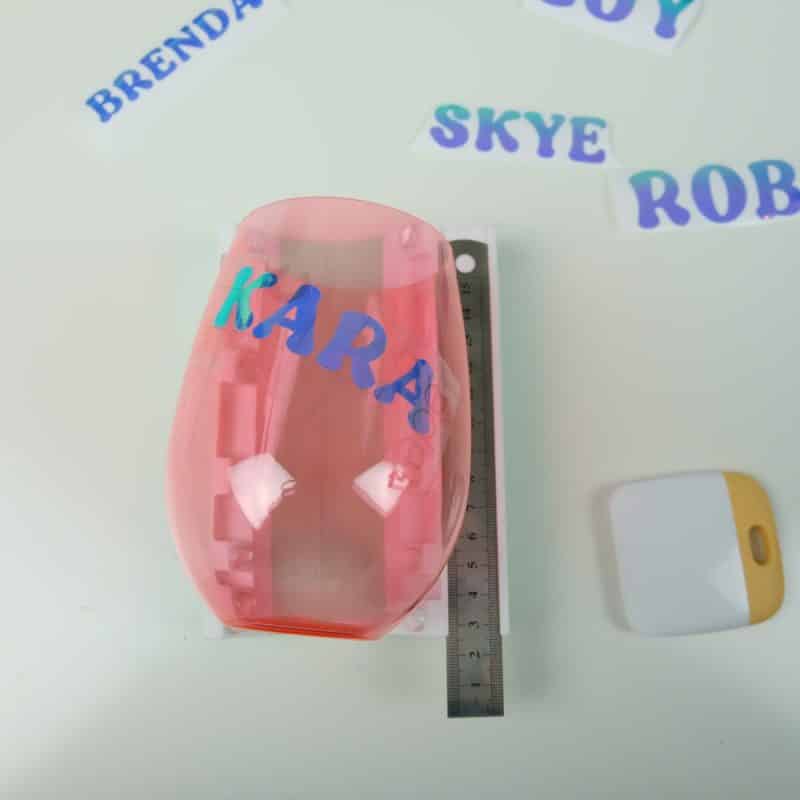
Personalized Tropical Ocean Glasses

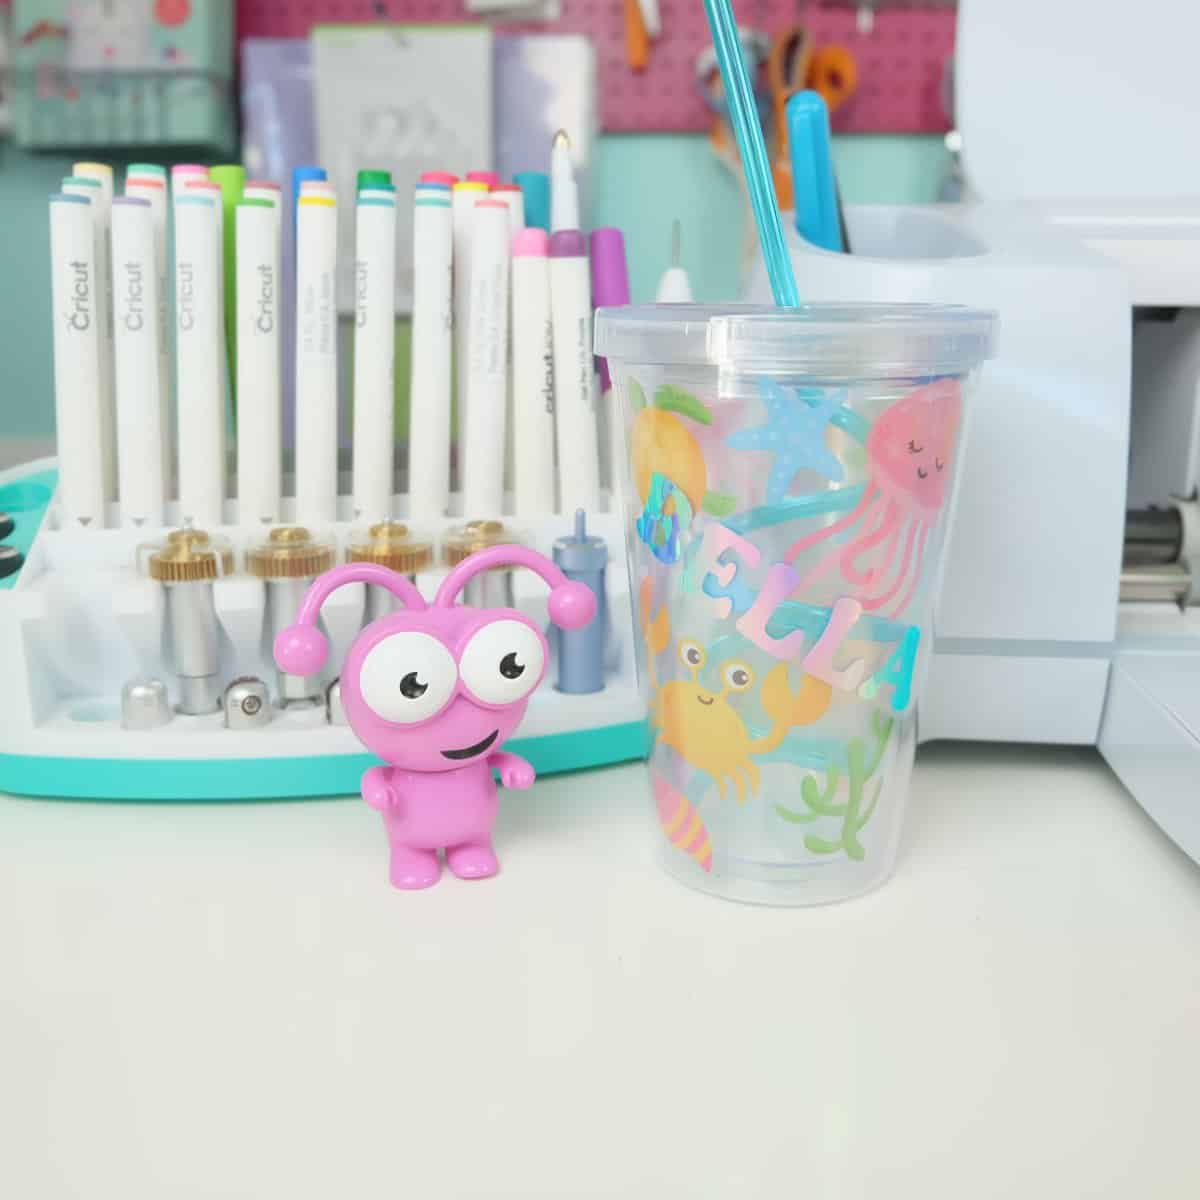
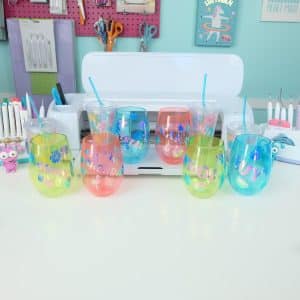
I love checking out the seasonal section of the dollar store. It’s always filled with hidden treasures that are great for parties. The first thing I found in the seasonal section was adorable ocean themed kids cups with lids and twirly straws. Then I found plastic wine tumblers in teal, green and coral. This ended up being my color scheme for the entire party.
The kids cups already had the cutest ocean creatures on them so I added names in holographic vinyl. To the adult cups I added names and decals cut from holographic vinyl that fit the tropical ocean theme including seahorses, seashells, starfish and bubbles! You can use this idea to decorate other birthday tableware too!
Materials:
- Cricut Maker, Cricut Explore Air or Cricut Joy
- Measuring Tape
- Cricut Smart Vinyl or Cricut Vinyl in your favorite color. I used Holographic Vinyl in blue
- StandardGrip Cutting Mat if not using Smart Vinyl
- Cricut Brayer
- Cricut Weeding Tools
- Scissors
- Transfer Tape
- Cricut Scraper Tool
- Cups
Directions:
Step 1: Open Cricut Design Space. You can find my ocean themed glasses cut file project here. I used the font BFC Paris for the names which is available in Cricut Design Space.
Step 2: Use your measuring tape to measure your glasses, then size your designs to the size that you would like for your cups.
Step 3: Duplicate the design for as many cups as you will be making.
Step 4: Click Make It. Follow the instructions on your screen to connect your Cricut to you computer or device and select your cutting material.
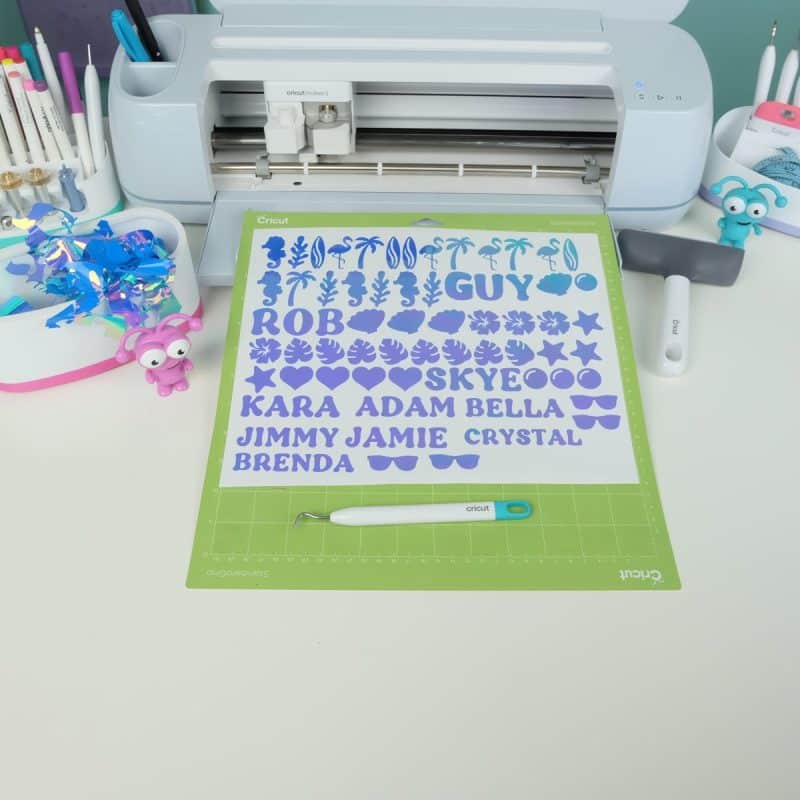
Step 5: If using Smart Vinyl feed your vinyl into your machine with the color side facing up. If using regular vinyl lay your vinyl on your cutting mat with the color side facing down. You may want to run a brayer over your vinyl to push it down onto the mat and firmly adhere it.
Step 6: When your design is done cutting, unload your cutting material/mat from your machine and use your weeding tools to weed your vinyl, removing the vinyl from around your design leaving just the design behind on the white paper backing.
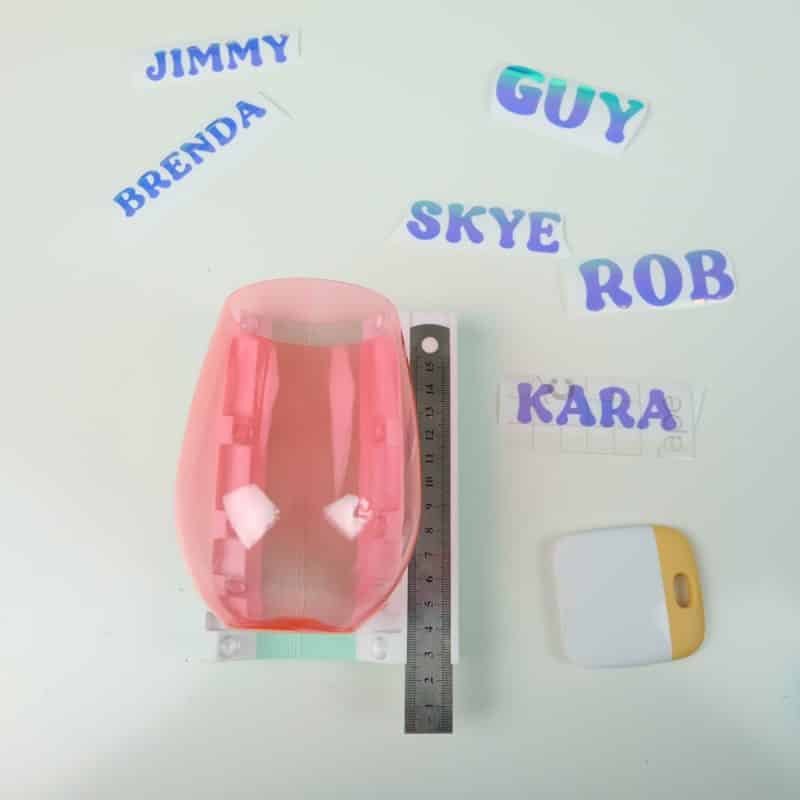
Step 7: For my cups I used transfer tape to transfer the names onto the cups, but placed the other decals by hand almost like stickers.
To use transfer tape, cut the name out of your sheet of vinyl so that you just have the name on the white paper backer. Cut a piece of transfer tape slightly larger than your design. Peel the paper backing off the back of your transfer tape and lay the transfer tape on top of your vinyl design with the sticky side of the transfer tape facing down.
Run your scraper tool over the front and back of your design, pushing the design onto the transfer tape. Peel up your transfer tape carefully, making sure your design transfers up with the tape.
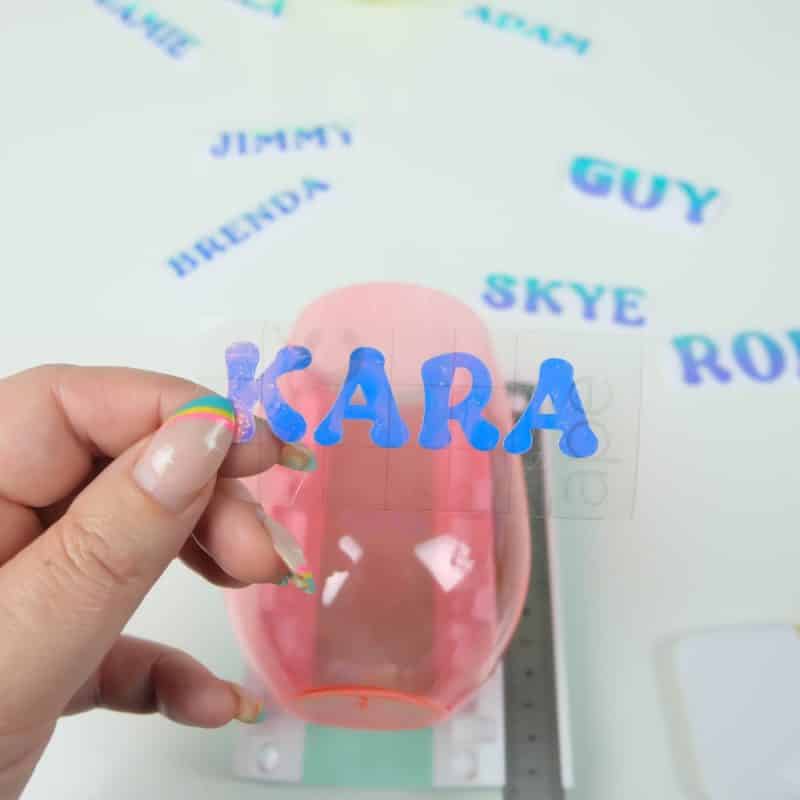
Position your design on your cup, run a scraper tool over top.
Peel away your transfer tape revealing your design beneath.
Personalized Tropical Ocean Glasses
Instructions
- Open Cricut Design Space. You can find my ocean themed glasses cut file project here. I used the font BFC Paris for the names.
- Use your measuring tape to measure your glasses, then size your designs to the size that you would like for your cups.
- Duplicate the design for as many cups as you will be making.
- Click Make It. Follow the instructions on your screen to connect your Cricut to you computer or device and select your cutting material.
- If using Smart Vinyl feed your vinyl into your machine with the color side facing up. If using regular vinyl lay your vinyl on your cutting mat with the color side facing down. You may want to run a brayer over your vinyl to push it down onto the mat and firmly adhere it.
- When your design is done cutting, unload your cutting material/mat from your machine and use your weeding tools to weed your vinyl, removing the vinyl from around your design leaving just the design behind on the white paper backer.
- For my cups I used transfer tape to transfer the names onto the cups, but placed the other decals by hand almost like stickers.
- To use transfer tape, cut the name out of your sheet of vinyl so that you just have the name on the white paper backer. Cut a piece of transfer tape slightly larger than your design. Peel the paper backer off the back of your transfer tape and lay the transfer tape on top of your vinyl design with the sticky side of the transfer tape facing down. Run your scraper tool over the front and back of your design, pushing the design onto the transfer tape. Peel up your transfer tape carefully, making sure your design transfers up with the tape. Position your design on your cup, run a scraper tool over top, then peel away your transfer tape revealing your design beneath.
Equipment
- StandardGrip Cutting Mat (if not using Smart Iron-On)
- Scissors
- Transfer Tape
- Cups
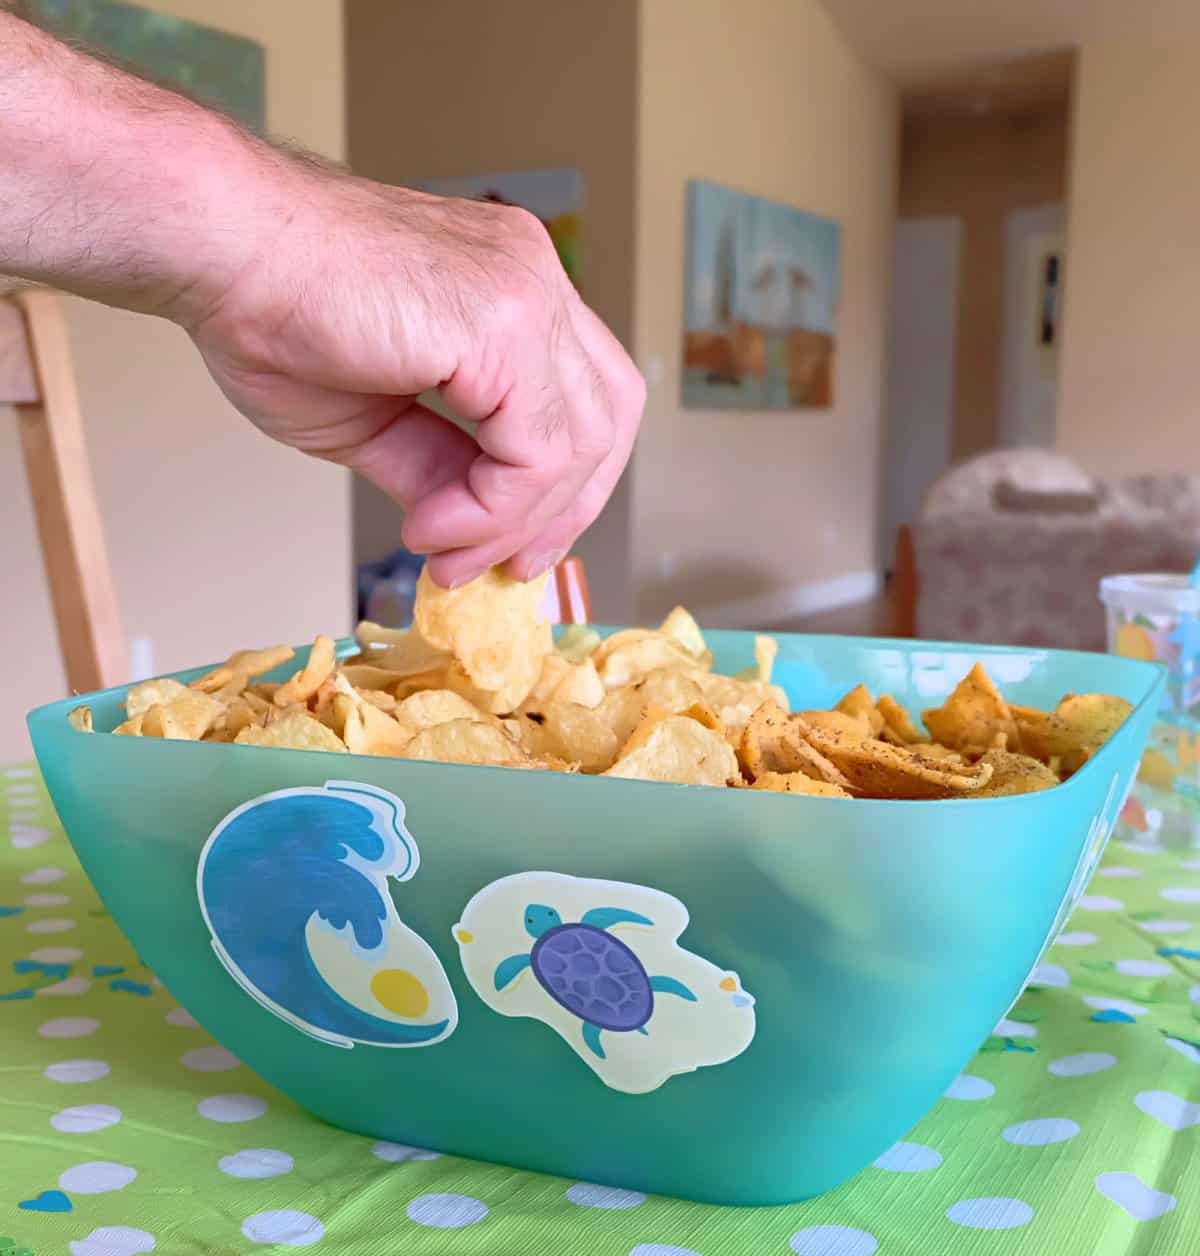
Holographic Water Resistant Ocean Stickers
I’ve been on a major sticker kick lately. I love making stickers SO MUCH! They are seriously the most fun thing ever!
I recently started adding a clear holographic layer to the top of my stickers to make them water resistant. This makes them great for decorating things you might need to wash like water bottles and bowls– just make sure you don’t soak them in the water! Plus the holographic flash is so pretty and fun! Use these stickers to decorate all the things!
Materials:
- Cricut Maker, Cricut Explore Air or Cricut Joy
- Cricut Printable Vinyl
- Inkjet Printer
- StandardGrip Cutting Mat
- Holographic Vinyl Overlay Sheets
- Cricut Brayer
Directions:
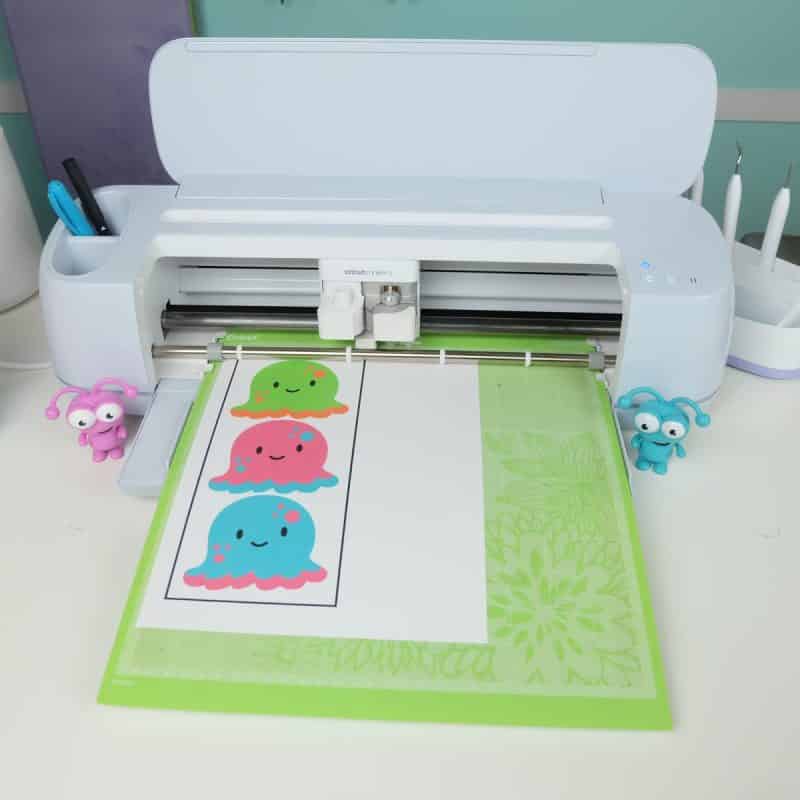
Step 1: Open Cricut Design Space. You can find my ocean themed stickers here, or create your own stickers with any design in Cricut Design Space.
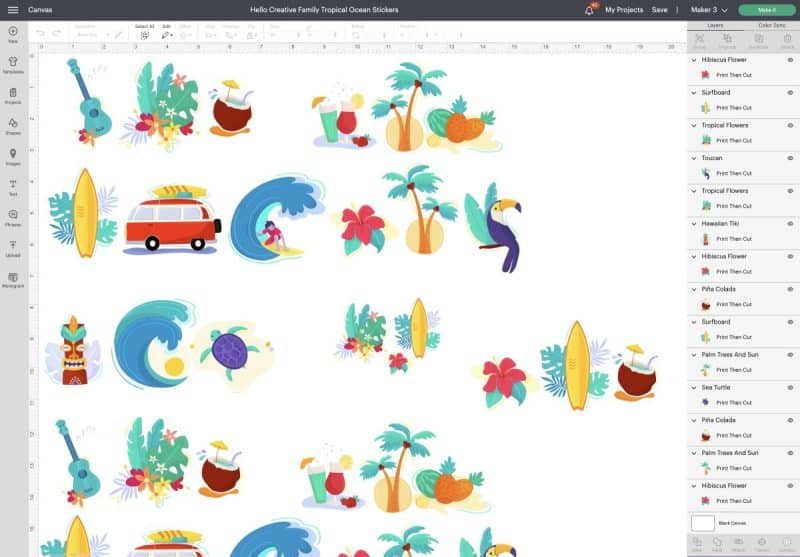
The designs I used were Print Then Cut Images, but you can create stickers out of any image in Design Space!
To create your own design, pick an image you would like to use. Use the offset tool to create a “bubble” to go behind your design and around it. Click Apply.
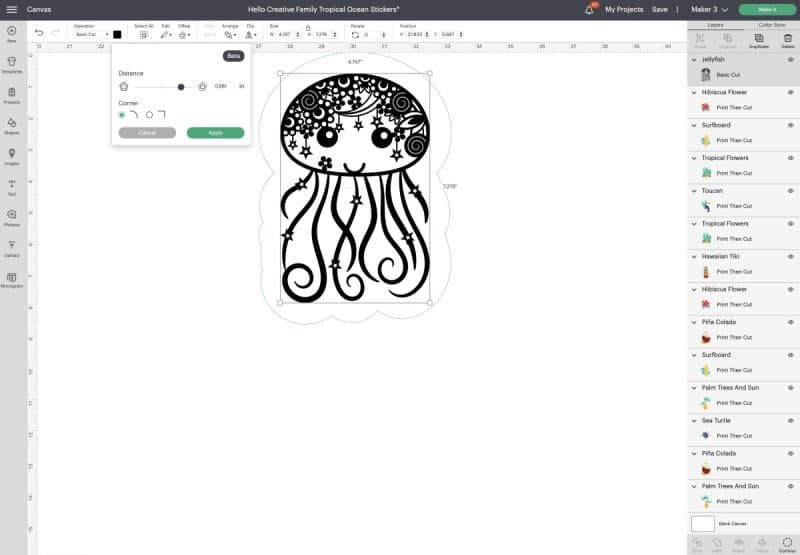
Once you click apply to the offset the offset part of your design will turn to grey. Change the offset bubble to white or whatever color you would like it to be.
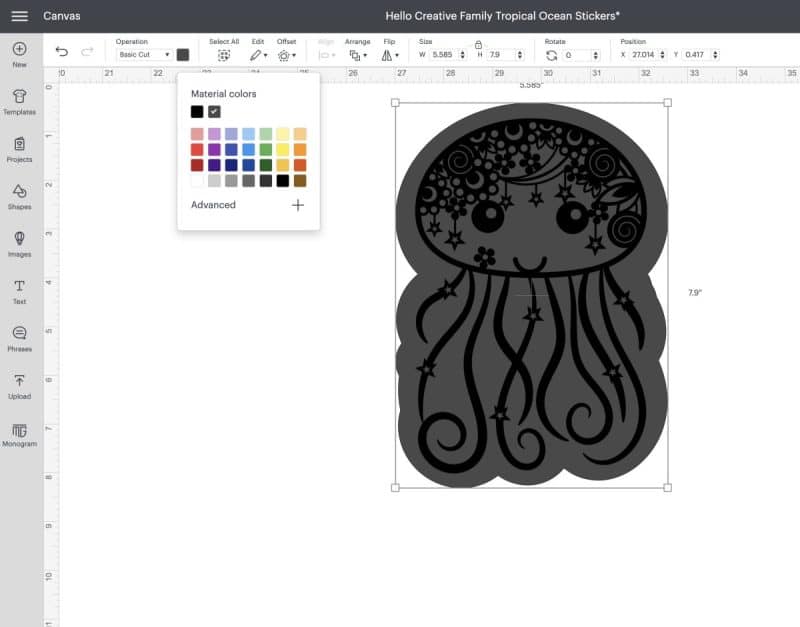
Lay your image on top of the offset bubble where you would like it. Select both the image and the offset bubble and click flatten. This will tell Design Space that you would like to print the image and have your Cricut cut around it.

Step 2: Click Make It. Follow the instructions on your screen. Load the printable vinyl into your printer and print the stickers.
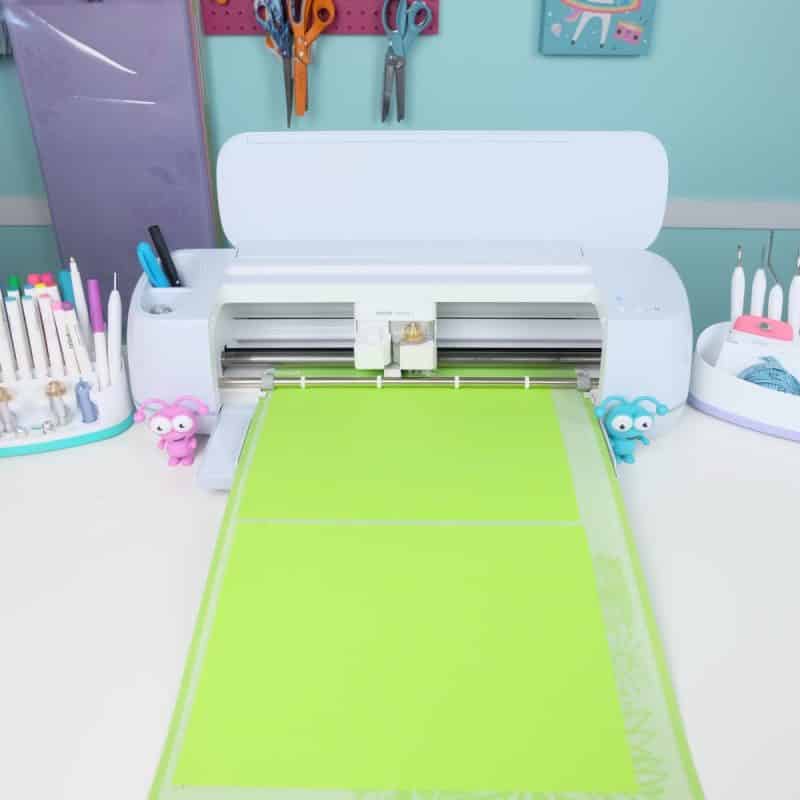
Step 3: Take a sheet of holographic vinyl overlay, remove the paper backing and lay it on top of your sheet of stickers. Use your brayer tool to remove any bubbles
Step 4: Lay your sheet of stickers on your StandardGrip cutting mat. Load it into your machine, select your cut material (I choose cardstock which has my Cricut cut through the holographic overlay, the printed vinyl and the backing so that I end up with each sticker cut out individually.
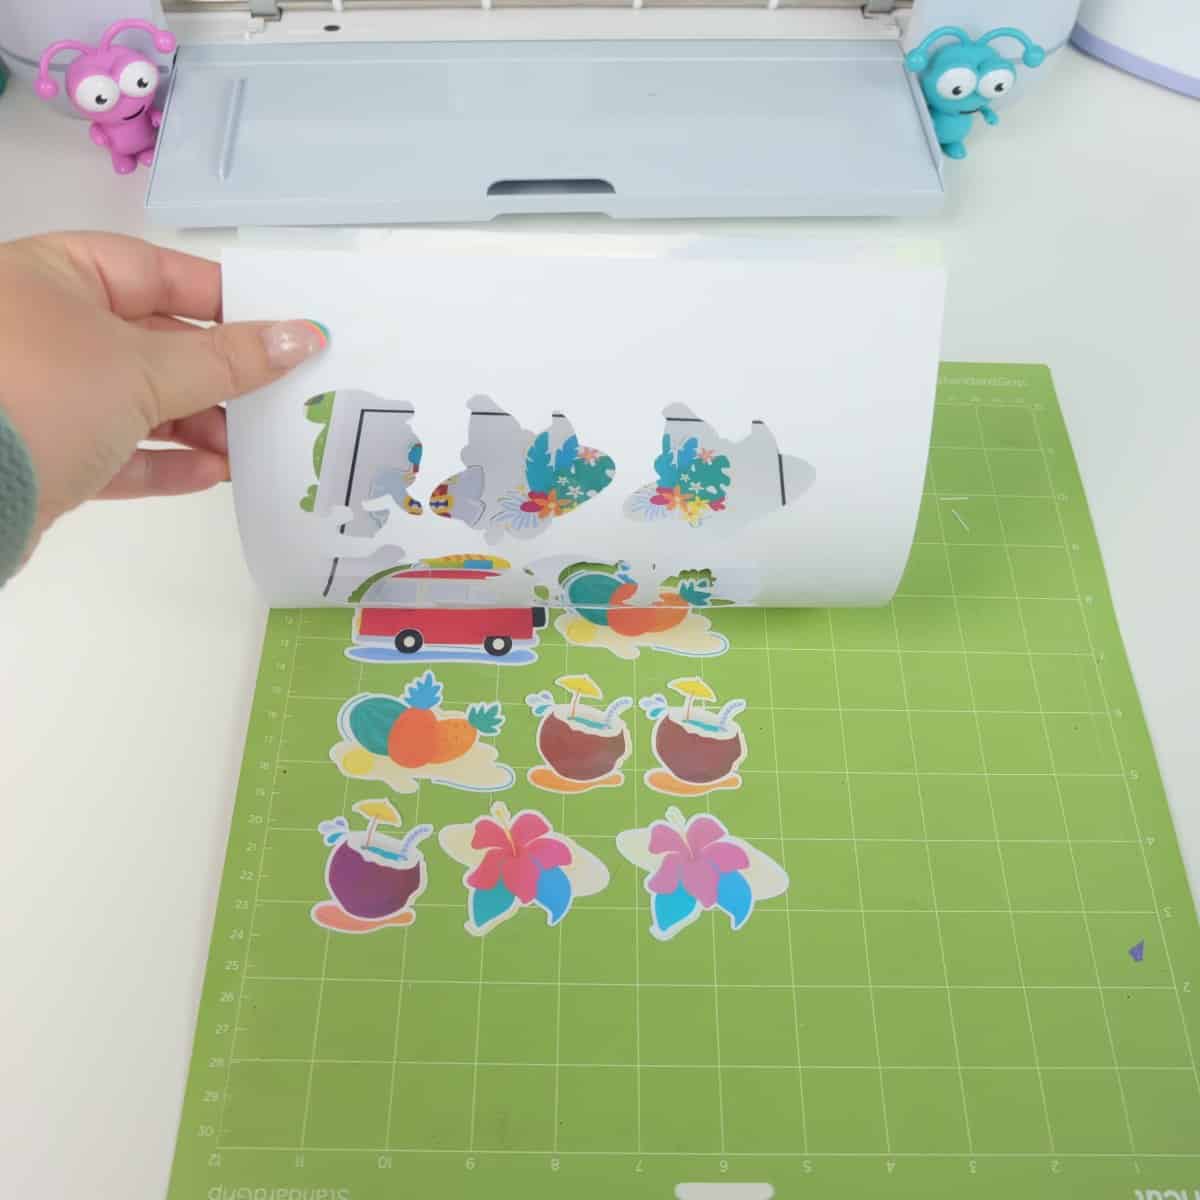
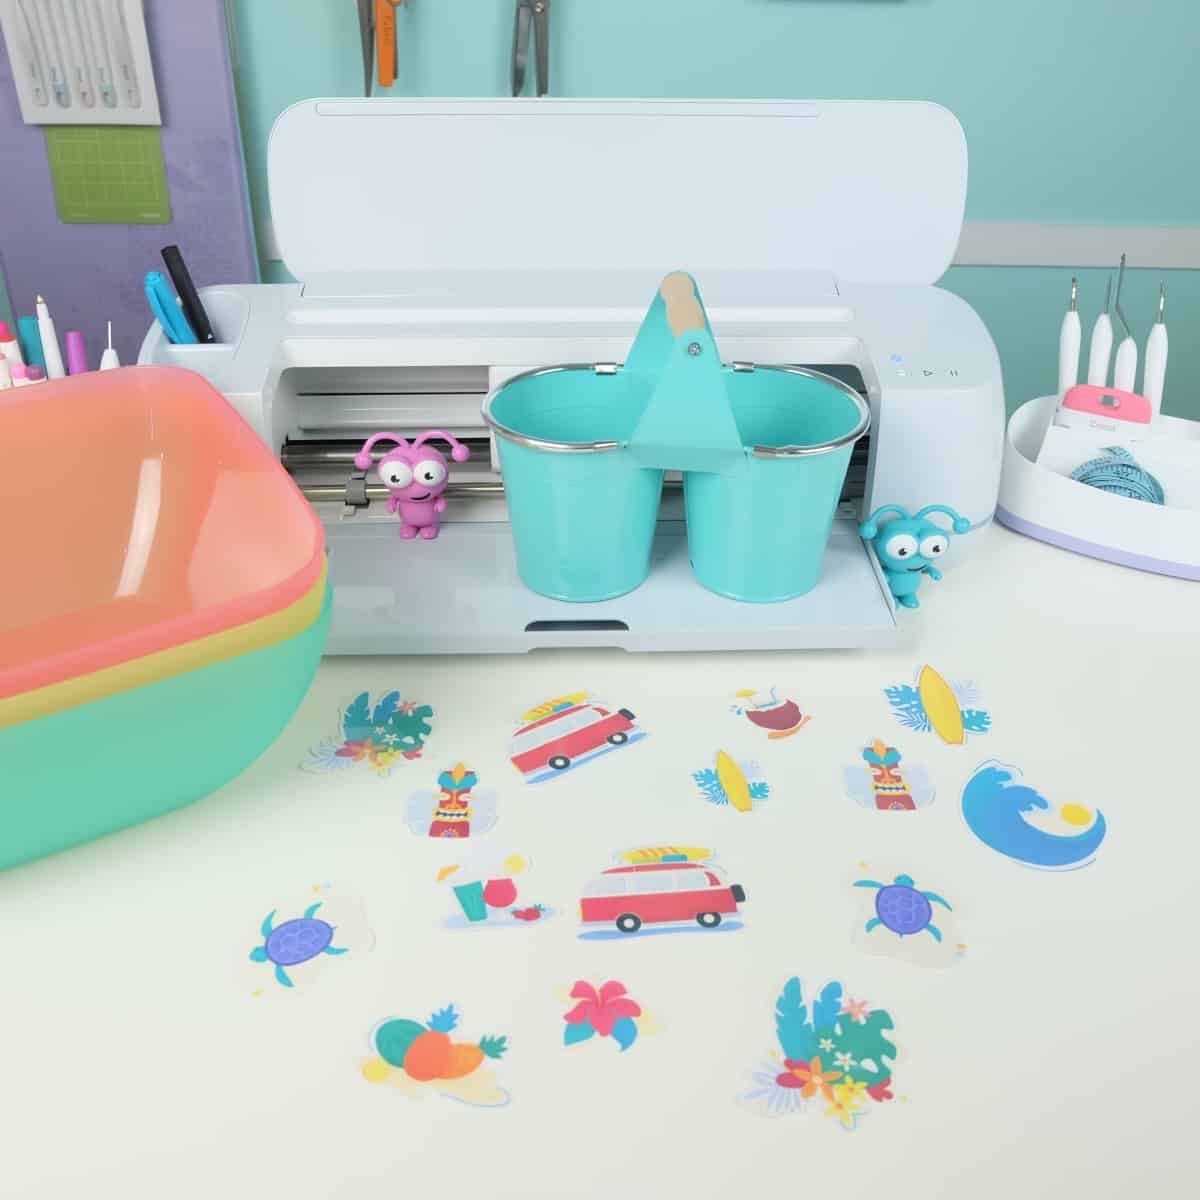
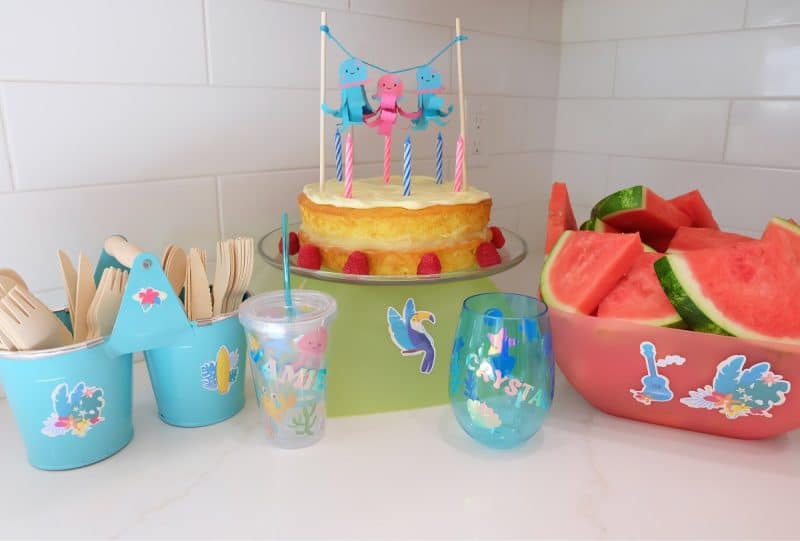
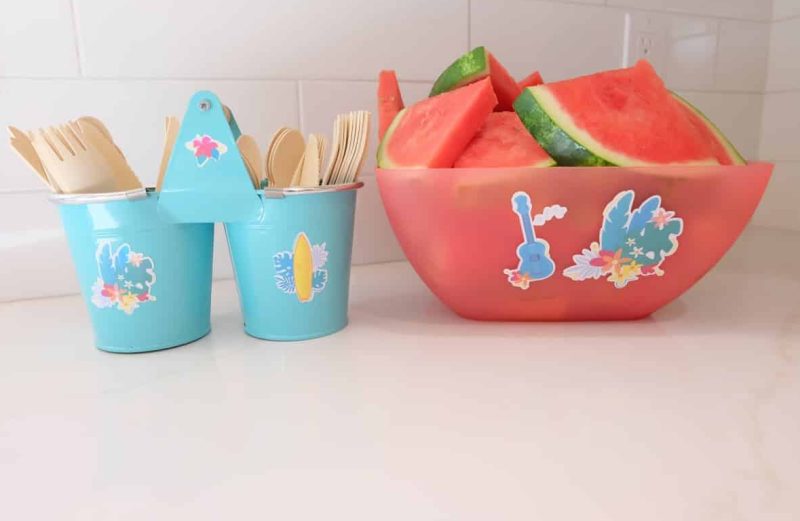
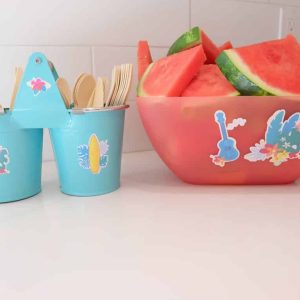
Step 5: Remove your stickers from your cutting mat and use them to decorate your party supplies! For our party I used them to decorate our chip bowl and watermelon bowl as well as a cutlery holder. I also put one at each place setting for our guests to bring home as party favors.
Holographic Water Resistant Ocean Stickers
Instructions
- Open Cricut Design Space. You can find my ocean themed stickers here, or create your own stickers with any design in Cricut Design Space.
- To create your own design, pick an image you would like to use. Use the offset tool to create a “bubble” to go behind your design and around it. Change the offset bubble to white. Lay your image on top of the offset bubble where you would like it. Select both the image and the offset bubble and click flatten. This will tell Design Space that you would like to print the image and have your Cricut cut around it.
- Click Make It. Follow the instructions on your screen. Load the printable vinyl into your printer and print the stickers.
- Take a sheet of holographic vinyl overlay, remove the paper backing and lay it on top of your sheet of stickers. Use your brayer tool to remove any bubbles
- Lay your sheet of stickers on your StandardGrip cutting mat. Load it into your machine, select your cut material (I choose cardstock which has my Cricut cut through the holographic overlay, the printed vinyl and the backing so that I end up with each sticker cut out individually.
- Remove your stickers from your cutting mat and use them to decorate all the things! For our party I used them to decorate our chip bowl and watermelon bowl. I also put one at each place setting for our guests to bring home as party favors.
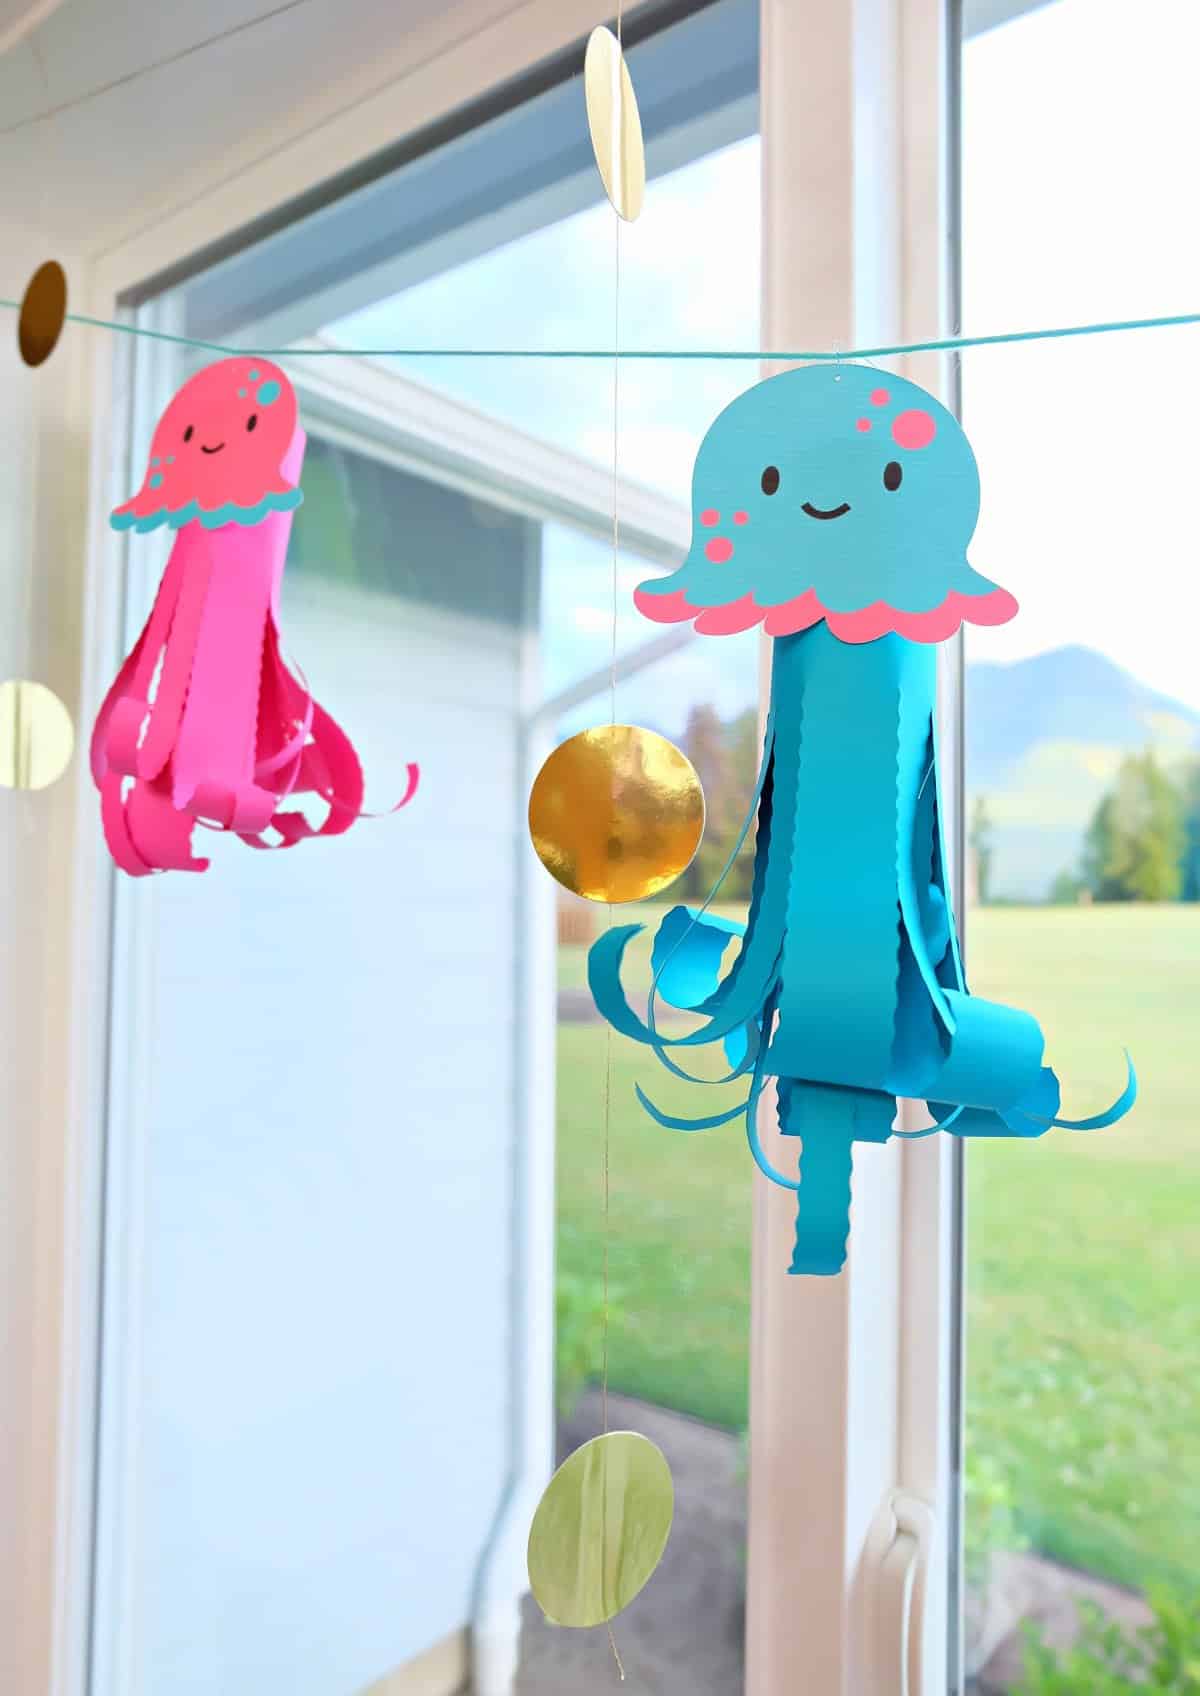
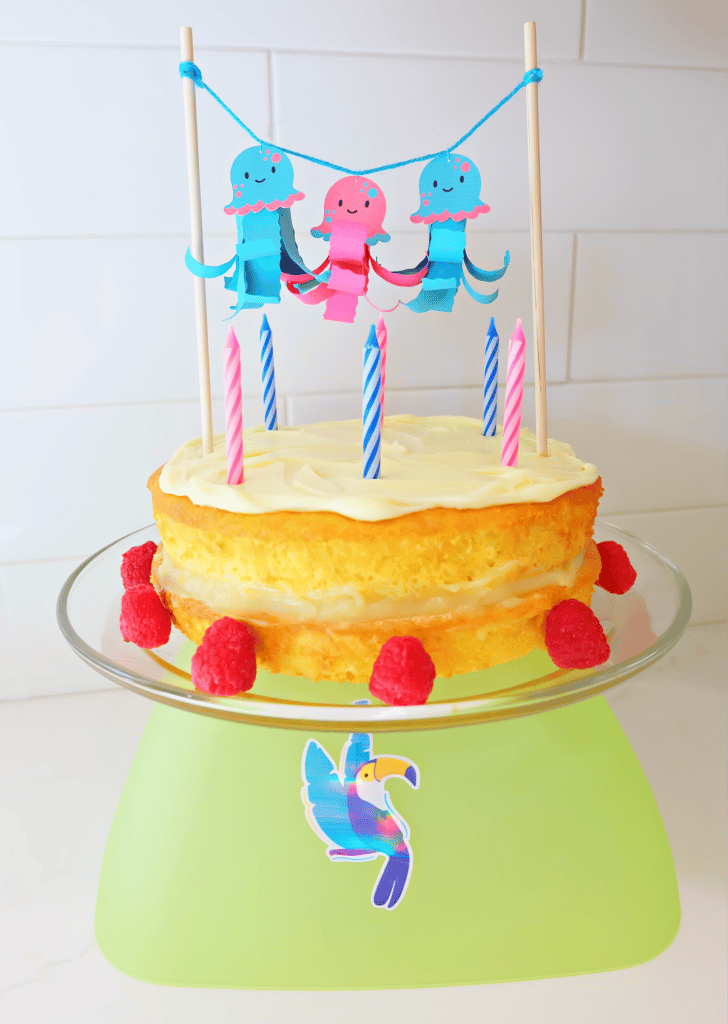
Paper Jellyfish For Garlands and Cake Toppers
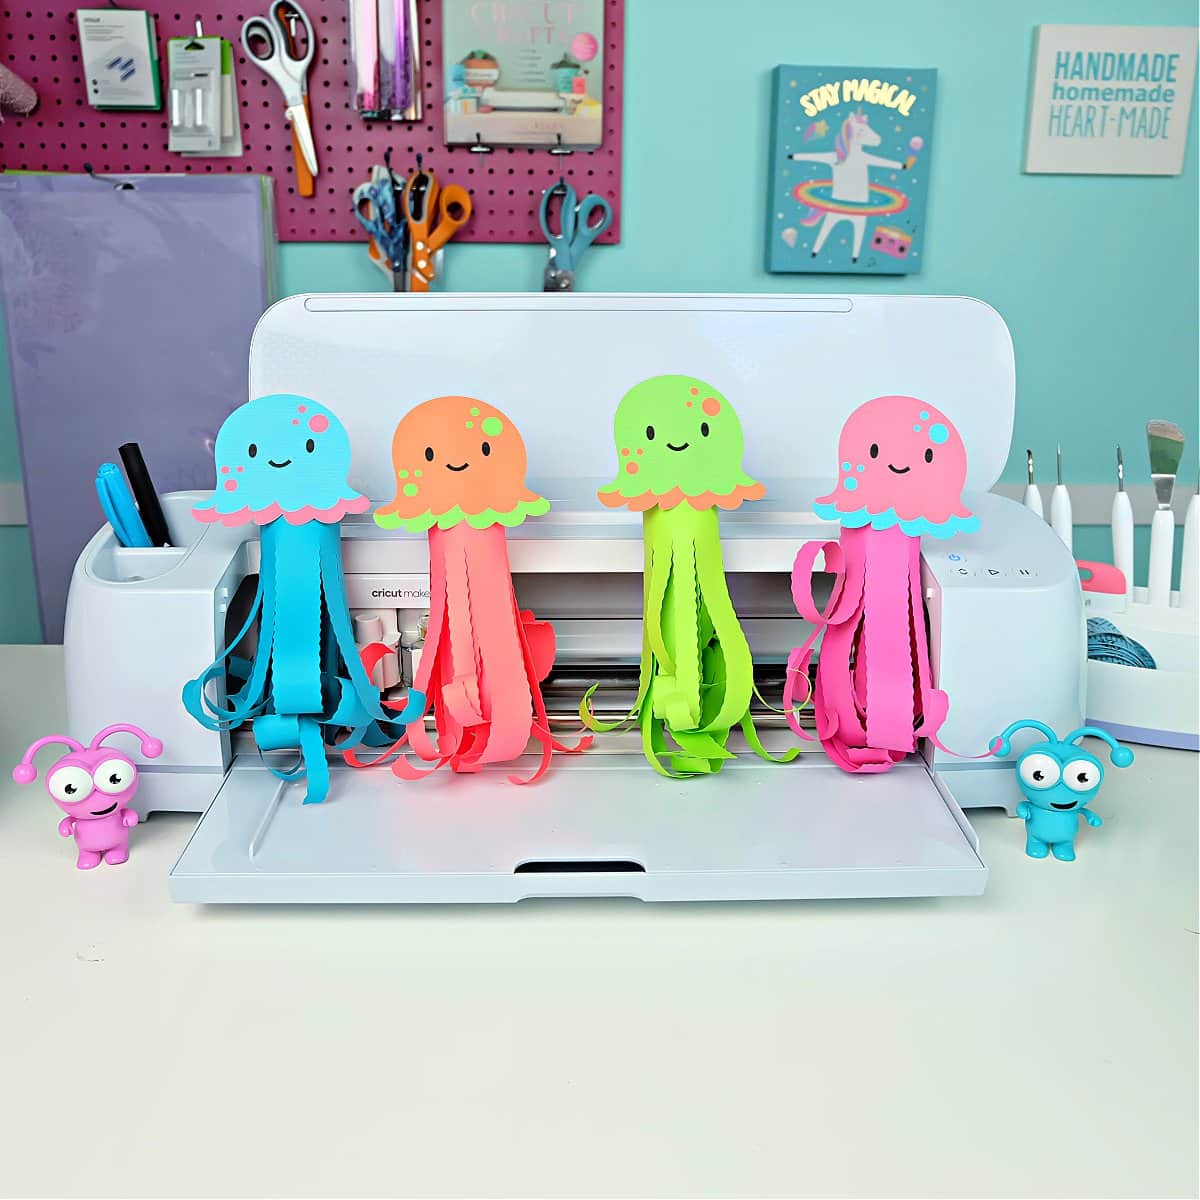
One of my favorite things about the Cricut Maker is the Integrated Tool System and all of the amazing blades that the Cricut has for it. When I started imagining this project and the way that jellyfish tentacles look, I realized that the Wavy Blade would help me accomplish the perfect look!
I love the way these jellyfish turned out! Not only are they the perfect embellishment for making cake toppers and garlands, they also make the CUTEST finger puppets!
A big thank you to my mom for making the most delicious lemon pound cake!
Materials:
- Cricut Maker
- 8.5×11 White Cardstock
- Inkjet Printer
- Cardstock In Your Favorite Jellyfish Colors
- LightGrip Cutting Mat or a StandardGrip Cutting Mat that has lost a bit of it’s stick
- Cricut Brayer
- Cricut Wavy Blade
- Pencil or small wood dowel
- Stapler
- Permanent Adhesive
- String, ribbon or piece of twine
Directions:
Step 1: Open Cricut Design Space. You can find my Large Jellyfish project here and my Small Jellyfish project here.

Step 2: Click Make It. Follow the instructions on your screen. Load the white cardstock into your printer to print the jellyfish faces. Then transfer the printed page to your cutting mat. Use your brayer to push the paper onto the cutting mat then load it into your machine and have it cut.
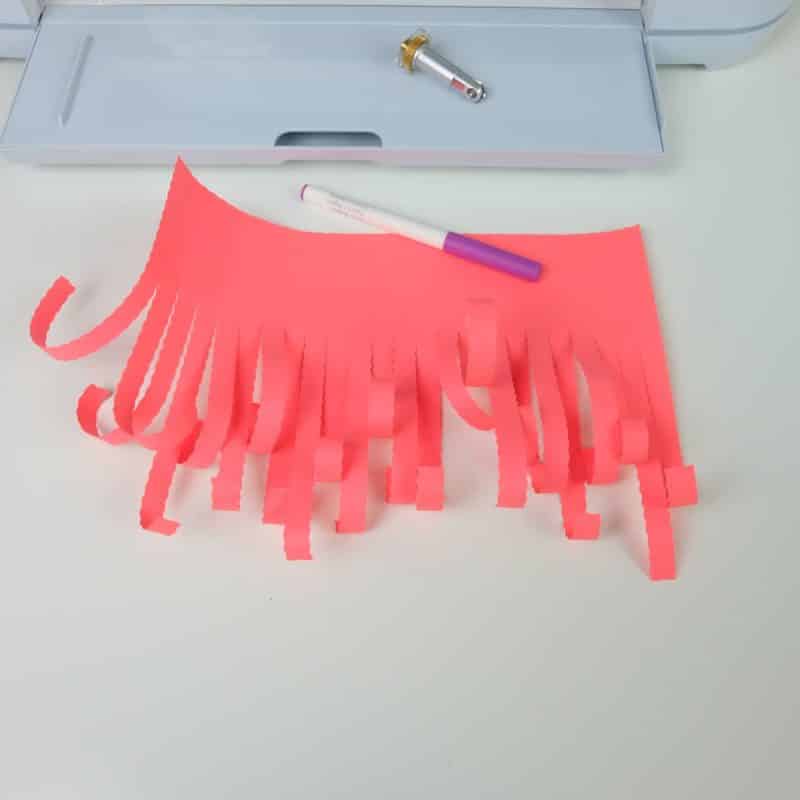
Step 3: When Design Space prompts you, load your colored cardstock onto your mat using your brayer to make sure it’s firmly stuck down. Insert your Wavy Blade into your machine and have your Cricut cut the jellyfish legs. When done cutting unload your mat and carefully peel the legs off of the mat.
Step 4: Use a dowel, pencil or pen to curl your jellyfish legs. For the larger jellyfish we rolled some of the legs going forward and some going back. For the small jellyfish we rolled all the legs in the same direction.
Step 5: Roll your jellyfish legs creating a tube with the band at the top and the legs at the bottom. Staple at the top to hold the roll in place.
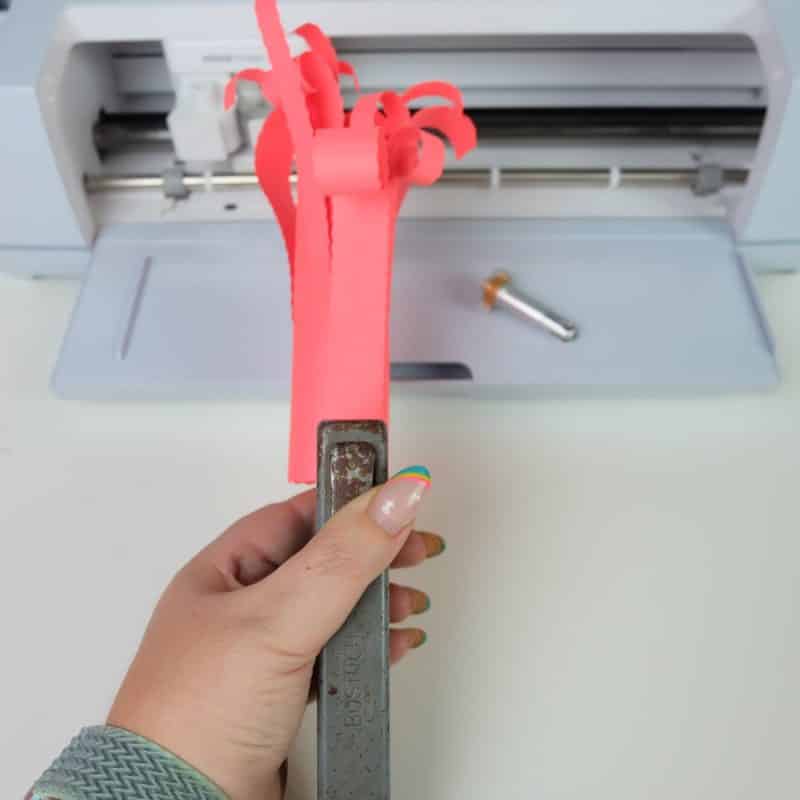
Step 6: Use permanent adhesive to attach the jellyfish face on top of the band of the jellyfish legs.

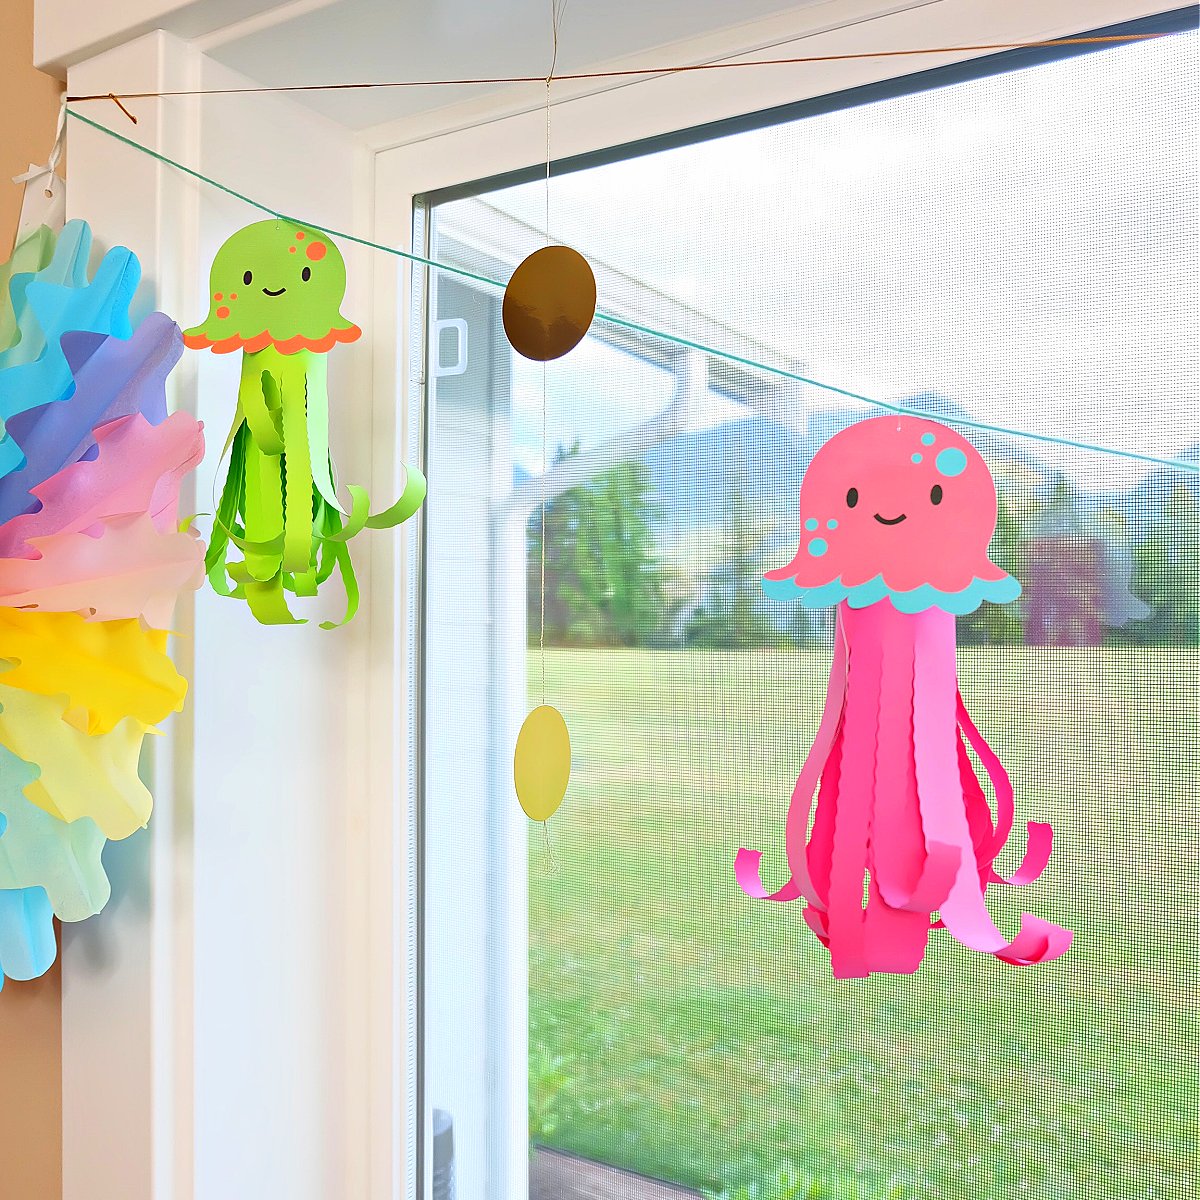
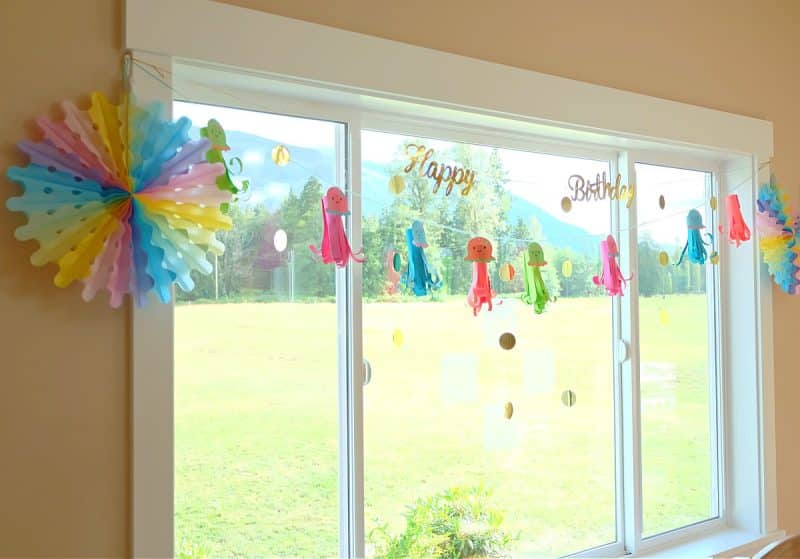
Step 7: Hang the jellyfish on a string, ribbon or piece of twine to use for a garland or cake topper. For the cake topper we tied the string of jellyfish to two small wood dowels that we inserted into the cake. You could also attach single jellyfish to toothpicks to stick in the tops of cupcakes to decorate them!

Paper Jellyfish For Garlands and Cake Toppers
Instructions
- Open Cricut Design Space. You can find my Large Jellyfish project here and my Small Jellyfish project here.
- Click Make It. Follow the instructions on your screen. Load the white cardstock into your printer to print the jellyfish faces. Then transfer the printed page to your cutting mat. Use your brayer to push the paper onto the cutting mat then load it into your machine and have it cut.
- When Design Space prompts you, load your colored cardstock onto your mat using your brayer to make sure it’s firmly stuck down. Insert your Wavy Blade into your machine and have your Cricut cut the jellyfish legs. When done cutting unload your mat and carefully peel the legs off of the mat.
- Use a dowel or pencil to curl your jellyfish legs. For the larger jellyfish we rolled some of the legs going forward and some going back. For the small jellyfish we rolled all the legs in the same direction.
- Roll your jellyfish legs creating a tube with the band at the top and the legs at the bottom. Staple at the top to hold the roll in place.
- Use permanent adhesive to attach the jellyfish face on top of the band of the jellyfish legs.
Equipment
- 8.5×11 White Cardstock
- Inkjet Printer
- Cardstock In Your Favorite Jellyfish Colors
- LightGrip Cutting Mat or a StandardGrip Cutting Mat that has lost a bit of it’s stick
- Pencil or small wood dowel
- Stapler
- Permanent Adhesive
- String, ribbon or piece of twine
Bonus: DIY Ocean Birthday Themed Cricut Confetti

You may have noticed ocean themed confetti with the other DIY decorations in some of our photos above! Custom confetti is a very inexpensive and easy way to add a handmade touch to a party!
Our confetti is ocean themed and uses elements that we used on our cups and napkins to add to the party’s ocean vibes.
Making decor for another party theme? Have fun choosing images for your confetti to fit the theme! Try adding the first initial of the birthday person or the age that they are turning as a nice way to add further customization.
I like using cardstock that has color on both sides for my confetti, that way you don’t have to worry about which side up the confetti lands. Use up those scrap pieces of cardstock to keep this project even more cost efficient!
Materials:
- Cricut Maker, Cricut Explore Air or Cricut Joy
- LightGrip Cutting Mat or a StandardGrip Cutting Mat that has lost a bit of it’s stick
- Cardstock in a variety of colors
- Cricut Brayer Tool
Directions:
Step 1: Open Cricut Design Space. You can find my ocean themed confetti cut file project here. If choosing your own designs I suggest choosing chunkier designs without a lot of fine detail. Since you will be cutting these so small, fine details can cause your paper to tear.
Step 2: Size your confetti to the size that you would like it to be. I sized the majority of my designs to 1/2 inch tall, but a few of the longer designs I made 3/4 inch tall.
Step 3: Click Make It. Follow the instructions on your screen to connect your Cricut to you computer or device and select your cutting material.
Step 4: Lay your cardstock on your cutting mat. Roll a brayer over it to push your cardstock onto your mat, making sure it’s firmly adhered in all areas. Load your mat into your machine and start cutting.
Step 5: When your machine is done cutting, unload the mat, remove the cardstock from around your confetti and then use a scraper tool to gently remove the confetti from the mat.
Repeat steps 3-5 for each color of confetti. Use the confetti to decorate tables, and put inside confetti poppers and transparent balloons.
DIY Ocean Themed Cricut Confetti
Instructions
- Open Cricut Design Space. You can find my ocean themed confetti cut file project here. If choosing your own designs I suggest choosing chunkier designs without a lot of fine detail. Since you will be cutting these so small, fine details can cause your paper to tear.
- Size your confetti to the size that you would like it to be. I sized the majority of my designs to 1/2 inch tall, but a few of the longer designs I made 3/4 inch tall.
- Click Make It. Follow the instructions on your screen to connect your Cricut to you computer or device and select your cutting material.
- Lay your cardstock on your cutting mat. Roll a brayer over it to push your cardstock onto your mat, making sure it’s firmly adhered in all areas. Load your mat into your machine and start cutting.
- When your machine is done cutting, unload the mat, remove the cardstock from around your confetti and then use a scraper tool to gently remove the confetti from the mat.
- Repeat steps 3-5 for each color of confetti. Use the confetti to decorate tables, and put inside confetti poppers and transparent balloons.
Equipment
- LightGrip Cutting Mat or a StandardGrip Cutting Mat that has lost a bit of it’s stick
- Cardstock in a variety of colors
I hope that these projects provide you with a ton of inspiration and that they act as a launching point for decorating for all different kinds of party themes!
It’s so much fun creating beautiful details for birthday parties and other special events! Whoever you make them for is sure to have a very happy birthday! With a Cricut cutting machine, there is no limit to where your creativity can take you!
Tell me… Which of these sea birthday party projects is your favorite?
If you like these Cricut ocean birthday party decoration ideas, I’d love for you to pin it for later! It helps us to continue bringing you Cricut content like this!
If you like this post, make sure you check out our Cricut section! Here are some more Cricut Birthday Ideas!