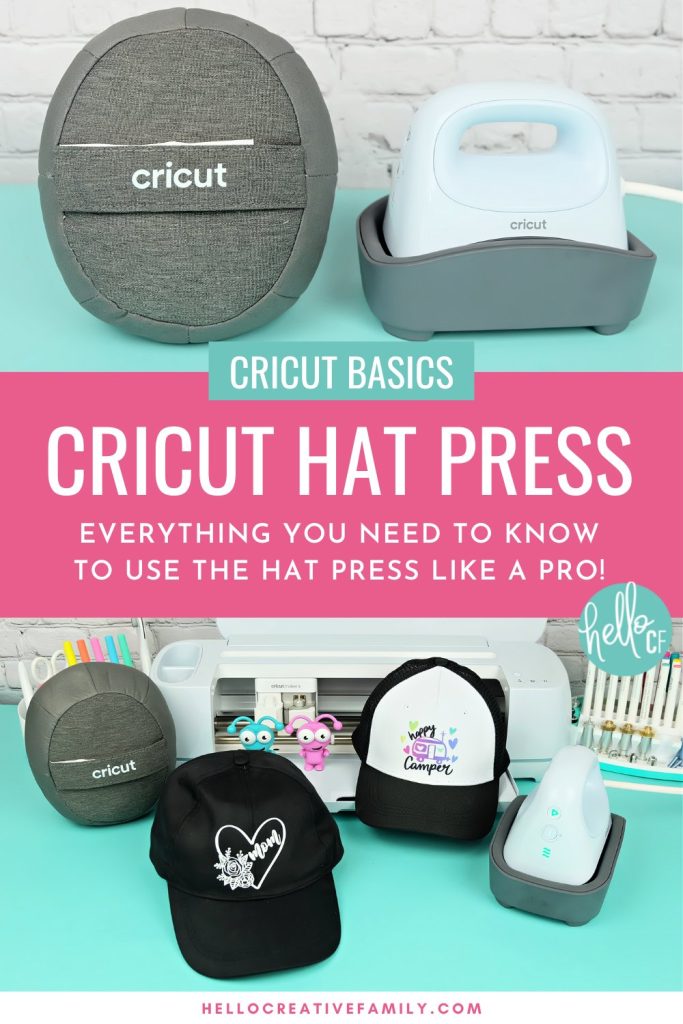
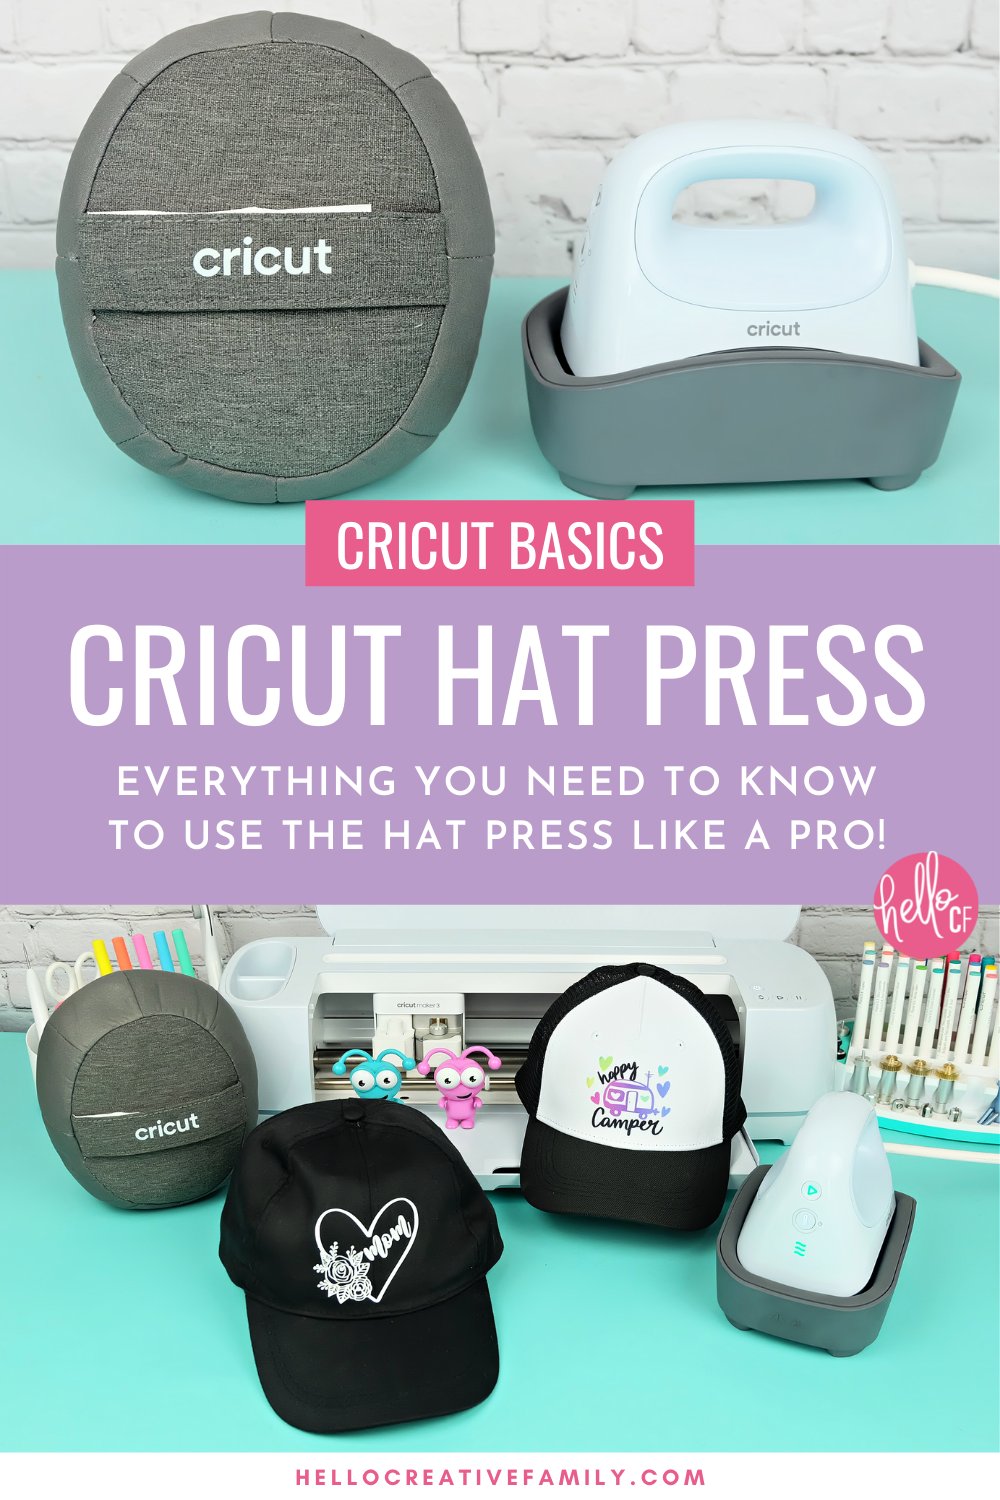
Cricut Basics: How To Use The Cricut Hat Press- Everything You Need To Know
This post and the photos within it may contain Amazon or other affiliate links. If you purchase something through the link, I may receive a small commission at no extra charge to you.

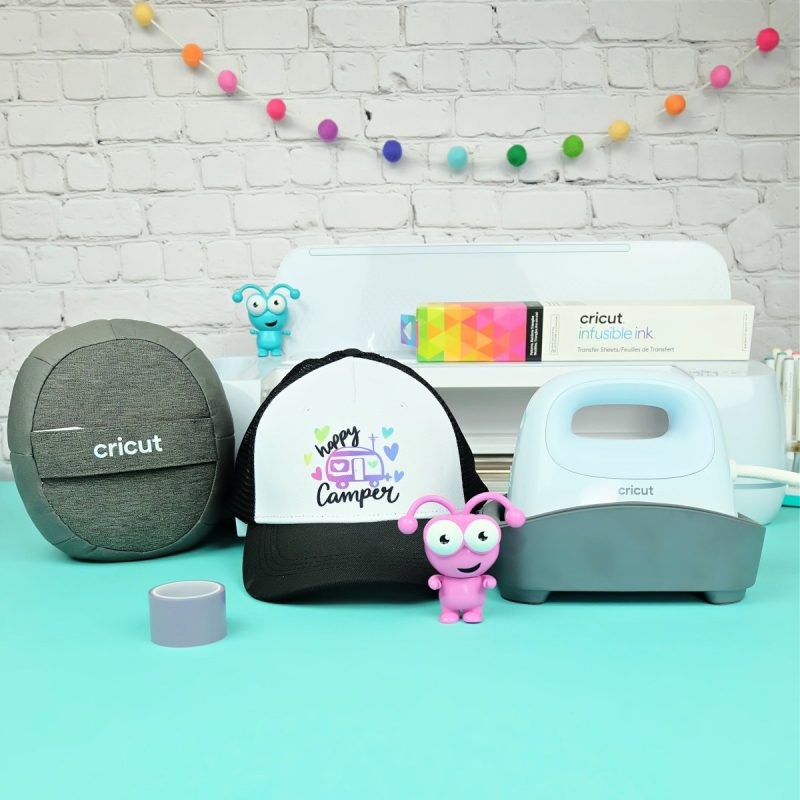
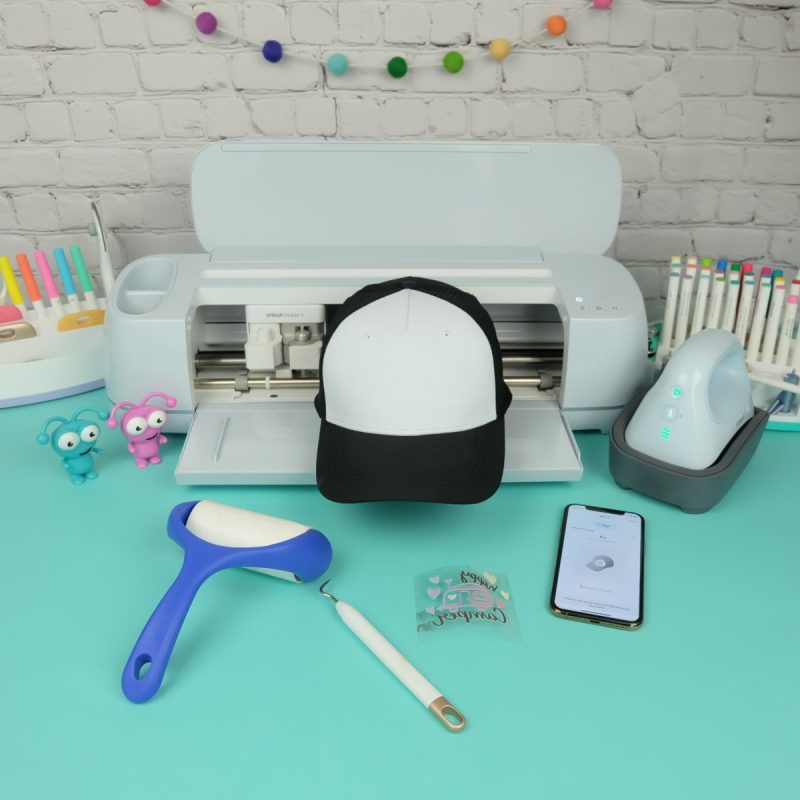
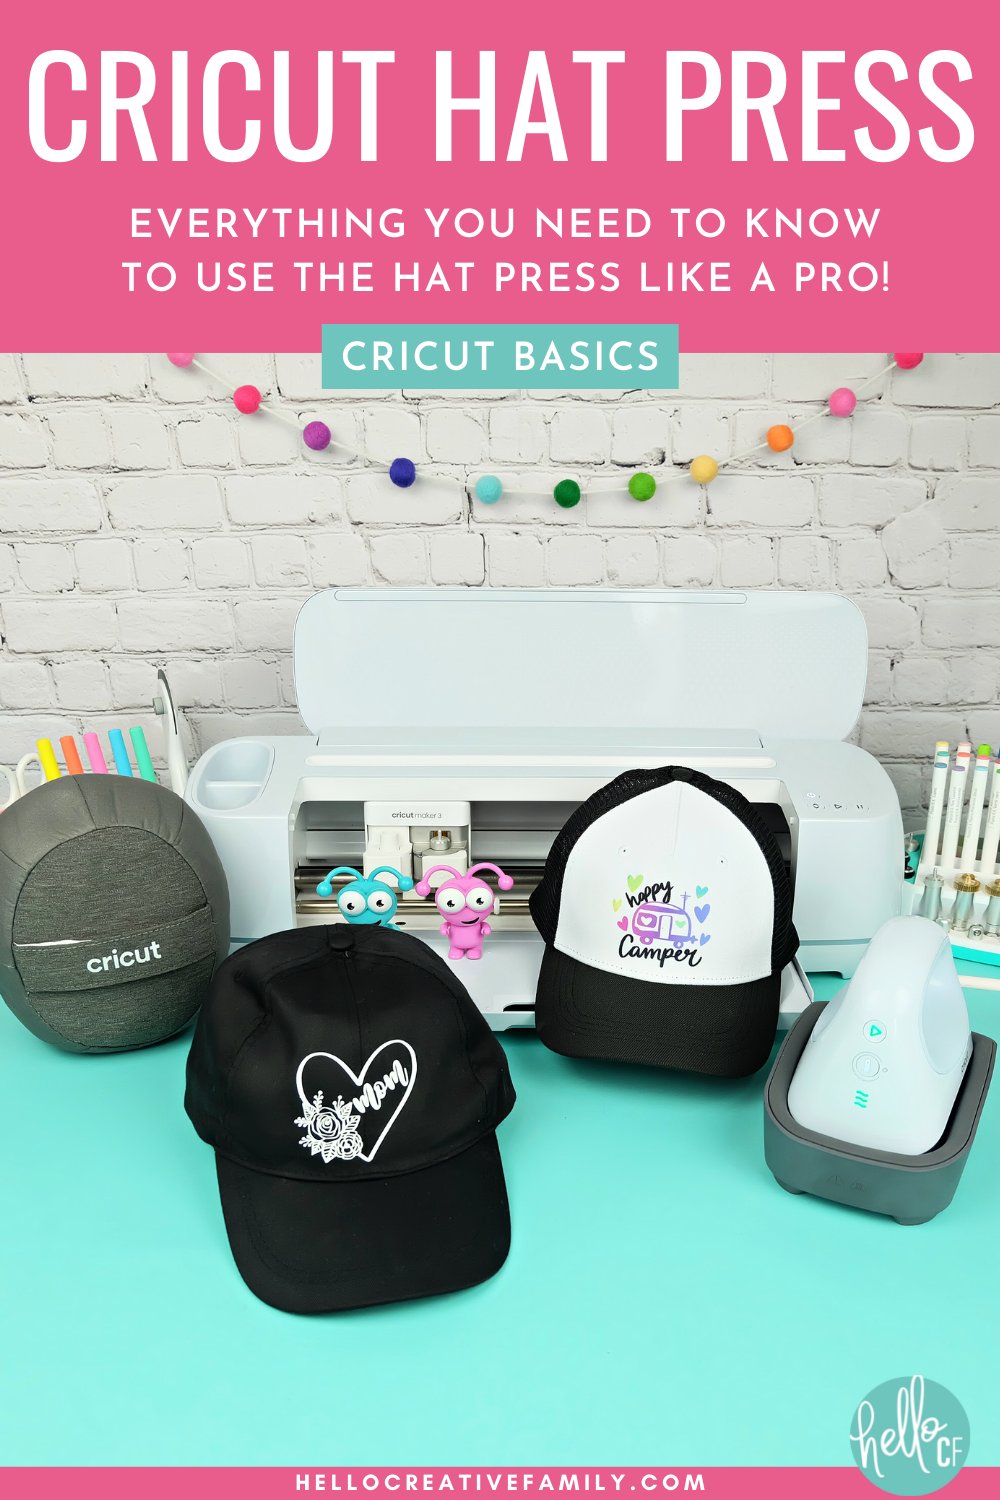
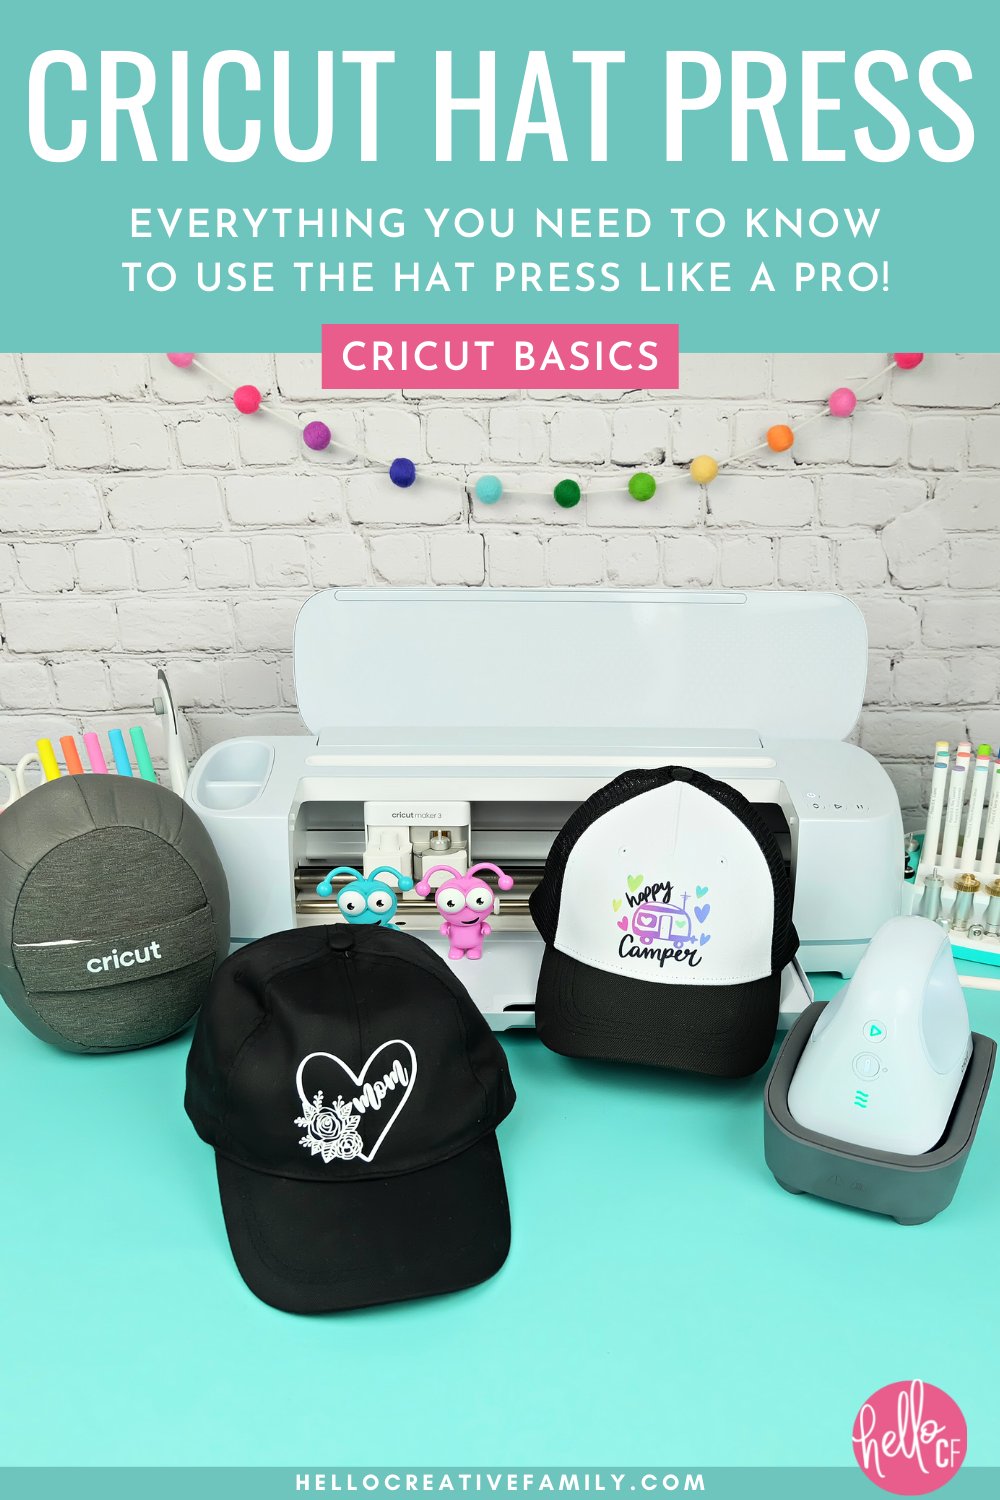
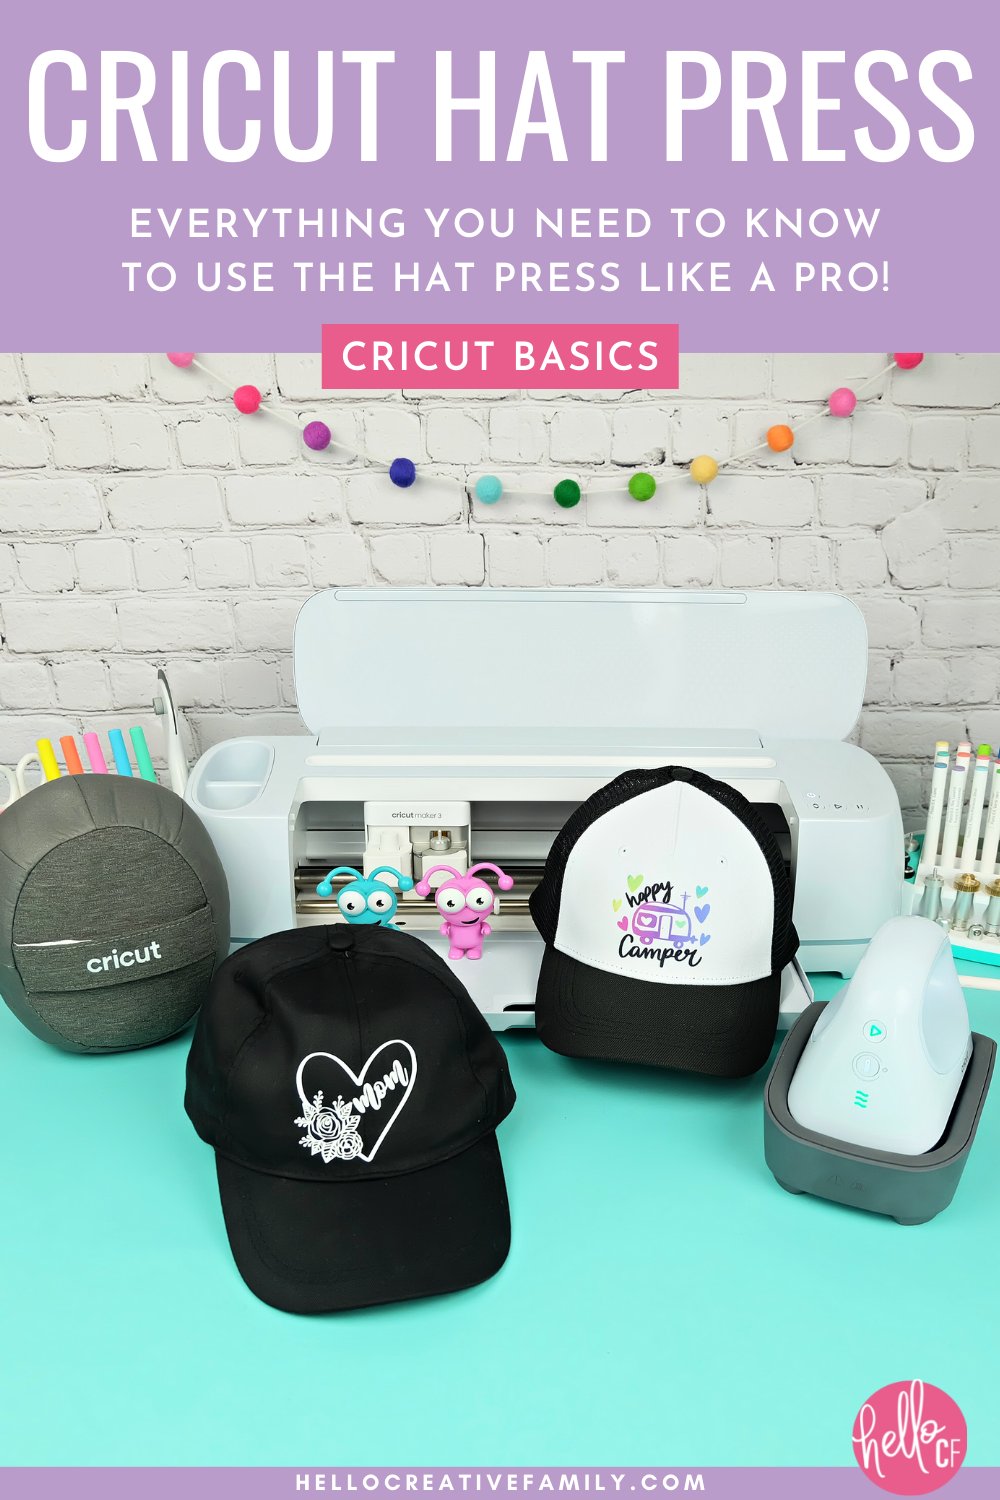
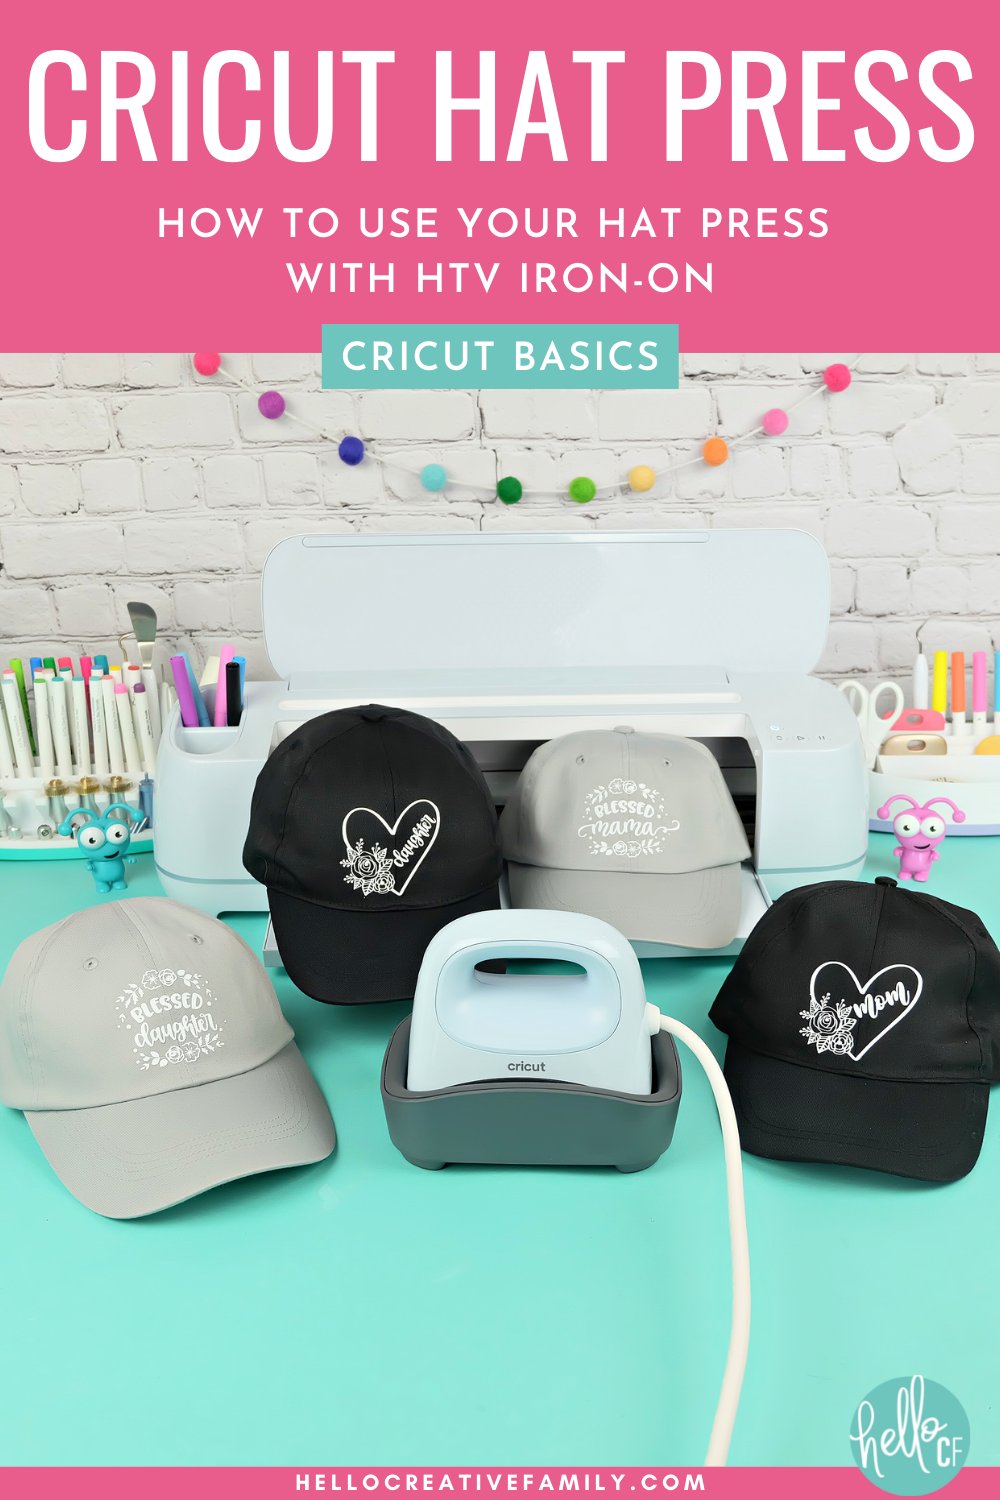
Learn everything you need to know about the Cricut Hat Press! This amazing hat heat press can be used to apply HTV, Infusible Ink and sublimation products to baseball hats, caps, sunhats and more! We cover everything you need to know about this amazing machine, plus walk you through step by step how to use it to make DIY hats using Iron-on HTV, Infusbile Ink and Sublimation.
Hi Crafty Friends!
I love playing with new crafting tools– especially Cricut crafting tools! I was super lucky to get my crafty little hands on the brand new Cricut Hat Press and today I’m going to share with you EVERYTHING you need to know to use this amazing little machine.
We are going to cover so much in this post!
The topics we’ll cover are:
- Cricut Hat Press Size
- What Comes With The Cricut Hat Press
- Materials That Can Be Used With The Cricut Hat Press
- What Kinds Of Hats Can You Use With The Cricut Hat Press?
- Setting up The Cricut Hat Press
- Do I Need Internet To Use The Cricut Hat Press
- How To Update Your Cricut Hat Press
- How To Use The Cricut Hat Press Without The Cricut Heat App
- How Long Does The Cricut Hat Press Take To Heat?
- Cricut Hat Press Safety Features
- What Voltage/Power Does The Cricut Hat Press Need?
- Cricut Hat Press Allergy Warning
- How To Use the Cricut Hat Press Hat Form
- How Big Of A Design Can You Apply With The Cricut Hat Press
- Can I Apply A Design Over Hat Seams?
- How To Use The Cricut Heat App
- Using The Cricut Hat Press With Iron-on/HTV
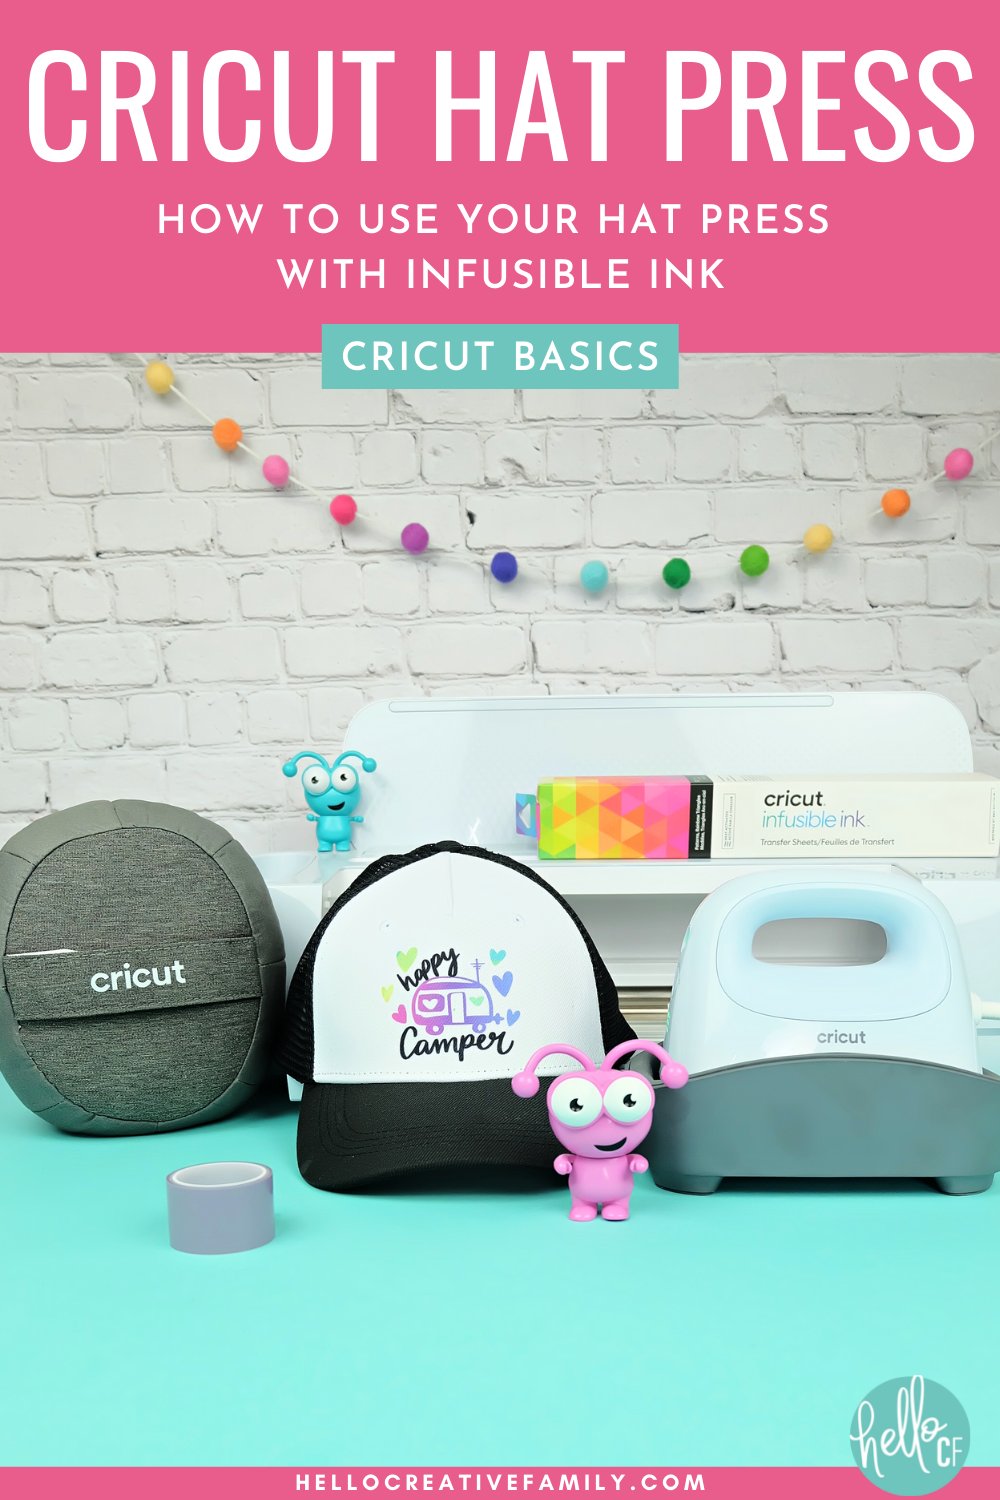
- Using The Cricut Hat Press With Infusible Ink Or Sublimation
- Are There Discounts To Buy The Cricut Hat Press?
Ready to get started? Let’s go!
Cricut Hat Press Size
As a crafter myself, I can tell you… there is no such thing as too much room in a craft room! I swear, I could have an entire house as my craft room and I’d still be able to fill up every single square inch. That’s one of the reasons I love the Cricut Hat Press so much– the size is so compact so it can work in any craft room!
The Cricut Hat Press itself measures:
- 6.5″ (16.51 cm) Wide
- 5.1″ (12.95 cm) Tall
- 4.3″ (10.92 cm) Deep
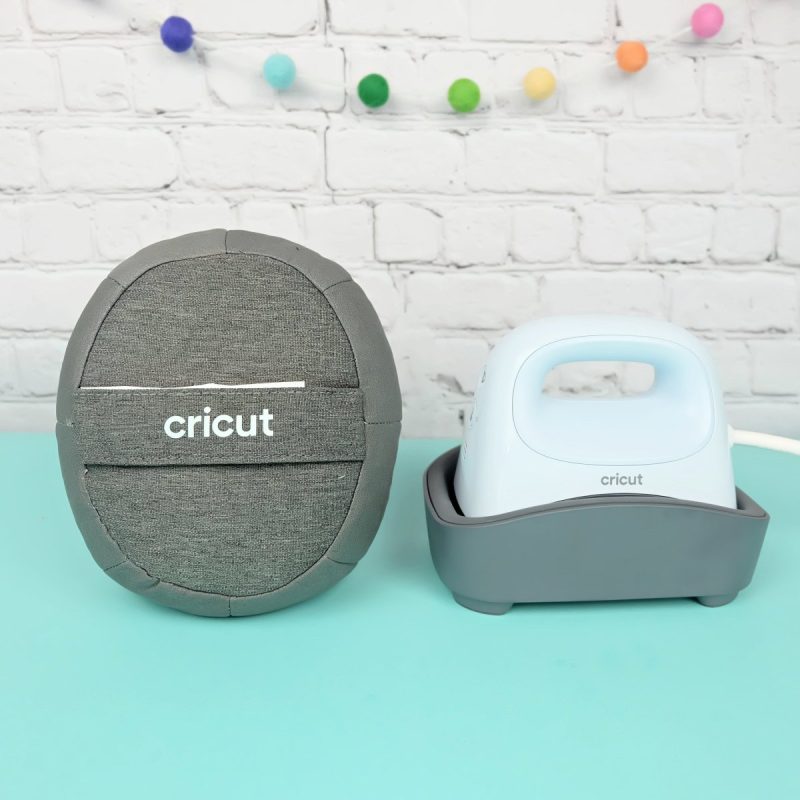
The Cricut Hat Pressing Form weighs 3 pounds and is:
- 7.5″ (19.05 cm) Wide
- 5.2″ (13.2 cm) Tall
- 6.5″ (16.51 cm) Deep
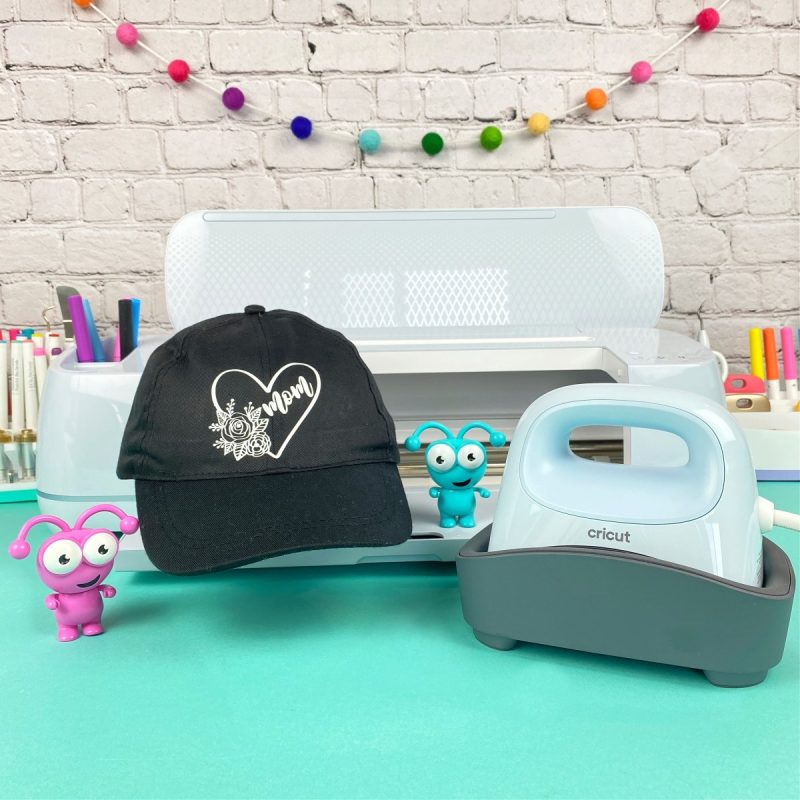
What Comes With The Cricut Hat Press
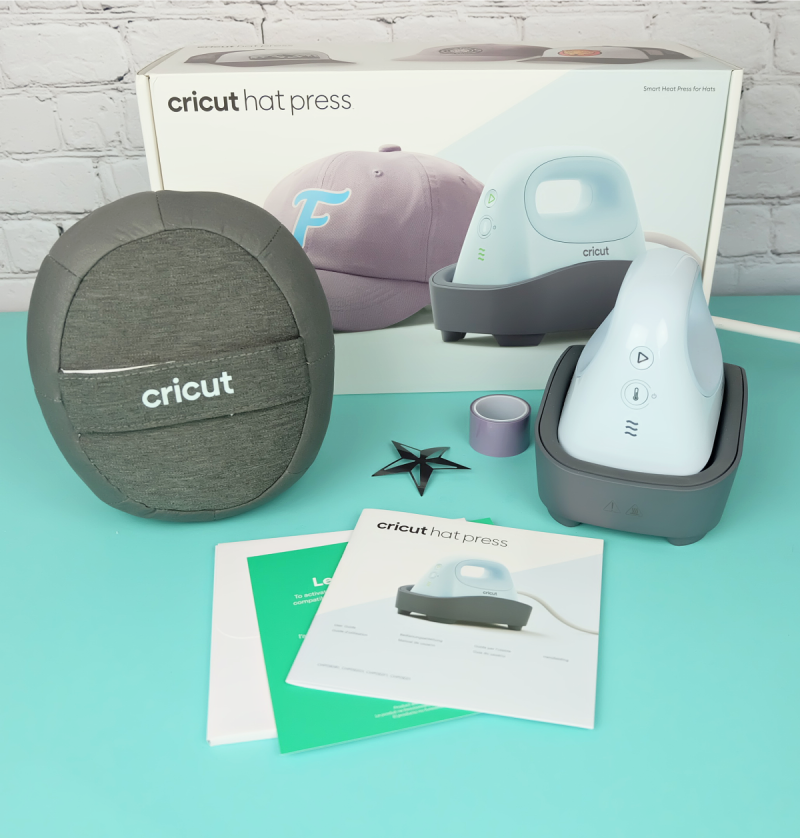
The Cricut Hat Press comes in a compact box that measures 15″ x 9″ x 6″.
Included in the box are:
- Cricut Hat Press
- Cricut Hat Pressing Form
- Safety Base
- Strong Heat Resistant Tape
- Iron On Design (Pre-cut and pre-weeded to use for your first project)
- Setup Instructions
- Cricut Hat Press User Manual
Materials That Can Be Used With The Cricut Hat Press
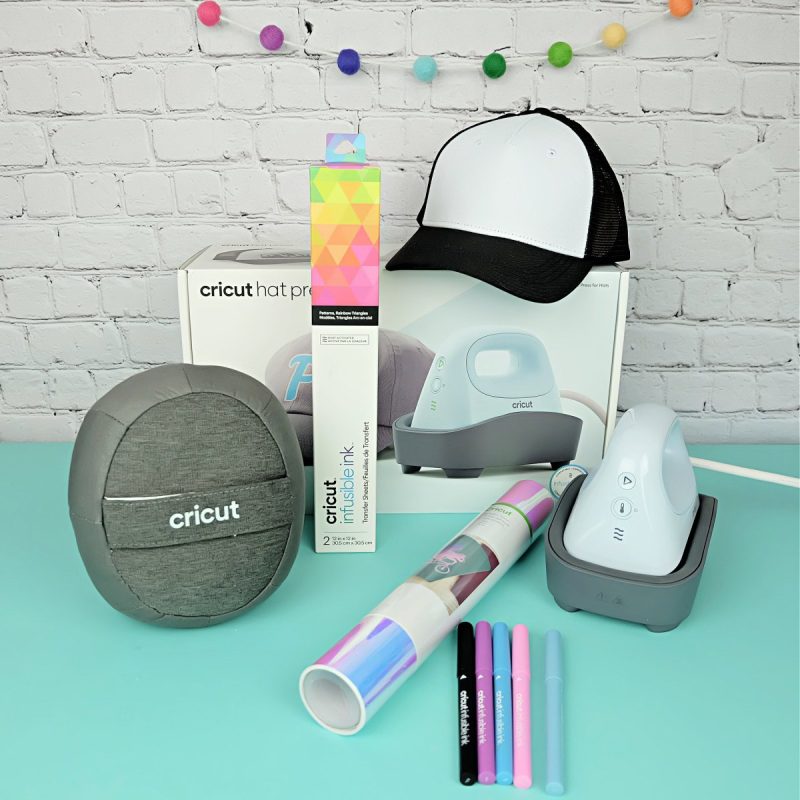
The Cricut Hat Press can be used with:
- HTV/Iron-on
- Infusible Ink Transfer Sheets
- Infusible Ink Pens applied to laser copy paper
- Designs printed with a sublimation printer or using sublimation products like sublimation pens or paints. (Read my post on how to convert an Epson Ecotank Printer to a sublimation printer here.)
- Other heat-transfer materials
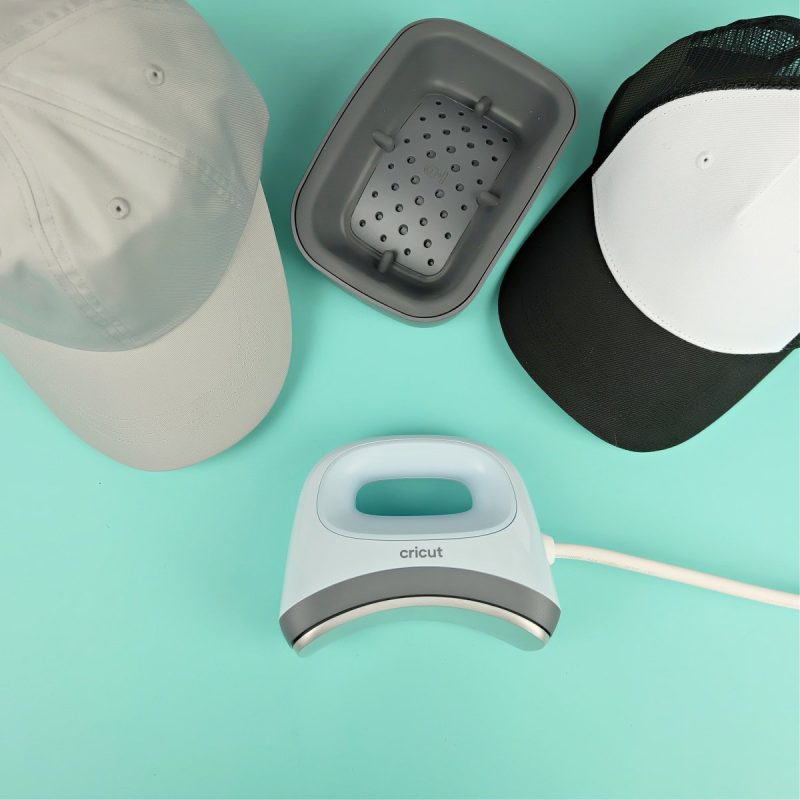
What Kinds Of Hats Can You Use With The Cricut Hat Press?
The Cricut Hat Press can be used with a variety of hats, in a variety of materials. Basically as long as it can fit on the Cricut Hat Form, and it’s a heat safe material, you can use it with your Cricut Hat Press. (I always suggest doing a heat test the first time you are using a type of base material you’ve never pressed on before.)
Cricut has their own line of Cricut hat blanks that are iron-on and Infusible Ink friendly. At this time there is a black and white Cricut Trucker Hat and a solid grey baseball cap. They come in a 3-pack and a 12-pack.
Additionally you can look for blank hats anywhere to press onto. I recently visited the accessories section of Walmart and found baseball hats and ball caps in a variety of colors that are part of the George brand, as well as sun hats, visors and other hats that you could press on.
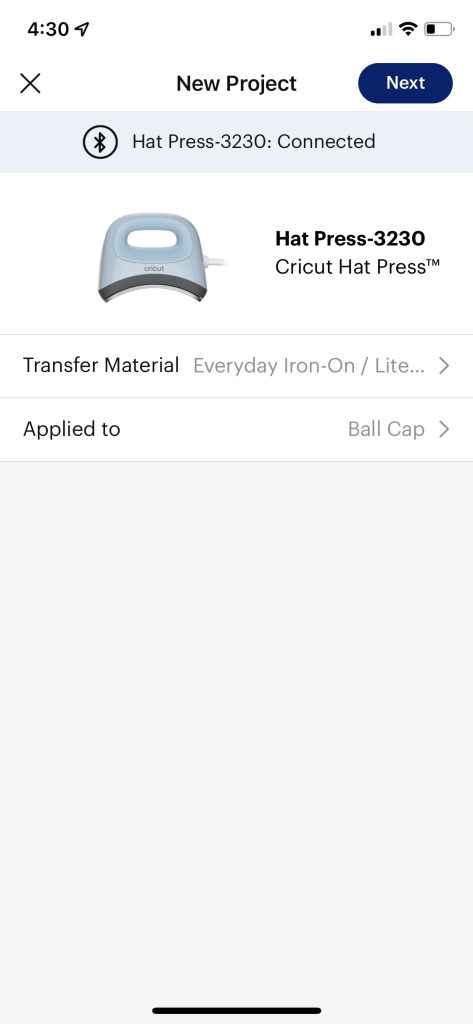
Setting up The Cricut Hat Press
Setting up the Cricut Hat Press the first time is simple and only takes a few minutes. To set up your Cricut Hat Press you will need a mobile device like a smart phone or tablet that will work with the Cricut Heat App. This app will let you activate your Cricut Hat Press and run any updates that need to be done.
After the initial setup, you have the option of using your Hat Press with the Cricut Heat App or without.
Step 1: Download the Cricut Heat App to your smart device.
Step 2: Open the Cricut Heat App and login to your Cricut account. If you do not have a Cricut account you can set one up for free.
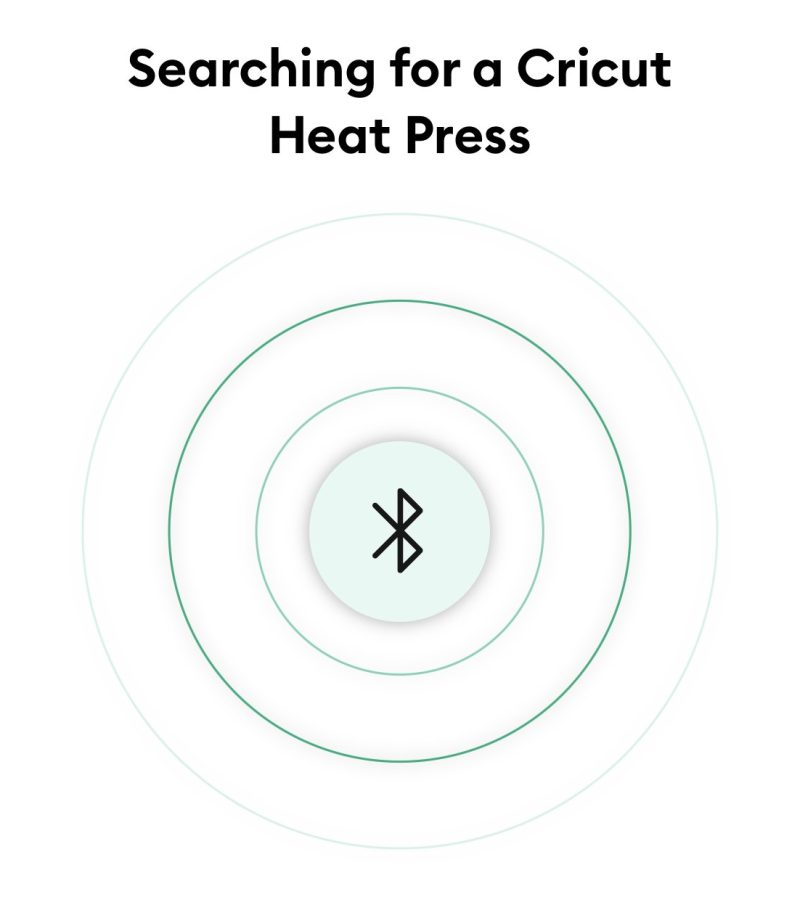
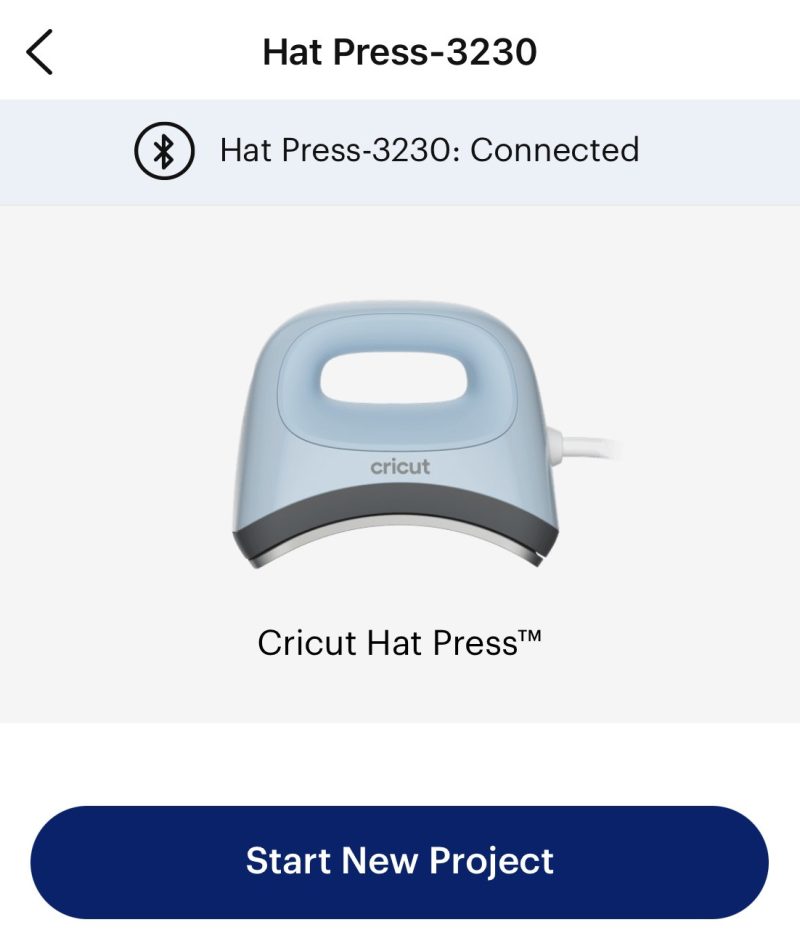
Step 3: Plug in your Cricut Hat Press and press the power button. Click setup in the app. Your hat press has bluetooth connectivity and the app will be able to search for your hat press. On your screen you will see “Available Heat Presses” with your Cricut Hat Press listed below and a button that says connect next to it. Click connect.
Step 4: The app will go through the registration process, registering your hat press to the account that you are logged in under. You will need to accept Cricut’s Terms Of Use and then click Activate. Leave your app open, your hat press turned on and both within range of each other. You may hear your hat press beep during this process, which is completely normal.
When the setup process is complete you will get a success message on your screen and then you will be free to start using your hat press!
Do I Need Internet To Use The Cricut Hat Press?
Do you need internet to use the Cricut Hat Press? The answer is both yes and no.
You will require an internet connection or cellular data to connect your hat press to the Cricut Heat App to activate it for the first time.
You also require an internet connection or cellular data to use the Cricut Heat App.
The Cricut Hat Press though can be used without the Cricut Heat App.
How To Update Your Cricut Hat Press
One of the things that is so wonderful about Cricut is that they are always updating their products, and making sure that their tools are the very best on the market. The Cricut Hat Press can have software updates done to it. Luckily this is so easy to do. Your Cricut Hat Press will check for updates and do them automatically when you connect your hat heat press to the Cricut Heat App.
How To Use The Cricut Hat Press Without The Cricut Heat App

If you would like to use the Cricut Hat Press without the Cricut Heat App you will want to keep the following temperature settings in mind.
There are three levels of heat:
- Low (one bar)– use this setting if you are using sensitive materials that require a heat setting of 255F to 295F. The timer for this setting is automatically set to 60 seconds.
- Medium (two bars)– use this setting for Cricut Everyday Iron-on, Cricut Express Iron-on, most heat transfer vinyl and any materials that requires a temperature of 300F to 355F. The timer for this setting is automatically set to 60 seconds.
- High (Three bars)– use this setting with Infusible Ink, sublimation and any materials that requires a temperature of 360F to 400F. The timer is automatically set to 90 seconds.
How Long Does The Cricut Hat Press Take To Heat?
The Cricut Hat Press can heat to 400F in 3 minutes which gives you the perfect amount of time to get your hat prepped and design weeded for application!
Cricut Hat Press Safety Features
Like everything that Cricut designs, a lot of thought has been put into safety.
The design of the Cricut Hat Press maximizes usable surface area for heat transfer and the curved heat plate minimizes the potential for touching hot, dangerous areas.
The press also comes with an insulated safety base which keeps it in a safe position when not being used so that the ceramic heat plate is covered so that you can’t burn yourself, and your work surface is protected from the high temperature.
The press also has an auto-off feature feature that powers off the machine after 13 minutes of inactivity. It first sends you a warning beep, and if you don’t press a button on the heat press will automatically shut off.
What Voltage/Power Does The Cricut Hat Press Need?
The Cricut Hat Press requires 380-470 watts of power. All Cricut heat presses are manufactured with power requirements specific to the region in which it is sold.
Cricut Hat Press Allergy Warning
On the side of the Cricut Hat Press box, on the Cricut Website and on the plastic wrapper on the hat press form you will notice an allergy warning. The pressing form contains walnut shells which helps to keep the heat inside your hat when you’re pressing it and to keep the form of the hat. The shells are in the very center of the pressing form, covered by protective layers, but with varying levels of nut allergies it’s an important thing to be aware of if anyone in your family, or who you are making hats for has an allergy.
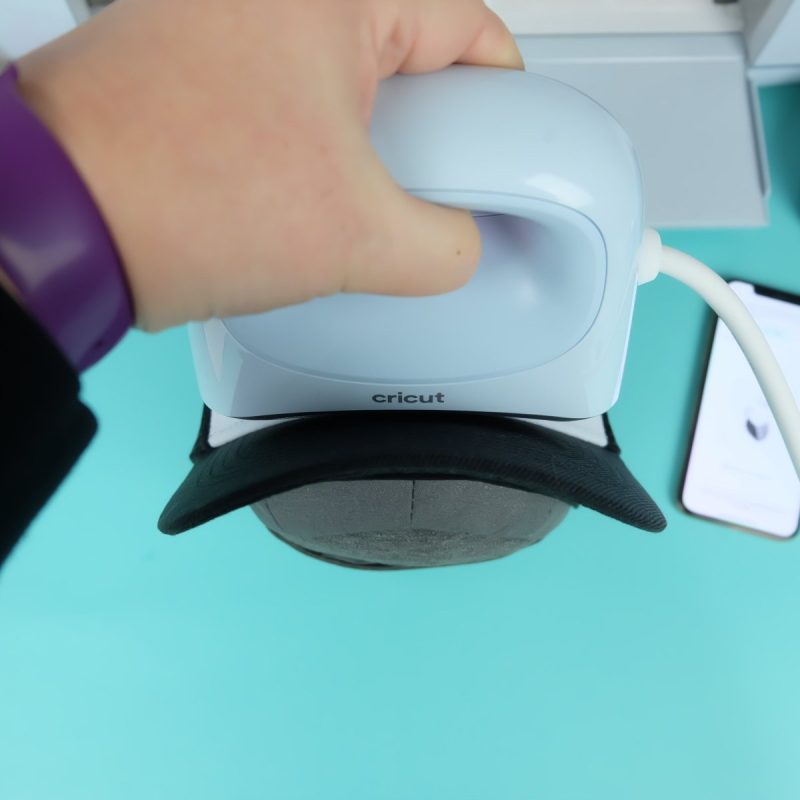
How To Use the Cricut Hat Press Hat Form
The Cricut Hat Press Form makes the ideal pressing surface for making DIY hats! Here’s how to use it!
To use the Cricut Hat Pressing Form:
Step 1: Remove any cardboard, price tags or packaging from your hat.
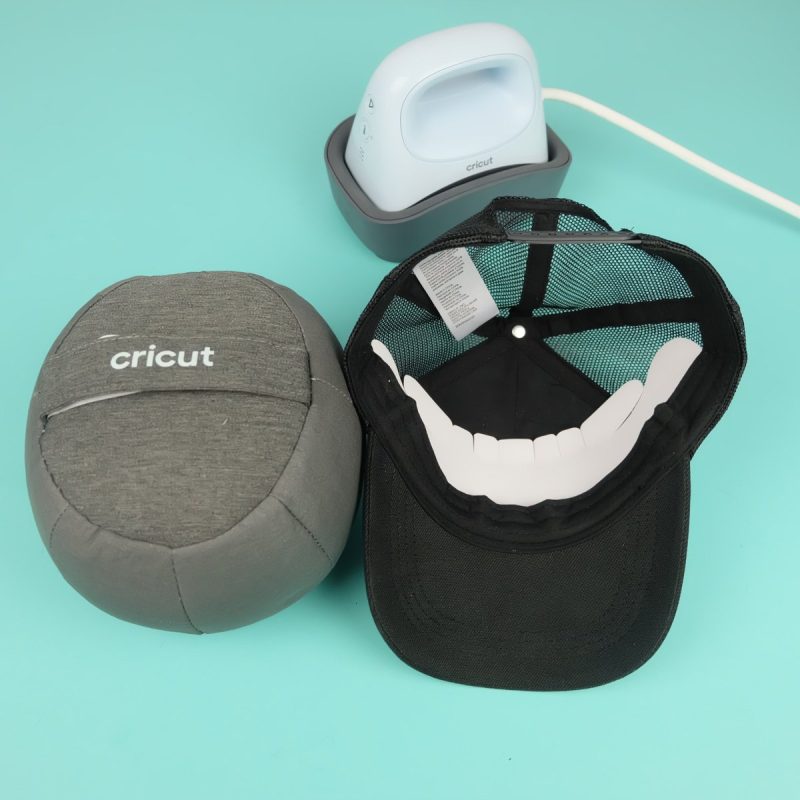
Flip up the sweatband inside your hat and open or loosen the hat as much as possible.
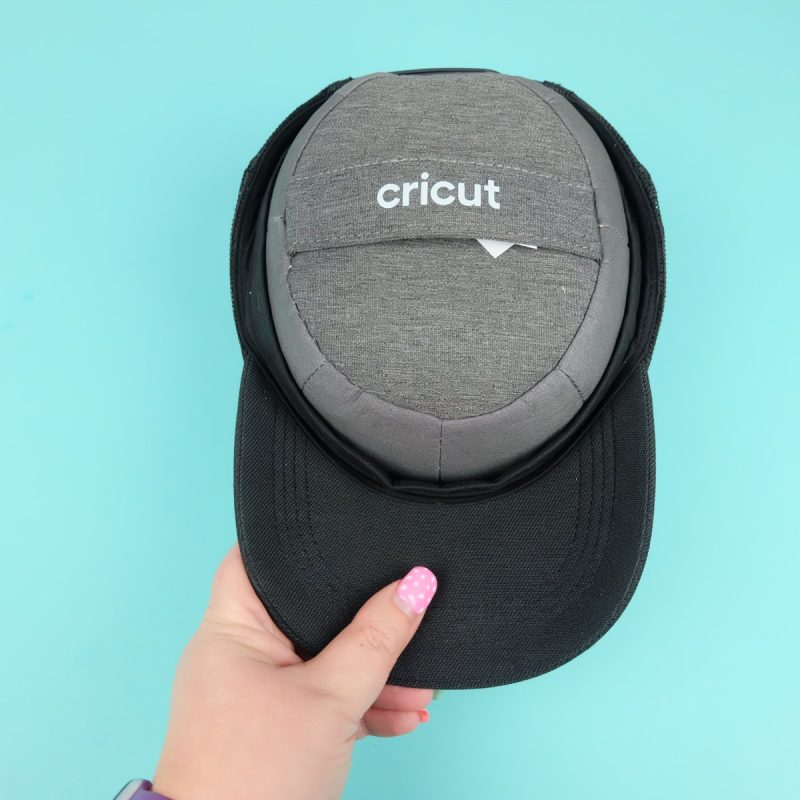
Put your hat on the form, getting as tight of a fit as possible. If your hat has tightening straps tighten them back up.
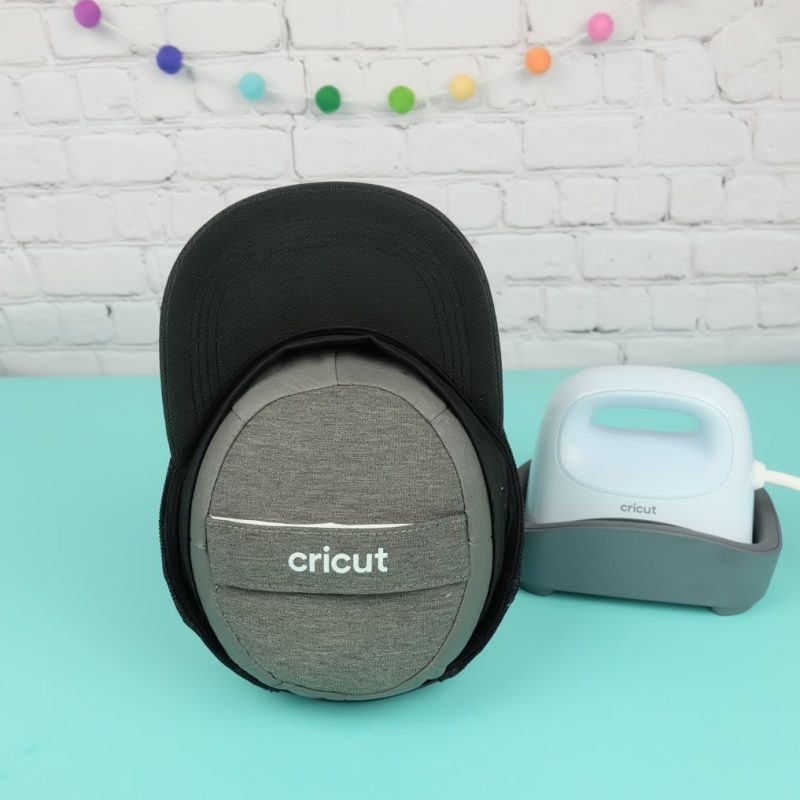
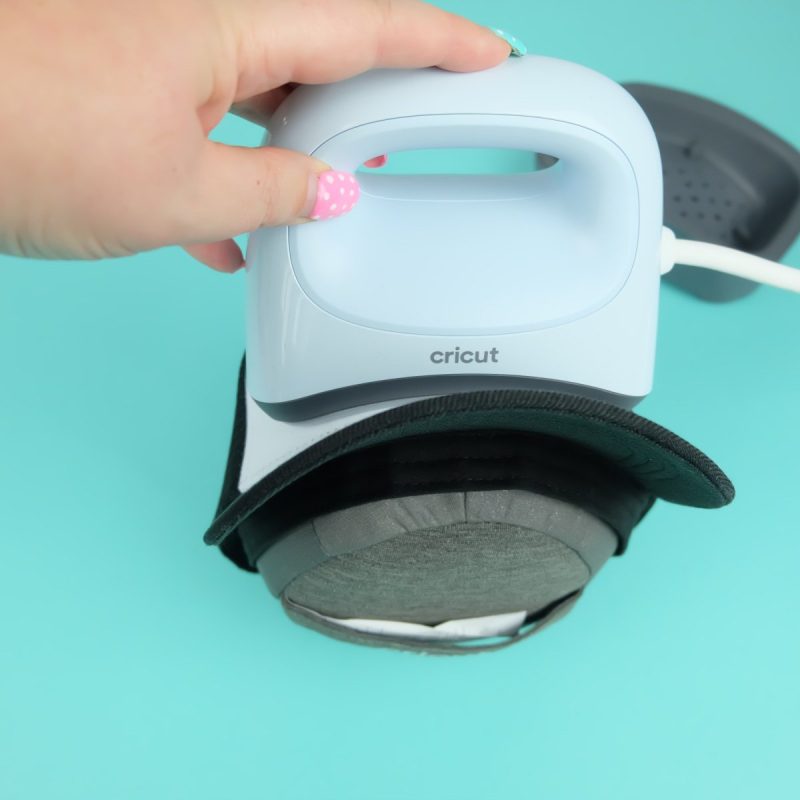
Once your hat is inside the hat form, you should be able to stand your hat up on your work surface and the curved ceramic plate of your hat press will curve firmly against the curve of your hat.
How Big Of A Design Can You Apply With The Cricut Hat Press?
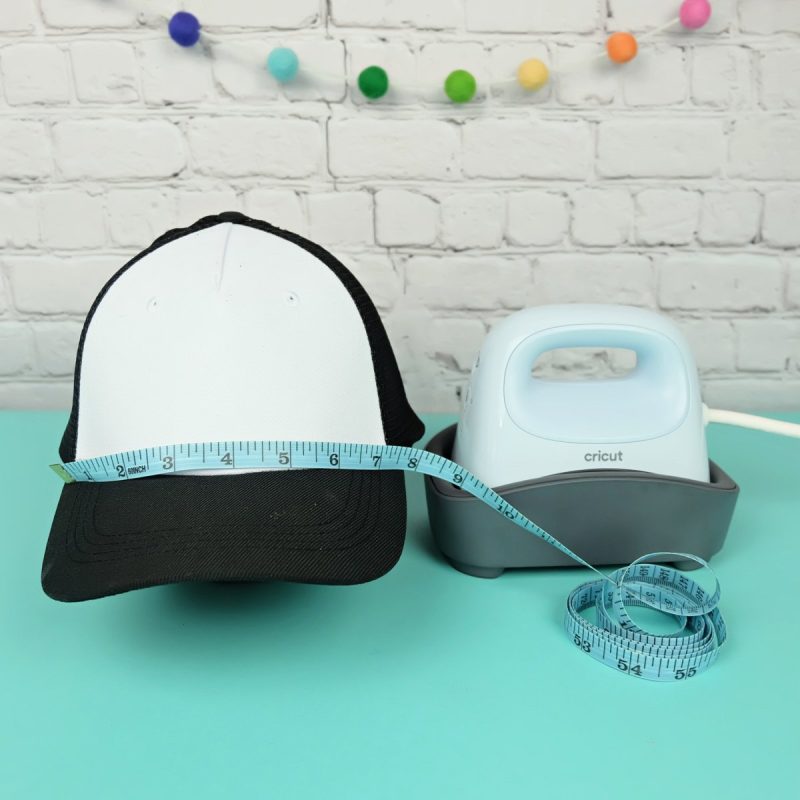
Cricut recommends that the largest design you press with your hat press is 2.25 inches high by 4.25 inches wide.
Also keep in mind that your design has to be able to curve around the rounded shape of your hat which can be challenging.
I actually had to remove my first design because it was too large for my hat and didn’t work with the curve.
I recommend cutting the plastic sheet of your Iron-On close to the design and also cutting little slits in the plastic sheet to help it fit around the curve better.
A seamstress measuring tape is one of my “must have” Cricut tools and definitely comes in handy when working on hats for measuring the size you want your design to be.
Can I Apply A Design Over Hat Seams?
You are able to apply your design over seams, but Cricut recommends avoiding placing your design over eyelets, mesh and any plastic pieces. If using Infusible Ink you will also want to avoid the brim of your hat. The high heat required for Infusible Ink can cause the form within the brim lose its shape.
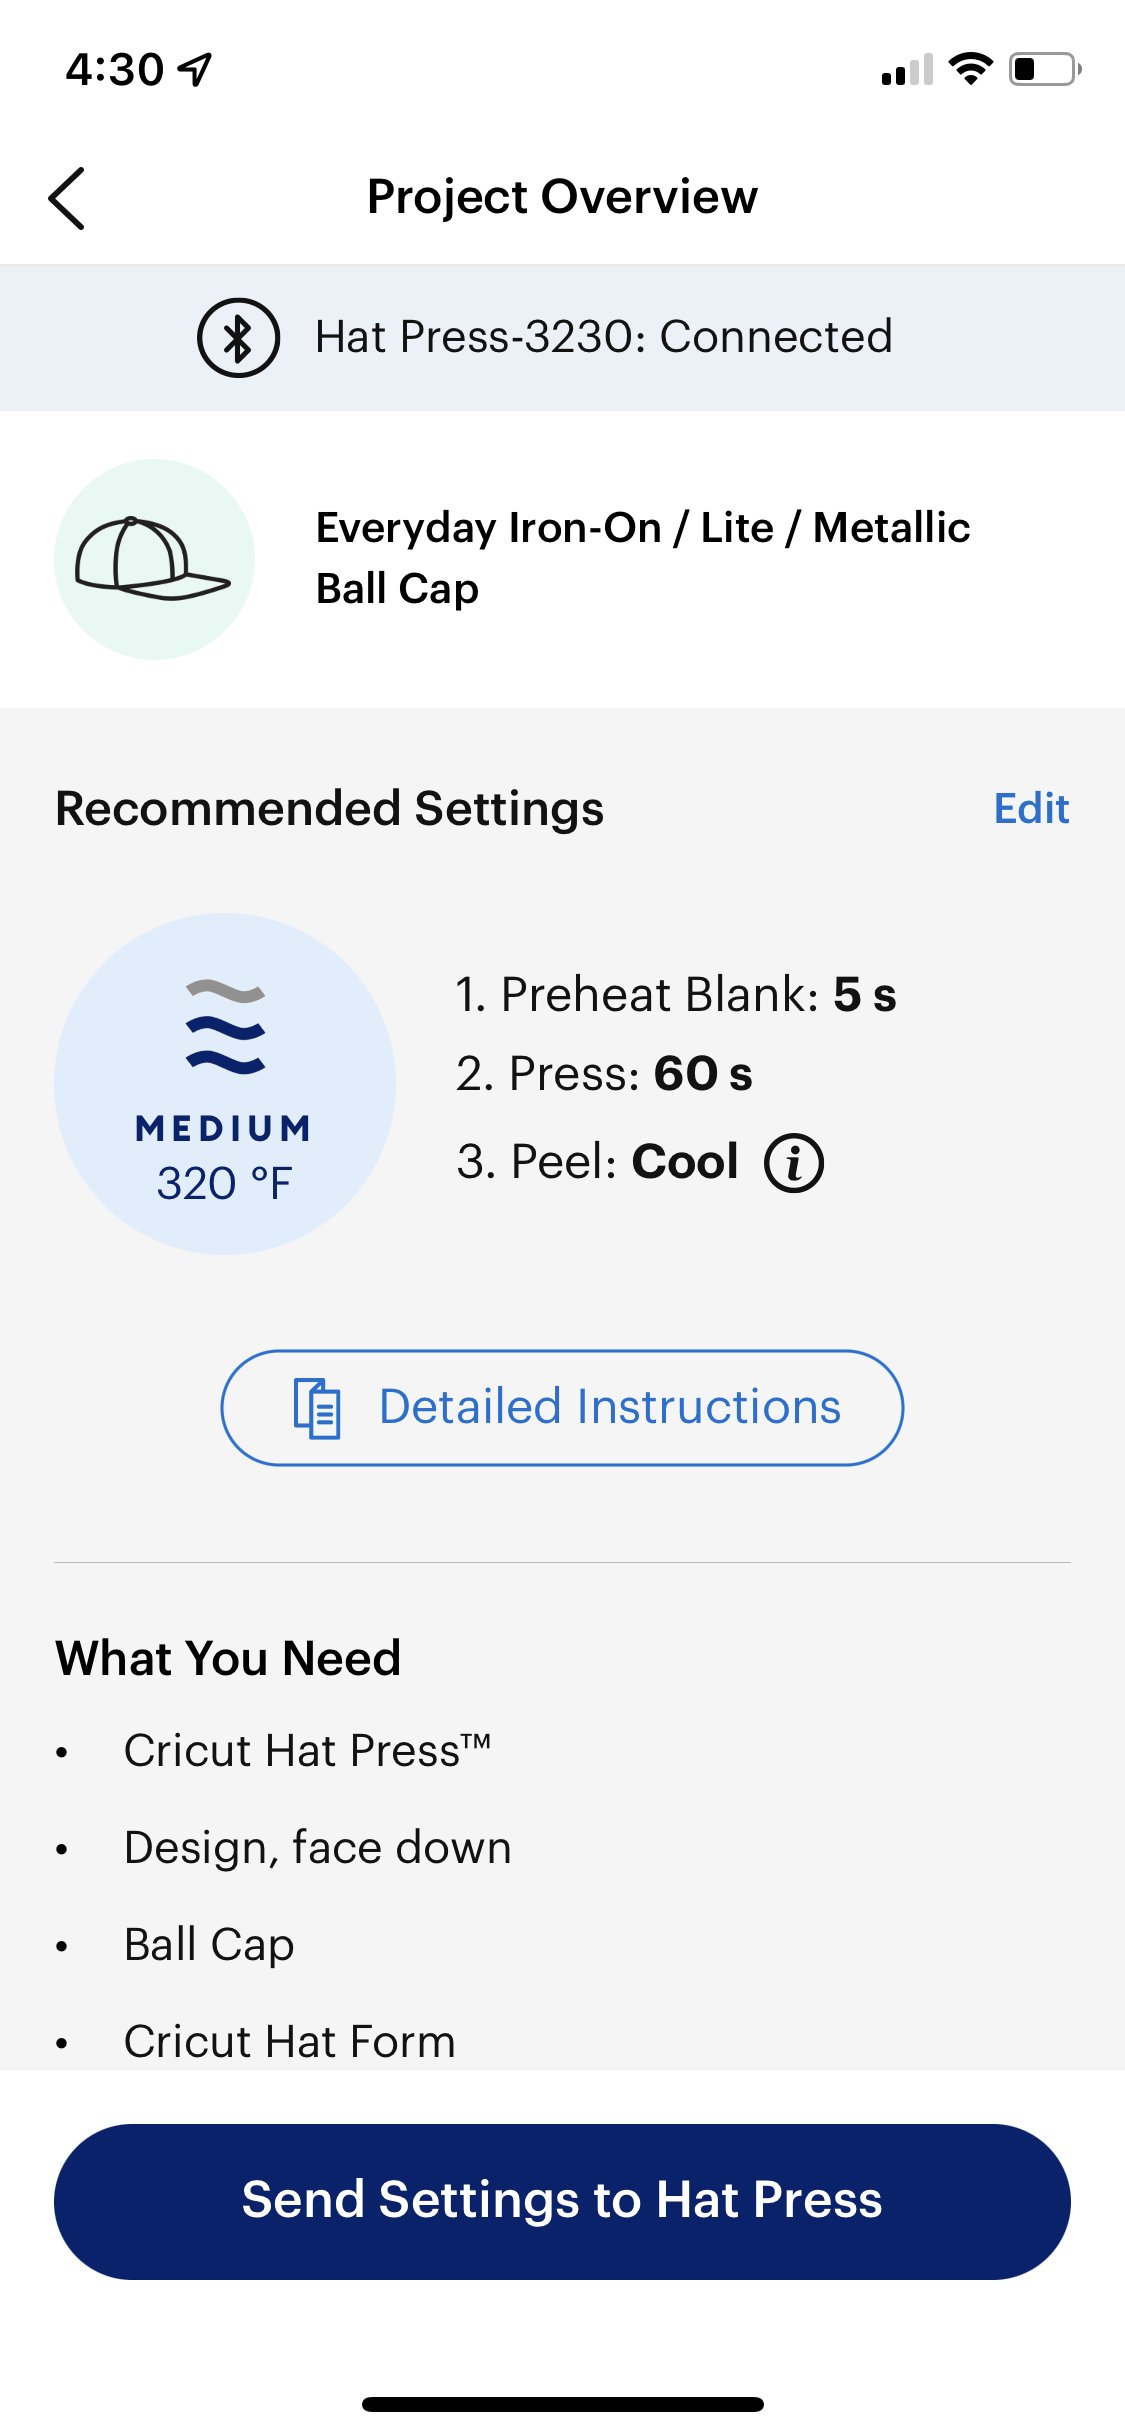
How To Use The Cricut Heat App
I LOVE the Cricut Heat App. I constantly have the Cricut Temperature Guide open on my computer so that I know what temperature and for how long to press each of my craft projects for.
Now, the Cricut Temperature Guide is right on my phone!
When you open the app you first select the heat press you are connecting to.
Then you select the type of material you are using and what you are applying it to.
The app then gives you detailed instructions on how to make your project. You can then send those settings to your heat press.
Once you send the instructions to your heat press, it will heat up your press, let you know when your press is heated, and walk you through step by step with written and video instructions. It also sets your timer for the precise time to heat for!
For example:
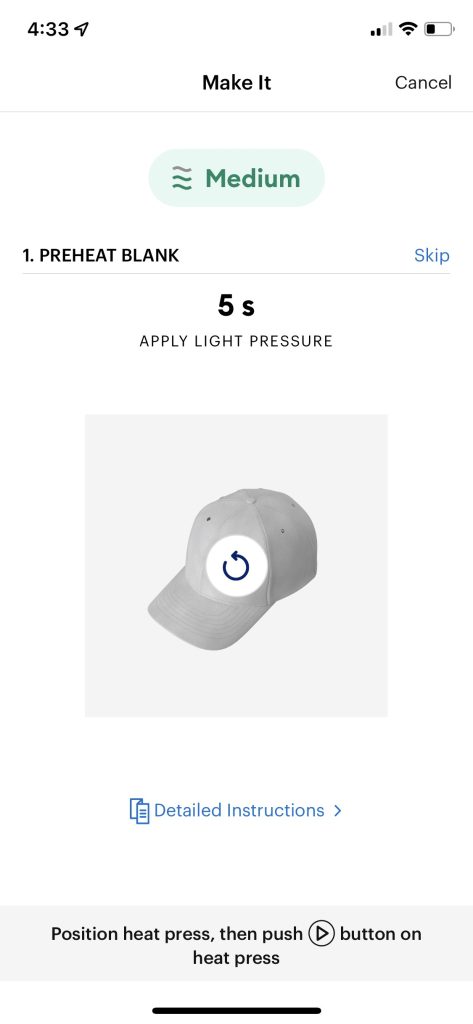
Step 1: Preheat blank for 5 seconds using light pressure. When you press the play button on your heat press the timer is automatically set to 5 seconds for you.
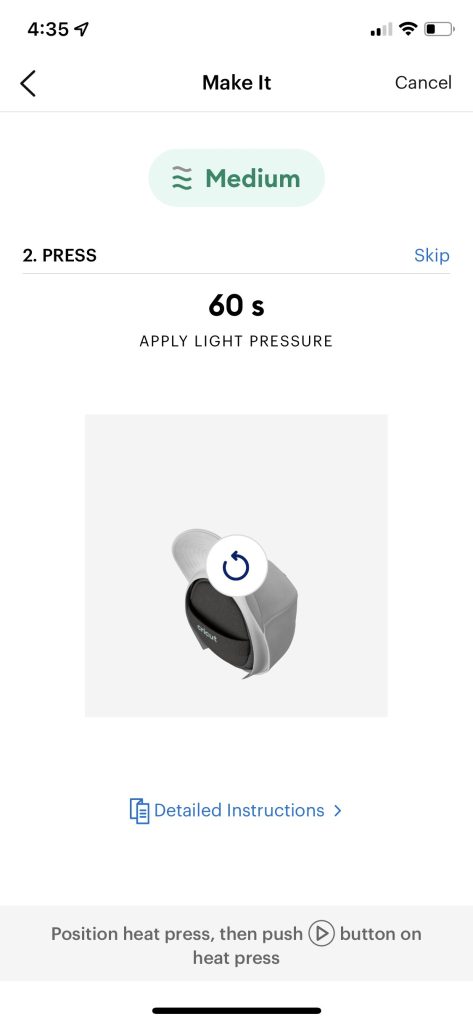
Step 2: Add your design to your hat and then press for 60 seconds applying light pressure. (Again when you press the play button on your heat press the timer is automatically set to 60 seconds for you!)
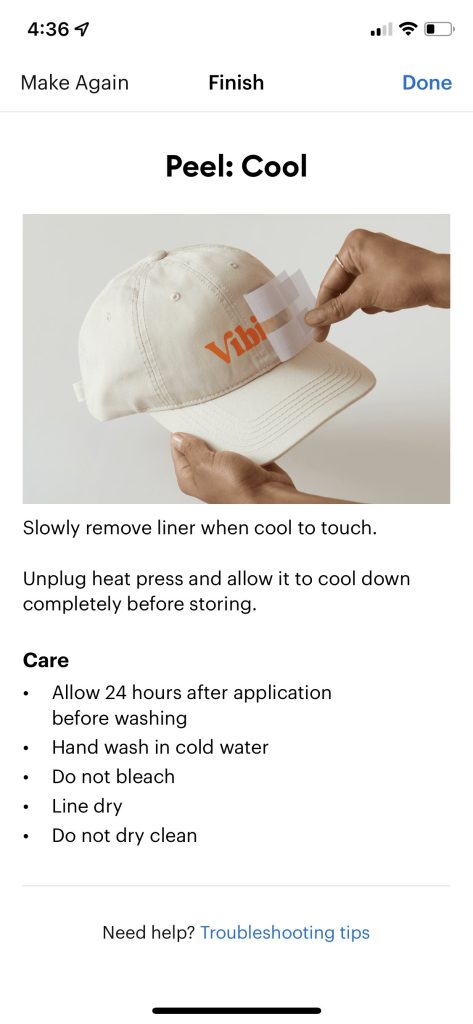
It even gives you the instructions for what temperature to peel your plastic liner off at, and how to care for your item that you just pressed!
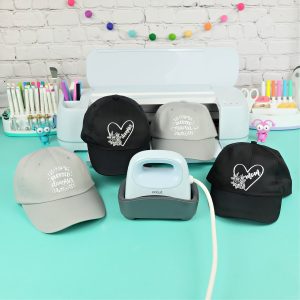
Using The Cricut Hat Press With Iron-on/HTV
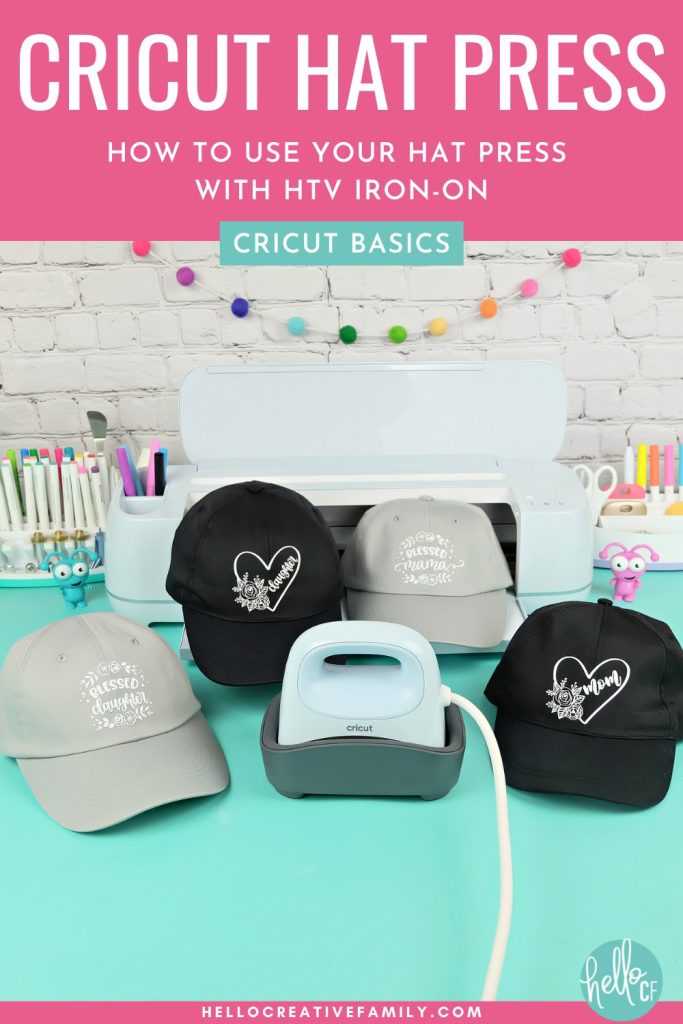
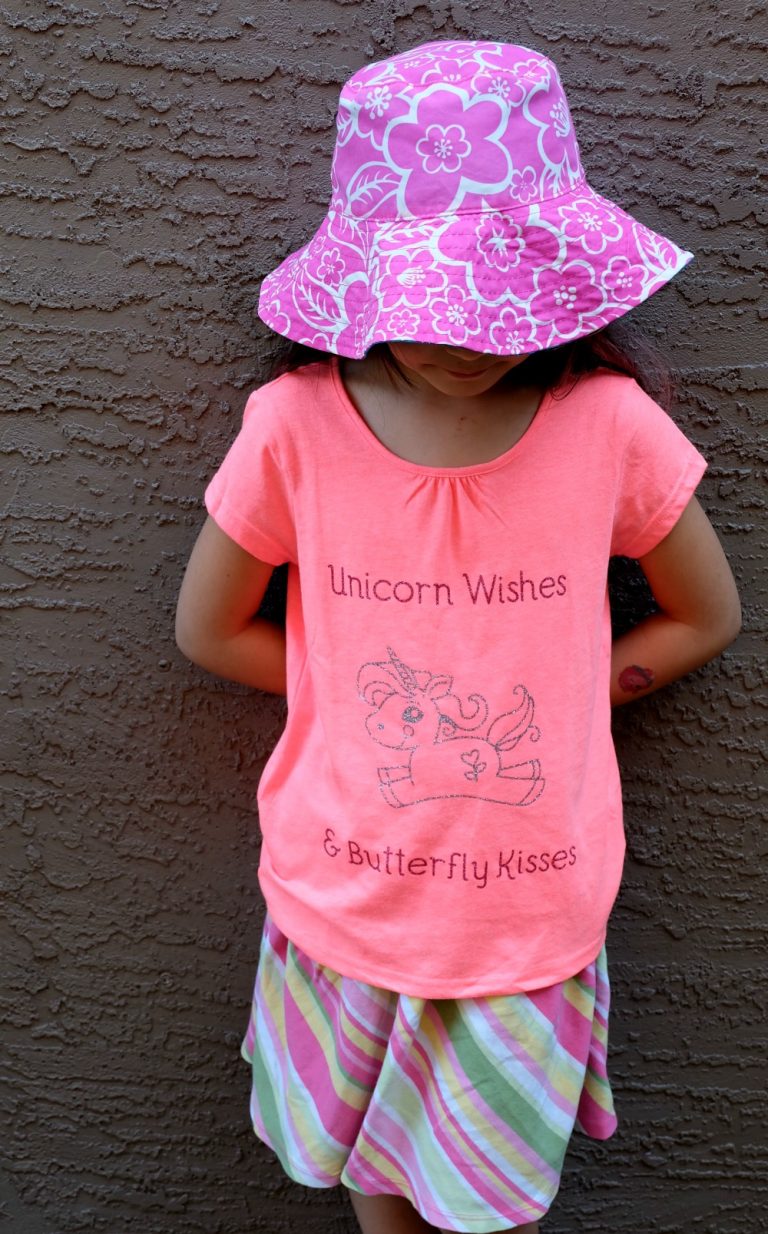
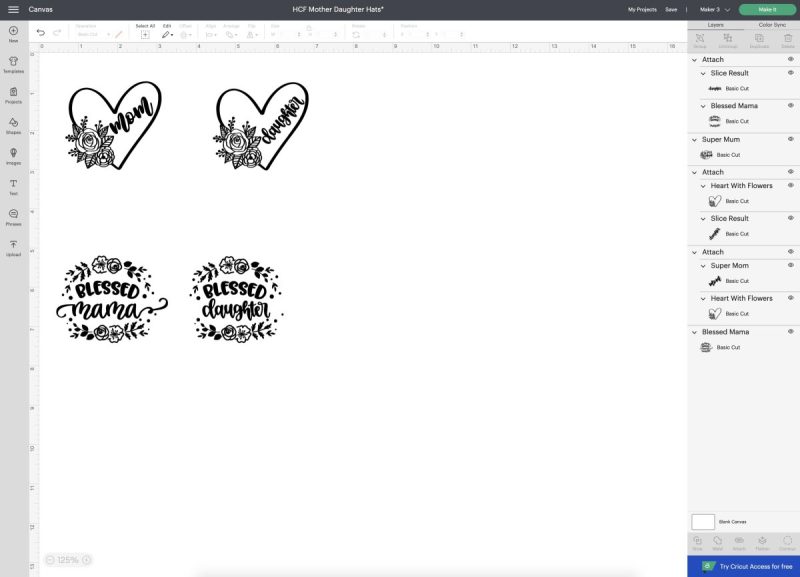
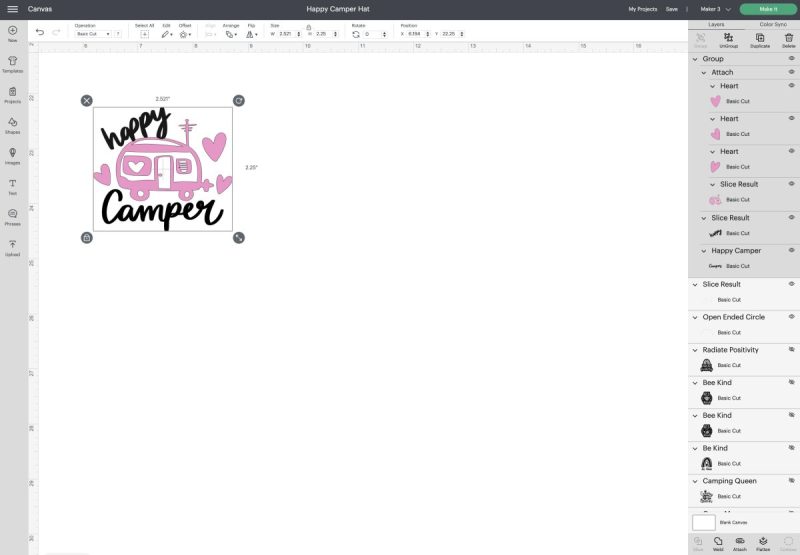
I decided to use my Cricut Hat Press to make some adorable Mother/Daughter hats for Mother’s Day. You can find a link to my Cricut Canvas here if you’d like to make the same designs or you can create your own new project!
Materials:
- Measuring Tape
- Hat
- Cricut cutting machine
- Cricut Iron-On
- Cricut Cutting Mat
- Weeding Tools
- Cricut Hat Press and Hat Pressing Form
- Cricut Strong Grip Heat Resistant Tape

Directions:
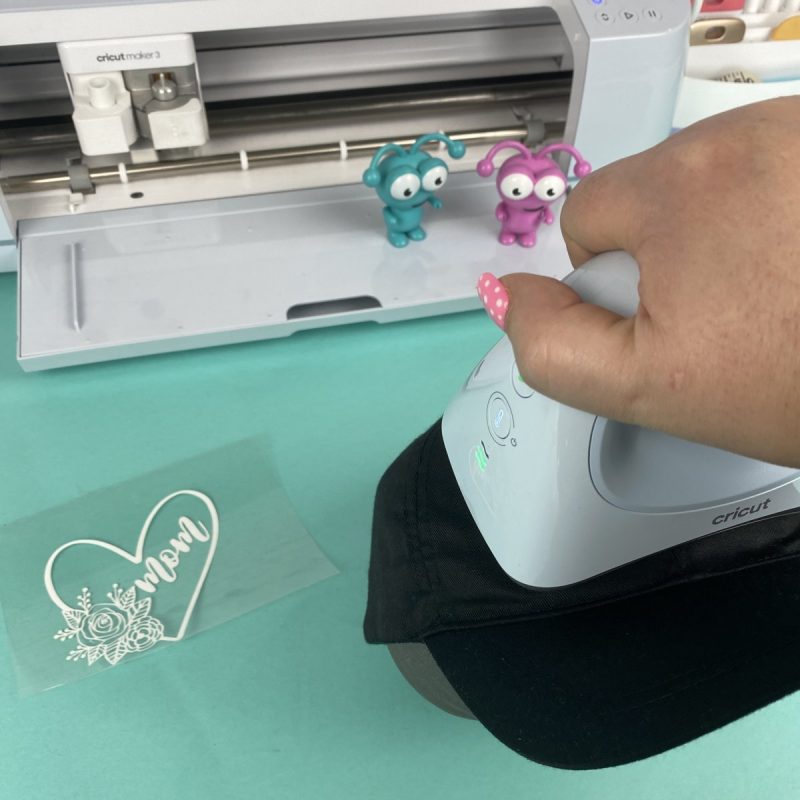
Step 1: Open Cricut Designs Space and select your design. You can find my canvas for my Mother Daughter hats here. Measure your hat and size your design accordingly. Remember Cricut recommends a maxium size of 2.25 inches wide and 4.25 inches tall. Click “Make It” and don’t forget to click the mirror slider to mirror your design. Follow the screen prompts to connect your machine and select your cutting material.
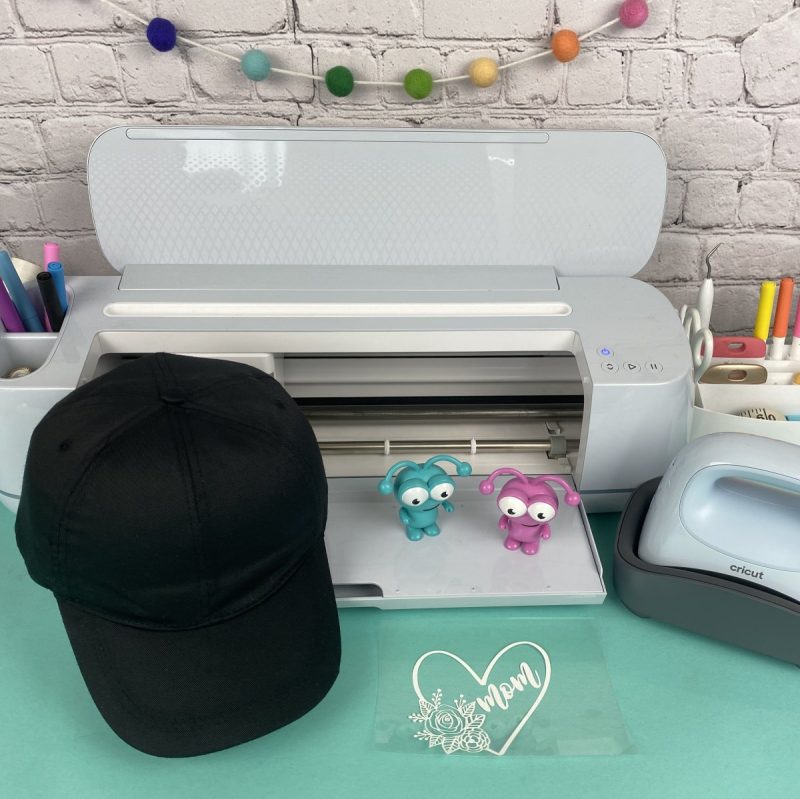
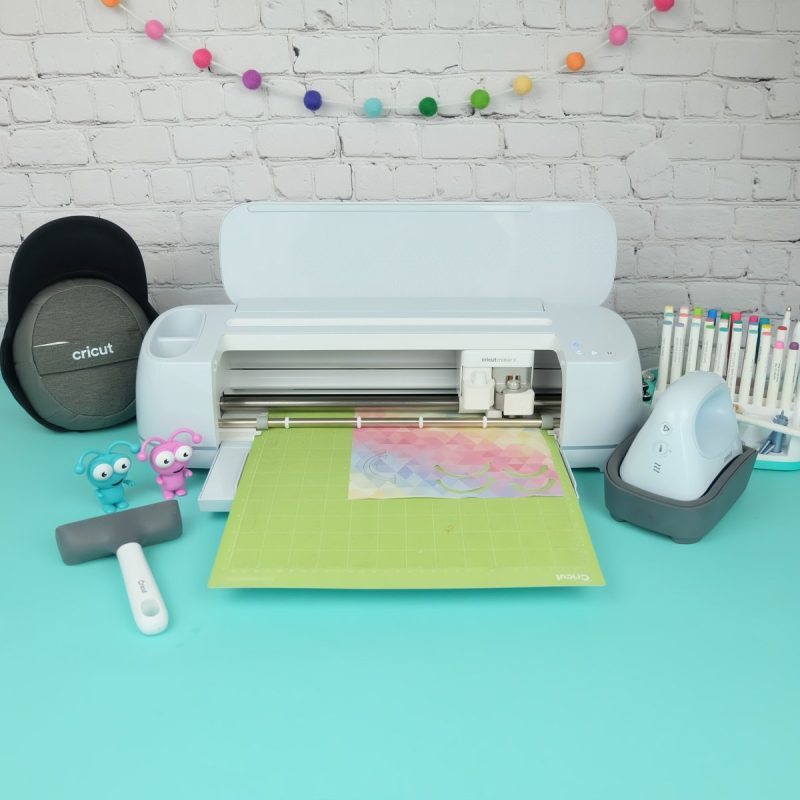
Step 2: Place your iron-on the mat with the shiny side facing down. Cut out your design using your Cricut cutting machine.
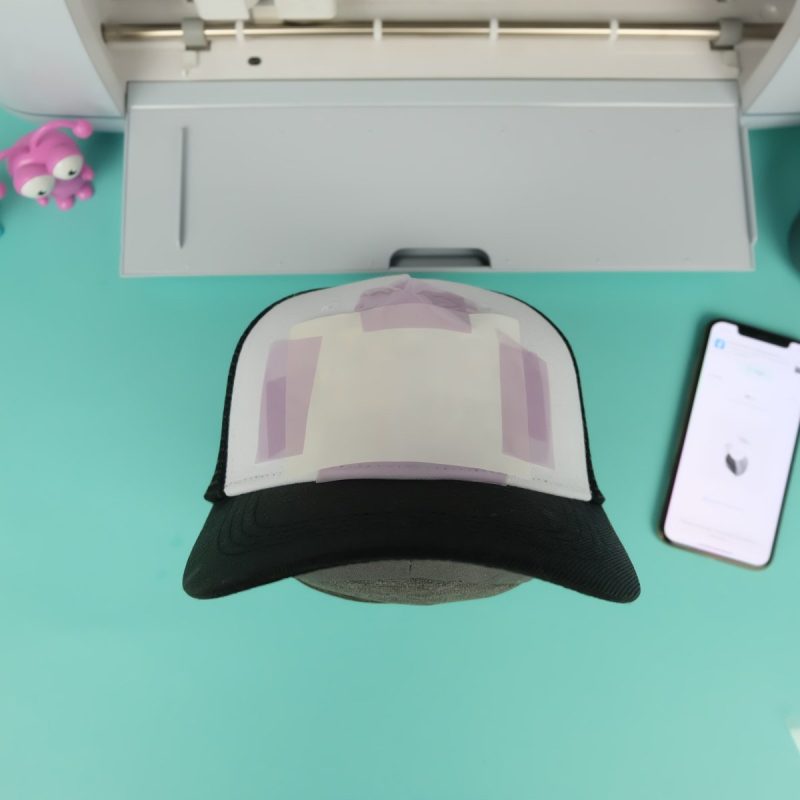
Step 3: Weed your design, removing the iron-on from around your design, leaving just your design behind on the clear plastic liner.
Step 4: Turn on your Cricut Hat Press and open the Cricut Hat Press app on your smart phone or tablet. Select the type of iron-on you are using and the the type of hat you are using. Send the settings to your heat press.
Step 5: Once your heat press has finished preheating follow the directions in the Heat Press App. Pre-heat your hat for 5 seconds. Then attach your design to your hat using heat resistant tape.
Press for another 60 seconds applying light and side to side movement.
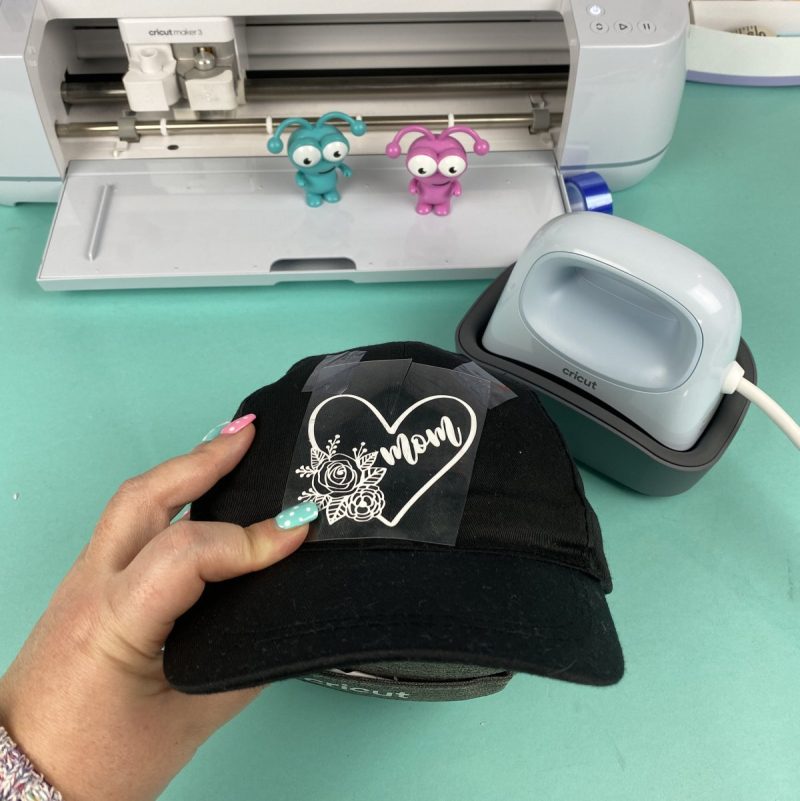
Return the Hat Press to the cradle and allow your hat to cool. Once cool, peel away the clear plastic liner leaving your design behind.
Always unplug your heat press and allow it to cool down completely before storing.
Print for later:
How To Apply An Iron-On Design To A Hat Using The Cricut Hat Press
Instructions
- Open Cricut Designs Space and select your design. You can find my canvas for my Mother Daughter hats here. Measure your hat and size your design accordingly. Remember Cricut recommends a maxium size of 2.25 inches wide and 4.25 inches tall. Click “Make It” and don’t forget to click the mirror slider to mirror your design.
- Place your iron-on the mat with the shiny side facing down. Cut out your design using your Cricut cutting machine.
- Weed your design, removing the iron-on from around your design, leaving just your design behind on the clear plastic liner.
- Turn on your Cricut Hat Press and open the Cricut Hat Press app on your smart phone or tablet. Select the type of iron-on you are using and the the type of hat you are using send the directions to your heat press.
- Once your heat press has finished preheating follow the directions in the Heat Press App. Pre-heat your hat for 5 seconds.
- Attach your design to your hat using heat resistant tape. Press for another 60 seconds applying light and side to side movement. Return the Hat Press to the cradle and allow your hat to cool. Once cool, peel away the clear plastic liner leaving your design behind.
- Always unplug your heat press and allow it to cool down completely before storing.
Equipment
- Hat
- Cricut Standard Grip Mat
- Cricut Hat Press and Hat Pressing Form
- Cricut Strong Grip Heat Resistant Tape
Using The Cricut Hat Press With Infusible Ink Or Sublimation
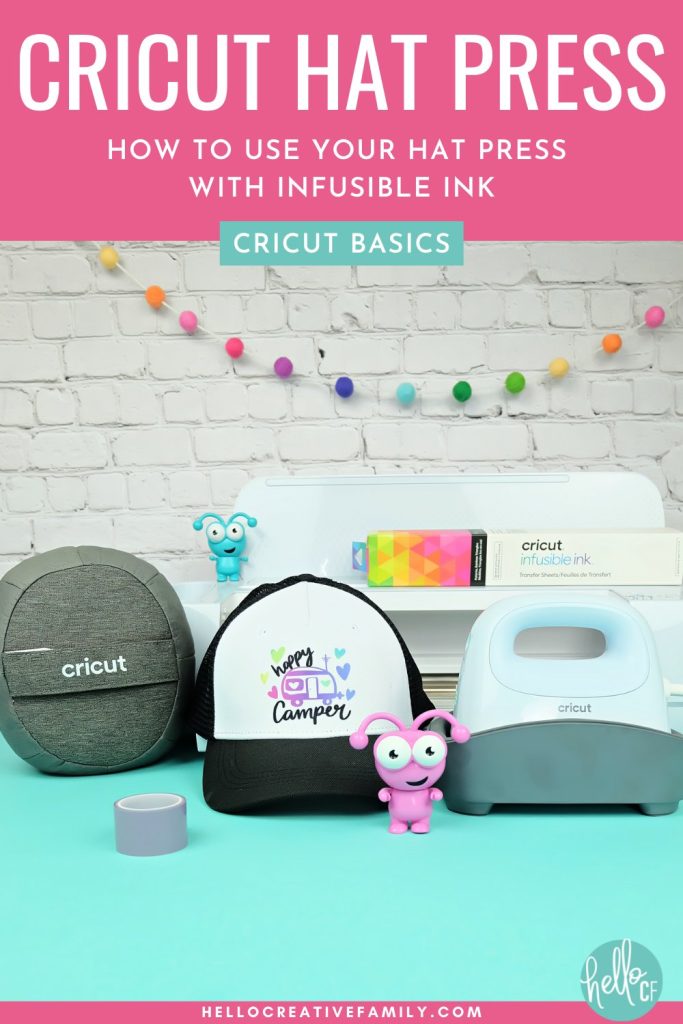
The Cricut Hat Heat Press is also wonderful for Cricut Infusible Ink and other sublimation projects. For this project make sure you use a hat that is Cricut Infusible Ink or sublimation ink friendly. I’m going to walk you through the process of using Infusible Ink, but you would use the same heat settings and process for sublimation.
Materials:
- Measuring Tape
- Cricut Infusible Ink Hat or Sublimation Hat
- Cricut cutting machine
- Cricut Infusible Ink Transfer Sheet
- Cricut Cutting Mat
- Weeding Tools
- Cricut Hat Press and Hat Pressing Form
- Lint Roller
- Butcher Paper
- Cricut Strong Grip Heat Resistant Tape
Directions:
Step 1: Open Cricut Designs Space and select your design. Measure your hat and size your design accordingly. Remember Cricut recommends a maxium size of 2.25 inches wide and 4.25 inches tall. Click “Make It” and don’t forget to click the mirror slider to mirror your design. Follow the prompts to connect your machine and select your cutting material.
Step 2: Place your Infusible Ink on the mat with the plastic side facing down. Cut out your design using your Cricut cutting machine.
Step 3: Weed your design, removing the Infusible Ink from around your design, leaving just your design behind on the clear plastic liner.
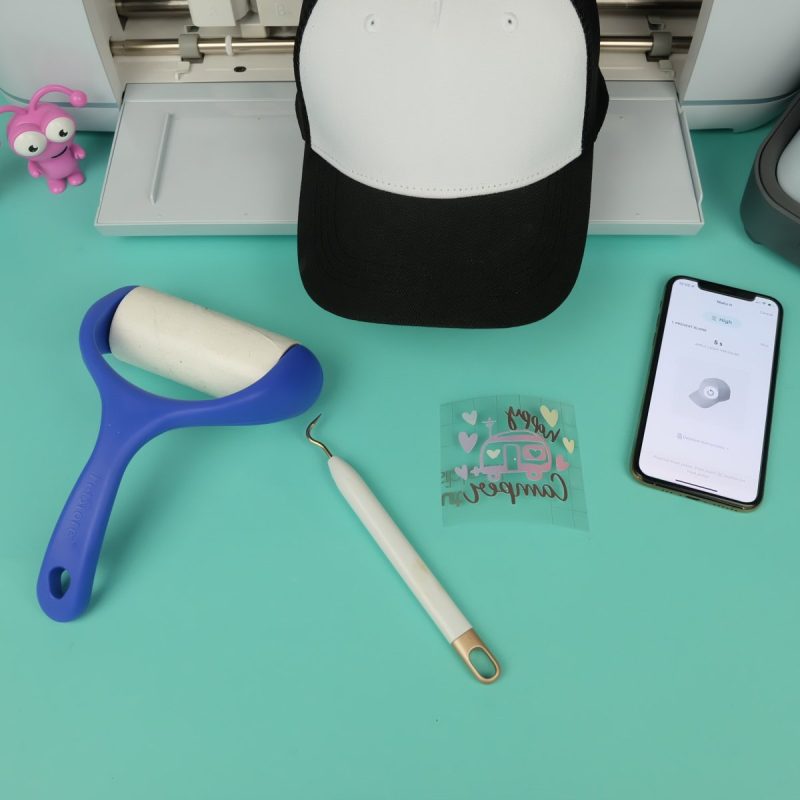
Step 4: Turn on your Cricut Hat Press and open the Cricut Hat Press app on your smart phone or tablet. Select Infusible Ink and the the type of hat you are using. Send the settings to your heat press. While it’s heating use a lint roller to remove any lint or debris from your hat.
Step 6: Once your heat press has finished preheating follow the directions in the Heat Press App. Lay a piece of butcher paper over your hat, and then pre-heat your hat for 5 seconds.
Step 7: Attach your design to your hat using heat resistant tape. Lay butcher paper on top and secure with heat resistant tape. Press for another 90 seconds applying light pressure and side to side movement.
Step 8: Return the Hat Press to the cradle. Allow your hat to cool until it is just warm to the touch. Remove butcher paper and then design.

Always unplug your heat press and allow it to cool down completely before storing.

Print for later:

Using The Cricut Hat Press With Infusible Ink
Instructions
- Open Cricut Designs Space and select your design. Measure your hat and size your design accordingly. Remember Cricut recommends a maxium size of 2.25 inches wide and 4.25 inches tall. Click “Make It” and don’t forget to click the mirror slider to mirror your design.
- Place your Infusible Ink on the mat with the plastic side facing down. Cut out your design using your Cricut cutting machine.
- Weed your design, removing the Infusible Ink from around your design, leaving just your design behind on the clear plastic liner.
- Turn on your Cricut Hat Press and open the Cricut Hat Press app on your smart phone or tablet. Select Infusible Ink and the the type of hat you are using. Send the settings to your heat press.
- Use a lint roller to remove any lint or debris from your hat.
- Once your heat press has finished preheating follow the directions in the Heat Press App. Lay a piece of butcher paper over your hat, and then pre-heat your hat for 5 seconds.
- Attach your design to your hat using heat resistant tape. Lay butcher paper on top and secure with heat resistant tape. Press for another 90 seconds applying light pressure and side to side movement.
- Return the Hat Press to the cradle. Allow your hat to cool until it is just warm to the touch. Remove butcher paper and then design.
- Always unplug your heat press and allow it to cool down completely before storing.
Equipment
- Cricut Infusible Ink Hat or Sublimation Hat
- Cricut Standard Grip Mat
- Cricut Hat Press and Hat Pressing Form
- Lint Roller
- Butcher Paper
- Cricut Strong Grip Heat Resistant Tape
Are There Discounts To Buy The Cricut Hat Press?
There are two ways to get a discount on the Cricut Hat Press.
- When you purchase a Cricut Hat Press Bundle you can save a ton of money (as opposed to buying the press by itself).
- Cricut Access Members get a discount on Cricut purchases. You can purchase Cricut Access here, and read my post all about Cricut Access here.
And that’s it! Everything you need to know about the Cricut Hat Press! Let me know in the comments if you have any questions!
Check Out More of Our Cricut Basics Posts
If you like this post, make sure you check out our Cricut Basics section. Here are a few posts that you might like.


If you like this Cricut Basics post I would love for you to pin it to Pinterest! It helps others discover our site which helps us bring you more awesome content like this!


Need supplies to make all your amazing Cricut creations? Click here for the best prices on Cricut cutting machines, bundles, iron-On, vinyl, cardstock and more!