


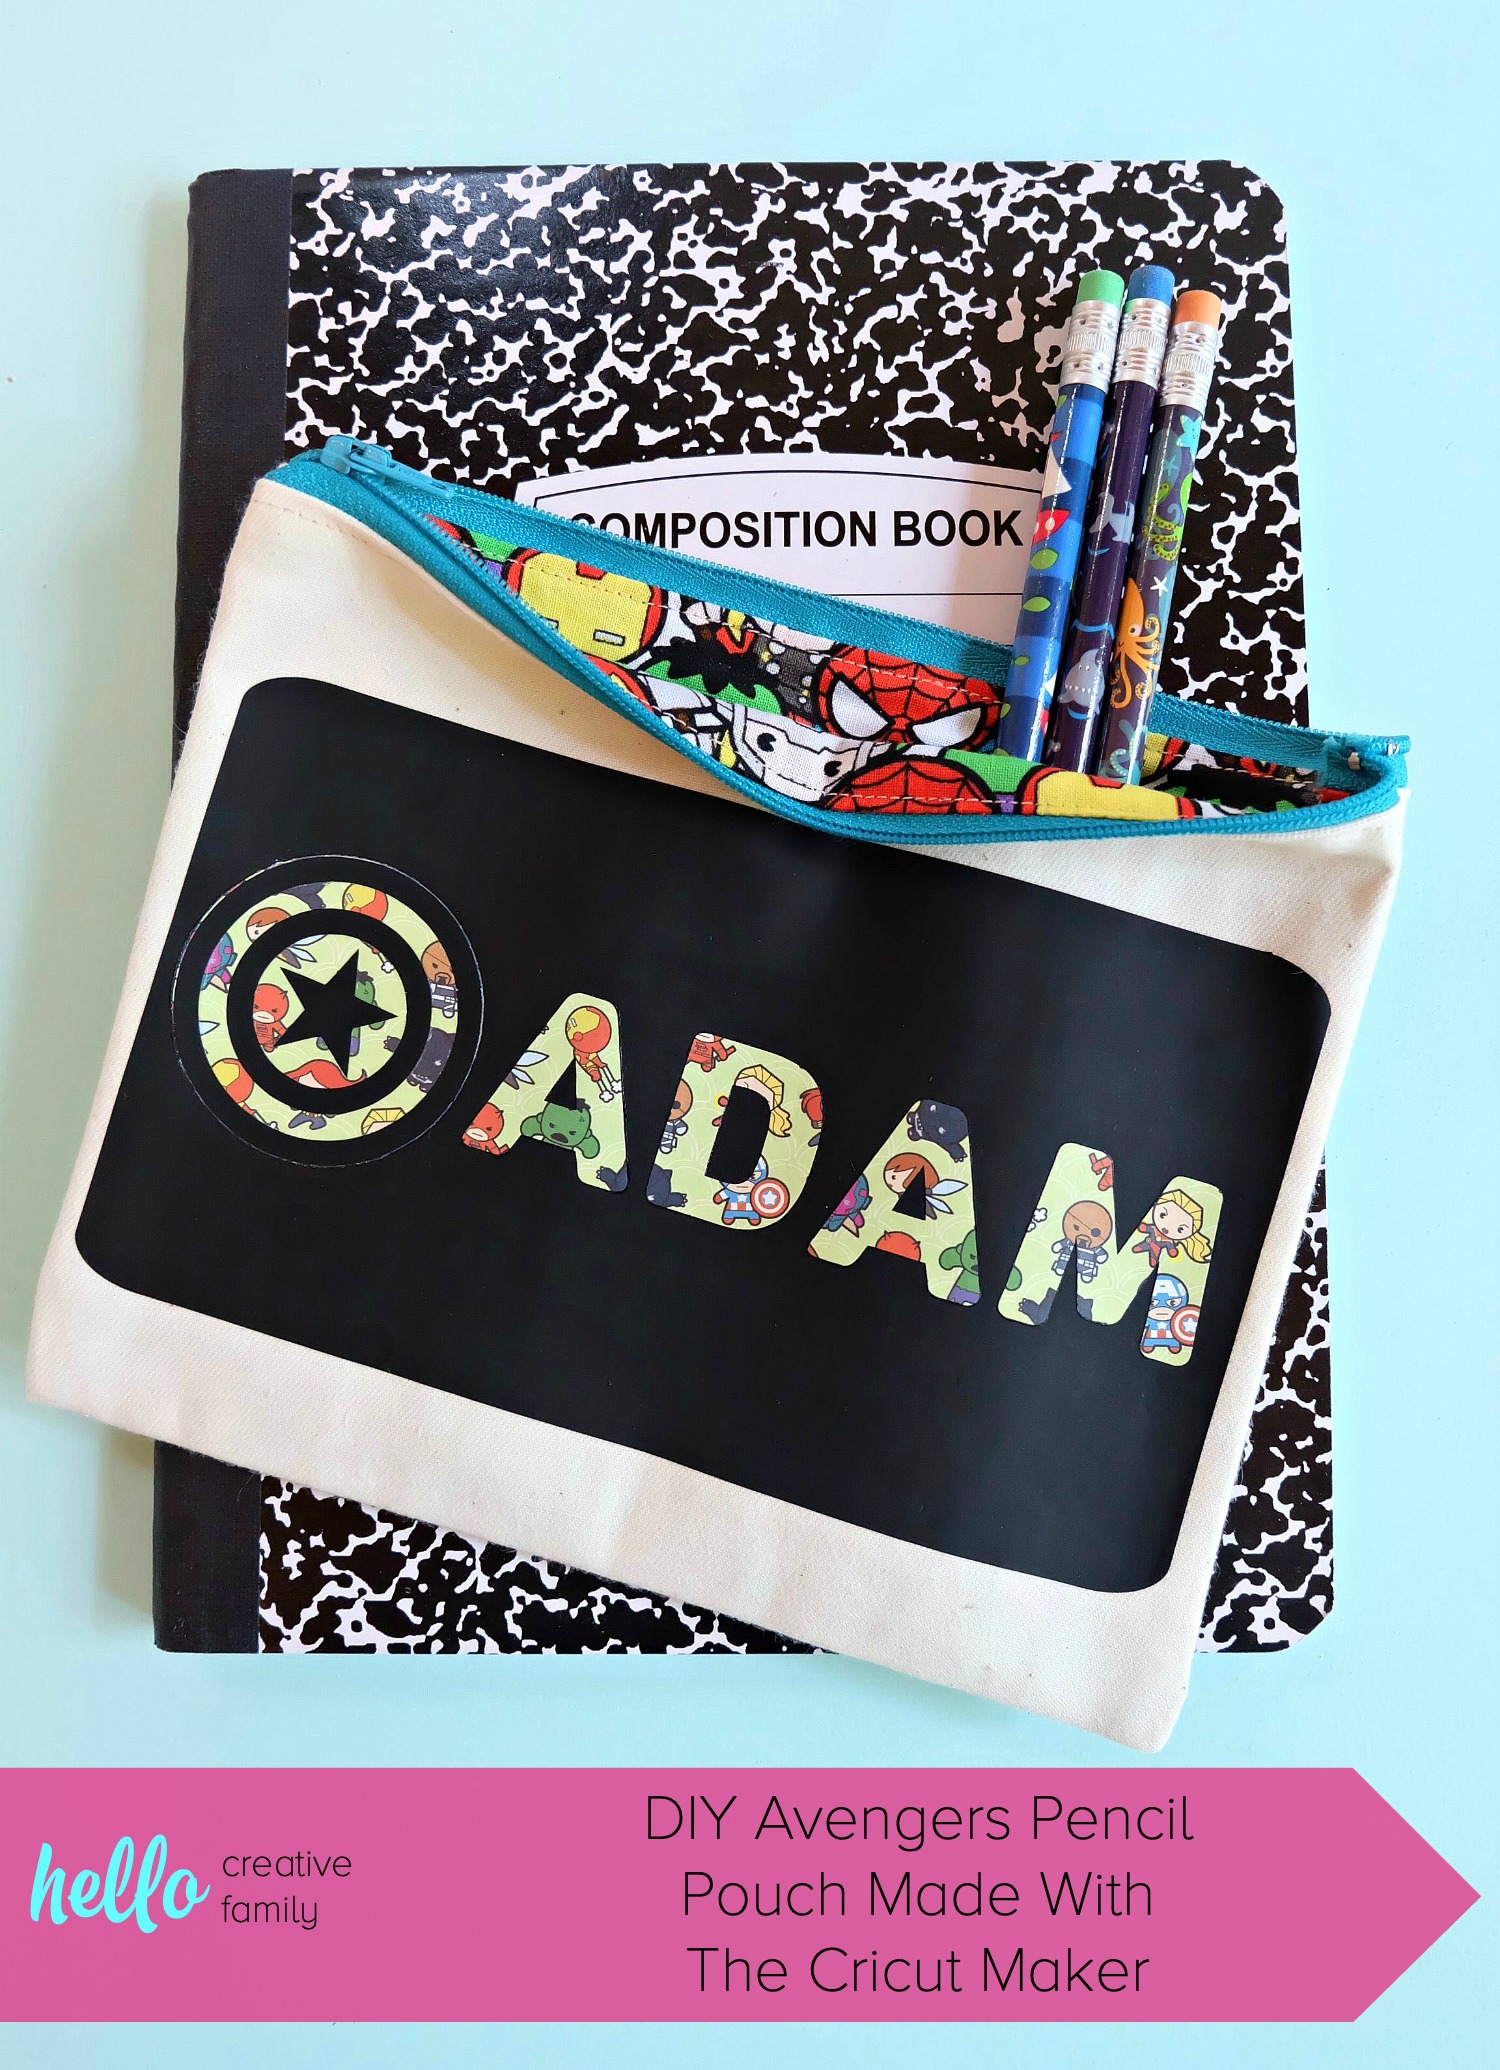
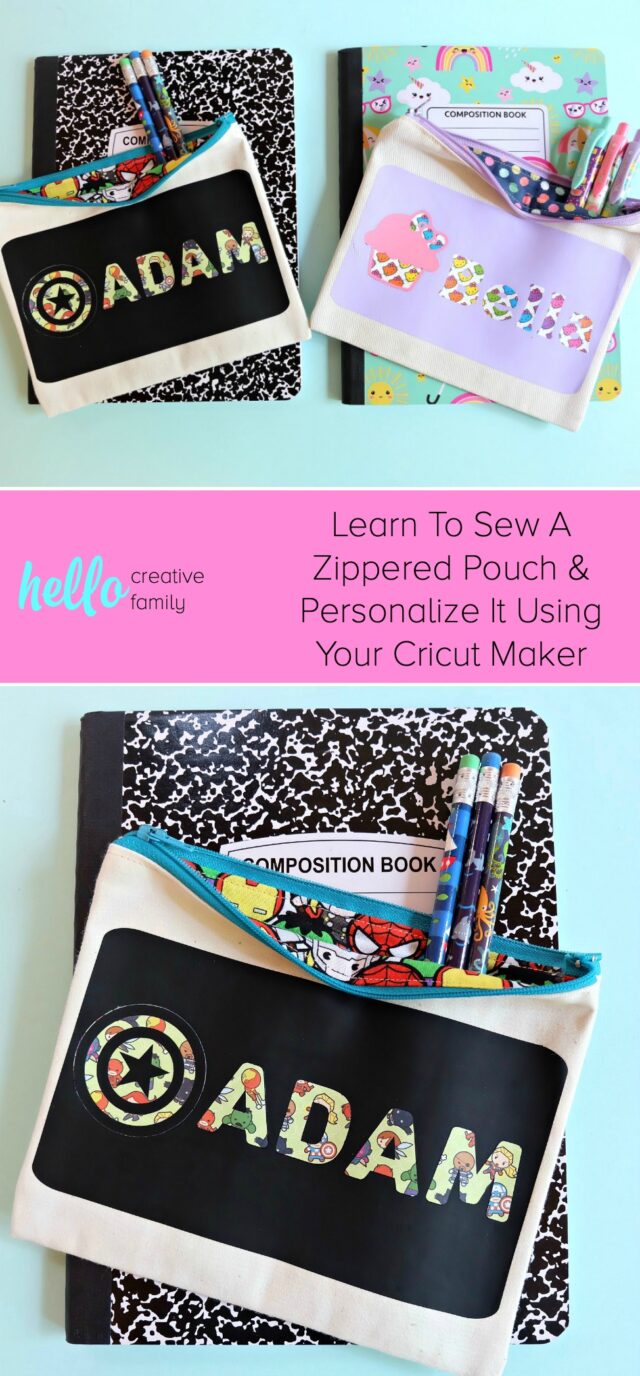
DIY Avengers Pencil Pouch Made With Cricut Maker- Perfect For Back To School
This post and the photos within it may contain Amazon or other affiliate links. If you purchase something through the link, I may receive a small commission at no extra charge to you.
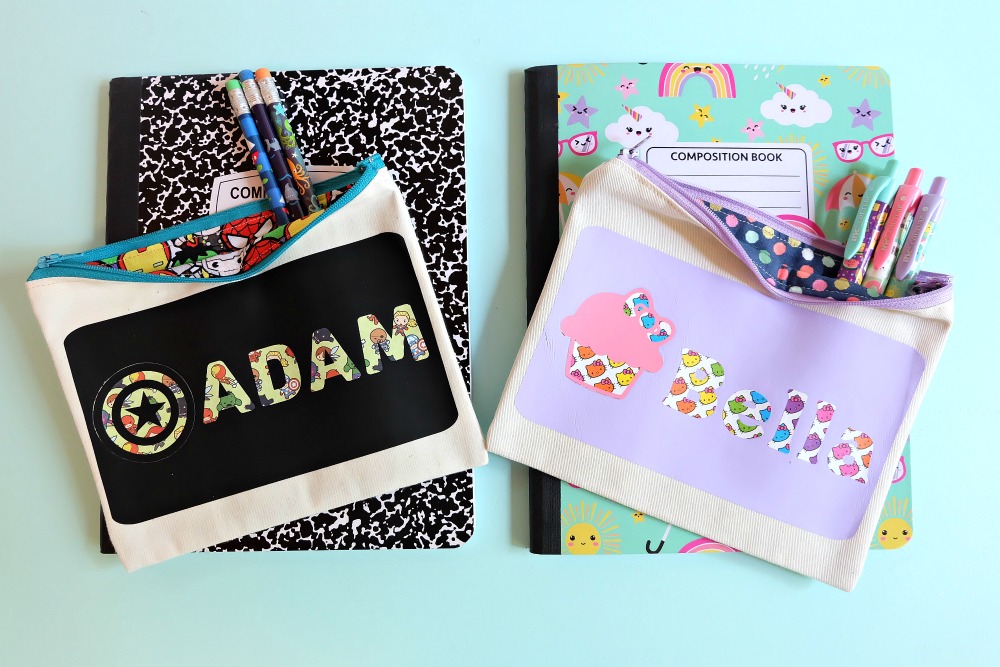
Learn how to sew a DIY Avengers Pencil Pouch or Hello Kitty zippered bag using your Cricut Maker to cut the fabric and customize the design! The perfect craft project for back to school!

This is a sponsored conversation written by me on behalf of Cricut. The opinions and text are all mine.
I’m one of those rare moms who LOVES having her kids home over summer break and laments when she starts to see “back to school” sales in stores. Don’t get me wrong, getting any type of work done at home while your kids are at home with you is near impossible BUT if you are able to slow things down a bit and enjoy summer break with your kids it sure is lovely.
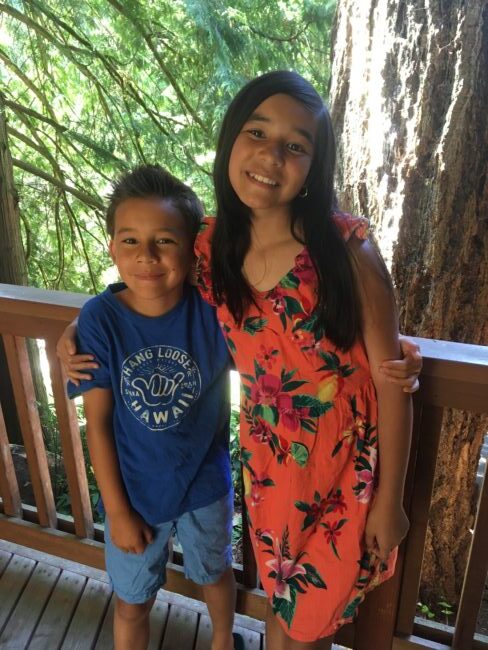
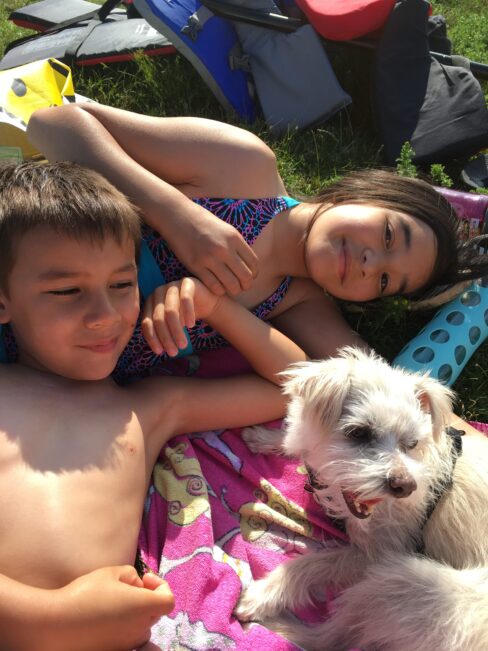
My kids and I have spent this summer so far in Washington while my husband and dad remodel our kitchen. We started the summer with a 10 day camping trip with my mom and some family friends, and have spent the rest of the summer at my parents’ house.

My parents still live in the house where I grew up in Sudden Valley, and it’s been so nice to relive my early days in my childhood home one last time. Almost every single day we’ve been taking the kids to the pool or the beach and making the most of the gorgeous weather.
Reality is starting to set in though and I just realized for us the summer is half over (we go back after Labor Day weekend) and for many people in the US school will be starting back up in the next few weeks. It’s time to start getting my back to school DIY’s going!
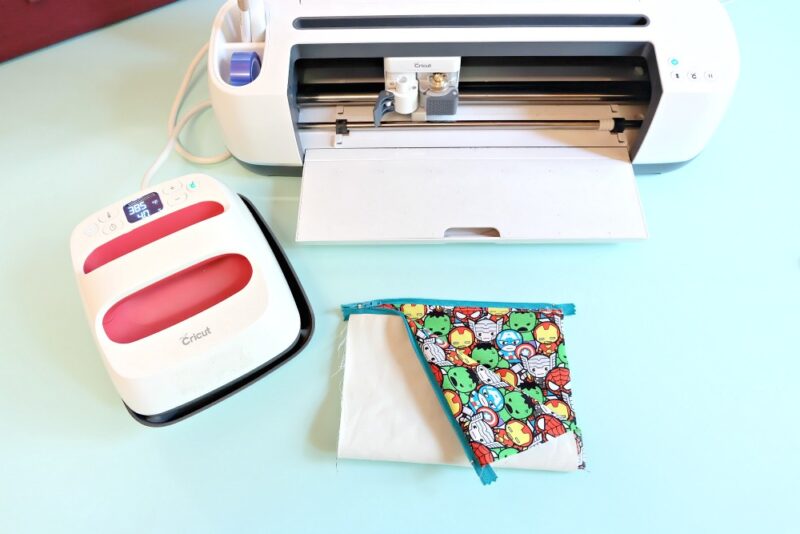
You all know how much I LOVE my Cricut, so of course it came with me to my mom’s house.
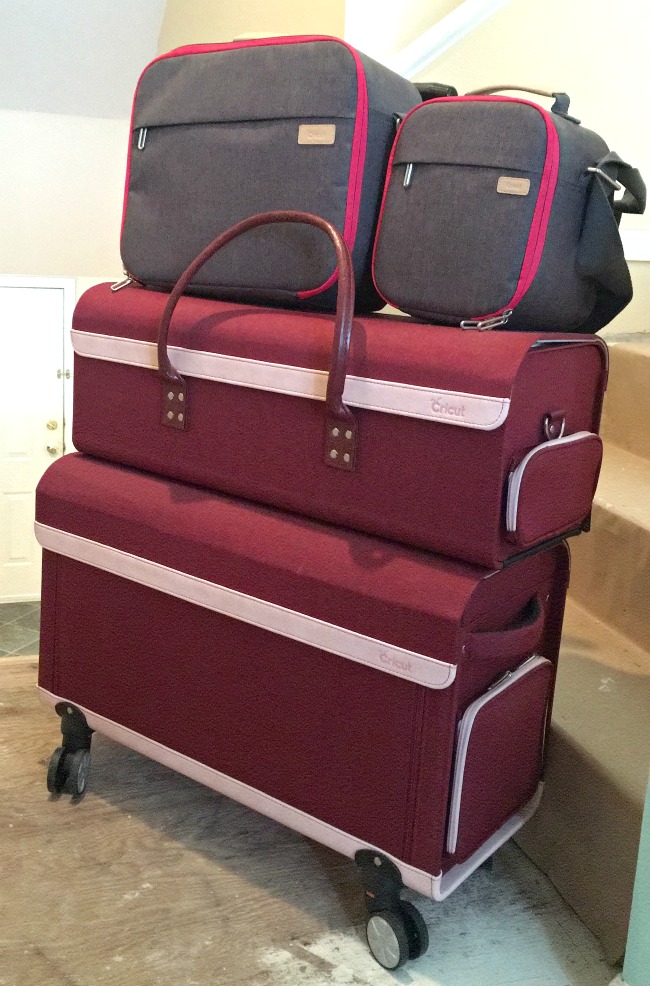
Cricut made it so easy for me to take my favourite crafting tool on the road with me, along with all of my Cricut supplies by sending me their Rolling Craft Tote, Machine Tote and EasyPress Totes. I packed them full of all my gear and have everything I need at my finger tips to craft away from home! Which made it super easy to do the project that I’m going to share with you today!
My favourite thing about the Cricut Maker is that it can turn anyone, no matter what your skill level is, into a maker. For this project I went 100% DIY, using my Cricut Maker to cut my fabric, using my mom’s sewing machine to sew up the pencil pouch, using Cricut Design Space to create a design to put on the pencil pouch, using my Cricut Maker to cut the design out of HTV and then using my Cricut EasyPress 2 to apply the HTV to the pouches. If sewing isn’t your thing though, you could buy a zippered pouch and use your Cricut Maker to cut out a personalized design for your child. That’s what I love about the Maker! It’s the the ultimate back to school personalization tool no matter what your crafting skill level is!

Speaking of personalization– I’m so in love with the patterned iron-on and fabric that I used for these zippered pouches!

I’ve had this Marvel Patterned Iron-On and Hello Kitty Patterned Iron-On in my stash for awhile now and was waiting for the perfect project to use it for. My kids love the Avengers and Hello Kitty and I’m in love with the adorable patterns.
I’m also in love with Cricut’s Strong Bond Guarantee! You can read more about it here, but the basic idea behind it is that Cricut stands behind their Iron-On Products! Look for the Strong Bond Guarantee sticker on their iron-on (you can see it in the blue bar on the paper wrap in the photo above). Cricut’s Iron-On is made to last wash after wash. Follow their instructions for applying it and if for some reason it should wrinkle or peel, let Cricut know and they will replace it for you!
With Cricut’s many patterns, colors, designs and finishes of iron-on it’s easy to make a one of a kind project for back to school! Find all of Cricut’s Iron-On here.
Ready to learn how to make our 30 Minute DIY Avengers Pencil Pouch Made With Cricut Maker? Read on!
[hr gap=”30″]30 Minute DIY Avengers Pencil Pouch Made With Cricut Maker[hr gap=”30″]
Materials:
- Cricut Maker
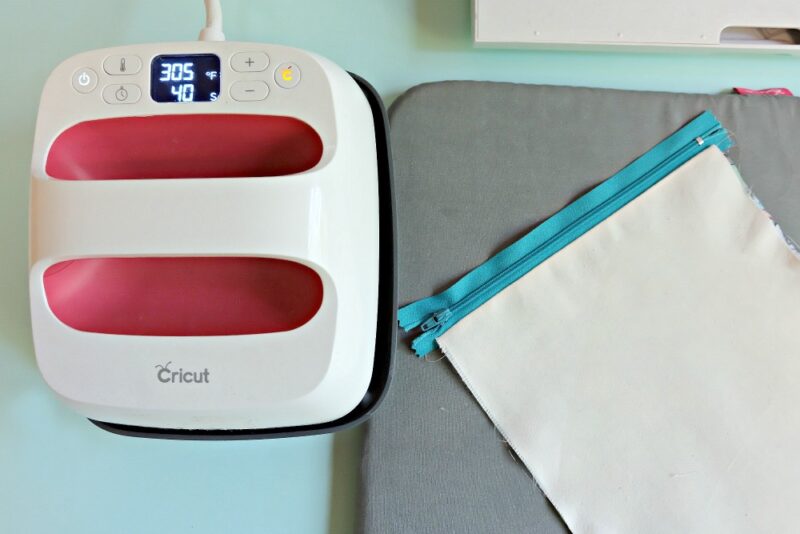
- Cricut EasyPress
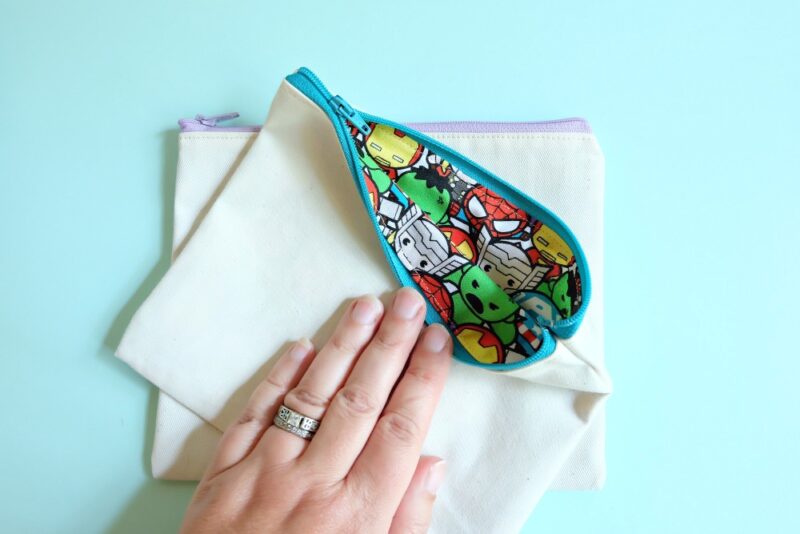
- Piece of canvas fabric which will be cut to 9″ by 15″
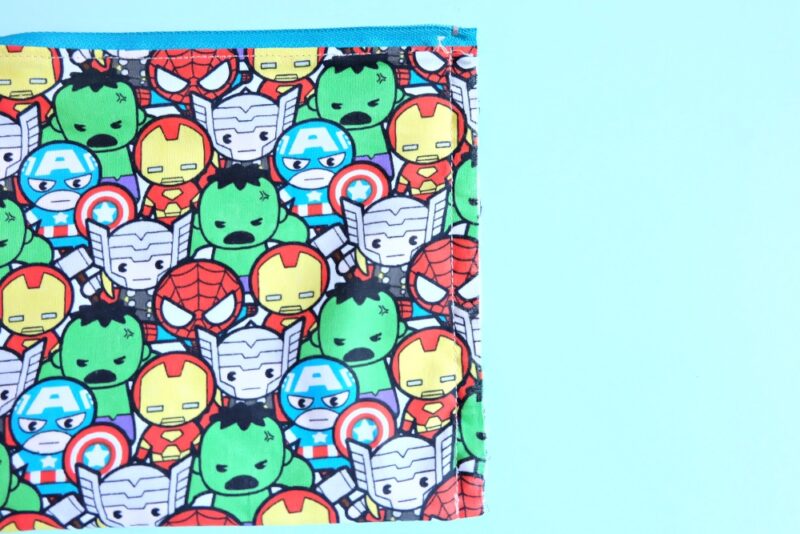
- Piece of fabric for inner liner which will be cut to 9″ by 15″ (I used Marvel Kawaii Fabric)
- 9 inch zipper in a coordinating color
- Marvel Patterned Iron-On
- Black Cricut Everyday Iron-On
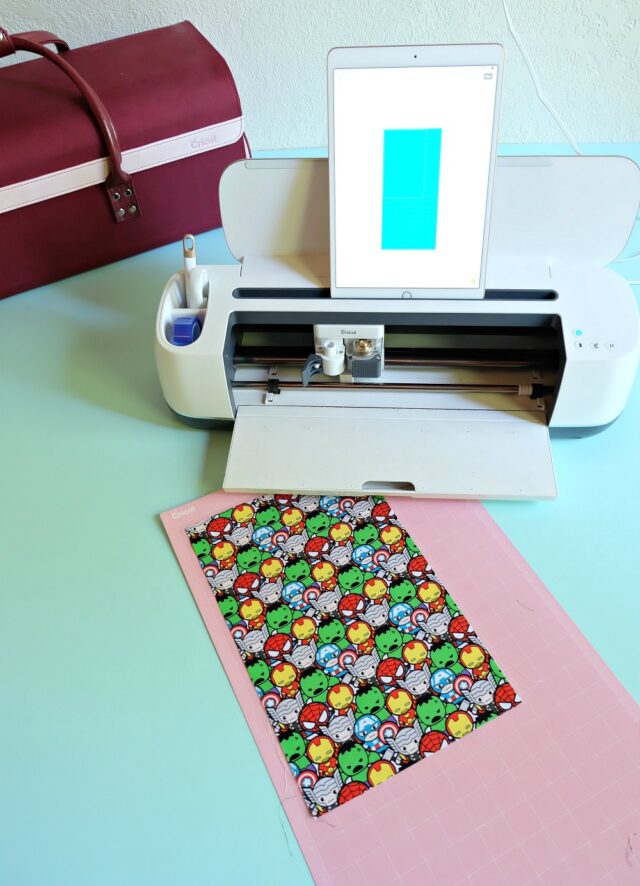
- Cricut 12×24″ Fabric Grip Adhesive Cutting Mat
- Light or Regular Grip Cutting Mat
- Sewing Machine (this is the one I have)
- Thread in coordinating colors
- Fabric Scissors, pins and pin cushion or Wonder Clips (You’ll love this sewing kit from Cricut that has all the tools you need to start sewing)
- Cricut Iron-On Protective Sheet
Directions:
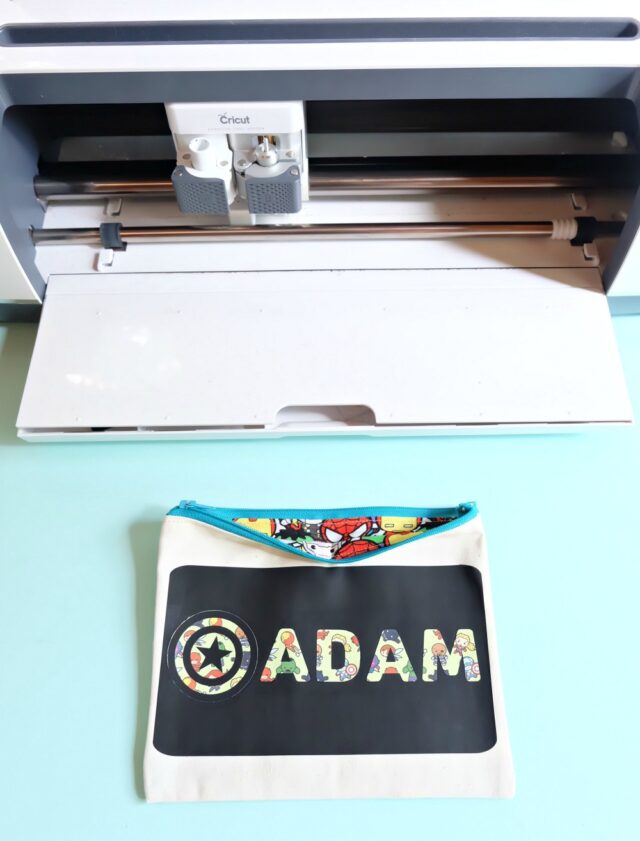
Step 1: Log into Cricut Design Space and cut out your fabric and iron on designs using the Cricut Maker. You can find my cut file here. Press your fabric so it is wrinkle free using your EasyPress or an iron.
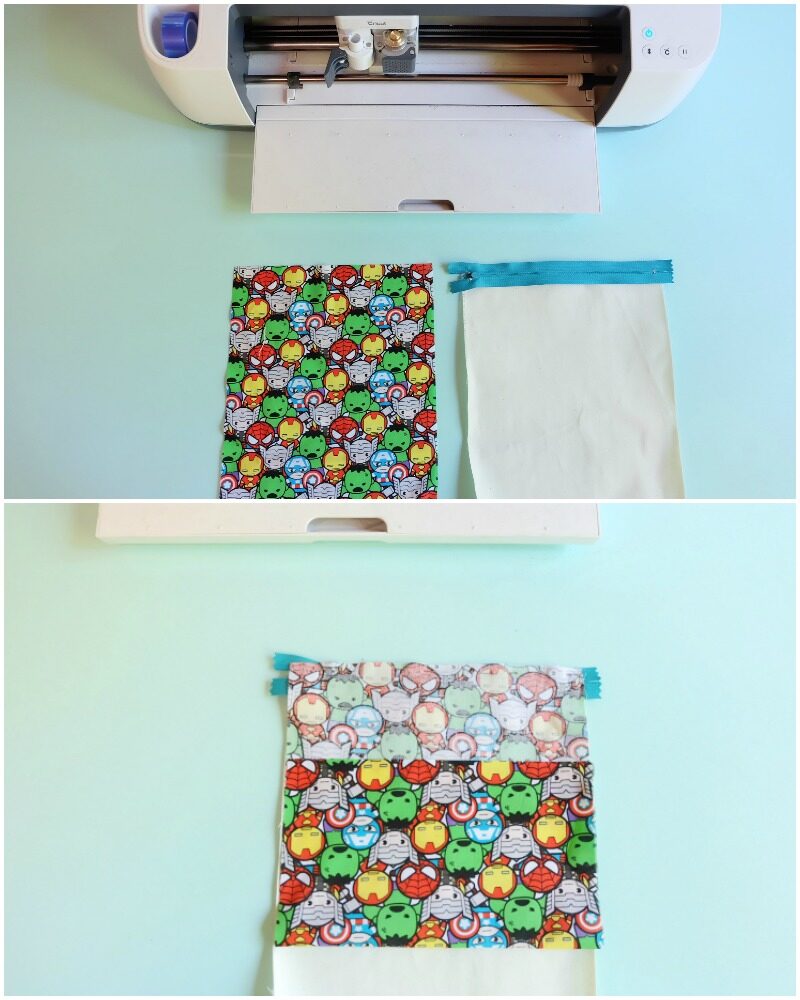
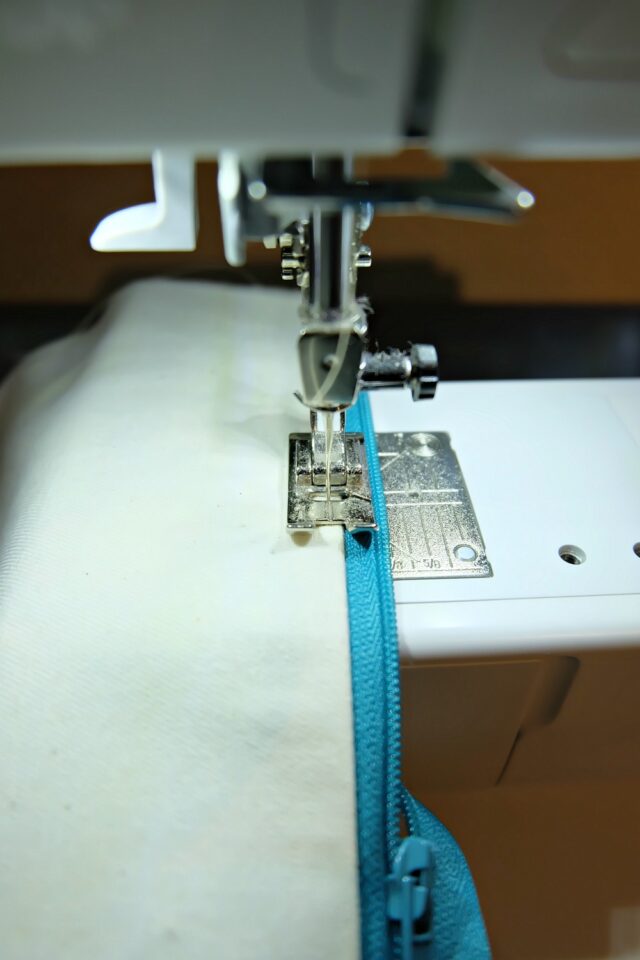
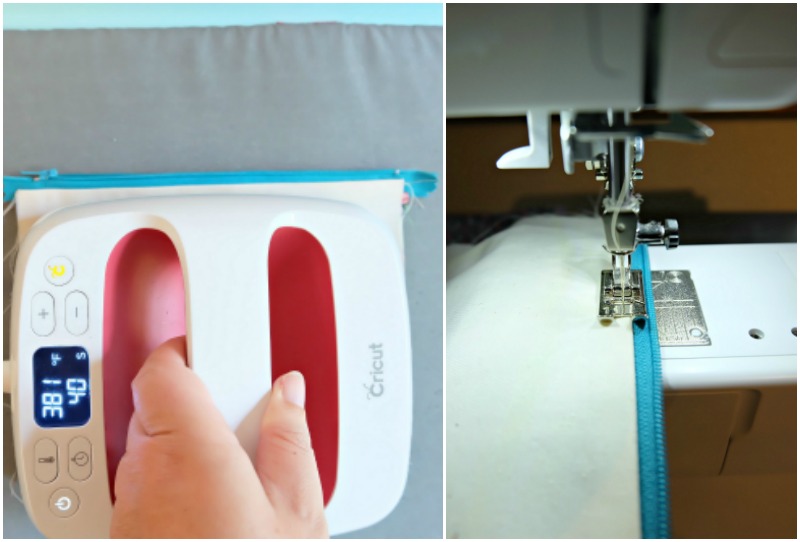
Step 2: Photo 1 below- Lay your piece of canvas flat on your work surface. Lay your zipper with the zipper pull facing down along the top edge of the canvas. You want to have equal parts of the ends of the zipper overhanging on each side. Photo 2 below- Lay your lining fabric on top with the printed side facing down. Pin or wonder clip in place. (The Avengers fabric in the second photo is flipped up on the bottom to show you that the canvas piece is below it. It’s not pinned there, it’s just pinned along the top strip where the zipper is.)
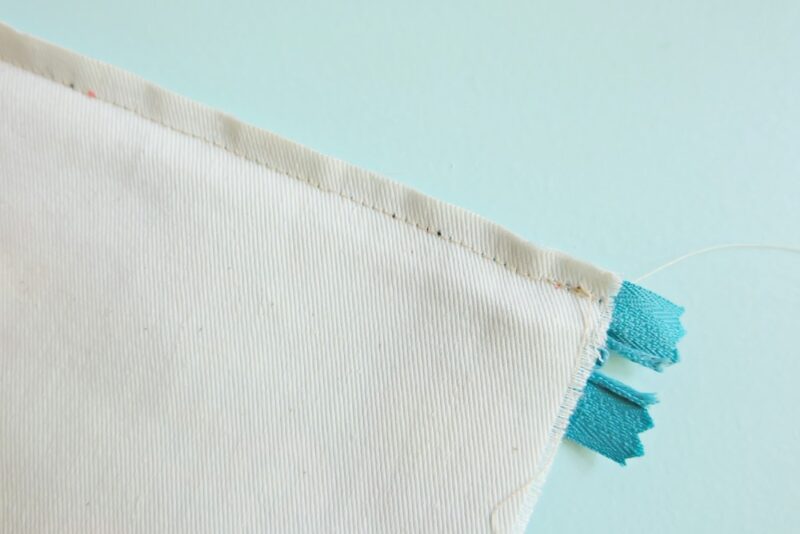
Step 3: Sew along the edge of your “canvas, zipper, lining sandwich”. You should be able to fill the edge of your pressure foot pressing against the zipper as you sew. Depending on your zipper this will probably be approximately 1/8-1/4 of an inch.
Step 4: Flip your fabric and zipper open so that the edge of the zipper that hasn’t yet been sewn is facing up, the printed side of the lining is facing down and the bottom edge of the lining and the bottom edge of the canvas are lined up. Press the canvas seam by the zipper.
Step 5: Using a coordinating color of thread, sew down your canvas seam approximately 1/8 of an inch from the edge of the canvas.
Step 6: Lay your fabric flat so that the unsewn edge of the zipper is facing up, and the canvas is laying out to one side and the printed side of the lining is facing up on the other side (see top left photo below).
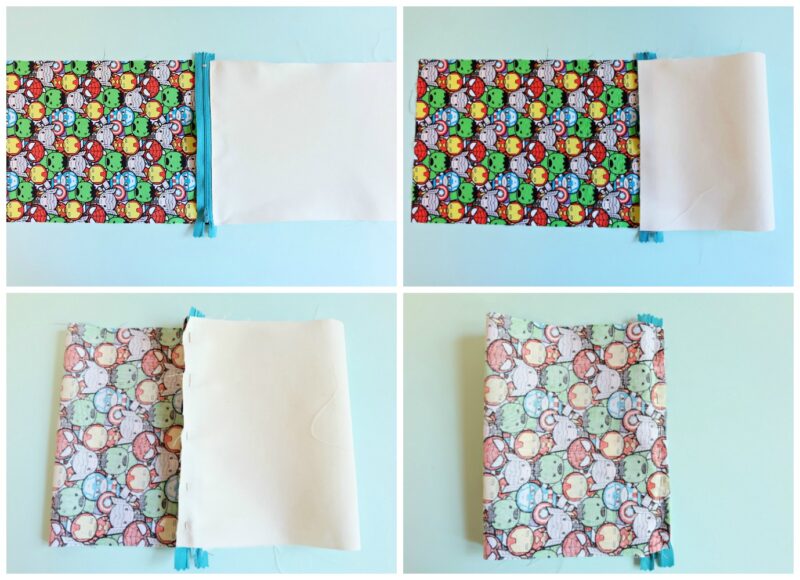
Fold the unsewn edge of your canvas over so that it meets up with the unsewn edge of the zipper (top photo right above).
Fold the unsewn edge of your lining over so that it lines up with the unsewn edge of the zipper and the edge of your canvas (bottom photo left above).
Clip or pin in place and lay everything flat. (bottom photo right above).
Step 7: Sew along the edge of your “canvas, zipper, lining sandwich”. You should be able to fill the edge of your pressure foot pressing against the zipper as you sew. Depending on your zipper this will probably be approximately 1/8-1/4 of an inch.
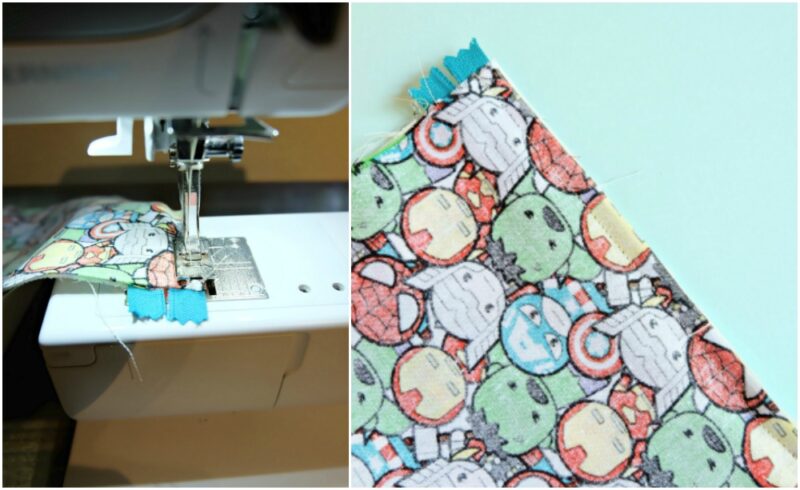
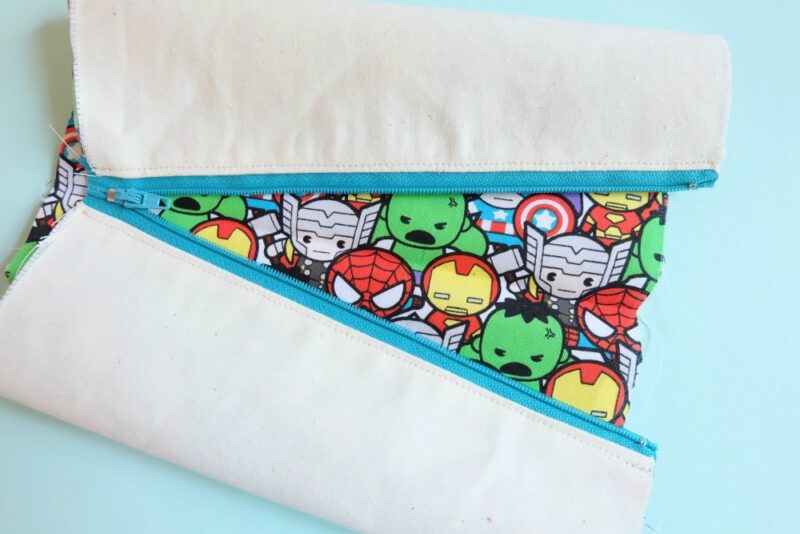
Step 8: Flip your pouch so that the canvas is on the outside and the lining is on the inside.
Press the canvas seam next to the zipper. Sew along the edge of the canvas so that now the zipper is firmly sewn down on both sides.
It’s coming along! You DIY Avengers zippered pouch is almost done!
Step 9: Trim the excess ends of your zipper so it lines up with the edges of your bag (just make sure that you trim past the little metal zipper stoppers). This is also a good time to trim any fabric that might be overhanging so that all of your edges line up nicely.
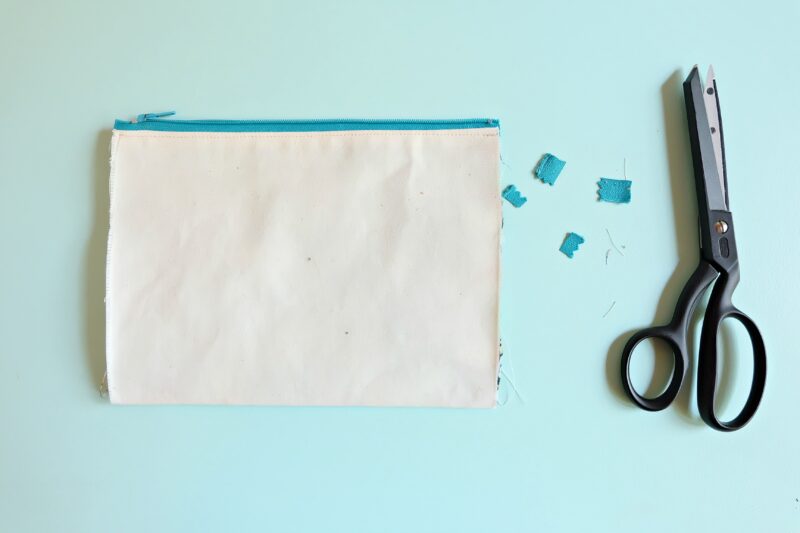
Flip your pouch so that the lining is facing out. Sew the edges of your pouch closed by sewing from the zipper down to the bottom edge of the bag on both the right and left hand side using a 1/2 inch seam allowance.
Step 10: Flip your bag right side out and get ready for the extra fun part!!! Personalizing your bag!
I originally planned on just using the Marvel Patterned Iron-On for my design, but I found it blended in to much to the color of the canvas. I decided to add a black backer behind my design.
Press your design onto your zippered pouch using EasyPress set to the temperature recommended in the EasyPress Heat Guide. Since you are layering iron-on I highly recommend using a Cricut Iron-On Protective Sheet between your EasyPress and your iron-on design. Preheat the fabric with the EasyPress, lay down first your black piece of Iron-On, press for 5 to 10 seconds, remove the clear plastic layer and then lay your next layer, press for 5 seconds, remove the clear plastic layer and then press your final layer, pressing from both the front and back. Allow to cool and then remove the clear plastic protective sheet!
Voila! You have an awesome DIY Avengers Pencil Pouch made with your Cricut Maker!
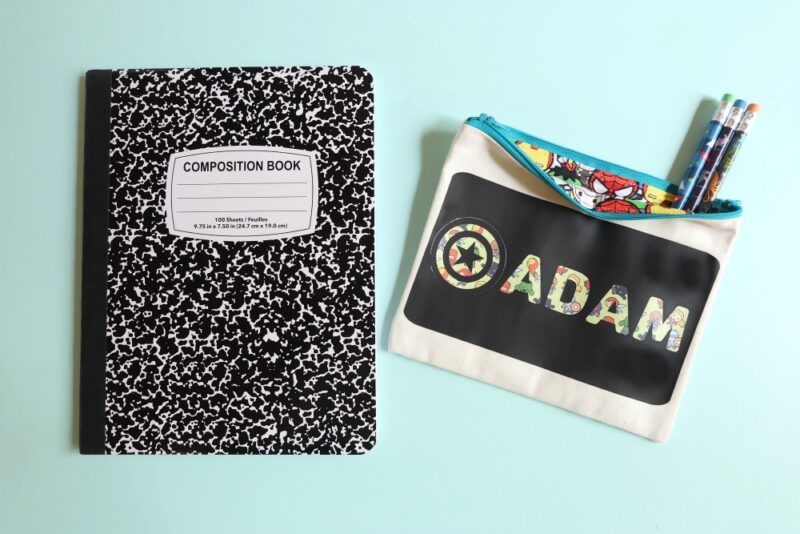
Now that you know how to make the bag, with a little imagination and your Cricut Maker the sky is the limit to the awesome pencil pouches you can personalize! My son is over the moon excited to start school and use his DIY Avengers pencil pouch!

Disclosure: Thank you to Cricut for working with us on this project. As with every article on Hello Creative Family all thoughts and opinions are 100% our own. We only share things we love and we definitely love our Cricut Maker!
[hr gap=”30″]Tell me… Do you personalize your kid’s school gear? Do you. have a Cricut Maker? What design would you put on a pencil pouch? Would you like to see more DIY Avengers projects?[hr gap=”30″]
Like our DIY Avengers Pencil Pouch Made With Cricut Maker? We’d love for you to pin it for later!
Looking for even more Cricut Ideas? We have them all in one handy place for your convenience! Find our Cricut Section Here.


Ooooh my kids will love this! Thank you!
I’m definitely going to try this as well. Perfect to motivate the kids a little bit more in going back to school 😉
OMG you are so talented Crystal! This looks amazing! Thanks for sharing.
These pouches are so cute. If I am as skillful as you are, I will try to make some for my children.