DIY Father’s Day Cricut Ideas For Gamer Dads
This post and the photos within it may contain Amazon or other affiliate links. If you purchase something through the link, I may receive a small commission at no extra charge to you.

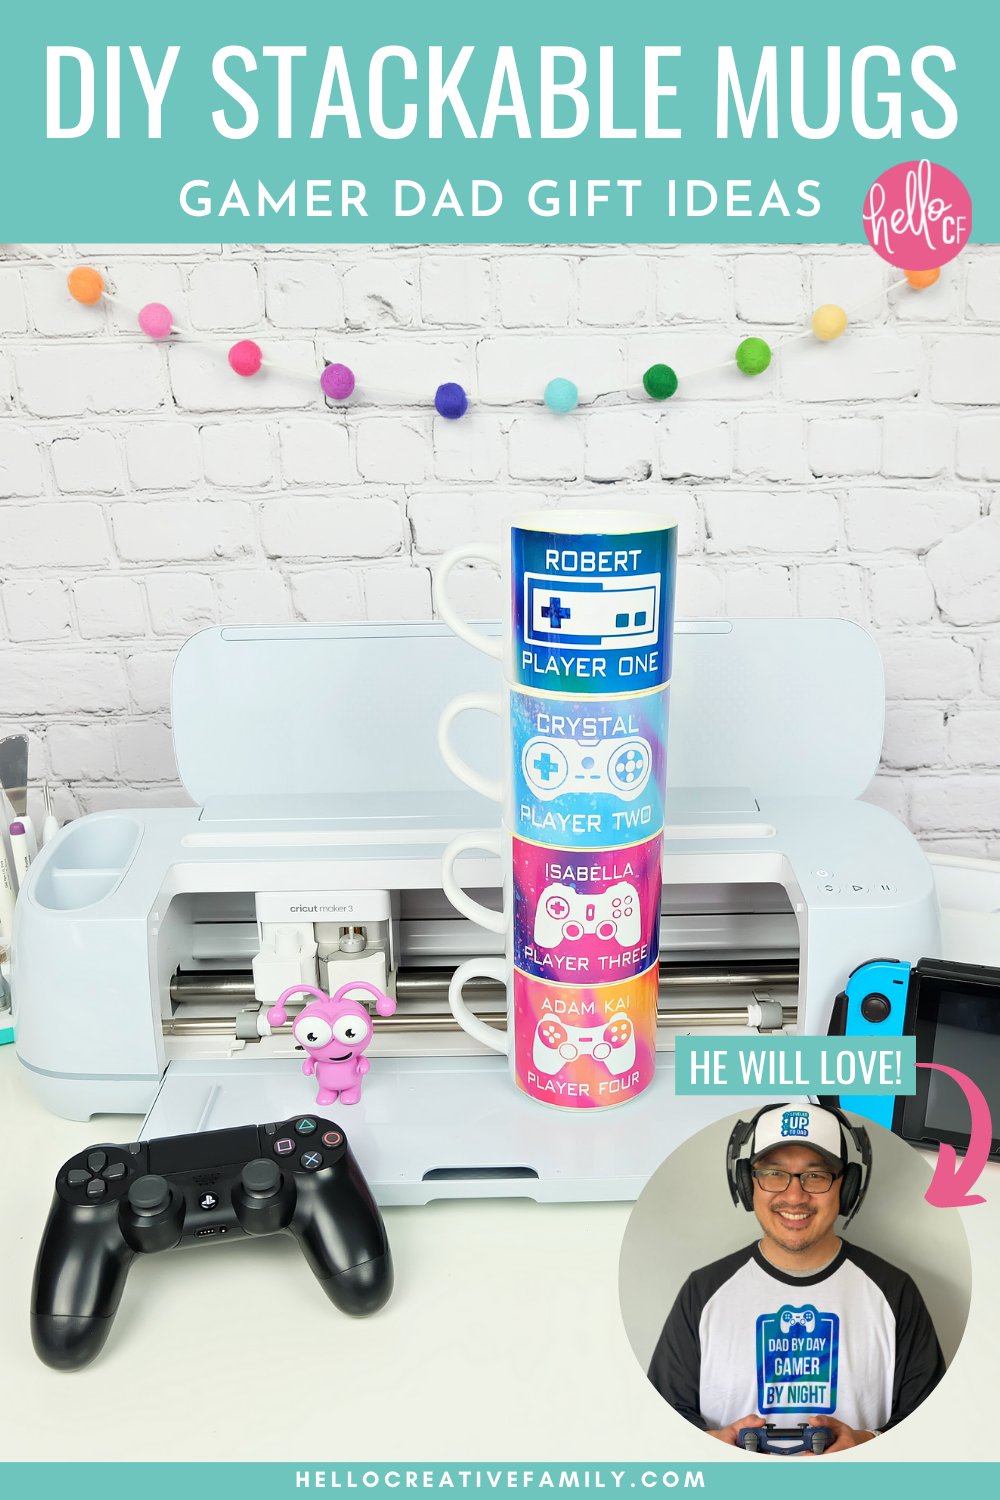
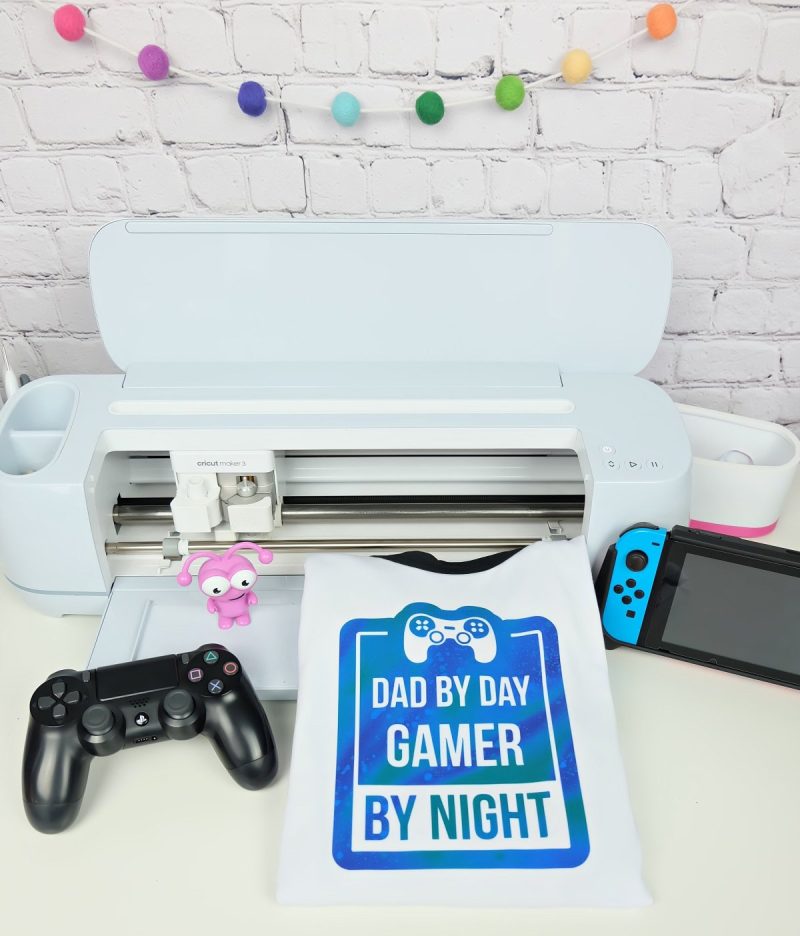
Know a dad who loves video games? We’re sharing 3 DIY Father’s Day Cricut Ideas that gamer dads will love! We’re sharing how to make a Leveled Up To Dad hat, a Dad By Day, Gamer By Night shirt and a set of stackable mugs with video game remotes, each family member’s name and a player number that relates to their birth order! Pull out your Cricut Maker, Cricut Explore Air or Cricut Joy and Infusible Ink and let’s get crafting!
Disclosure: Thank you to Cricut Canada for sponsoring this project and post. As is with every article on Hello Creative Family, all thoughts and opinions are 100% our own.

Hi Crafty Friends!
Father’s Day is coming up and that means that it’s time to make Dad some handmade gifts to celebrate him on his special day! Today I’m sharing with you some of my favorite Father’s Day Cricut Ideas!
One of my very favorite things about my Cricut is that I firmly believe that this incredible machine can make anyone a maker! It’s the best craft tool for craft beginners and advanced crafters alike!
You don’t need to be able to draw, or design to use your Cricut. There are thousands of ready to make projects in Cricut Design Space and over 200,000 images (and growing) in the Cricut image library, most of which are free with a Cricut Access subscription.
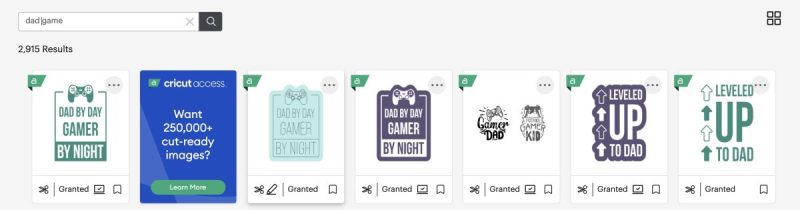
Father’s Day Images In Cricut Design Space
When Cricut asked for me to create Father’s Day gifts for my hubby using my Cricut, the very first thing I did was go and visit the image library in Cricut Design Space.
My husband always comes up with the most original, heartfelt gifts for me. When I open them I always know that he has has thought about the things that I love when he is picking them out– and I love doing the same thing for him. To me, that’s what handmade, homemade, heart-made gift giving is all about.
There are so many great images for Dads in the library to help you create personalized gifts that make it so obvious that you care. My husband loves gaming in his spare time so I searched Dad Game and had a ton of options pop up.
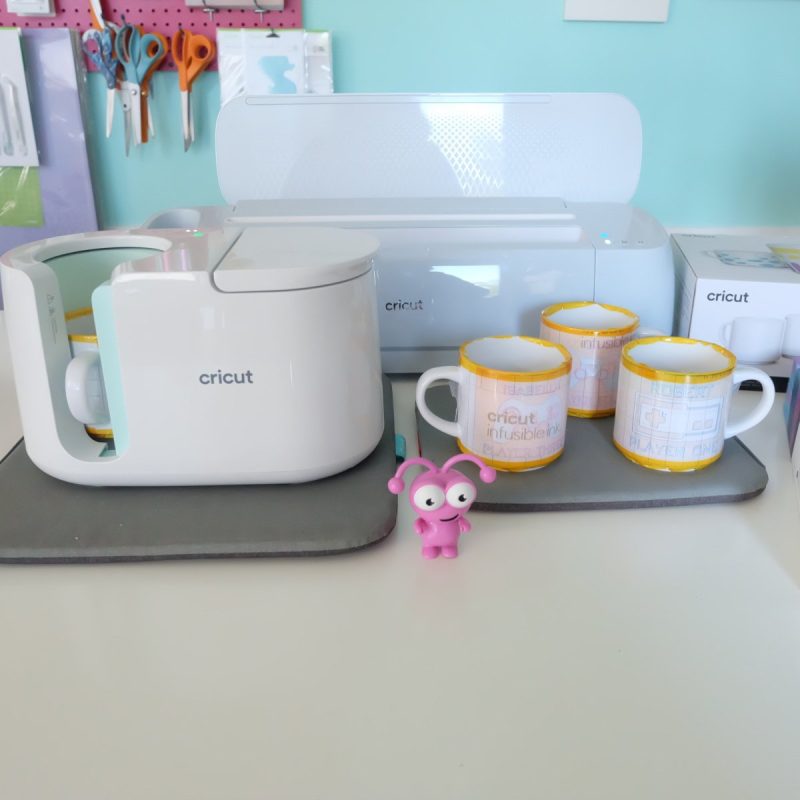
I thought it would be fun to put all of my heat presses to the test for the gift for my husband– the Cricut Mug Press for making a set of stackable mugs, the Cricut Hat Press for making a gaming hat and the Cricut EasyPress 3 for making my hubby a shirt to wear while playing his video games.
I always tell you guys how my favorite color is “rainbow” so I pulled out my Rainbow Watercolor Splash Infusible Ink sampler to use for this project. There was a sheet of Infusible Ink Transfer Sheets that matched each of our personalities which was great for making the stackable mugs!
I’m so excited to share these three projects with you along with the step by step tutorial to make each of them! If the dad you are making gifts for is into video games then you’ll be able to grab my Cricut Design Space Canvas link and use it to make your gifts.
If they aren’t into video games, take a peek in the Design Space library, find the perfect image to match your special person’s personality and use my step by step instructions to create t-shirts, mugs, and hats with the designs that you picked! The Father’s Day Cricut Ideas are endless!
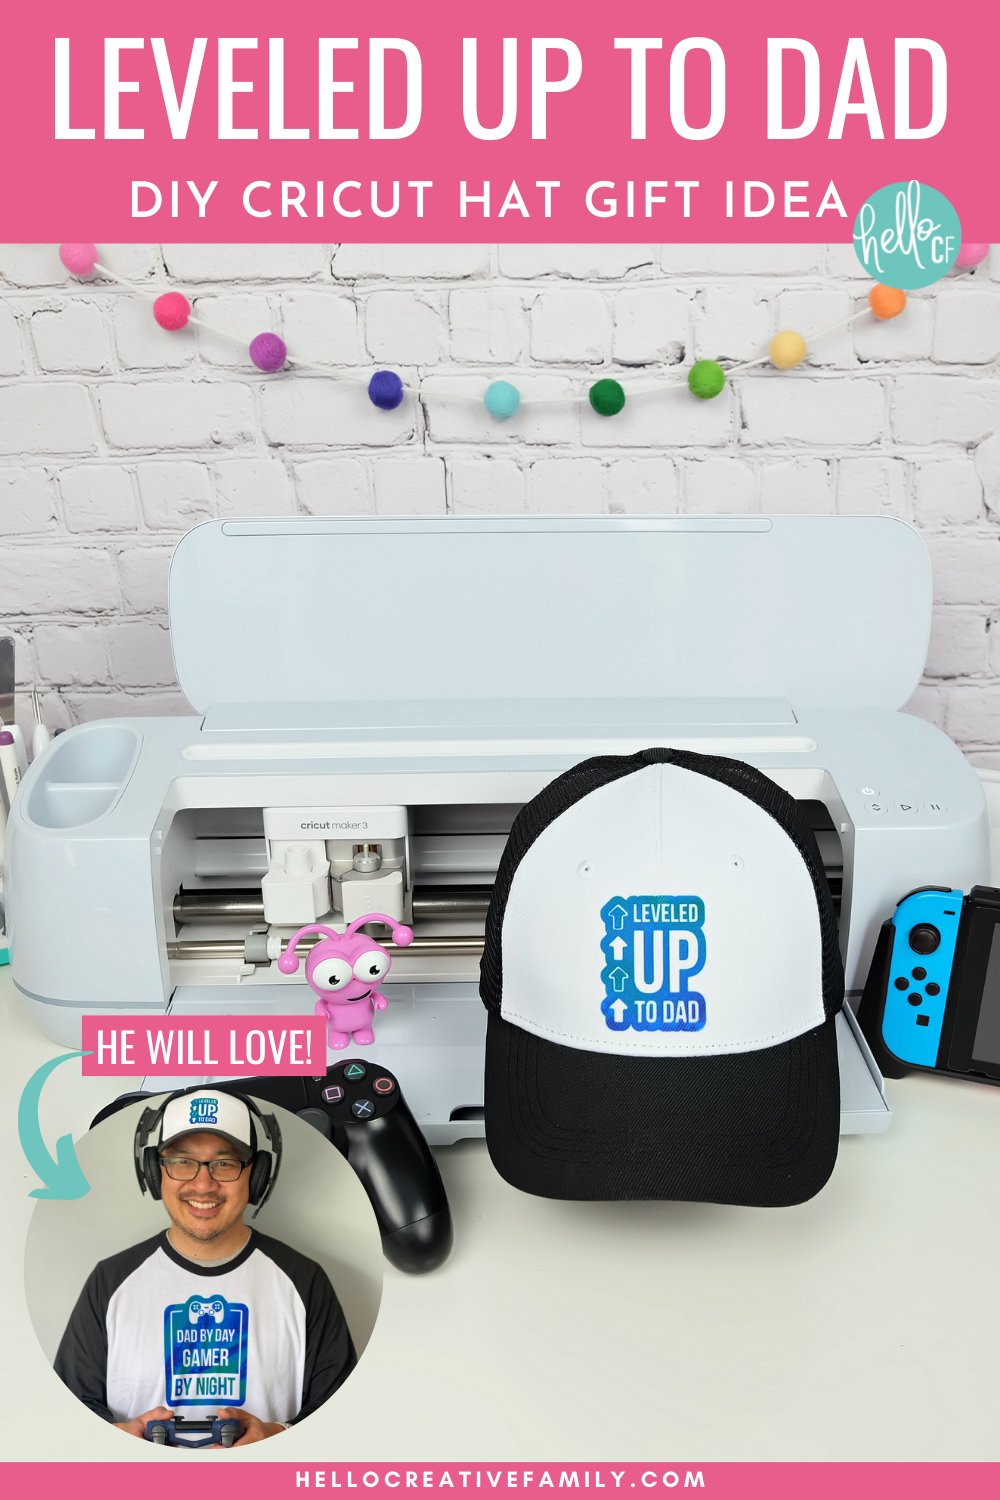
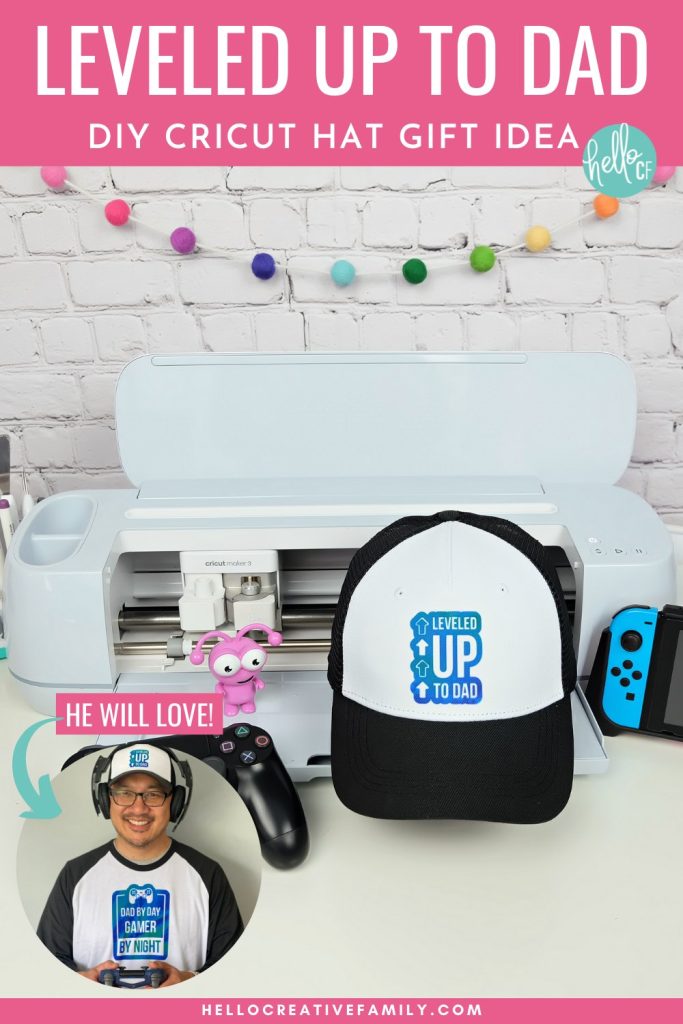
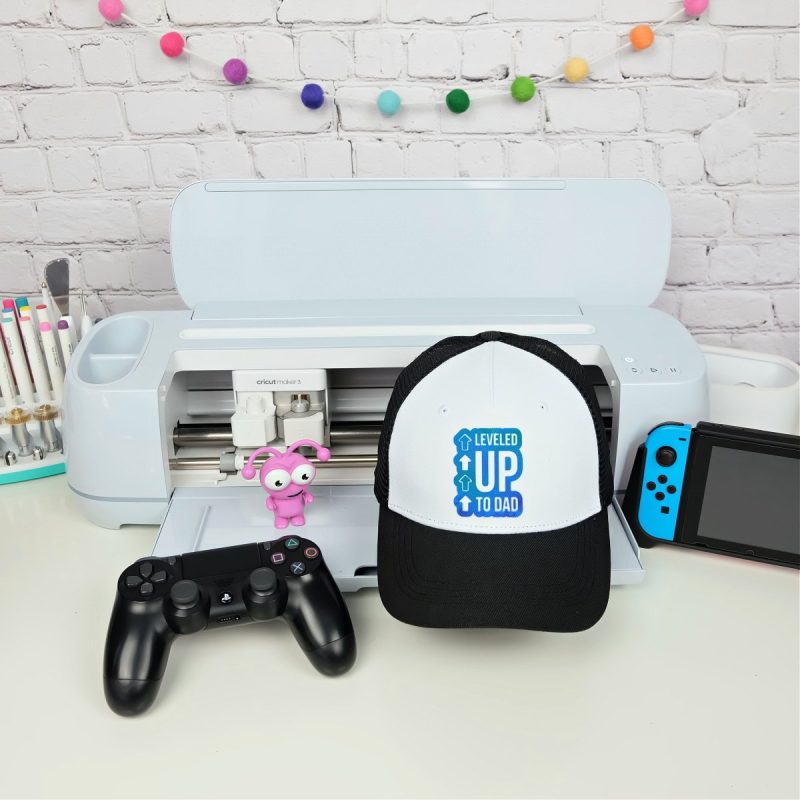
Father’s Day Cricut Ideas- DIY “Leveled Up To Dad” Hat
I’ve been having so much fun making hats over the last couple of months with the new Cricut Hat Press! This is the perfect time to pick up this compact heat press if you haven’t already! I’m going to be a hat making machine all summer long and can’t wait to make hats for Christmas gifts too!
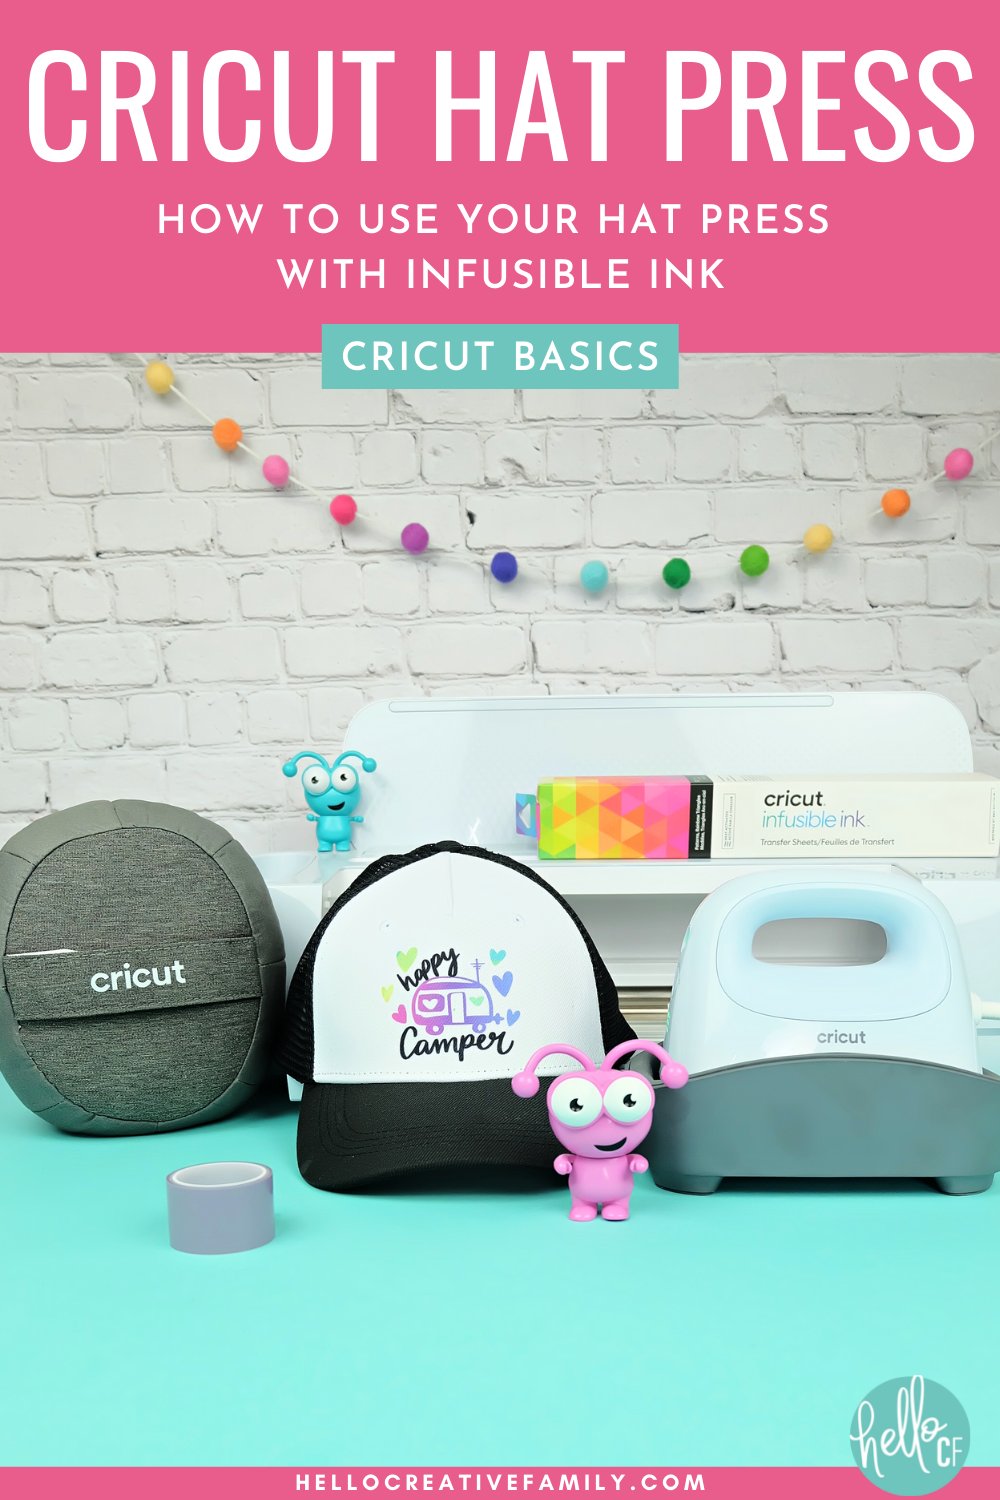
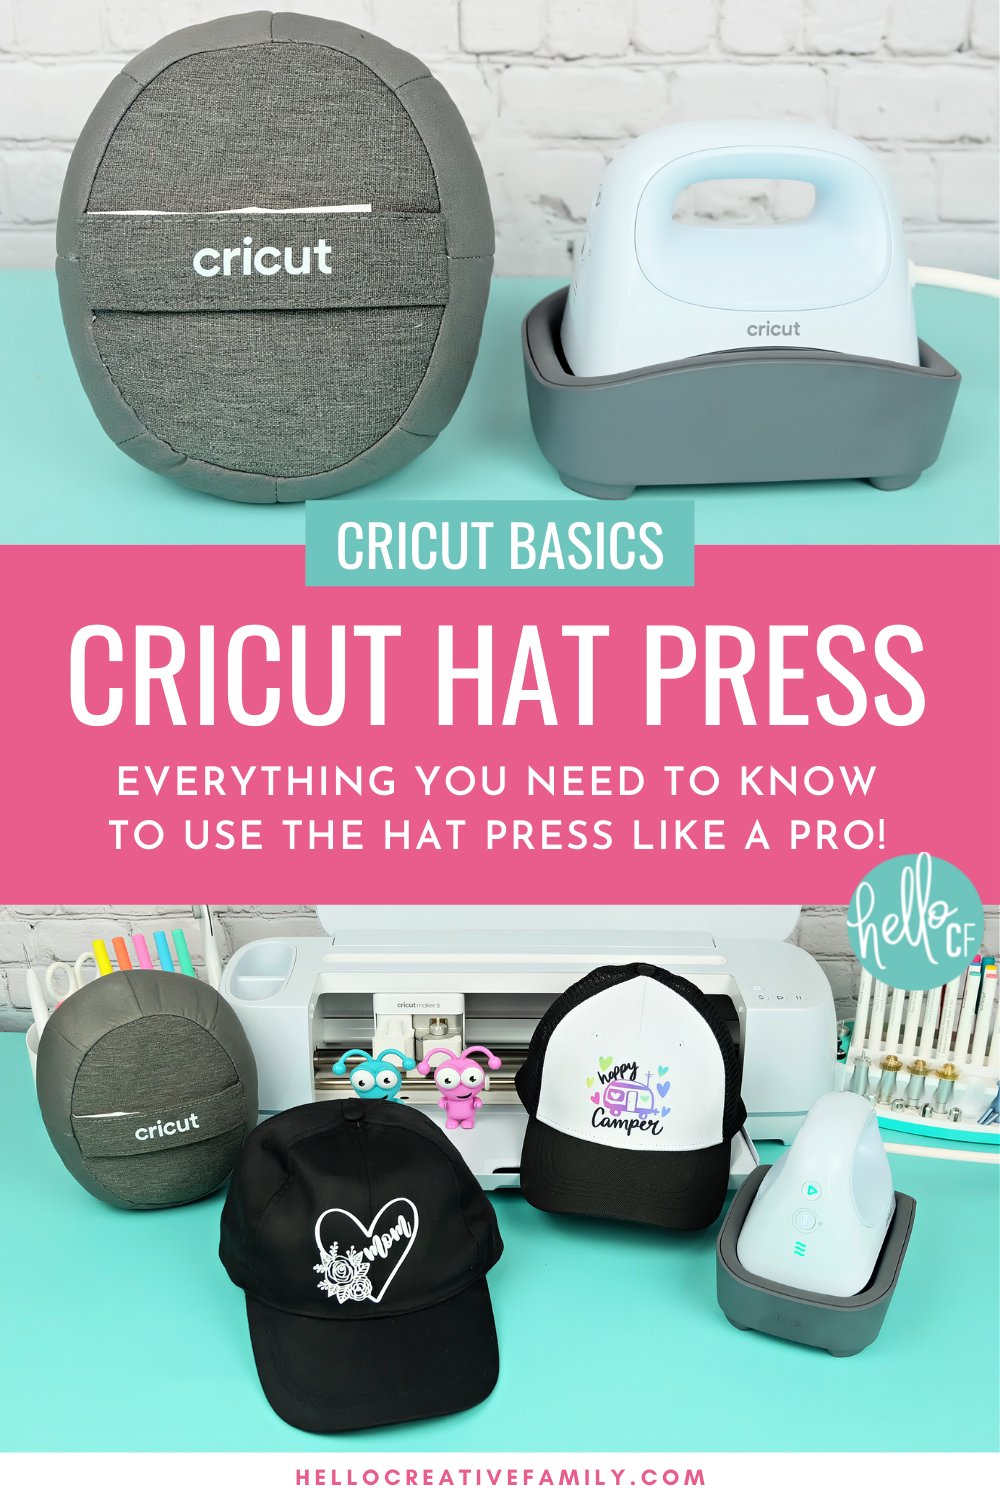
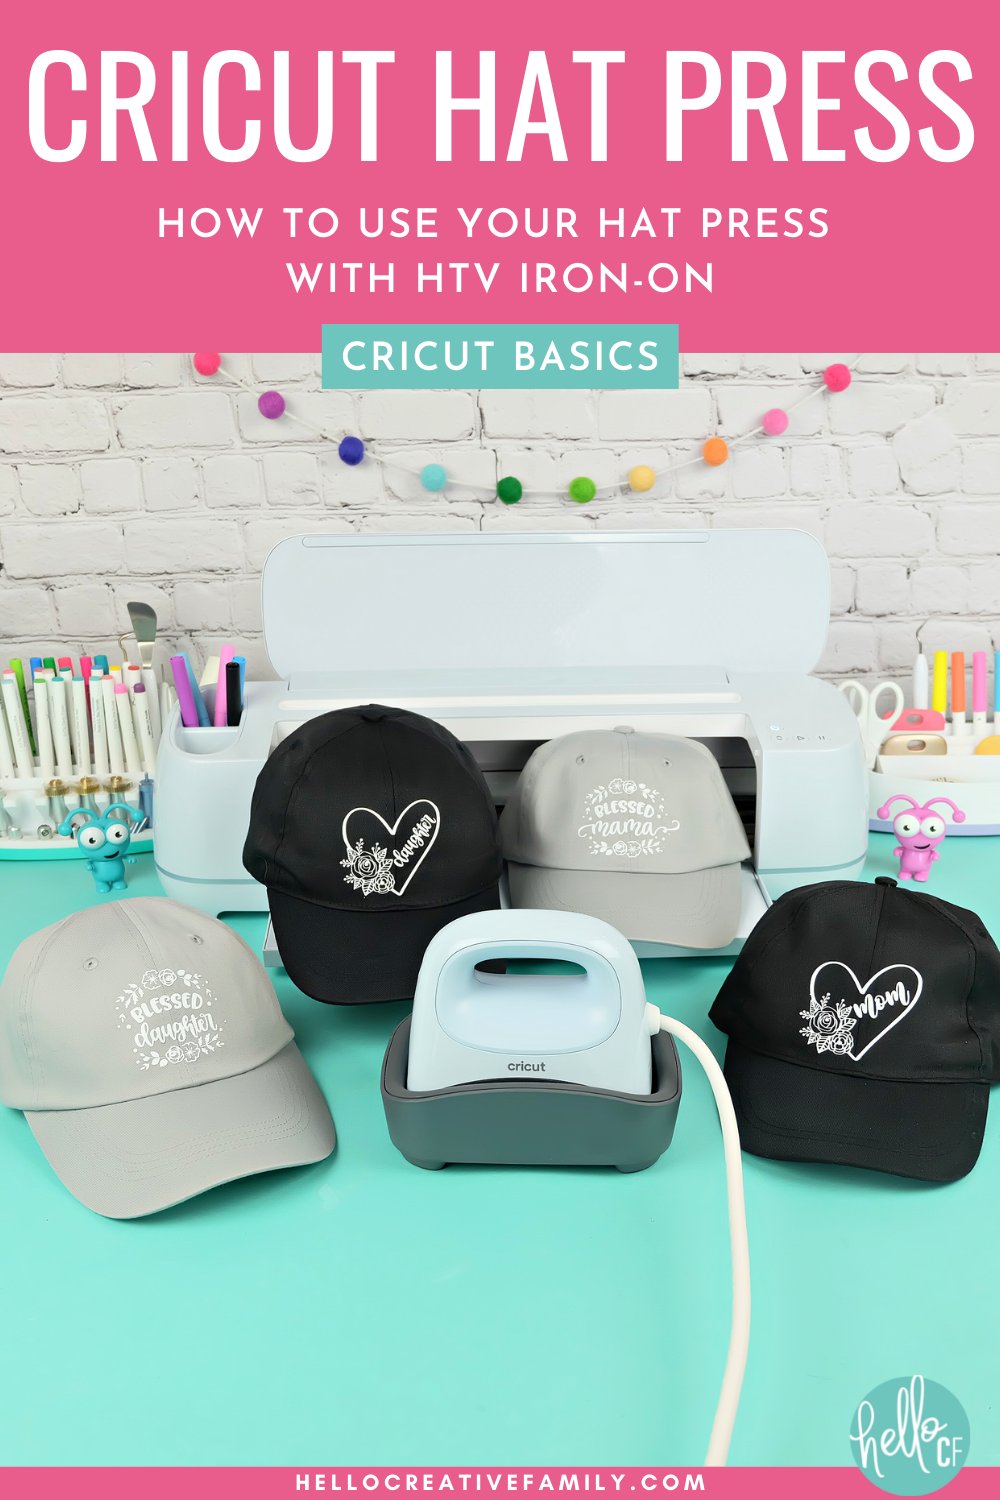
Read all about the Cricut Hat Press and how to use it with both Infusible Ink and HTV in my Cricut Basics: Cricut Hat Press- Everything You Need To Know To Use The Hat Press Like A Pro post.
Let’s make a Leveled Up To Dad hat shall we?
Materials:
- Measuring Tape
- Cricut Infusible Ink Hat or Sublimation Hat
- Cricut cutting machine
- Cricut Infusible Ink Transfer Sheet (I used the Rainbow Watercolor Splash sampler)
- Cricut Cutting Mat
- Weeding Tools
- Cricut Hat Press and Hat Pressing Form
- Lint Roller
- Butcher Paper
- Cricut Strong Grip Heat Resistant Tape
- Optional: Cricut Brayer
Directions:
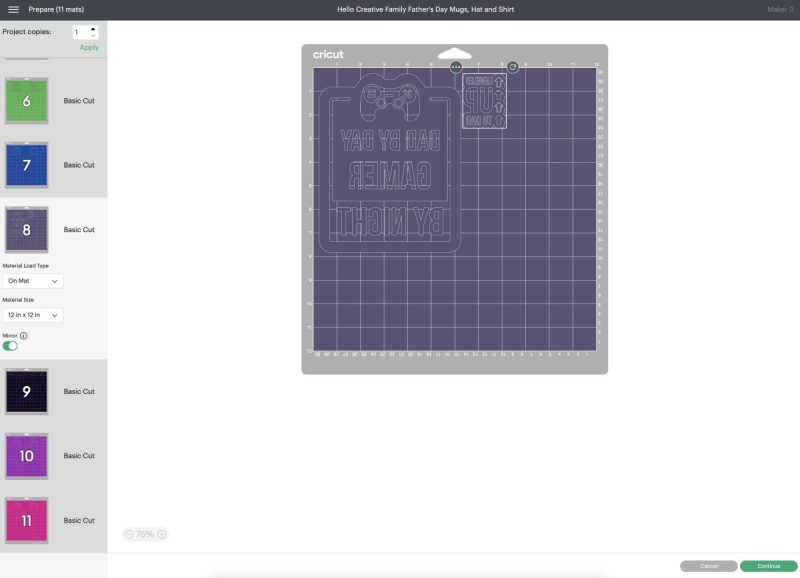
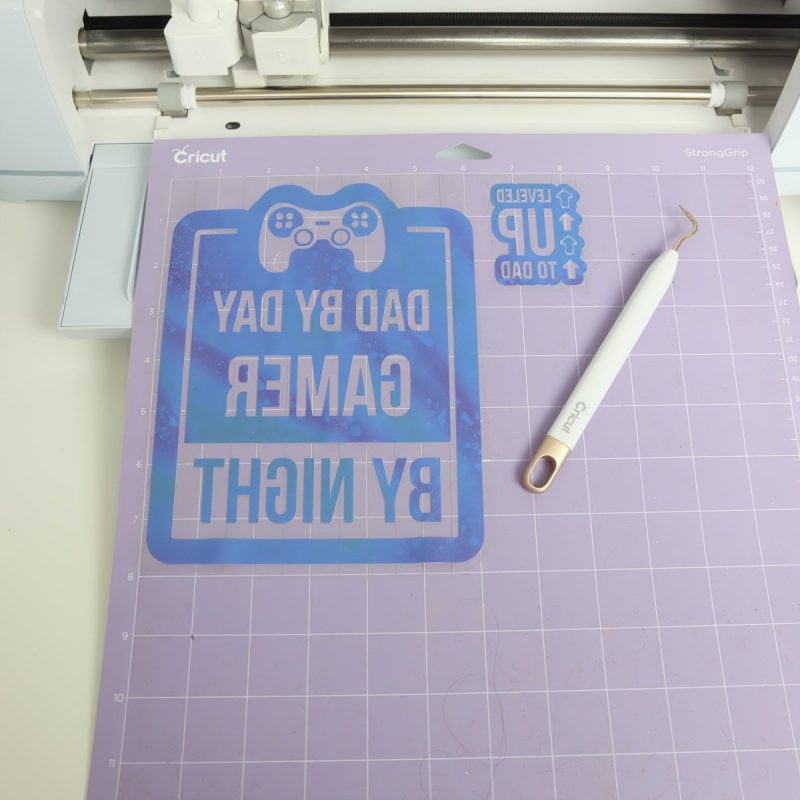
Step 1: Open Cricut Designs Space and select your design. (You can find my Video Game Father’s Day Canvas here.) Measure your hat and size your design accordingly. Remember Cricut recommends a maximum size of 2.25 inches wide and 4.25 inches tall. Click “Make It” and don’t forget to click the mirror slider to mirror your design. Follow the prompts to connect your machine and select your cutting material.
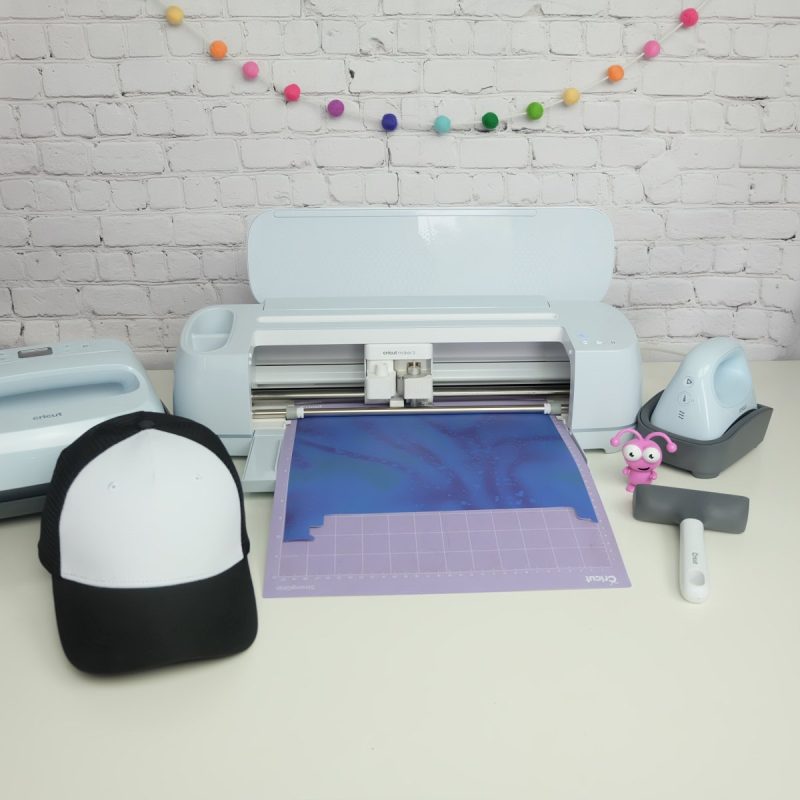
Step 2: Place your Infusible Ink on the mat with the plastic side facing down. I like to use a Strong Grip Mat for Infusible Ink and to use my Cricut Brayer to push my Infusible Ink onto the cutting mat. Cut out your design using your Cricut machine.
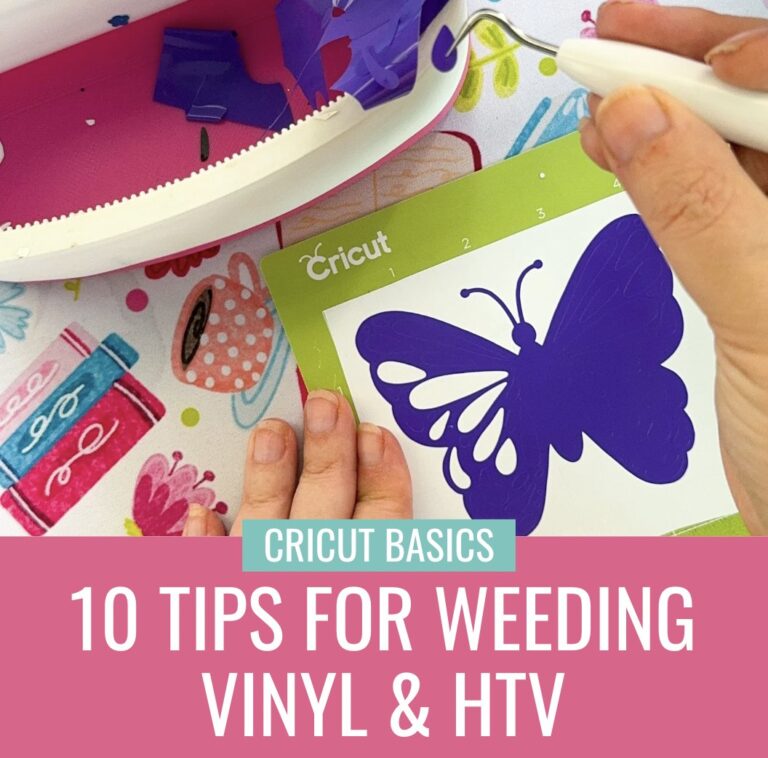
Step 3: Weed your design, removing the Infusible Ink from around your design, leaving just your design behind on the clear plastic liner.
Step 4: Turn on your Cricut Hat Press and open the Cricut Heat app on your smart phone or tablet. Select Infusible Ink and the the type of hat you are using. Send the settings to your heat press. While it’s heating use a lint roller to remove any lint or debris from your hat.
Once your heat press has finished preheating follow the directions in the Heat Press App. Lay a piece of butcher paper over your hat, and then pre-heat your hat for 5 seconds.
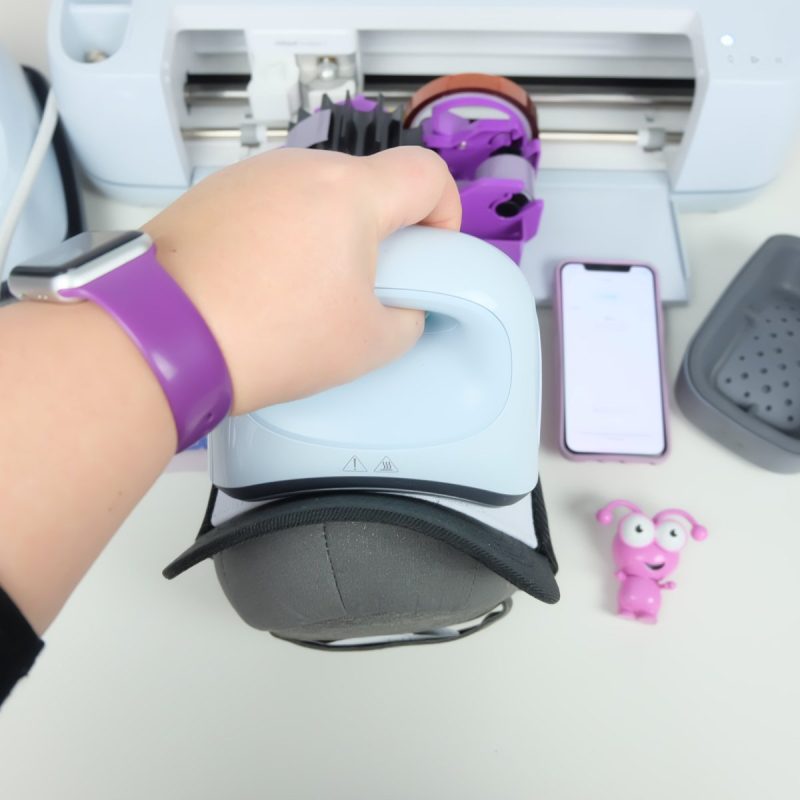
Step 5: Attach your design to your hat using heat resistant tape. Lay butcher paper on top and secure with heat resistant tape. Press for another 90 seconds applying light pressure and side to side movement.
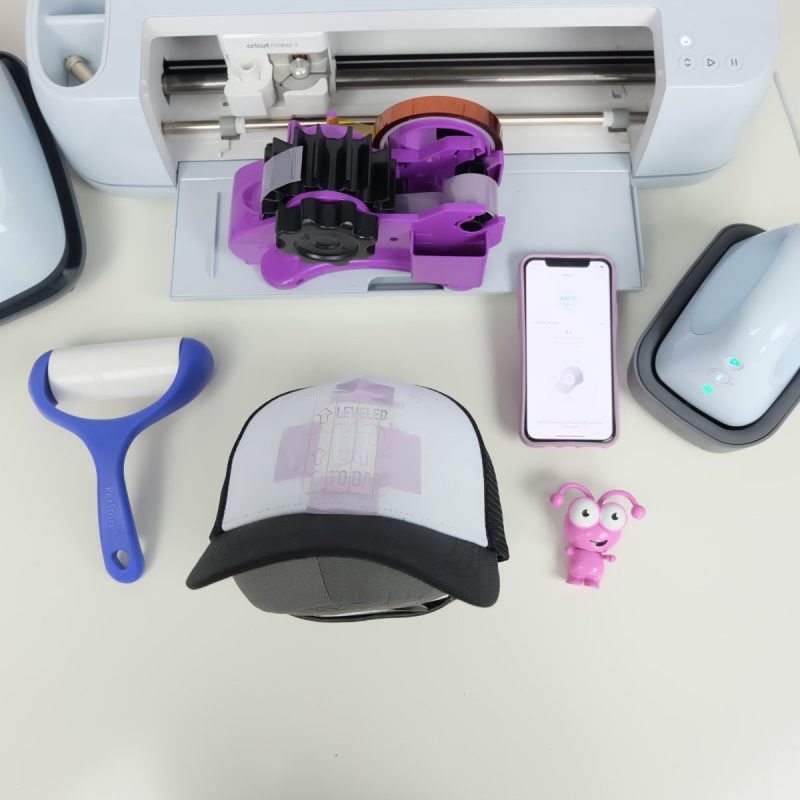
Step 6: Return the Hat Press to the cradle. Allow your hat to cool until it is just warm to the touch. Remove butcher paper and then design revealing your design beneath.
Always unplug your heat press and allow it to cool down completely before storing.

Print It For Later:
Using The Cricut Hat Press With Infusible Ink
Instructions
- Open Cricut Designs Space and select your design. Measure your hat and size your design accordingly. Remember Cricut recommends a maxium size of 2.25 inches wide and 4.25 inches tall. Click “Make It” and don’t forget to click the mirror slider to mirror your design.
- Place your Infusible Ink on the mat with the plastic side facing down. Cut out your design using your Cricut cutting machine.
- Weed your design, removing the Infusible Ink from around your design, leaving just your design behind on the clear plastic liner.
- Use a lint roller to remove any lint or debris from your hat.
- Once your heat press has finished preheating follow the directions in the Heat Press App. Lay a piece of butcher paper over your hat, and then pre-heat your hat for 5 seconds.
- Attach your design to your hat using heat resistant tape. Lay butcher paper on top and secure with heat resistant tape. Press for another 90 seconds applying light pressure and side to side movement.
- Return the Hat Press to the cradle. Allow your hat to cool until it is just warm to the touch. Remove butcher paper and then design.
- Always unplug your heat press and allow it to cool down completely before storing.
Equipment
- Cricut Infusible Ink Hat or Sublimation Hat
- Cricut Standard Grip Mat
- Cricut Hat Press and Hat Pressing Form
- Lint Roller
- Butcher Paper
- Cricut Strong Grip Heat Resistant Tape
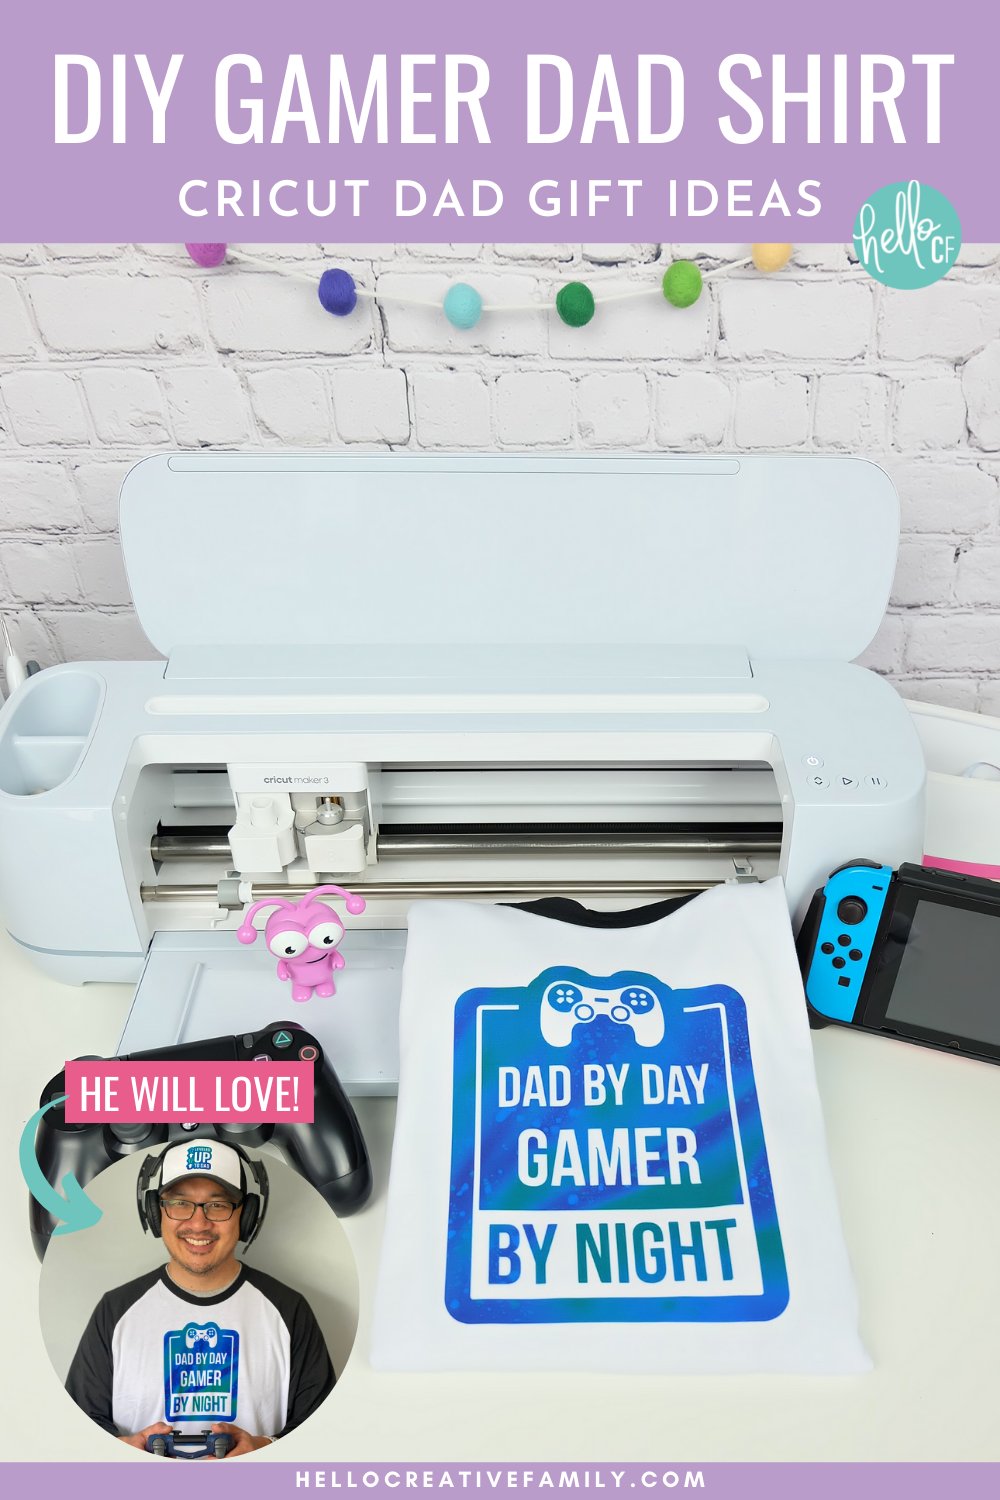
Father’s Day Cricut Ideas- DIY “Dad By Day Gamer By Night” Shirt

Did you know that Cricut makes shirts? As soon as I made my husband a black and white trucker hat, I knew that he needed a black and white raglan shirt to go with it! And lucky for me, Cricut makes them!
My hubby is hard on his shirts. He’s never heard of the delicate cycle. Everything gets thrown in the washing machine together, washed on a normal cycle and dried on a normal cycle. That’s why I love Infusible Ink for clothing for him. The ink is infused right into the shirt, as opposed to the design sitting on top of the shirt like with HTV. Since the design is infused into the shirt, there’s no risk of peeling!
Materials:
- Measuring Tape
- Cricut Infusible Ink Raglan Shirt
- Cricut cutting machine
- Cricut Infusible Ink Transfer Sheet (I used the Rainbow Watercolor Splash sampler)
- Cricut Cutting Mat
- Weeding Tools
- Cricut EasyPress
- Cricut EasyPress Mat
- Cardstock
- Lint Roller
- Butcher Paper
- Cricut Heat Resistant Tape
- Optional: Cricut Brayer Tool
Directions:
Step 1: Open Cricut Designs Space and select your design. (You can find my Video Game Father’s Day Canvas here.) Measure your shirt and size your design accordingly. Click “Make It” and don’t forget to click the mirror slider to mirror your design. Follow the prompts to connect your machine and select your cutting material.
Step 2: Place your Infusible Ink on the mat with the plastic side facing down. I like to use a Strong Grip Mat for Infusible Ink and to use my Cricut Brayer to push my Infusible Ink onto the cutting mat. Cut out your design using your Cricut cutting machine.
Step 3: Weed your design, removing the Infusible Ink from around your design, leaving just your design behind on the clear plastic liner.
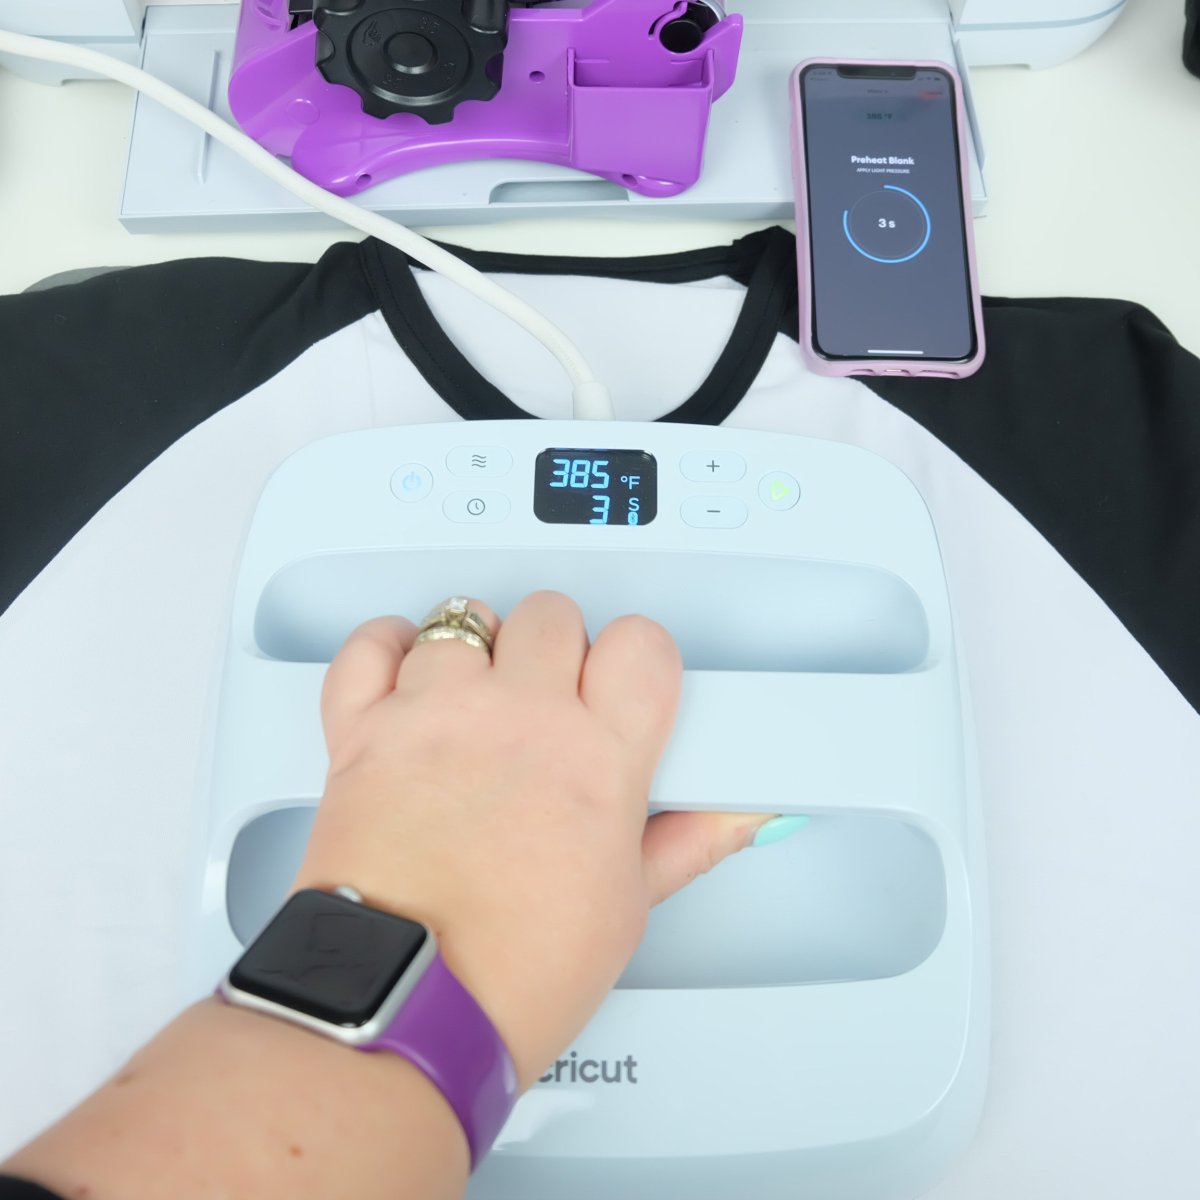
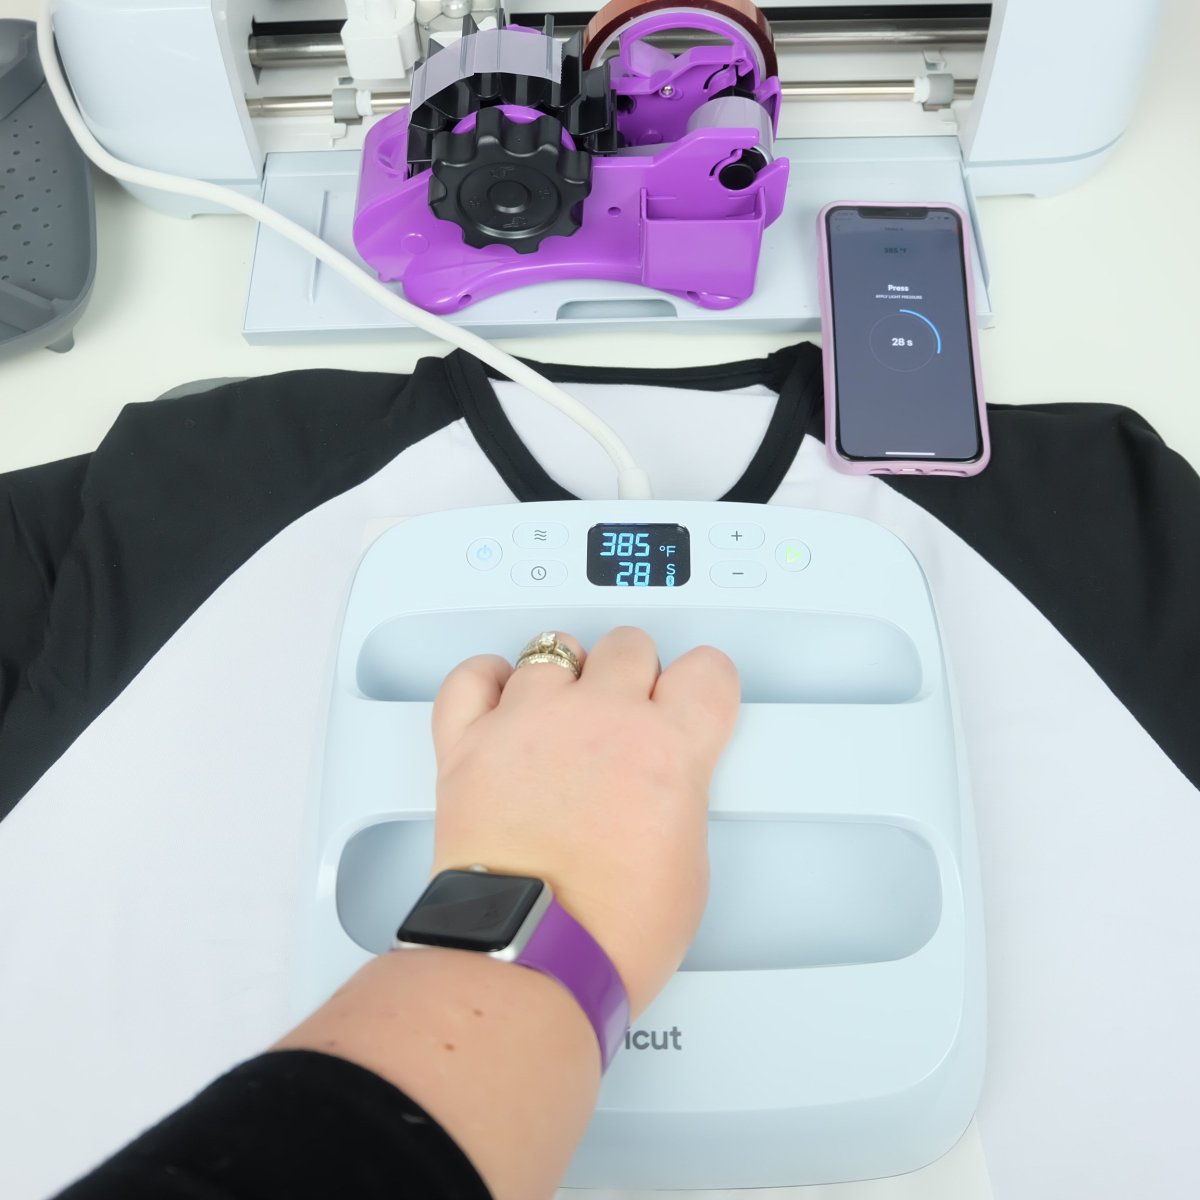
Step 4: Turn on your Cricut EasyPress. I am using the Cricut EasyPress 3 with the Cricut Heat App which will walk you through step by step on what to do. If you are using an older Cricut EasyPress or a different heat press, set your press to 385F.
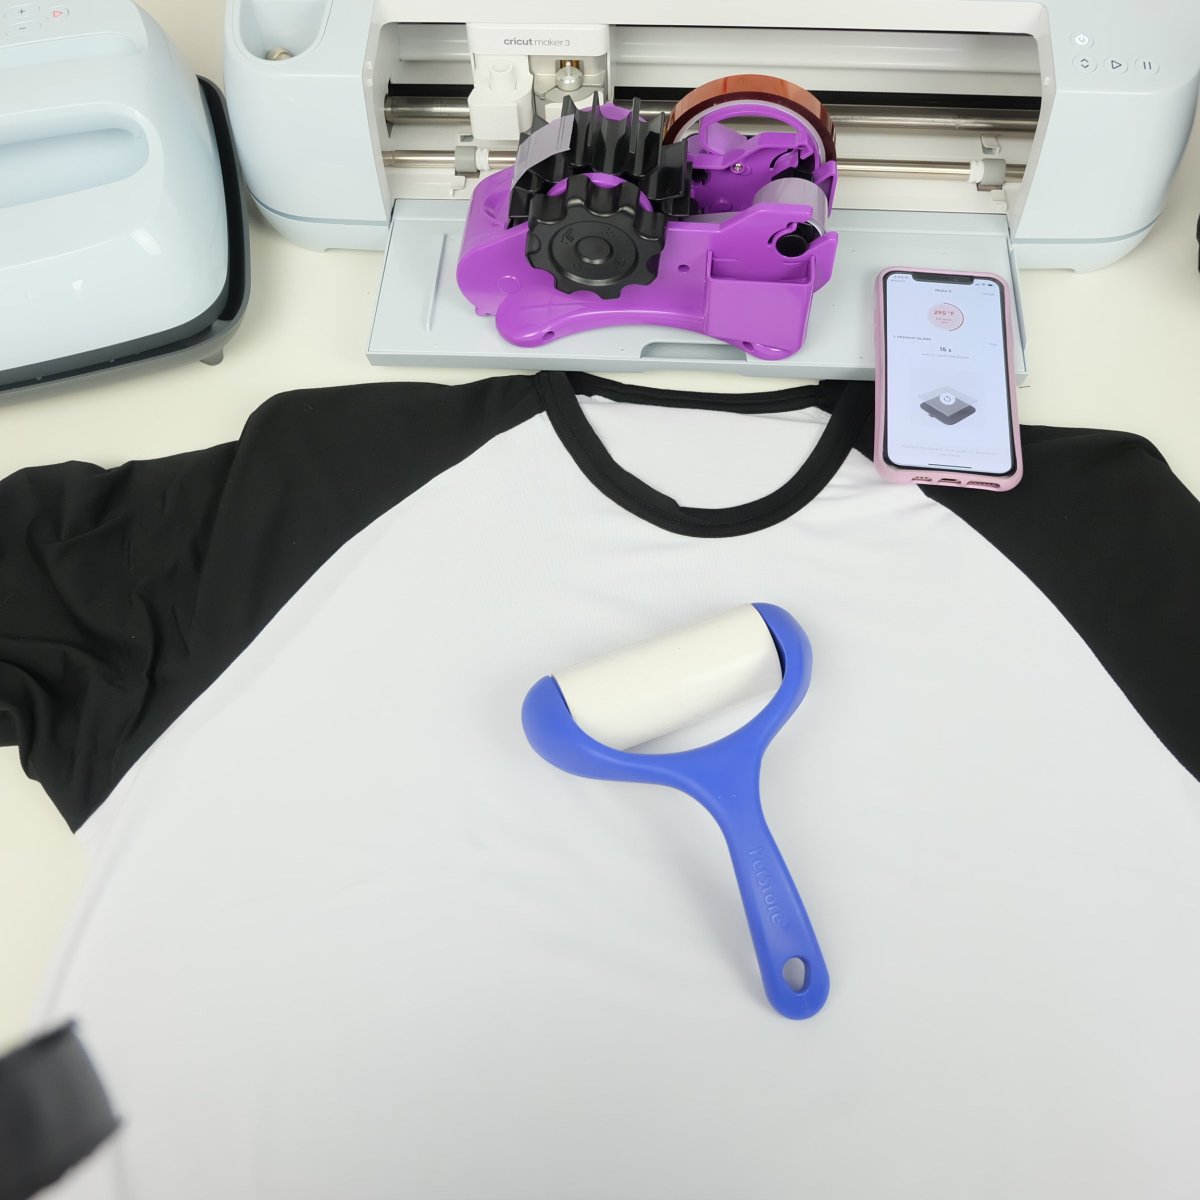
Step 5: Place your shirt on the Cricut EasyPress Mat. Insert cardstock inside the shirt to prevent bleed through. Lint roll your shirt, then cover the shirt with butcher paper and preheat shirt for 15 seconds.
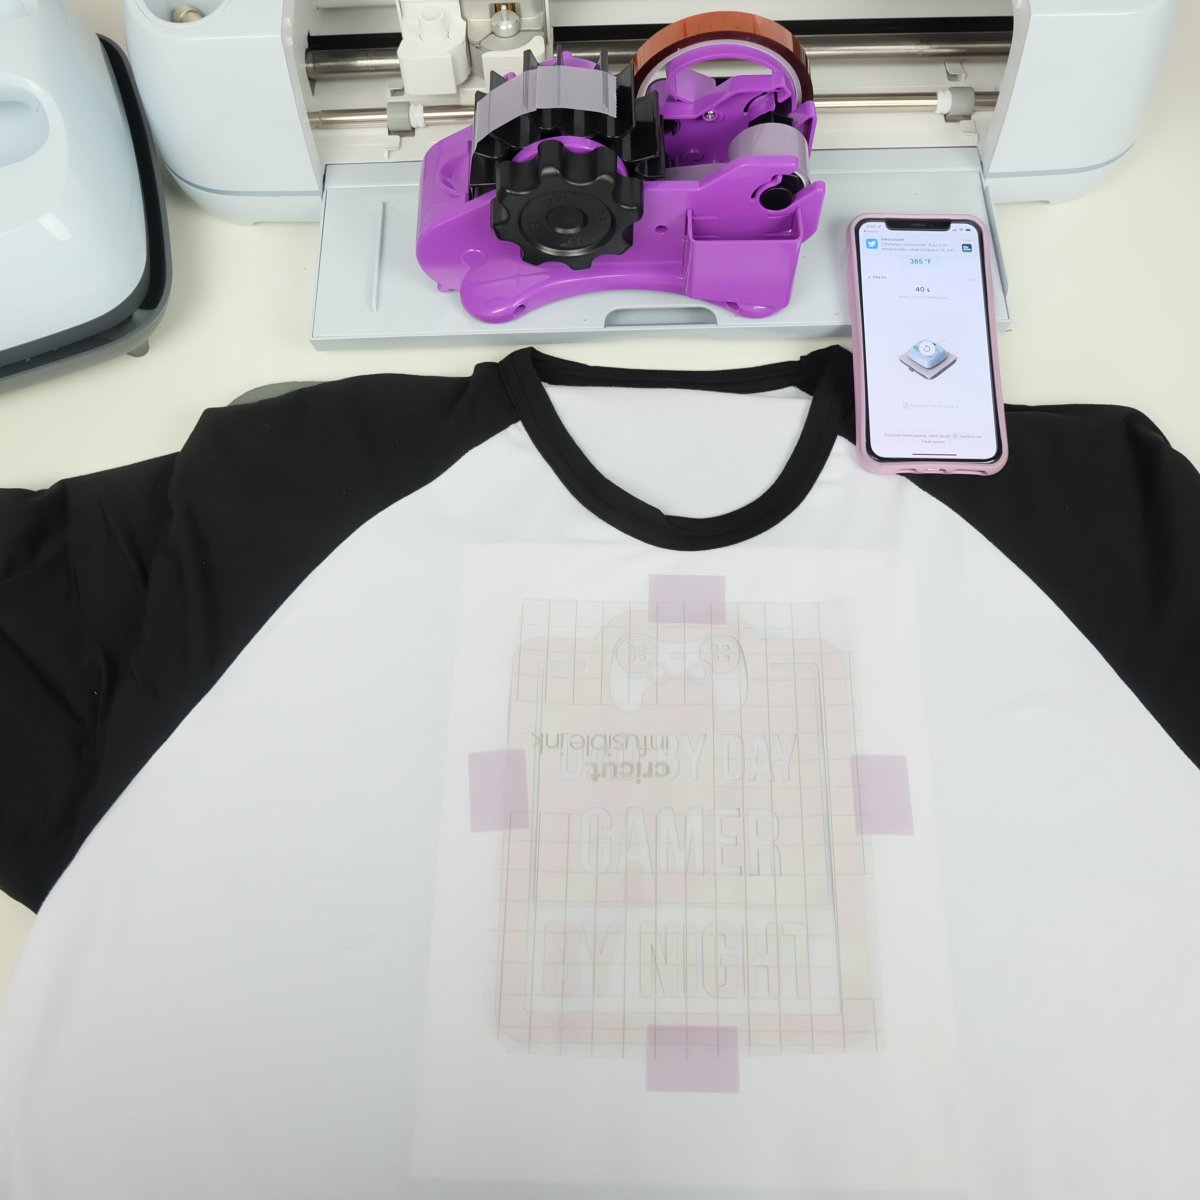
Step 6: Remove butcher paper from the shirt and place your design face down (plastic side up) onto your shirt. Tape into place using heat resistant tape. Cover with butcher paper and press with light pressure for 40 seconds.
Step 7: When 40 seconds is up, carefully remove your EasyPress and leave your shirt untouched to cool.
Step 8: When shirt has cooled to the point where you can touch it, carefully remove the tape and peel back the Infusible Ink Transfer Sheet revealing your design on the shirt!


I can not get over what a good sport my hubby was with these photos. His expressions crack me up.
Print It For Later:

How To Use Infusible Ink Transfer Sheets On A Cricut Infusible Ink Shirt or Onesie
Instructions
- Open Cricut Designs Space and select your design. (You can find my Video Game Father’s Day Canvas here.) Measure your shirt and size your design accordingly. Click “Make It” and don’t forget to click the mirror slider to mirror your design. Follow the prompts to connect your machine and select your cutting material.
- Place your Infusible Ink on the mat with the plastic side facing down. I like to use a Strong Grip Mat for Infusible Ink and to use my Cricut Brayer to push my Infusible Ink onto the cutting mat. Cut out your design using your Cricut cutting machine.
- Weed your design, removing the Infusible Ink from around your design, leaving just your design behind on the clear plastic liner.
- Turn on your Cricut EasyPress. I am using the Cricut EasyPress 3 with the Cricut Heat App which will walk you through step by step on what to do. If you are using an older Cricut EasyPress or a different heat press, set your press to 385F.
- Place your shirt on the Cricut EasyPress Mat. Insert cardstock inside the shirt to prevent bleed through. Lint roll your shirt, then cover the shirt with butcher paper and preheat shirt for 15 seconds.
- Remove butcher paper from the shirt and place your design face down (plastic side up) onto yur shirt. Tape into place using heat resistant tape. Cover with butcher paper and press with light pressure for 40 seconds.
- When 40 seconds is up, carefully remove your EasyPress and leave your shirt untouched to cool.
- When shirt has cooled to the point where you can touch it, carefully remove the tape and peel back the Infusible Ink Transfer Sheet revealing your design on the shirt!
Father’s Day Cricut Ideas- DIY Video Game Player Stackable Mugs

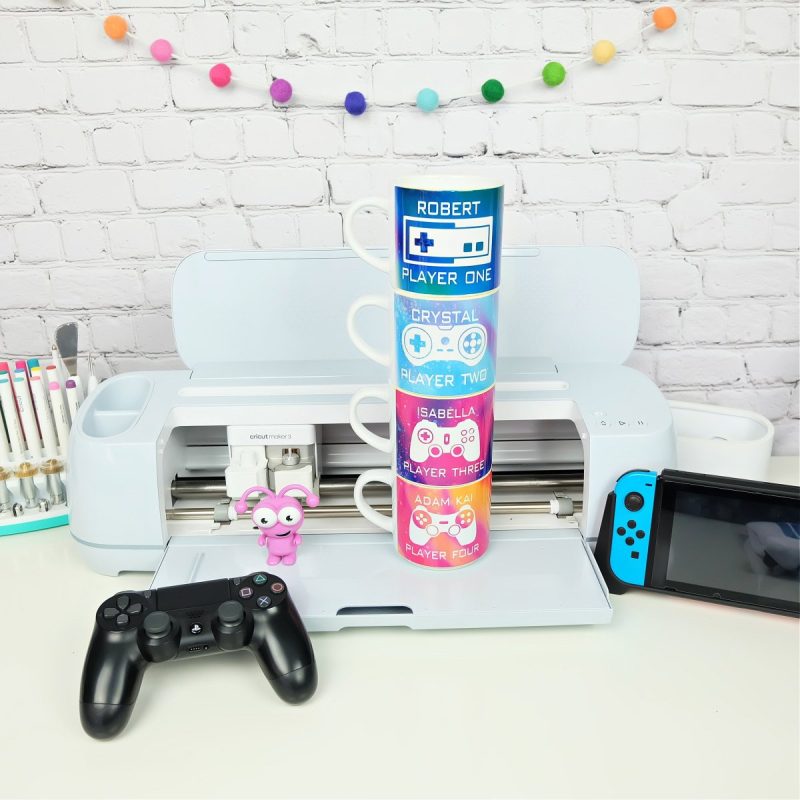
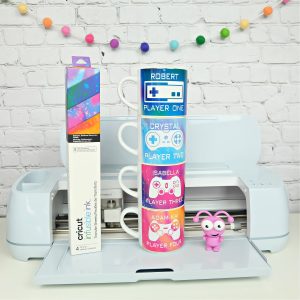
The minute I saw Cricut Stackable Mugs I knew that I needed them in my life and Father’s Day mugs seemed like the perfect fit! It’s so fun to create a set of mugs that goes together in a theme and stacks up nicely! I thought creating a “Player 1”, “Player 2”, “Player 3” and “Player 4” with our names and different video game controls from over the years would be a fun way to use these stackable mug blanks. Bonus, all the different types of video game controls are right in the Cricut image library!
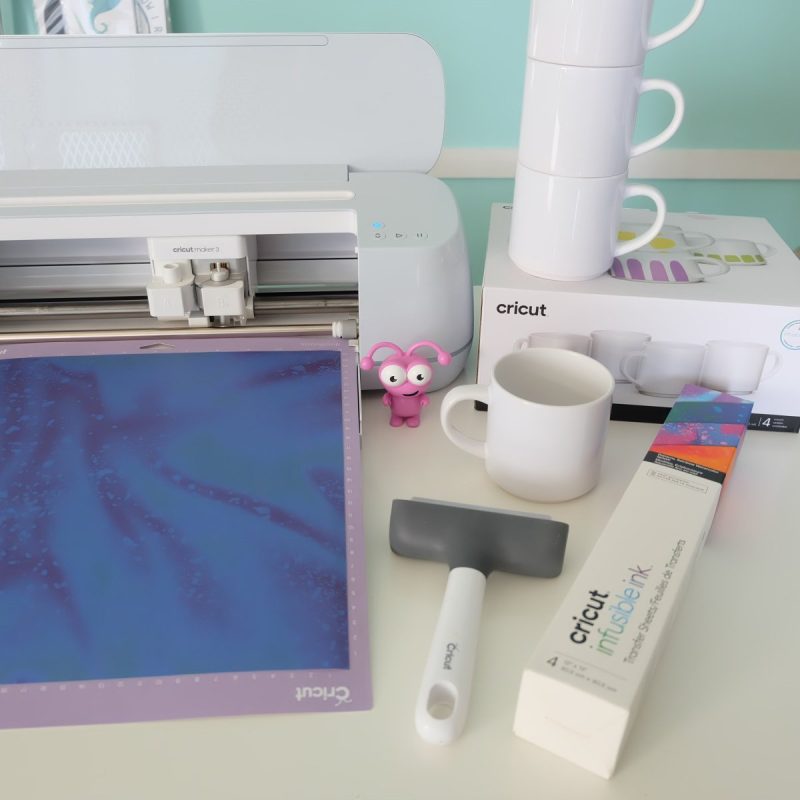
Materials:
- Cricut Stackable Mugs
- Cricut cutting machine
- Cricut Infusible Ink Transfer Sheet (I used the Rainbow Watercolor Splash sampler)
- Cricut Cutting Mat
- Weeding Tools
- Cricut Mug Press
- Cricut EasyPress Mat
- Cardstock
- Lint Roller
- Cricut Heat Resistant Tape
- Optional: Cricut Brayer Tool
How To Use The Cricut Mug Template:
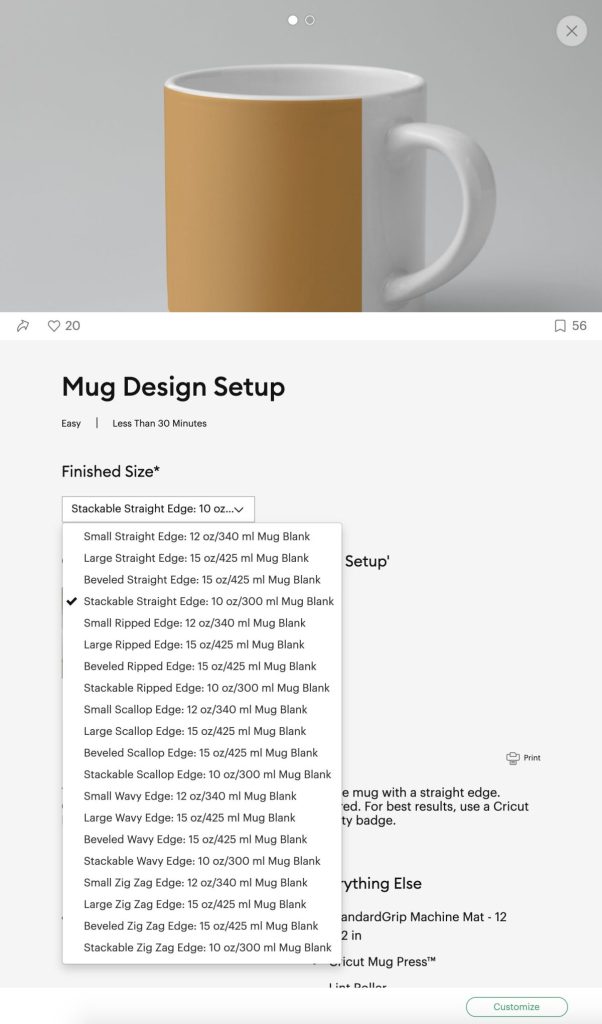
If you search under projects in Cricut Design Space for Mug Design Setup you will find a template with a drop down menu for different mug sizes.
The benefits of using this template are:
- Each template is pre-sized for each size Cricut Infusible Ink mug taking measuring and guess work out of the process.
- It provides you with lines to use to center the images on your mug for perfect placement every time.
- The design has your machine not only cut the design out of Infusible Ink but also do another cut all the way through the backing of the Infusible Ink that you can use to wrap around your mug. The Infusible Ink backing is sticky which helps you hold your design in place, and also has a section on each end that goes under the handle of the mug helping you to get perfect placement.
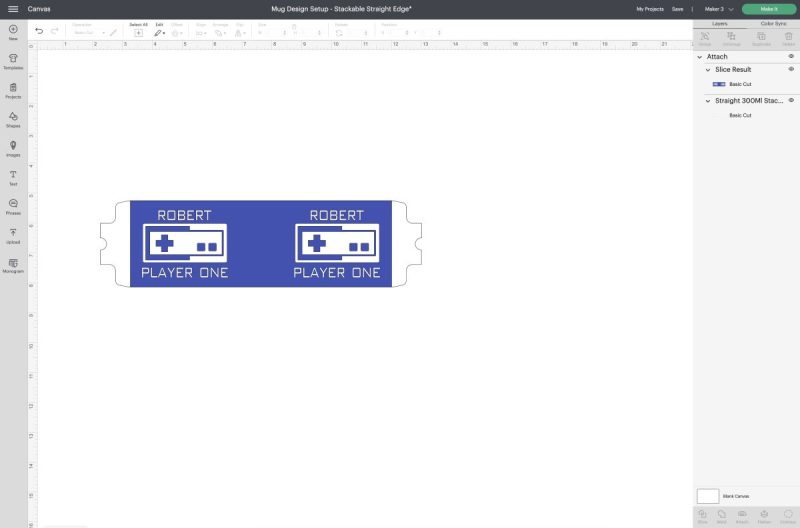
I already have the mug wrap on my video game canvas for you, but since this design is personalized with names I’m going to walk you through step by step how to use it.
Find my canvas for making these mugs and other video game projects here.
Watch the video on how to do this here:
Step By Step Instructions To Make Your Mug:
Step 1: Open my canvas for making these mugs and other video game projects here. Click on the video game controller graphic and click the “Ungroup” button.
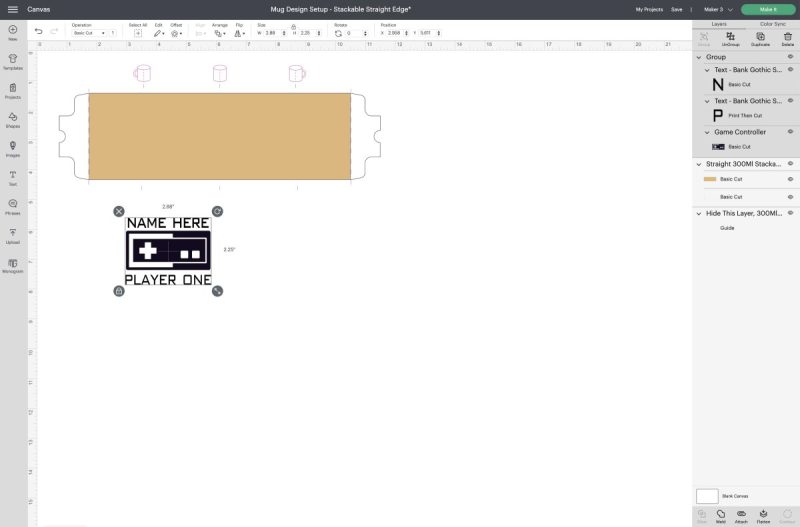
Step 2: Personalize with the name you would like to use for your project and align the name where you would like it above the controller. You may want to use the align tool to do this.
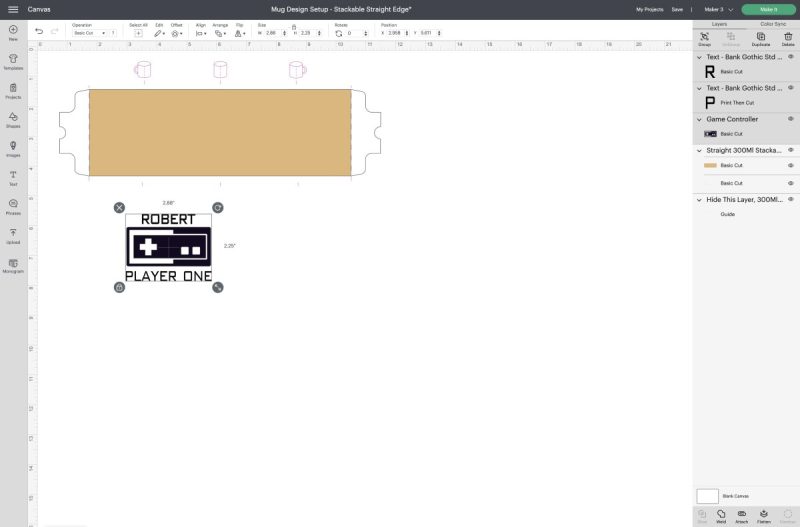
Step 3: Select the name, controller and player number all at once and click “Weld”. This will turn all three layers into one layer.
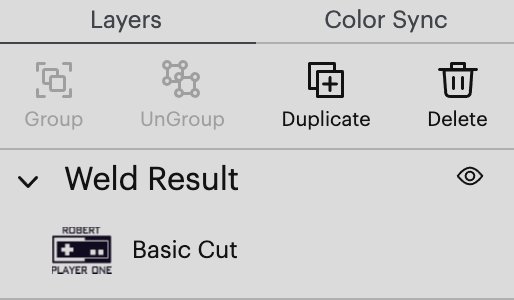
Step 4: Next you want to center your design so that it appears exactly where you want it on your mug. You can eyeball this using the mug placement template or you can line up the center crosshairs of your design with the line of the template and then move your design down. In the video above I walk you through my exact process.

If you want your design on both the back and the front of your mug, place the two designs exactly where you want them and then use the “Weld” button to weld the two name/controller/player pieces together.

Step 5: Click on the mug template group in your right hand layers bar and then click “Ungroup”.
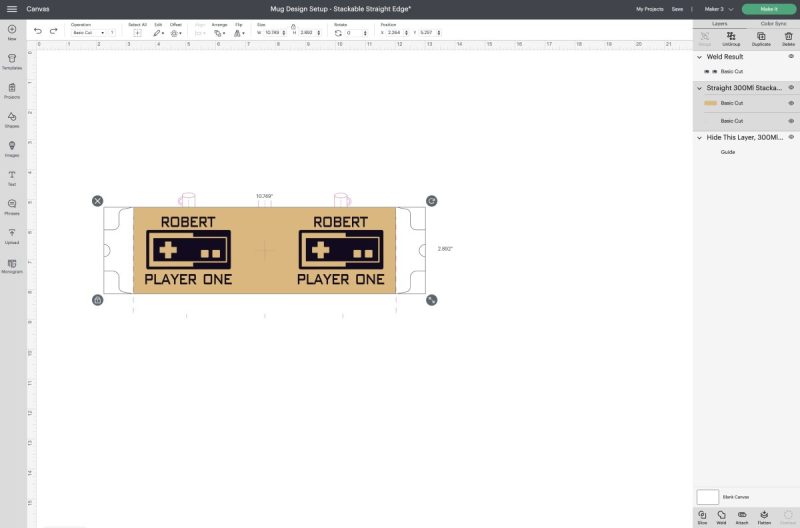
Step 6: Click the yellow layer of your mug template and your welded video game controller piece and click “Slice”. Think of the yellow mug template as dough, and the video game controller piece as a cookie cutter. The video game controller pieces will now be cut out of the mug template.

Delete the black video game controller piece and the yellow mug wrap piece that has been cut out and you will be left with a wrap with your image sliced out.
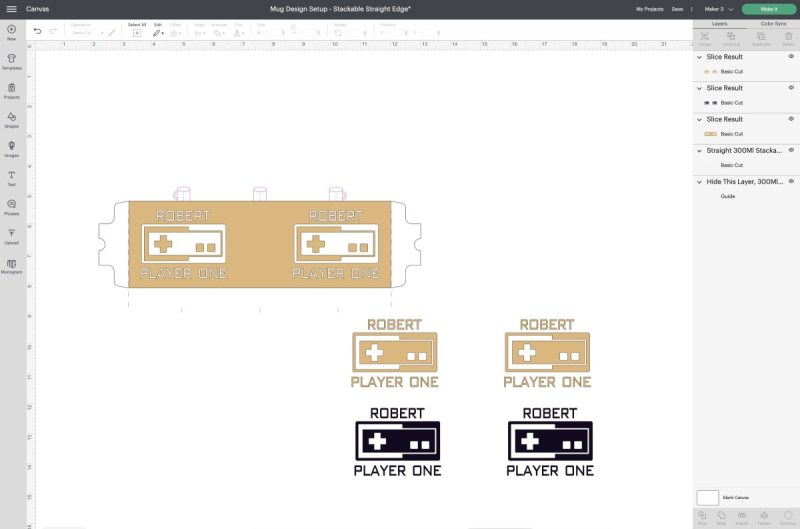
Step 7: Last but not least, delete the template layer that shows you where to position your images on your mug. Then select the two remaining pieces (make sure they are lined up properly) and click “Attach”. You are now ready to cut your design. Repeat this process for each of your mugs.
Now that we have your design ready to go, let’s make a mug!
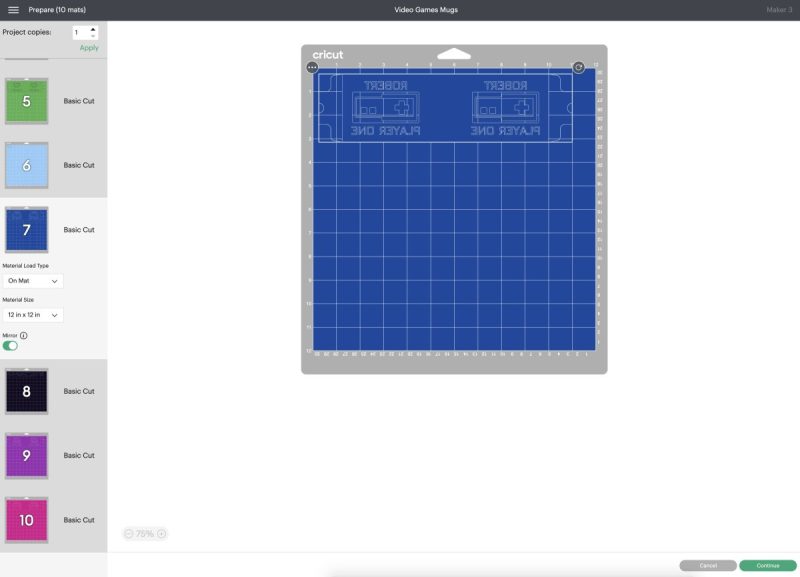
Step 1: Click “Make It” and don’t forget to click the mirror slider to mirror your design. Follow the prompts to connect your machine and select your cutting material.
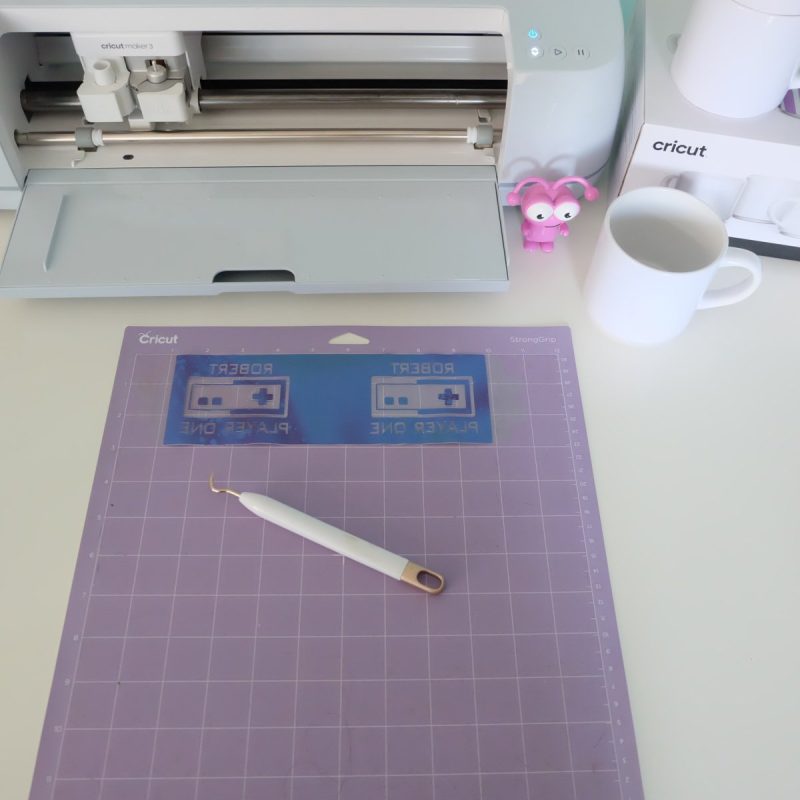
Step 2: Place your Infusible Ink on the mat with the plastic side facing down. I like to use a Strong Grip Mat for Infusible Ink and to use my Cricut Brayer to push my Infusible Ink onto the cutting mat. Cut out your design using your Cricut cutting machine.
Step 3: Weed your design, removing the Infusible Ink from around your design, leaving just your design behind on the clear plastic liner.
Step 4: Turn on your Cricut MugPress. It is set to automatically heat to the correct temperature and to know how long to press your mug for.
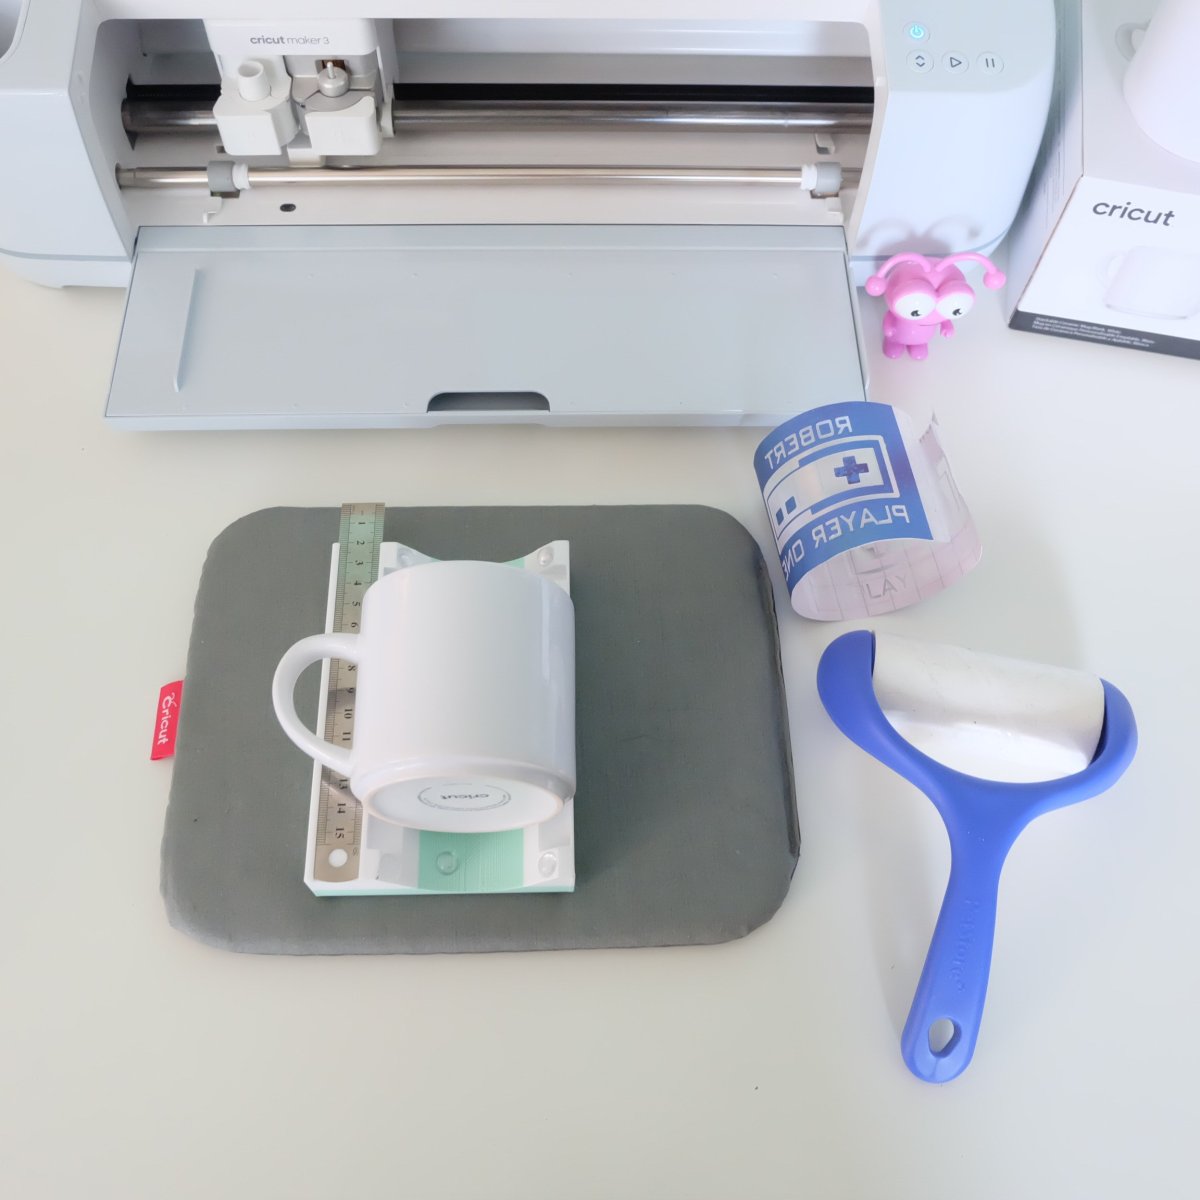
Step 5: Clean your mug with either a lint free cloth or a lint roller. Carefully wrap your Infusible Ink wrap around your mug, with the clear plastic notches overlapping inside the handle. You may want to lay your mug on a secure surface like Uniquely Whynot’s Tumbler Cradle. Use Heat Resistant Tape to secure your design to your mug. The tighter your Infusible Ink Transfer Sheet is pressed against the mug, the better your transfer results will be.

Step 6: Place your mug in the mug press with the handle sticking out of the slot. Press down the lever on the top of the mug press to close the opening where the handle is sticking out and to start your press. The lights on the top of the Mug Press will show you where you are in the heat cycle and will beep when it’s done. When your Mug Press beeps, lift the lever back up to open your Mug Press. Carefully set your mug on a heat safe surface like your EasyPress Mat to cool.
Repeat with each of your mugs.
Step 7: When your mug has completely cooled. Peel away the heat resistant tape and Infusible Ink transfer sheet revealing your design beneath!
Print the instructions for later:
How To Make Infusible Ink Mugs With The Cricut Mug Press
Instructions
- Click “Make It” and don’t forget to click the mirror slider to mirror your design. Follow the prompts to connect your machine and select your cutting material.
- Place your Infusible Ink on the mat with the plastic side facing down. I like to use a Strong Grip Mat for Infusible Ink and to use my Cricut Brayer to push my Infusible Ink onto the cutting mat. Cut out your design using your Cricut cutting machine.
- Weed your design, removing the Infusible Ink from around your design, leaving just your design behind on the clear plastic liner.
- Turn on your Cricut MugPress. It is set to automatically heat to the correct temperature and to know how long to press your mug for.
- Clean your mug with either a lint free cloth or a lint roller. Carefully wrap your Infusible Ink wrap around your mug, with the clear plastic notches overlapping inside the handle. You may want to lay your mug on a secure surface like Uniquely Whynot’s Tumbler Cradle. Use Heat Resistant Tape to secure your design to your mug. The tighter your Infusible Ink Transfer Sheet is pressed against the mug, the better your transfer results will be.
- Place your mug in the mug press with the handle sticking out of the slot. Press down the lever on the top of the mug press to close the opening where the handle is sticking out and to start your press. The lights on the top of the Mug Press will show you where you are in the heat cycle and will beep when it’s done. When your Mug Press beeps, lift the lever back up to open your Mug Press. Carefully set your mug on a heat safe surface like your EasyPress Mat to cool. Repeat with each of your mugs.
- When your mug has completely cooled. Peel away the heat resistant tape and Infusible Ink transfer sheet revealing your design beneath!
Equipment
- Cricut Stackable Mugs
- Cricut Infusible Ink Transfer Sheet (I used the Rainbow Watercolor Splash sampler)
- Lint Roller
And there you have it– 3 handmade, homemade, heart-made gifts made using your Cricut for your video game loving dad!

Need craft supplies to make all your amazing Cricut creations? Click here for the best prices on Cricut cutting machines, bundles, iron-On, permanent vinyl, transfer tape, cardstock and more! Who can stand to pass up a good deal?
Tell me… Which of these Father’s Day gift ideas is your favorite? Will you be using your Cricut to make dad a gift?
If you like these Father’s Day Cricut Ideas I would love for you to pin it to Pinterest! It helps others discover our site which helps us bring you more awesome content like this!