


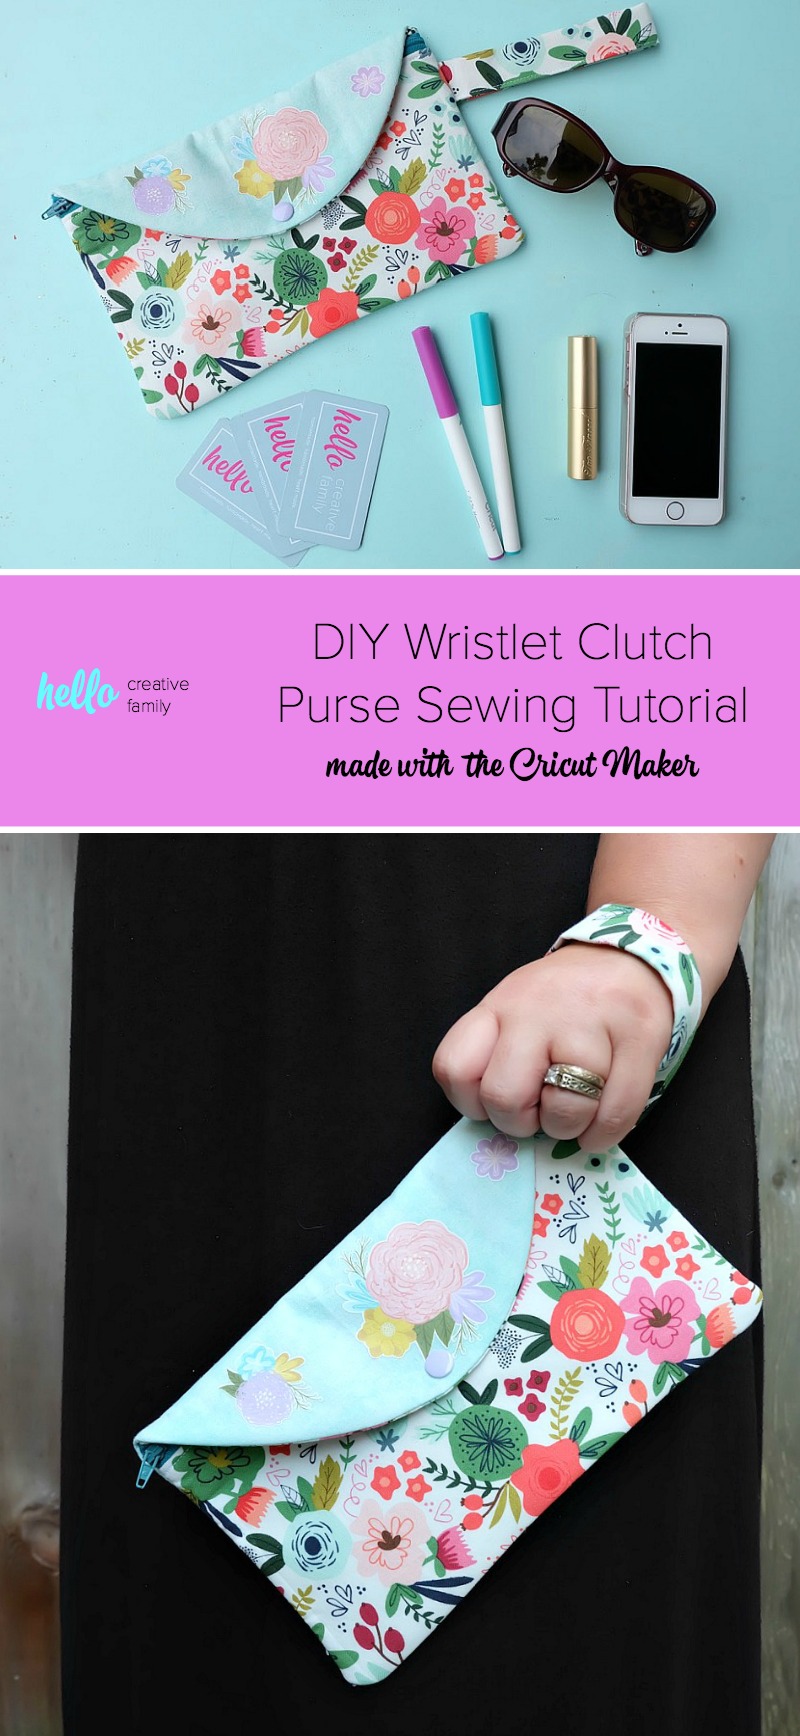
DIY Wristlet Clutch Purse Sewing Tutorial- Made With The Cricut Maker
This post and the photos within it may contain Amazon or other affiliate links. If you purchase something through the link, I may receive a small commission at no extra charge to you.
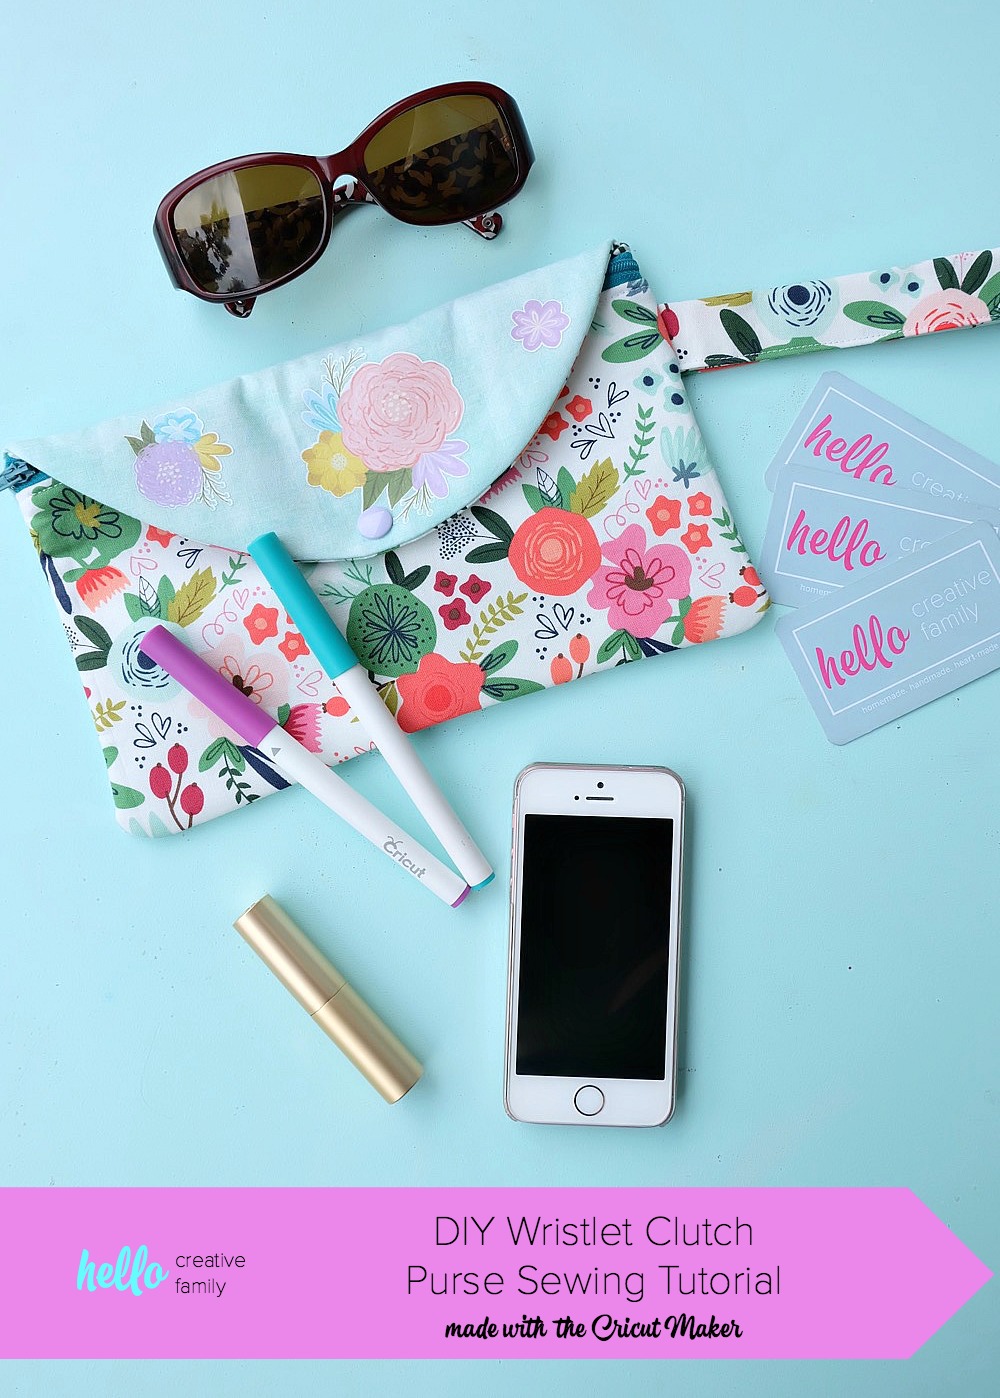
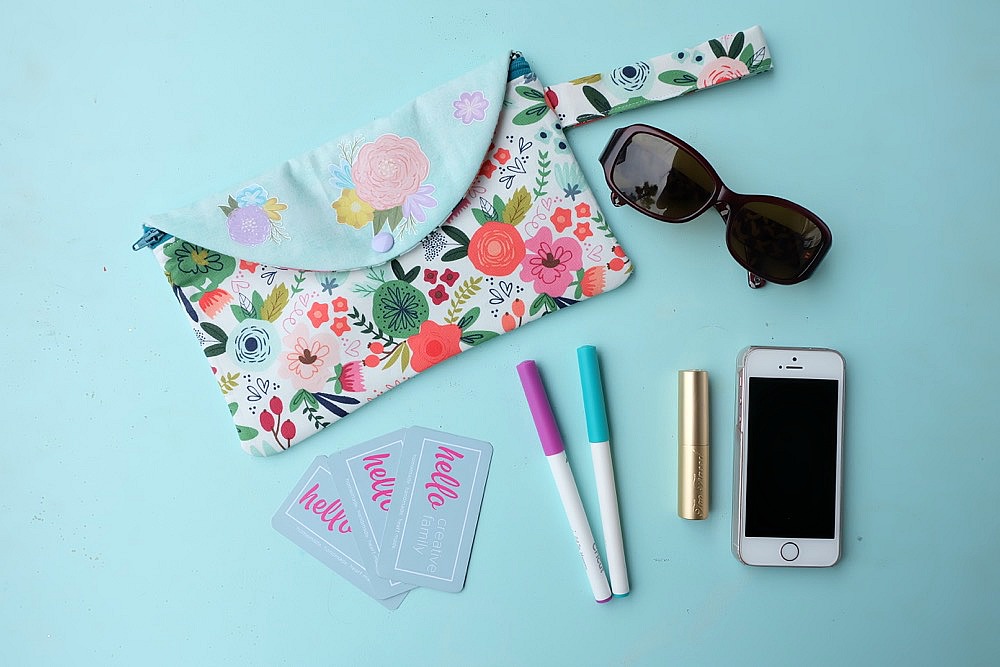
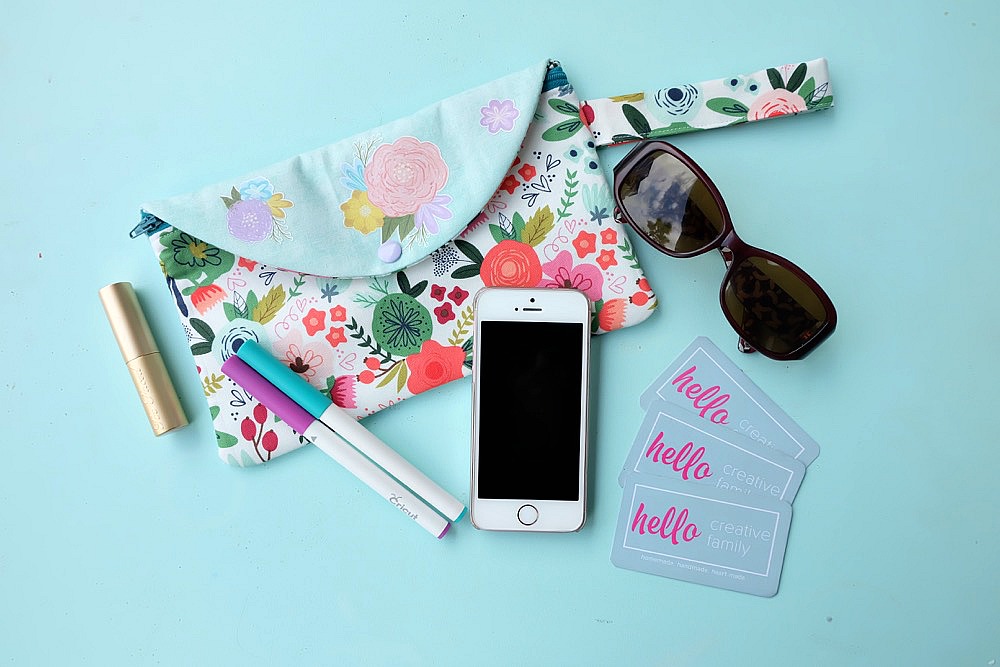
Every girl needs the perfect clutch, so why not make one! This easy sewing tutorial has step by step photos and instructions for making a DIY Wristlet Clutch Purse using your Cricut Maker. Fit all of your essentials into this one little bag! Make extras for handmade gifts!

One of the best things about being a maker is seeing something you like and being able to create it yourself to fit your style. Even better is being able to take elements that you love from a few different “things you love” and being able to combine them together into one awesome project.
At a recent conference, my conference roomie gave me this amazing clutch with a wrist strap. I literally started using it the moment she gave it to me. It’s big enough to fit my wallet inside, but I can also fit lipstick, lip gloss, a pen or two, my cell phone and any little extras that I’m carrying. However it’s not so big that it hurts my back or that things get lost in it. When I’m using it my husband can’t drop things into my purse without me noticing (where they disappear until the next time I clean out my purse). The clutch she gave me is black with small gold geometric shapes. It’s the perfect little wristlet for nights.
I decided that I loved the wristlet so much that I would recreate it in a fun summer pattern. When the Cricut Maker came out I made an Essential Wallet (a free pattern available for Cricut Maker users). I decided to take that same basic idea but create my own pattern that was bigger and had a wrist strap.
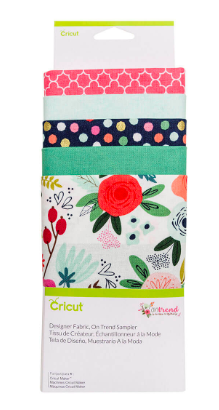
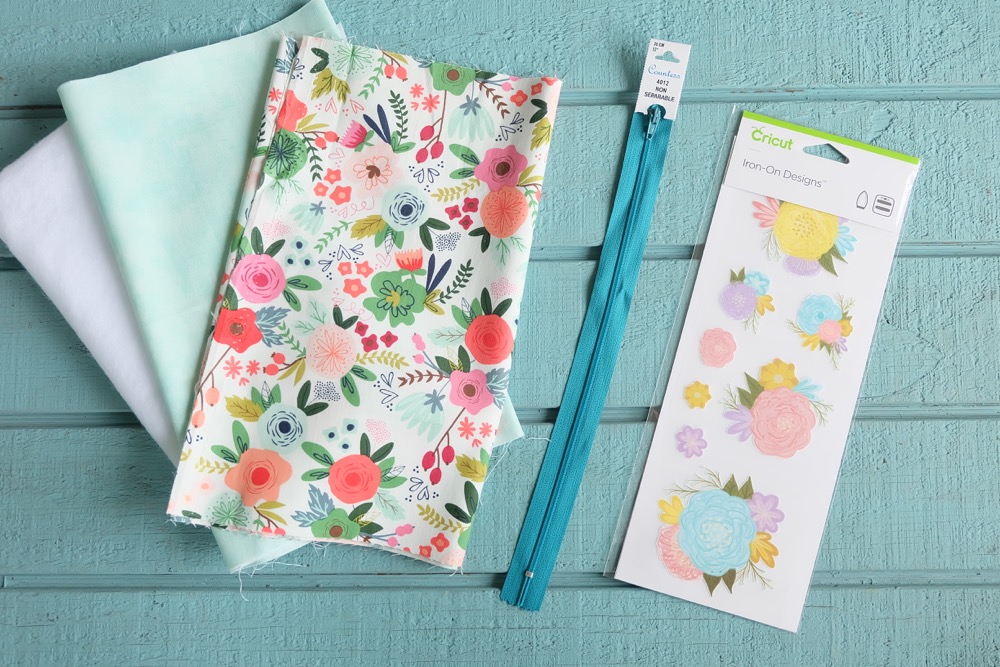
I’m absolutely in love with the Cricut On Trend Fabric Sampler. Especially the On Trend Main White (the floral fabric at the bottom of the photo above). I felt like the floral was perfect for summer and decided to pair it with the light Bottle Green color, but I added a twist. I decorated the light green fabric with one of Cricut’s new Iron-On Designs, Flowers.
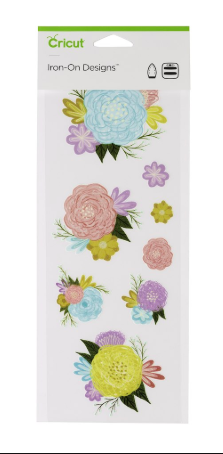
I’m so in love with these new product line from Cricut (you can find them all here). There is such a great variety of designs so you will find something for everyone. It makes it super simple to customize a shirt, bag, apron, pillow or just about any fabric project with a cute design, even if you don’t have a Cricut… there is no cutting required. All you need is the Easy Press or an iron and something to attach your design to!

Ready to get started creating this incredible DIY Wristlet Clutch Purse? Read on!
[hr gap=”30″]DIY Wristlet Clutch Purse Sewing Tutorial[hr gap=”30″]
Materials:
–Hello Creative Family DIY Wristlet Clutch Cut File
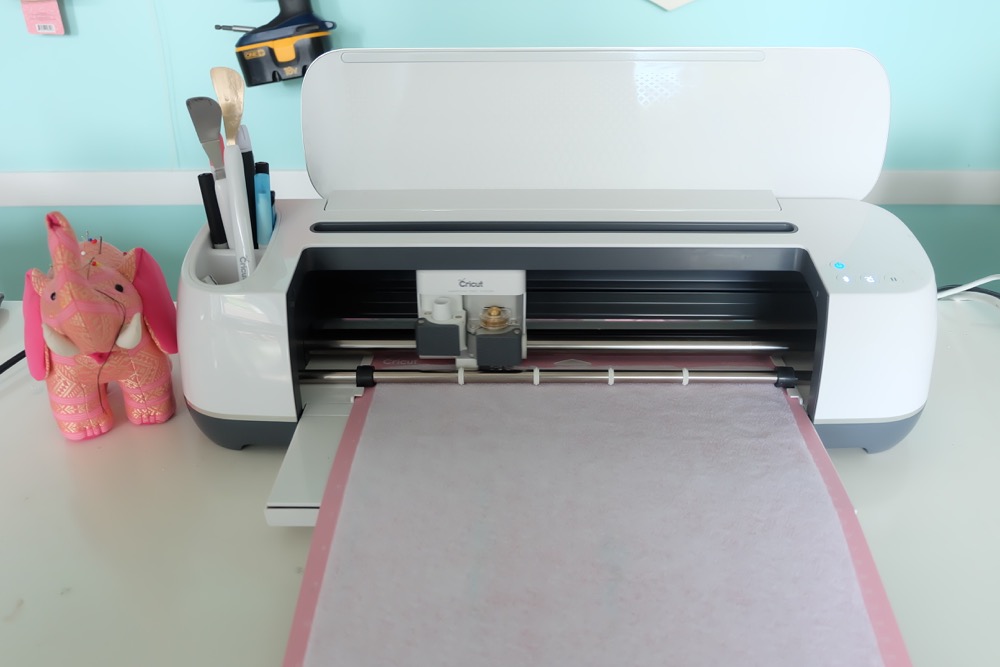
-Cricut Maker (prefer shopping on Amazon? Find the Cricut Maker here)
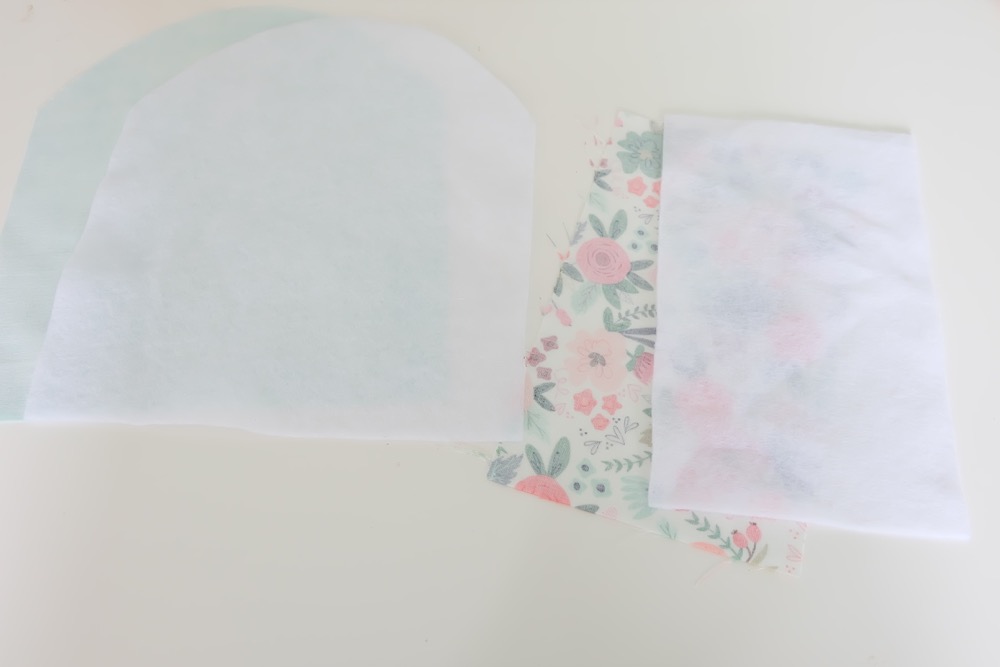
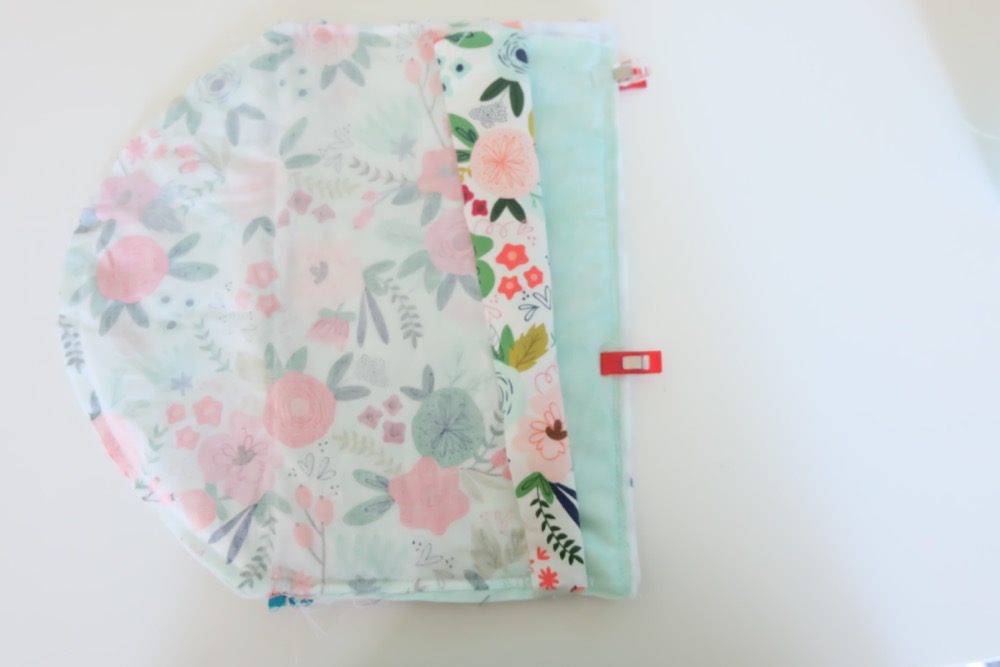
-11″x19″ piece of fabric to be used for the interior lining, front bottom of wallet and strap (this is my floral fabric and is the pink pieces in my cut file)
-11″x19″ piece of fabric to be used for back and top of wallet (this is my light green fabric and is the green pieces in my cut file)
-11″x19″ piece of fusible fleece (this is the white pieces in my cut file
–Cricut Fabric Grip Adhesive Cutting Mat
-Snaps (I love my KAM snaps and snap press)
-Sewing Machine (this is the one I have)
-Thread in coordinating colors (this is one of my favorite brands)
-Fabric Scissors, pins and pin cushion or Wonder Clips (You’ll love this sewing kit from Cricut that has all the tools you need to start sewing)
–Cricut Flowers Iron-On Designs
–Cricut EasyPress or iron(prefer shopping on Amazon? Find the Cricut Easy Press here)
Note: Finished bag measures approximately 10 inches wide by 5.5 inches tall.
Directions:
Step 1: Open the Hello Creative Family DIY Wristlet Clutch Cut File and cut your pieces using your Cricut Maker.
Step 2: Take the long thin rectangular piece of fabric that will be used for your strap. Place your fabric on the table so that the printed side is facing down and the longer part of the fabric is laying left to right (like a landscape photo). Fold the bottom edge of the fabric up and the top edge of the fabric down so that the two raw edges meet in the middle. Press in place.
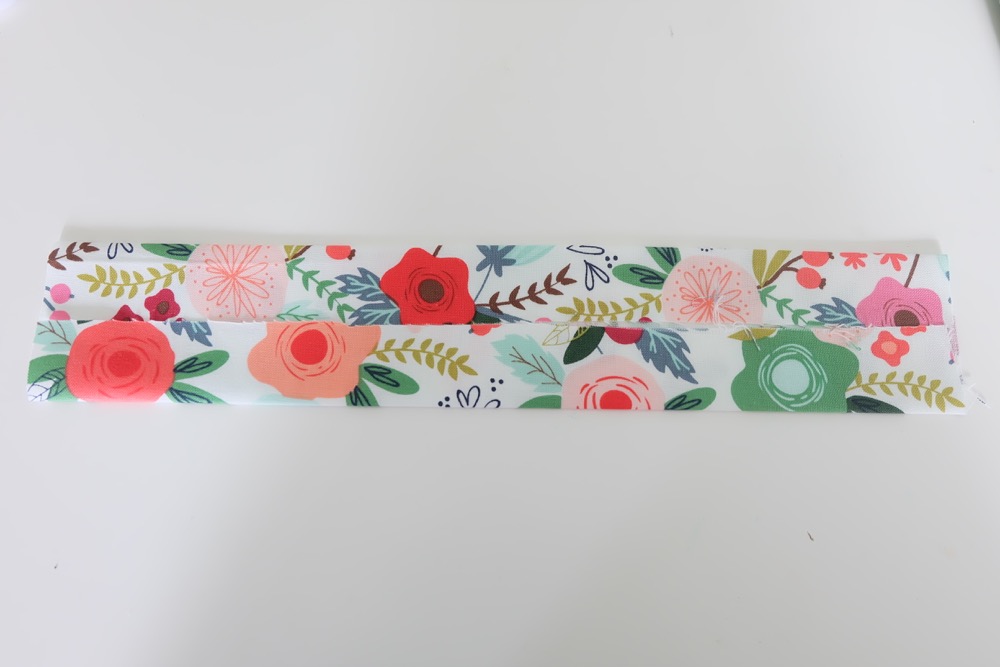
Fold in half again so that the two raw edges are hidden in the middle. Press in place.

Using coordinating thread stitch down the long open edge to secure the fabric into place forming a strap.

Step 3: Iron the fusible fleece to the large piece of fabric that you will be using for the outside of the wallet as well as the rectangular piece that you will be using for the inner pocket. You want to iron the fusible webbing to the back of the fabric, not the side of the fabric that is printed on.
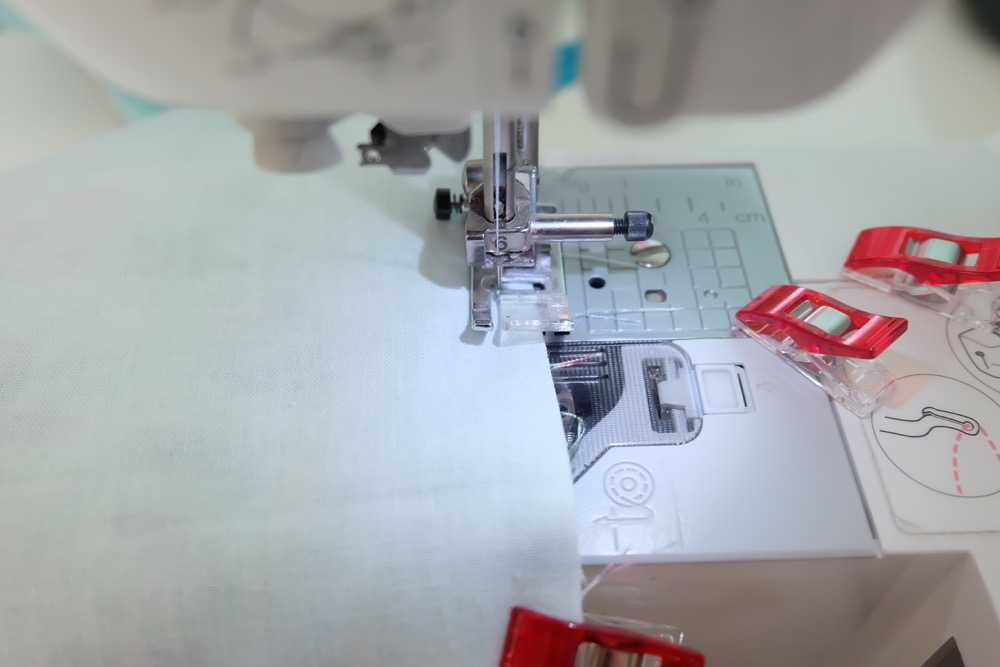
Step 4: Pin the strap to the fabric that will be used for the outside of the wallet as pictured below.
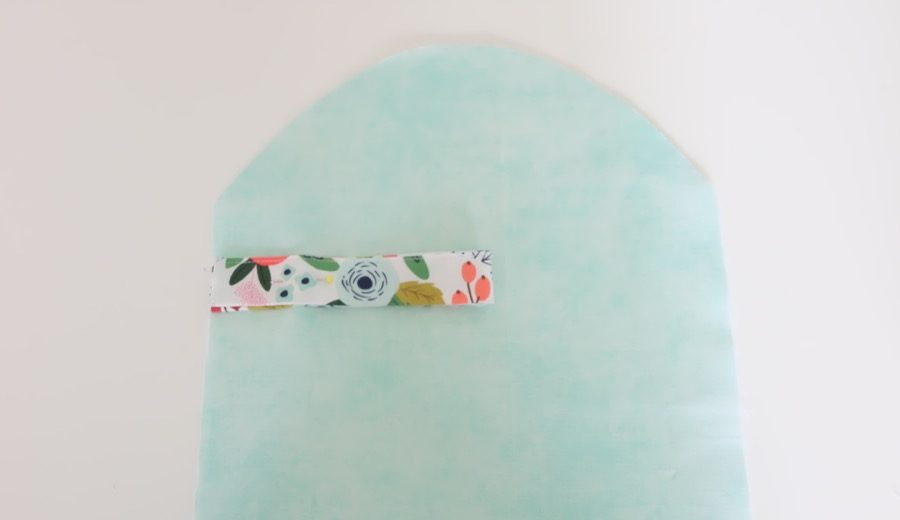
Pin and then stitch into place.
Step 5: Lay your zipper out over the interfaced piece of the pocket. If your zipper is too long, line up where the zipper starts with one edge of your pocket and make a mark where your zipper should end.
Stitch over the zipper several times where you have made your mark and then cut the zipper just past the line.

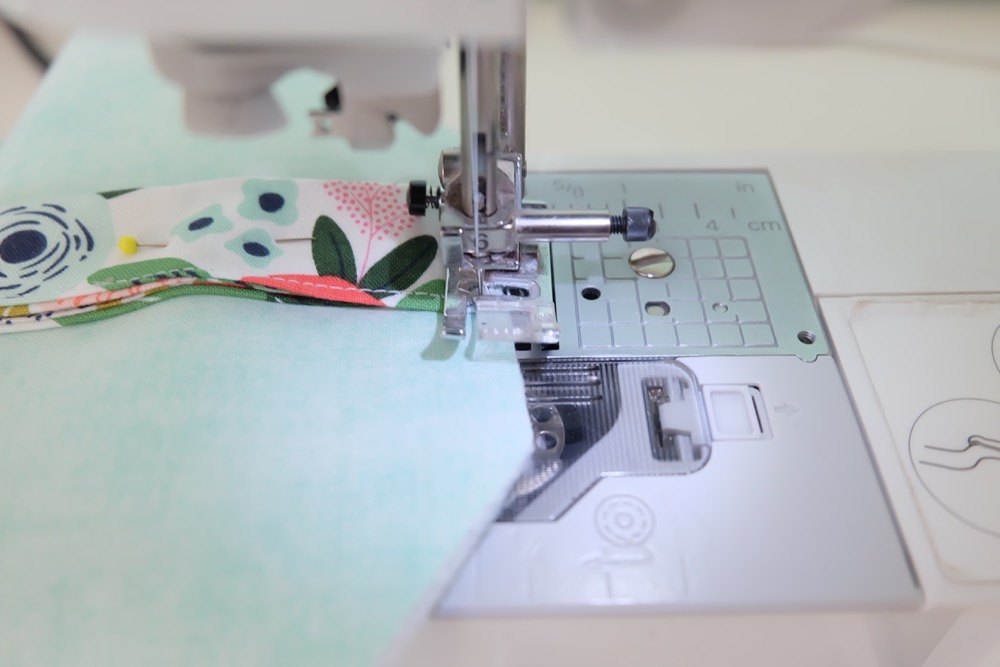
Step 6: Place the zipper face down against the top right side of the interfaced pocket piece, then lay the other pocket piece over the zipper, placing right sides together. Pin in place.
Step 7: Using a zipper foot if possible, sew along the top edge of the pocket where you pinned using a 1/4 inch seam allowance. If you don’t have a zipper foot, feel for the edge of the zipper through your “fabric sandwich” line the edge of your sewing machine foot up with the edge of the zipper and sew along the top edge.
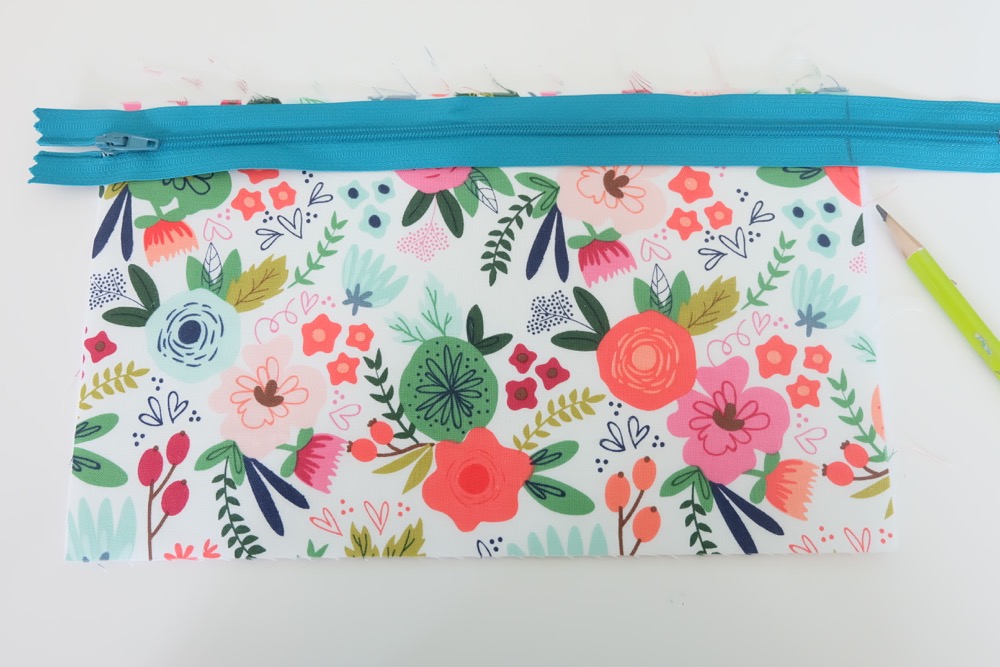
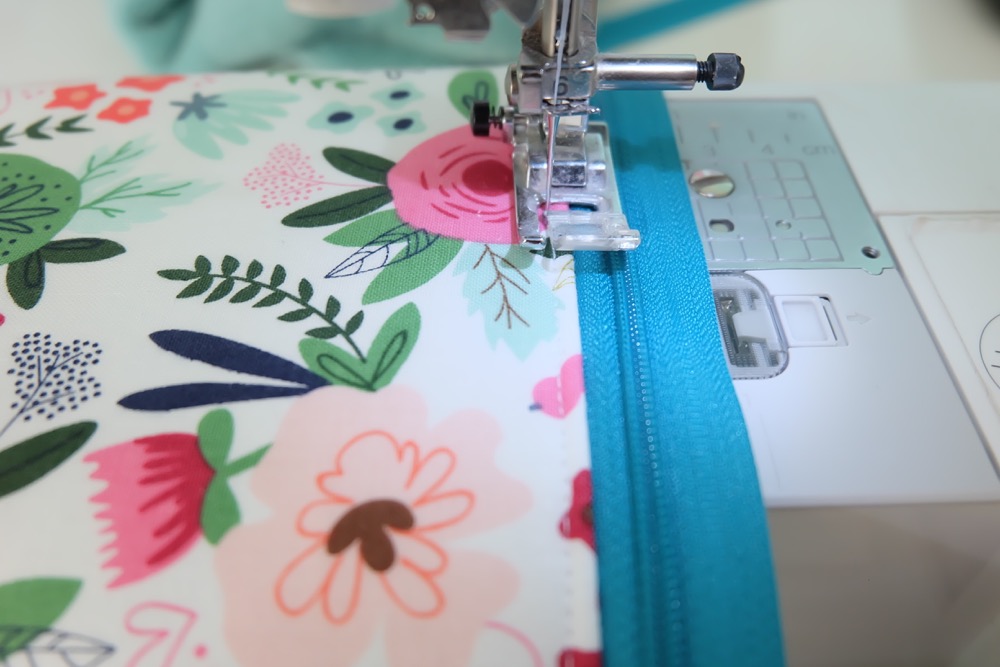
Step 8: Fold your pocket open so that the printed sides of the fabric are facing out in the front and back. Line up the edges of the front and back pieces of fabric and press into place and iron your seam.

Next topstitch along the length of the zipper, 1/8 of an inch from the edge of the fabric.
Step 9: Lay your large piece of fabric that will be used for the purse liner (aka the big piece without the fusible fleece) on the table with the printed side of the fabric facing up. Lay your pocket with the zipper facing down and the fabric you want on the inside of your bag facing up. The top part of the teeth of the zipper should be lined up on each side where the curve of the top of the wallet meets the straight part.
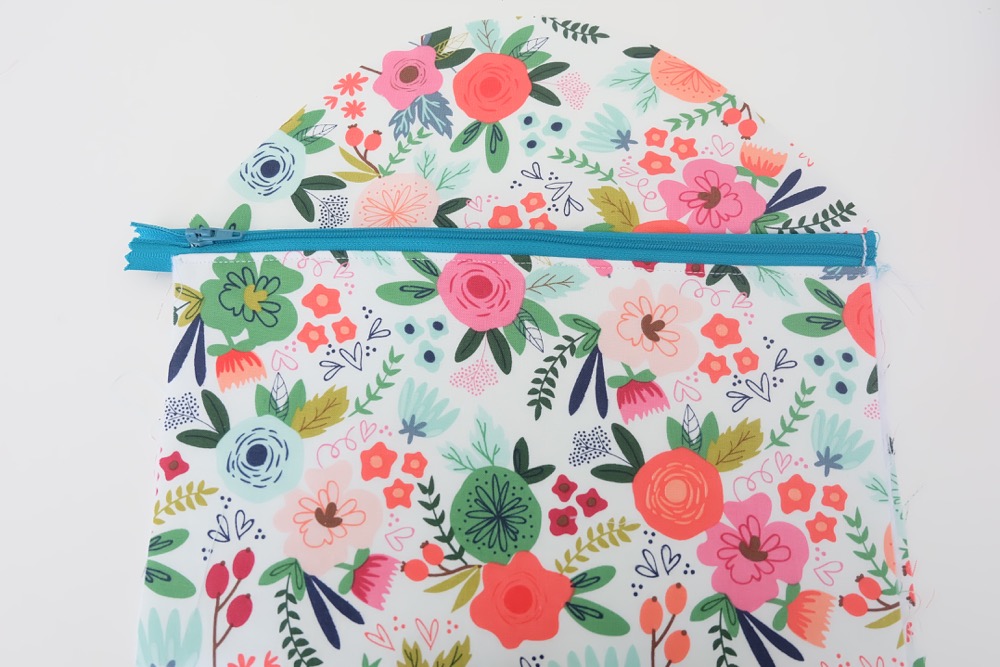
Sew along the zipper leaving a 1/4 inch seam allowance.
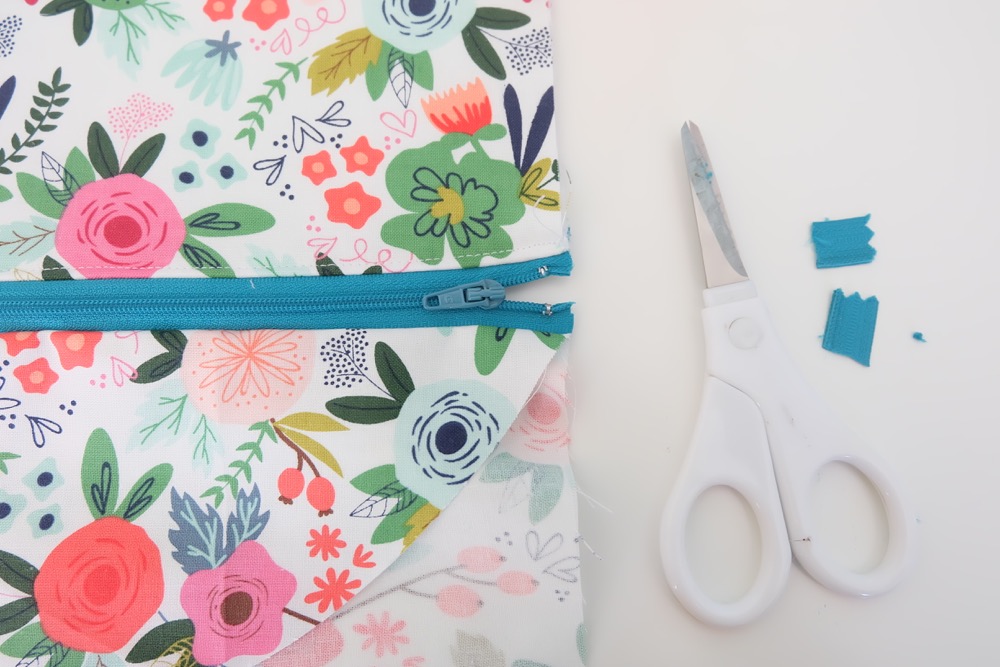
Step 10: Trim off the excess edge of the zipper being careful to not go past the metal stopper at the end of the zipper.
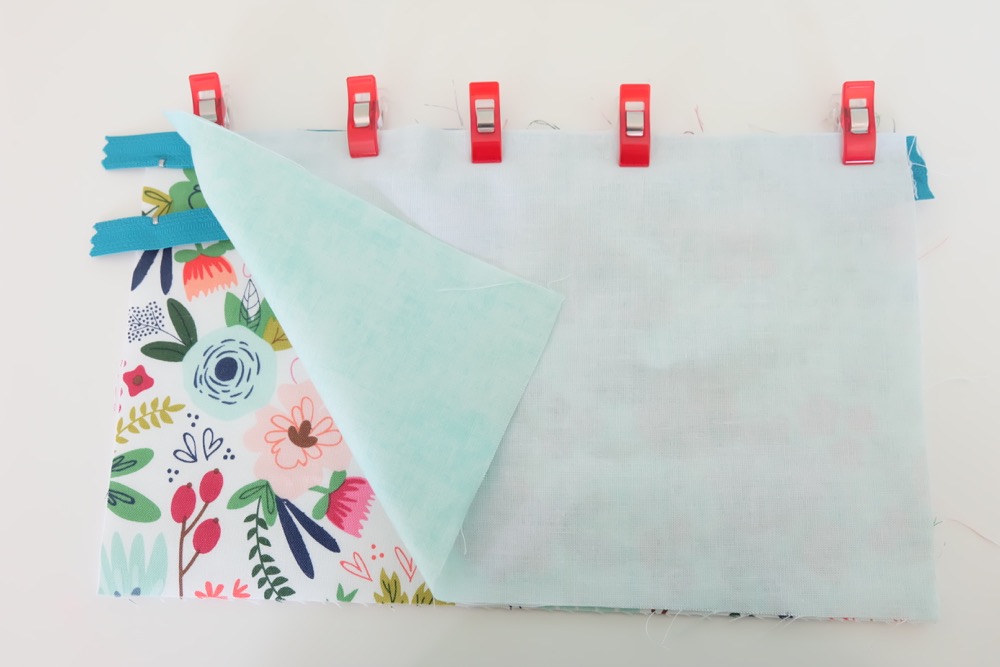
Step 11: Line the bottom of the rectangular “pocket pieces”up with bottom of the exterior piece of the fabric that has the fusible fleece attached to it. Stitch across the bottom attaching them together using a 1/4 inch seam allowance. (I missed taking a photo of this until after I had completed the next step. You can where it is stitched together where the wonder clips are attached in the photo below, just ignore the top floral piece of fabric. )
Step 12: Lay the exterior fabric and fusible webbing on top of the interior piece with the pocket with the printed sides of the fabric facing the center.
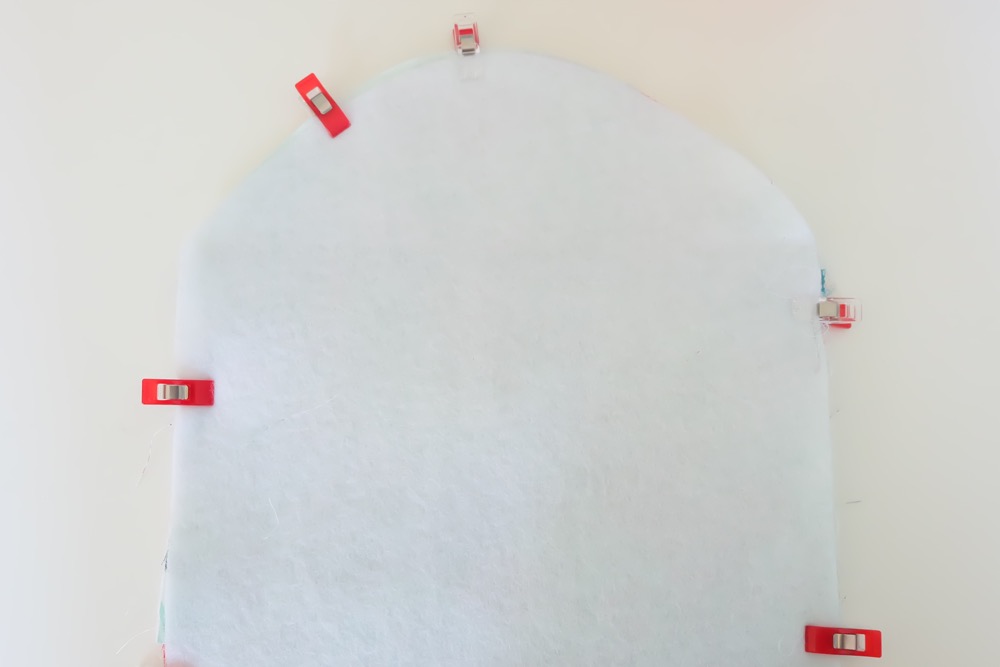
Sew all the way around using a 1/2 inch seam allowance. Leave a 3 inch opening at the bottom.
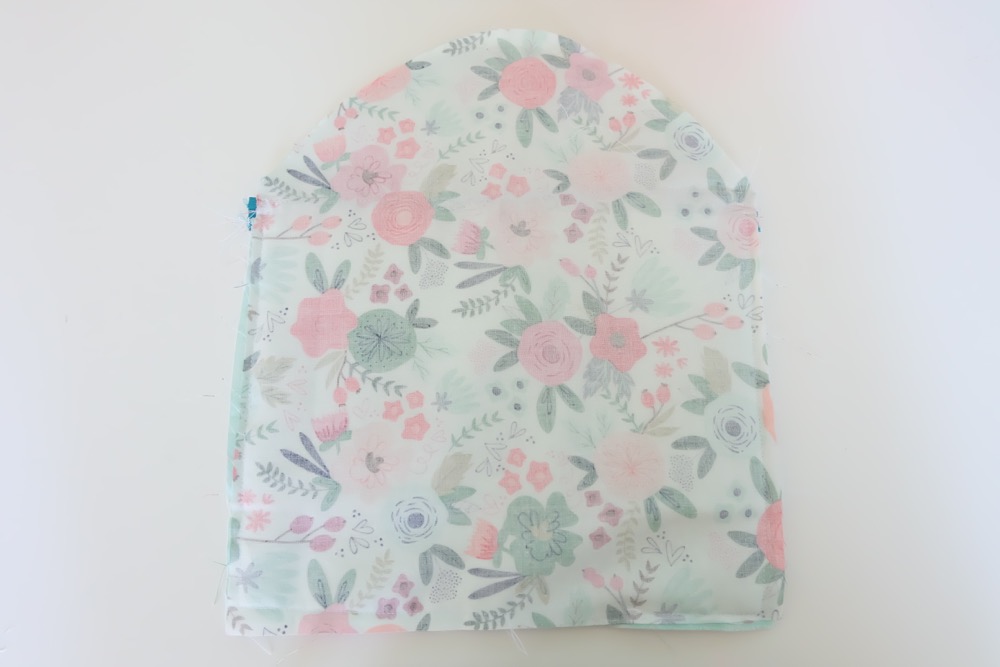
Step 13: Flip the wallet right side out. Hand stitch the inside of the pocket closed. We’re almost there! It’s looking like a real wristlet!
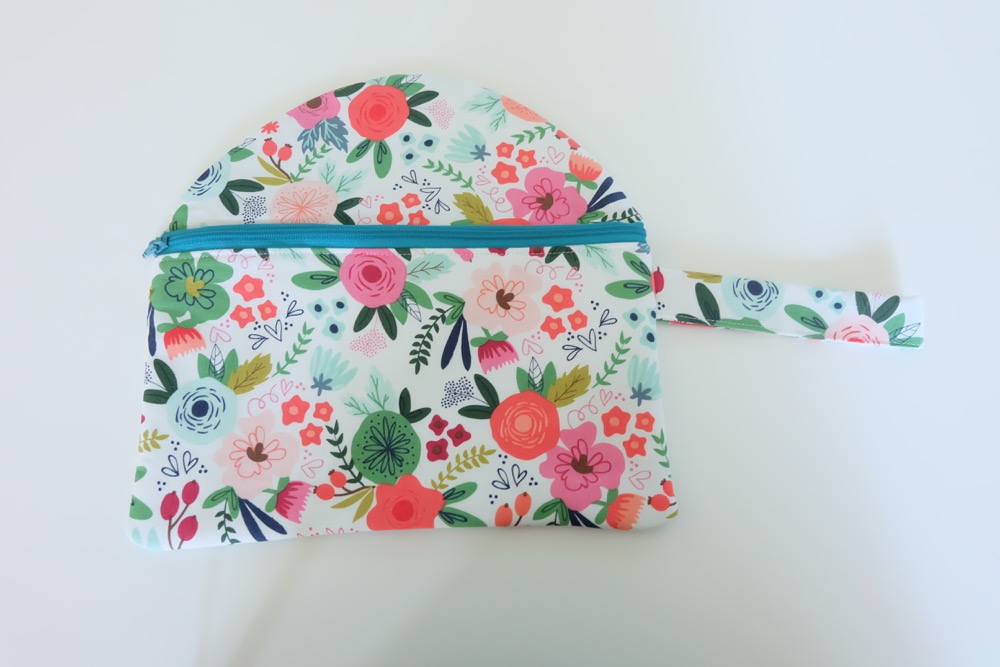
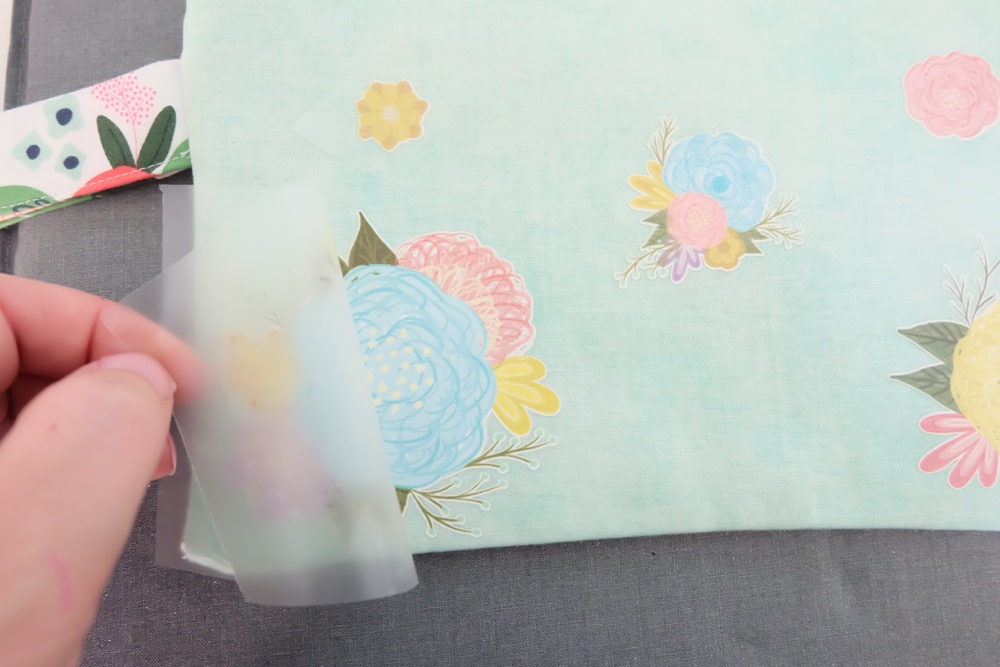
Step 14: Decide where you want your iron-on flowers to go on your wristlet.

Preheat the material, lay the flowers iron-ons down and then press according to the directions on the package.
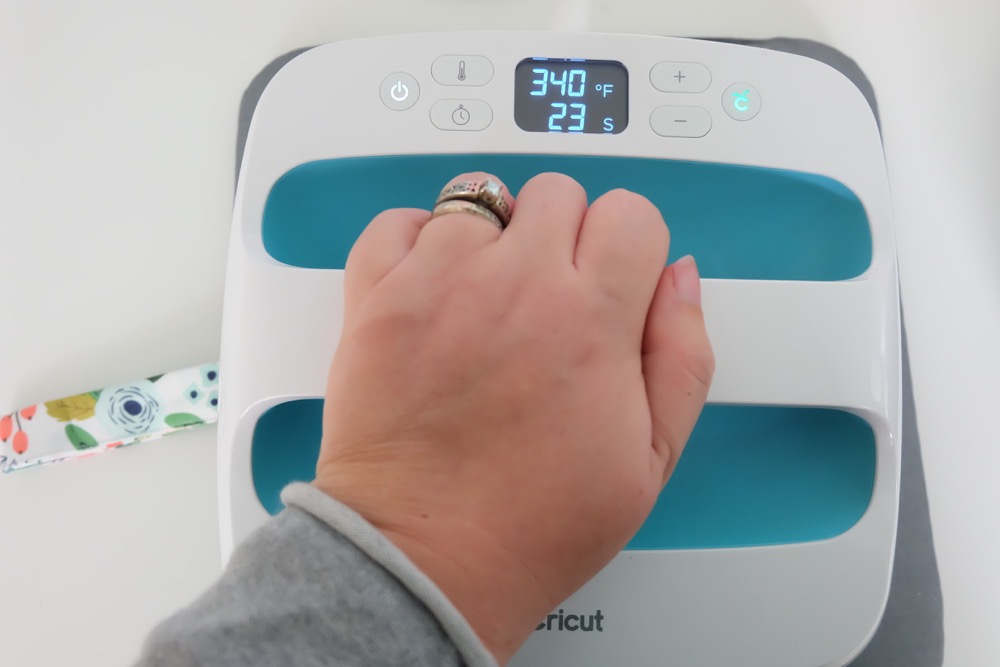
Allow the designs to cool for 2 minutes and then remove the plastic leaving behind your iron-on designs.
Step 15: Add your snaps to your wristlet.

Viola! You are all done! You have a gorgeous DIY Wristlet Clutch Purse that is perfect for spring and summer! Make others in different fabrics for each season and/or make extras for gifts for friends!
[hr gap=”30″]Tell me… Do you have a Cricut Maker? What has been your favorite thing you’ve made with your Cricut? Do you love having a variety of purses and wallets like I do?[hr gap=”30″]
Like this post? We’d love for you to pin it for later!


Great idea. Perfect for traveling, shopping, in fact any occasion.
Very nicely done tutorial!!!!
This is adorable & I love it! I love my Cricut Maker too! I don’t sew but after seeing this cute project I should learn. Thanks for sharing at Merry Monday. Hope to see you at the party next week!
What a cute clutch! I love that floral fabric and those iron-on designs! Thanks for sharing at our Merry Monday party – I’ll be featuring your DIY clutch this week. Hope you’ll stop by and link up again!
What a pretty print!
It’s so adorable. I love the print and I can’t wait to make my own wristlet. Thank you for sharing.
Jennifer Kessler | https://shelovesbest.com/
These are great. Thanks for sharing