


Let It Snow Recycled Pallet Winter Decor with Expressions Vinyl & Cricut Explore
This post and the photos within it may contain Amazon or other affiliate links. If you purchase something through the link, I may receive a small commission at no extra charge to you.

The Hubs has a habit. It’s a habit that some wives might hate, but that I, as a crafter, love. My husband finds the odd things at work and brings them home. Once it was a giant “bubble” that I turned into a DIY Airplant Terrarium, another time it was a giant styrofoam surf board (I still have to figure out how I’m going to DIY that one). The Hubs is constantly on the lookout for pallets for me. I made my DIY Mason Jar Her Garden with one and I used another pallet piece for today’s project.
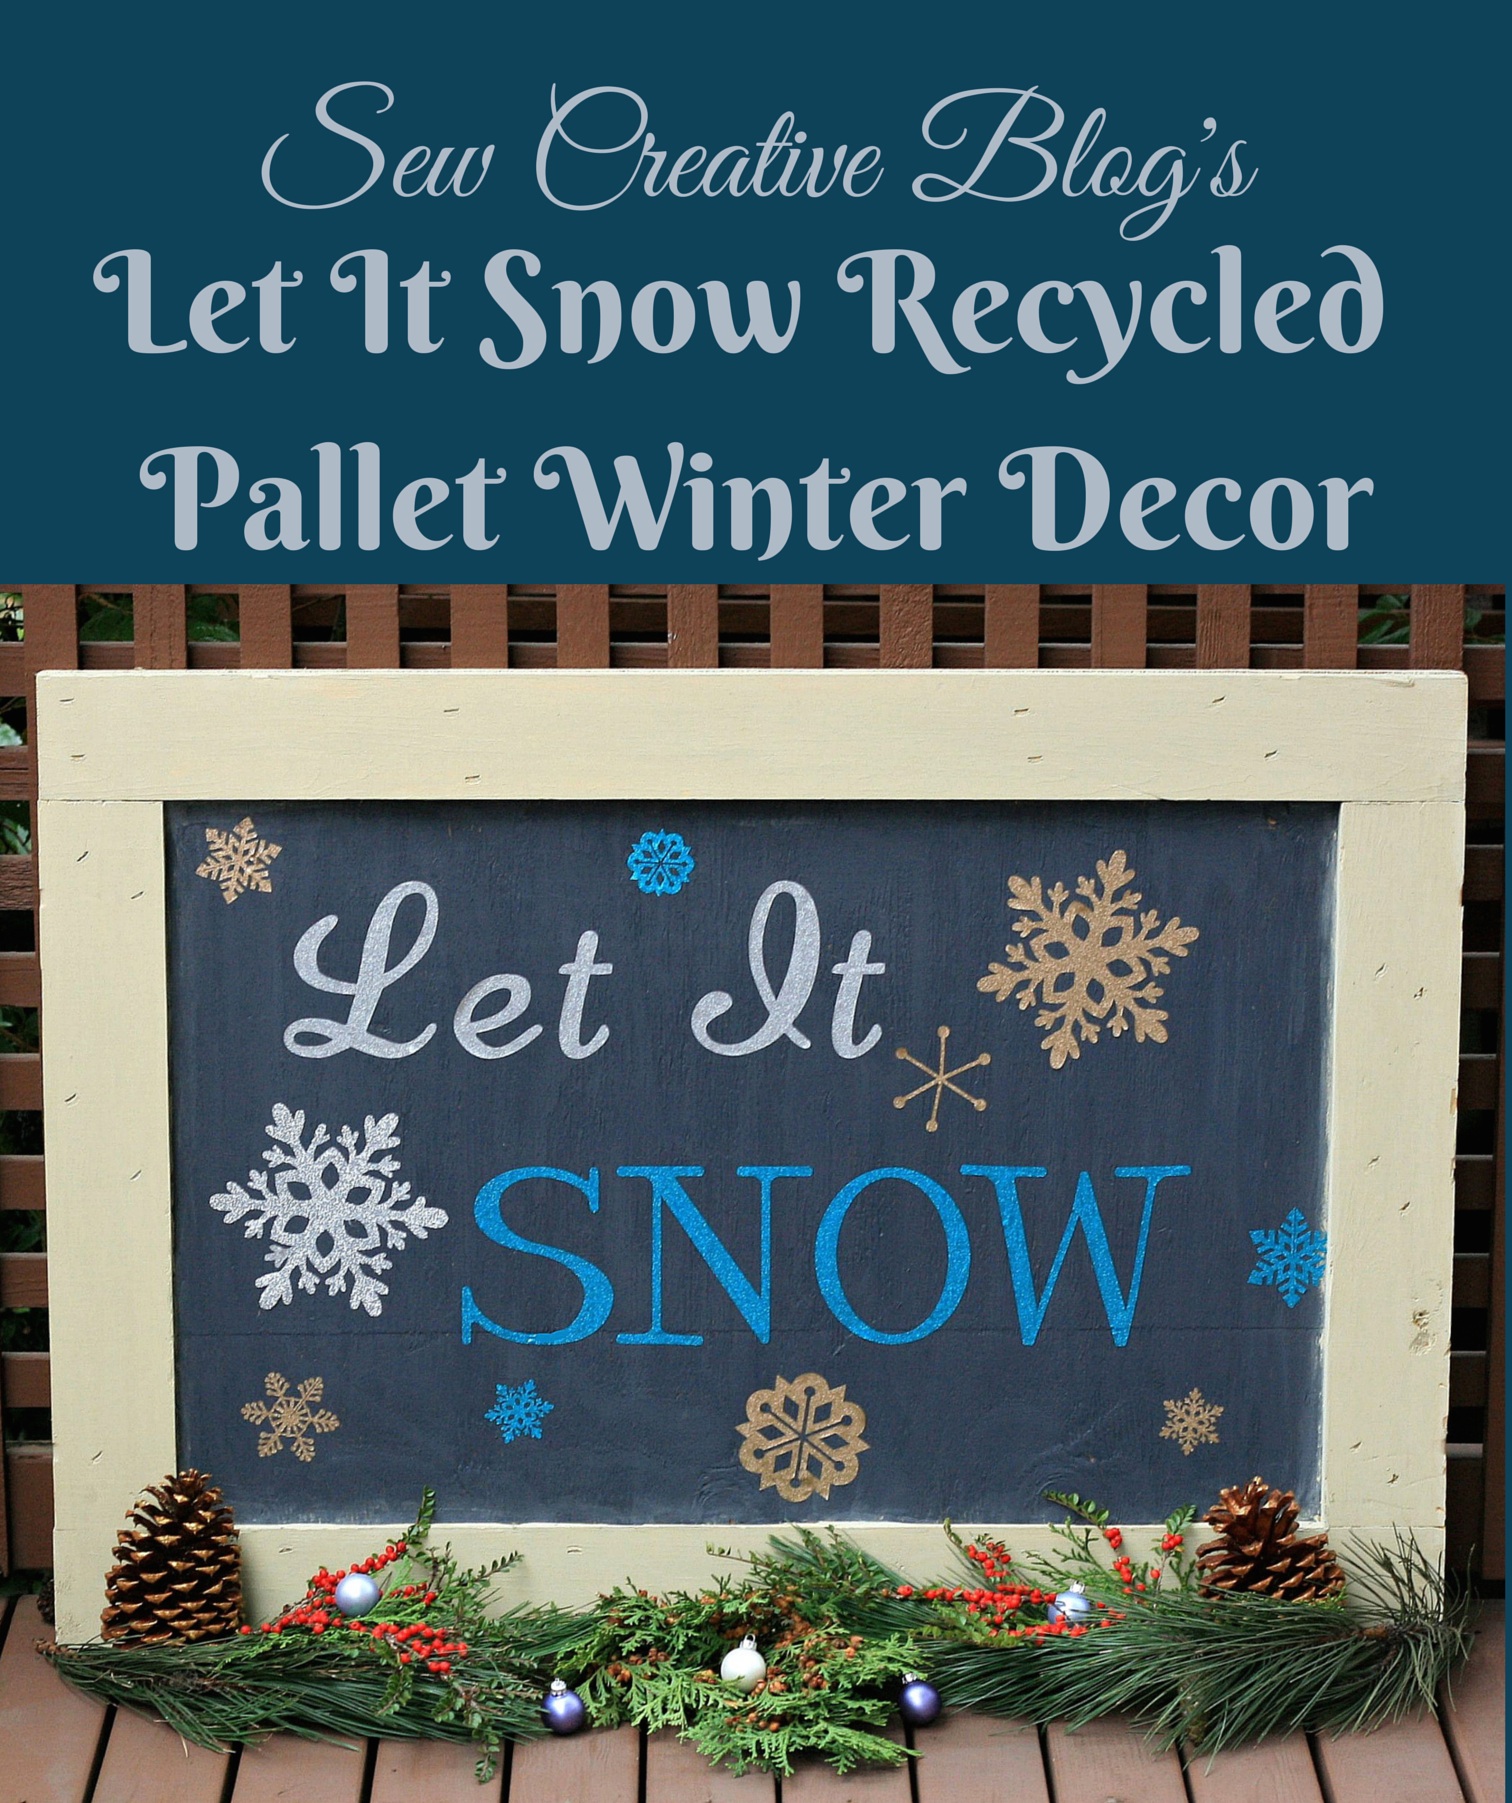
This was the Hubs’ last work dumpster find. He says it is the lid for a pallet shipping container. When I looked at it I immediately saw a picture frame and I knew I had to use it to make some Recycled Pallet Winter Decor! I peeled all of the stickers off of it and painted it with 2 different colors of chalk paint. A beige chalk paint for the “frame” and a chalkboard colored chalk paint for the center. After it dried I put on a layer of sealant and let dry again.
Finally my pallet was a blank canvas to set to work on. This month’s my team’s Cricut Design Space Star Challenge theme was Holiday Sparkle. My friend’s at Expression’s Vinyl sent me a selection of beautiful glitter vinyl and glitter heat transfer vinyl to play with. I figured that nothing says Holiday Sparkle like snow, so I set to work creating a Let It Snow sign for our front entrance.

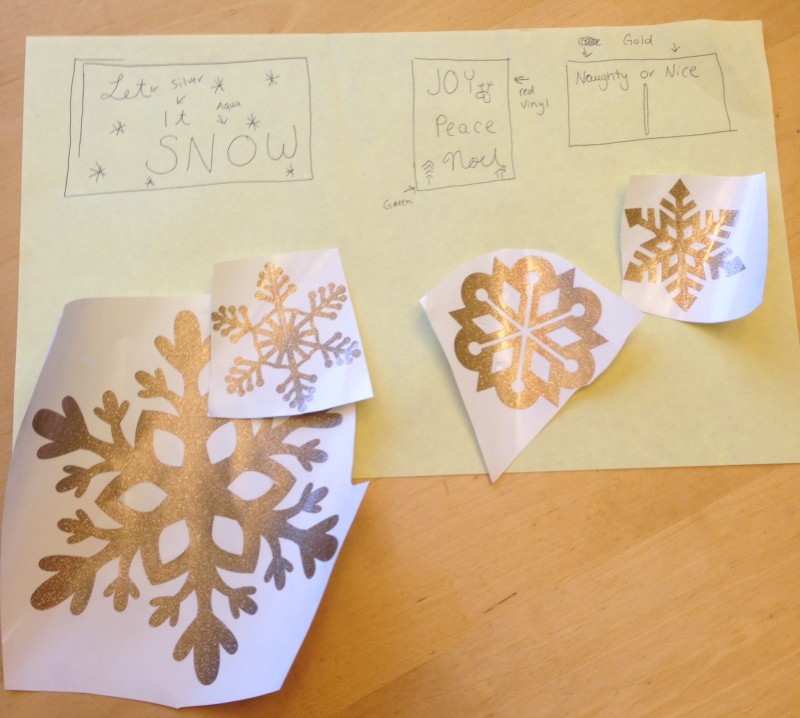
Cricut has a large selection of beautiful snowflakes in the Design Space library. I cut them out on my Cricut Explore in a variety of sizes in Expressions Vinyl Ultra Mint, Ultra Gold and Ultra Silver. For the fonts, I decided on Quarter Nate for Let It and Soiree Lettering Eleanor Engraved for the word Snow.
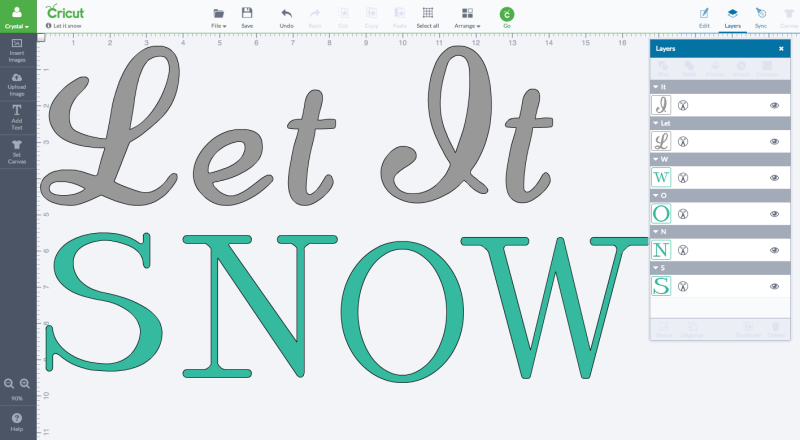
I cut “Let It” in Expressions Vinyl Ultra Silver and the “SNOW” in Ultra Mint. I used the Expressions Vinyl Transfer Tape to transfer the vinyl to the pallet.
After a ton of weeding (boy those snowflakes have lots of little holes you have to clear away before transferring) my project came to life. I love how it turned out. Pallets give craft projects a beautiful rustic look that I adore.
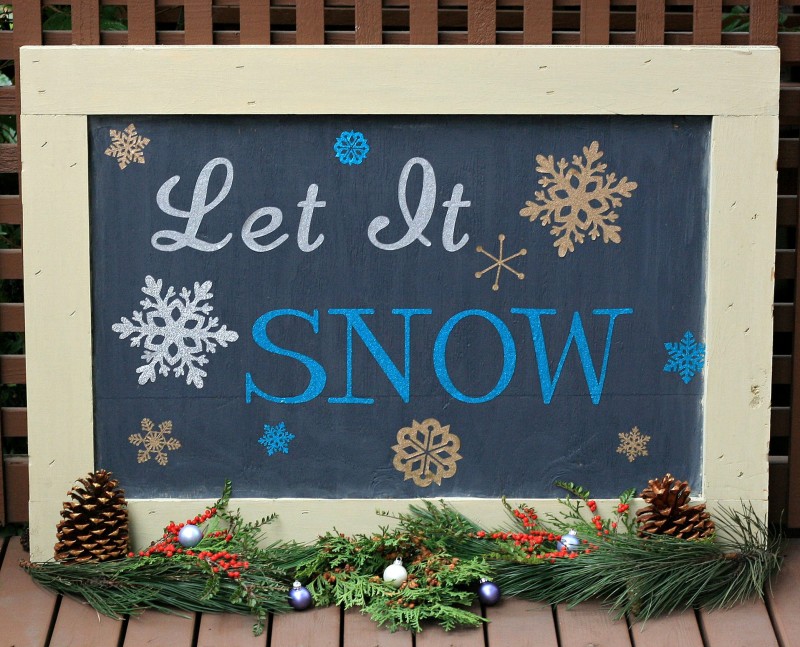 This sign is HUGE the lid was 41 inches in width, so finding a place with good light to photograph it wasn’t easy. After I snapped these photos it took up its new place of residence above my tea cabinet in my dining room.
Living in Vancouver, we don’t get a ton of snow. The other day Bean asked me “What happens if we don’t have snow this year mama? Does that mean there isn’t any Christmas?” I gently reminded her that I don’t think we’ve ever had snow on Christmas day since she was born, but that Christmas still happens every year anyways. I’m in the minority of Vancouverites that love snow. Between us, I’m secretly hoping for a white Christmas, and if we get it, I’ll give all the credit to my lovely winter sign.
The back of this sign is a blank canvas so once winter is over I may repurpose the back of the sign with a summer message!

I had never used Expressions Vinyl before but I’m so happy to have discovered it. It’s great vinyl, the customer service is excellent and the Glitter Vinyl has a great sparkle to it.
Thank you to my friends at Expressions Vinyl for sending me vinyl to use for this project and to Cricut for sending me my Cricut Explore!
This past month Cricut released a new update for the Cricut Explore! The Cricut Explore Print and Cut function. It is AMAZING. With the new update you can print any image, pattern or design that you would like with your home printer and then cut it with your Cricut Explore. It opens up a whole new world of craft options! Check out a video with more info here:
https://www.youtube.com/watch?v=8RBM1TUNzuY
The fabulous members of my team- Lucky #13, each created their own Holiday Sparkle projects. Please take a peek at what they all came up with:


This is just lovely! I really, really like this project and how it came out. I am going to check out the vinyl company too – it looks quality.
Also – 13 is my favorite, and lucky, number 😉
Great post.
you guys are so creative how wonderfully you carried all this.. good luck to you!