


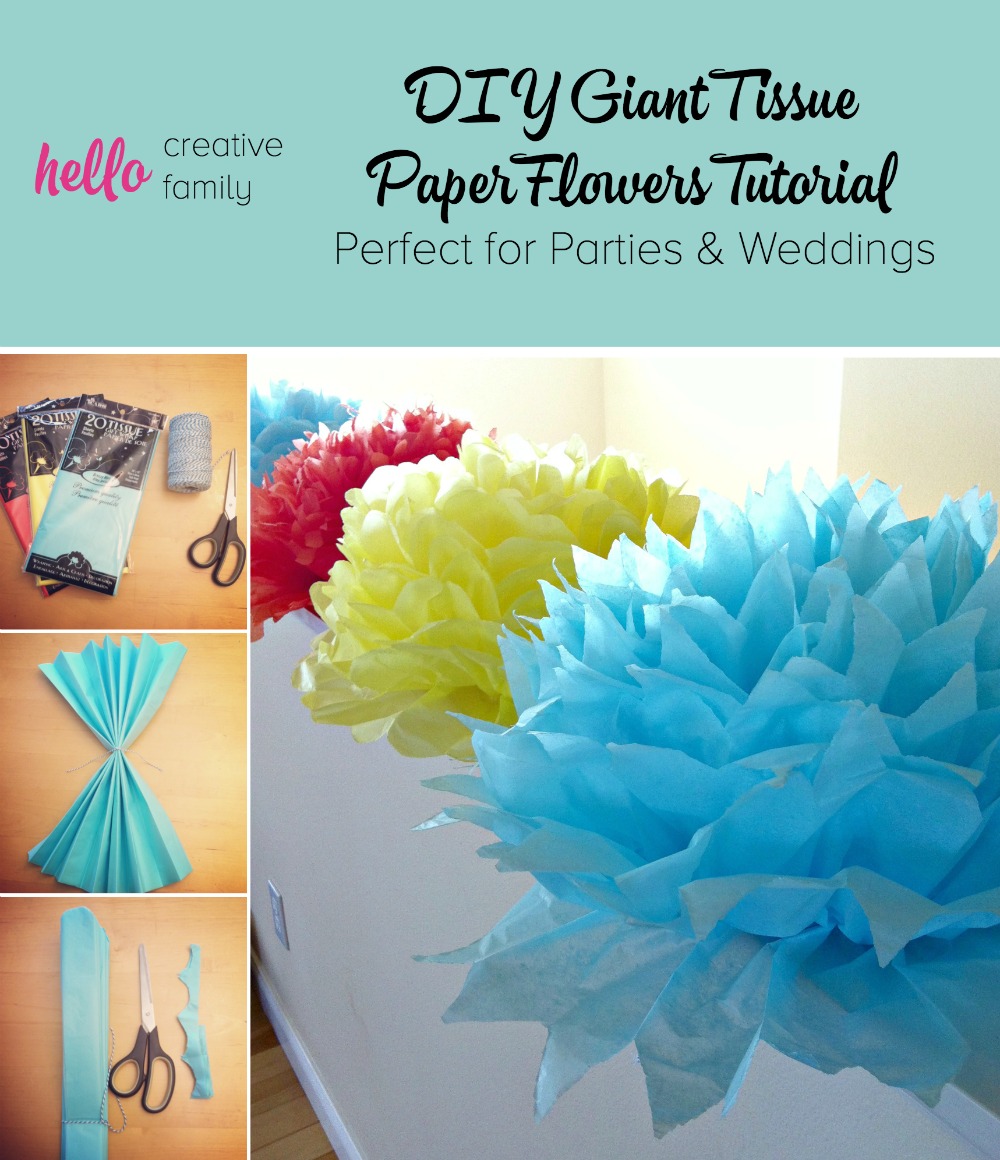
DIY Giant Tissue Paper Flowers Tutorial
This post and the photos within it may contain Amazon or other affiliate links. If you purchase something through the link, I may receive a small commission at no extra charge to you.
These DIY giant tissue paper flowers are a fun and inexpensive way to decorate all sorts of parties, from birthdays to Christmas parties, Superbowl parties, or weddings. They take less than 10 minutes to make two so read on to learn how!
Hi Crafty Friends!
Tissue paper flowers are so easy and inexpensive to make and add a huge impact to a room. Today I thought I would share my tutorial for DIY Giant Tissue Paper Flowers. You can make 2 of them in 5-10 minutes and they cost 50 cents each! Can’t beat that.
This is the perfect craft for people who say “Oh I’d love to make that… but I’m not crafty.” Trust me. You are crafty enough to make these.
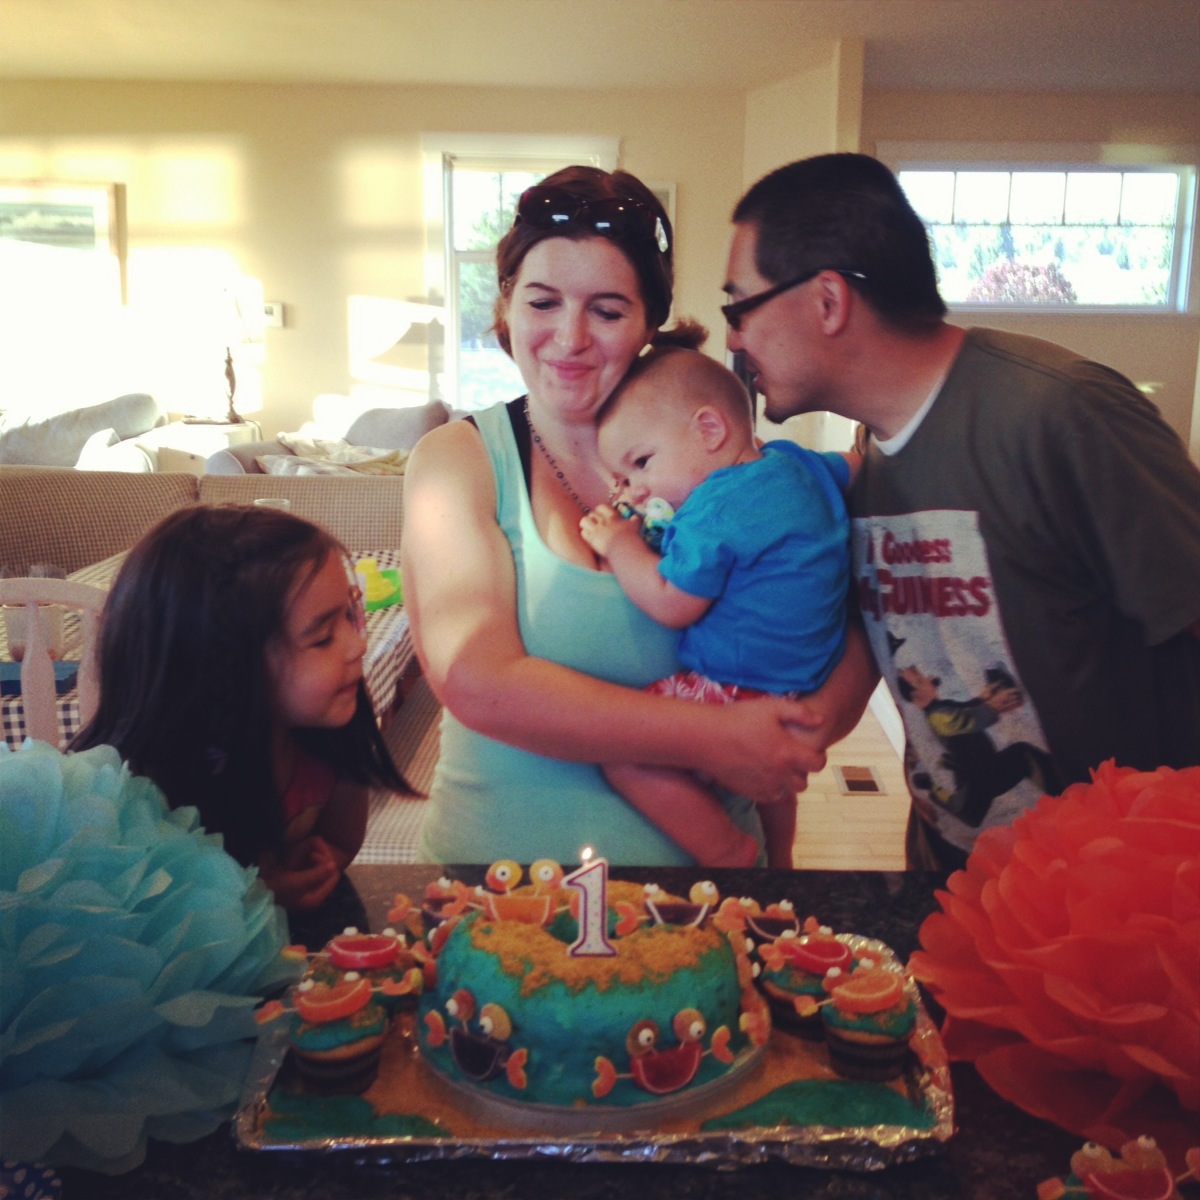
I shared pictures yesterday in Turtle’s 1st Birthday Party post so today I thought I would share how to make them.
Giant Tissue Paper Flowers Tutorial
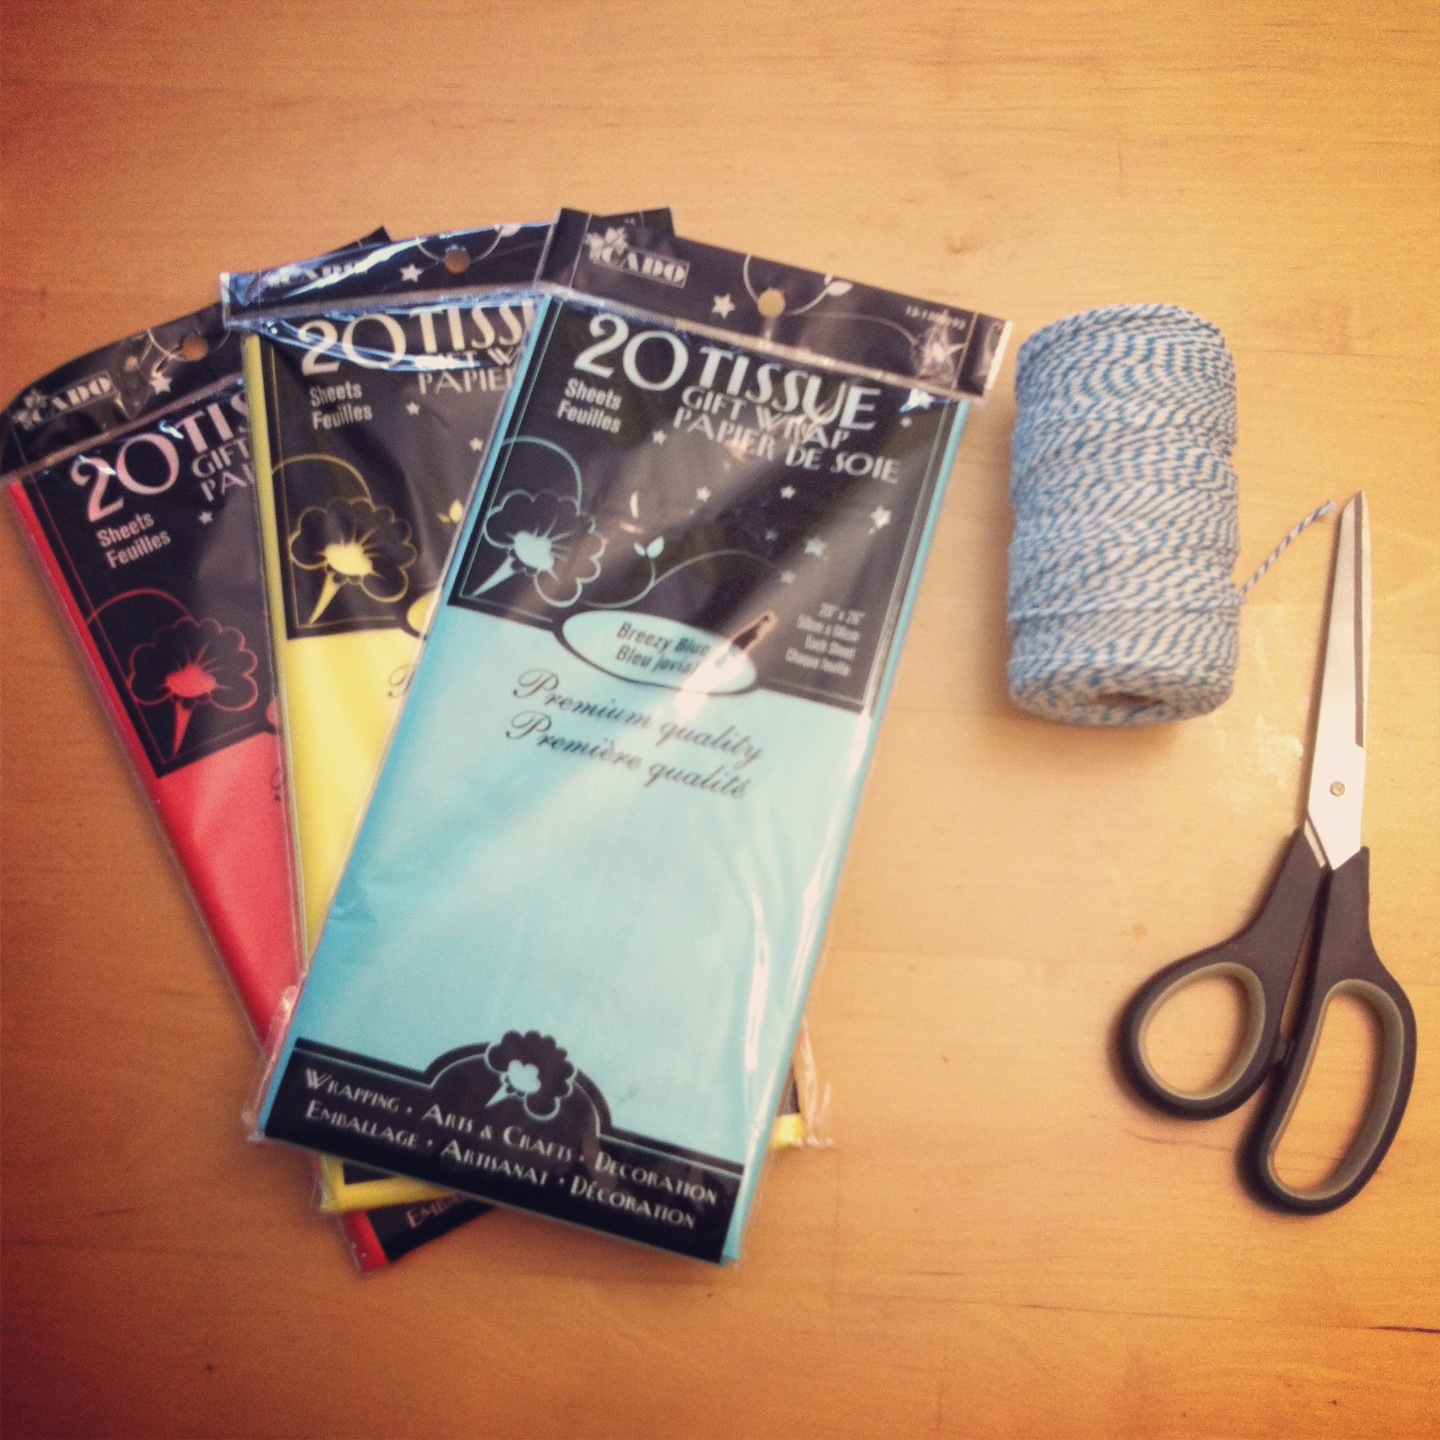
Supplies
- Tissue paper in your favorite colors. You will need 10 sheets of paper per flower.
- Scissors
- String or yarn
Instructions
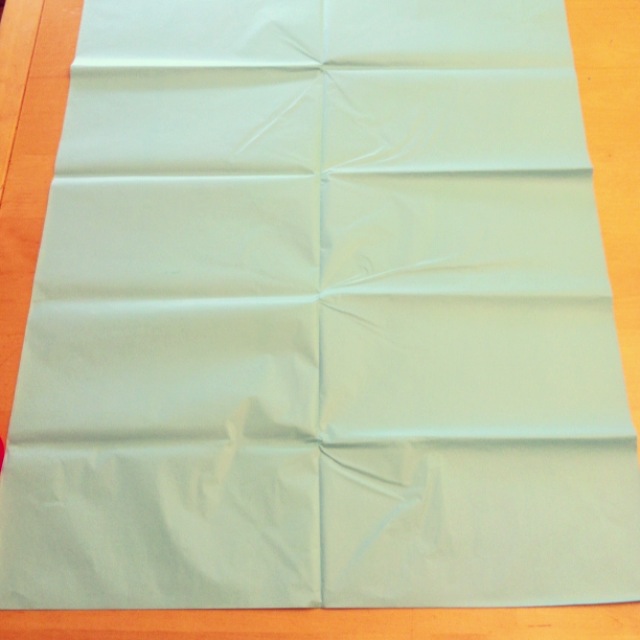
Step 1: Take 10 sheets of tissue paper and lay them stacked on top of each other on a flat surface. The shorter side of the paper should face you.
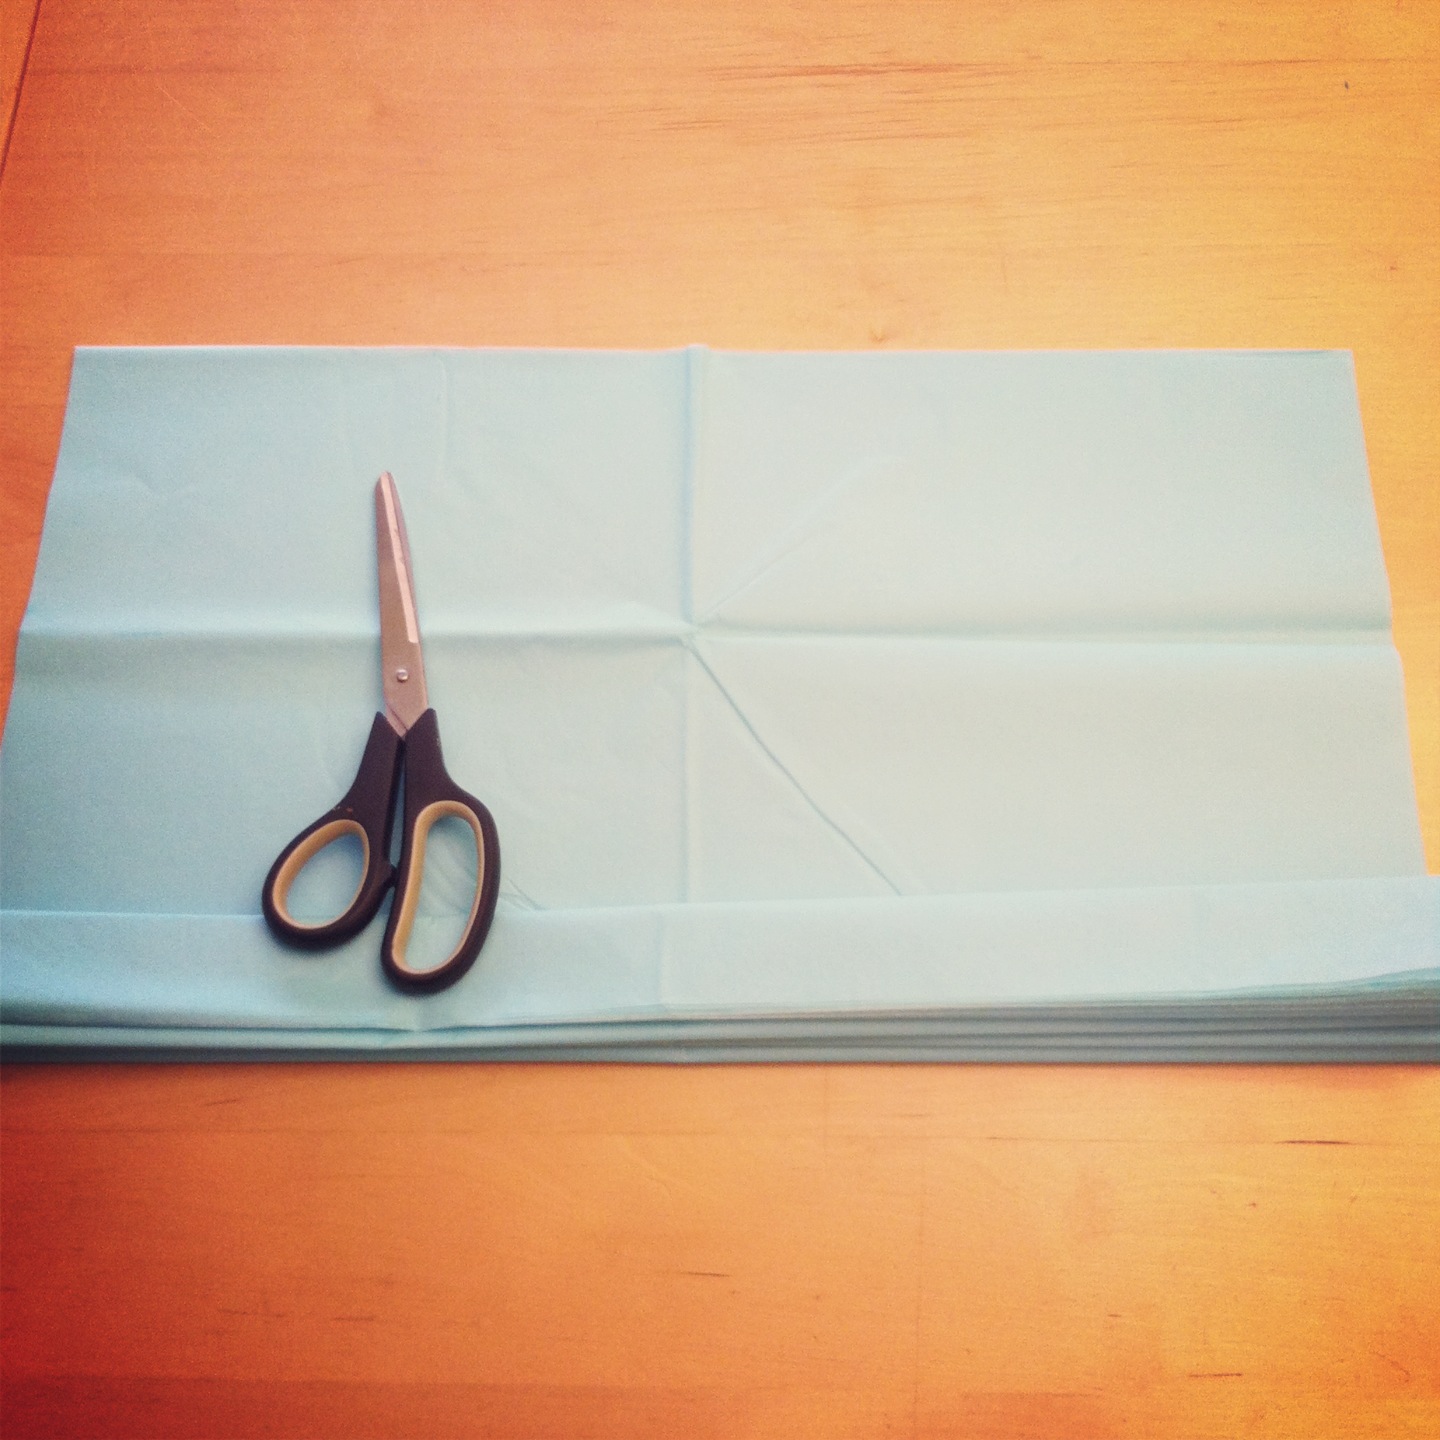
Step 2: Accordion fold your tissue paper making each fold approximately 1 inch wide. Fold all the way to the end of the tissue paper. (The above picture is the halfway point… keep folding until you reach the end of the paper.)

Step 3: Tie the string around your tissue paper at the halfway point of the paper. Double knot your string.
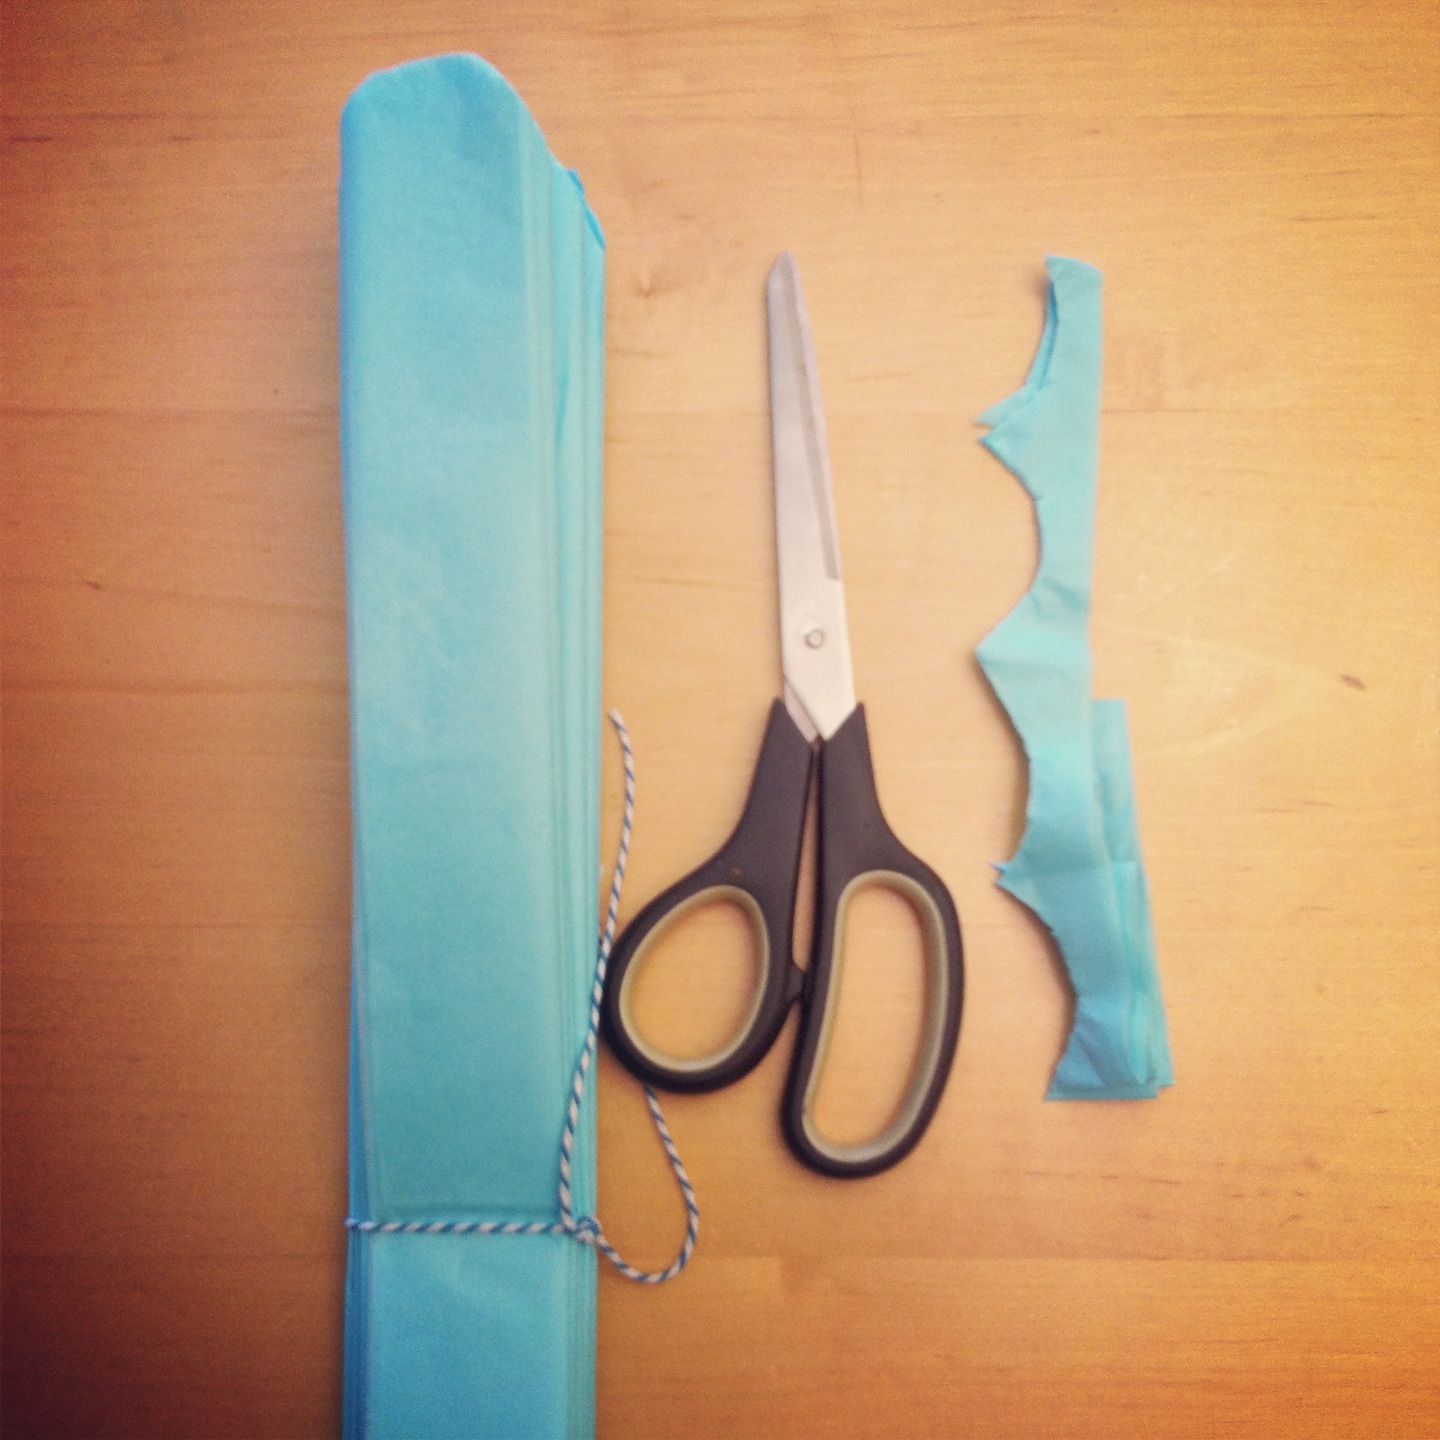
Step 4: Cut your petal shape out of each end of the tissue paper. Different shapes will result in different shaped petals: a rounded cut looks like a peony or rose, a rounded cut with slits looks like a chrysanthemum, a triangle looks like a dahlia.
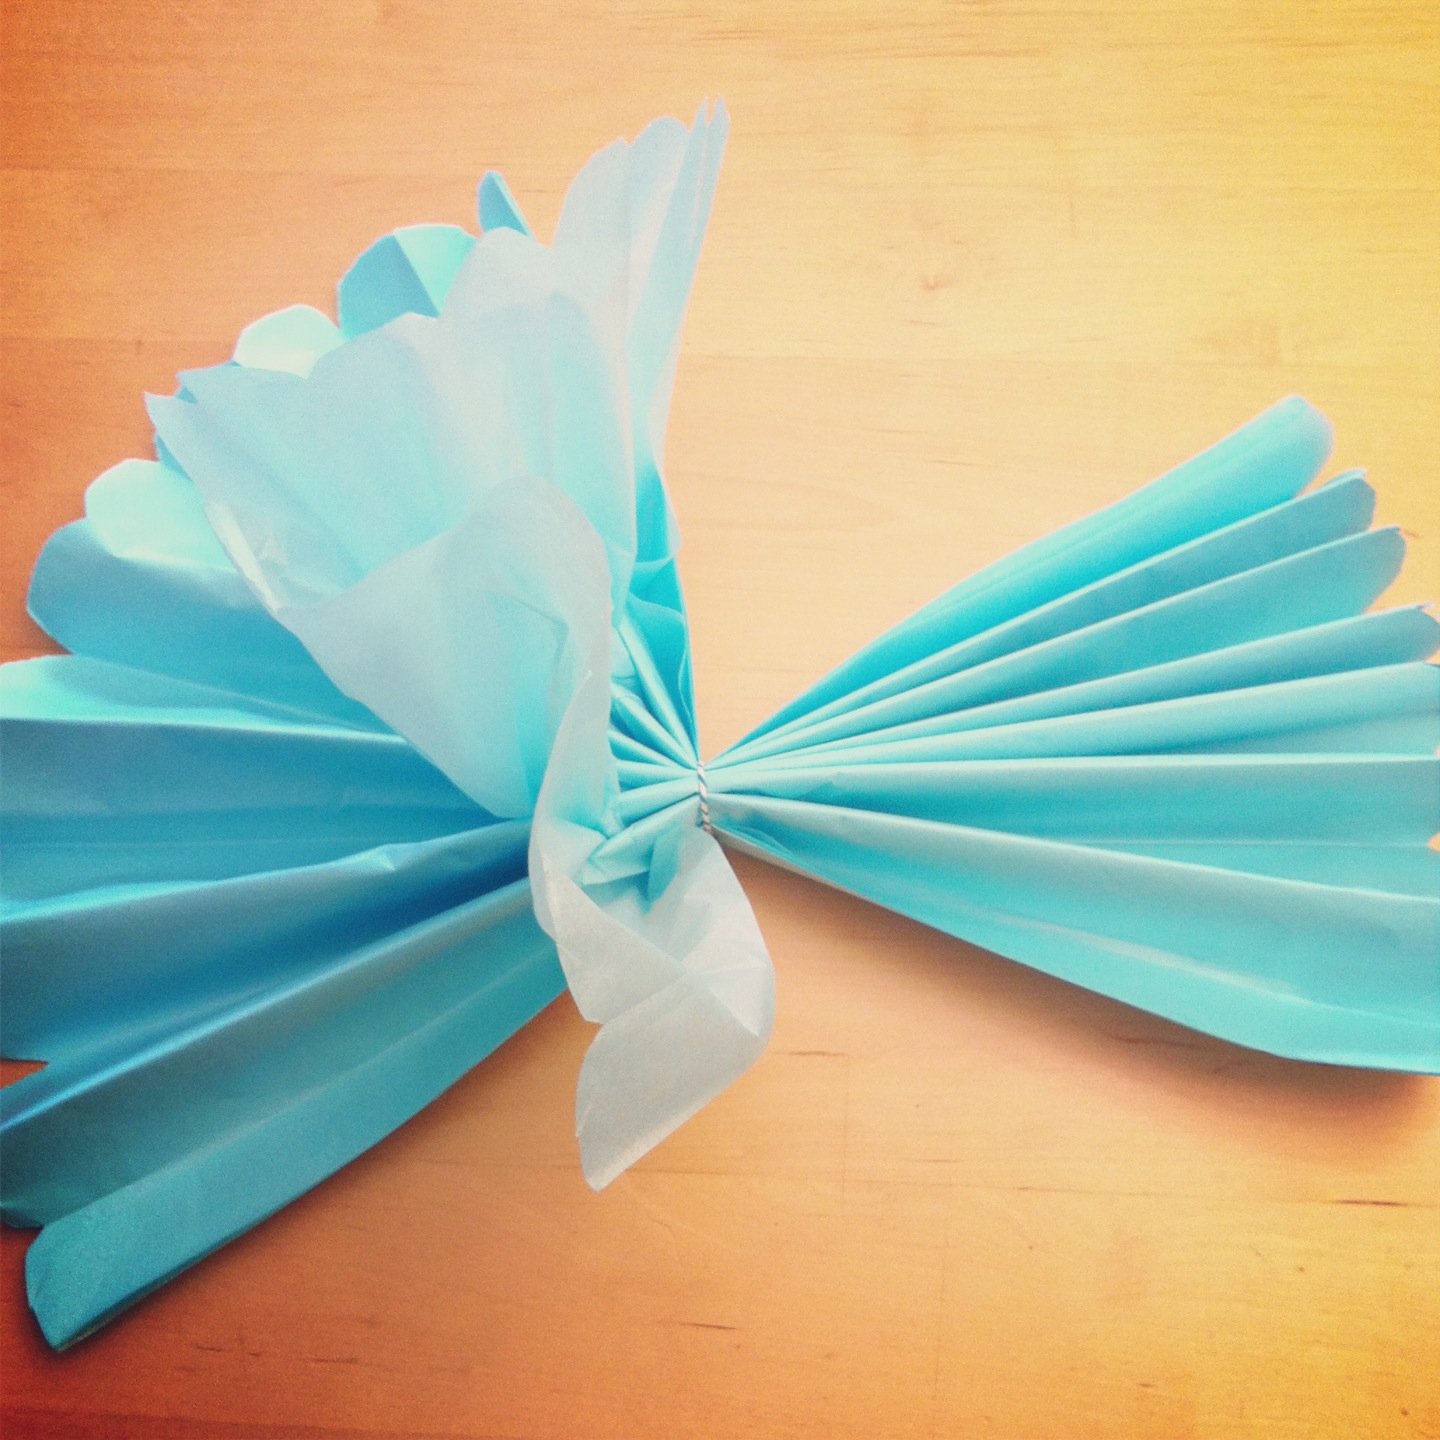
Step 5: Working on one sheet at a time, start gently separating and fluffing the tissue paper. Work gingerly so as not to tear the tissue paper.
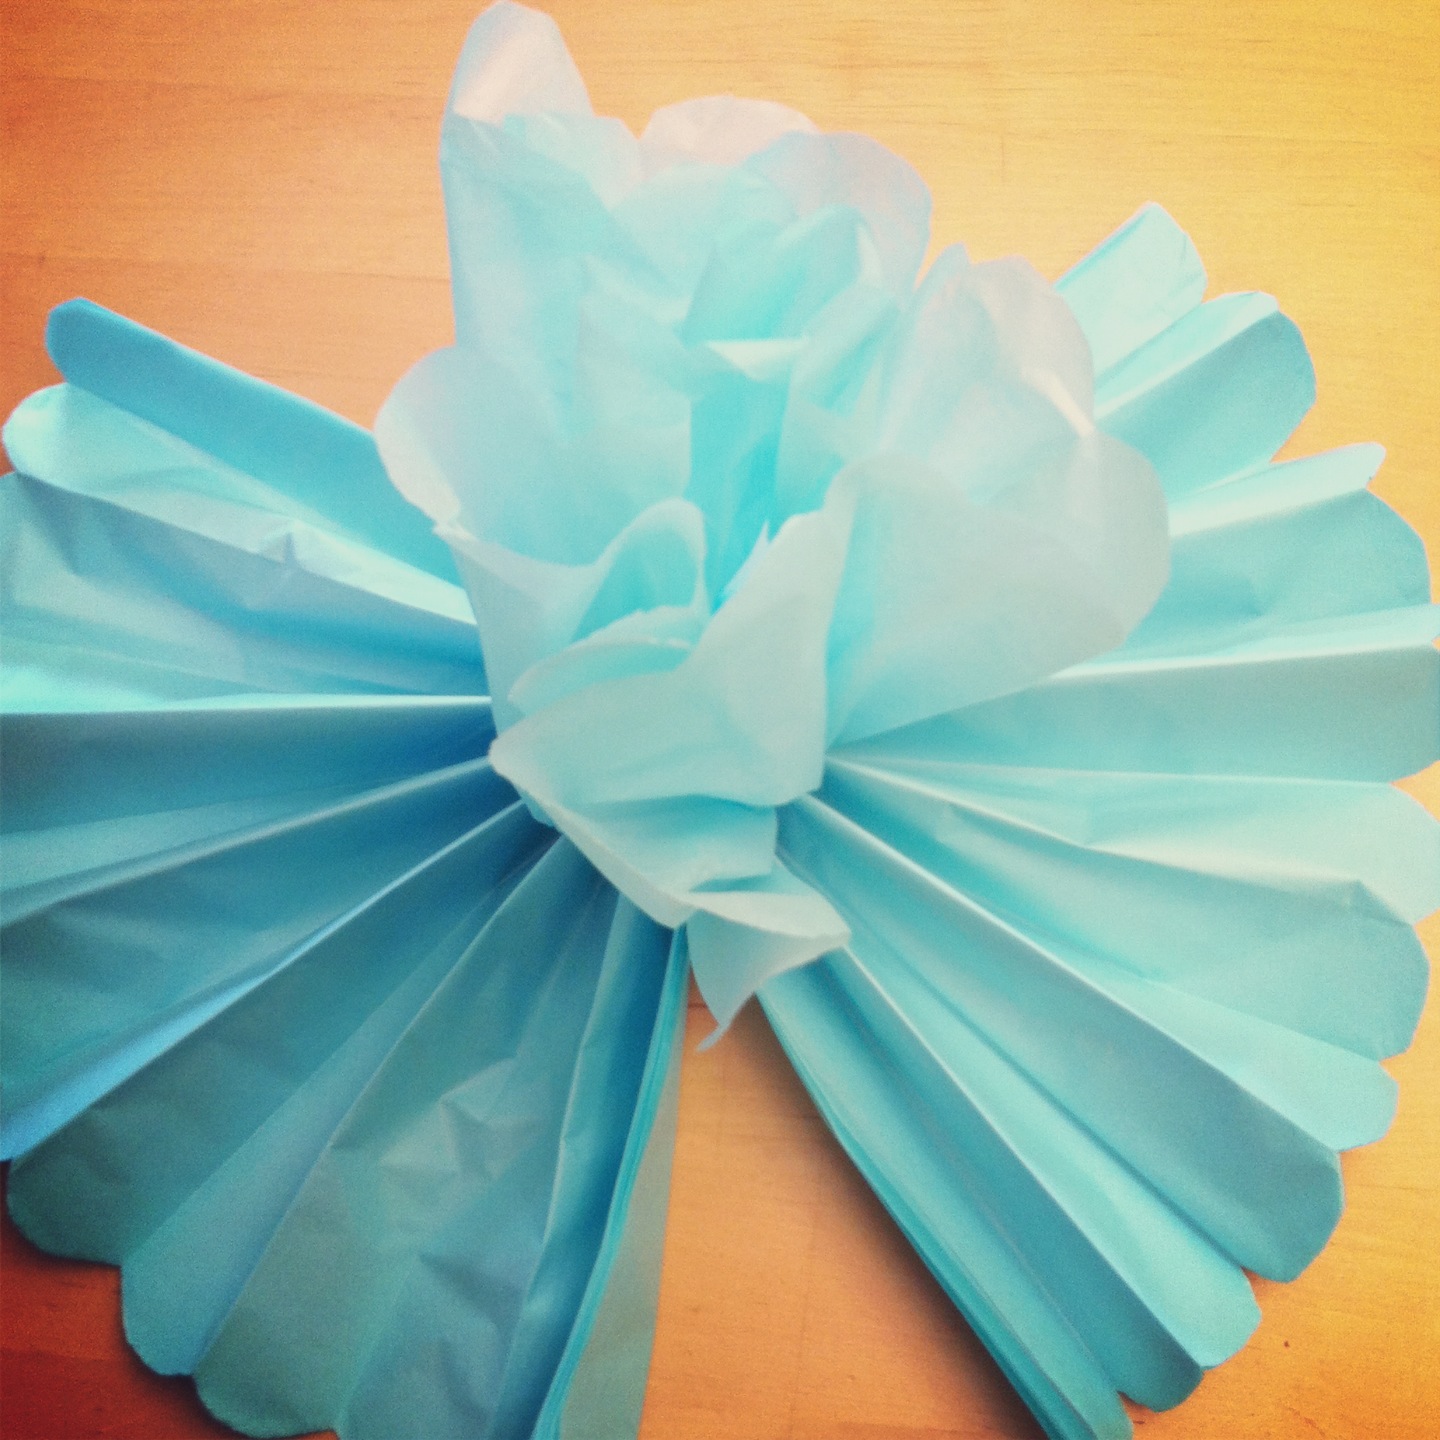
At first, it won’t look like much, but continue to separating sheets working back and forth from one side to the next.
Soon a flower will start to emerge!
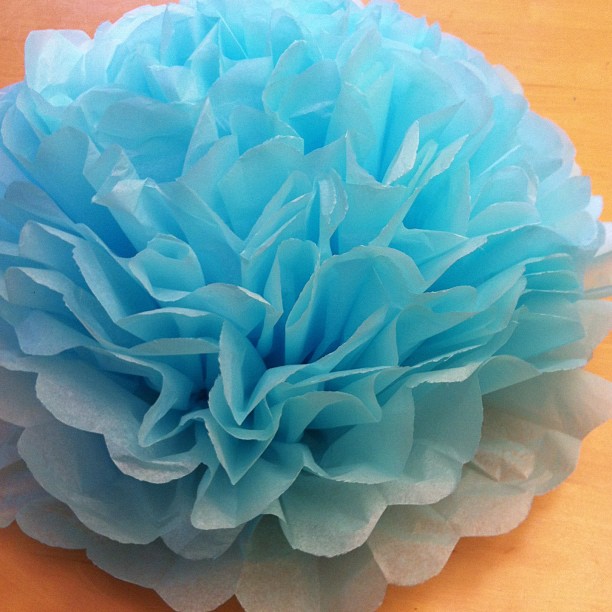
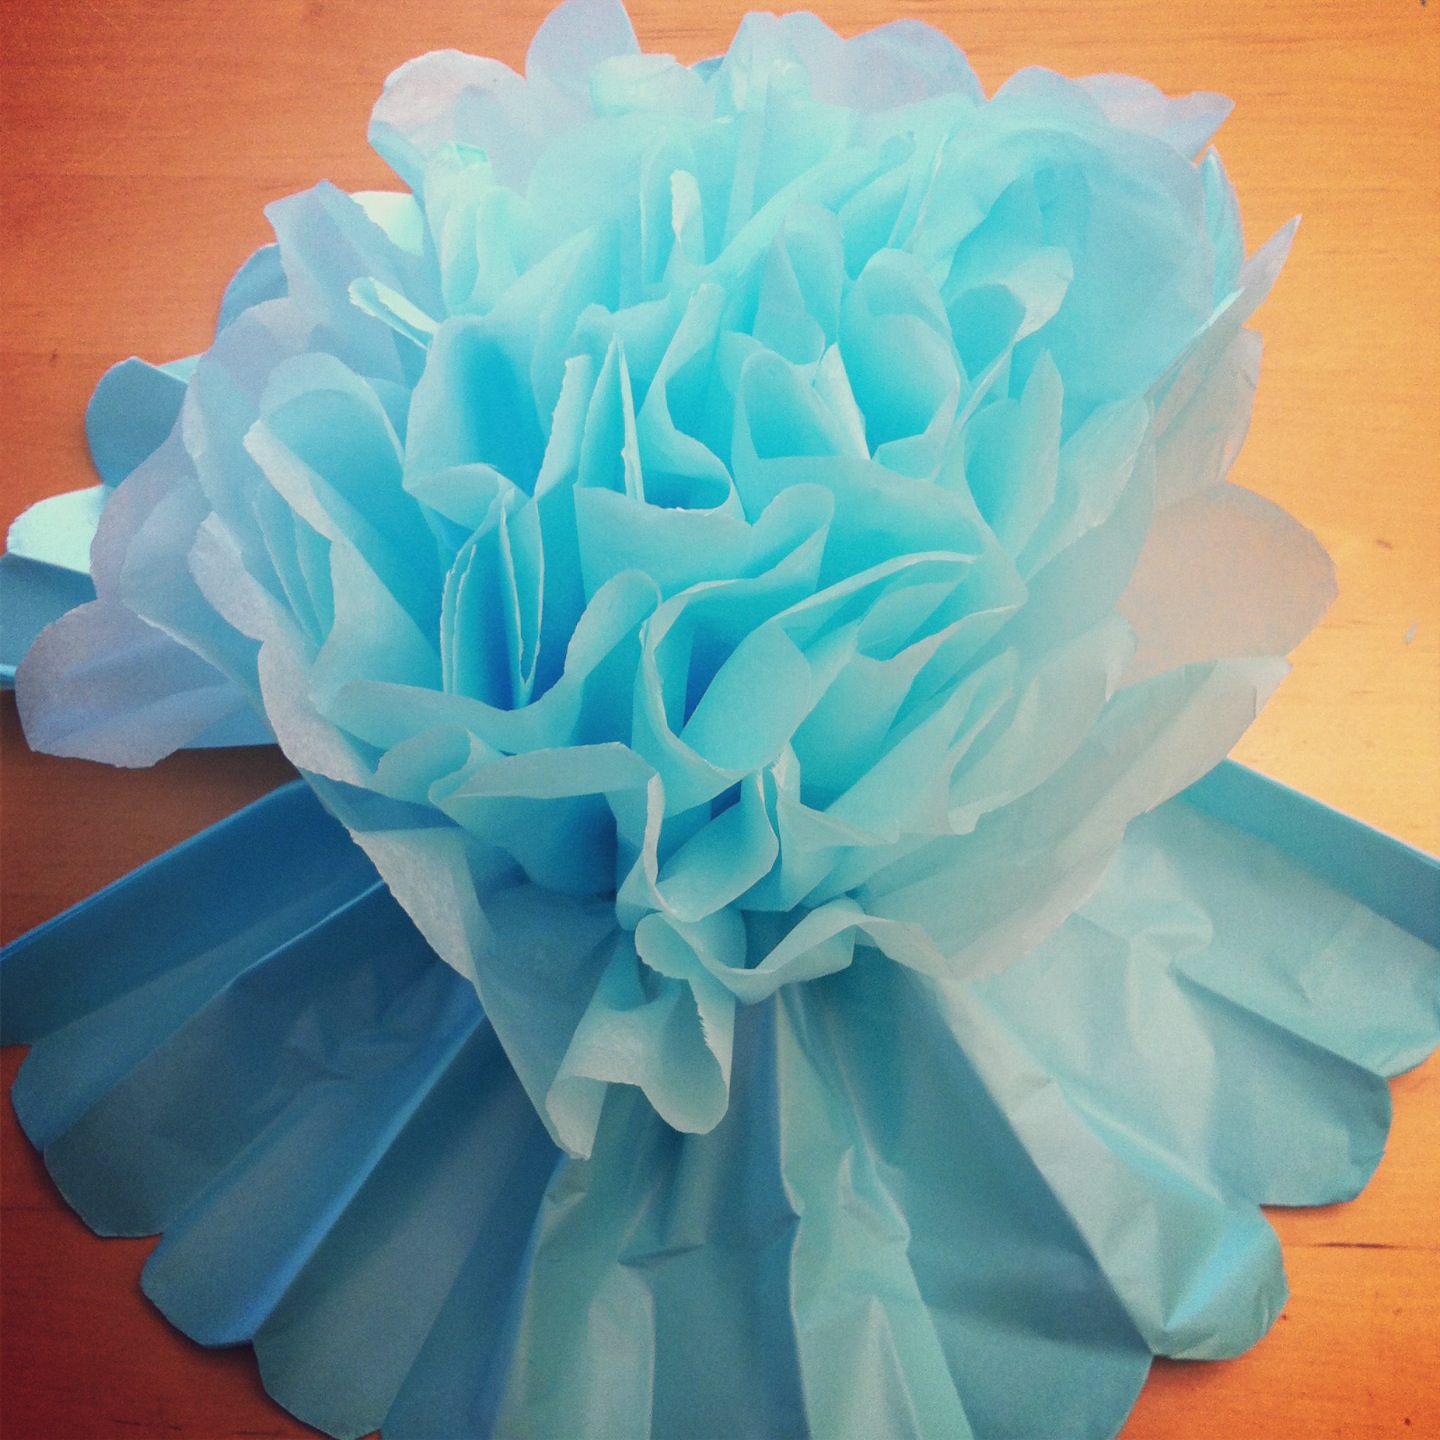
Voila! Your finished flower! Wasn’t that easy?
Experiment and Decorate with Your Completed Tissue Paper Flower!
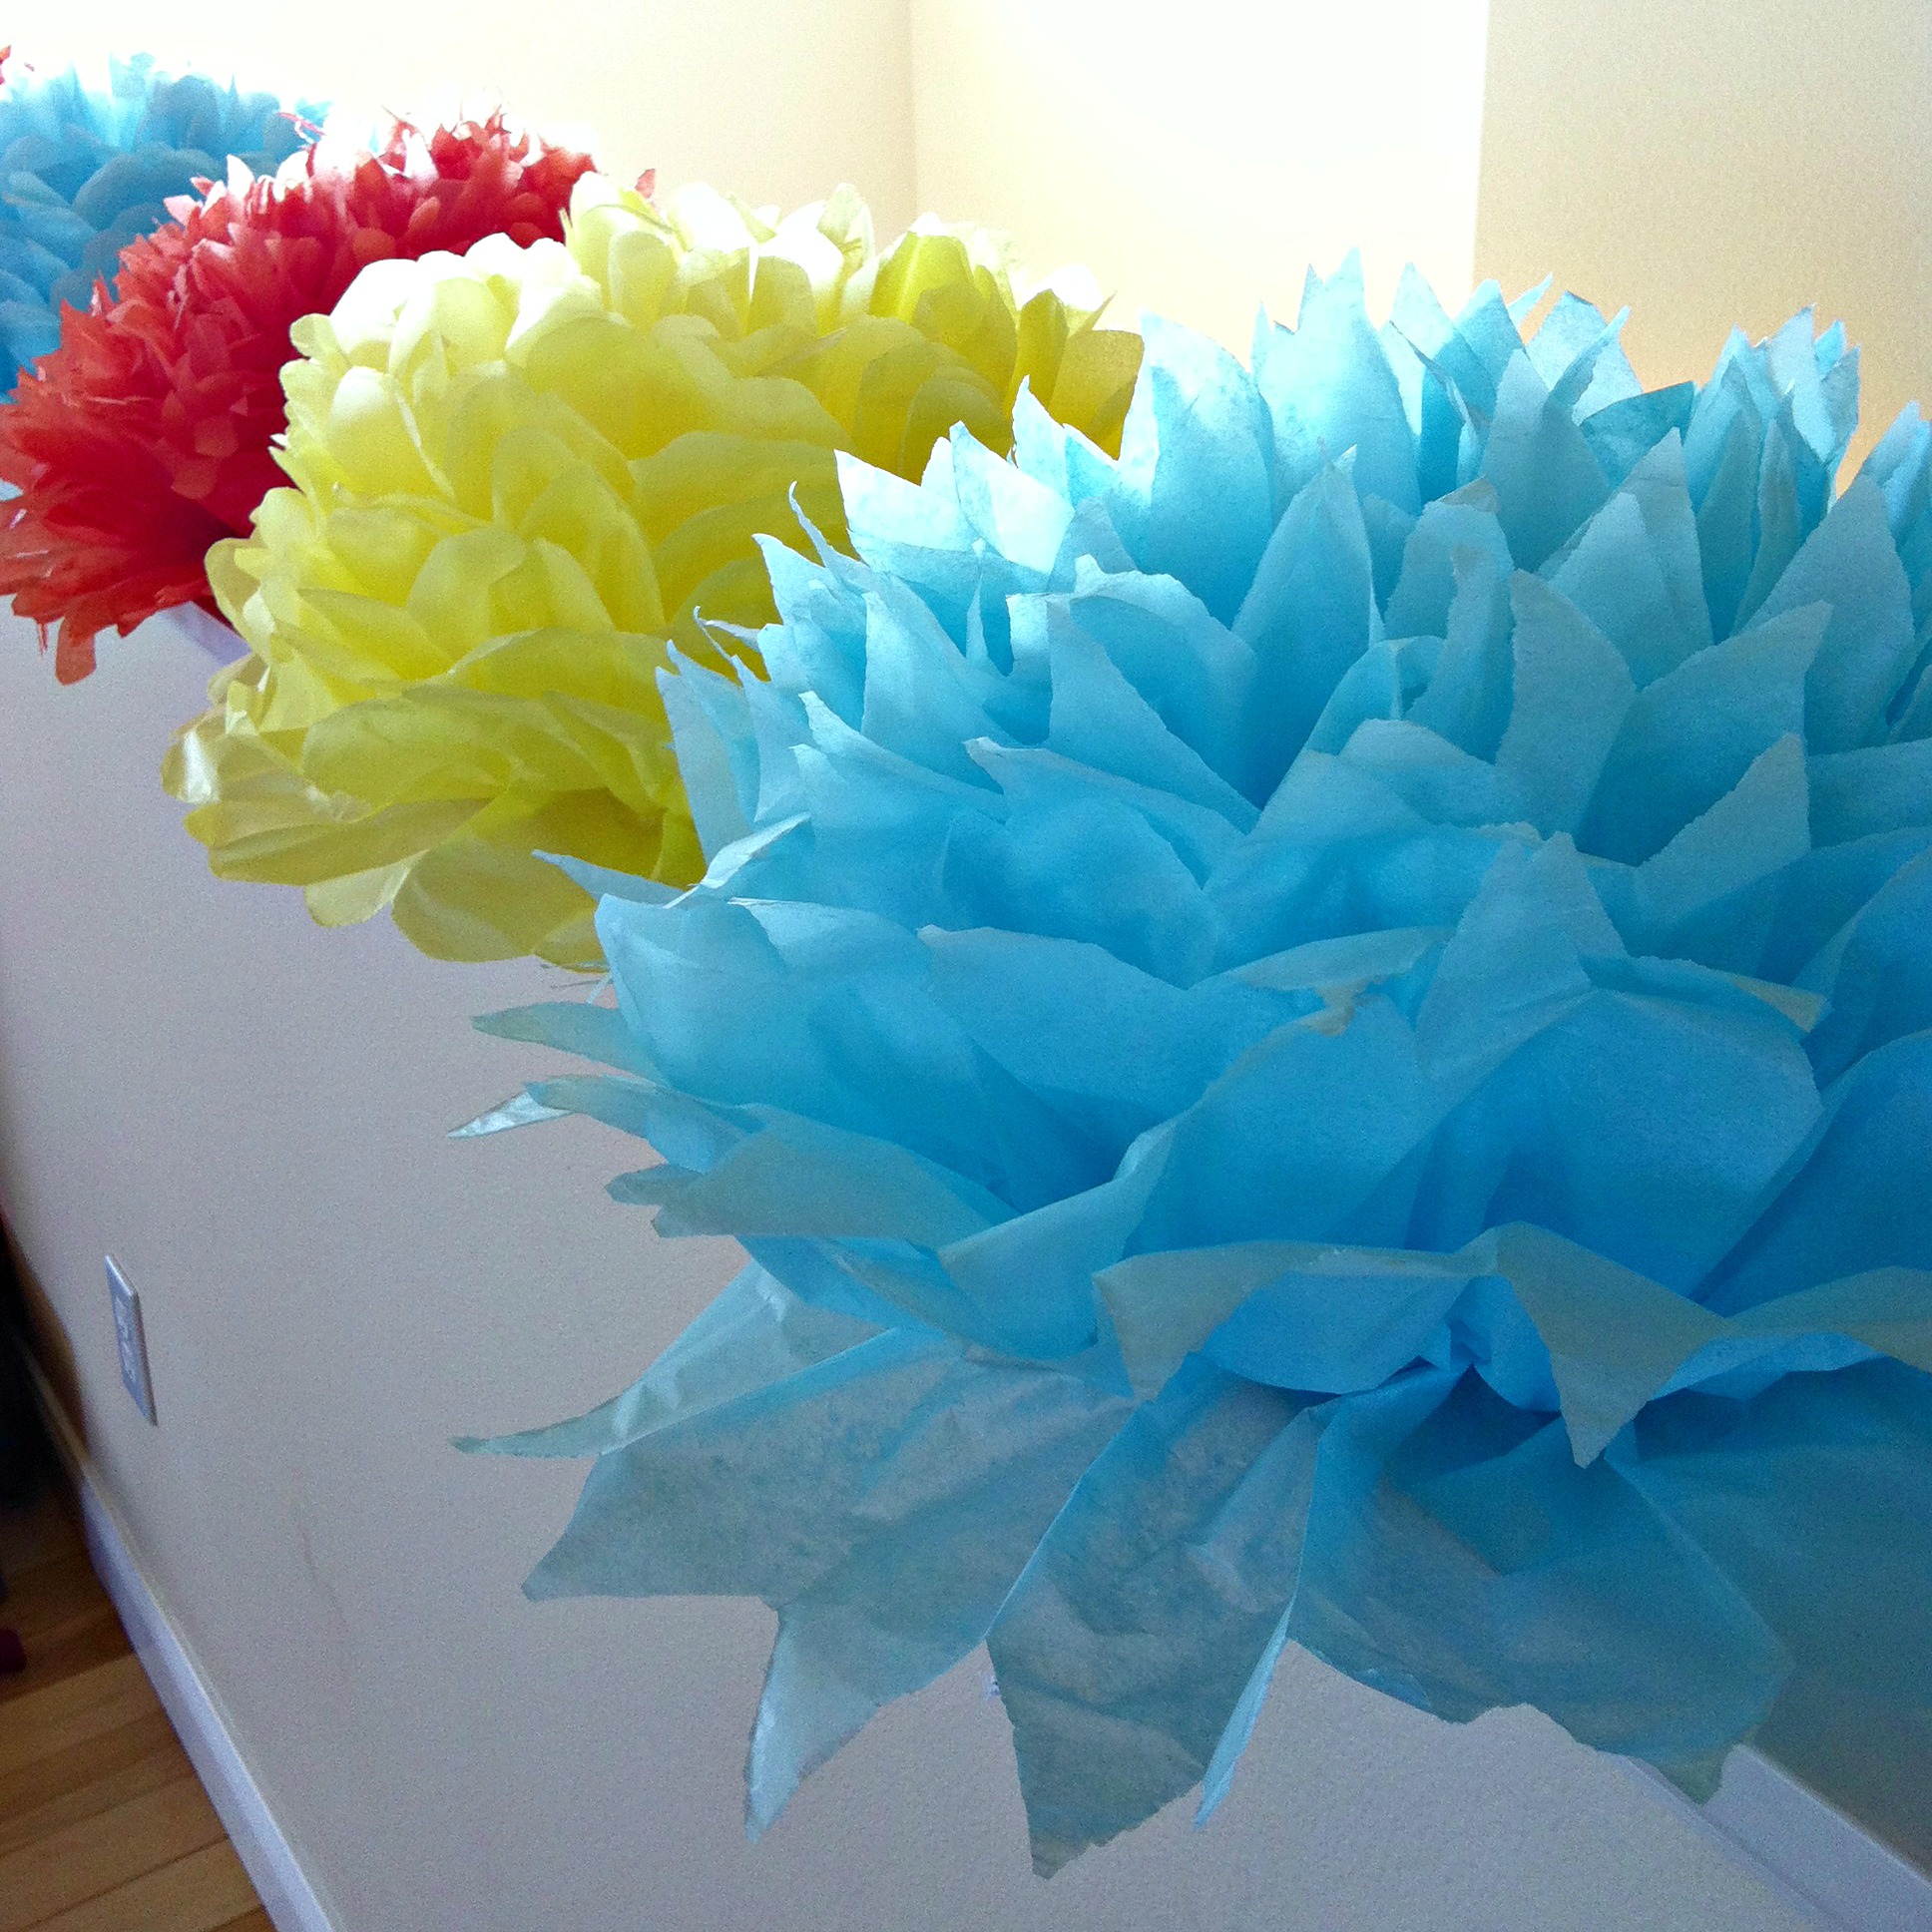
Now decorate with them. Make your string extra long So you can hang them around the room, use them as a centerpieces on tables, use double sided tape to stick to walls or chairs, or line them up along a pony-wall and around the birthday cake like we did at Turtle’s Birthday party. The ideas are limitless!
Experiment with different end cuts and colors and different sizes and lengths of paper. Try alternating different color sheets for a rainbow effect!
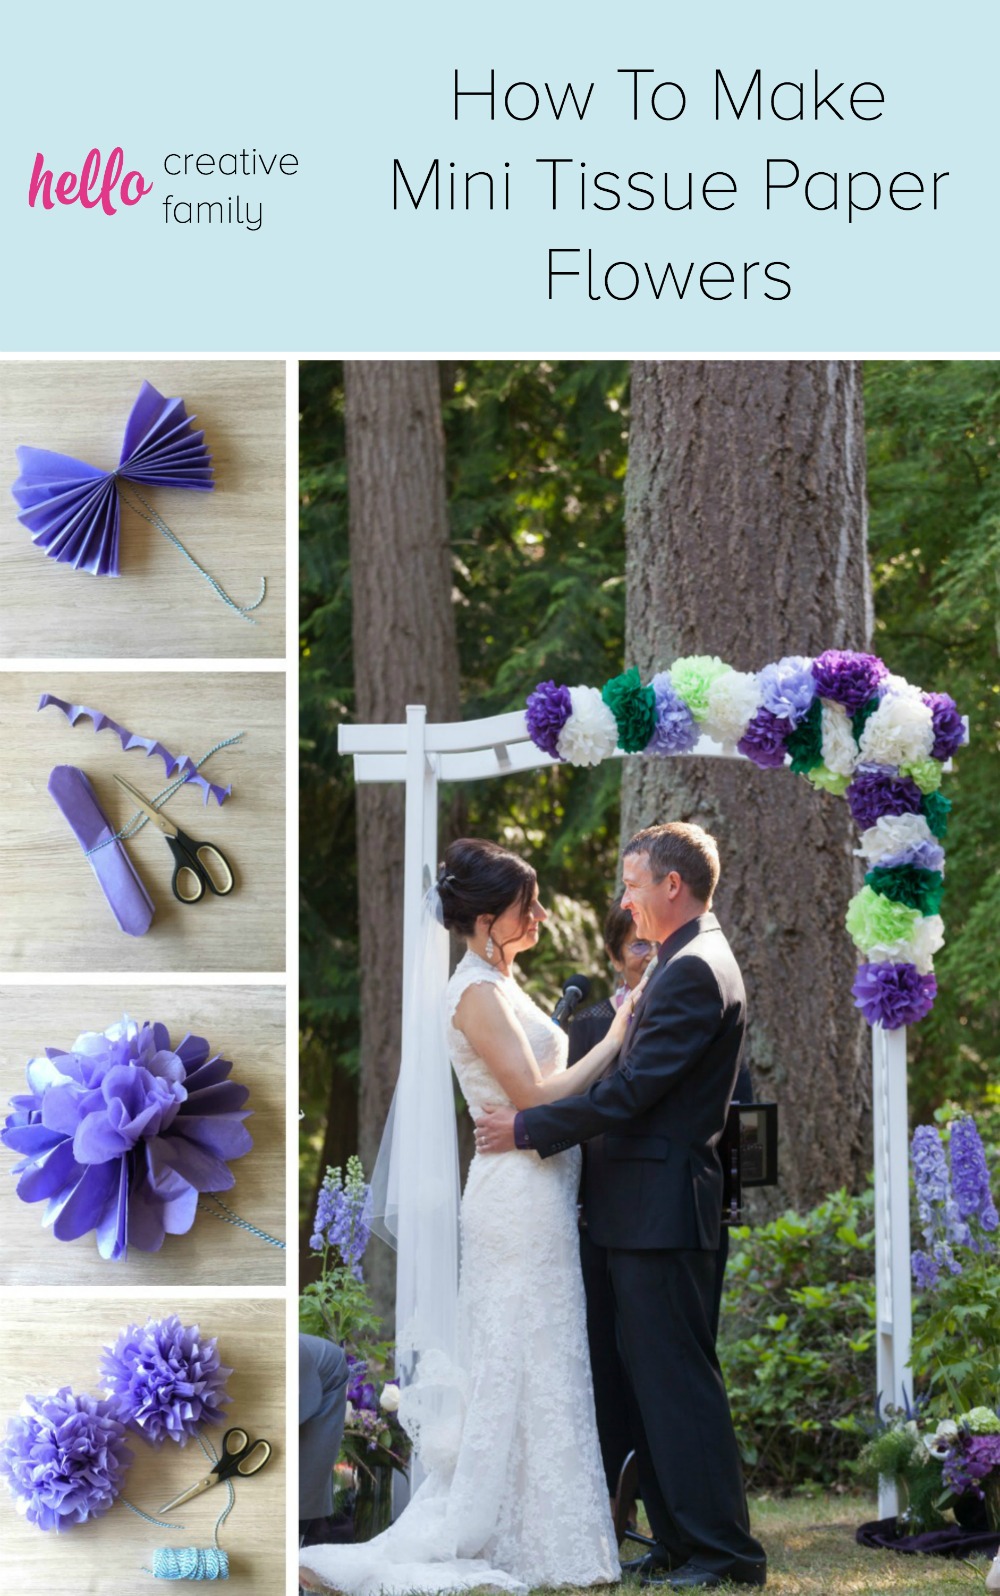
We made these flowers for my sister’s wedding, and the result was beautiful! Check out the arch.

Questions? Comments? Let me know. I love hearing from you!
Want to learn how to make Mini Tissue Paper Flowers? Check out this post here:


love this!!thanks for such a great tutorial, was a little confused when it came to opening up and fluffing the tissue paper!
Yes, I, too, recall making similar tissue paper flowers in high school. THANKS for your tutorial with only 5 EASY steps. LOVE the vivid colors of flowers you created. Wish I had a special occasion soon so I could make these FUN decorations. Sarah in Minneapolis
This is beautiful and unique, I can imagine that it will look like that. Thank you for sharing your wonderful DIY idea and it is an inspiration.
Very beautiful. Liked it.
Do you have instructions for making the smaller paper tissue flowers. I love making the large ones. Im making them for my grandson wedding
Thank you
Hi Linda,
Thank you so much for your message! I made these last year for my sister’s wedding as well. I have made them smaller before, but unfortunately I didn’t write down what I did. If memory serves me correctly, I cut the tissue paper into 4 pieces (so in half lengthwise and then in half width wise) and then I only used 5 sheets of paper instead of ten. I hope that helps! I’d love to see pictures!
Best Wishes,
Crystal
I made these from Tissues when I was in the hospital having knee surgery when I was 13…many many years ago
however this size is more fun, could even cut the tissue paper in half to get a variation of sizes thanks for bringing back memories of 50 years ago
I made these out of toilet paper and Kleenex back in the 70’s in girl scouts.
I made these from Tissues when I was in the hospital having knee surgery when I was 13…many many years ago
however this size is more fun, could even cut the tissue paper in half to get a variation of sizes thanks for bringing back memories of 50 years ago
Love this! I am always looking for ideas for craft time at a nursing home where I volunteer. I wonder what you and others have used to affix these once made? Do you just tie with string? Add clips? Has anyone put them on bamboo stakes for bouquet?
Hi Bobbi!
Thank you for visiting. I’ve always tied the flowers to whatever I’m attaching them using the string that I tied around the tissue paper. Hope that helps!
Best Wishes,
Crystal
Hi…I’m throwing a 90th birthday party for my mother=in=law in a couple weeks. I’ve been looking for something cheap to do for the table decorations. It’s an afternoon luncheon at a country club. Real flower arrangements seem too expensive and impractical. I’m not crafty AT ALL, but these seem like something I could make. About how big are they when they’re finished? I’m thinking of lining them up in the middle of the long tables that I’ve requested to be set up. Would 6 be enough on each table or 8, do you know? I might have to make 20 or more. The colors of the party are purple, pink, and, maybe, silver. So, I can use a variety of shades from those colors.. Thanks for the idea!
Hi Pamela,
Oh that would be so pretty. They are great for decorating with. I love doing the flowers in variegating colors too for a different effect. 🙂 The flowers I’d say are approximately 12 inches across. You can also cut your tissue paper into smaller pieces and use less layers to make smaller flowers. I’d love to see pictures of how they turn out!
Best Wishes,
Crystal
Thank you, Crystal, for getting back with me. I, also, looked at the other tutorial you have on here and found that you can make them with different colors in the same bow. I might try that, as well. Thanks for letting me know how big they are…that helps me figure out how many I need. I’ll send you a picture from the party.
Thanks, again…Pamela
Hi again, Crystal. I was wondering….although I love how big the flowers are, they’re too big for our table. Would you suggest just cutting the tissue paper in half to get 6 inch flowers, instead of 12 inch? On the other tutorial she cuts squares but wouldn’t that, possibly, be too small? I just saw today at Joanne’s Fabric Store that Martha Stewart has packages of these all made up so you can just unfold them. She has a very cute one with small brown boxes that you put the flower on top of…..and tissue paper green leaves. I was tempted to buy them cause they were so cute, but I’m continuing with this project. Thanks! Pamela
Hi Pamela,
Yes you can definitely cut the tissue paper in half for smaller flowers. I’ve done it the way you suggested as well as square and both are lovely, just different sizes. When I do smaller ones I usually use less pieces of tissue paper too. The Martha Stewart ones are lovely, but trust me you can make a ton of handmade ones for the price of one of the Martha Stewart ones!
Best Wishes,
Crystal
My daughter and I make these to go in a gift bag instead of just jamming in tissue paper. People are always in aw which suprises me since I started making these years agoe. Back in the 70 they were a big part of weddings and showers with kleenex.
Love these! Been thinking of making some to accessorize my daughters’ room. I love how pretty they looked at you sister’s wedding.
Hellow from kenya nairobi,I love flowers and this is the best method ever coz the materials are readily available ,it’s not complicated either thank you so much.
thanks so much for sharing your ideas. Got to make some of these flowers soon.
Your kid’s pictures are adorable but please tell me that you didn’t really name them Bean and Turtle.
Ha ha! Great question Sana! Nope their names aren’t Bean and Turtle. That’s what I call them on here to give them a bit of anonymity. Thank you so much for visiting and for taking the time to comment.
Best Wishes,
Crystal