


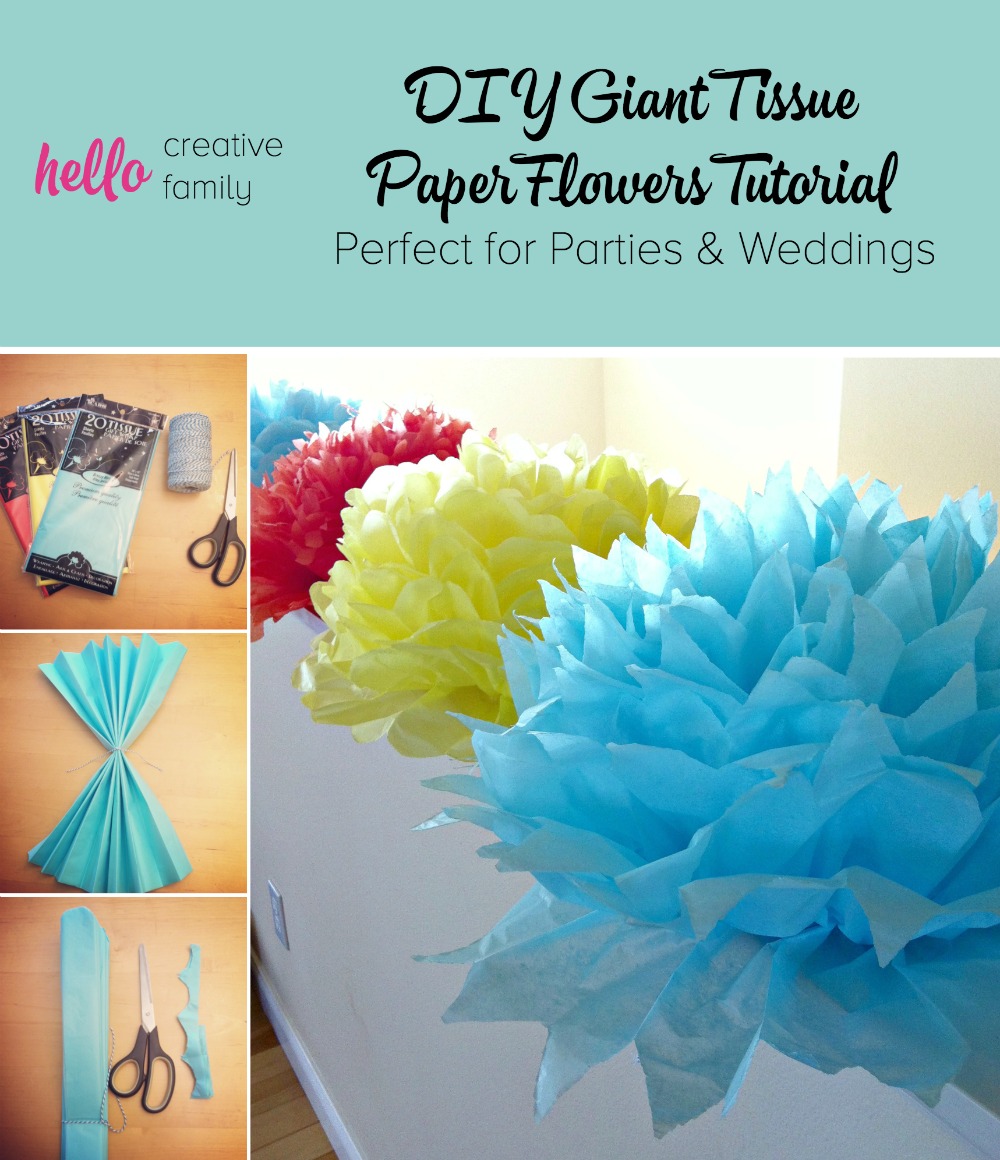
DIY Giant Tissue Paper Flowers Tutorial
This post and the photos within it may contain Amazon or other affiliate links. If you purchase something through the link, I may receive a small commission at no extra charge to you.
These DIY giant tissue paper flowers are a fun and inexpensive way to decorate all sorts of parties, from birthdays to Christmas parties, Superbowl parties, or weddings. They take less than 10 minutes to make two so read on to learn how!
Hi Crafty Friends!
Tissue paper flowers are so easy and inexpensive to make and add a huge impact to a room. Today I thought I would share my tutorial for DIY Giant Tissue Paper Flowers. You can make 2 of them in 5-10 minutes and they cost 50 cents each! Can’t beat that.
This is the perfect craft for people who say “Oh I’d love to make that… but I’m not crafty.” Trust me. You are crafty enough to make these.
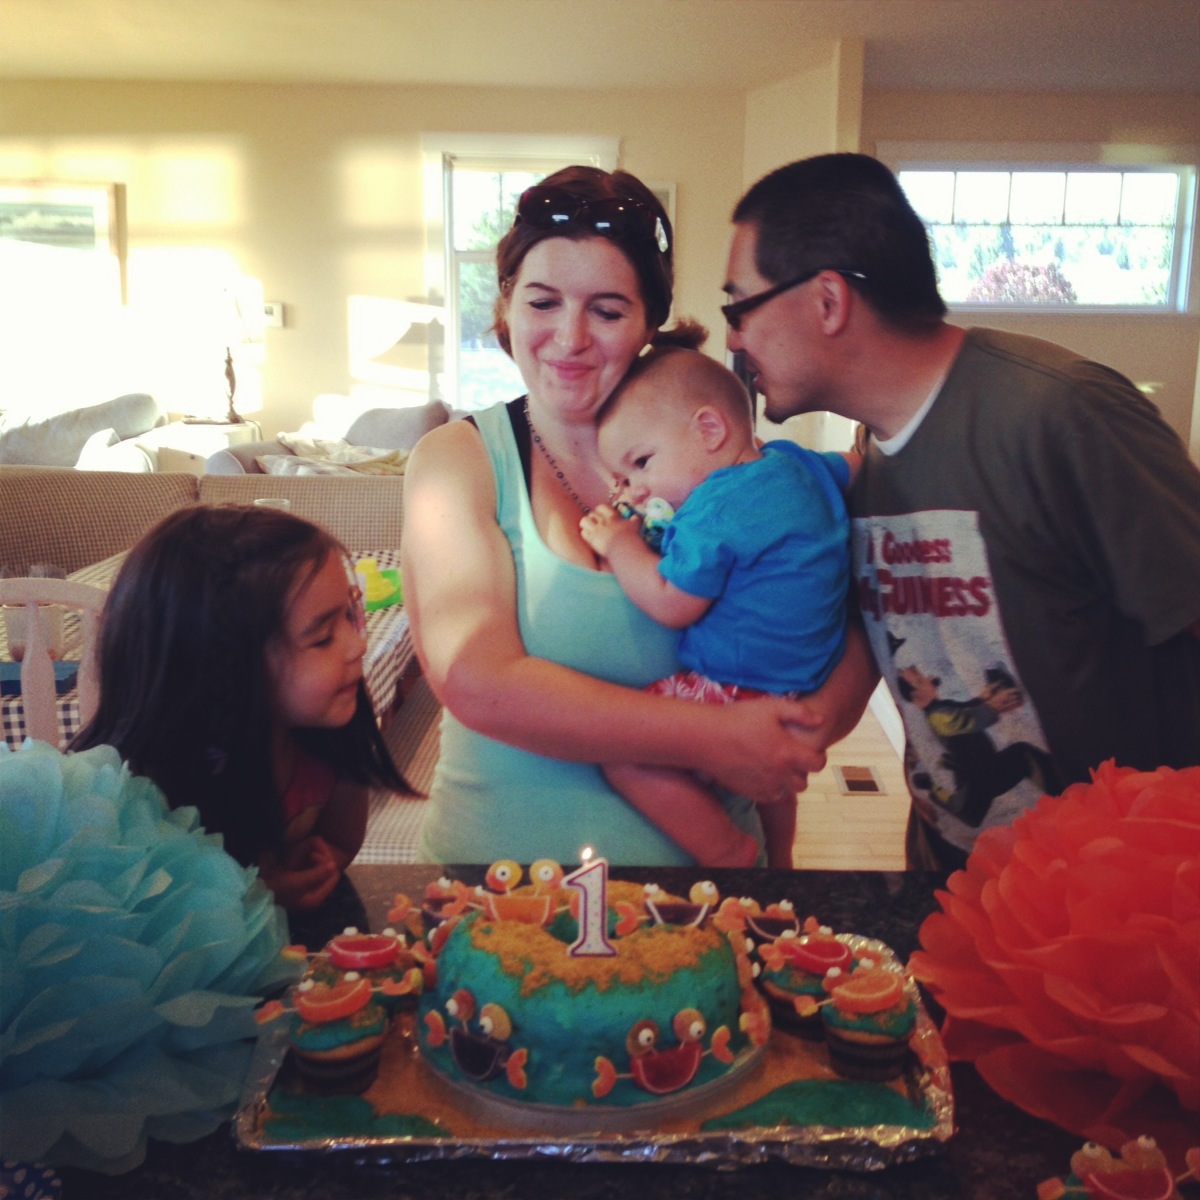
I shared pictures yesterday in Turtle’s 1st Birthday Party post so today I thought I would share how to make them.
Giant Tissue Paper Flowers Tutorial
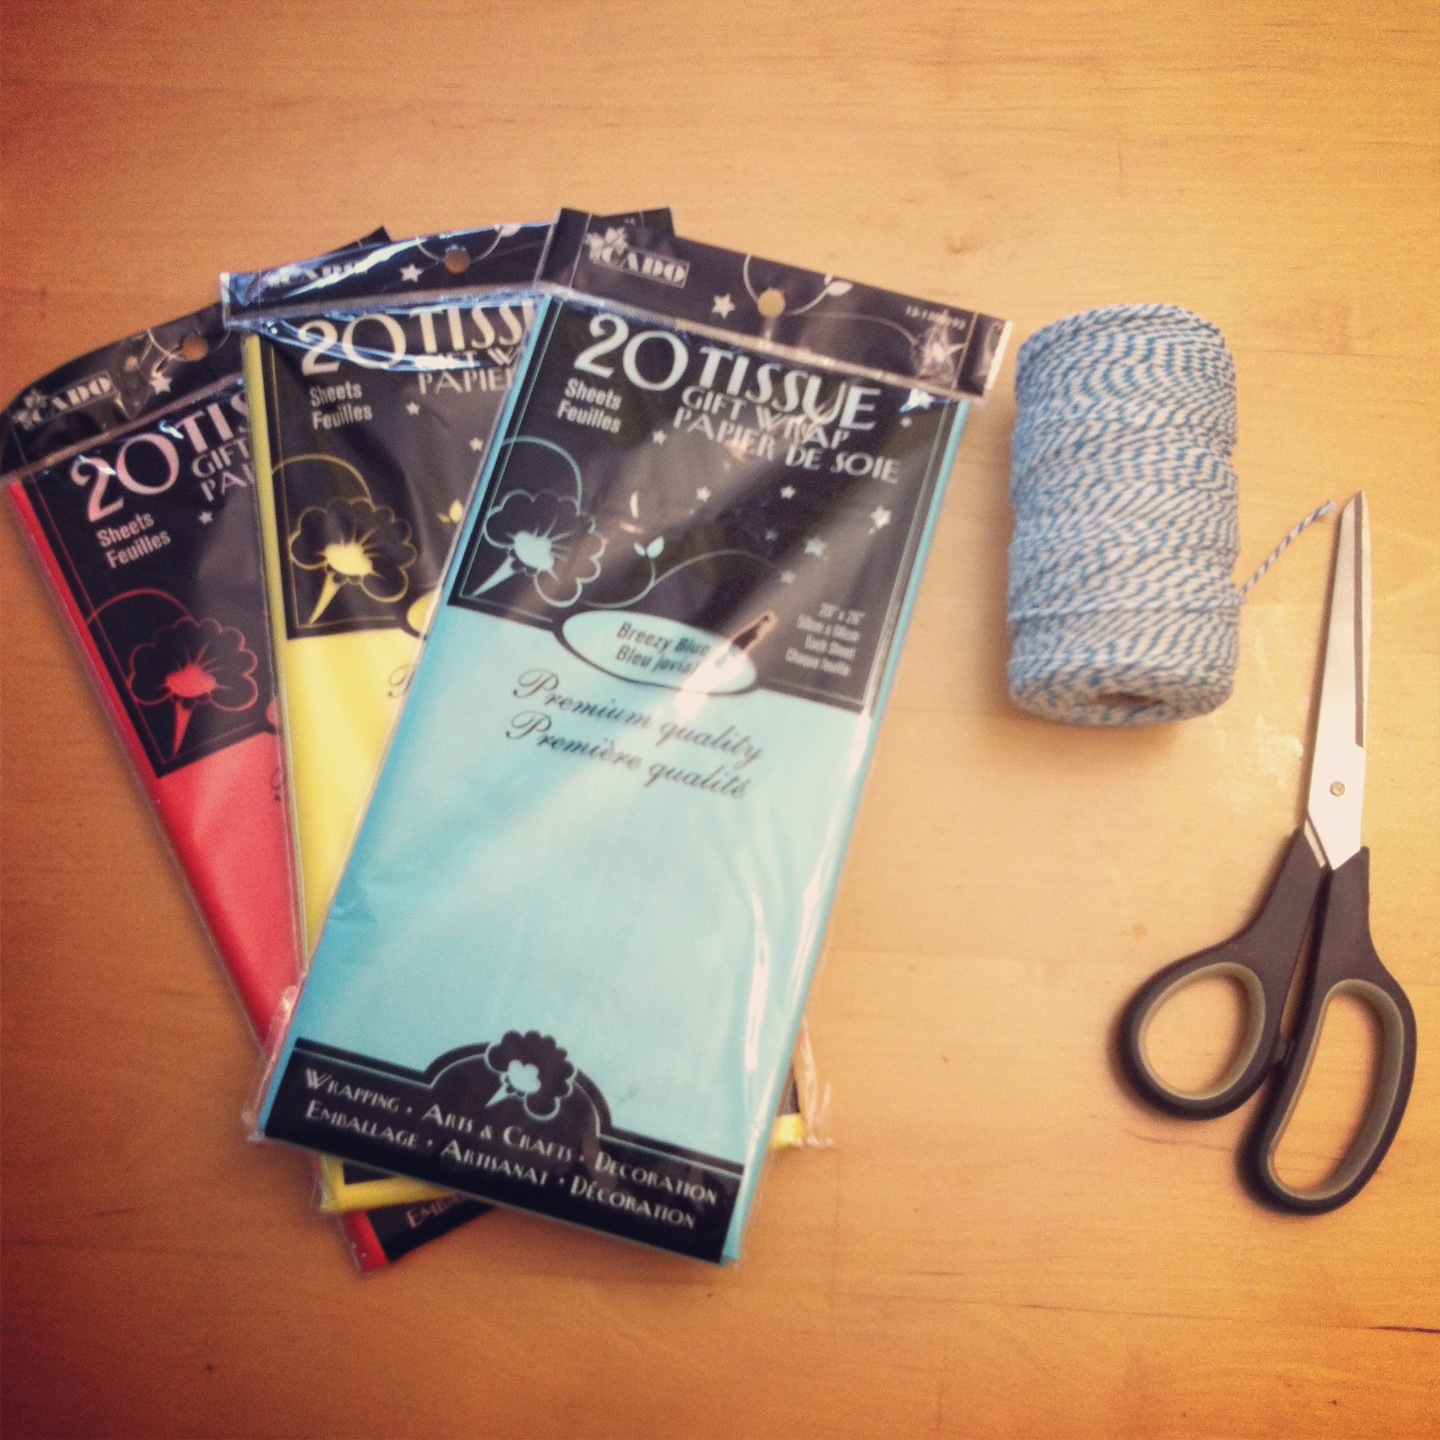
Supplies
- Tissue paper in your favorite colors. You will need 10 sheets of paper per flower.
- Scissors
- String or yarn
Instructions
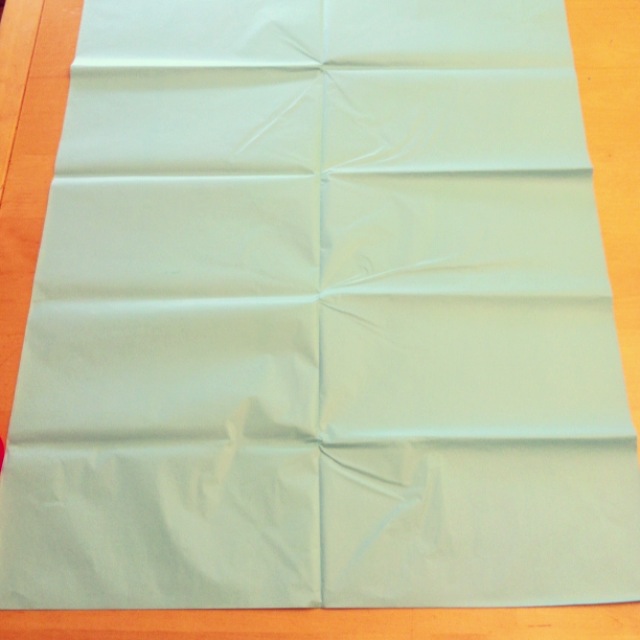
Step 1: Take 10 sheets of tissue paper and lay them stacked on top of each other on a flat surface. The shorter side of the paper should face you.
Step 2: Accordion fold your tissue paper making each fold approximately 1 inch wide. Fold all the way to the end of the tissue paper. (The above picture is the halfway point… keep folding until you reach the end of the paper.)

Step 3: Tie the string around your tissue paper at the halfway point of the paper. Double knot your string.
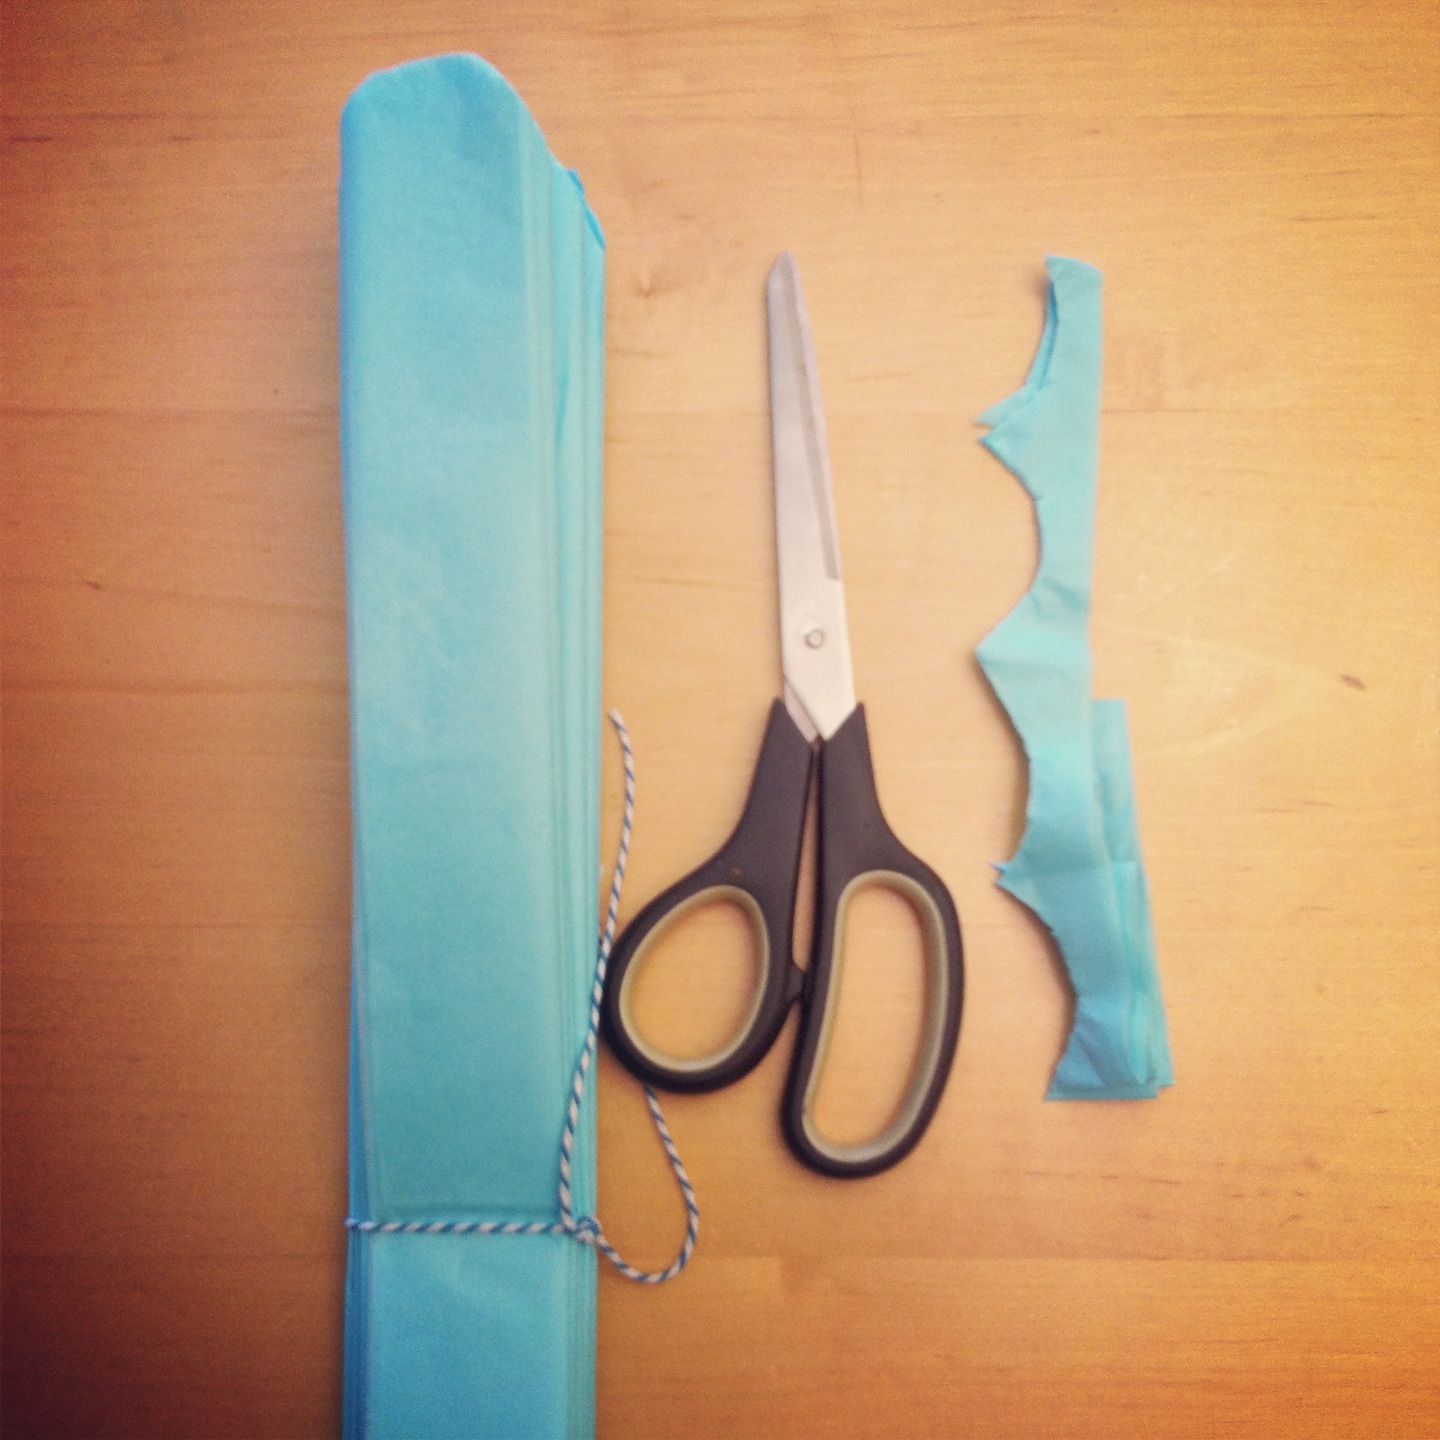
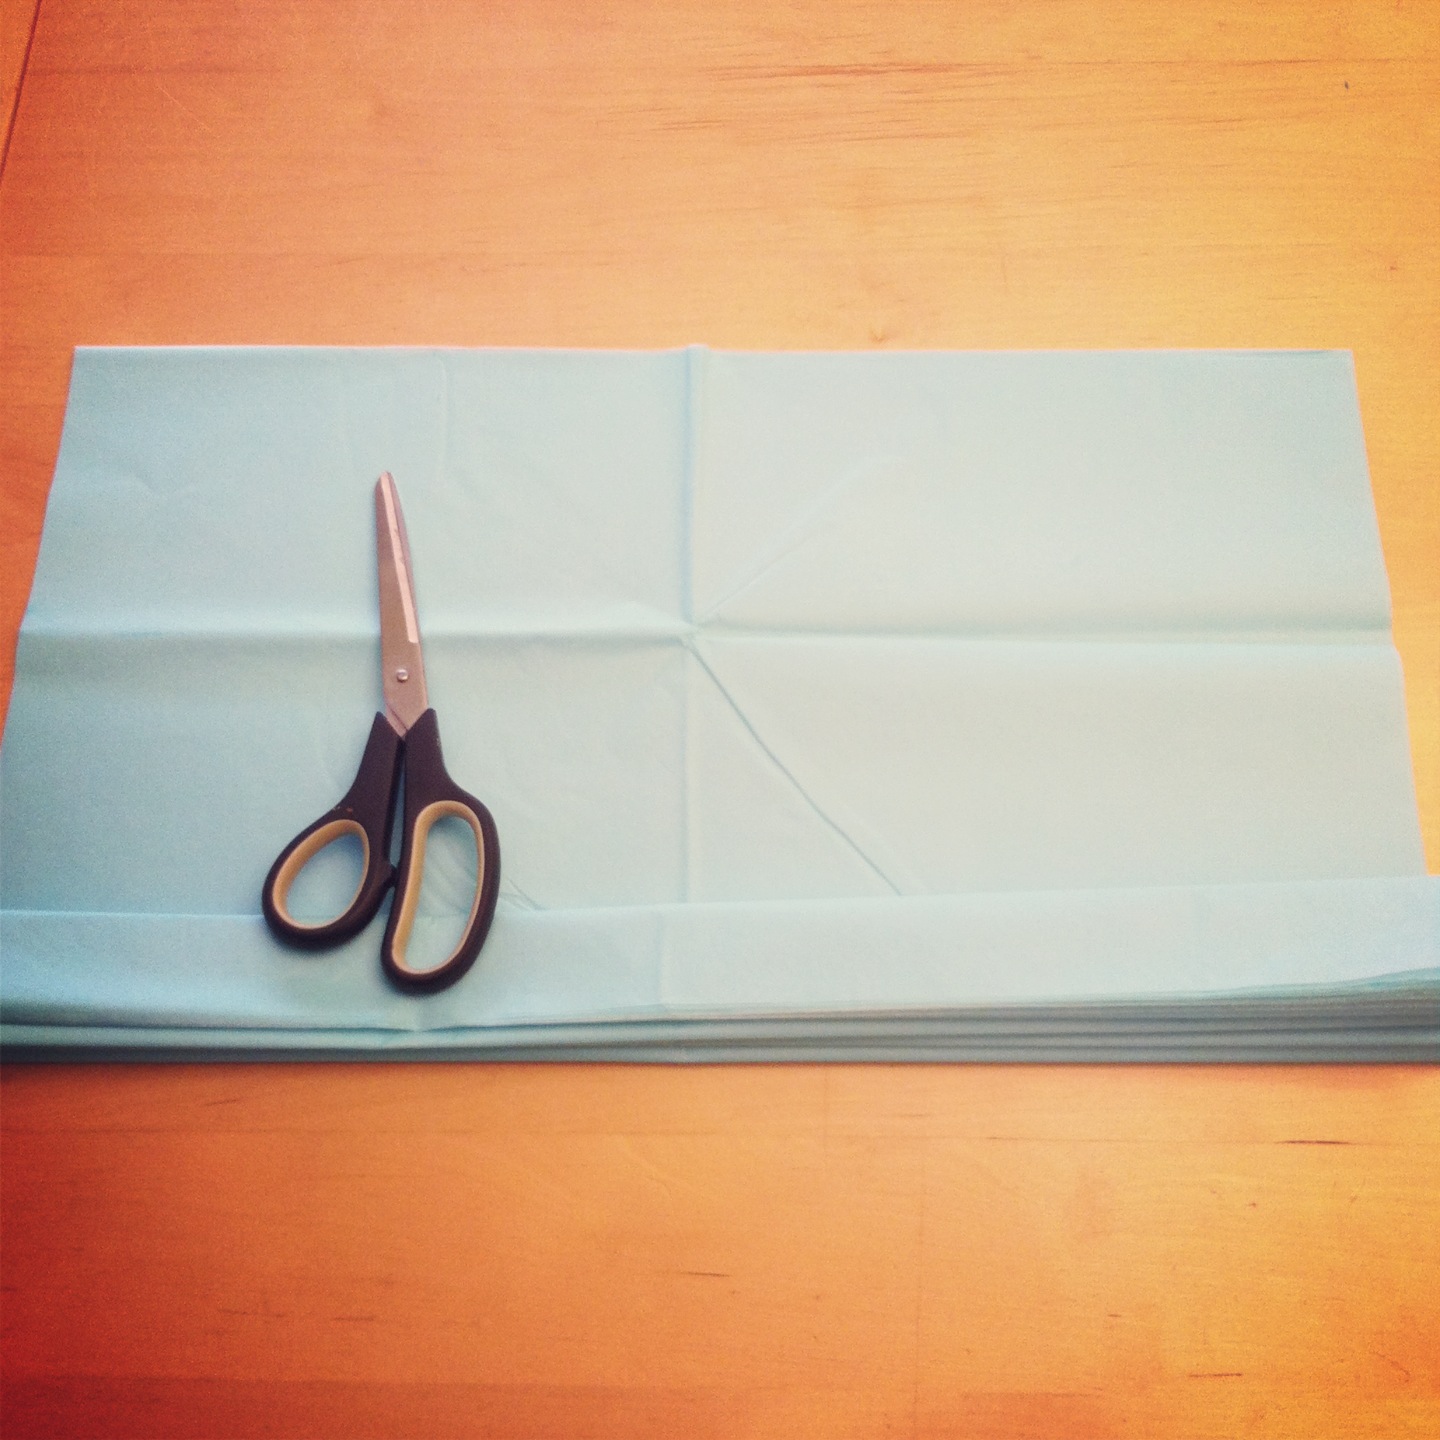
Step 4: Cut your petal shape out of each end of the tissue paper. Different shapes will result in different shaped petals: a rounded cut looks like a peony or rose, a rounded cut with slits looks like a chrysanthemum, a triangle looks like a dahlia.
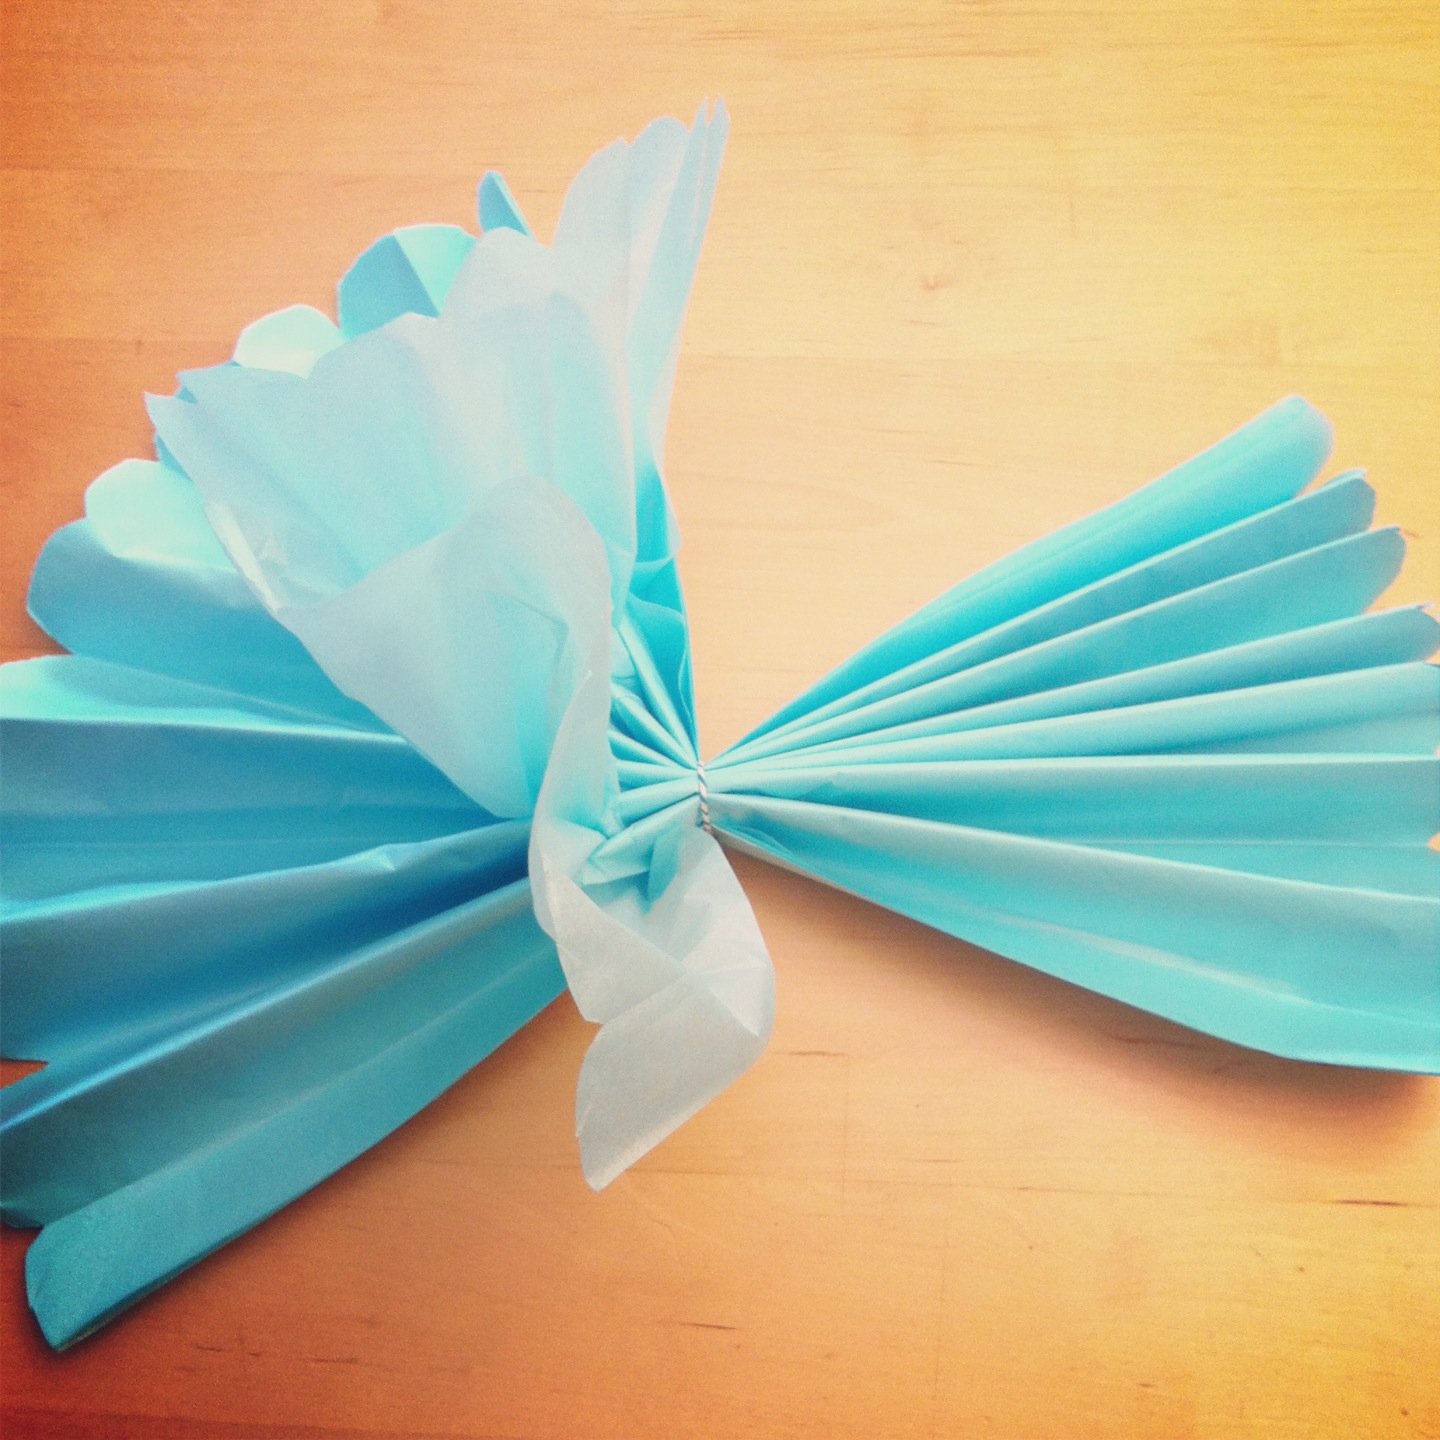
Step 5: Working on one sheet at a time, start gently separating and fluffing the tissue paper. Work gingerly so as not to tear the tissue paper.
At first, it won’t look like much, but continue to separating sheets working back and forth from one side to the next.
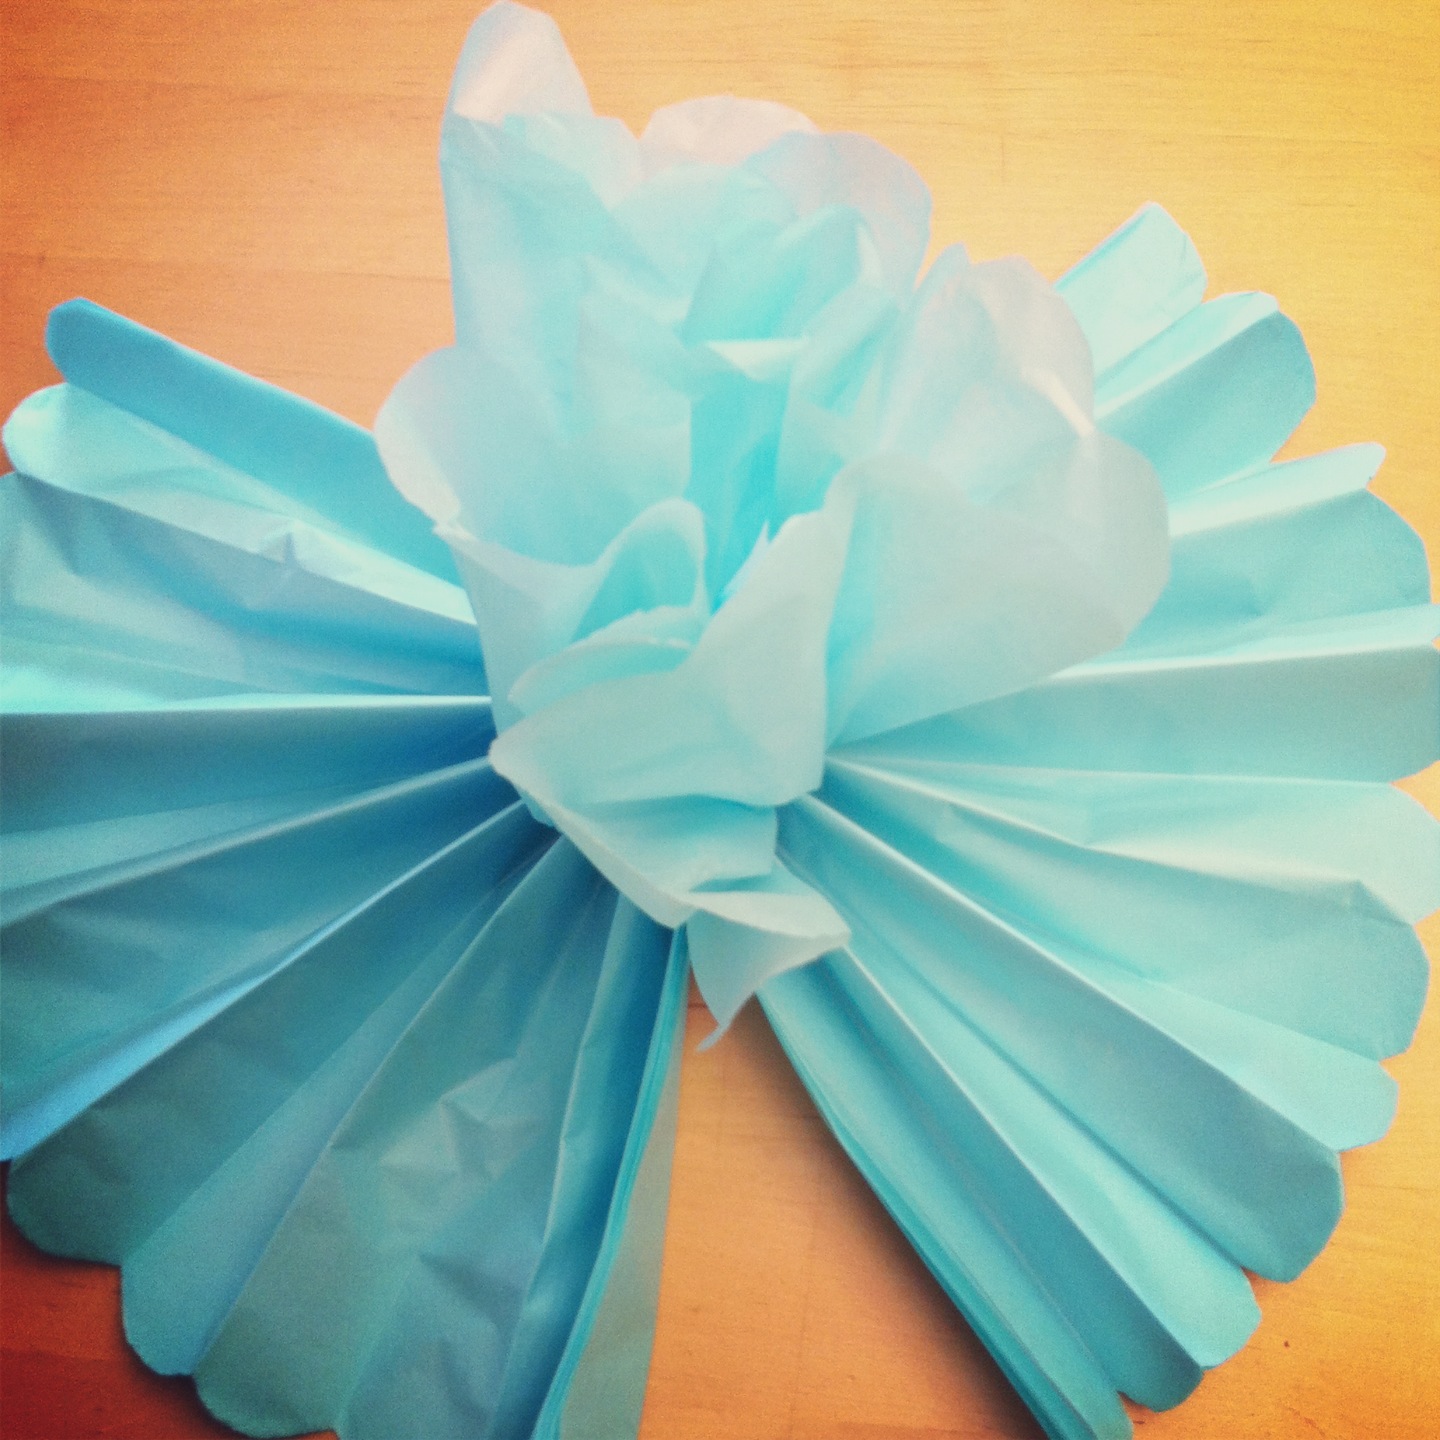
Soon a flower will start to emerge!
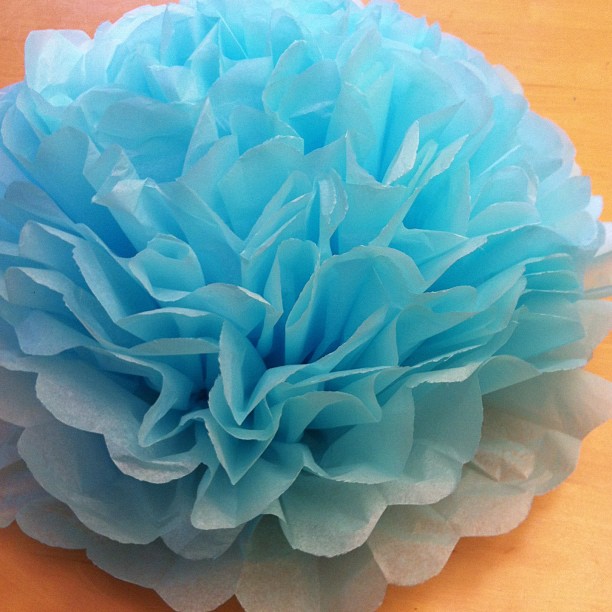
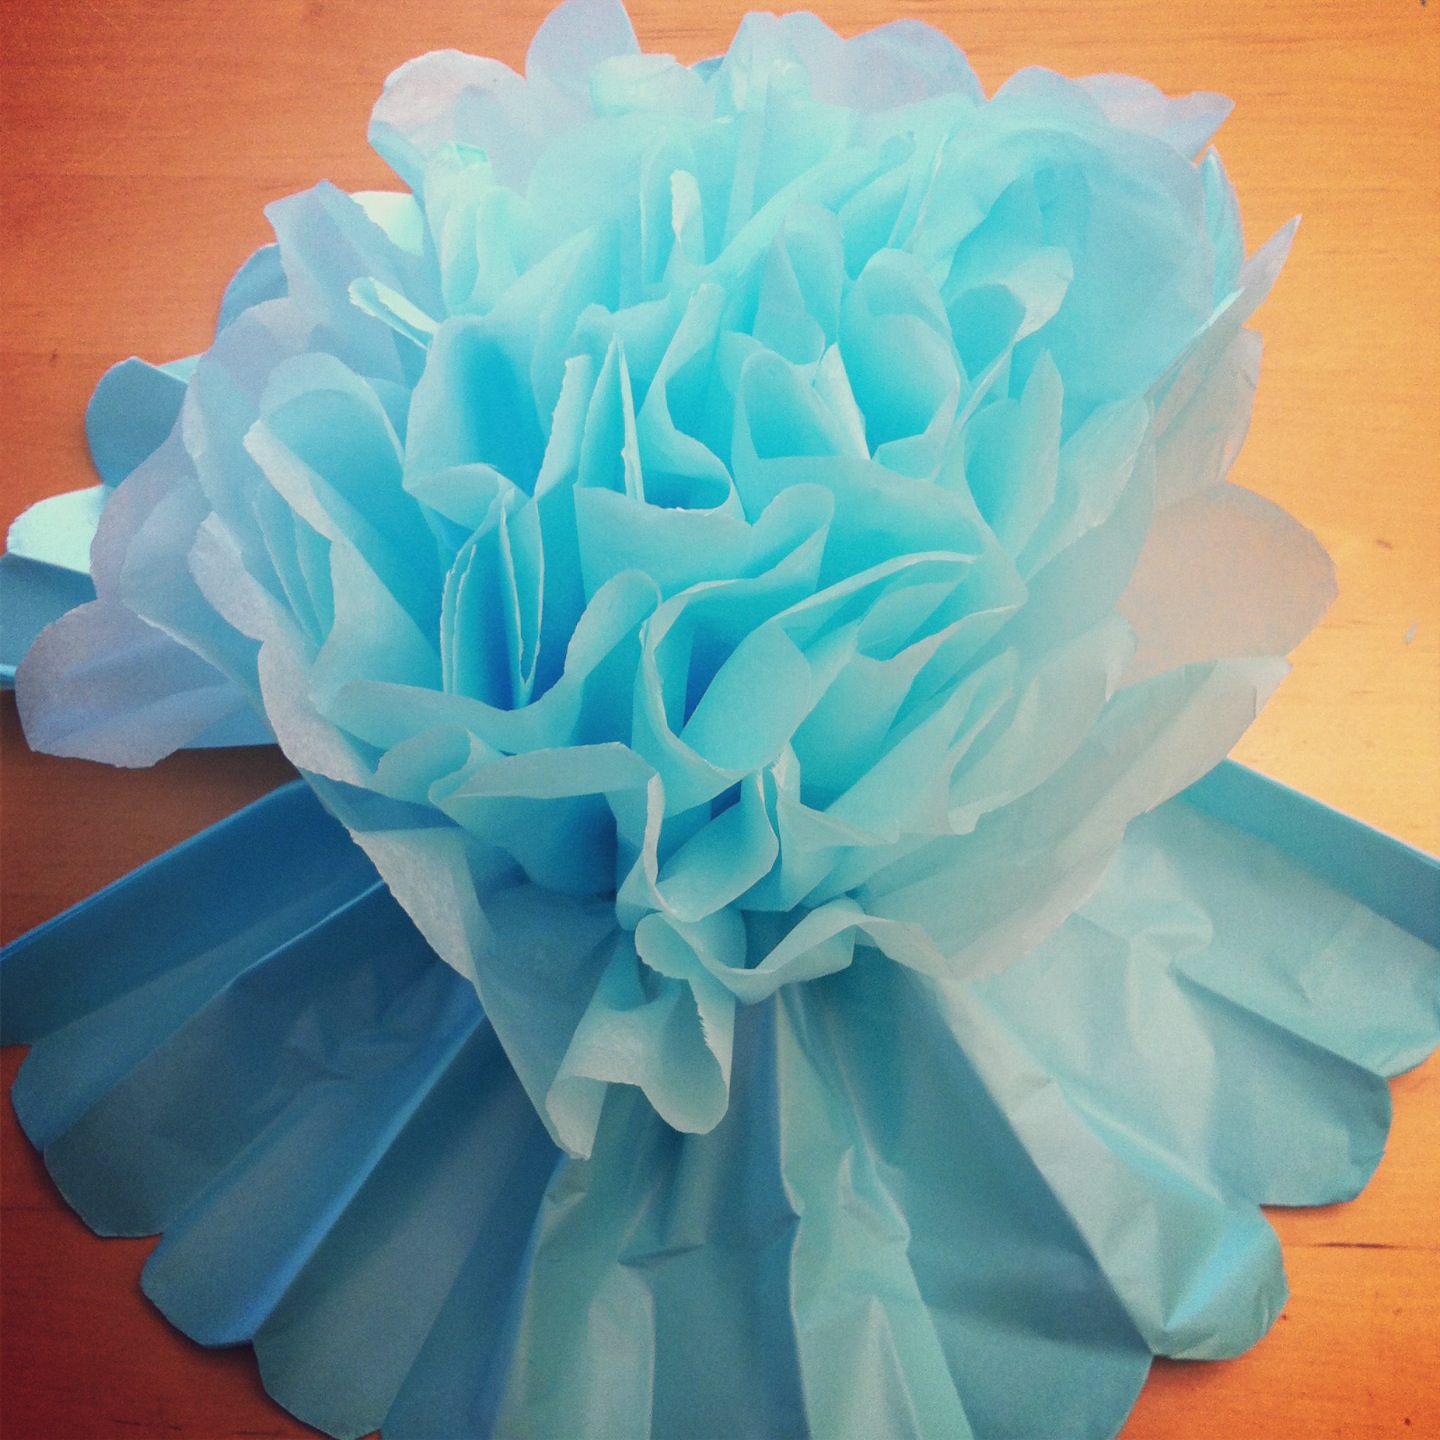
Voila! Your finished flower! Wasn’t that easy?
Experiment and Decorate with Your Completed Tissue Paper Flower!
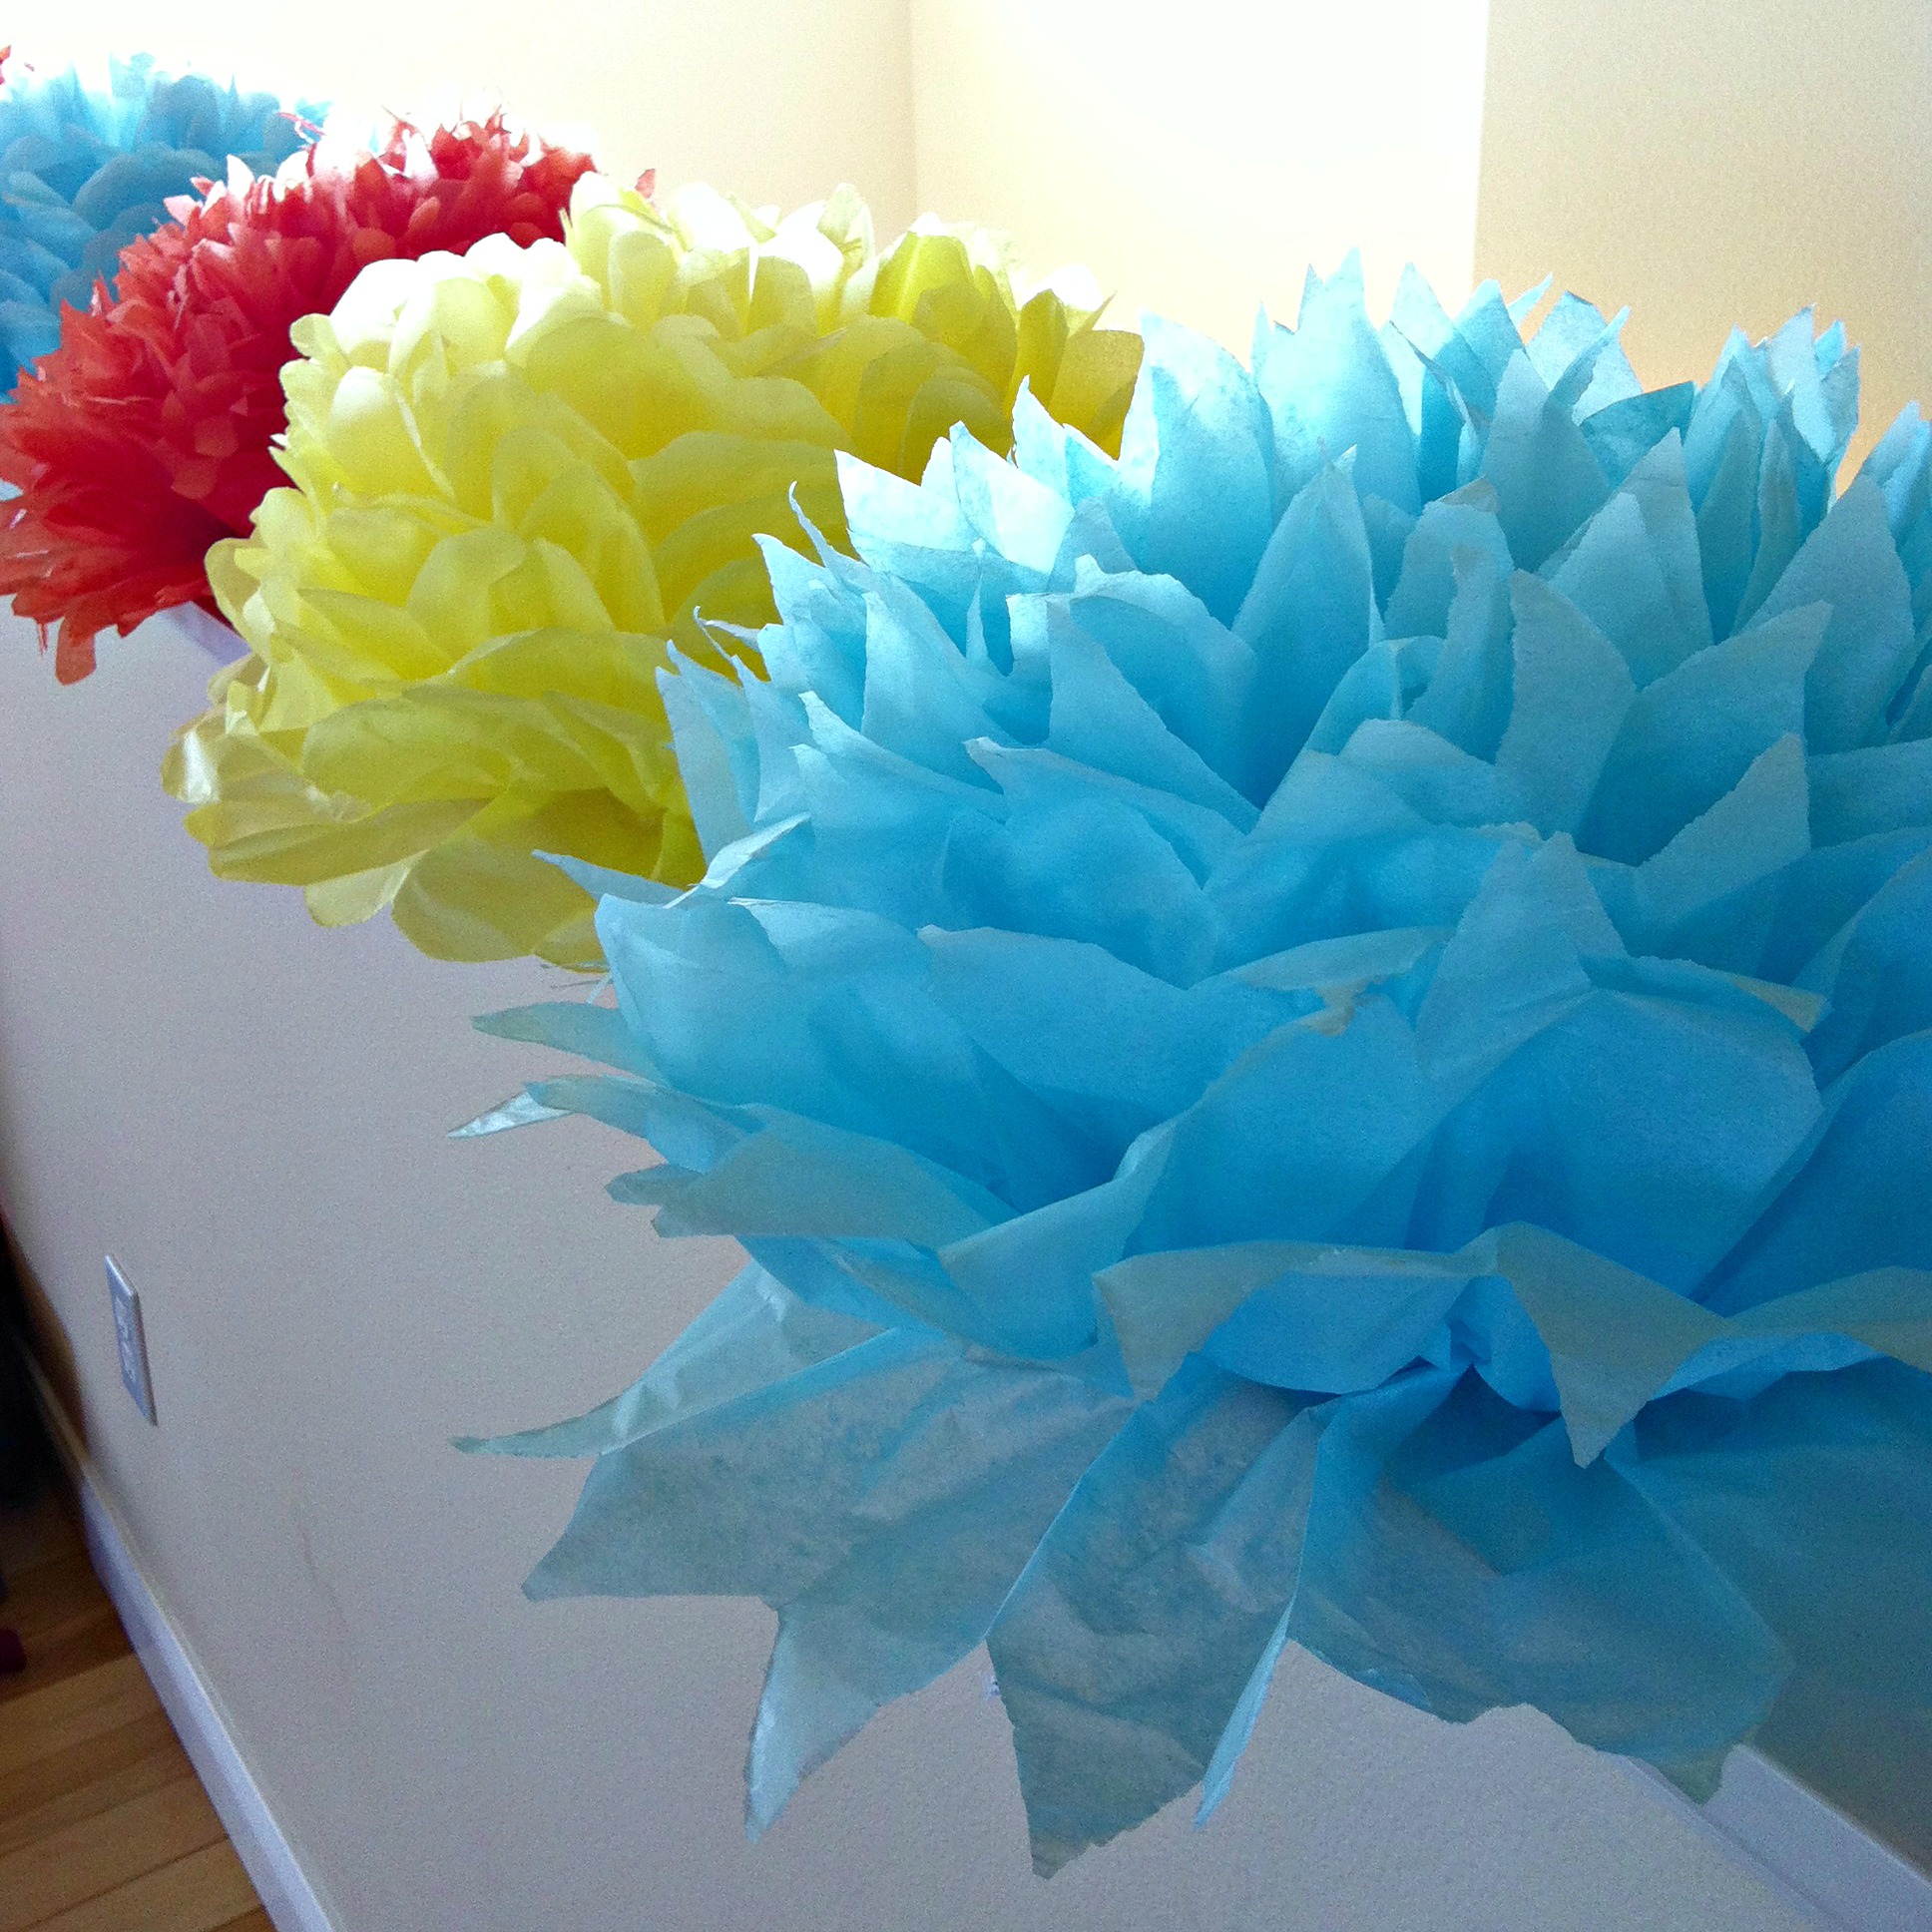
Now decorate with them. Make your string extra long So you can hang them around the room, use them as a centerpieces on tables, use double sided tape to stick to walls or chairs, or line them up along a pony-wall and around the birthday cake like we did at Turtle’s Birthday party. The ideas are limitless!
Experiment with different end cuts and colors and different sizes and lengths of paper. Try alternating different color sheets for a rainbow effect!
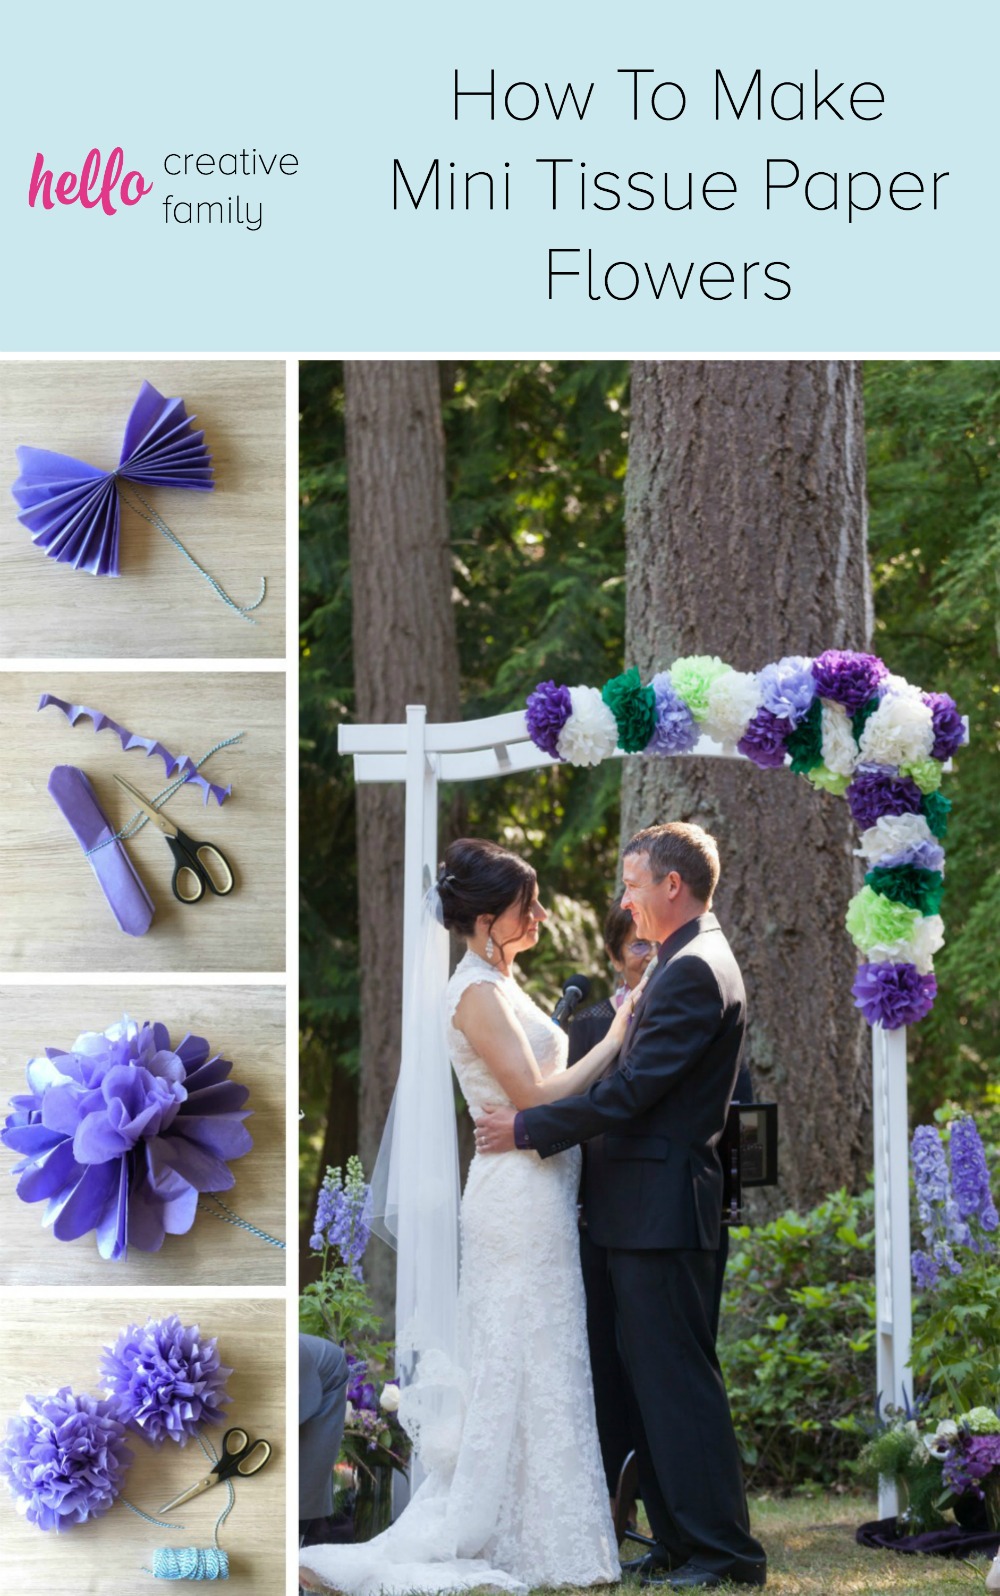
We made these flowers for my sister’s wedding, and the result was beautiful! Check out the arch.

Questions? Comments? Let me know. I love hearing from you!
Want to learn how to make Mini Tissue Paper Flowers? Check out this post here:


Hi Chrystal! I LOVE these and your directions are wonderful. These would be so great for any holiday or celebration! Thank you so much for sharing and am pinning! If you have time, would love you to share these at our Best of Weekend party, which kicks off at 8:00 p.m. tomorrow night! Happy 4th and have a wonderful weekend.
Thank you so much Cindy! I’ll make sure to stop by. 🙂
thanks so much for sharing you ideas. Got to make some of these flowers soon.
Your kids pictures are adorable but please tell me that you didn’t really name them Bean and Turtle!! LOL
Thank you so much for visiting Charlene!
LOL. No their real names aren’t Turtle and Bean. Both are nicknames. 🙂
Best Wishes,
Crystal
Love these, they are so pretty and effective, thanks for sharing!
Thank you Charlotte! They are so easy to make. Glad you like them. 🙂
Thank you for giving these through directions.These were so easy and fun to make.Infact we are using these that we made for my sisters open house .
Most of my wedding flowers were paper, since my husband is allergic to everything. We had them made, and they were gorgeous, but yours is the easiest tutorial I’ve found, so now I might try it myself!
Thanks for sharing!
Lorna
Thanks so much Lorna. They really couldn’t be easier. Let me know if you make them!
Best Wishes,
Crystal
These are super cute! They would be perfect to add around my daughter room! Thanks for sharing!
Thank you Stephanie! I actually hung the one that I made in this picture in my daughter’s bedroom. 🙂 She loves them. They were a big hit among the girls at the birthday party. I’d love to see pictures if you make some.
Best Wishes,
Crystal
I used to make these in high school… for proms and such. I forgot all about them. They brought back lots of memories. Saving this link so I can remember how to do them for the next party. Thanks.
Found your post in SITS Sharefest. This is amazing and cute! Thanks for sharing.
Visiting from http://www.ritewhileucan.com where we love all things of paper! These are beautiful and easy to make too as it was my teenage daughter who showed me how. After the party I used some post-it wall tags and stuck them to the wall in her room (flattened 1/2 of the flower first). They still look fantastic! I really appreciated your easy to follow instructions on here. Found you via SITSSHAREFEST linky
This saves sooo much $$! Great family picture! Thanks for sharing on DIY Showcase!!
Shelly-Co-host
Dear Crystal, These are beautiful decorations. I Love being creative and making things myself. It is fun and saves money too!
Thank you for visiting my blog and leaving a nice comment. It is so nice to meet you in this lovely blogging world.
Blessings dear. Catherine xo
Thanks for linking to Take-A-Look Tuesday over at http://www.SugarBeeCrafts.com – you were featured today!! –Mandy, Sugar Bee Crafts
Thank you so much Mandy for featuring my DIY Giant Tissue Paper Flower Tutorial. This was my first week back to work after maternity leave so you have idea how much of a pick me up it was to see my craft featured on your site. I wrote about it here on the blog today:
https://hellocreativefamily.com/beach-boy-summer-celebrations-and-new-beginnings/
Best Wishes,
Crystal
Those are so much fun! Thank you for sharing at Best of the Weekend 🙂
love this simple craft that I can use at my daughters birthday thank you very much for the idea
love this simple craft that I can use at my daughters birthday thank you very much for the idea HOPE I CAN LEARN MORE FOR MY DAUGHTER’S UP COMING DEBUT 18TH BIRTHDAY
Awesome
Thank you so much for these easy to follow instructions! So pleased with my tissue paper flowers!
I also make flowers and headbands from tissue paper.
I am so happy with this tutorial. The directions were so easy to follow. Made these for our boss’ baby shower and they were a blast! Everybody loved it and wanted to know how to do it. Shared this link so they could try it out themselves. Thanks for this! 🙂
Thank you so much Glynn for using the tutorial and then for coming back to let me know what you think of it. It completely made my day. I’m glad they were a hit at your boss’ baby shower!
Best Wishes,
Crystal
Very nice and easy!! I’ll definitely try making those.. Thanks so much for sharing!
So fun! I love to see tissue paper used in such a creative way. Beautiful for spring 🙂
Hi Crystal,
My daughters birthday is in 10 days and I have been looking to make my own decorations this year! Thank you for your step by step tutorial, which is so simple to follow. This will help me create the look I wanted at the price I want. I’m definitely heading to Dollarama today!
Thank you,
Kym