


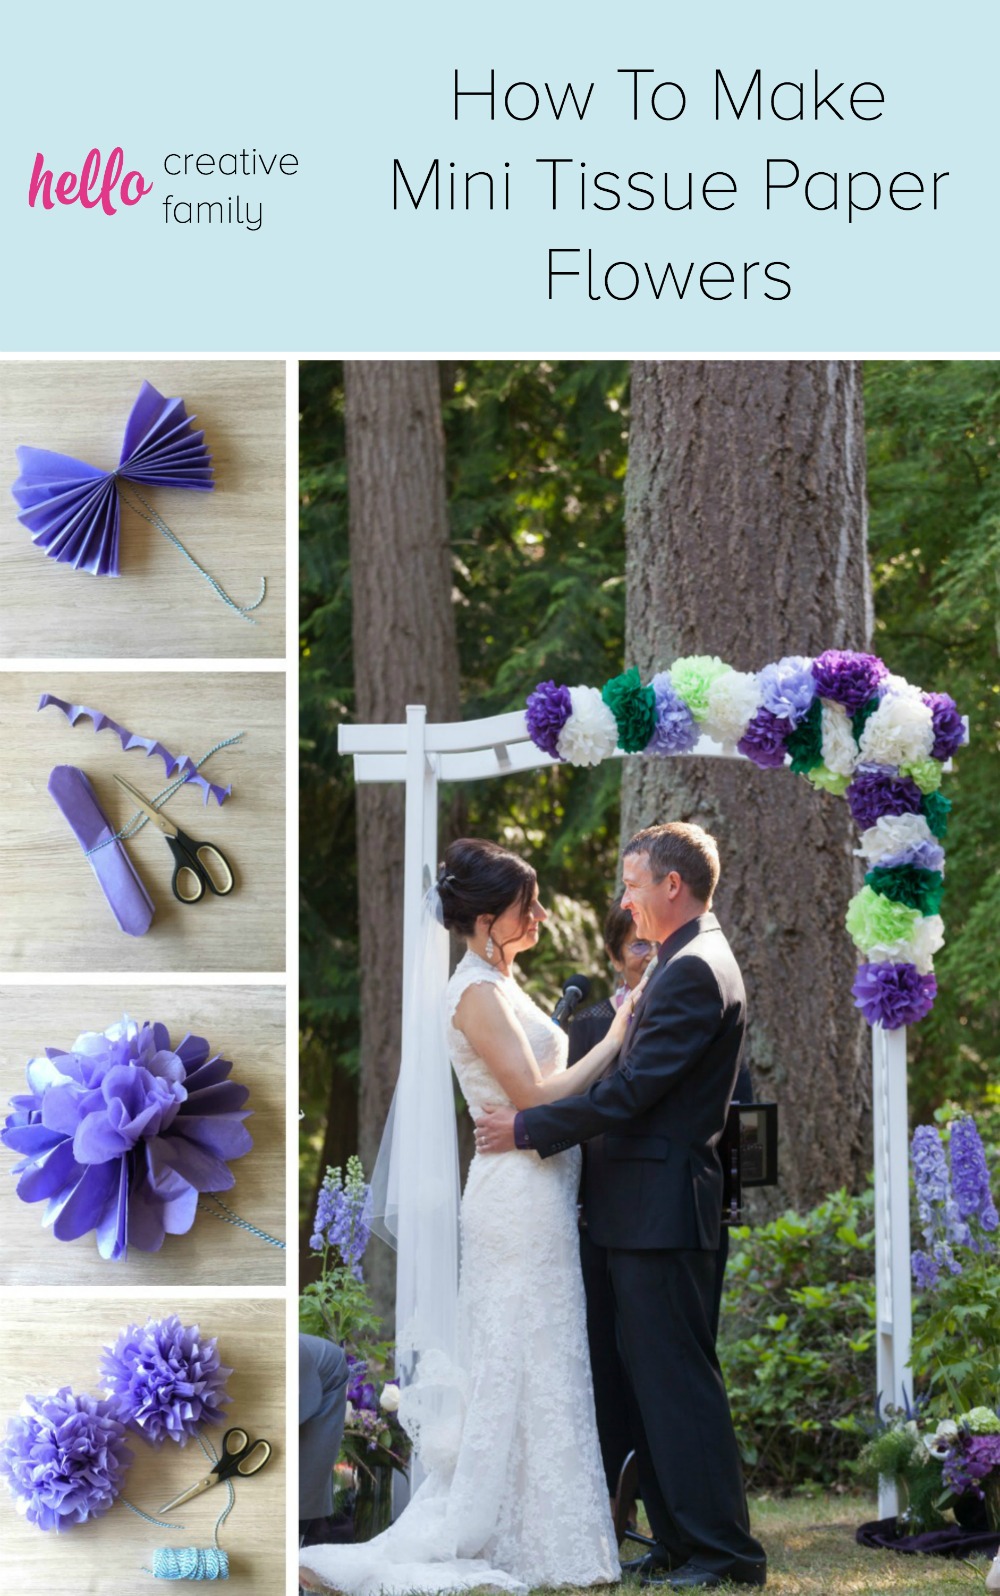
How To Make DIY Mini Tissue Paper Flowers For Party Decorations
This post and the photos within it may contain Amazon or other affiliate links. If you purchase something through the link, I may receive a small commission at no extra charge to you.
One of my very favorite things to do is check out the “Top Posts” bar at the bottom of Hello Creative Family. Seriously… I’m obsessed with it. I probably check the thing 20 times a day. I love seeing which posts are resonating with all of you. I love knowing which posts are your favorite, and what you’d like to see more of. (BTW if there is ever anything that you’d like to see us do, please email me at crystal@hellofamilymedia.com. I love hearing from you!)
In the top 10 I always see our Photo to Wood Transfer, our How To Mount A Photo To Canvas Tutorial, our How To Make Giant Tissue Paper Flowers Tutorial, a sewing project (or two or three), and then a mix of other things. The first three projects are always on the list and they get the most comments and questions.
One of the questions I get the most often for the Giant Tissue Paper Flowers is how to make smaller versions of them. My sister got married last summer and we made tissue paper flowers in a few different sizes for her wedding, so today I thought I’d share with you how to make DIY mini tissue paper flowers. The flowers work out to be approximately 8 inches in diameter and are so pretty clustered together in different colors.

My favorite part? You can make 8 flowers with one package of $0.99 tissue paper from the dollar store. AMAZING! That’s a lot of bang for your party planning budget! With a $10 budget you could make 80 of these lovelies! That’s not something you can say about the pre-made poms that you can buy at the party store!
I make these almost every year for my daughter’s birthday party decorations! They are also fun for baby showers, Christmas parties (I did them in red and green for ours), and summer BBQ decorations! Get the kids involved with making them! They’ll have fun practicing their accordion fold!
Read on for instructions on how to make mini tissue paper flowers for party decorations!
How To Make DIY Mini Tissue Paper Flowers For Party Decorations
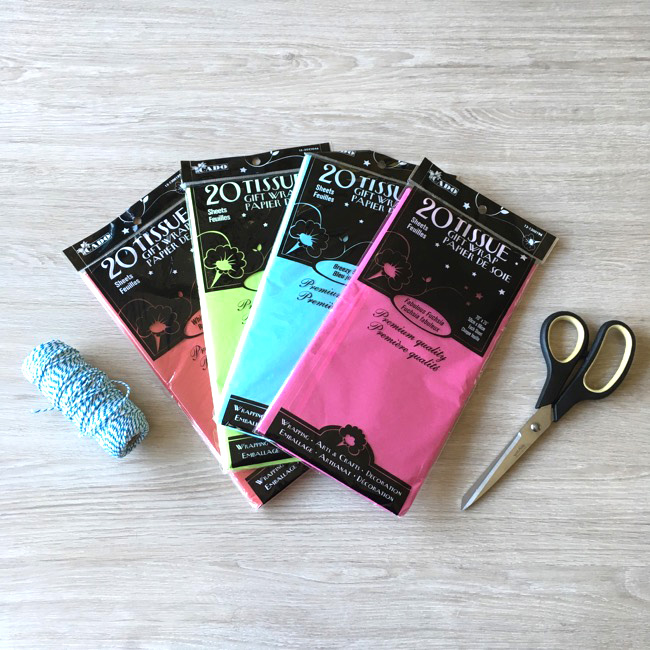
Materials:
-Tissue paper in your favorite color (5 sheets cut in half will make 2 flowers)
-Scissors
-Yarn, string or twine
Directions:
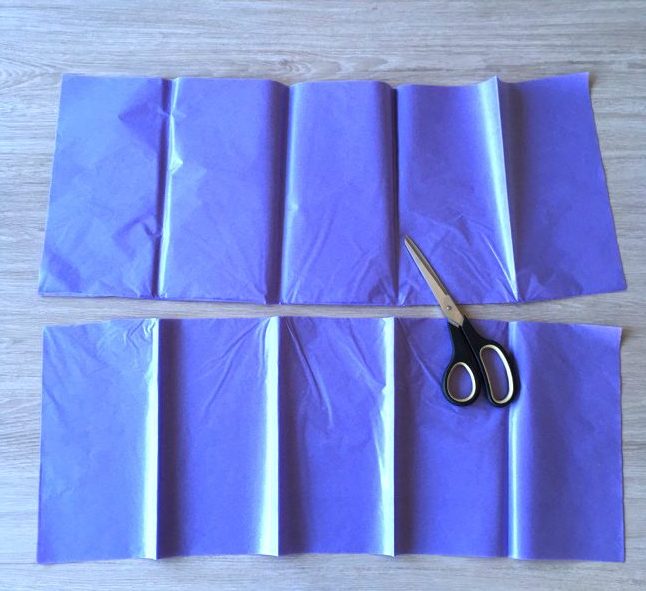
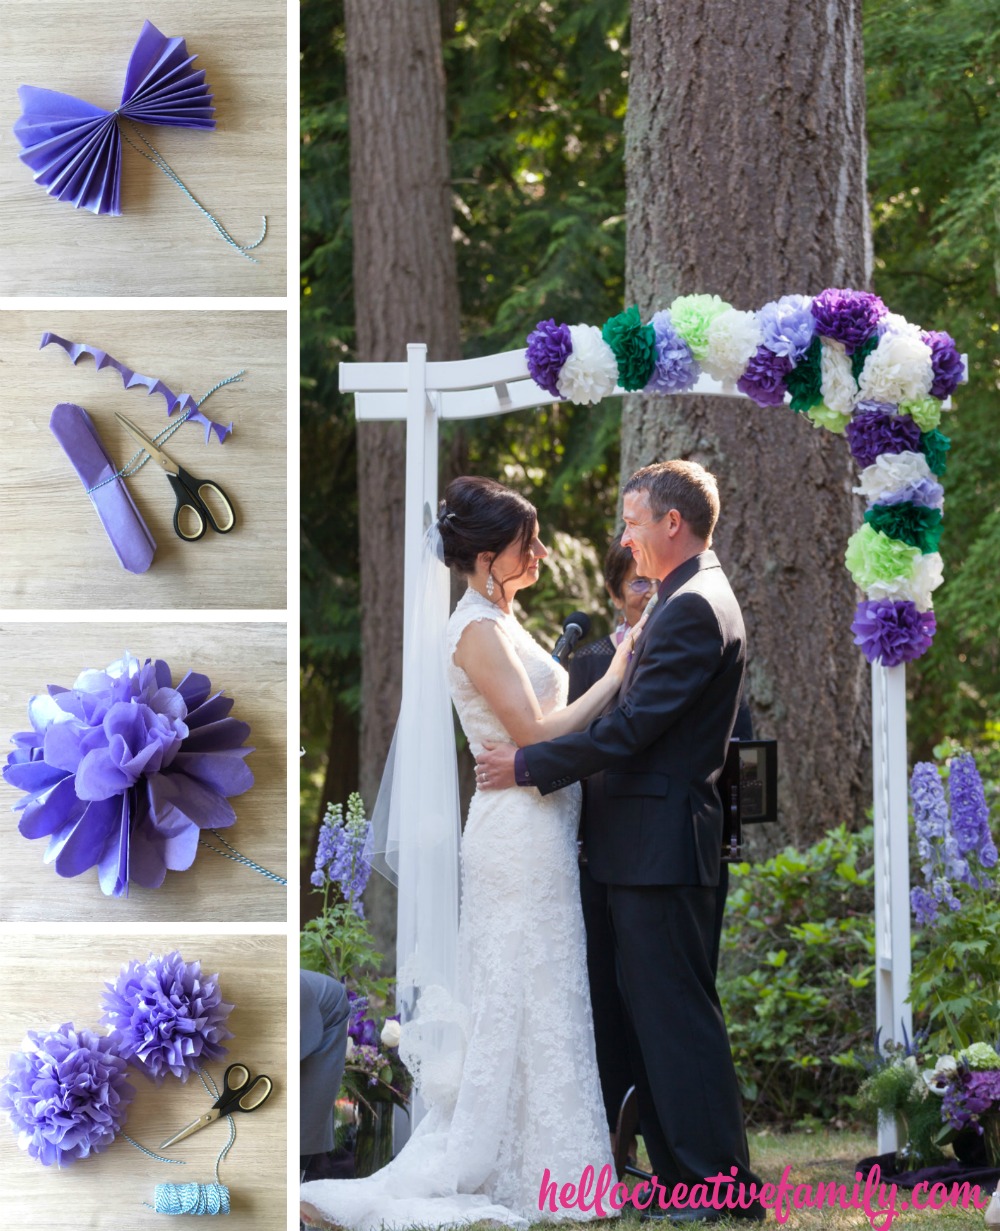
1. Count out 5 pieces of tissue paper, lay them in a stack and cut down the center lengthwise. This will make 2 tissue paper flowers.

2. Accordion fold your tissue paper leaving each pleat approximately 1 inch in width. (Unsure of what an accordion fold is? Check here.)
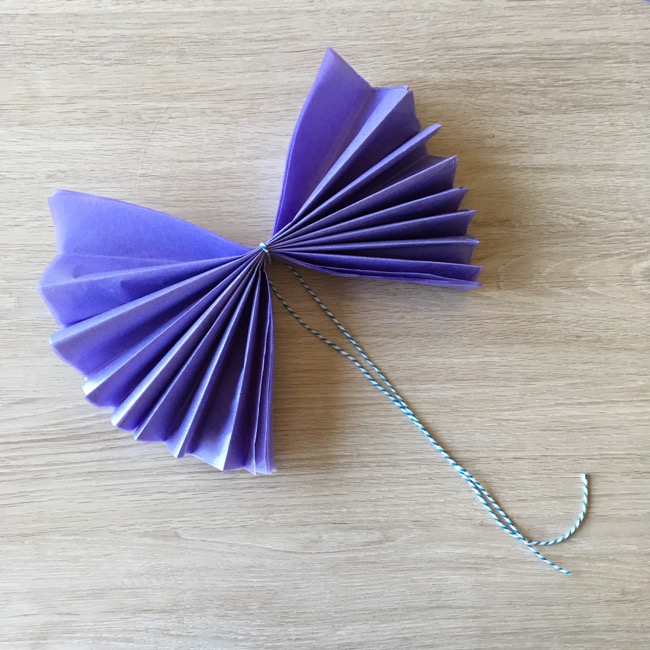
3. Tie a piece of twine or string around the center of the flower. This is what I use to tie my flowers wherever they are going so I usually leave my string on the longer side.

4. Cut the ends of your flowers for you petal shape. These are the two shapes I do the most often. A triangle tip for a “dahlia” type look and a rounded tip for a rose/peony type look.
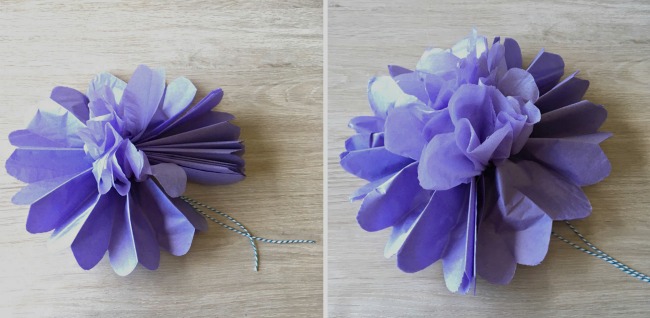
5. This is the portion of the craft that my mom calls “playing mother nature”. We get to bring the flower to life! One layer of tissue paper at a time, start separating the tissue paper from the tissue paper below it and fluffing it up towards the center of the flower. Work around in a circle, until all 5 layers have been fluffed up. Tissue paper tears very easily so be gentle, but if you do happen to tear a petal a bit, don’t worry. No one will ever notice!
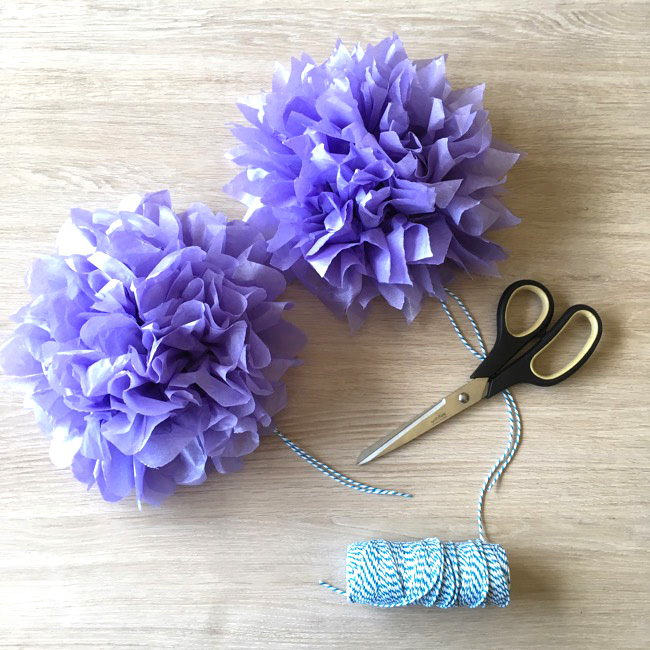
6. Repeat with your second half of the tissue paper stack to make a second flower! Voila! You are left with 2 beautiful DIY mini tissue paper flowers! Make up a bunch in all different colors to make a huge impact at your next party or gathering!

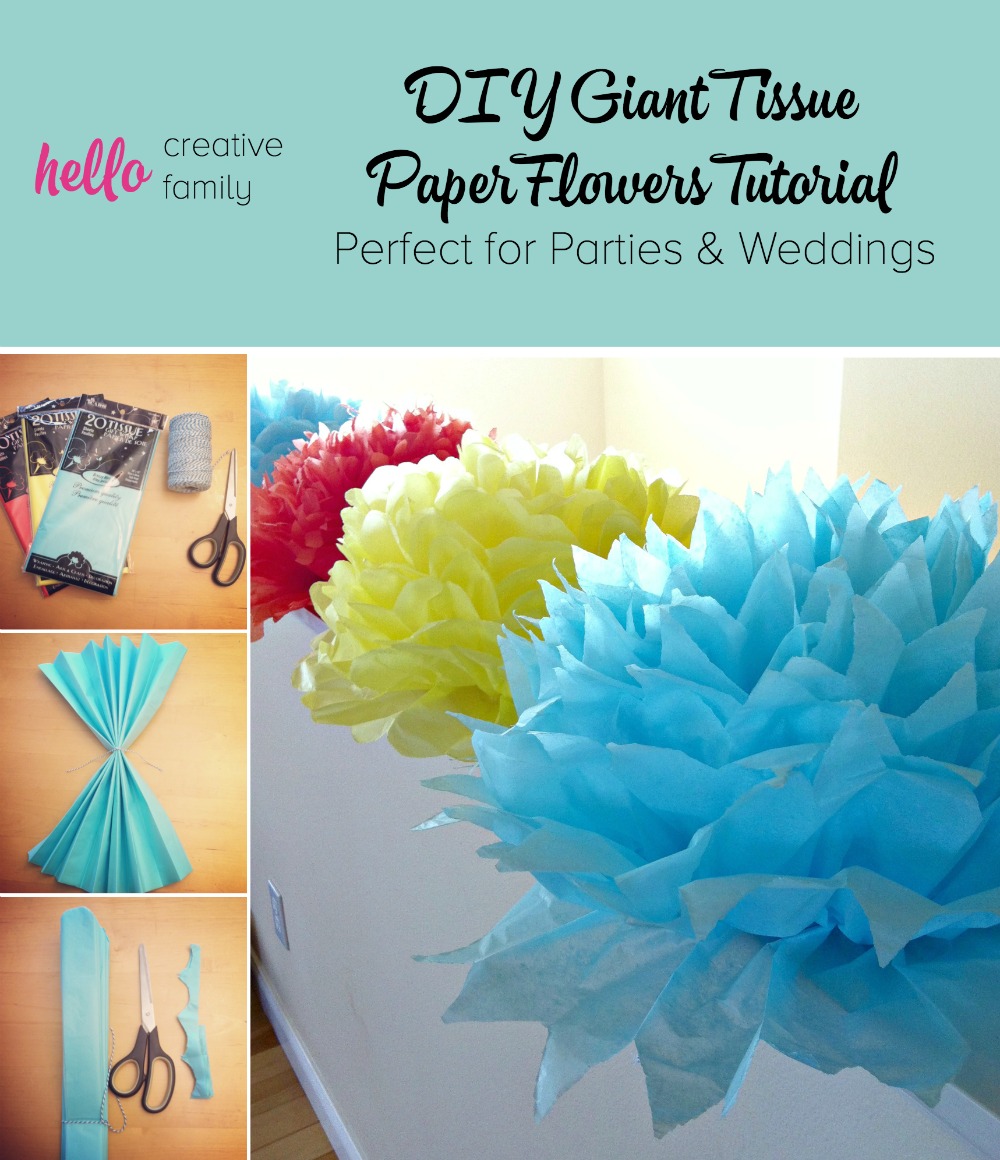
Want to make some giant tissue paper flowers to go with them? Check out our Giant Tissue Paper Flowers Tutorial!
Pin me for later:
Wedding photos courtesy of Sara Miedema Photography.
Tell me… What’s your favorite budget friendly DIY party decorating tip?
Looking for a budget party decoration idea? Learn how to make 8 mini tissue paper flowers for $1.00! With step by step photos and instructions this post is a “must pin”. Easy and inexpensive, perfect for weddings, birthday parties, baby showers, wedding showers, Christmas parties and summer bbqs. The perfect DIY budget party decoration! Also links to Hello Creative Family’s original post on how to make Giant Tissue Paper Pom Flowers.


This is so great! and exactly what I was looking for, for my girls summer birthday!
I love tutorials like yours which show the project step by step. It makes it so much easier to figure out! Thanks for sharing. #HomeMattersParty
These are beautiful – I was taught how to make these in high school in mid ’50s, I made tons of these tissue flowers for a friend’s wedding decos, then came along fine multi-coloured plastic sheets especially for creating these flowers. They came in packages similar to what you’re showing here, and not expensive at all. Got married in ’64, made a lot of them for our bride and groom’s car and various sizes for our reception hall. Rain or shine, plastic doesn’t wilt and dyes do not drip their colours onto anyone’s car or clothing if it rains – luckily the rain didn’t last long on morning of our special day. 😉
WOW, who would have thought that paper flower decorations could look so stunning and elegant- to the point of making an appearance at a wedding! Wonderful work, thank you so much for sharing the gorgeous idea. While I may not be planning a wedding, these are sure to look wonderful for any sort of event! Thank you so much for sharing the awesome article!
Wow, these are so pretty, what an inexpensive way to decorate for a wedding! I will definitely have to reference this tutorial when I set up for my ceremony. Thanks so much for sharing!
I also have made these flowers since I was little back in 1950. But my husband now says what do you spray on them to keep them from becoming old or torn? I have never sprayed anything on them. What do you suggest?
Hi Carla,
I’ve never heard of spraying tissue paper flowers but it seems like a great idea. We typically just use ours for parties and then they end up being recycled. Does he know what people spray them with?
Best Wishes,
Crystal