


Photo to Wood Transfer Tutorial With Step By Step Photos and Instructions
This post and the photos within it may contain Amazon or other affiliate links. If you purchase something through the link, I may receive a small commission at no extra charge to you.


This photo to wood transfer tutorial is one of the most popular posts on Hello Creative Family. It was one of the very first projects that I did on my original blog, Sew Creative. I think people love it so much because of the step by step photos and instructions. It’s a fun project, but does require a bit of patience. You’ll notice as you go through my instructions that I actually did this project twice. I wasn’t completely satisfied with how it turned out the first time, so I scraped the wood and tried again. It’s not a fast project, but if you have patience and stick with it, you’ll get beautiful results. Enjoy and please let me know if you have any questions! -Crystal
UPDATE: I’ve recently discovered a much easier way to transfer photos to wood. It takes about 15 minutes to do my new project and isn’t nearly as challenging as the original way I shared below. Curious to see my new method? Check out my post The Easiest Way To Transfer Photos To Wood In Minutes.

Still want to try my original method? Read on!
Photo to Wood Transfer Tutorial With Step By Step Photos
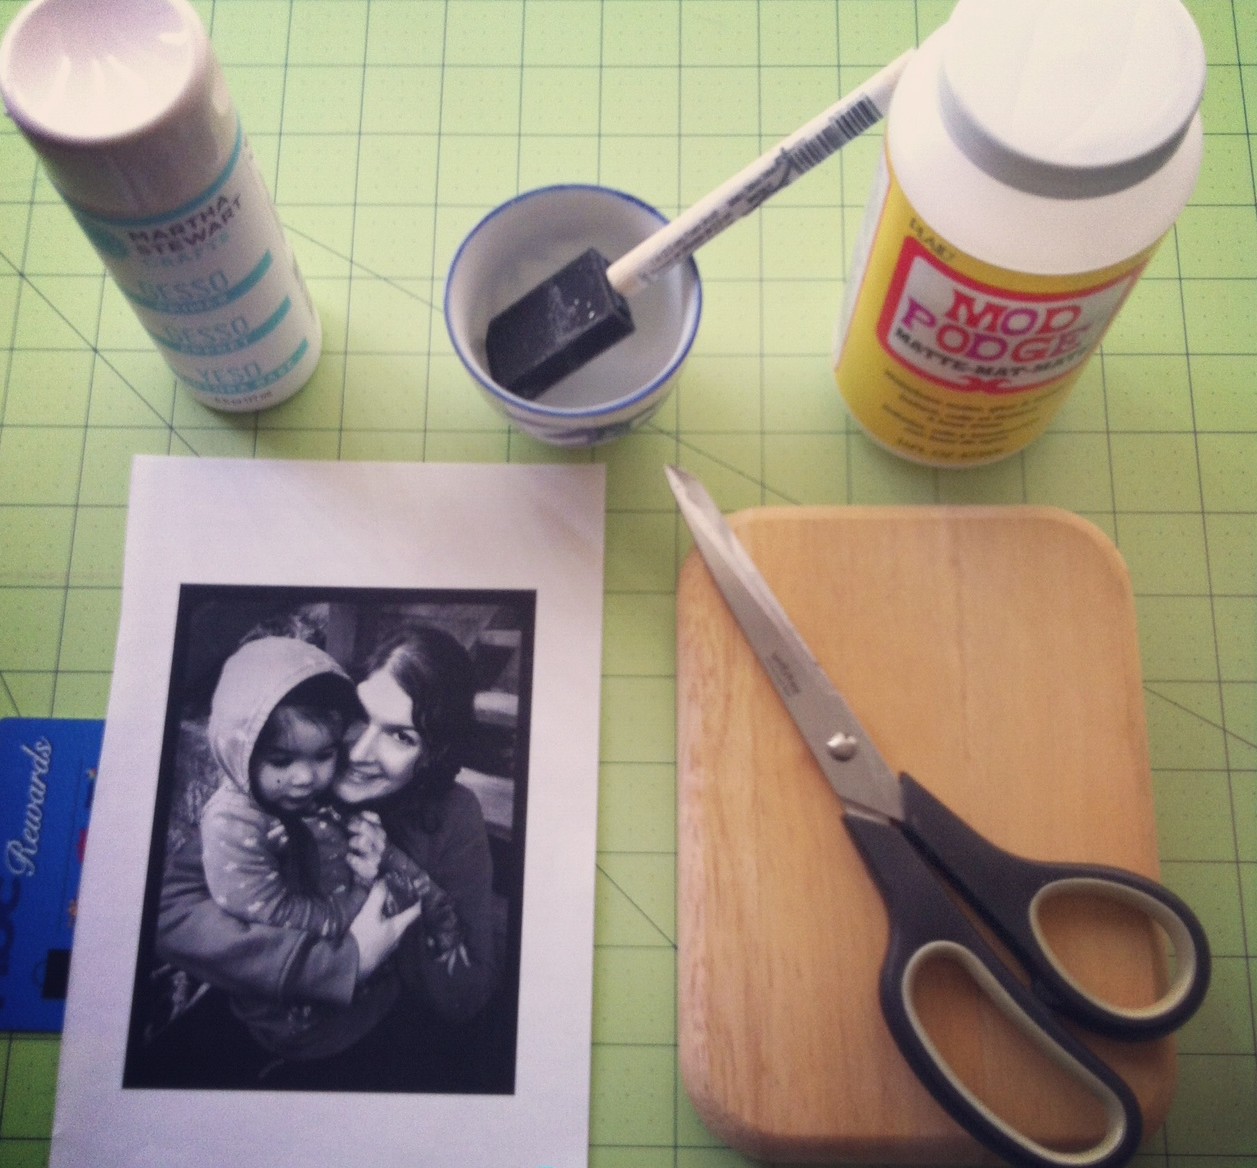
What you need:
-A piece of wood (mine was a small cutting board from the thrift store)
-A laser printed copy of your photo on copier paper, the copy should be the mirror image of how you would like it to appear on the wood. This ONLY works with laser copies. It won’t work with ink jet. (Make sure this is printed on regular paper, not photo paper.)
–Gel Medium (I used Martha Stewart’s Gesso but Mod Podge also makes this photo transfer medium now. You can find Gel Medium at any Michael’s or Joann’s stores… don’t forget to bring your coupons!)
-Scissors to cut out your photo
-A rag to soak your photo
-A cup or plate to pour your gel medium and mod podge into
-A boning tool or plastic card to get the air bubbles out with
Step 1: Print out the image you would like to transfer using a laser printer. Unfortunately ink jet printouts won’t work for this project. Most copy stores (Kinko’s, Staples) use laser printers. You may want to mirror your image as the transfer will make your image the reverse of how it is printed.
Step 2: Trim your image to the size that you want it to be on the wood.
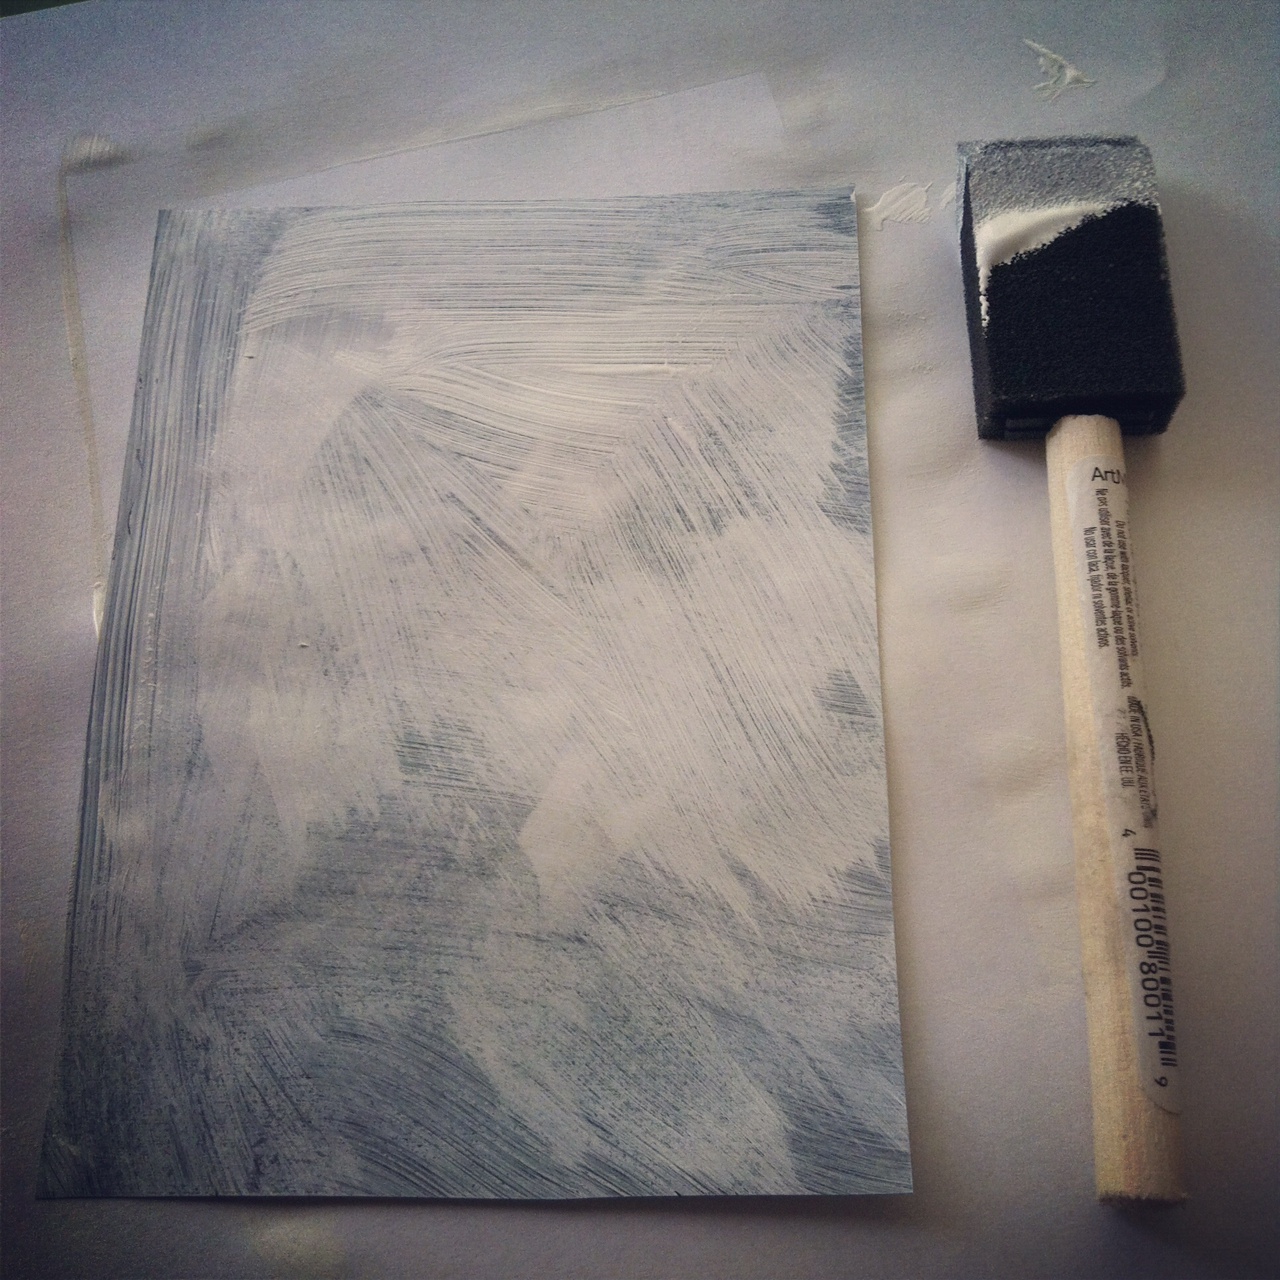
Step 3: Put a layer of gel medium on the printed side of your photo.
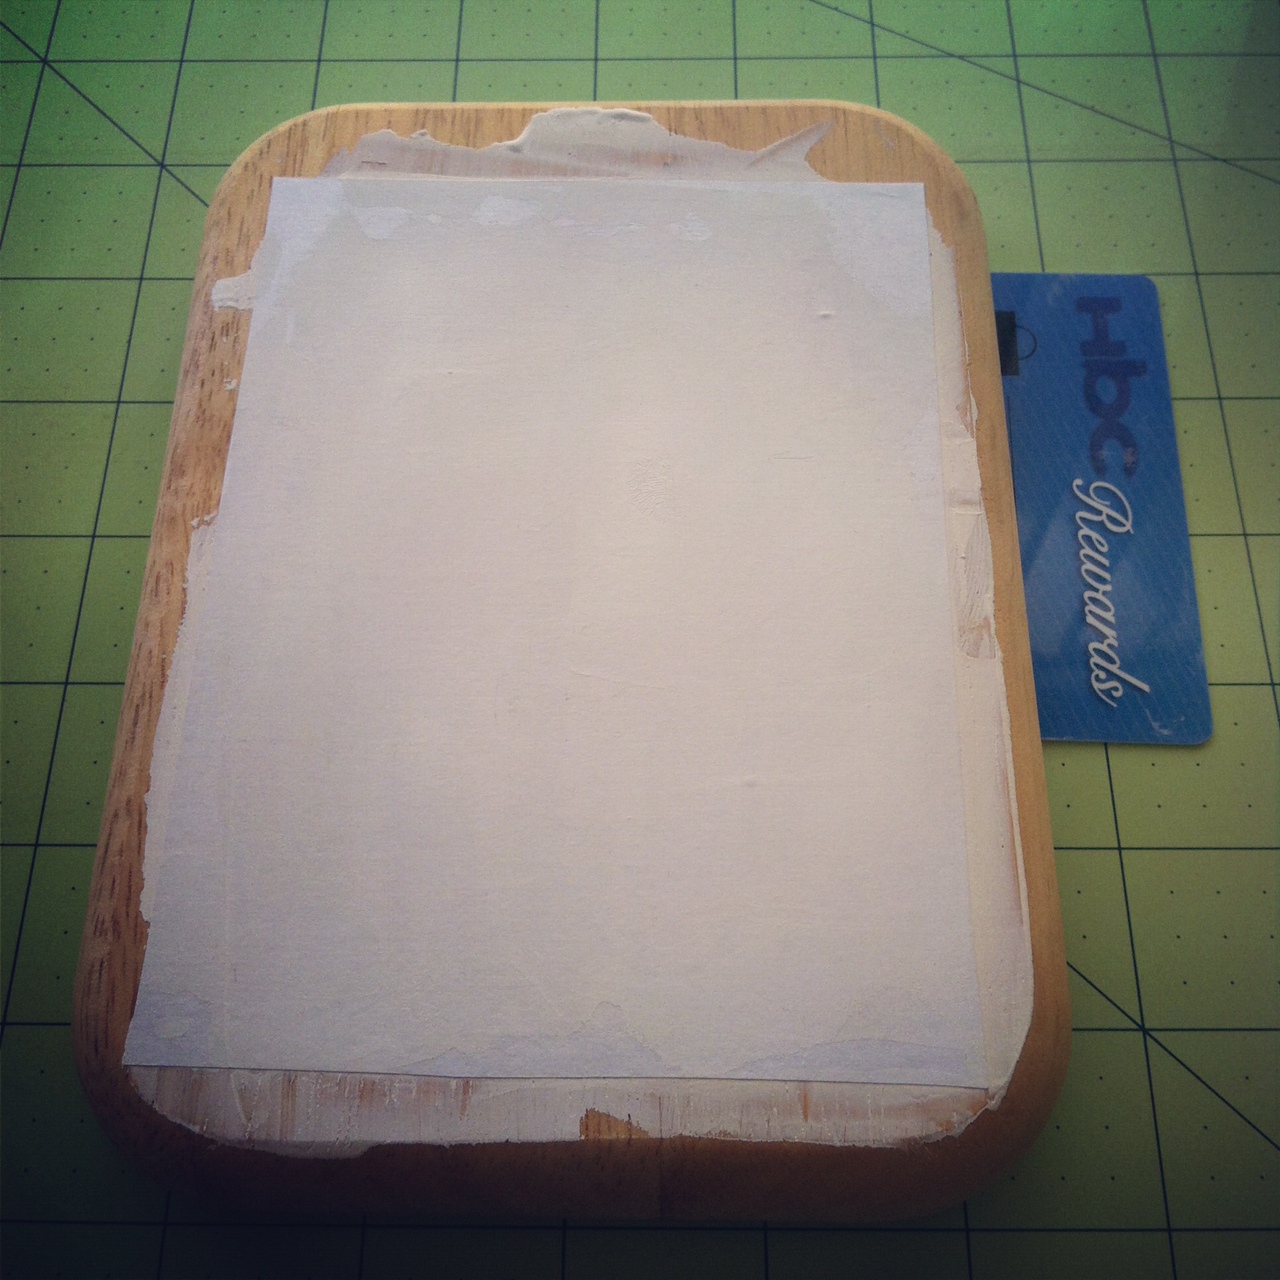
Step 4: Put a layer of gel medium on the wood, then lay the paper photo side down onto the wood. Use your plastic card or boning tool to remove any bubbles of gel medium from between the paper and wood by smoothing the card over the paper pushing excess to the outer edges. Make sure all of your corners are stuck to the wood with the gel medium. If it’s not stuck it won’t transfer.
Step 5: Wipe away excess gel medium from around photo then leave to dry for at least 4 hours.
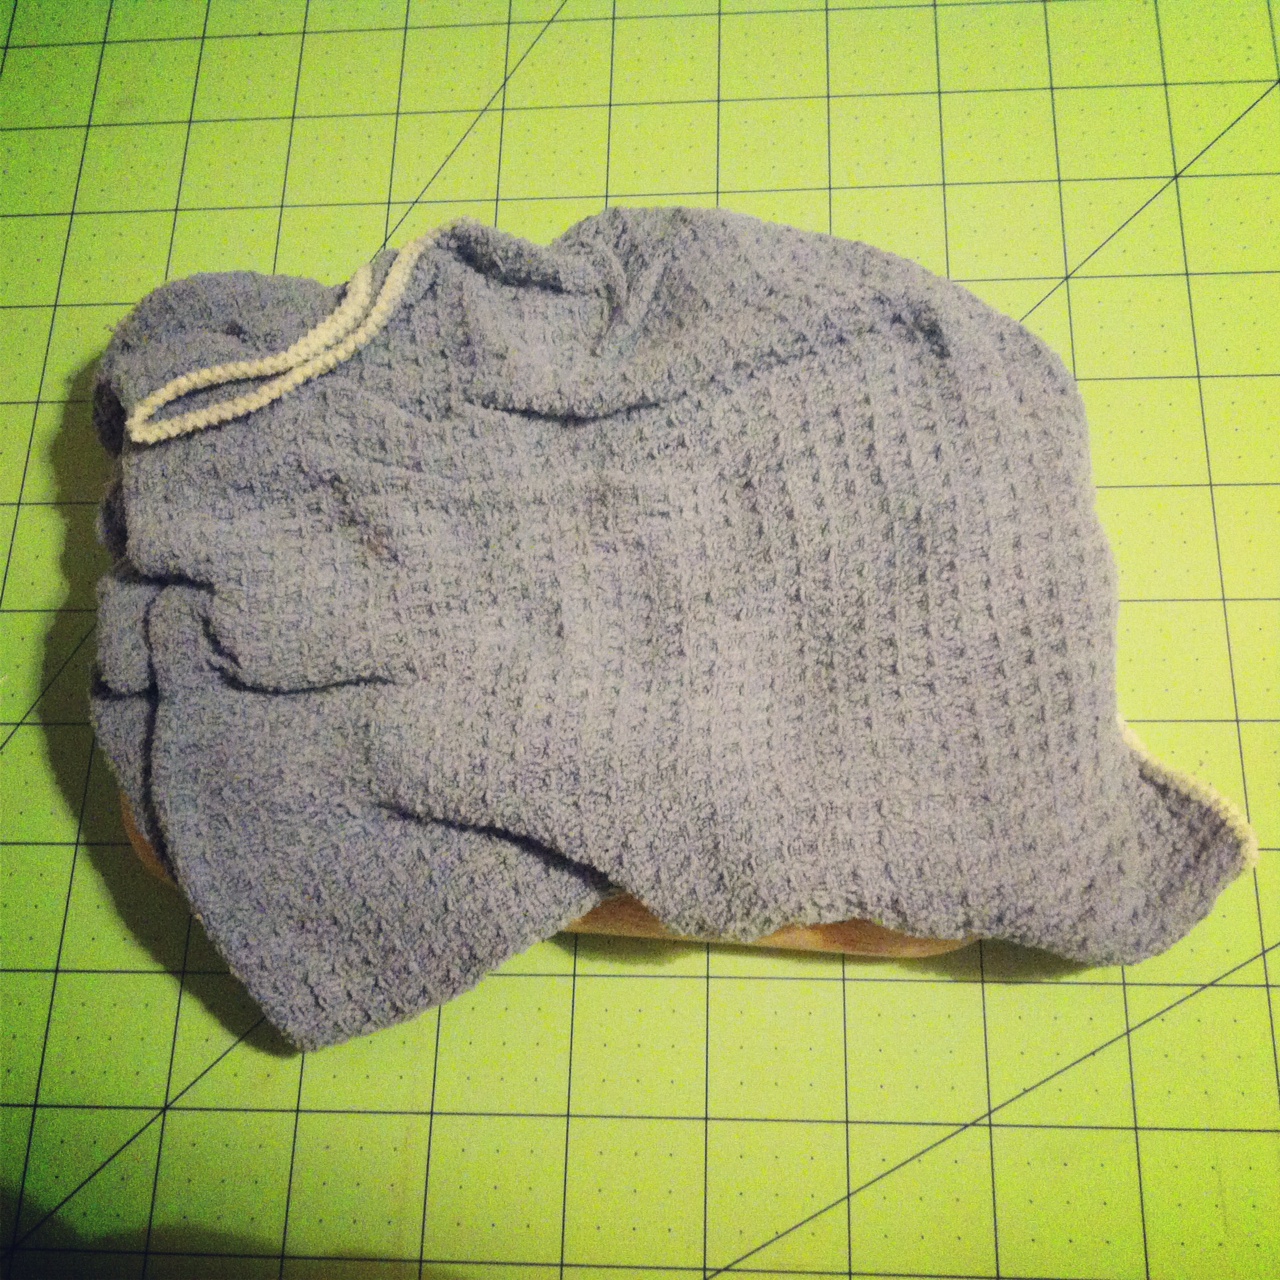
Step 6: 4 plus hours later, once the paper has completely dried, dampen a rag with warm water and and lay it over top of your photo. Leave for approximately 5 minutes.
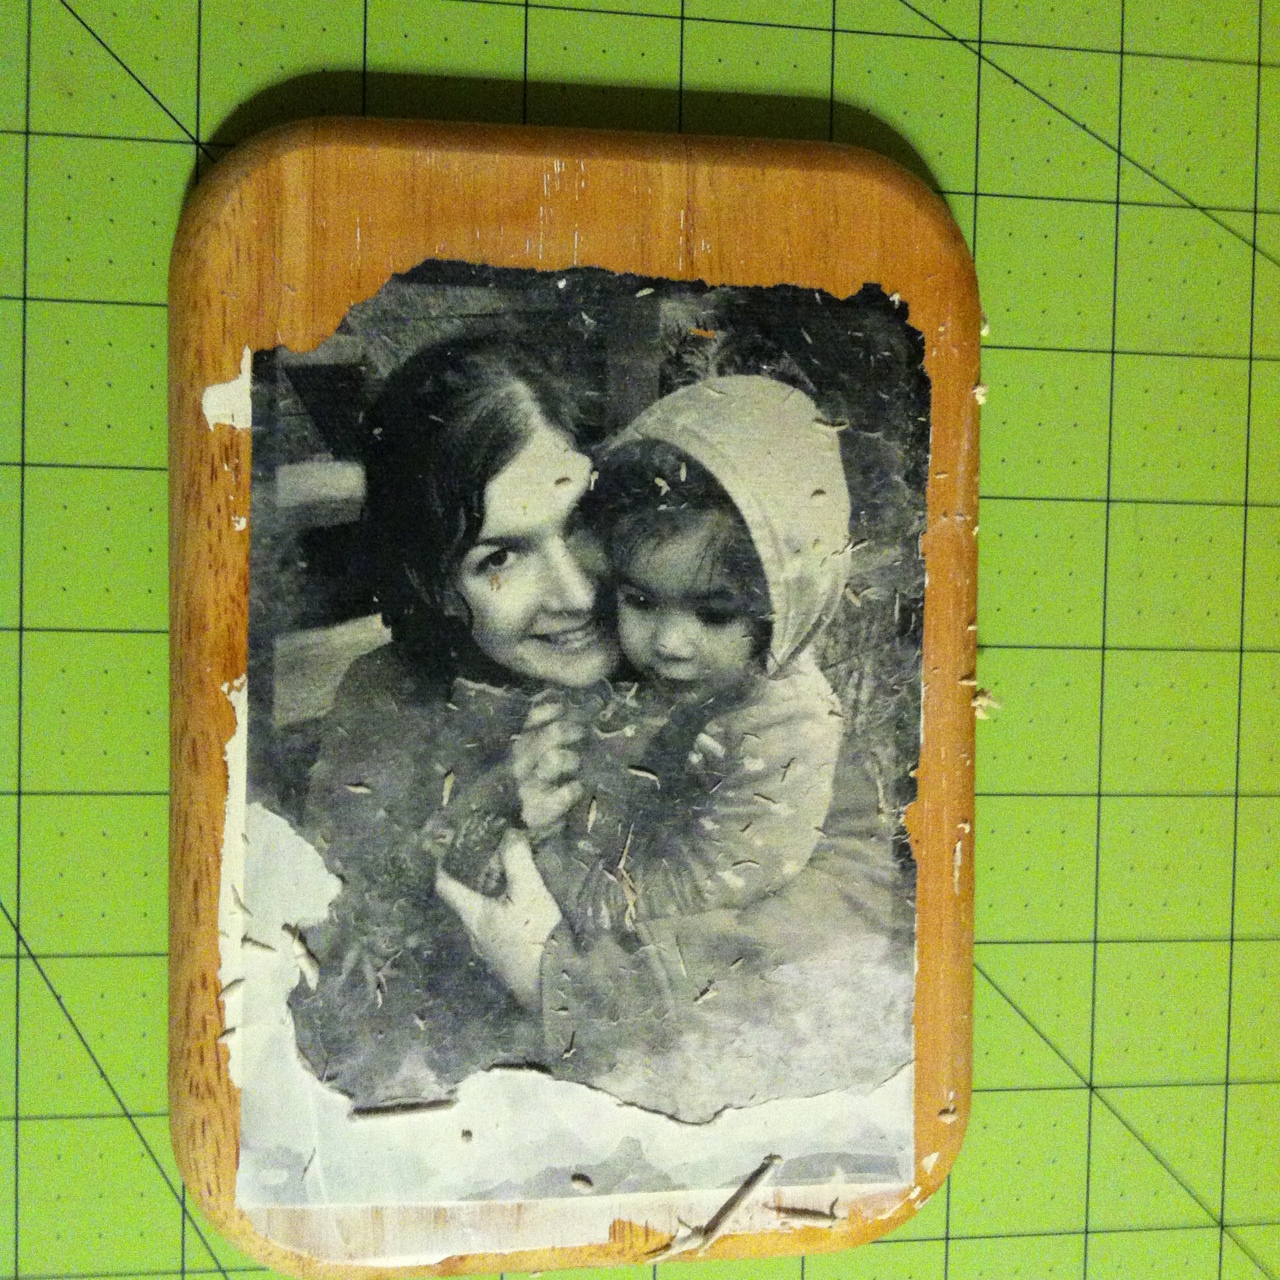
Step 7: Once the paper is damp comes the fun, but time intensive part of this project. Stand over a sink, wet your fingers and slowly start rubbing your finger over the paper, almost using your finger like sand paper. The photo copy is going to appear to split in half. The white part of the paper will start to lift away and the paper with the ink will stick to the wood. Take this part very, very slow. If you go to fast the ink will lift away from the wood and you will be left with bare patches.
*Note- having done this step several times now I have come up with the following technique. I stand at the sink and slowly remove the top layer of paper using circular motions with my fingers. I am constantly wetting my fingers and lightly rinsing the wood under the sink to wash off clumps of paper. Once I think I have the first layer of paper off I set the wood down for a couple of minutes and clean up all of the paper bits. This will give the transfer time to dry. When you look at it you will probably see that there are still places where there is a thin layer of paper left, the image will look cloudy. Wet down your fingers and start “sanding” away again. When you can’t see any white cloudy bits anymore set aside again, clean up a bit while it dries, pick it up again and “sand” some more. I wet down and let me project dry 5-10 times before I was done.
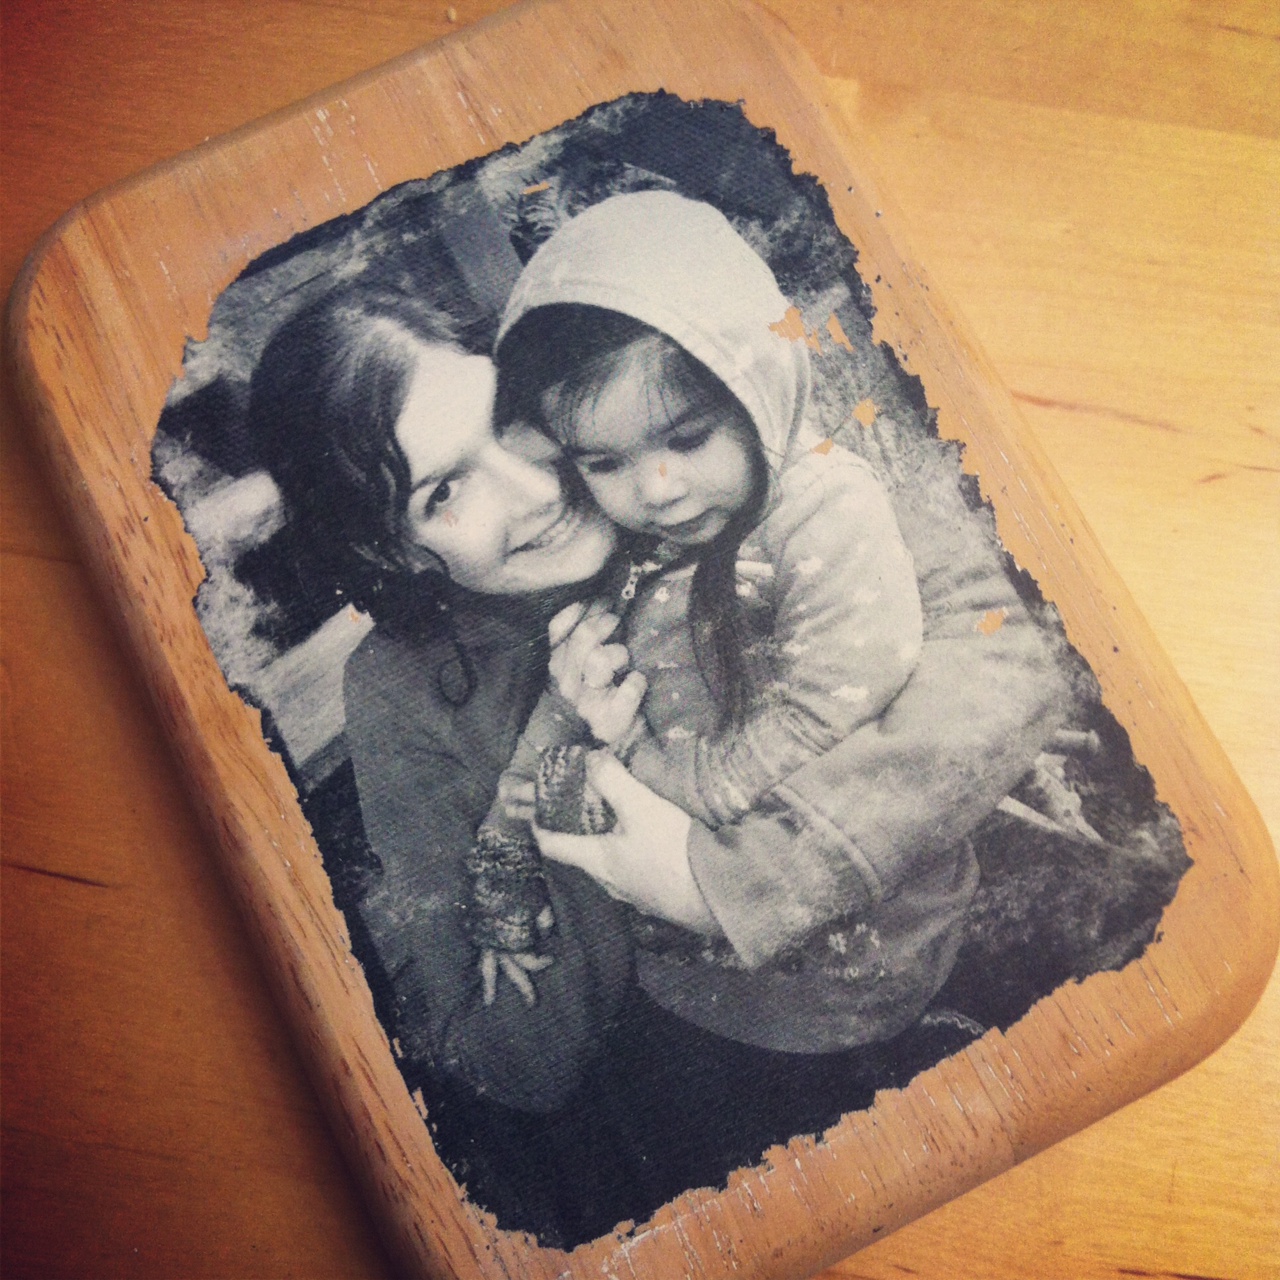
Step 7: Leave your project to dry for about an hour then look at it to see if you are satisfied. Grab your boning tool and rough up the edges a bit if you like. You can take a gray sharpie marker and lightly dot in areas where the transfer doesn’t look quite right. If you need to you can wet it down and “sand” down some more if there are bits of paper that you missed. In my case I decided that I would prefer if my photo filled the entire front of the wood so I wet the wood down, scraped the project off and redid it.
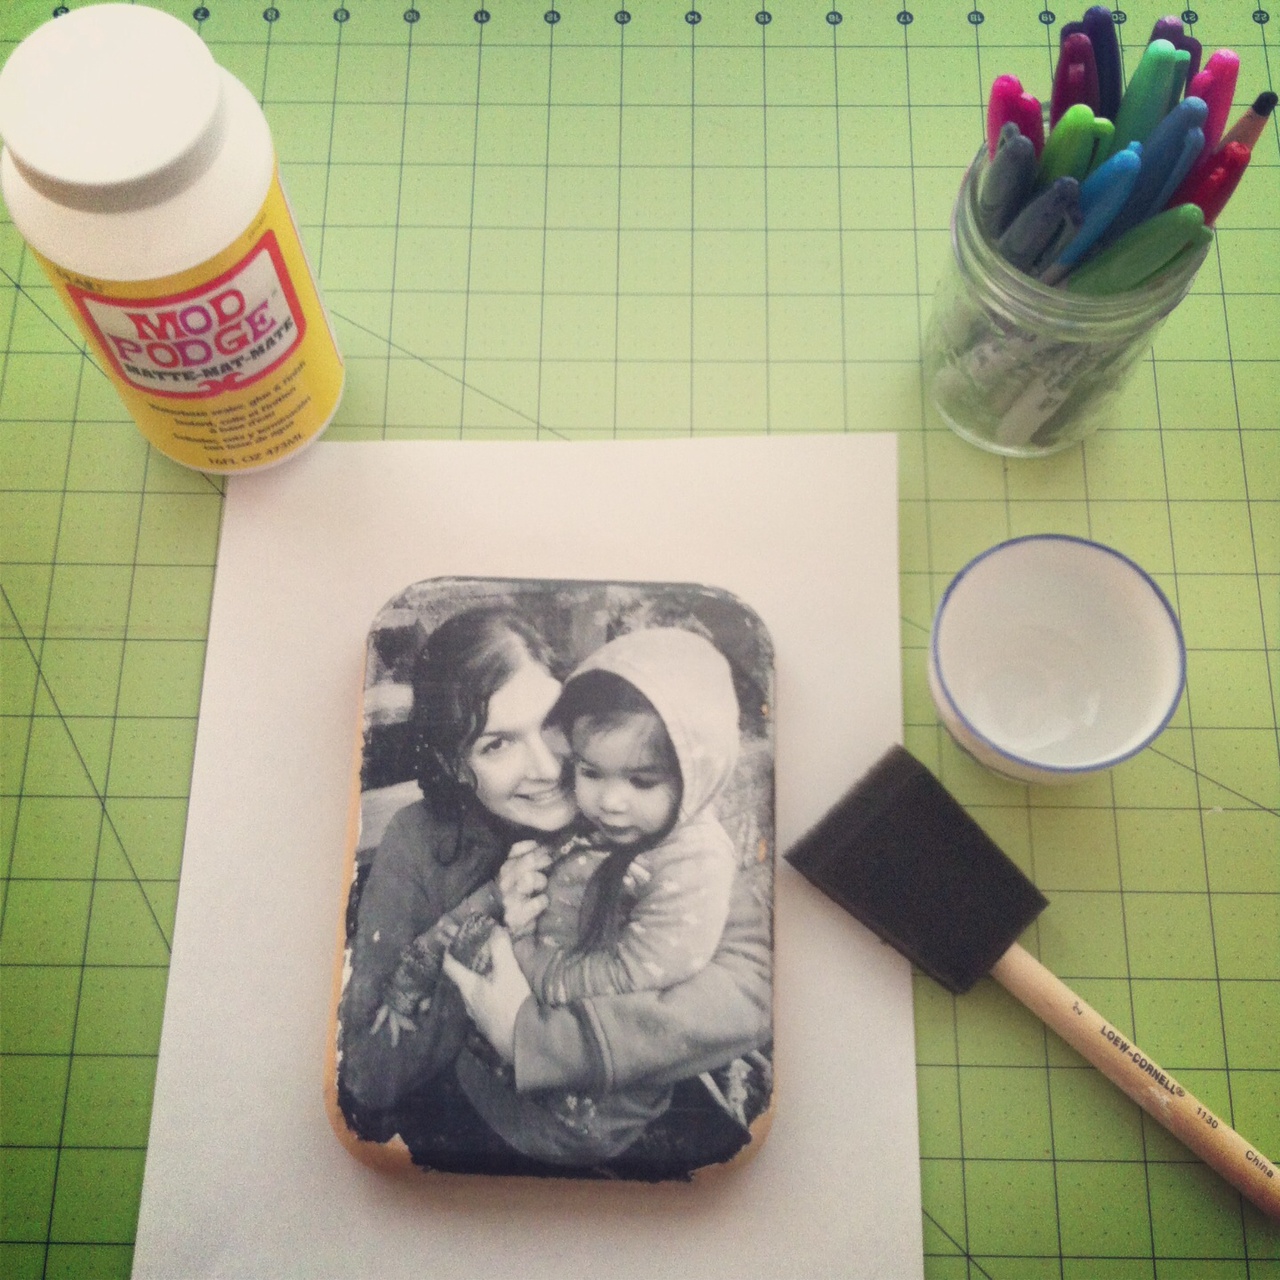
Step 8: When you are satisfied with the look of your transfer put a small amount of mod podge into a cup, and using a sponge brush apply a thin layer of mod podge all over your photo, including the edges. Use smooth, even strokes. Allow to dry for at least 15 minutes then repeat 2 more times.
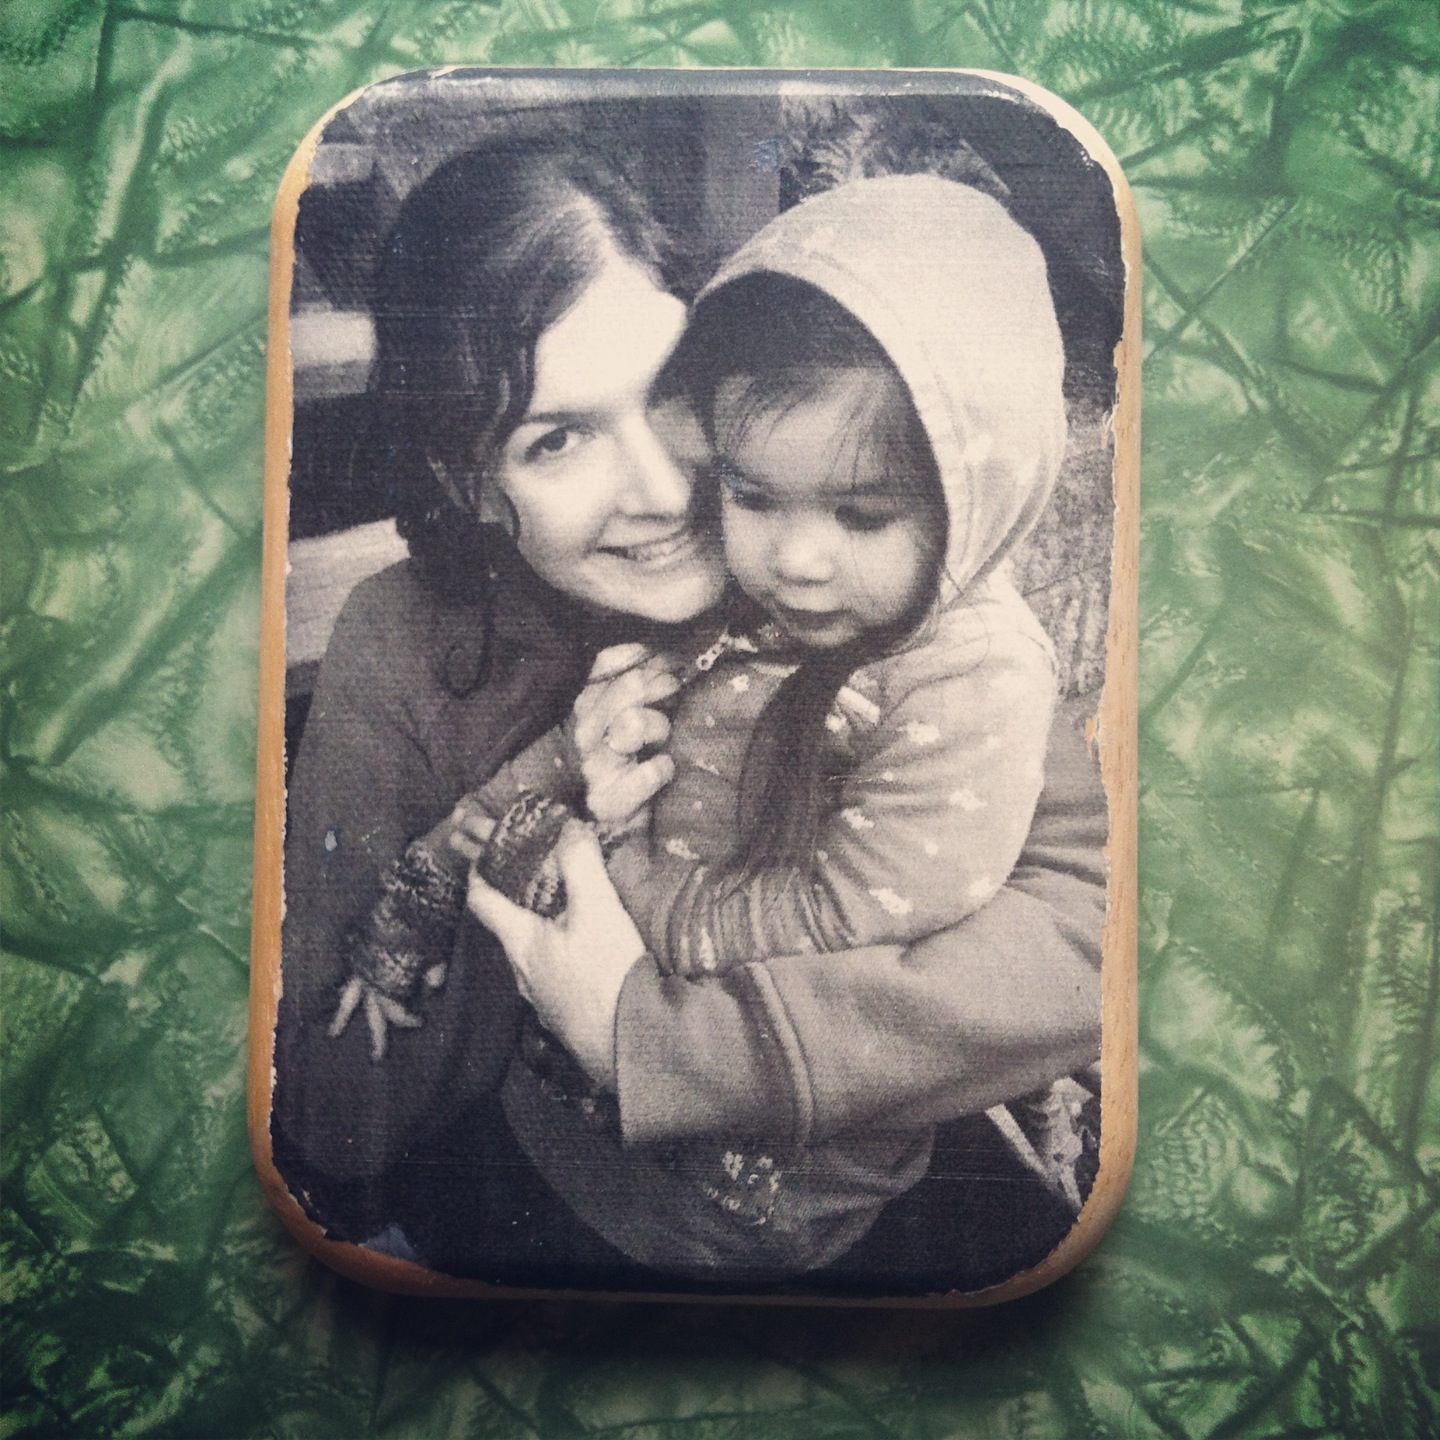
Once your mod podge has dried you have a beautiful photo impact piece that will be commented on by everyone who enters your home. They also make great gifts!
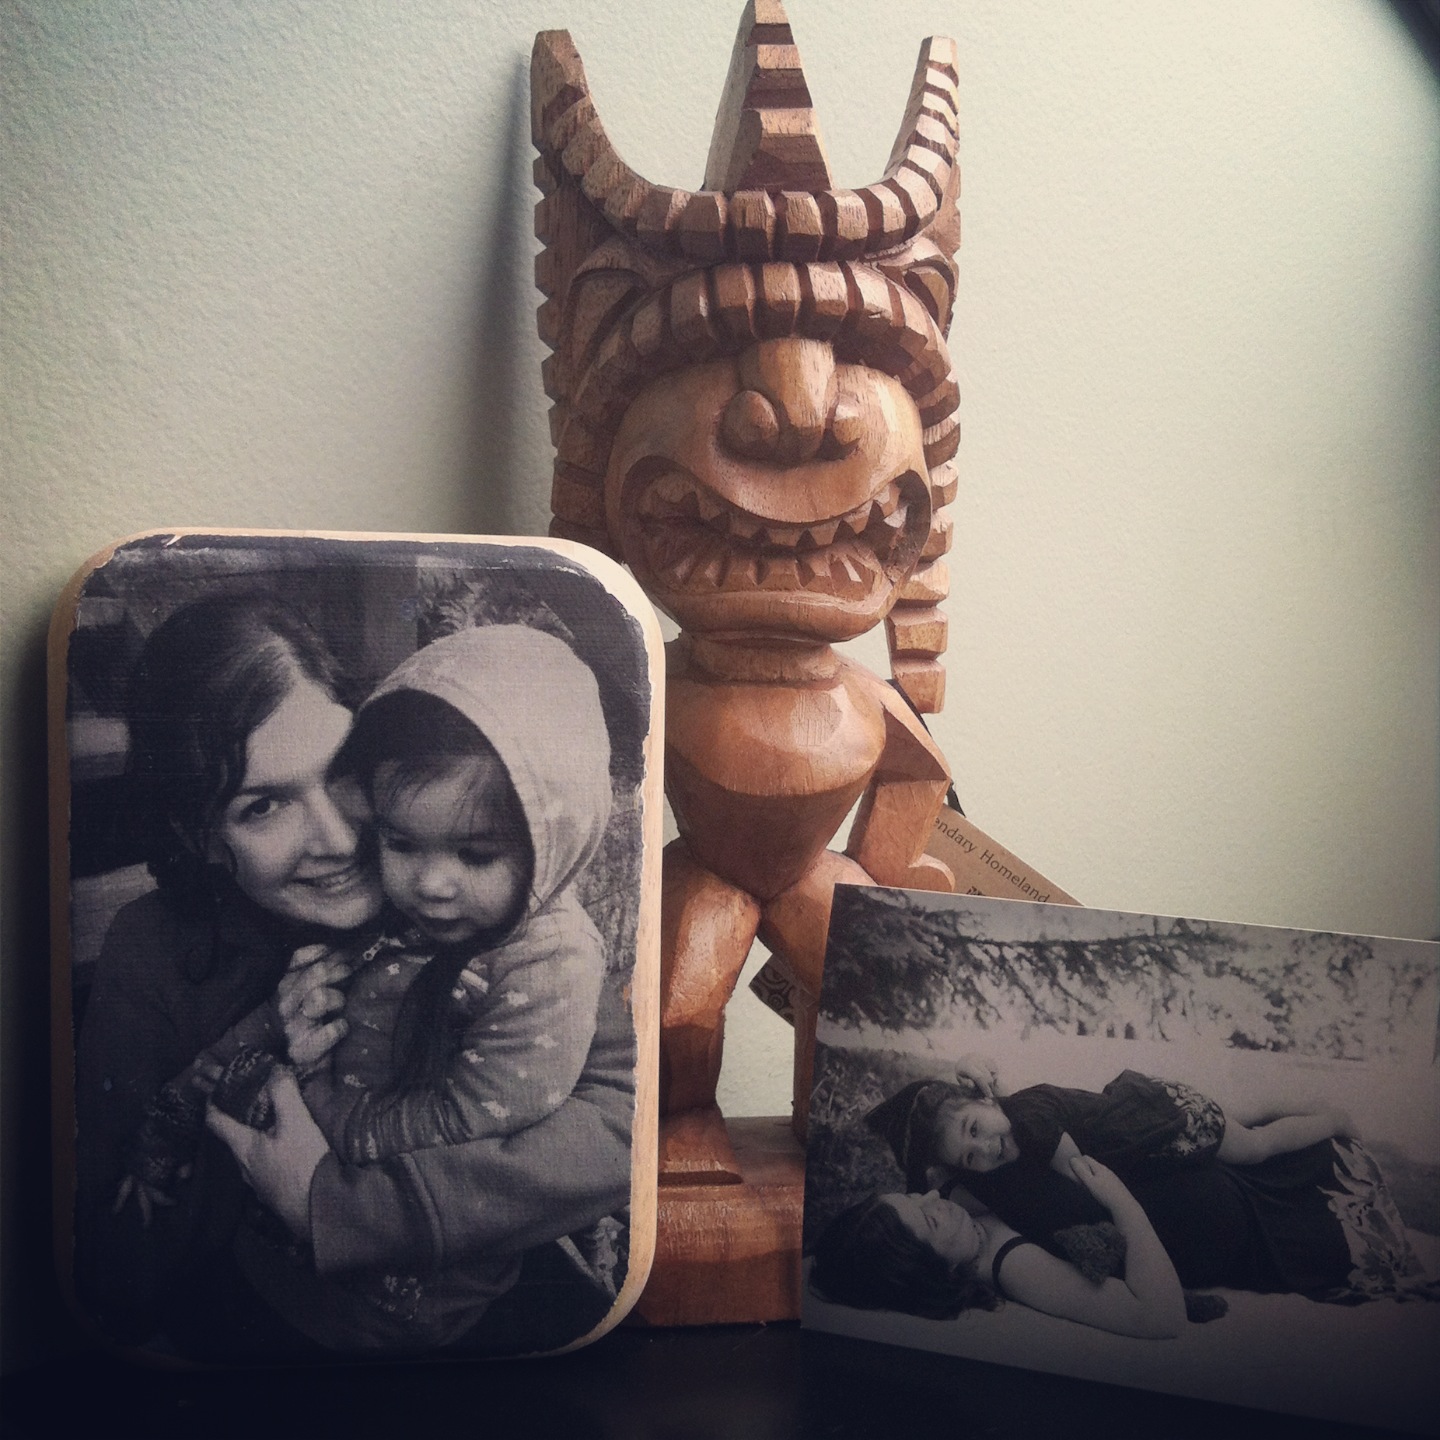
I hope you enjoyed our Photo To Wood Transfer Tutorial. If you have any questions please ask and I’d be more than happy to try to answer. I would love to see the results of your Photo to Wood Transfer projects. Amy Anderson from Mod Podge Rocks recently wrote a great post on 5 Tips for Using Mod Podge Photo Transfer Medium! I’d highly suggest giving it a read if you are having any problems.
If you like this post, we think you’ll love:
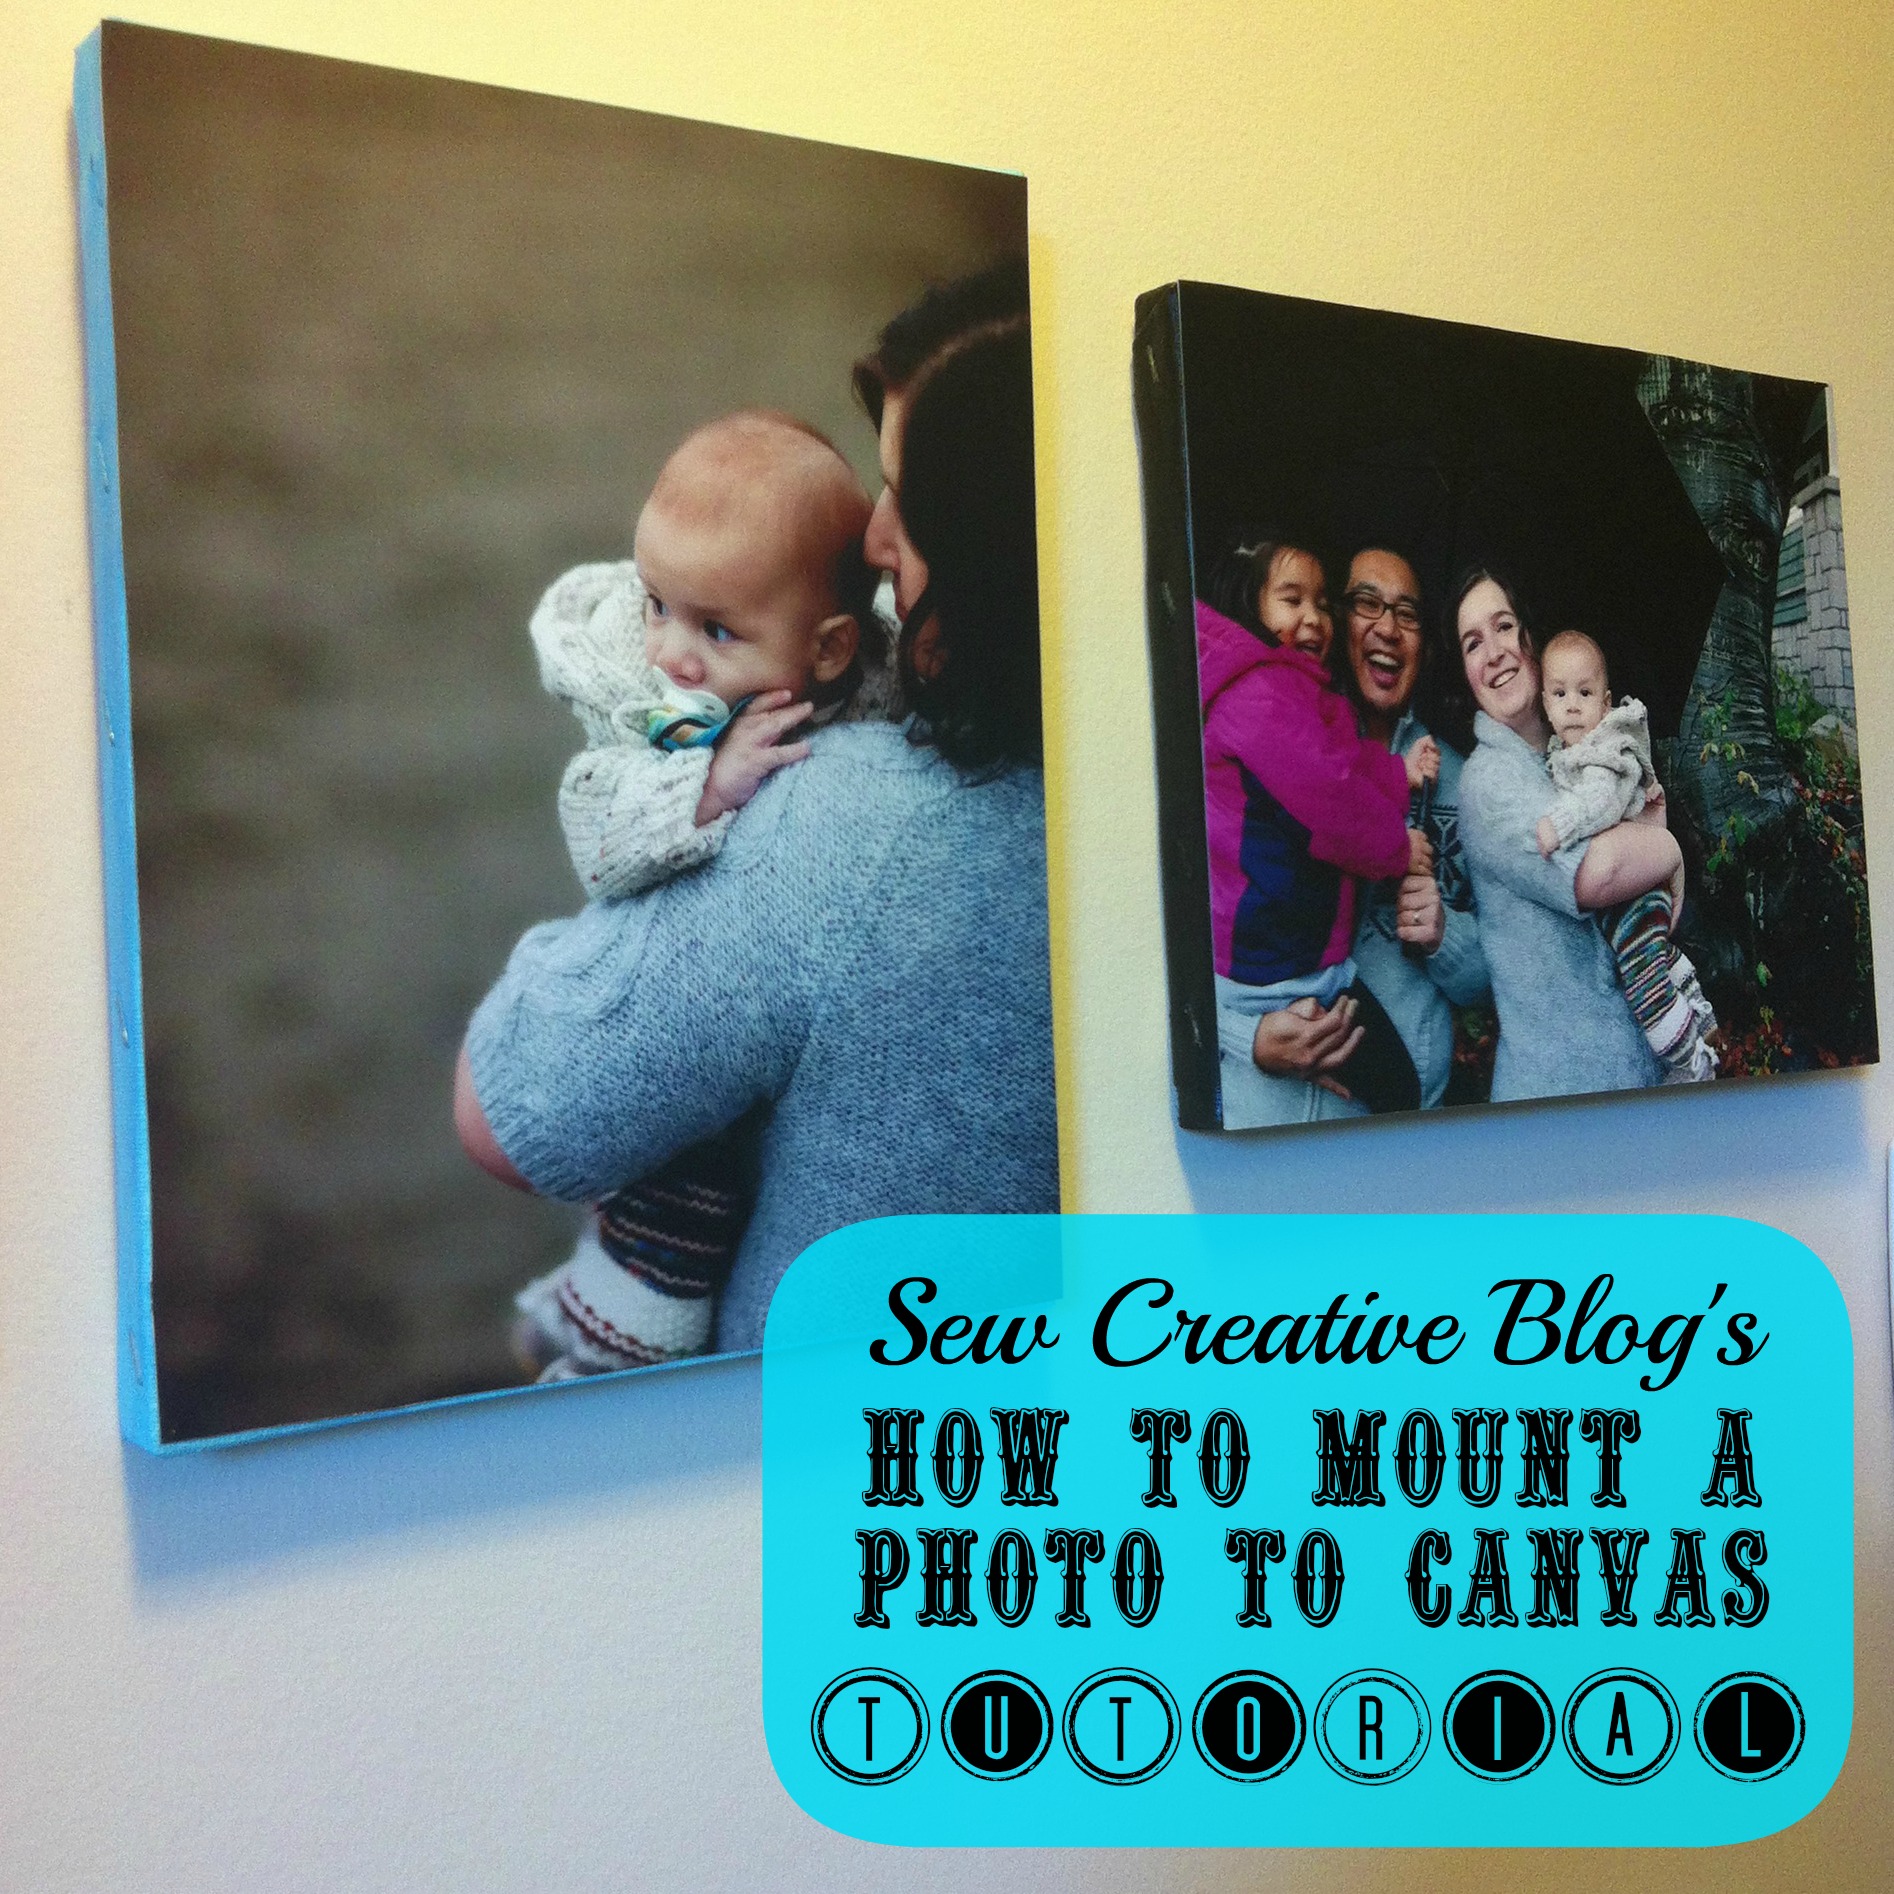
How to mount a photo to canvas.

How To Make Easy DIY Photo Coasters
The Easiest Way To Transfer Photos To Wood For Perfect Results Every Time


Hello Crystel, Loved the tutorial and have just done my first transfer to a piece of smooth plywood…. but i have got lots of white Blobs or Blisters over a lot of the print, I can’t rub them out as it will tear the print, any idea what would have caused it and if i can deal with it Regards Carol
Hi Carol,
Congrats on finishing your first transfer. I wasn’t happy with the way my first one turned out so I rubbed it all off and started again. My guess is that the white blobs might be blobs of the gel medium that didn’t get smoothed out properly after you applied the photo copy to the wood. I haven’t had any blobs on mine but I always makes sure to smooth it out really well using a credit card.
I’d love to see a picture of your finished project.
Best Wishes,
Crystal
Thanks Crystel, I have just come back from holiday and am trying again. my second one (before going away) did tear in a couple of places so am now scraping off tand trying for third time lucky… any tips for sraping off, have wetted down and using a scraper, but it is hard to remove…. regards Carol
Hi Carol,
I don’t use a scraper when removing the paper. I wet the paper and then use the tip of my finger in a circular motion to lightly “sand” off the paper. Once the paper gets too wet and I think it’s going to start to tear I leave it to try for a few minutes and then start again. I have also used sharpie markers to dot in areas where the paper tore.
Hope that helps.
Crystal
I saw somwhere that if you get the glue on the white side of the print that in those spots it will be impossible to remove it from the print since it is adhering the white paper part to the canvas as well as the photo. be sure to get NO glue/podge on the outside of the print paper.
Good tip Tina! I usually don’t even pull out the Mod Podge until I’m all done “sanding down” my image and it’s already adhered. No need to get the mod podge out and have it dry up. 🙂
Best wishes,
Crystal
Hi , I was just wondering if the picture has to be printed on regular copy paper or actual photo (glossy) paper .
Thanks
Inna
Hi Inna,
I’ve only tried it using regular copy paper. I don’t know if the photo paper would split in half leaving the laser printed part behind.
Thanks so much for visiting and for the question.
Best Wishes,
Crystal
Hello,
Do you know if photos that you get printed from say Walgreens would transfer well onto hardboard; which is a smooth surfaced fiberboard? I notice that most people use ink jet printer photos for most transfers, but I would love to use some old printed photos I have in projects.
Thanks,
Marie
Hi Marie,
Great question. With the photo to wood tranfer the gel medium splits the paper in half and leaves the laser ink on the wood. I don’t think you would get the same effect with a printed photo… but my other Mod Podge Photo project would be great for that. It’s a project where you mount the photo to canvas but it could easily be done with wood and it takes much less time than this project does.
Here is the link:
https://hellocreativefamily.com/how-to-mount-a-photo-to-canvas-tutorial-5-00-gift/
Best Wishes,
Crystal
Hi Crystal,
Thanks so much for responding! I really like the look of your other project too,so maybe I will try that one out!
Thank you,
Marie
My pleasure Marie. Let me know how it turns out on wood. It’s been a project I’ve been wanting to try for awhile. 🙂
Hello Crystal, loved this tuition, am finishing one this morning, looking good so far….. do you know if the same system would work with wood panels and using a canvas print as well as a photo print… best regards
Hi Carol,
I’m so happy you like it. For your other project you may want to try this tutorial:
https://hellocreativefamily.com/how-to-mount-a-photo-to-canvas-tutorial-5-00-gift/
Best Wishes,
Crystal
I followed your instructions but used a raw piece of wood and it warped. How can I avoid this next time??
Hi Angie,
Thank you for stopping by. Are you able to give me a bit more information? Was it your wood that warped or the image?
If it was the wood I would suggest a couple of things. 1. Maybe don’t get it as wet. 2. Maybe get a thicker piece of wood. 3. Maybe ask at the store for a wood that is pressure treated so it can withstand water damage?
I’ve tried it with reclaimed wood from a cutting board and with a wooden box from Michael’s and neither warped.
If it’s your picture that warped. Maybe you didn’t get all of the air bubbles out underneath the Gesso?
Let me know if any of these tips helped.
Best Wishes,
Crystal
Hello,
Thank you so much for these tips. I have not attempted to do this yet, but was wondering if the gel medium is necessary for it to turn out right. I have all of the supplies other than this gel, and didn’t know if it was necessary. I have seen on other websites that the gel is optional.
Thanks,
Hanna
Hi Hanna,
I believe you need the gel medium if you want the paper to split and leave the laser ink behind. However if you want to do it without gel medium this might be a good tutorial for you, and it’s way faster and easier. 🙂
https://hellocreativefamily.com/how-to-mount-a-photo-to-canvas-tutorial-5-00-gift/
Best Wishes,
Crystal
Hello,
I’m not a follower and I am new to crafting. But I saw this type of project on Pinterest and went on the hunt.
One thing I am curious about, and seems silly to me but here goes 🙂
All the projects I’ve seen are black and white photos. Does anyone know if it will work with colour photos?
Thanks in advance
Cathy
Hi Cathy,
Thanks for visiting. It does work with colored photos. My friend made a wooden box for her husband for their wedding anniversary with a wedding photo on the top of the box. The one thing about the color is that during the “rubbing” part of the project you happen to rub off to much it is more obvious in color than in black and white.
Best Wishes,
Crystal
Can mod podge be used as the gel medium? Thanks!
Hi Abigail,
Mod Podge and gel medium are two different things. The gel medium makes the paper split where the mod podge would fuse the paper. I believe that Mod Podge now makes a line of gel medium though.
Best Wishes,
Crystal
So on my second attempt and my photos keep “lifting” off the wood while rubbing the paper off- could I be using too little medium? That’s my theory as it seems that the image is not transferring. I end up with a cloudy looking patchy image on my projects 🙁
Hi Chris,
My best guess would be that you aren’t using enough medium. You are printing your photos on a laser printer right? When I do it I often coat both the wood and the paper in gel medium. After I let it dry I wet a washcloth with warm water and lay it on top. The paper almost splits in half with the bottom of the paper with the image attached to the wood and the other half of the paper lifting up.
If you are having a hard time this is another really nice photo project that you could probably do just as easily on wood:
https://hellocreativefamily.com/how-to-mount-a-photo-to-canvas-tutorial-5-00-gift/
Best Wishes,
Crystal
Do you use photo paper or regular copy paper when printing out a copy of the photo to transfer?
Can’t wait to try this. Thank you for posting the tutorial.
Hi Sheila,
Thanks for visiting! Regular copy paper but it needs to be printed on a laser printer.
Best Wishes,
Crystal
Iam trying to do the photo transfer on wood. I have everything I need . I have a question. When you have the photo printed , what type of paper do you use? regular paper for printing or photo paper? also can you do this in color or only black and white? I tried this before I seen it had to be laser printed so I want to make sure I get the right paper this time also.
Hi Becky,
It’s printed on just regular laser printer printer paper. You can definitely do it in color or black and white, however I noticed the black and white is a bit more forgiving if you don’t get the top layer of the paper completely removed or if you accidentally remove too much.
Thank you for visiting.
Best Wishes,
Crystal
Hi! Love your tutorial! One thing that struck out to me is the time to dry. All the other tutorials I’ve looked at state it needs at least 8+ hours before removing the paper. I’m using an 8×10 block of wood… Do you think I could get by with just 4 hours?
Thanks!
Hi Michelle,
I read somewhere that the gesso actually only needs a few minutes to saturate and set. I’ve always at the very least let it dry. I’ve done anywhere from half and hour to overnight and I’ve never had a problem. 🙂 Good luck. I’d love to hear how it turns out.
Best Wishes,
Crystal
Have you ever done this on a rough, uneven wood surface? For my wedding, I made small wood trays out of lathe boards, to use as centerpieces. I was going to recycle them by placing some of our wedding pictures in them. Figured it would be a nice anniversary gift and it’s got to be cheaper than purchasing frames. If you don’t think that would work, I could possibly mount them to luan first and then to the trays. Any thoughts/suggestions? Thank you.
Hi Gary,
What a beautiful idea. You are a very thoughtful husband. Unfortunately, I think that this project would be quite tough to do on a rough uneven wood surface.
You might have better luck following the technique in this project here, instead:
https://hellocreativefamily.com/how-to-mount-a-photo-to-canvas-tutorial-5-00-gift/
I think that if you are just mounting instead of transferring that it might be easier.
The one thing that I do love about this project is that if it doesn’t work out you can always just scrub the paper off and try again and all you have lost is your time… so if you have time to spare it might be worth trying out.
Thank you so much for visiting! I hope that you come up with a great anniversary gift using your upcycled wood trays.
Best Wishes,
Crystal
I ended up mounting the 8×10 picture to plywood and then mounted the plywood to the tray. Braided bailing twine for hanging it. Turned out pretty sweet…but I could be slightly biased. If I knew how to attach a picture, I would. She loved it. Thanks for all of your help and advice.
just wondering why you say that ink jet printing wont work? i want to do this with colored photos but everytime i try it doesnt turn out well.
Hi Constance,
You can definitely use colored photos, you would just need to print them using a laser printer. The reason it doesn’t work has something to do with the printing process. With the laser printing the ink is transferred to the wood, with the ink jet the ink I believe is absorbed into the paper and won’t transfer.
This is another option that I love for colored photos. You could mount the photo to the wood:
https://hellocreativefamily.com/how-to-mount-a-photo-to-canvas-tutorial-5-00-gift/
Thank you so much for visiting.
Best Wishes,
Crystal
I purchased Martha Steward Gesso Primer. Is the correct gel medium?
Hi Ann,
Yes! That’s the one!
Best Wishes,
Crystal
Here’s my first attempt at a photo to wood transfer. I’m pretty happy with how they turned out!! Your tutorial is great!!
Brittney!!! Those are AMAZING! I love them. I wish I had thought of them for Father’s Day!
Thank you so much for visiting and for sharing.
Best Wishes,
Crystal
Hi crysal
When i had wiped all the paper off my picture it was still cloudy, but once i added some more water it would become clear. I added the modge podge and the picture came out cloudy. Should i have “sanded” the picture more or did I do something wrong?
Another question since i have added the podge modge to the wood should i just start over again with a new piece of wood?
Thanks.
Kelly
Hi Kelly,
Great question. If once the paper has dried it is cloudy that means that there is still paper there that needs to be “sanded” off. Once the mod podge has been applied you won’t be able to sand it anymore.
I have removed my image and started over before I added mod podge but not after. You might be able to remove it by soaking the wood in water and then scraping it since usually Mod Podge isn’t waterproof. Or of course, you could try again with a new piece of wood.
Let me know if you have more questions.
Best Wishes,
Crystal
Great tutorial , you made it seem so easy, do you think the transfer would work on glass or a mirror?
Thanks for sharing..
….jack
Hi Jack,
Thank you very much. Also thank you for visiting. I’m actually not sure if it would work on glass. My fear would be that the surface would be too smooth and the transfer would just slip off. Definitely worth a try though! If you do it please let me know if it works.
Thank you for visiting!
Best Wishes,
Crystal
Can you tell me why it does not work with an inkjet printer? I am curious. I tried transferring something from an inkjet printer onto painted wood on a little desk and it worked except I got it a little too wet when I was rubbing off the paper and it smeared a little. I doctored it up and am still going to use it. But now I am curious if it would work better if I used a laser printer?
Hi Elaine,
Great question. From what I’ve been told it won’t work with an inkjet because an inkjet lays the ink into the paper where a laser jet lays the ink on top of the paper. Also ink jet ink is usually water soluble so it would wash away where a laser jet isn’t. Interesting to hear that you did it successfully with an inkjet image though!
Thank you so much for visiting.
Best Wishes,
Crystal
So I’ve been giving this a try and 1 or of 3 i’m happy with. If your photo is basically all ink then it makes for a better picture. what i mean by that is if it’s say a picture with white back ground (no ink) and in my case blue letters then the letters come out fine (well almost as 2 letters won’t let the paper go so it
s started to take the ink with it) but you can see what it appears to me is gell on the wood which makes it darker then the surrounding wood that did not have any gell on it. I don’t think i’m explaining this very well. To me it’s almost like i would have to cut out each letter and do it letter by letter. Anyone understand what i’m talkng about…lol. Wish I could post a picture..it is obvious when you see it. Before I get the sander out and start from scratch…any tips/advice? TIA
Hi Paul,
Thank you for your message. Hmmm. I’ve only tried this with black and white images, not color so I’m not sure if that has anything to do with it… Black and white might be more forgiving. Did you want to try posting a link to a picture?
Best Wishes,
Crystal