


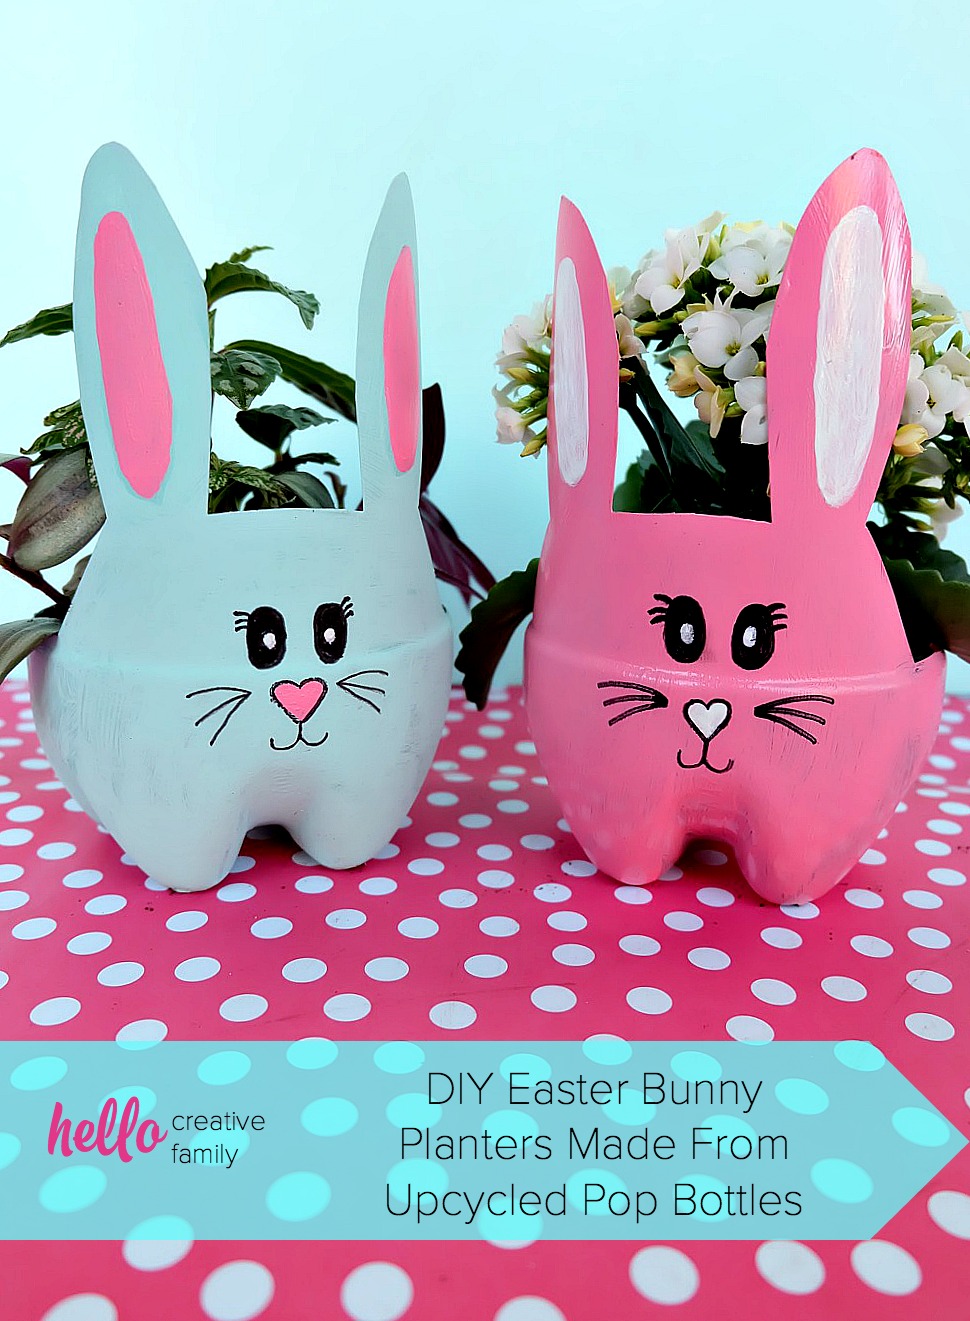
DIY Easter Bunny Planters Made From Upcycled Pop Bottles
This post and the photos within it may contain Amazon or other affiliate links. If you purchase something through the link, I may receive a small commission at no extra charge to you.
These DIY Easter Bunny Planters are made using recycled pop bottles! Bright and colorful they are a fun craft for a table centerpiece, front porch or handmade Easter gift idea!
It will come as no surprise to you that I love crafting. As much as I would love to spend every single day and every last penny I make on craft supplies at Michaels, for some reason my hubby just isn’t down with that.
I’m always looking for projects that I can do with the craft supplies I have on hand and if I can upcycle something that was going to end up in the trash or recycling– even better!
Spring break starts for the kids tomorrow so I decided to create a craft project that the kids could make (with a bit of adult supervision) using supplies that we have on hand.
-Craft paint? Check!
-Scissors? Check!
-Paint brushes? Check!
-Sharpies? Check!
-2 litre pop bottles? …After rummaging through my neighbor’s recycling… Check!
-Potting soil? Check!
-Plants? Well that we had to run to the garden center for, but boy did it make it feel like spring!
I bet that you have most of these supplies on hand too! So get crafting! Grab the kids, call a few girlfriends to come over to craft, or put on your favorite podcast and make this a solo project!
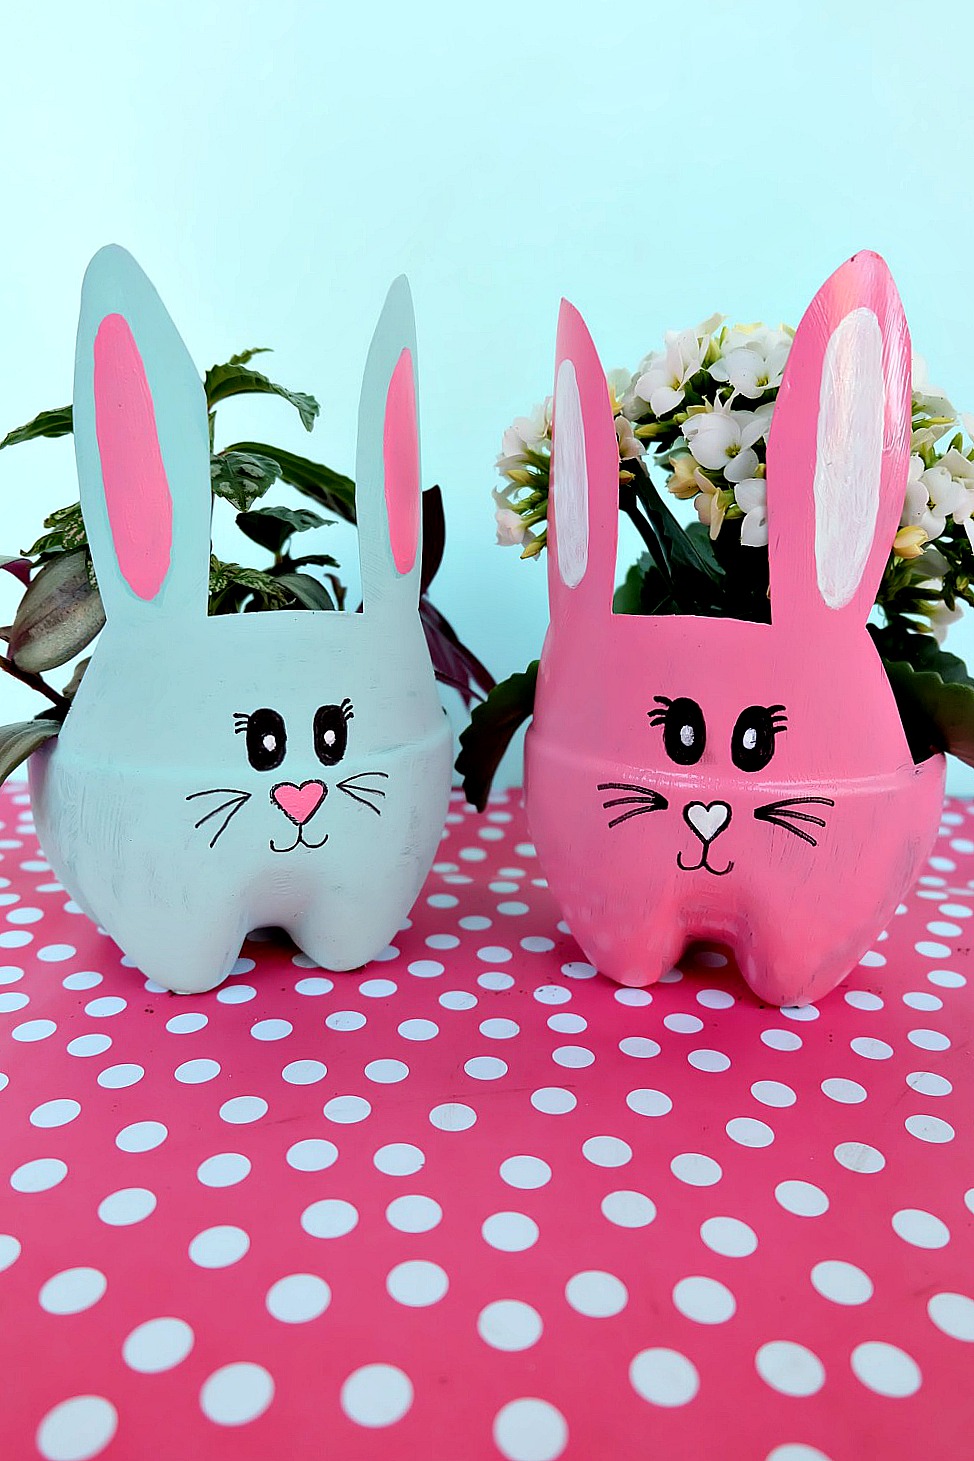
These sweet little DIY Easter Bunny Planters would make adorable Easter centerpieces and are also amazing handmade gifts that cost less than $5 to make!
Ready to get started? Read on for the instructions!
DIY Easter Bunny Planters Made From Upcycled Pop Bottles
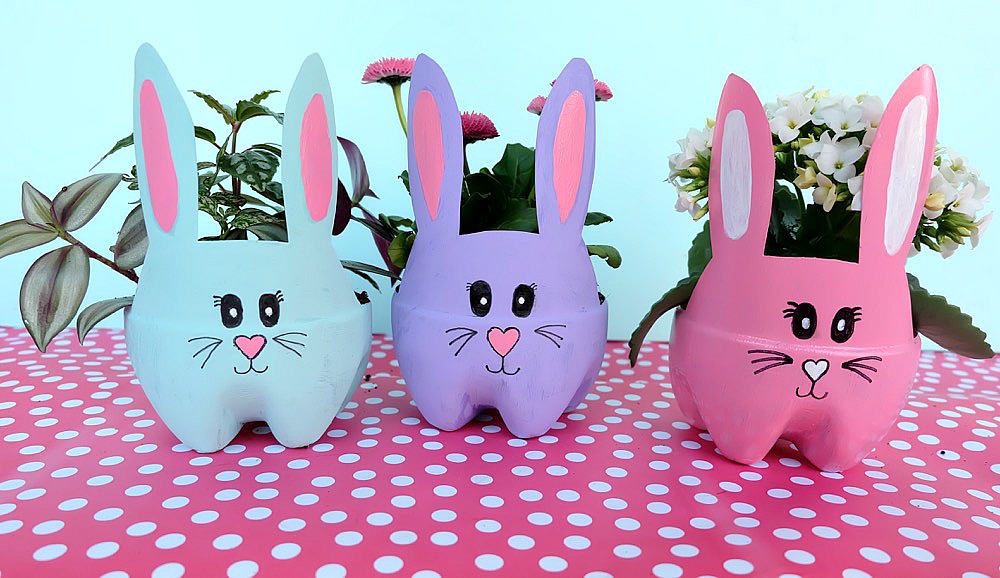
These adorable Easter bunny planters are sure to brighten anyone’s day! Leave them at neighbor’s doors to spread a random act of kindness, gift them to teachers or use them to decorate your own home!
Materials:
–Acrylic craft paint (You will want a color for the body, a color for the center of the ears and nose and then I like using black for the eyes, mouth and outlining the nose and white for the dot in the middle of the eyes.)
-Scissors (You will want a pair sharp enough to cut the 2 litre bottle. You might also want a box cutter to start your cut into the plastic. These are my favorite craft scissors.)
-Paint brushes (I like foam brushes for painting the body and then a smaller paint brush for the finer details)
-2 litre pop bottles (cleaned, dried and with label removed)
-Plants (since these planters are short I would recommend getting plants in small 1 to 2 inch pots)
Optional: Drill for making drainage holes (you could also do this with a hammer and nail), Rustoleum Clear Sealer (if planters will be outside in the rain), pencil (if you would like to pre-draw your face on before attempting it with paint).
Directions:
Step 1: Using a sharpie marker draw the rabbit head and ears on your pop bottle. Line up the center of the face between two of the nubs at the bottom of the bottle so that the nubs will look like legs. I drew the bunny head on a piece of paper and used the paper as my template. I lined up the bottom of the bunny’s head with the ring that goes around the lower part of the pop bottle.

Step 2: Using your scissors and the lines that you just made on your pop bottle cut out your bunny planter. I cut around the bunny head and then used the ring that goes around the lower part of the pop bottle as the line that I cut around for the rest of the planter.

Step 3: Using your acrylic craft paint and your foam brush, paint your planter the color you will be using for your bunny’s body. I put 3 coats of paint on each of my planters letting the paint dry thoroughly between each layer.
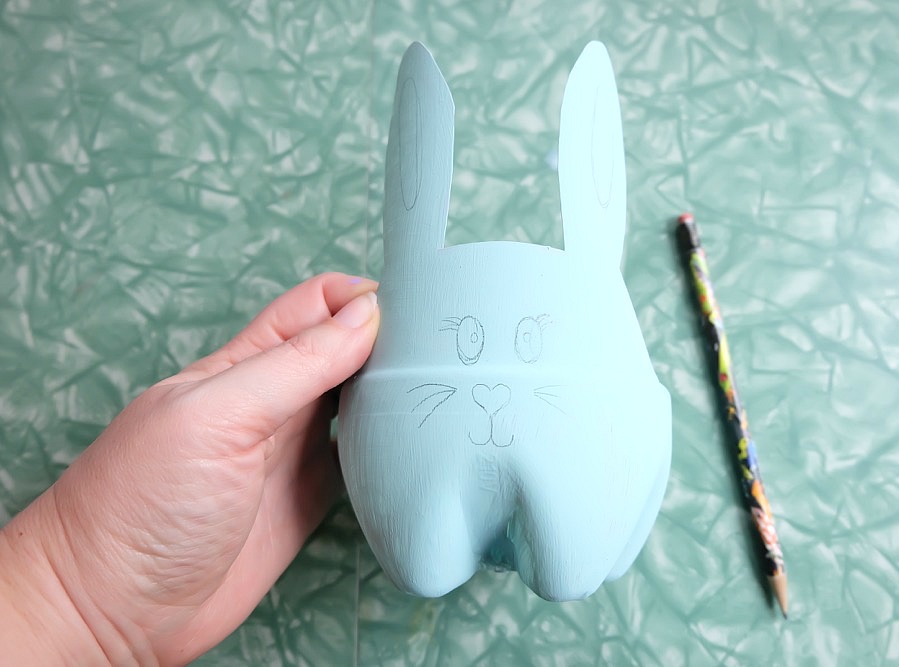
Step 4: Once your final layer of paint has dried, it’s time to add the face to your bunny. I used a pencil to lightly pre-draw my face before going in with paint. Allow to dry thoroughly.

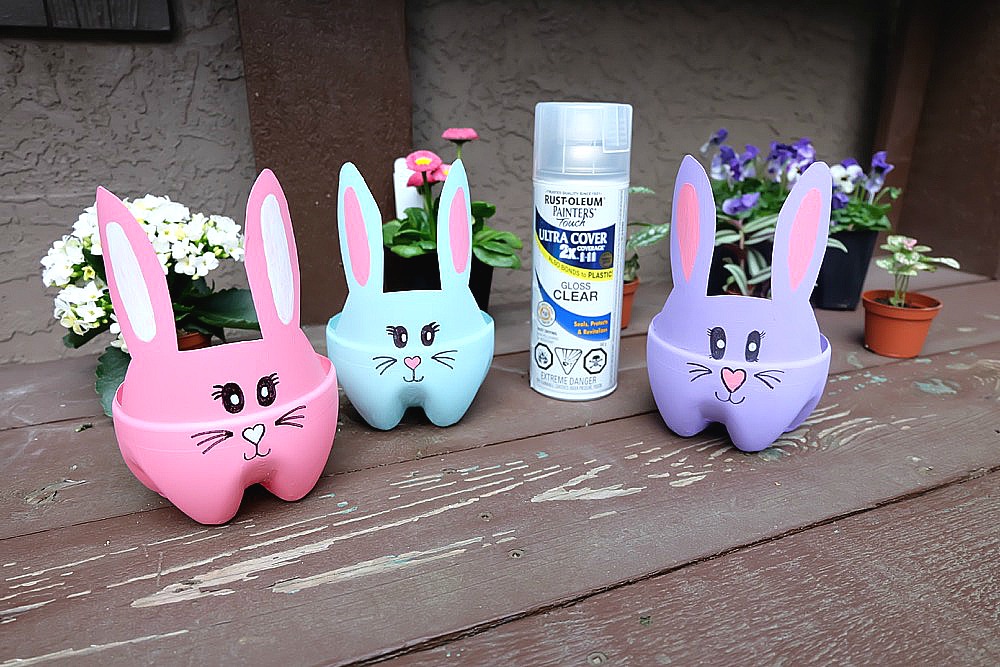
Optional step: If your bunny planter will be outside, you may want to cover it with a protectant layer of Rustoleum Clear Sealer. Allow to try before moving onto step 5.
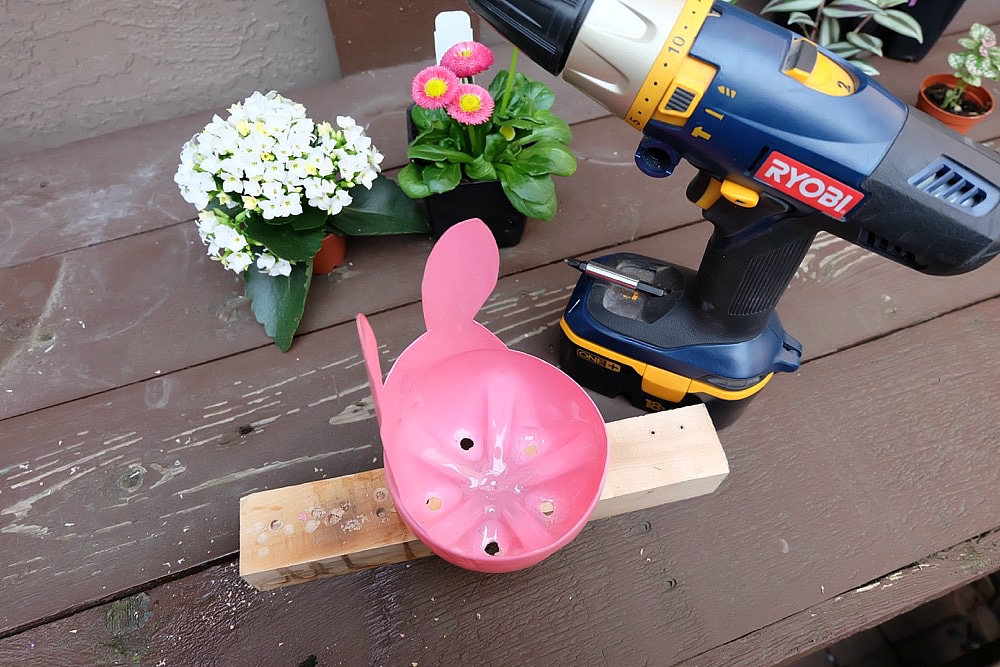
Step 5: Create holes in the bottom of your planter for drainage. I did this using my drill but you could also use a hammer and nail to create the holes.
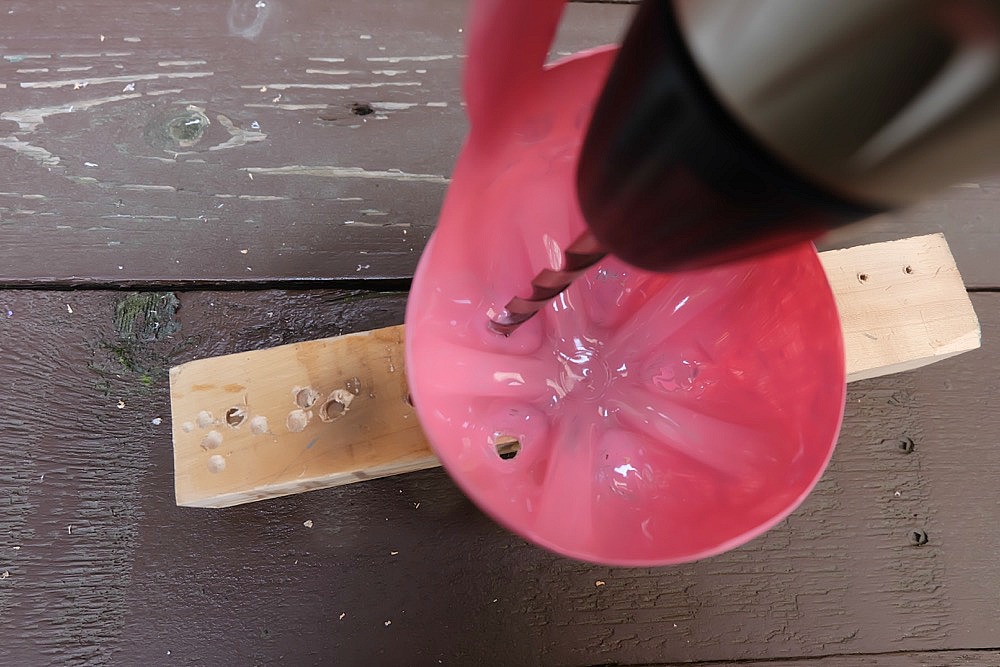
I did 5 holes in the bottom of mine, 1 hole in each of the little compartments at the bottom of the bottle.
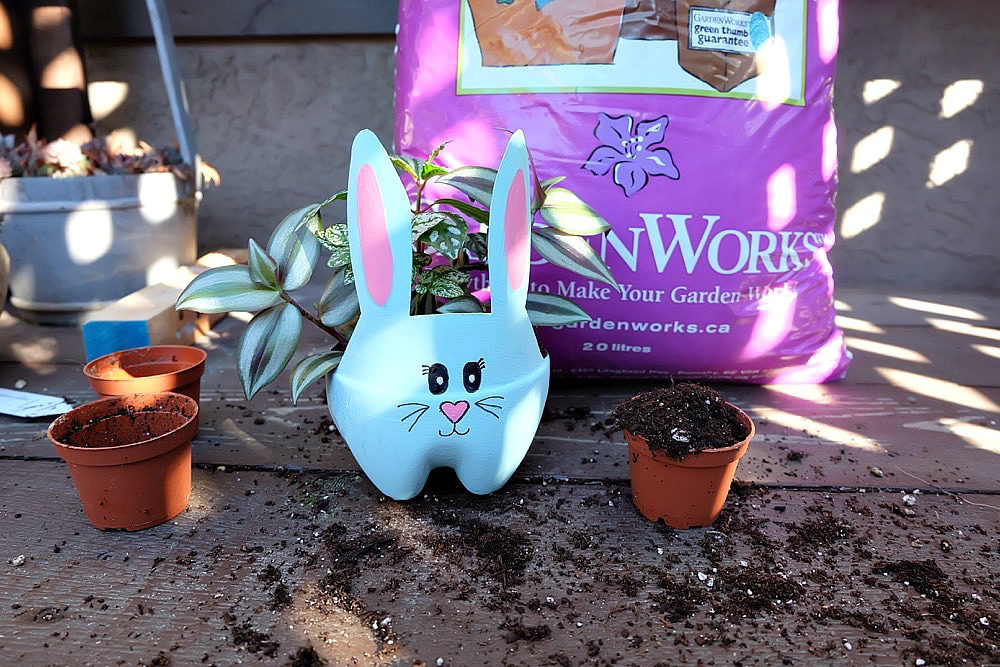
Step 6: Fill your planters with potting soil and plant your flowers or plants inside the soil.
And there you have it! A beautiful DIY Easter Bunny Planters Made From Upcycled Pop Bottles! Use them for a centerpiece on your Easter table, to brighten your front porch, or as a sweet handmade gift idea for those you love!
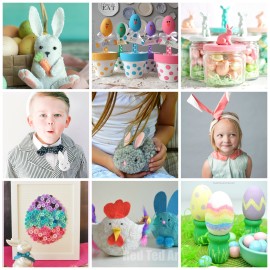
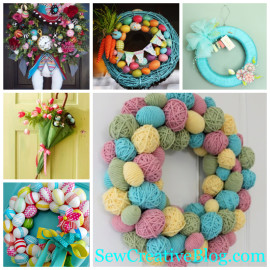
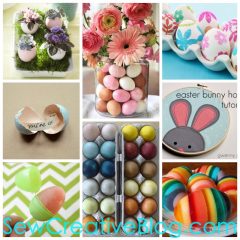
More Easter Craft and Crochet Ideas You’ll Love!
Need more crochet projects and other Easter inspirations? Have a look at these adorable ideas. You’ll find sewing and crocheting crafts as well as paper and felt projects, recipes, and ideas for your Cricut!


this is a great idea. Can we share on our social media channels next week using your images?
Hi Helen,
Thank you so much. Feel free to use one image, tagging @hellocreativefamily as the creator and sending people to our site for instructions. Thank you!
Best Wishes,
Crystal
These bunny planters are absolutely precious! I would love to make some for my porch next Easter!