


15 Minute DIY Sloth Sleep Mask Sewing Tutorial
This post and the photos within it may contain Amazon or other affiliate links. If you purchase something through the link, I may receive a small commission at no extra charge to you.
Create an adorable DIY Sloth Sleep Mask in just 15 minutes using your Cricut Maker or Cricut Explore with this fun sewing tutorial!


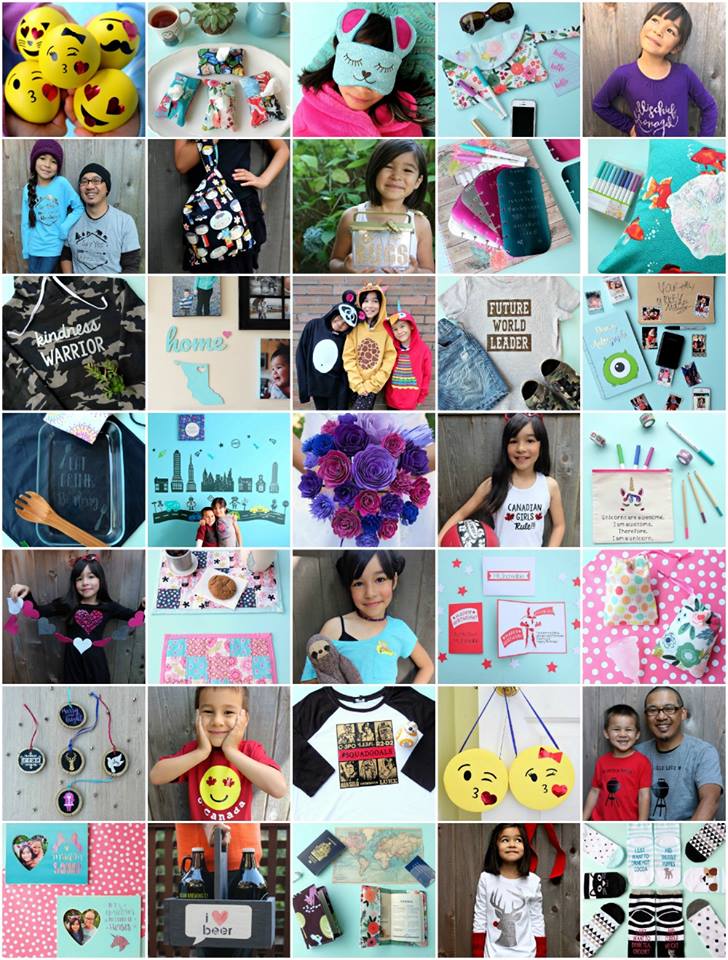
What is it about sloths that make them just so darn cute? I’m seriously in love with these slow moving little critters. My kiddos are in love with sloths too and are constantly coming to me with sloth facts. “Mom, did you know that the #1 cause of death among sloths happens when they are going to the bathroom? They come down out of the tree to go poop and they move so slowly when they are down there that their predators get them!” Yes, we are a family of sloth lovers.
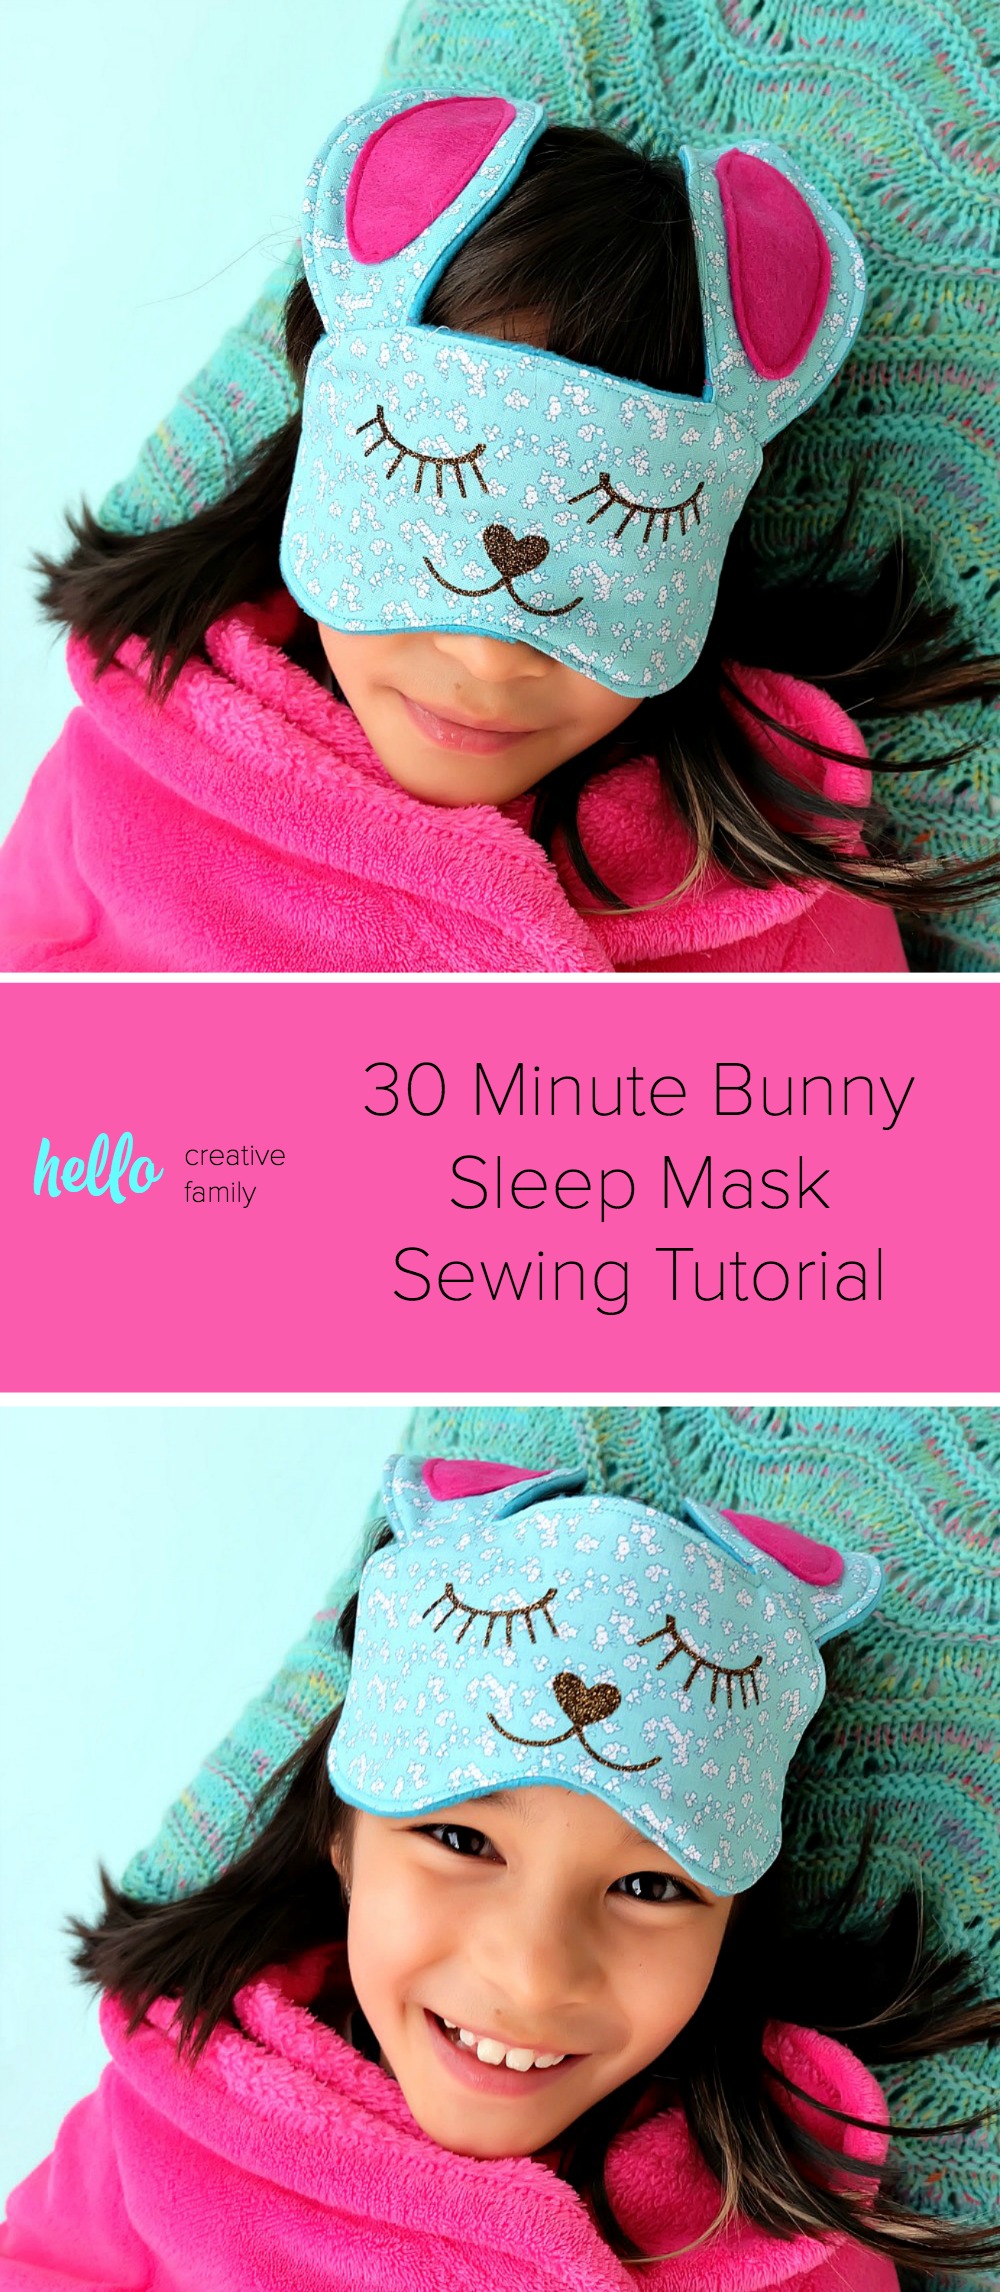
Last year I created a 30 Minute Bunny Sleep Mask and I’ve been dreaming of creating a DIY Sloth Sleep Mask ever since.
I recently received a box of goodies from Cricut that included some pretty fabric. I used two of the pieces for my 15 Minute Makeup Bag Sewing Tutorial. As I was looking at the other fabric in the Cricut Riley Blake Yes Please Fabric Sampler it occurred to me that the white piece with gold lines would be adorable for a slothy sleep mask! So I went for it!
I’m just as pleased as punch with how it turned out. I am also super happy because I designed it in Cricut Design Space so that means all of you with Cricuts can cut out all of your pieces with just the click of a button! I cut mine using my Cricut Maker using the Cricut Rotary Blade but those of you with a Cricut Explore can still make this project too! Just cut out the pieces that would be fabric on cardstock and then use it as a template to trace and cut your fabric! Easy peasy lemon squeezy!
I know that this project is going to become a regular handmade gift in our family… we have a lot of sloth loving little friends! Once this little sweetie ends up on the slumber party circuit I’m sure we are going to be getting a ton of requests for it!

Ready to learn how to make my 15 Minute DIY Sloth Sleep Mask? Read on for the step by step instructions and the Cricut cut file! Also if you love sloths make sure you read all the way to the bottom of this post for 50+ Sloth Craft, DIY and Gift Ideas!
[hr gap=”30″]15 Minute DIY Sloth Sleep Mask Sewing Tutorial[hr gap=”30″]

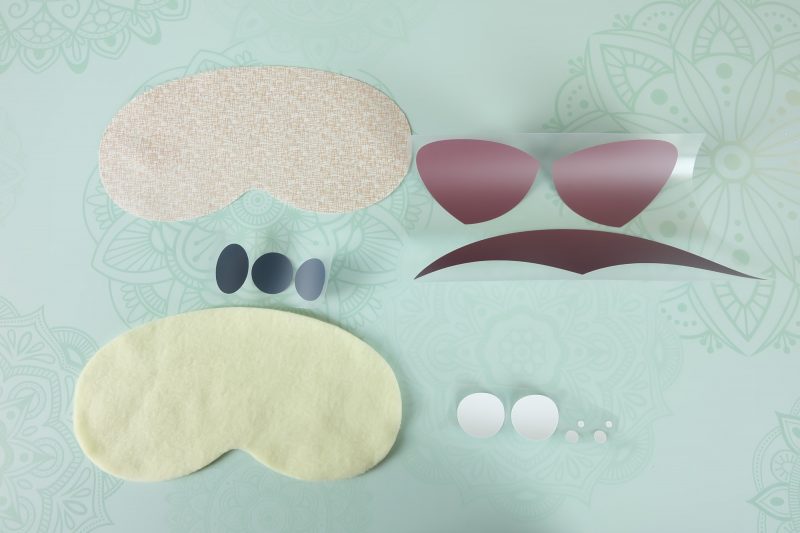
The materials you need for this project are:
- Find This Design In Cricut Design Space Here
- Cricut Maker or Cricut Explore (if using the Explore cut paper or cardstock to use as your pattern and then trace onto fabric)
- Iron on Vinyl (I used brown, black and white iron on for this project. Find Iron-On from Cricut here and from Expressions Vinyl here.)
- 10 inch X 12 inch piece of fabric for the front of your mask (I used fabric from the Cricut Riley Blake Yes Please Sampler Black which can be found here.)
- 12 inch piece of black elastic (like this)
- Cricut Fabric Grip Adhesive Cutting Mat
- Regular Grip Cutting Mat
- Cricut Rotary Blade
- Cricut Iron-On Protective Sheet
- Sewing Machine (this is the one I have)
- Thread in coordinating colors
- Scissors (These are the Tide Blue Fiskars Sparkle Scissors I use in the photo below)
- Wonder clips or Pins (read why I recommend Wonder Clips in Step 3 below)
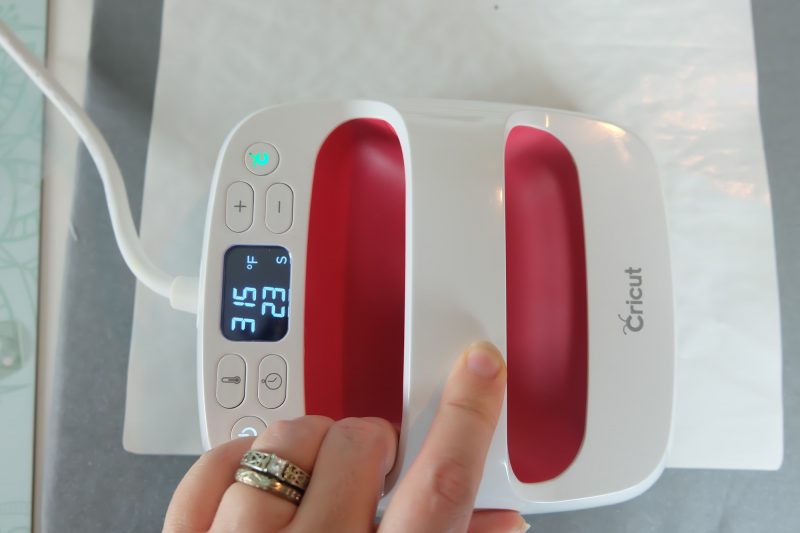
- Cricut EasyPress or iron
Directions:
Step 1: Log into Cricut Design Space and then open the sloth sleep mask cut file from the top of the materials list above. Cut your pieces by clicking “Make It” in the top right hand corner of your screen. 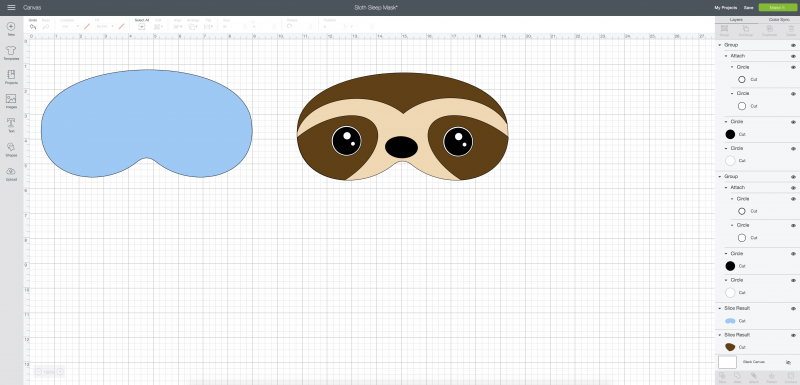
You’ll then click “Continue” in the bottom right hand corner of your screen.
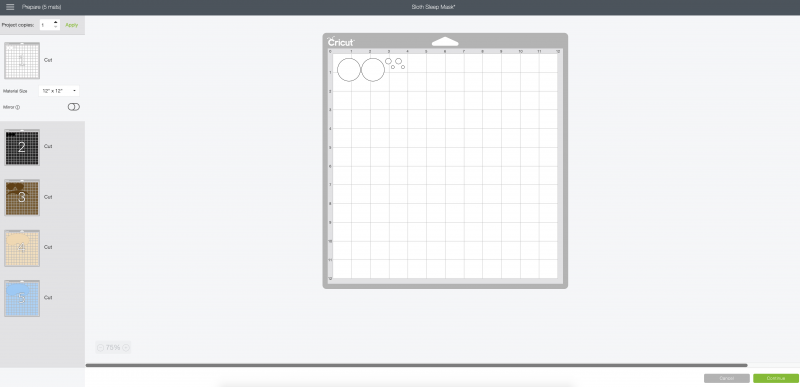
Next select your Cricut Maker machine from the drop down menu which will bring up a screen for you to select your material. If you don’t see your material listed click the “View All” button and chose your material from the list (you can also search for the name of the material). Cut the sloth hair, eyes, eye patches and nose from iron-on which you’ll need your regular Cricut Fine Blade for. Cut the sleep mask pieces from fabric (I used cotton for the front and fleece for the back). You will need to use a Cricut Rotary Blade for your fabric. Alternatively if you have a Cricut Explore you can cut the sleep mask pieces out of cardstock and then use them to trace and cut your fabric.
Step 2: After you have cut all your pieces, it’s time to apply the iron-on shapes to the front of your sleep mask fabric. Which involves layering. Now layering can be a tricky thing because you don’t want to scorch your iron-on. I find that the Cricut Iron-On Protective Sheet makes layering so much easier. Check the EasyPress Heat Setting Guide to know what temperature and for how long each piece gets pressed. When layering I never press any of the pieces for as long as the settings suggest because otherwise your other pieces will get scorched.
For the sloth sleep mask I applied the sloth’s hairline and eye patches first, pressing for approximately 10-15 seconds or until the eye patches were just stuck to the fabric. I then removed the plastic covering from the eye patches but left it on the hair line.
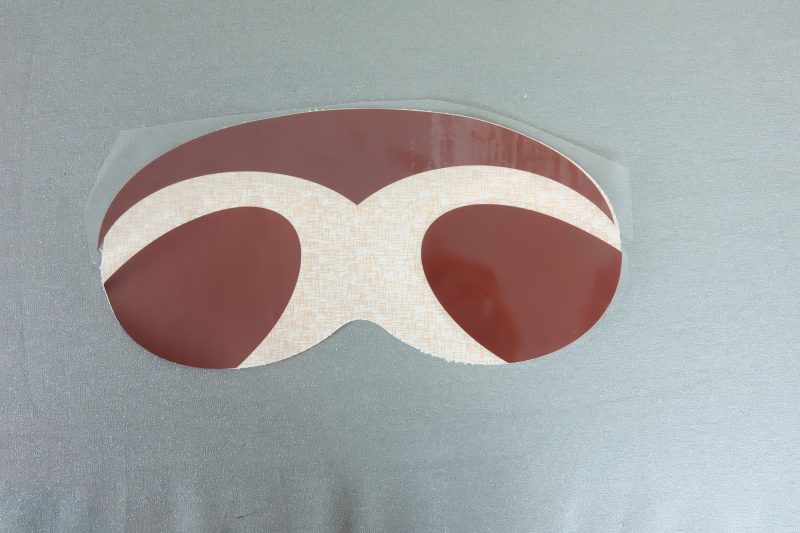
I then applied the whites of the eyes and covered the whole mask with the iron on protective sheet. I tried to avoid the hairline with my EasyPress as much as possible and just apply the heat to the eyes. I pressed for just 5 seconds, so that the white iron-on was just attached.
I then removed the clear plastic cover from the white pieces and put on the black eyes and the nose. I again pressed for approximately 5 seconds, covering the sleep mask with the iron-on protective sheet. Then finally I applied the white dots to the eyes, pressing for approximately 10 seconds (again under the iron-on protective sheet).

When that was done I removed all of the clear plastic protective sheets and proceeded onto the sewing step.
Step 3: Pin your elastic onto the back fleece part of the sleep mask. Let the elastic overhang the edge of the mask by 1/2 inch on each side.
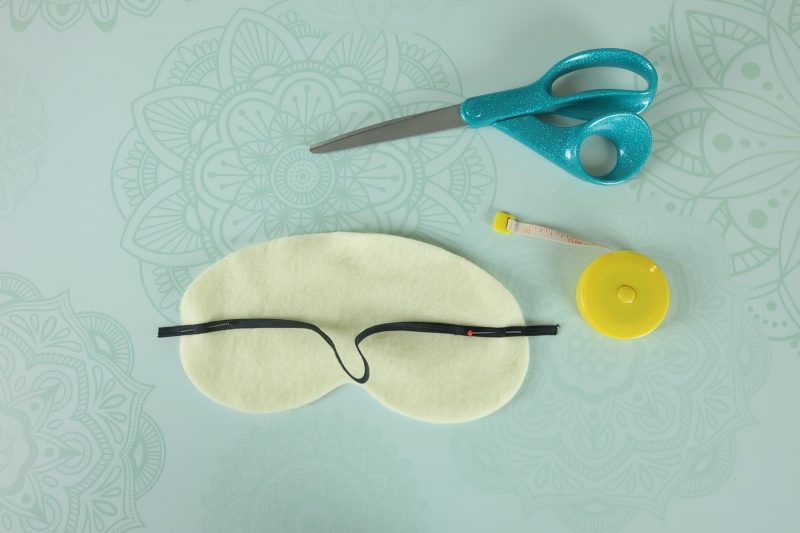
Next you want to make a “sleep mask sandwich”. The side of the fleece with the elastic pinned to it should be facing up. On top of that lay the front of your face mask with eyes and nose facing down. Since the face of the mask has iron-on applied to it, I suggest using wonder clips so that you don’t poke holes in your iron-on and/or being strategic with where you place your pins.
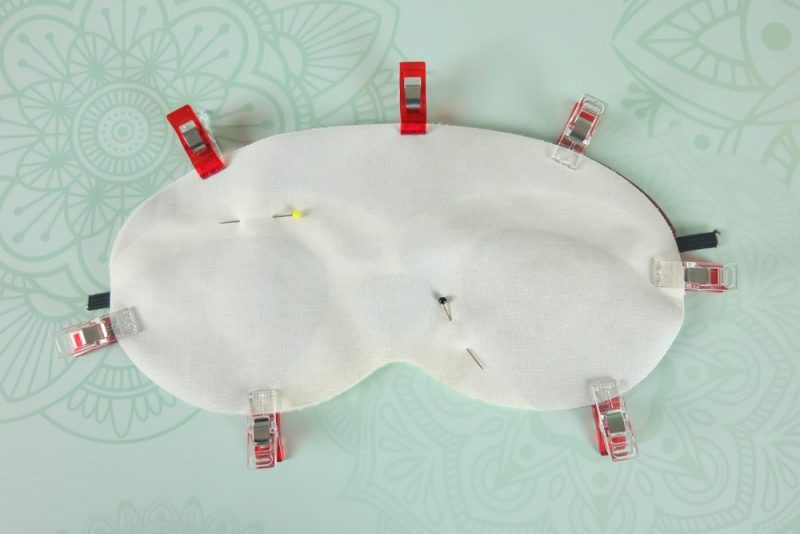
Step 4: Sew all the way around the outside of your sleep mask using a 1/4 inch seam allowance and making sure to leave a 1 inch or bigger gap to flip your mask right side out.
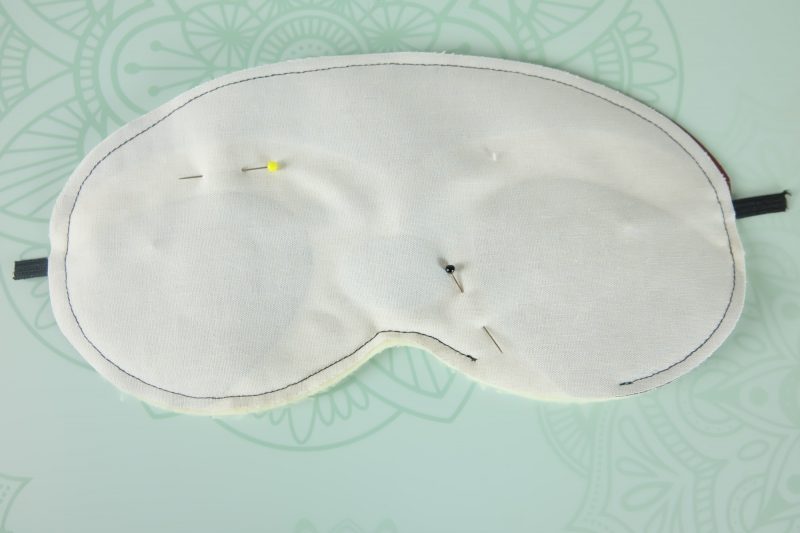
Flip your mask right side out, press into place (make sure you use the iron-on protective sheet if pressing the sloth’s face) and sew closed the opening that you used to turn the sloth mask right side out using needle and thread.
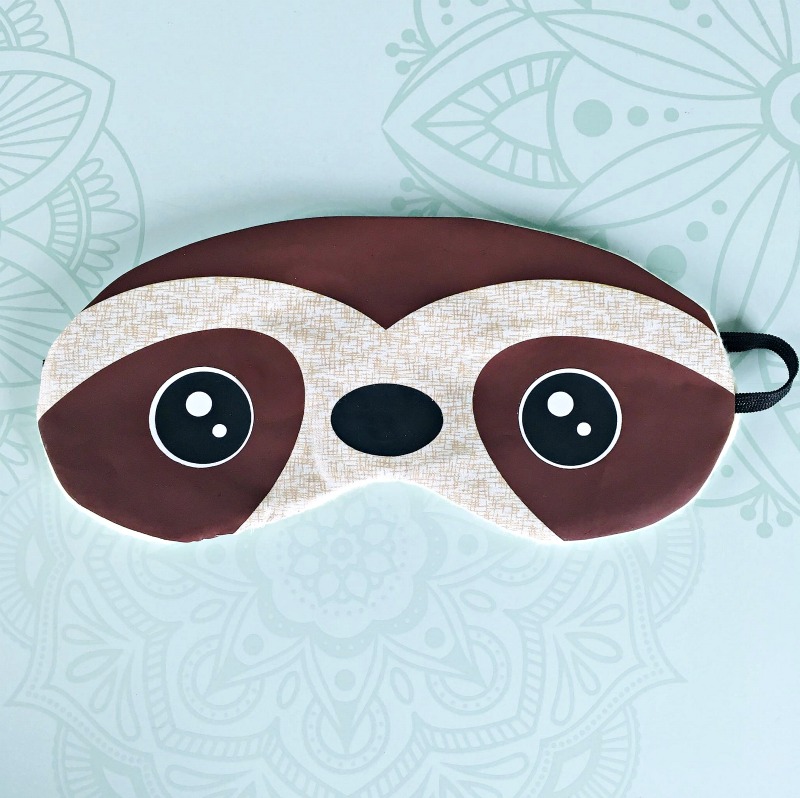
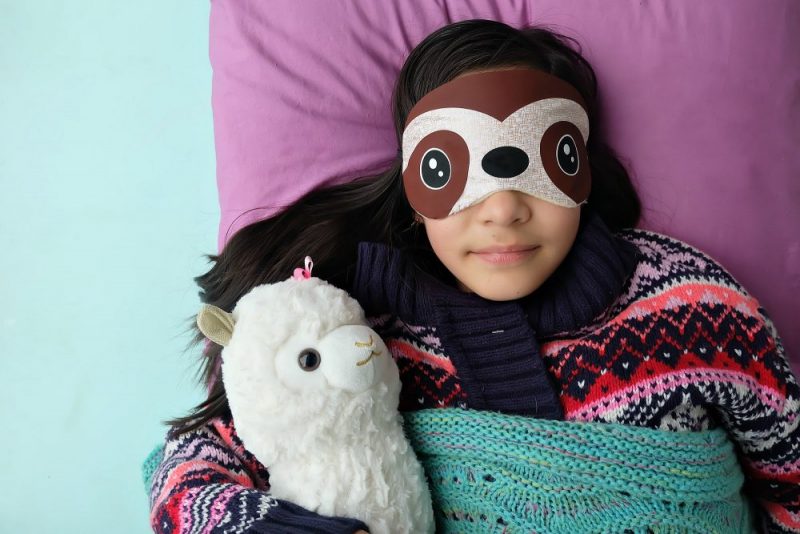
Voila! You have a sloth sleep mask made in just 15 minutes! Just look at that sweet little face!

I’m pretty in love with how it turned out… and so is this kid!

[hr gap=”30″]Tell me… Do you have a sloth lover in your life? Who would you make this for? What would you like to see us make with our Cricut Maker next?[hr gap=”30″]
Like this post? We’d love for you to pin it for later!

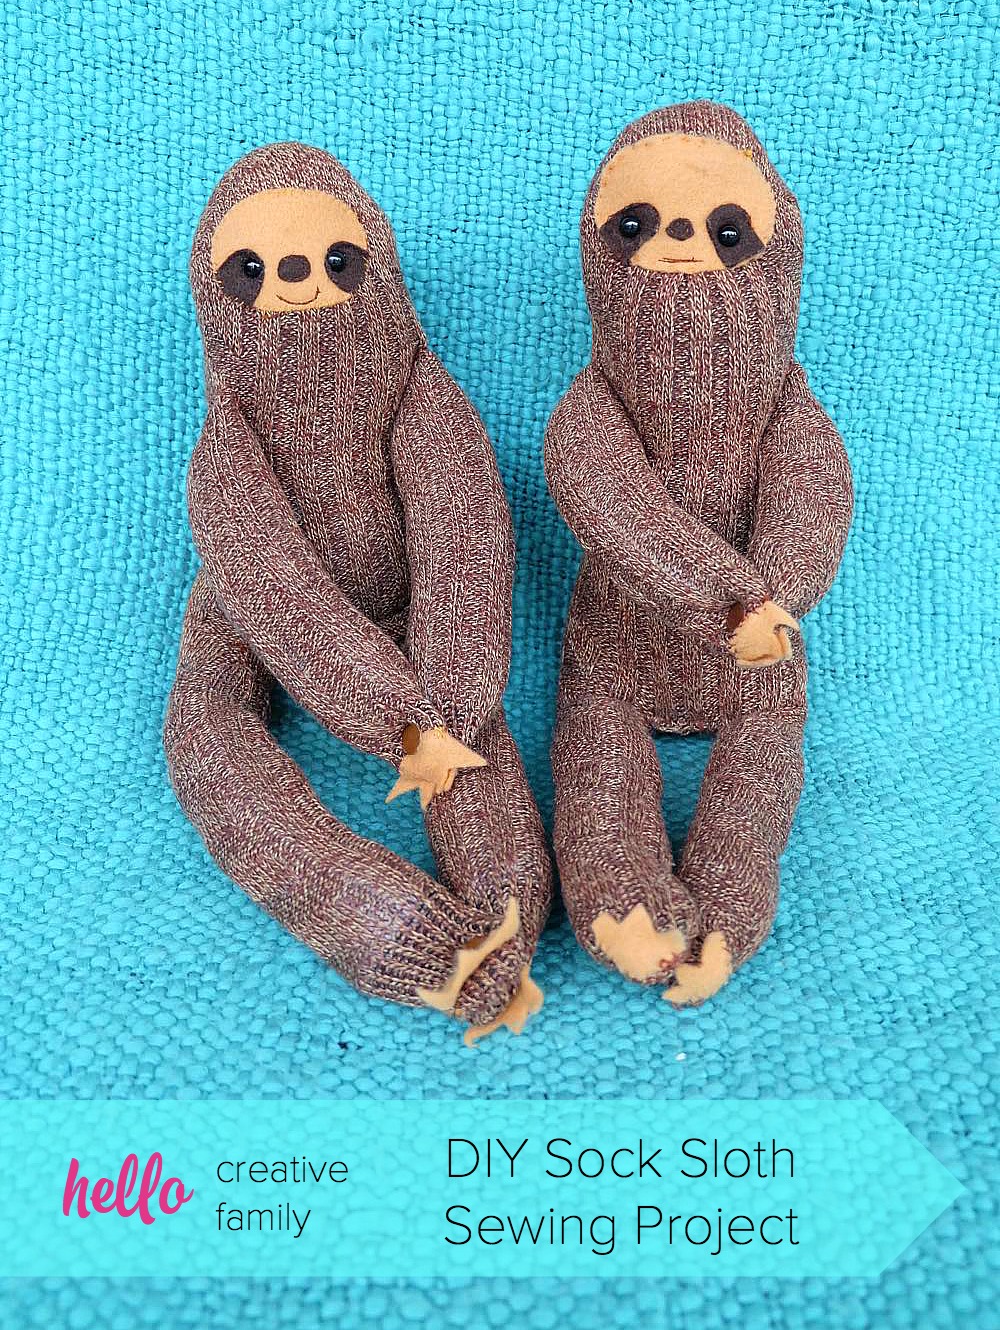
Love Sloths and DIY Sloth Projects? Check out our DIY Sock Sloths!
And our Easy DIY Pocket Animal Shirts With Adorable Sloths!

Also make sure you check out our 50+ Sloth Crafts, Printables, SVG’s, DIY’s, Food and Gift Ideas post!

Looking for even more Cricut Ideas? We have them all in one handy place for your convenience! Find our Cricut Section Here.


This is so cute! I want to get into the Cricut world, but I’m honestly completely overwhelmed. I am new to your site. Do you have any intro tutorials? Or do you have tutorials that you’ve used in the past that you’ve really liked?
Super cute project any sweet princess would love. Happy Crafting, Kippi #kippiathome
I want to try out this mask to see if it will help me to sleep better.
Just so cute! I need to make some sloth crafts of yours.