


Oh Sew Easy 10 Minute Fabric Flower Tutorial No Sewing Machine Required
This post and the photos within it may contain Amazon or other affiliate links. If you purchase something through the link, I may receive a small commission at no extra charge to you.

I’m feeling inspired from my time away at SNAP. There is so much I want to do on Sew Creative, I met so many fabulous people and my brain is packed to capacity with crafty ideas.
I’ll be sharing a SNAP recap soon, but in the meantime, today I thought I would share with you my Oh Sew Easy 10 Minute Fabric Flower Tutorial.

Oh Sew Easy 10 Minute Fabric Flower Tutorial
No Sewing Machine Required
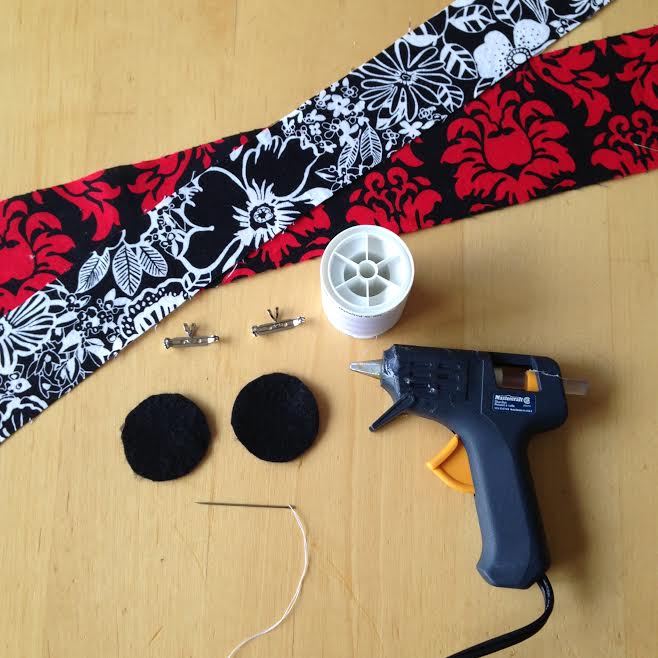
Materials :
- Strip of fabric. For small flowers you will want a strip that is 2 inches wide by 41 long (or whatever the width of your fabric is). For the large flowers you will want a strip that is 3 inches wide by 41 inches long.
- Needle and thread
- Glue Gun
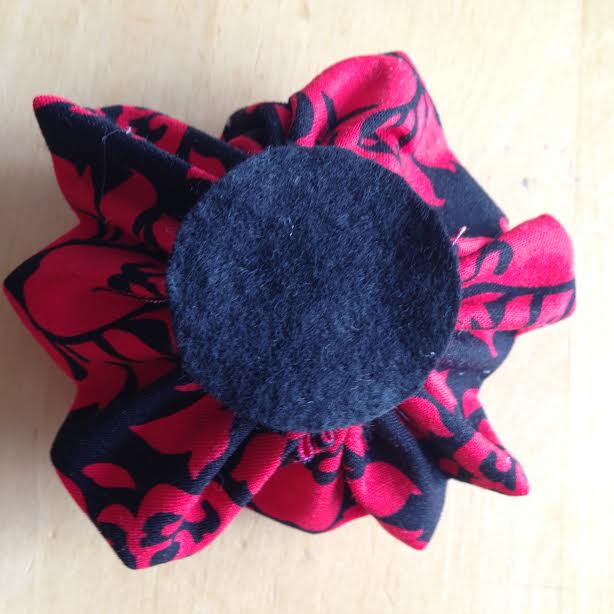
- Coordinating colored felt cut in a 2 inch circle
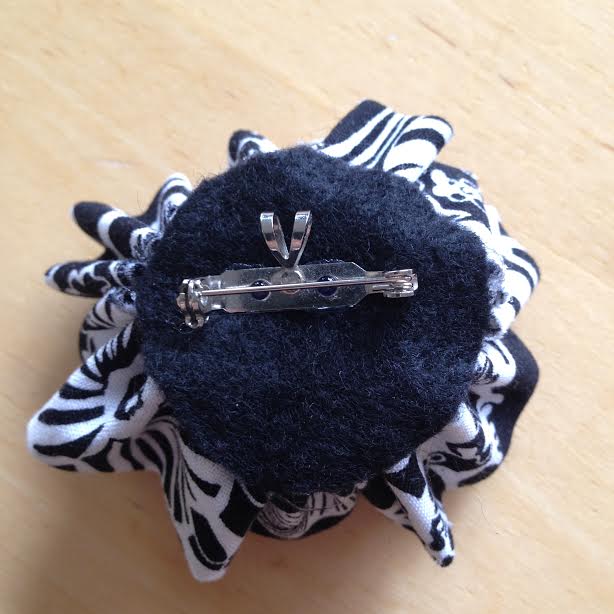
- A brooch back
Directions:
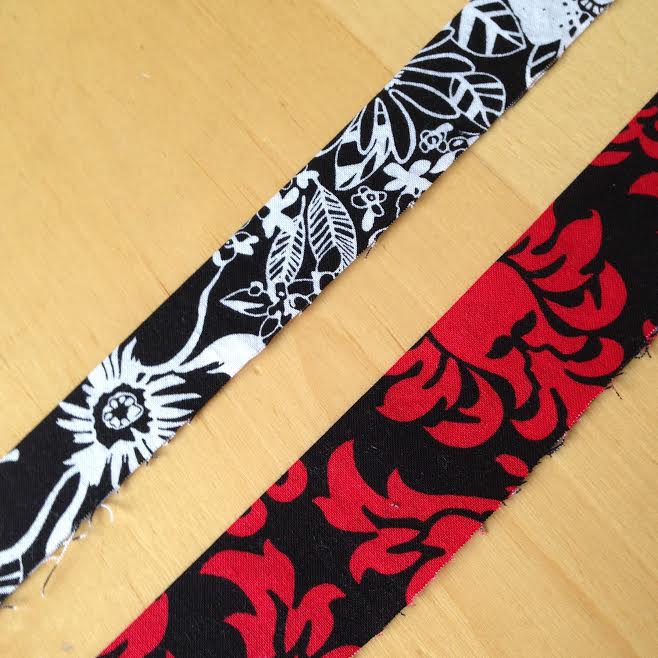
1. Take your strip of fabric, fold in half and press. Trim off side of the selvage that has writing on it. You will have a strip of fabric that is 1″ x 41″ if you are making a small flower or 1.5″ x 41″ if you are making a large flower.
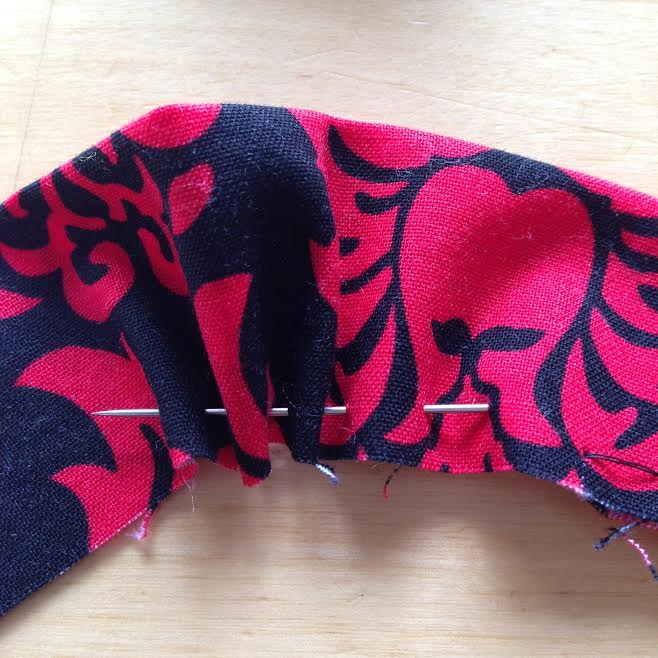
2. Take approximately 20 inches of thread. Knot one end and thread your needle. Using a running stitch, sew along the base of the length of your fabric leaving approximately 1/2″ between stitches.
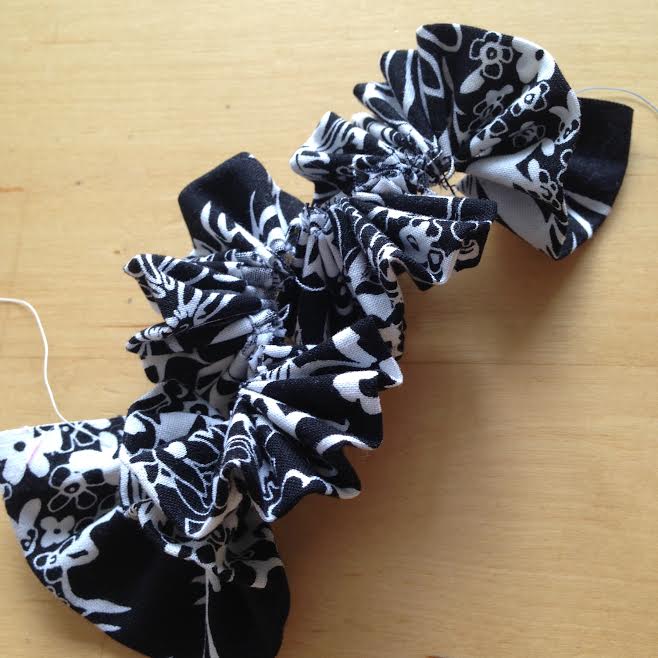
Now for the fun part! Assembling your flower!!!
4. Plug in your glue gun and allow to heat.
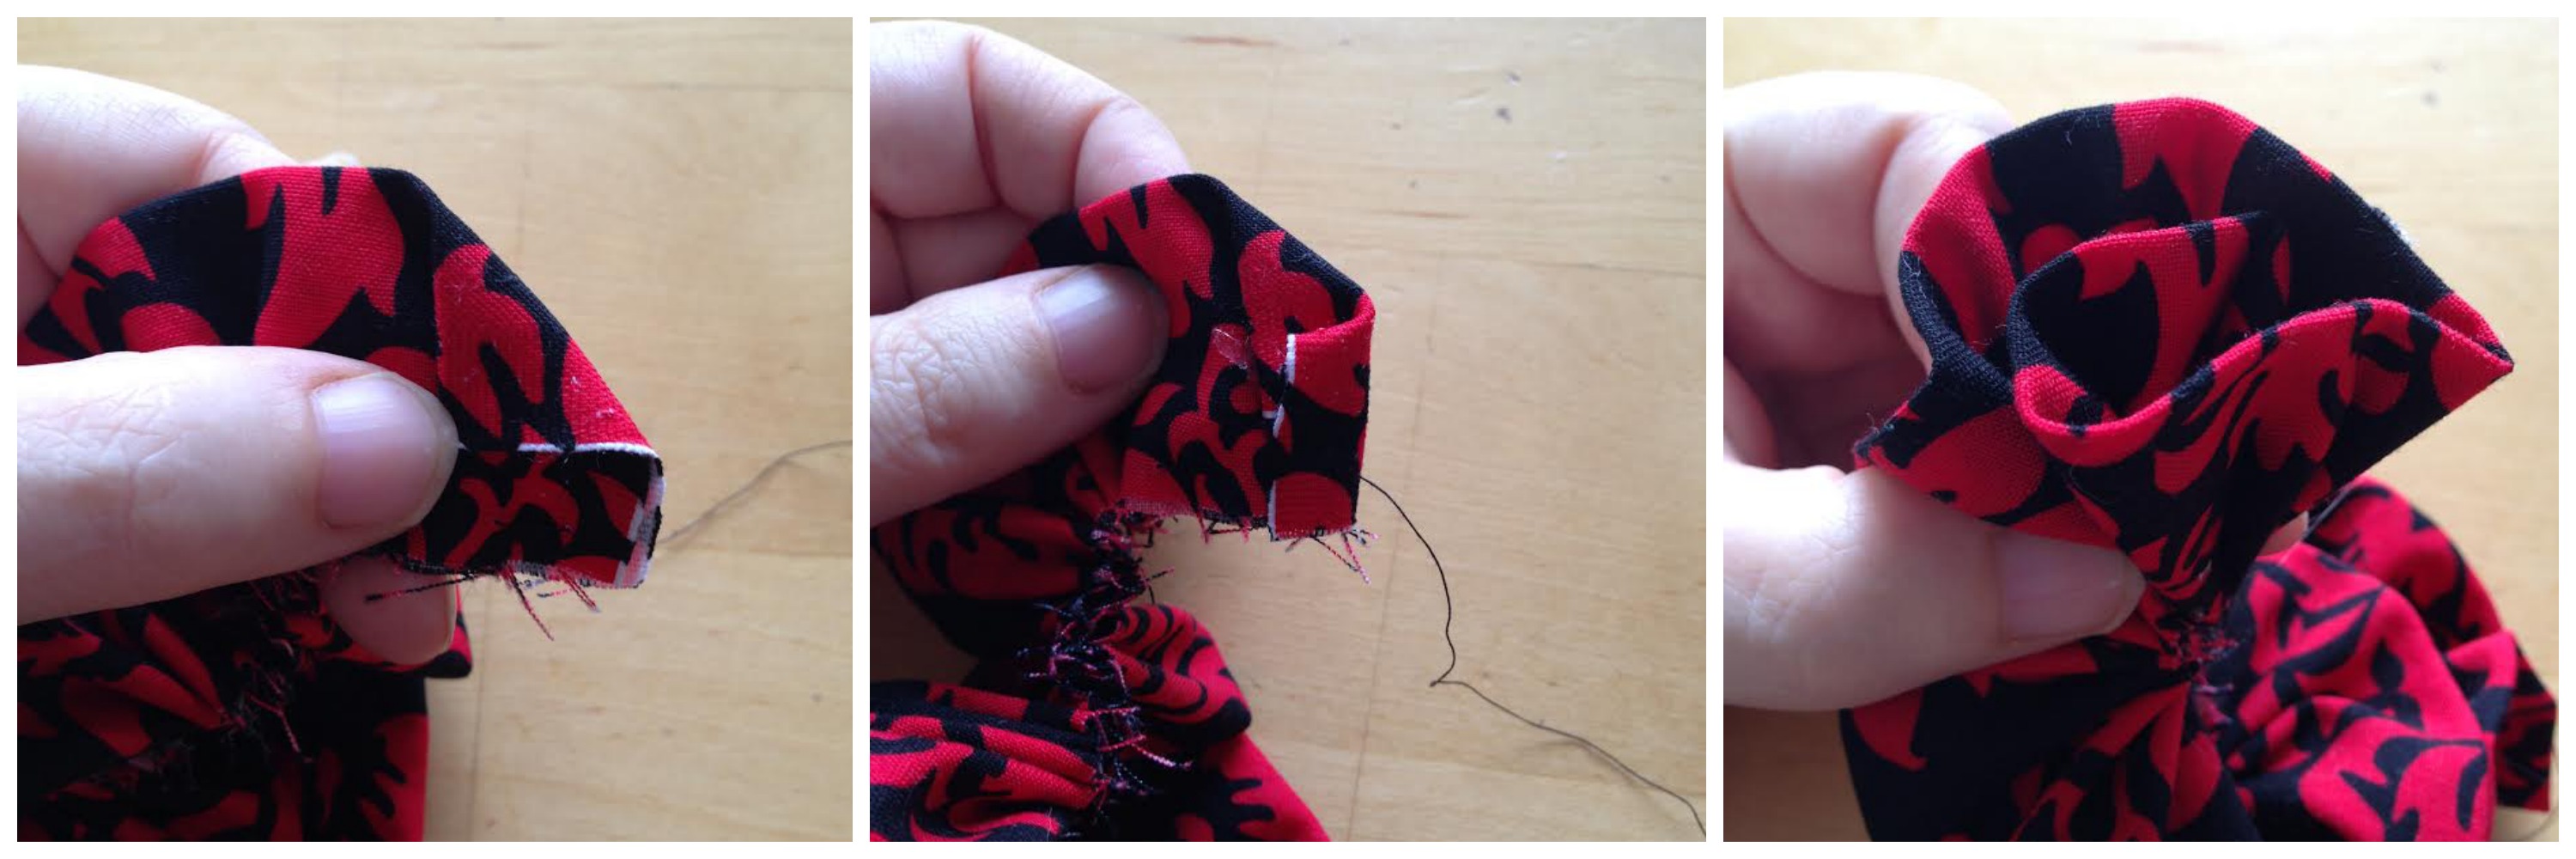
5. Creating the “bud” of your flower: The first flower I made I didn’t love the center of the flower. I found that the method illustrated in the photo above made a lovely center. Pick one end of your fabric. Fold one corner down and glue, fold the raw edge in so it lines up with the edge of the corner that you just folded down. Glue.
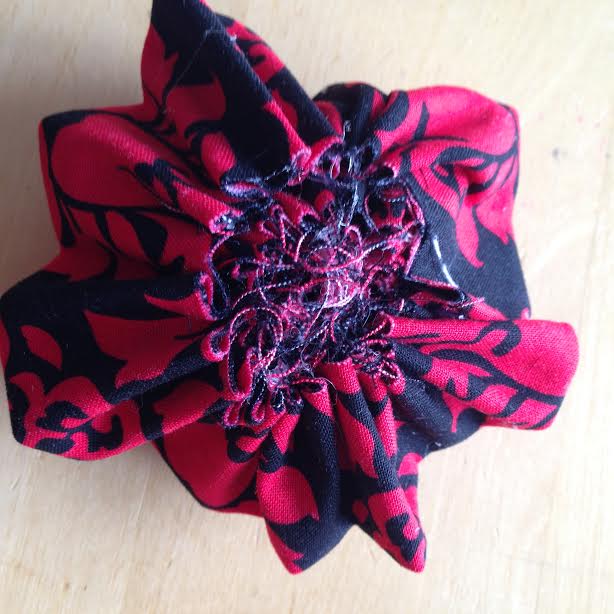
6. Start wrapping your ruffles around the bud that you just created, gluing as you go. Adjust the ruffles, tightening or loosening depending on how you want your flower to look. Continue wrapping and gluing as you go, creating your flower. When you get to the end, take a look at your flower. I sometimes find that some of the “petals” look like they are too spread out. Put a drop of glue where you want petals to meet, and then pinch together until you have your perfect flower.
7. Flip your flower over. It will look something like this.
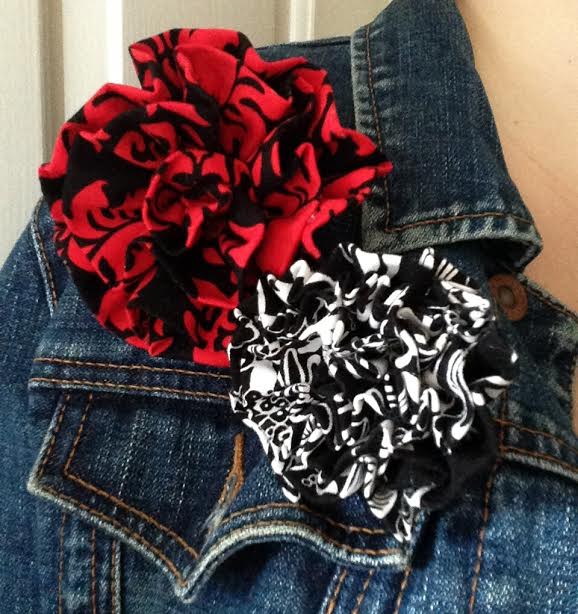
At the end you should be left with beautiful flowers that look like this! A super easy-peasy one of a kind summer accessory handmade in minutes!
Like what you see on Sew Creative? Pinning our recipes and craft projects, commenting on our posts, following us on Pinterest, Twitter & Facebook and subscribing (in the box in the side bar towards the top in the right hand column) mean a lot to us.
If you have any questions about this tutorial please let me know by leaving a comment below.
Tell me… What is your favorite handmade accessory?
Like this post? Check out our other Sewing Projects here.
Here are a few to get you started:
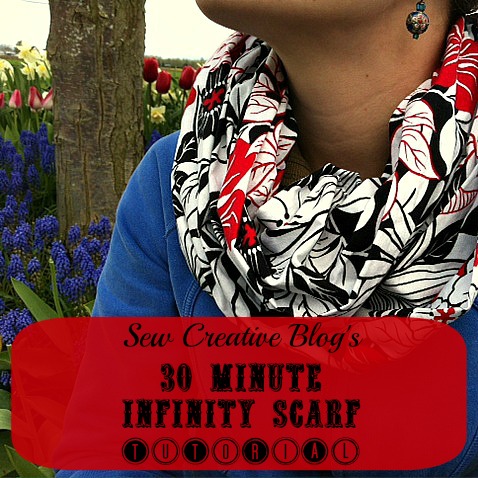
30 Minute Infinity Scarf Tutorial

1 Hour Laptop Sleeve Sewing Tutorial


I love these little flower guys, you looked so cute at SNAP wearing one!
I can visualize these in crushed velvet for the holidays and trimming sweaters. Beautiful!
Oooh Marcia that would be so pretty!
Great idea!
Thank you for visiting.
Crystal
Very cute and I like that yu don’t need sewing machine!