How To Engrave Jewelry With The Cricut Engraving Tool
This post and the photos within it may contain Amazon or other affiliate links. If you purchase something through the link, I may receive a small commission at no extra charge to you.
Make a meaningful and personalized gift for your loved one by learning how to engrave jewelry with the Cricut Maker and Cricut Engraving Tool. Follow our step-by-step guide and create a beautiful engraved necklace that your loved one will cherish forever.

Disclosure: Thank you to Cricut for working with me on this sponsored post. As with all content on Hello Creative Family, all thoughts and opinions are 100% my own.
Hi Crafty Friends!
Did you know you can engrave jewelry using your Cricut?!
This revelation was one of those things that blew my mind. When I show people the engraved jewelry I’ve made, they’re always shocked it was done with a Cricut. It’s one of those things that makes them want to run out and buy a Cricut Maker or Cricut Maker 3 right away, even if they only use it to engrave.
Engraved jewelry makes such a lovely, personalized gift. Create some with children’s names or initials for a beautiful gift for mom for her birthday, Christmas or Mother’s Day.
Engrave pieces with hearts, initials, dates, and locations for incredible anniversary and wedding gifts.
I also really love the idea of making best friend necklaces for your childhood best friend that has the year you two became friends forever.
When I give a handmade gift I love it to be the perfect combination of personalized, heartfelt and something that they will actually use.
I know that one of the gifts that I love to receive as a mom is jewelry and if that jewelry is personalized with meaningful words, names and dates it elevates that gift to a whole new level!
Personalized Engraved Jewelry: The Perfect Gift for Moms
Creating personalized engraved jewelry with your Cricut Maker and Cricut Engraving Tool is the perfect way to show your love and appreciation for your mom and to give your mom something that’s truly one-of-a-kind.
It’s personal, sentimental, and can hold special meaning for your mom. With the Cricut Maker and Cricut Engraving Tool, you can create customized jewelry pieces that your mom will love and cherish for years to come.
Ideas for engraved gifts for mom include:
- A pendant necklace with children’s names, initials or dates of birth engraved.
- A charm bracelet with each charm engraved with a special message or date.
- A pair of earrings with a beautiful design engraved on them.
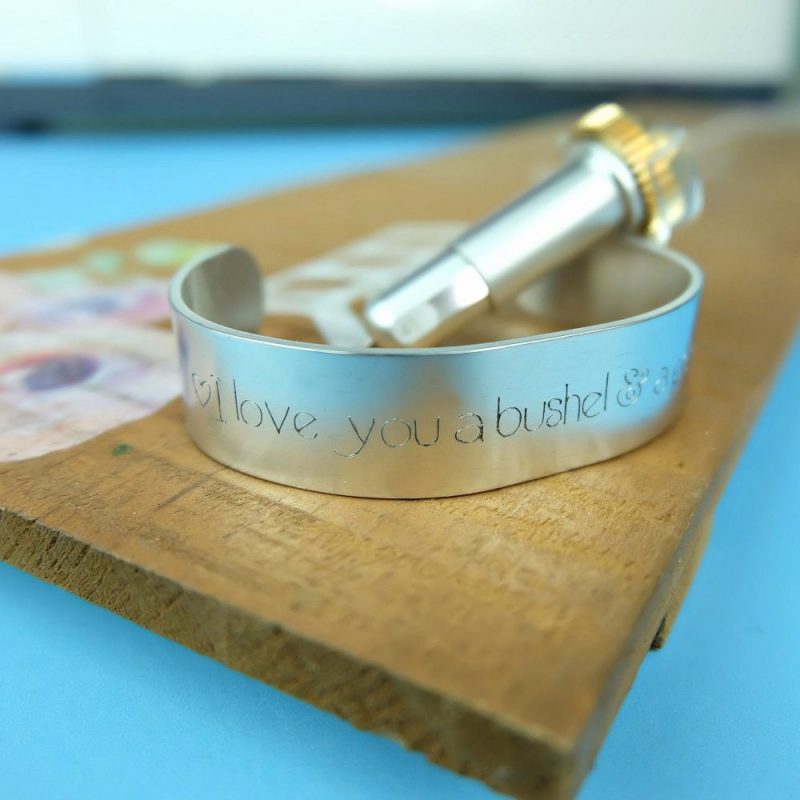
- A cuff bracelet with an inspirational quote or personal message engraved.
- A necklace with mom’s horoscope sign engraved on it.
- A monogrammed keychain
Getting Started with Cricut Maker and Cricut Engraving Tool
In this post I’m going to show you how to make a necklace with a pendant for each member of the family with their initial engraved and birthstone charms. I love this project because it has a huge impact but takes less than 30 minutes to make!
The Cricut Engraving Tool combined with the Cricut Maker or Cricut Maker 3 are simple to use and produce beautiful results. Once you know how to use your engraving tool the possibilities are endless! It will take your crafting game to a whole new level!
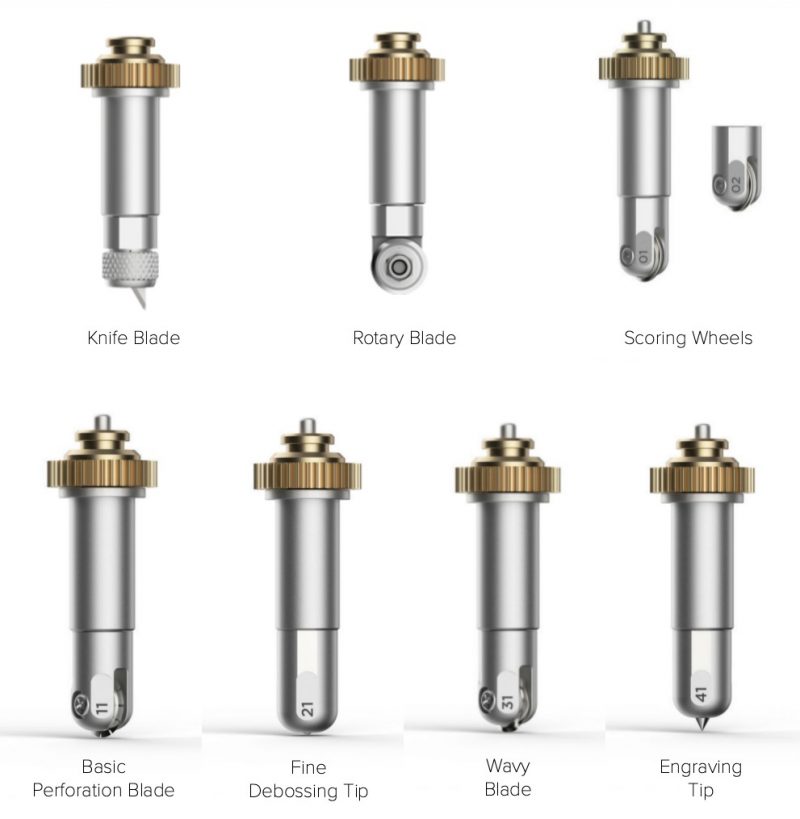
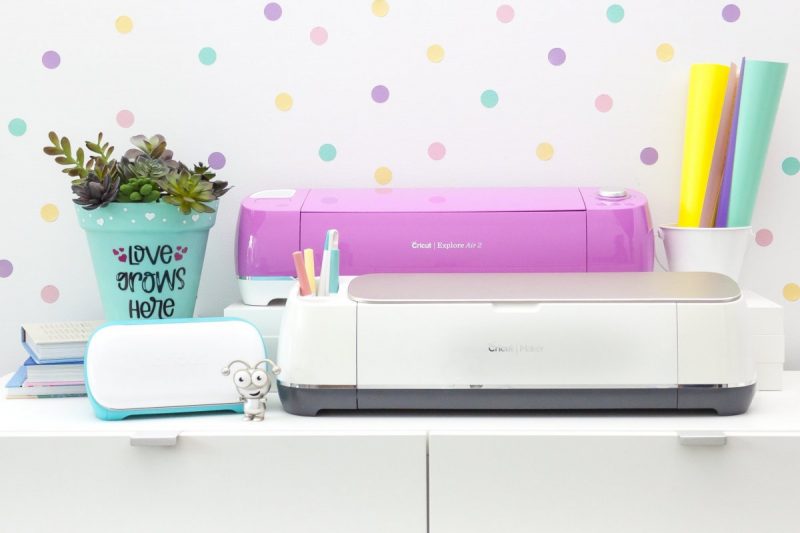
The Cricut Engraving Tip is one of the 8 tools in the Cricut Adaptive Tool set.
What are Cricut Adaptive Tools?
Unique to the Cricut Maker, the Adaptive Tool system brings together three major technologies that give professional class cutting versatility and performance:
- Delivers 10 times (4 kg) or more cutting force than the Explore line.
- Uses a sophisticated steering system to actively control the direction of the blade at all times. (That’s what the shiny gold teeth at the top of each tool does.)
- Tests to be sure you are using the correct blade before it starts cutting, and tells you to change it, if not… which makes this system pretty much goof proof!
There are 8 tools in the Cricut Adaptive Tool family. They include:
- Knife Blade
- Rotary Blade
- Single Scoring Wheel (#01)
- Double Scoring Wheel (#02)
- Basic Perforation Blade (#11)
- Fine Debossing Tip (#21)
- Wavy Blade (#31)
- Engraving Tip (#41)
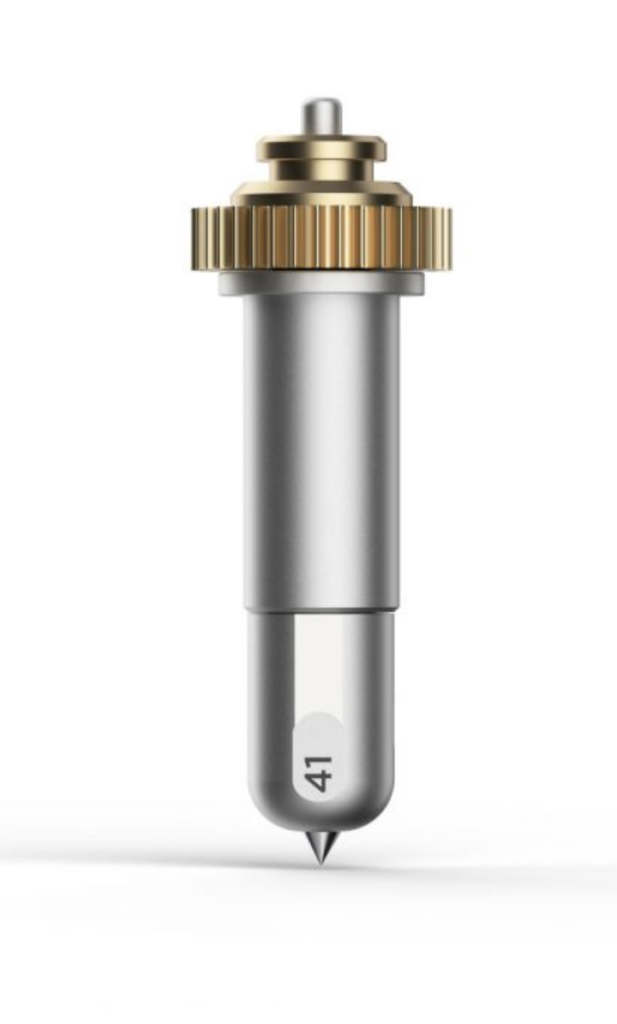
The Cricut Engraving Tip is the tool we will be using in today’s project. It is marked with a #41.
With the Cricut engraving tip you can engrave unique and permanent designs on a variety of materials.
This tip truly allows you to personalize your projects and make them one of a kind! Use it to write personalized text or create monograms, draw decorative flourishes and embellishments, or inscribe your favorite quotes on a keepsake.
What Materials Can the Cricut Maker Engrave?
Engraving with your Cricut Maker and Cricut Maker 3 is so much fun, but you’ll want to make sure that you have the best materials to ensure success.
The materials that the Cricut can currently engrave are:
| Art Board: |
| Foil Kraft Board – Holographic |
| Foil Poster Board |
| Kraft Board |
| Metallic Poster Board |
| Cardstock: |
| Glitter Cardstock |
| Fabric: |
| Faux Leather (Paper Thin) |
| Foil & Metal: |
| Aluminum Sheets |
| Anodized Aluminum |
| Brass |
| Bronze |
| Metal – 40 gauge thin copper |
| Stainless Steel |
| Leather: |
| Genuine Leather |
| Metallic Leather |
| Thin Garment Leather – 2-3 oz. (0.8-1.3 mm) |
| Tooling Leather – 2-3 oz. (0.8 mm) |
| Tooling Leather – 4-5 oz. (1.6 mm) |
| Tooling Leather – 6-7 oz. (2.4 mm) |
| Paper: |
| Calibration Paper |
| Heavy Watercolor Paper – 140 lbs (300 gsm) |
| Shimmer Paper |
| Sparkle Paper |
| Vellum |
| Plastic: |
| Acetate |
| Acrylic, Thick (2 mm) |
| Acrylic, Thin (1 mm) |
| Foil Acetate |
| Transparency |
| Other: |
| Vinyl Record |
Can You Engrave With A Cricut Explore Air 2, Cricut Explore Air 3 Or Cricut Joy?
The Cricut Maker and Cricut Maker 3 are the only machines at this time that have the Adaptive Tool System. You are unable to engrave with the Cricut Explore Air 2, Cricut Explore Air 3 or Cricut Joy.
Designing Your Engraved Jewelry
It’s time to design some engrave some jewelry using your Cricut Maker or Cricut Maker 3! Open Design Space and let’s get started!
Tips For Designing Cricut Engraved Jewelry
Cricut Design Space is full of images and fonts that are sure to make mom smile. But how do you create the best design for your piece of custom jewelry?
Here are a few tips for designing and creating your engraved jewelry:
- Keep it simple. Most jewelry that you’ll be engraving is relatively small so simple designs and fonts do best.
- Make it heartfelt. Pick dates, a quote, names, initials, monograms and designs that have special meaning to the recipient and reflect their style and personality.
- Add embellishments. Pair your engraved jewelry with a bit of extra bling! Birthstone charms are a favorite of mine but you could also include horoscope charms and other charms that have a special meaning.
- Choose the right material. Make sure to choose materials that are compatible with your Cricut Maker and Engraving Tool for best results. You also want to make sure that the item you are engraving is flat, will fit on your cutting mat and will fit underneath the rollers of your machine.
- Calibrate your machine before engraving. Proper calibration ensures accurate and precise engraving. Machine calibration can be found under the menu with the three lines in the upper left hand corner of Cricut Design Space.
- Use the right settings. Set the proper speed, pressure, and depth for your engraving project.
- Secure your material. Use painters tape to secure your material to the mat to prevent slipping.
- Test your design. Engrave a small test design on a scrap piece of material before engraving on your actual jewelry piece.
- Move star wheels to the right. On your Cricut Maker make sure that you move the star wheels to the right so that they don’t run over your jewelry and cause them to shift.
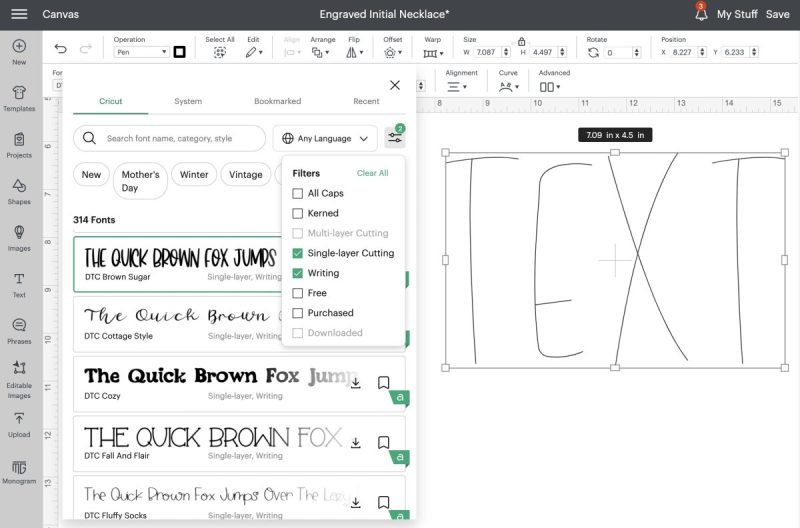
Choosing The Right Fonts For Your Jewelry Design
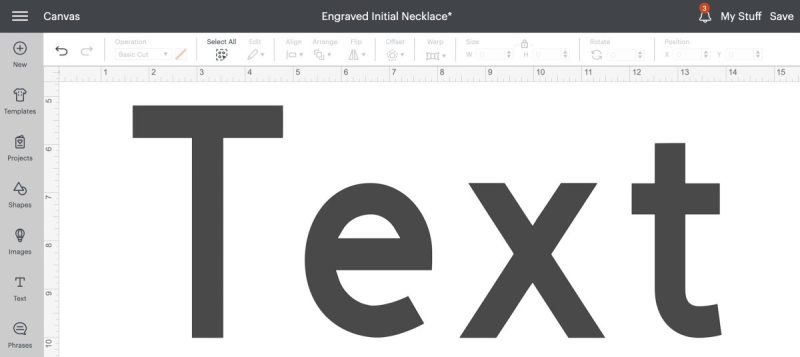
When you cut a design with your Cricut cutting machine the machine cuts around the outside of the design. You can use the image below as an example. The Cricut would cut all the way around the T, E, X and T.
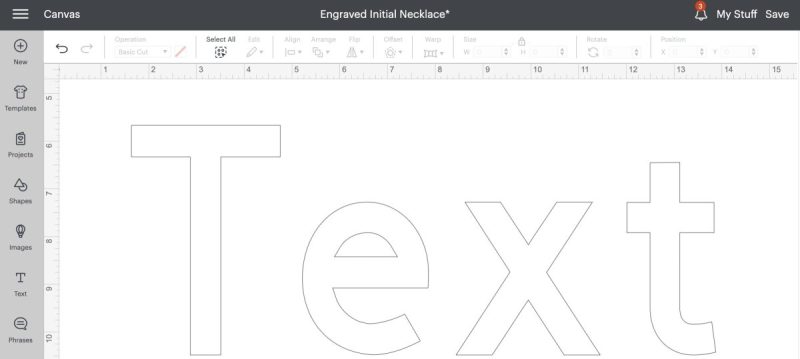
If you were to change the word “Text” from Basic Cut to Engrave, your Cricut would engrave it the same way it cut it– Tracing all the way around the outside of the word. See below.
This is definitely one style of look that you can go for, but I prefer to have my Cricut engrave more in a writing style, like if your Cricut was writing with a pen. To find fonts in this style you want to filter your fonts.
To filter your fonts:
- Click the text box in the left hand side toolbar
- Click the font box in the top toolbar
- Click the filter button in the right hand side of the font box
- Click the boxes next to “Writing Style” and “Single Layer”
- Once you have found a font you like, make sure that you change the operation type (found in the top toolbar) from pen to engrave.
Choosing The Right Graphics For Your Jewelry Design
Similar to fonts, my favorite designs to engrave are simple designs that are engraved in a drawing style instead of tracing around the outside of the design.
Let’s take my mushroom design below as an example. Looking at the image on the left you would think it would make an adorable design to engrave. But once you change your operation type from “Basic Cut” to “Engrave”, you’ll see in the image on the right that the engraving tool will engrave all the way around instead of treating the design like it’s drawing it.
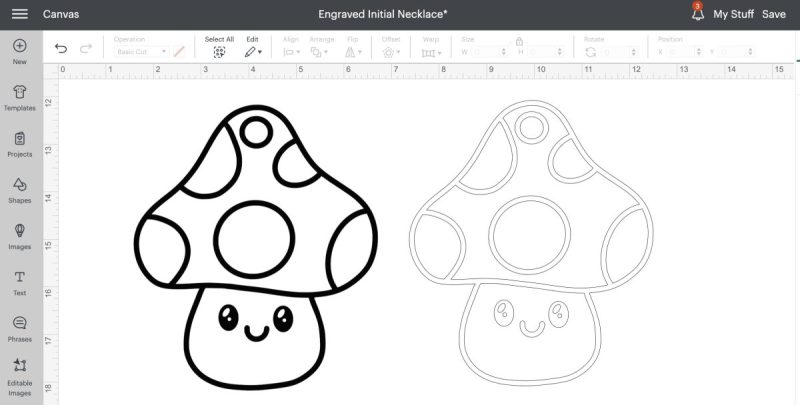
Again this is where you will find that a filter is your best friend.
To filter looking for images that can be engraved in a writing style:
- Click on Images in you left hand toolbar
- Select All Images
- In the left hand toolbar click Operation Type and then Draw Only
- In the search bar search by keyword for the image that you are looking for
Engraving Your Jewelry with the Cricut Engraving Tool
Now that you have all the tips under your belt to make your Cricut engraving process a success, let’s get to our project!
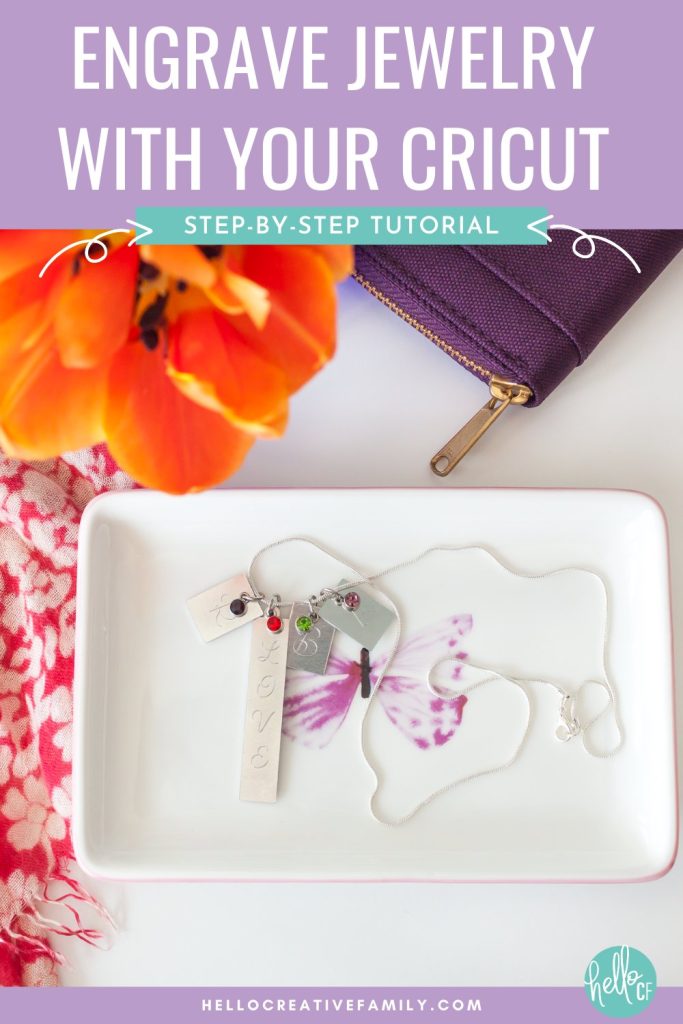
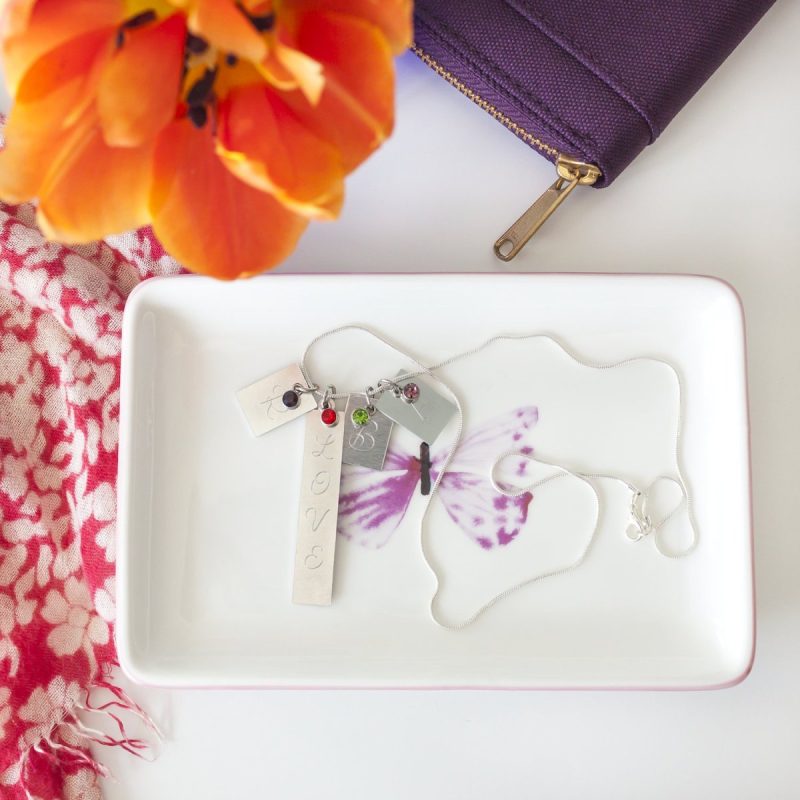
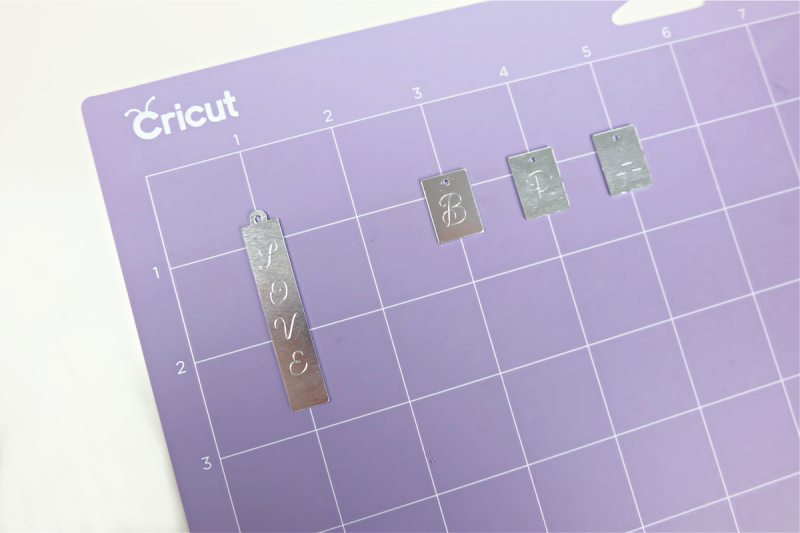
We are going to be making a very special Mother’s Keepsake Necklace. This necklace has a charm with the initials of each of her family members engraved on it, a birthstone for each of those family members, and a longer charm that says “Love” with mom’s birthstone attached.
This sweet handmade gift will ensure that mom’s loved ones are always close to her heart.
Materials:
- Measuring tape
- Jewelry blanks meant for metal stamping
- Strong grip cutting mat
- Painter’s tape or washi tape
- Cricut Engraving Tip
- Chain
- Jump rings
- Birthstone charms
- Jewelry pliers
- Metal stamp enamel marker and soft cloth (optional)
Directions:
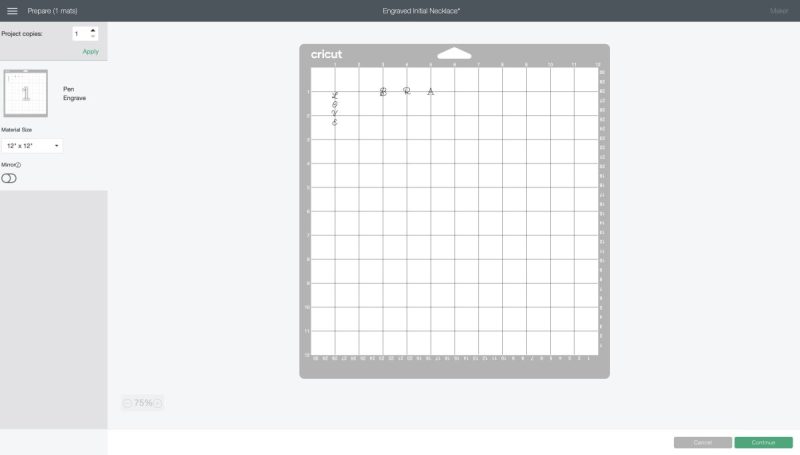
Step 1: Log into Cricut Design Space. Use the Text tool and type the letters or words you want engraved on your necklace charms. Under Operation change the linetype to Engrave. Select the font you want to use. I like filtering by fonts in a handwriting style and single layer.

Step 2: If you have a long vertical charm like I do, type out your word and then click Ungroup. Stack the letters on top of each other. Select all the letters and then use the Align function to center your letters horizontally and then distribute vertically so that they are nicely lined up and evenly spaced. With all the letters still selected click Attach.
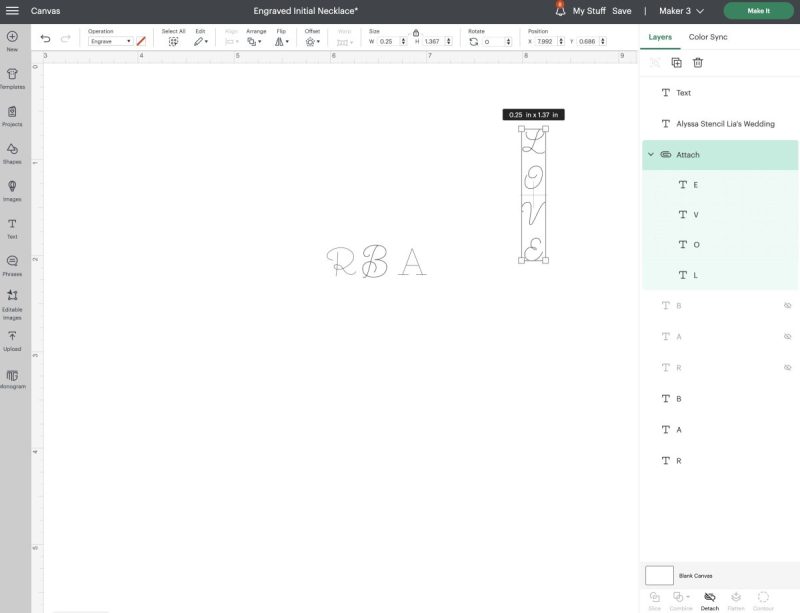
Step 3: Measure your blank charms and determine the size you would like each of your words or letters to be. Size each word or letter to the appropriate size. Do this by clicking on the design and using either the arrow that appears in the bottom right-hand corner of the design or use the Size tool in the top toolbar.
Step 4: Make note of the centers of each of your letters or words. Click Make It. Place your charms on the cutting mat and tape them in place. I like to put my charms so they are centered on the lines on my cutting mat. Pay careful attention to where each charm is placed on the cutting mat, then in Design Space, place your letters and words so they are centered where each charm is on the cutting mat. Click Continue and connect your Cricut Maker. Select Aluminum Sheet as your cutting material.
Make sure your white star wheels are pushed to the right. Load your Cricut Maker with your engraving tip. Use the arrow button on your machine to load your mat, then press the flashing Cricut C. When your Cricut is done engraving, press the arrow button again to unload your mat.

Step 5: Peel away the painter’s tape on your mat and remove the charms.
Step 6: Use your jewelry pliers to add jump rings and birthstones to the charms you’ve just engraved. Put them on your necklace.
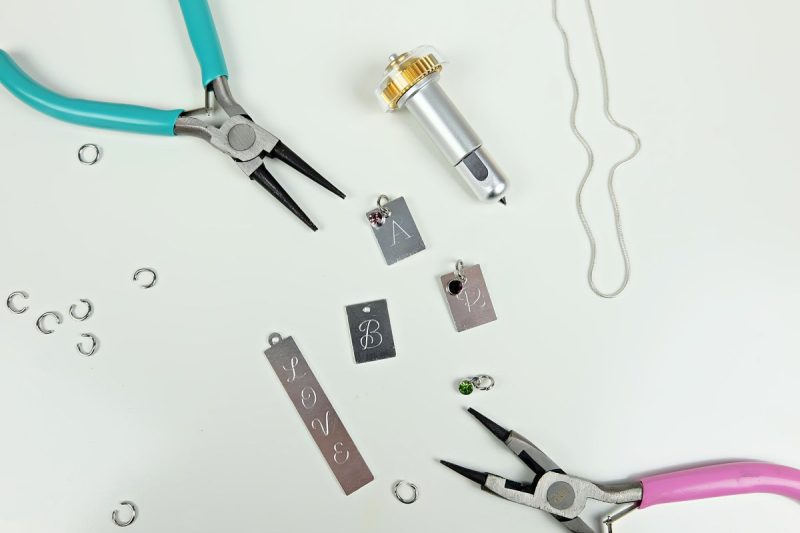
Optional: If you want your engraved lines to be darker, use a metal stamp enamel marker to color over the letters. Leave the paint on for 2 minutes and then wipe away with a clean, dry cloth.

The possibilities with the Cricut Engraving Tip are endless. I’ve used it for pet tags, keychains, bracelets, earrings, necklaces, keychains, army-style dog tags and more! Now that you know how to use it, experiment with it and have fun!
How To Engrave With The Cricut Maker
Watch the video for making this project here:
Print These Instructions For Later:

Cricut DIY Engraved Mother’s Keepsake Necklace
Instructions
- Log into Cricut Design Space. Use the Text tool and type the letters or words you want engraved on your necklace charms. Under Operation change the linetype to Engrave. Select the font you want to use. I like filtering by fonts in a handwriting style and single layer.
- If you have a long vertical charm like I do, type out your word and then click Ungroup. Stack the letters on top of each other. Select all the letters and then use the Align function to center your letters horizontally and then distribute vertically so that they are nicely lined up and evenly spaced. With all the letters still selected click Attach.
- Measure your blank charms and determine the size you would like each of your words or letters to be. Size each word or letter to the appropriate size. Do this by clicking on the design and using either the arrow that appears in the bottom right-hand corner of the design or use the Size tool in the top toolbar.
- Make note of the centers of each of your letters or words. Click Make It. Place your charms on the cutting mat and tape them in place. I like to put my charms so they are centered on the lines on my cutting mat. Pay careful attention to where each charm is placed on the cutting mat, then in Design Space, place your letters and words so they are centered where each charm is on the cutting mat. Click Continue and connect your Cricut Maker. Select Aluminum Sheet as your cutting material.
- Make sure your white star wheels are pushed to the right. Load your Cricut Maker with your engraving tip. Use the arrow button on your machine to load your mat, then press the flashing Cricut C. When your Cricut is done engraving, press the arrow button again to unload your mat.
- Peel away the painter’s tape on your mat and remove the charms. Use your jewelry pliers to add jump rings and birthstones to the charms you’ve just engraved. Put them on your necklace.
- If you want your engraved lines to be darker, use a metal stamp enamel marker to color over the letters. Leave the paint on for 2 minutes and then wipe away with a clean, dry cloth.
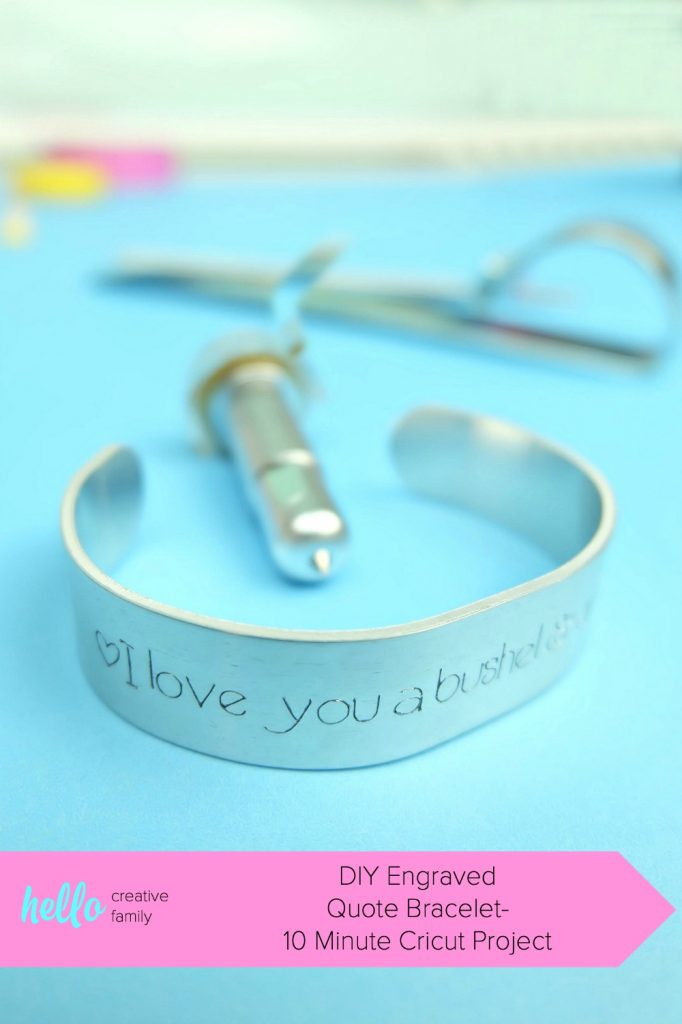
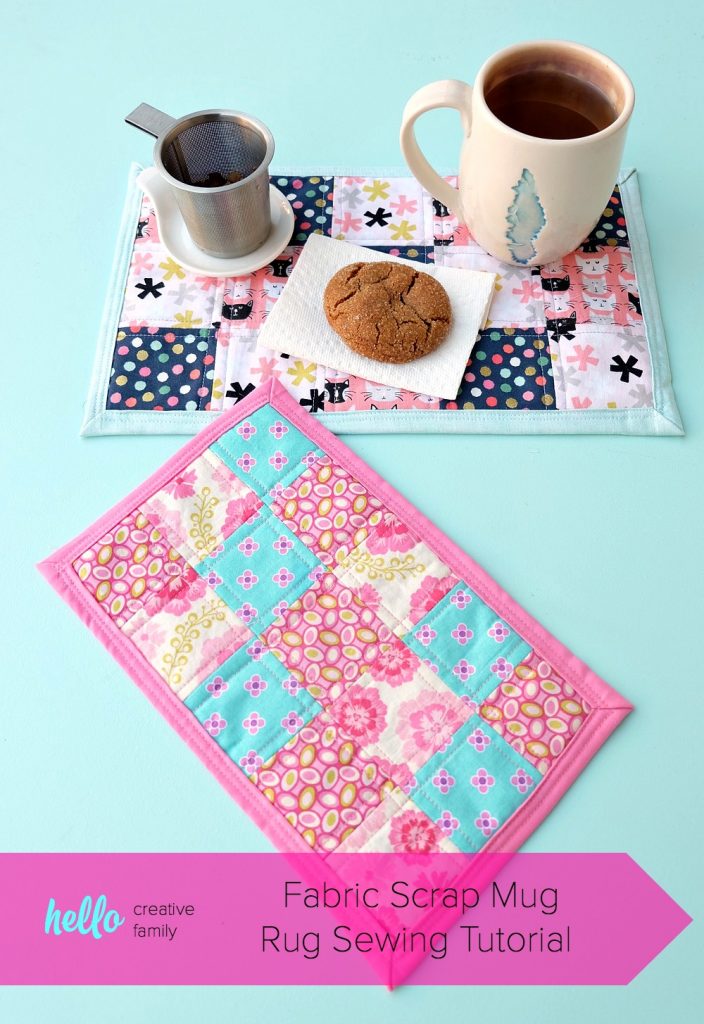
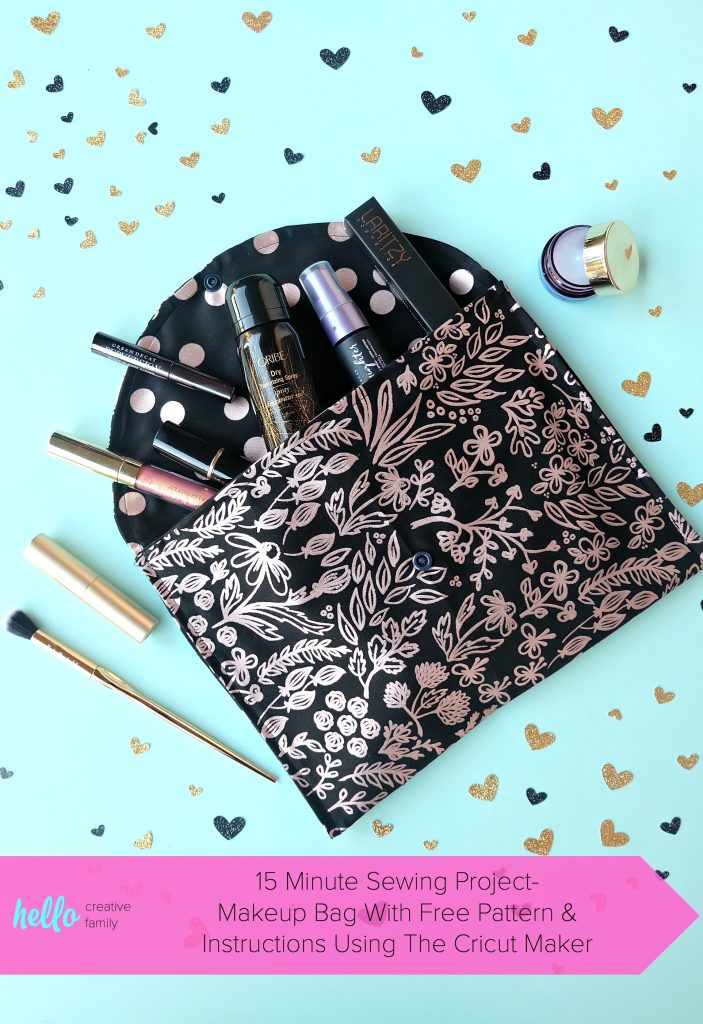
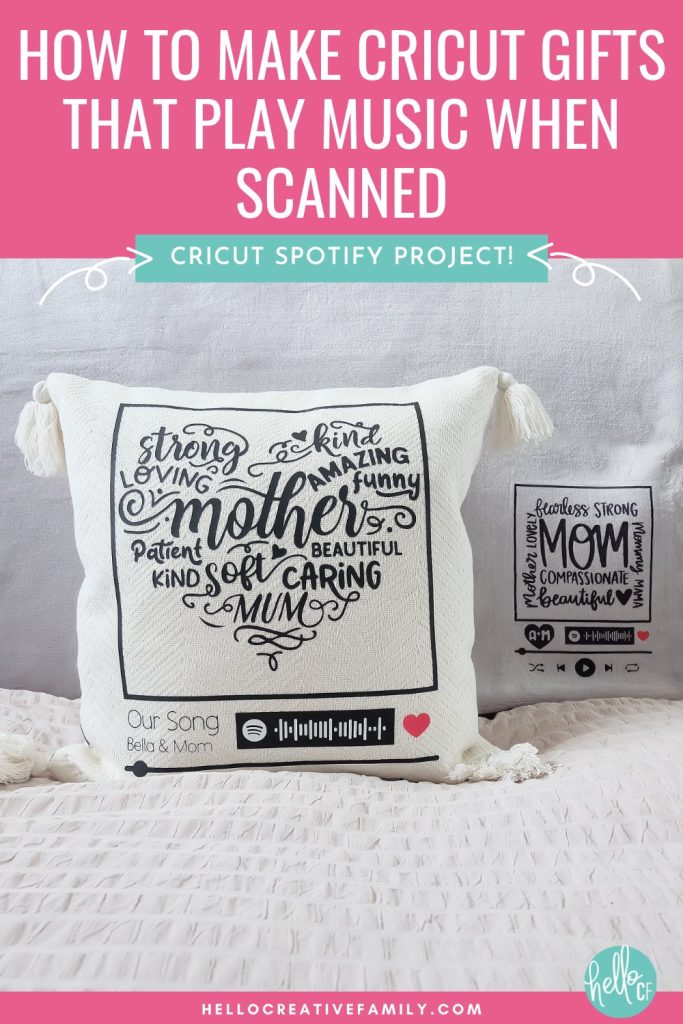
More Handmade Mother’s Day Gift Ideas You Can Make With Your Cricut
If you love this project here are some more ideas for handmade gifts you can make for Mom using your Cricut!

Cricut Engraving Questions Answered
Can you engrave with Cricut Explore Air 2, Cricut Explore Air 3 or Cricut Joy?
No. The engraving tip requires the Adaptive Tool System. At this point the only Cricut machines that have the adaptive tool system are the Cricut Maker machines– The Cricut Maker and Cricut Maker 3.
What can I engrave with a Cricut Maker?
There are over 20 materials that you can engrave with the Cricut Maker and the Cricut Engraving Tip. They range from leather, to metal, to cardstock. You can even engrave old vinyl records! For a full list of compatible materials see our table above.
How can you make Cricut engraving stand out?
To help your engraving stand out I suggest using a metal stamp enamel marker. Color over your engraving with the marker, let sit for 2 minutes and then wipe away with a soft cloth.
How do you use a Cricut Engraving Tool?
The Cricut engraving tool is so easy to use! Create beautiful engraved pieces in minutes. Simply insert the Cricut Engraving Tool into your Cricut Maker’s clamp B, slide your star wheels to the right hand side of your machine, tape your material to your Strong Grip Mat, set your design to engrave and click Make It!
Find the step-by-step instructions for engraving above.
Can a Cricut Engrave Acrylic?
Yes a Cricut Maker or Cricut Maker 3 can engrave acrylic. Simply set your material setting to acrylic and engrave away. I love using the engraving setting to make engraved acrylic keychains.
Can you engrave leather with a Cricut Maker?
Yes a Cricut Maker or Cricut Maker 3 can engrave leather. Simply set your material setting to the type of leather you are using and engrave away. I love using the engraving setting to make leather bookmarks.
Can a Cricut Engrave Metal?
Yes a Cricut Maker or Cricut Maker 3 can engrave metal. See the table above for the types of metal that the Cricut can engrave along with a step by step tutorial for making engraved metal jewelry with your Cricut.
What is Cricut quickswap housing?
Quickswap housing is the name for the Cricut adaptive tools where the tips can be changed and you can use one housing. 6 out of the 8 Cricut Maker Tools feature quickswap tips. This means that you can have one housing for these tools and the tips can be switched.
The Cricut Maker Machine tools that DON’T USE quickswap housing are:
The adaptive tools that DO USE quickswap housing are:
- Cricut Scoring Wheel and Double Scoring Wheel (#1&2)
- Cricut Basic Perforation Blade (#11)
- Cricut Fine Debossing Tip (#21)
- Cricut Wavy Blade (#31)
- Cricut Engraving Tip (#41)
I hope you enjoyed learning how to use the Cricut Engraving Tool to make beautiful, peronalized, keepsake jewelry in minutes! If you have any questions, please ask them in the comments.