Personalized Cricut Homeschool Rules Sign and Planner Dashboards
This post and the photos within it may contain Amazon or other affiliate links. If you purchase something through the link, I may receive a small commission at no extra charge to you.
This is a sponsored post written by me on behalf of Cricut. All opinions are 100% mine.
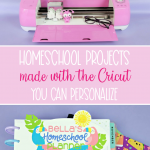
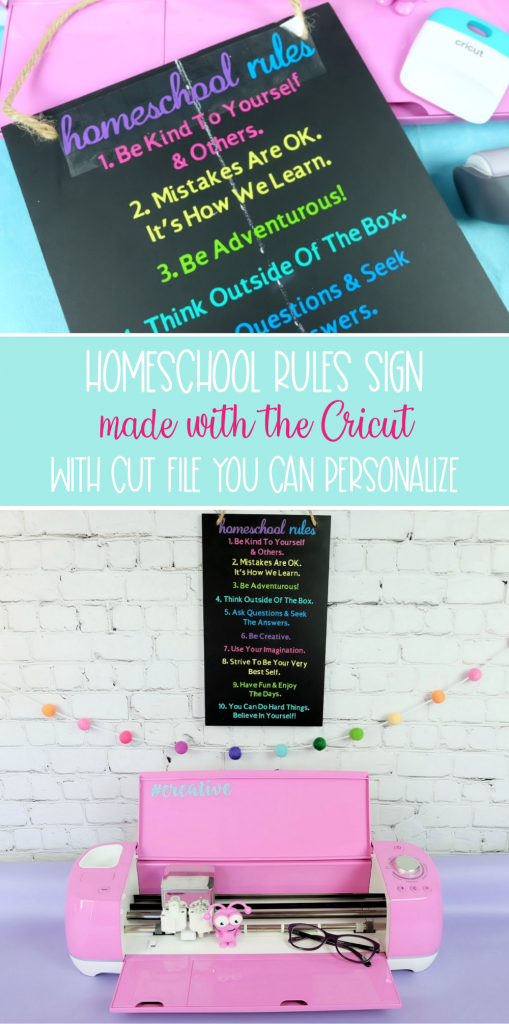
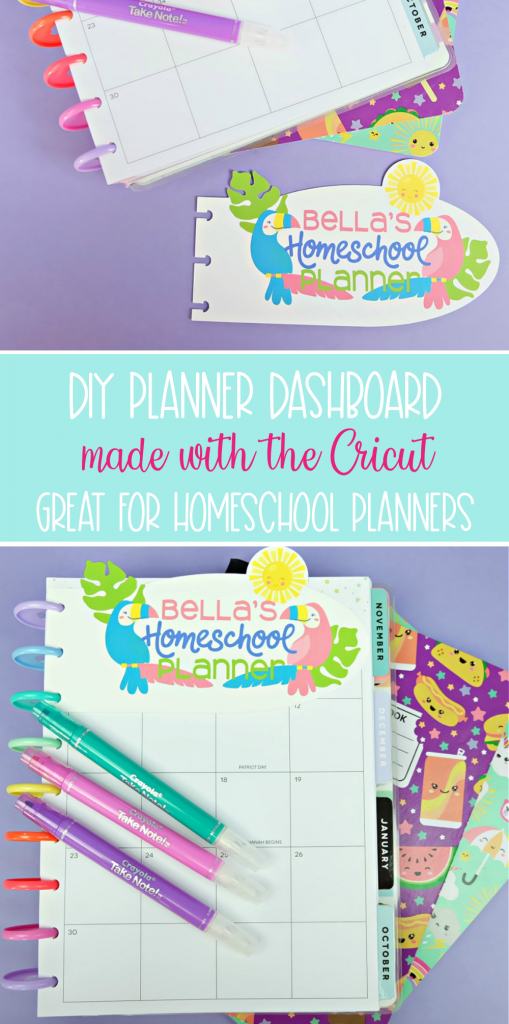
Homeschooling this year? We’re sharing two Cricut homeschool projects you’ll love to craft! A Homeschool Rules sign you can personalize with your family’s own rules and a super cute homeschool planner dashboard.
Hi crafty friends! The last two weeks have been eventful here in our Hello Creative Family home. It was filled with some major decisions, big heart to heart discussions and nervous energy as we sat waiting to hear if our idea was going to come to fruition.
My husband, children and myself came to the decision a few weeks ago that we were going to pull our kids out of the public school system and put them into a distributed learning school. For our family that means a blended learning program which is two days in person school in a classroom of 15-20 children, and then three days at home.
We sent in an application almost 2 weeks ago and sat anxiously waiting to hear back. A few days after our submission was sent in we heard that they had received an influx of over 200 applications in 1 week and that a waiting list was being created. There are limited spaces in the blending learning program so we honestly weren’t sure if we would get in.
Waiting for that homeschool phone call…
Yesterday we received the phone call, our children were accepted into the blended learning program.
We will be working with the teachers at the school to develop a curriculum for our children which will no only meet BC curriculum guidelines for their grades, but also allow us to create a more personal learning plan which helps build on their strengths, lets them dive deeper into their passions and interests and helps them gain confidence in areas where they are unsure of.
It was a big, big decision for us. The fact that my kids are excited about the idea made it a bit easier, but I’ll admit it’s just so hard. I love our neighborhood school. I love the teachers, the community, being able to see our school from our kitchen window, the fact that the kids are in school 5 days a week!!!
We are in for a major change this year and I have so many emotions flowing through me– excited, nervous, happy, sad, hopeful…
I know, deep down in my gut that this is a decision that will keep my family the safest. But that doesn’t mean that it isn’t easy. So what do I do when I’m feeling a bit under the weather emotionally? I craft!!!
Today I’m bringing you two Cricut Homeschool Crafts!
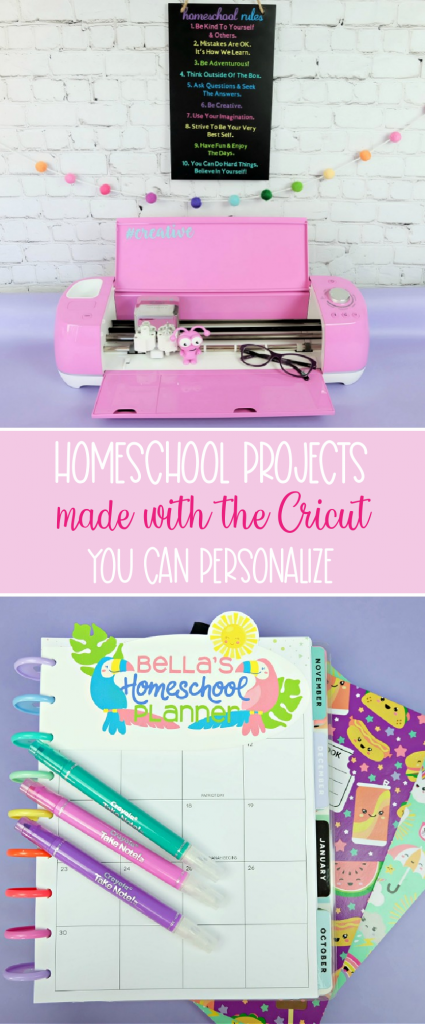
First I’m going to show you how to make a homeschool rules sign that your family can personalize with their own set of rules, or use as is.
Second I’m going to show you how to make adorable personalized planner dashboards. Organization isn’t my strong suit so staying organized is going to be key for us this year!
I love that my Cricut helps me make one of a kind crafts that are personalized to my family and things that we actually need and use! I use my Cricut multiple times a week and can’t tell you how much I love it.
Ready to get started on these awesome personalized homeschool Cricut projects? Read on!
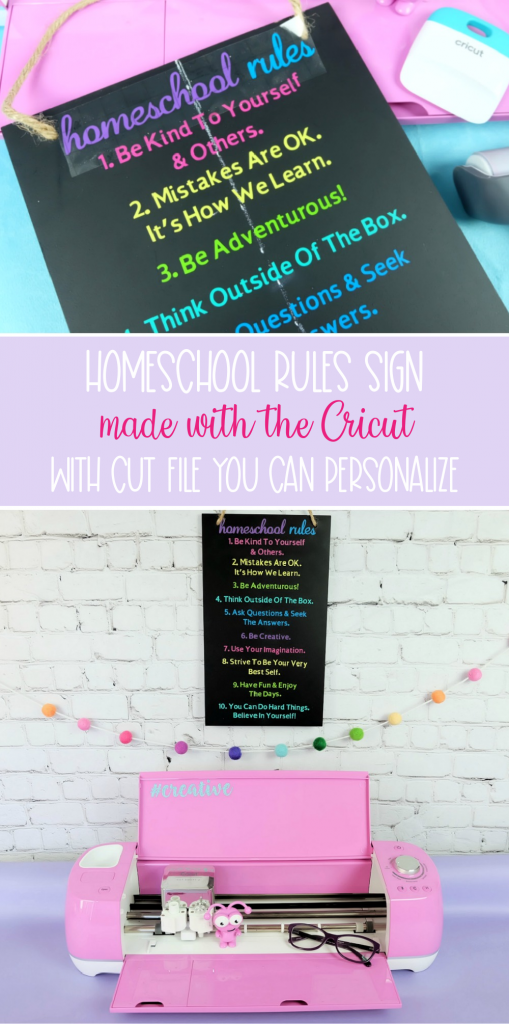
DIY Homeschool Rules Sign Made With The Cricut
When I think about homeschooling, my biggest fear is “Will I be able to do it?” I have no doubt that my kids can conquer anything they set their mind to. But I’ll be honest– I’m scared! Sometimes I find myself wondering if I’m up to the task!
I want to make sure that my kids love school. That they thrive and love learning. That each day is a new adventure. I want all four of us to live under one roof as a happy family, without tension from schooling. I have this feeling that our experience will either be the best thing we ever did, or a complete disaster.
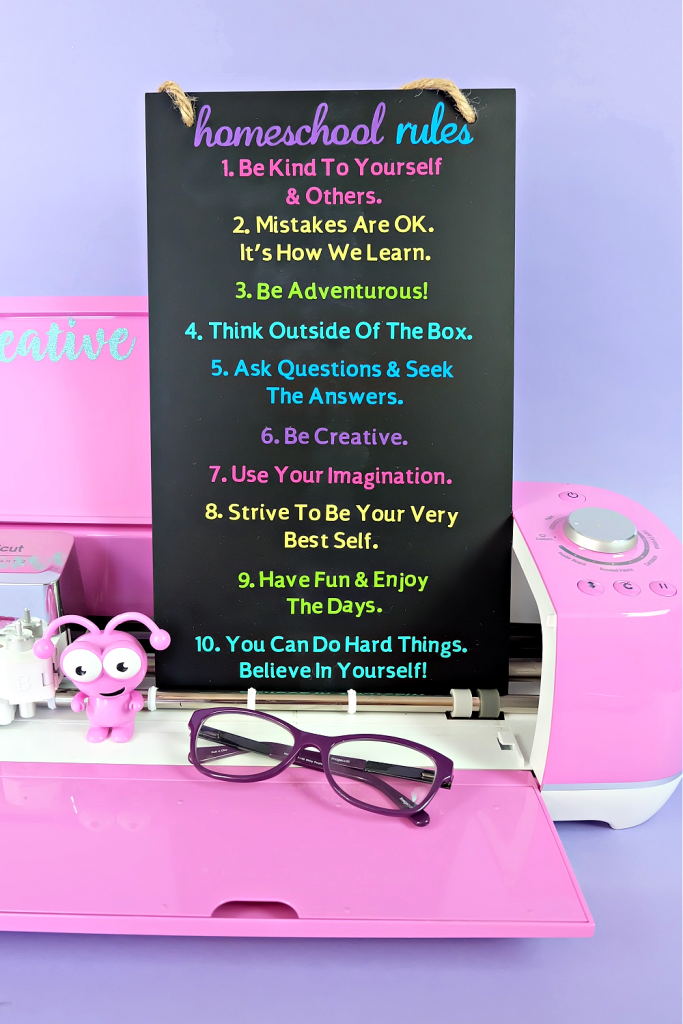
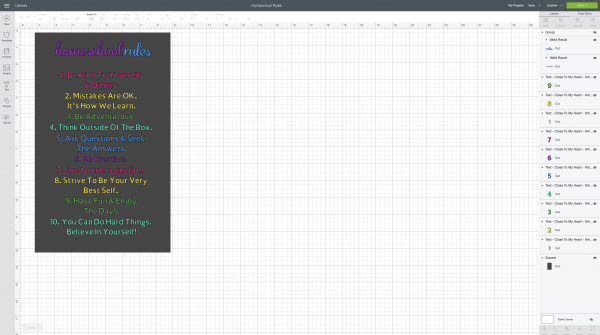
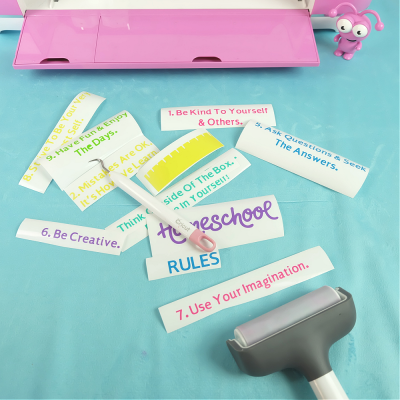
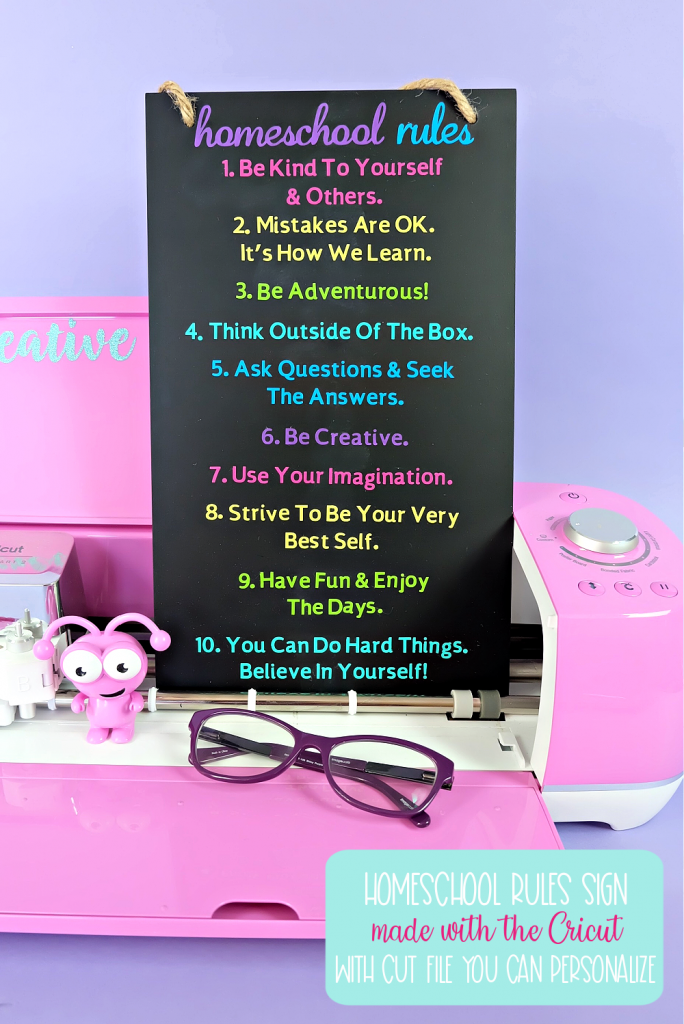
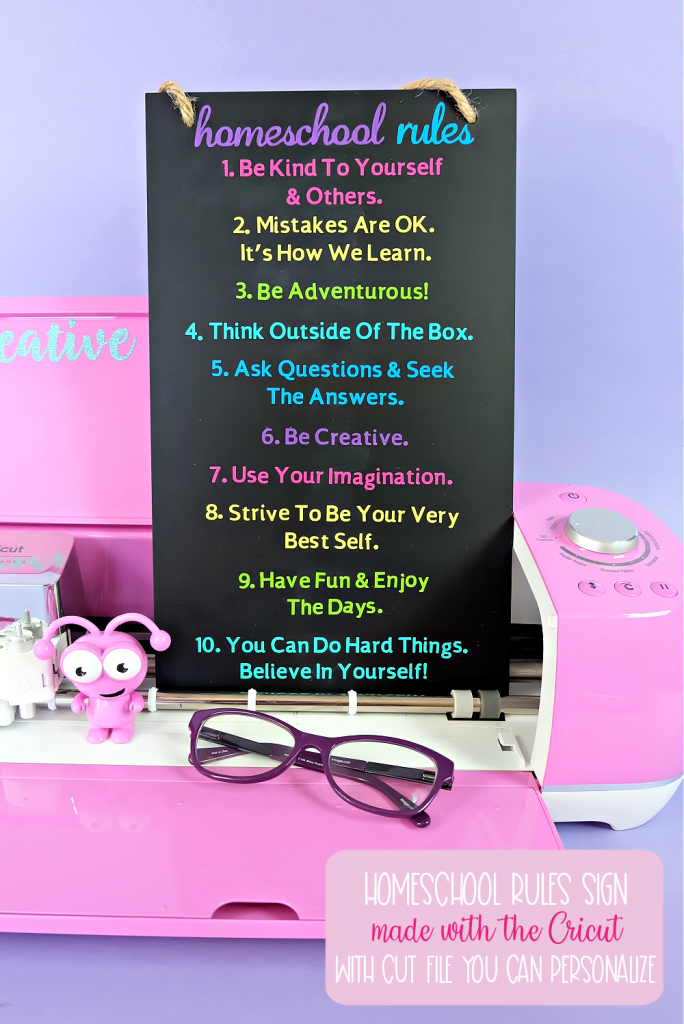
Last week I sat down with the kids and said to them “What are some rules that we want to have for homeschooling?” Together we came up with the list on our DIY Homeschool Rules sign. I’m giving you access to this cut file. That means you can sit down with your family, have your own discussion about what you want your homeschooling life to look like, create a list of rules and edit my cut file to reflect them. Have fun!
DIY Homeschool Rules Sign Made With The Cricut
Instructions
- Open the Hello Creative Family Homeschool Rules cut file from the supply list above. Edit to reflect your own homeschool rules and size to fit your blank wood sign. I like placing a rectangle on my Design Space mat the same size as the sign I'll be decorating to get a better idea of size and layout.

- Click "Make It" and follow the prompts to connect your machine and cut your vinyl. Vinyl should be laid on the standard grip cutting mat with the color size up. Note: In the past I have laid my entire sheet of vinyl on my cutting mat and then cut it down to size afterwards. Because the letters in this sign have such fine details I find that cutting your vinyl down to size you need before you lay it on the mat works best, otherwise the letters tend to lift off of the paper backing.

- Weed your vinyl removing the area around your design, leaving just your design behind on the white paper backing.
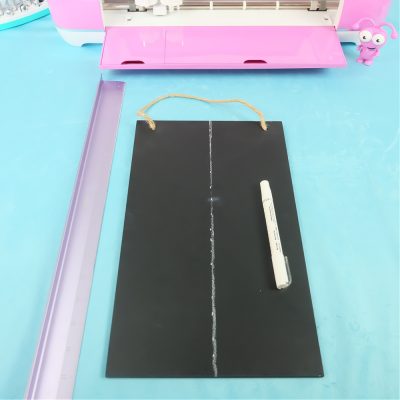
- Mark the center of your sign using a ruler and chalk or a pencil. Mark the center of each piece of weeded vinyl. Make marks where you want each rule.
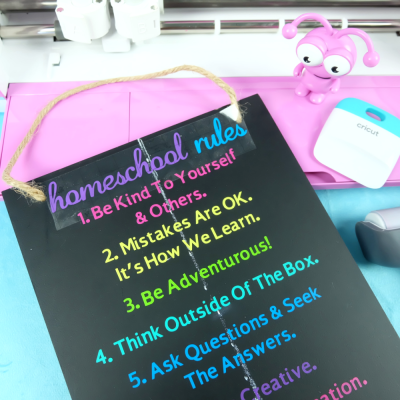
- Cut a piece of transfer tape that is slightly larger than your vinyl decal. Peel off the paper backing and lay the transfer tape on top of your vinyl decal. Use your scraper to rub on top of the transfer tape to make sure the design sticks to the tape. Peel the transfer tape and vinyl up off of the paper backing. Lay your design where you want it on your sign. Rub your scraper on top of your transfer tape again to make sure the vinyl sticks to your sign. Peel up the transfer tape leaving your vinyl stuck to the sign. Repeat for each color of vinyl.
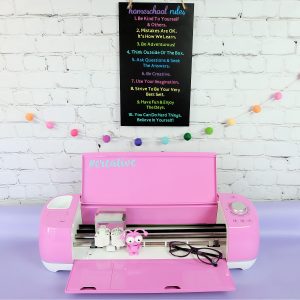
- When all of your vinyl decals have been transferred to the sign, use a paper towel to wipe away your chalk marks or an eraser to erase your pencil marks. Voila! You have a beautiful DIY Homeschool Rules sign filled with your family's own rules for having a wonderful homeschool experience.


Equipment
- Cricut Vinyl in your favorite colors
- Blank Sign (I used a chalkboard sign from the wedding section at Michaels)
- Scissors
- Chalk or pencil for marking sign layout
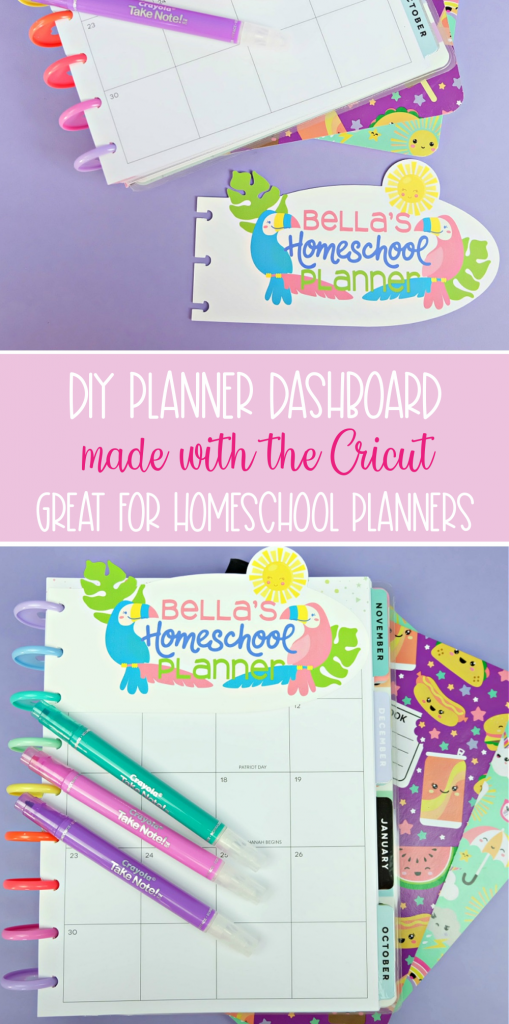
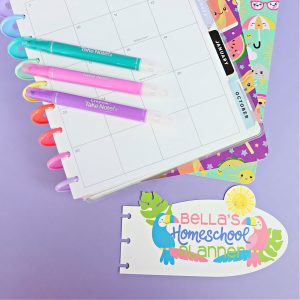
DIY Personalized Homeschooling Planner Dashboard
Yesterday after getting the call that our kids had gotten accepted into their new school, The Hubs and I had to take the dog to the vet. After our vet appointment was over I said to my hubby “Do you think we could swing by Michaels? I’d love to buy a planner for each of the kids and myself to celebrate.”
You guys… I haven’t been in a craft store in 5 months!!! That might just be a record for me. I masked up, went on in and spent a blissful half hour looking at all the planners, stickers and accessories. When I got home and presented the kids with their new planners they were SO EXCITED! They couldn’t wait to start personalizing them and making them their own.
I hope that these planners will not only keep us super organized this school year, but also help us preserve memories about their first year of homeschool.
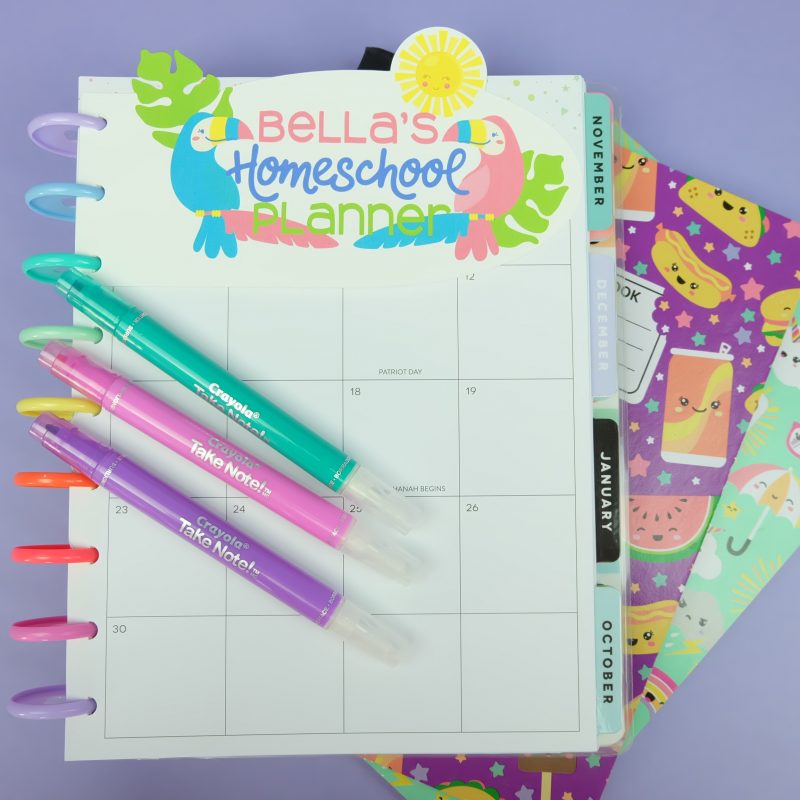
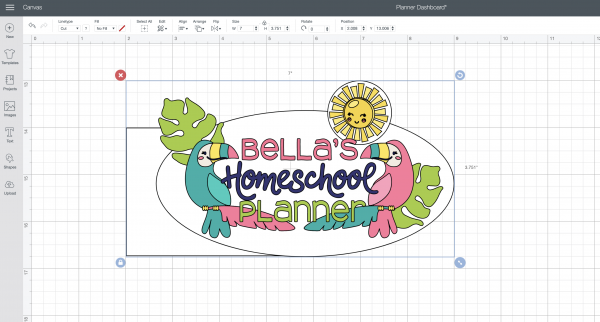
Planner dashboards are super easy to make. I’m going to walk you through how to make one step by step, or you can customize mine with your child’s name.
If you want to you can laminate these, but I think I’ll switch ours out each season so I cut ours out of cardstock and left it as is. Ready to learn how to make a personalized planner dashboard of your own? Read on!
DIY Personalized Planner Dashboard Made With Cricut
Ingredients
Instructions
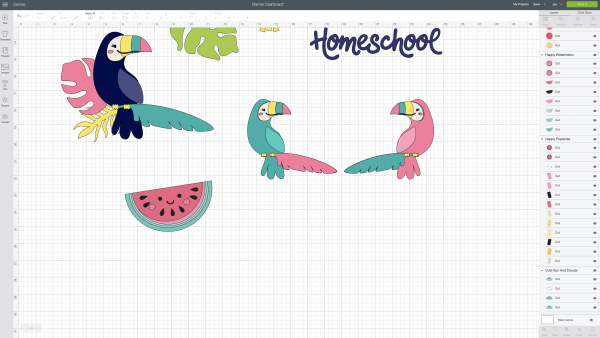
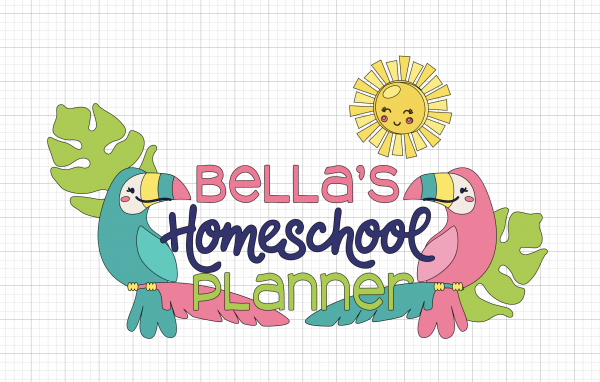
- Open Cricut Design Space and either open my design from the equipment list above or open a blank canvas. (If using my design I've done most of the below steps for you, you will need to add your child's name and then skip on down to step 5.)
- Explore the images in the Cricut image library looking for ones that appeal to your child. I like clicking a bunch that I like so that I have lots of options, and then keeping the ones I want and deleting the ones I don't as I start working on my layout.

- Lay them out as you would like and add the words "YOUR CHILD'S NAME Homeschool Planner", or whatever words you would like your planner dashboard to say.

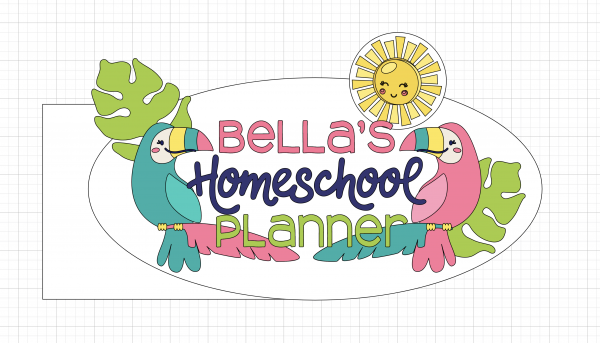
- Using the shapes tool add shapes as a background for your planner dashboard. I selected a circle and stretched it into an oval for behind the toucans, a circle for behind the sun and a rectangle for the edge of the dashboard that clips into the planner. Move those pieces to the back of your stack.

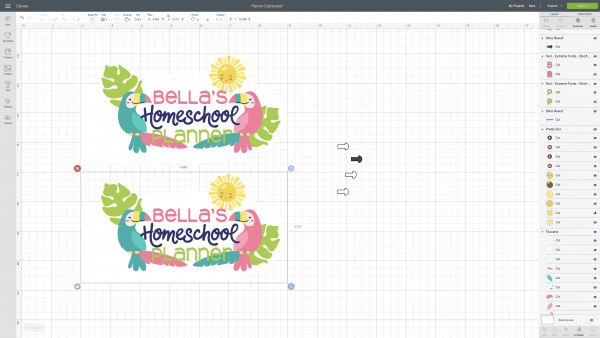
- Next measure your planner to see what size you want your dashboard. Select all of the pieces of your planner dashboard (I like doing this by clicking down on my mouse and dragging a rectangle over the collection) and size it appropriately.

- I decided to also add Happy Planner punches to mine, so I created a Happy Planner punch, laid it on top of my dashboard where I wanted it, selected both pieces and clicked slice.

- Once you have all the pieces as you want them, select them all and then click flatten.
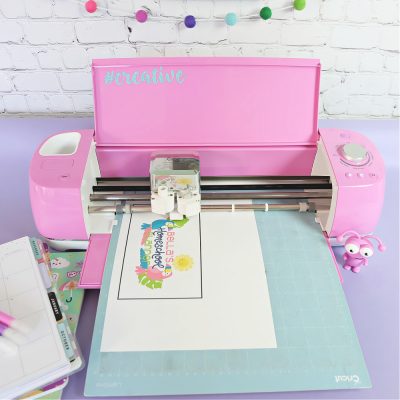
- Next click "Make It" and follow the prompts on your screen. You will want to print this on cardstock. Then load it onto your fine grip cutting mat, load it into the machine and watch it cut!
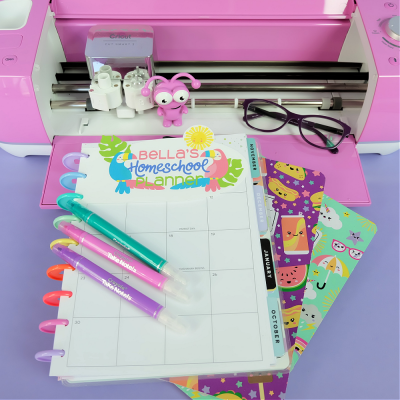
- Peel your planner dashboard off of the cutting mat (If you aren't using a Happy Planner or didn't use the Happy Planner punch then punch holes in your dashboard) and pop it into your planner! Use it to mark your place in your homeschool planner!

Equipment
- Cricut Cutting Machine (You will need a Cricut Maker or Cricut Explore for this project. The Cricut Joy doesn't allow for the Print and Cut function.)
And there you have it! My two personalized Cricut homeschool projects! They were so much fun to make and I know that they are making my kids feel really special as they start their homeschool journey!
Tell me… Are you a homeschool family? Do you have any tips for me as we start this new journey? What other Cricut homeschool projects would you like to see?

Like these projects? Make sure you check out our printables section for homeschool worksheets and these homeschool SVG files!