


10 Minute Cricut Infusible Ink Pencil Pouch
This post and the photos within it may contain Amazon or other affiliate links. If you purchase something through the link, I may receive a small commission at no extra charge to you.
Go back to school in style with a 10 minute DIY project! This Cricut Infusible Ink Pencil Pouch is easy to make your Cricut cutting machine!
Hi crafty friends! School starts up here in BC in just two weeks. Our family is doing a mad scramble to get ready for the new school year. This year my family has made the very big decision to take our kids out of public school, and enrol in a distributed learning program.
My kids will be in a small class twice a week, and learning at home the other three days a week. It’s going to be a major change for us for sure, but we’re all really looking forward to it.
In public school, we paid a flat fee and all of our school supplies were purchased and supplied to the kids by the school. This year we received a shopping list and we’ve been running around the house, collecting what we have, and placing orders for what we need.
DIY School Supplies
Last year I made my son this ADORABLE DIY Avengers Pencil Pouch.

This year, this pencil pouch is nowhere to be found— and that means I’m making him a new one.
The pencil pouch I made last year I sewed and personalized myself, but this year I decided to take the easy route! I love a good 10 minute projects, and that’s about all the time I had to invest in a pencil pouch!
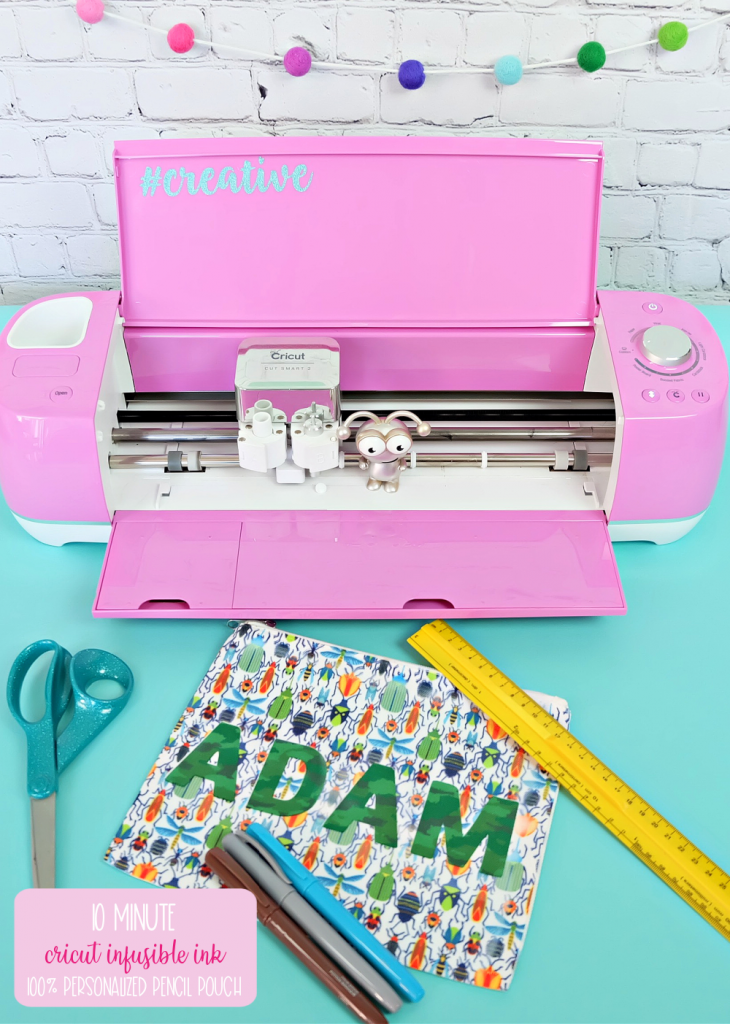
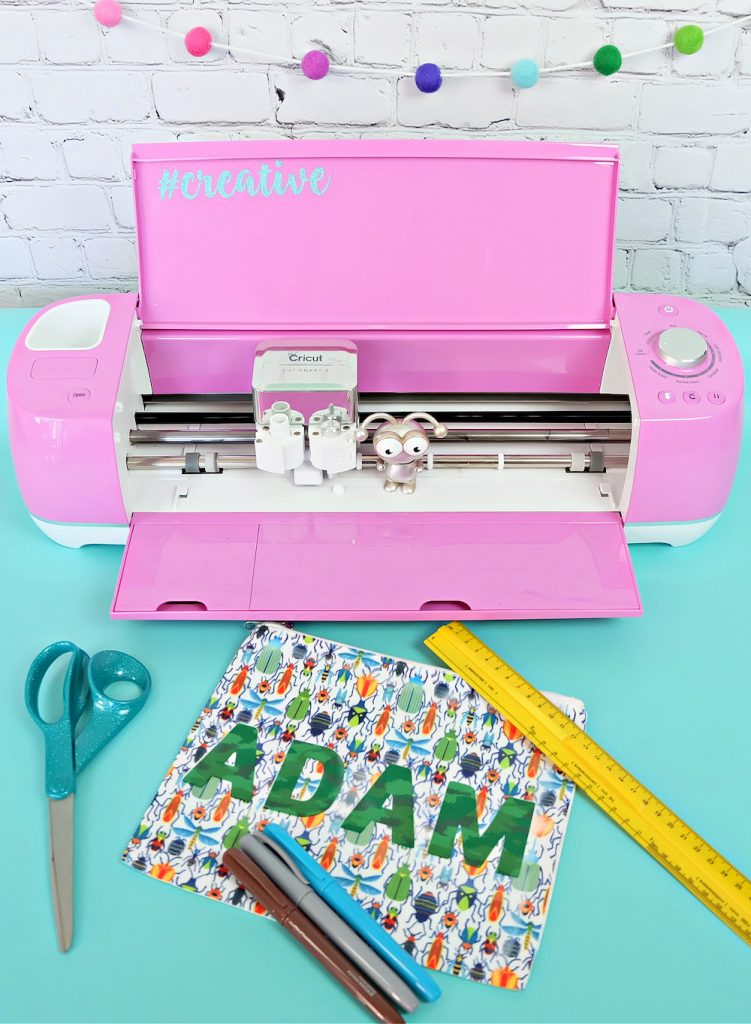
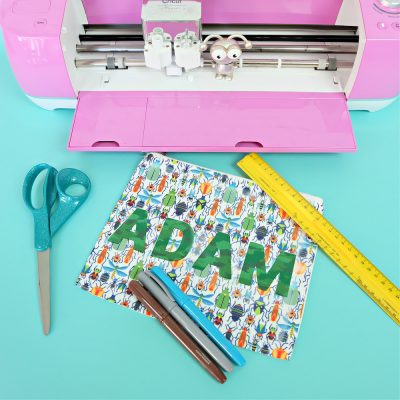
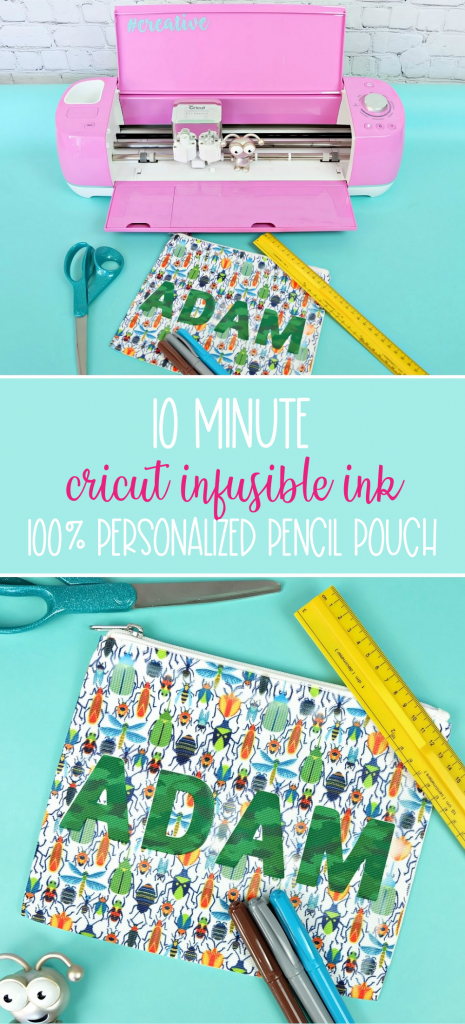
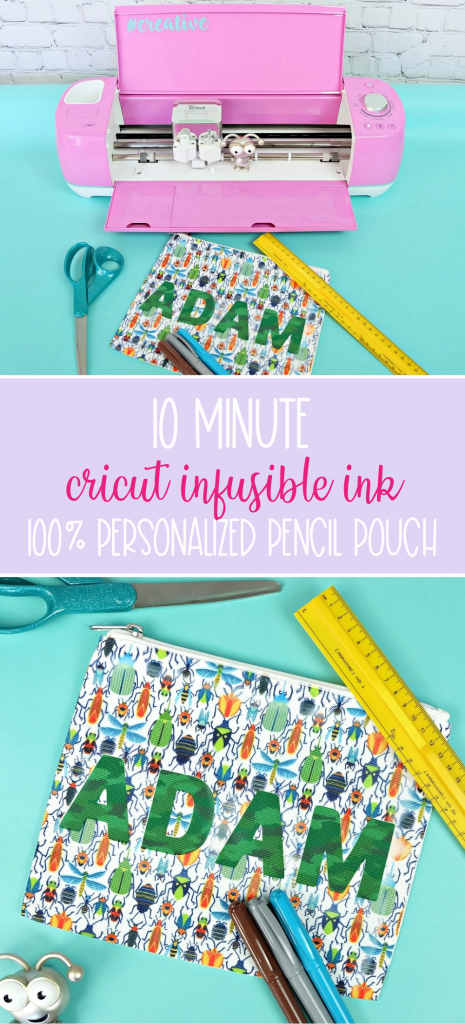
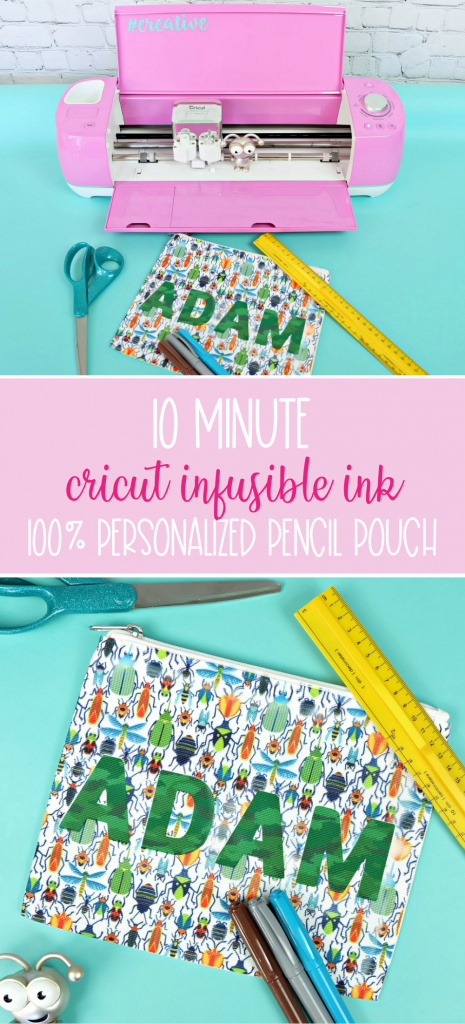
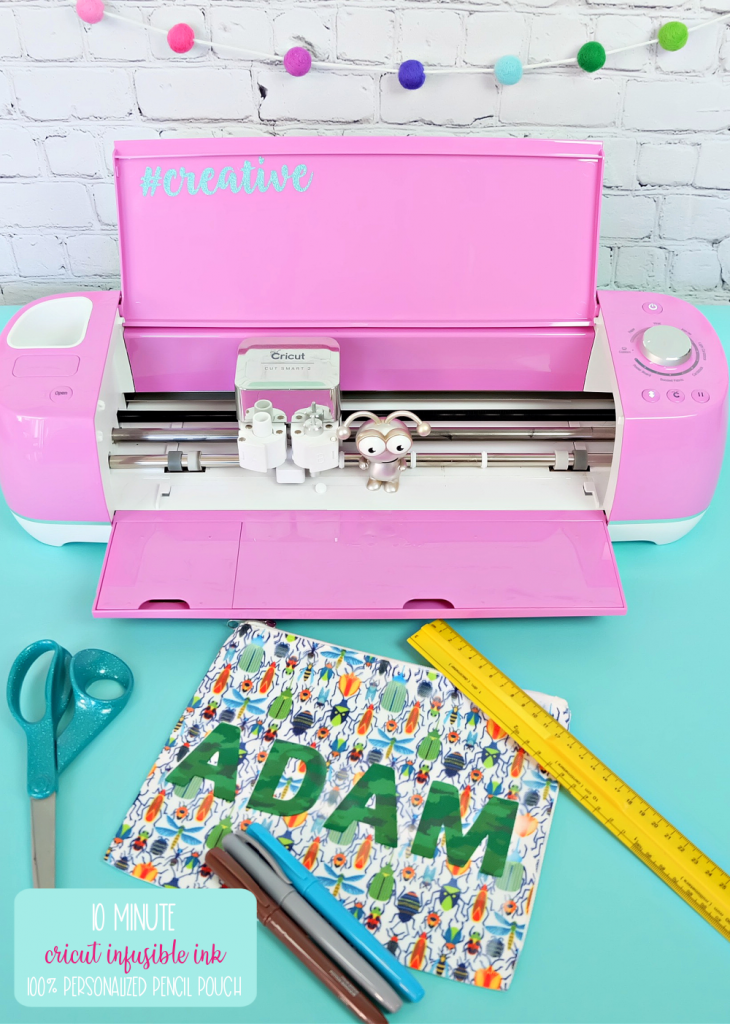
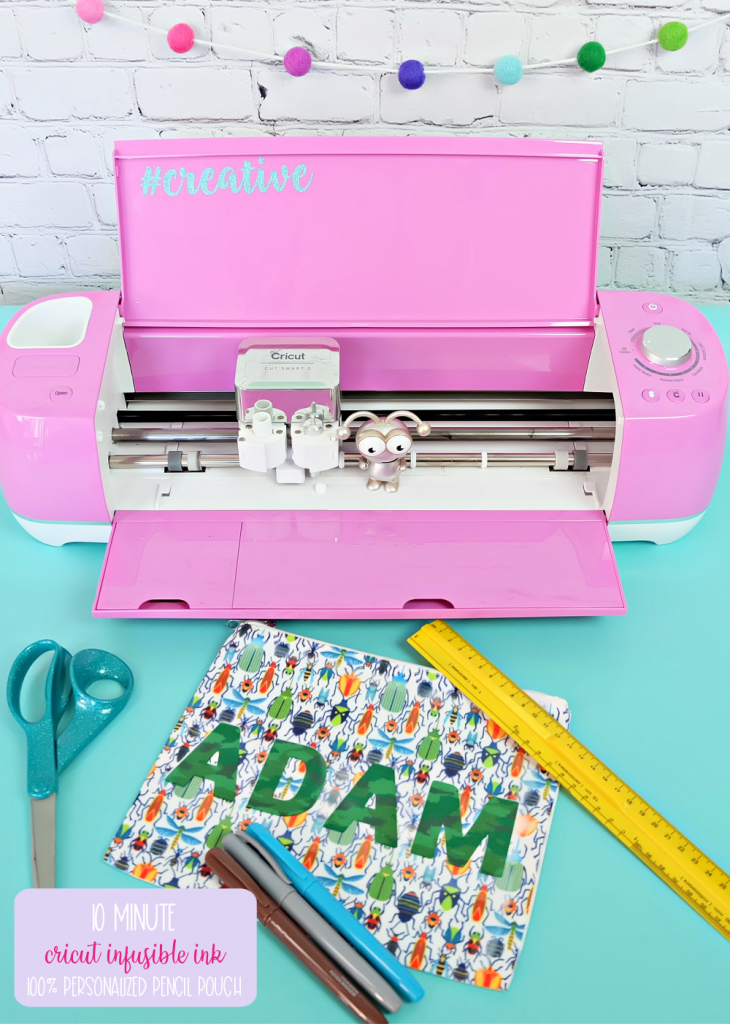
Cricut released a whole lineup of new Infusible Ink blanks recently that includes Infusible Ink cosmetic bags! Lucky for us, the cosmetic bags are the perfect size for a pencil pouch.
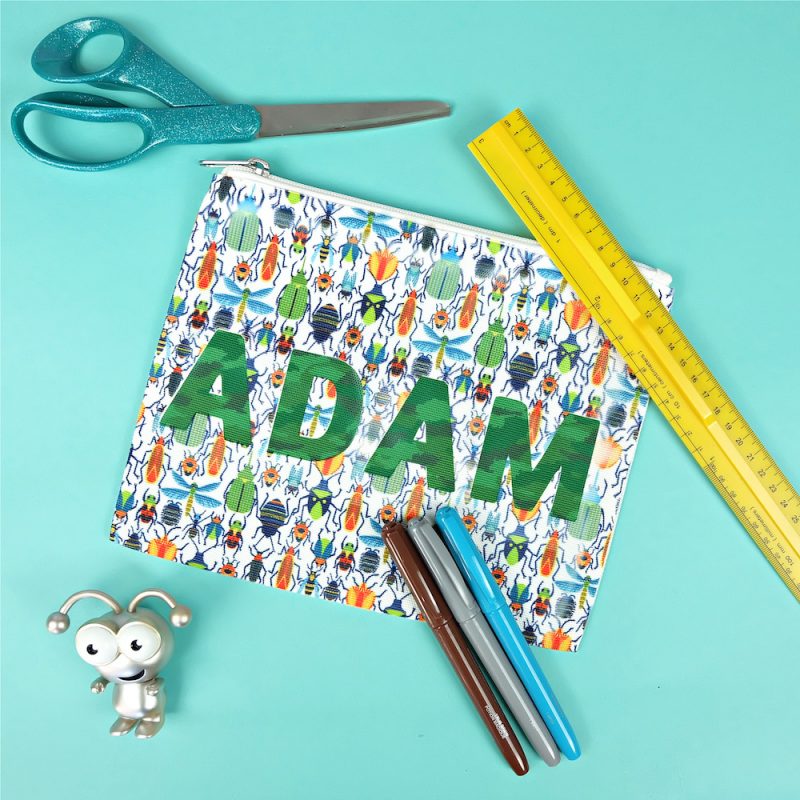
I had some adorable Bug and Camo Infusible Ink and Adam went right for it when I told him to pick something out for his bag. I love how it turned but more importantly he’s thrilled and so excited to bring it to his new class! Ready to learn how to make it? Read on!
10 Minute Cricut Infusible Ink Pencil Pouch
Click to shop!

10 Minute Cricut Infusible Ink Pencil Pouch
Instructions
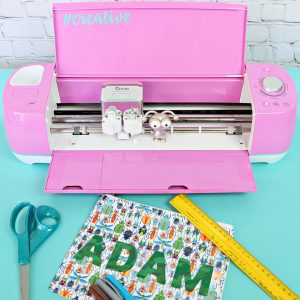
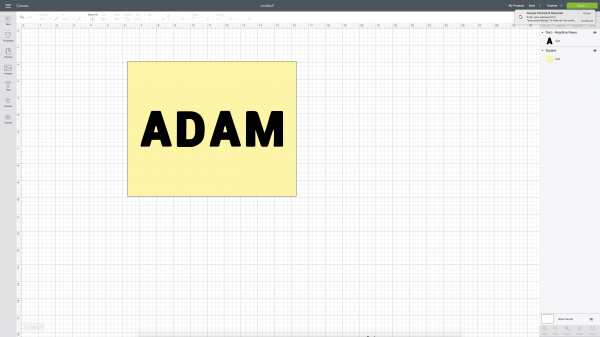
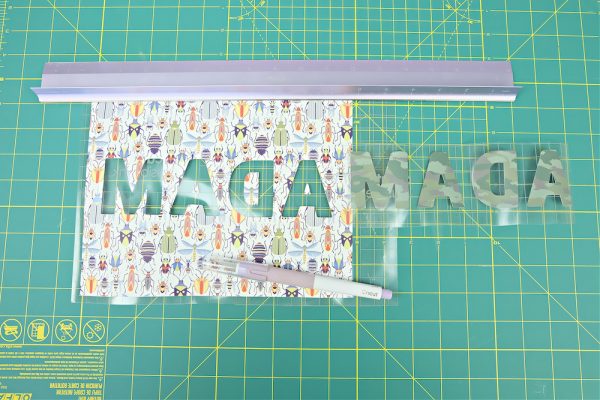
- Open Cricut Design Space. Measure your cosmetic bag. Pick the square from under the shape button. Unlock the square and resize it to be the same size as your cosmetic bag. Click the text button, pick a favorite font and type out your child's name. Lay their name on top of the rectangle where you would like it placed.

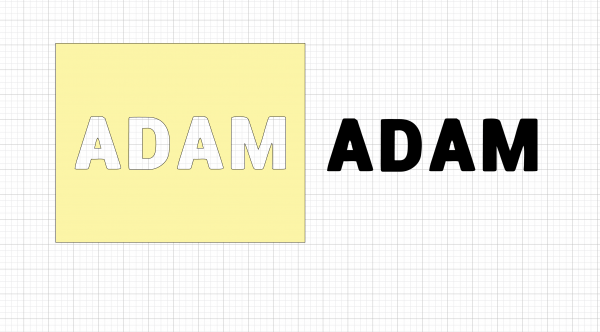
- Select both the name piece and the rectangle. Click the slice button which will slice the name out of the rectangle almost like a cookie cutter. Delete the name piece that is the same color as your rectangle leaving just your rectangle and the name behind.

- Click "Make It", then click the mirror slider on each of your cutting mats. Follow the prompts on your screen to connect to your machine and select your cutting material.
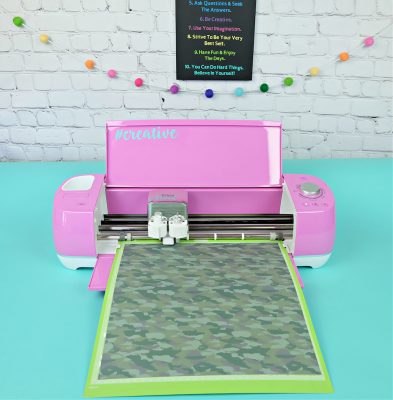
- Lay your Infusible Ink on the cutting mat with the patterned side facing up and the clear plastic backing facing down. Load it into your machine by pressing the arrow button and then start the cutting by pressing the flashing Cricut C. Repeat for your second color of Infusible Ink.

- Weed your Infusible Ink. For the rectangle you will want to weed away the excess Infusible Ink Transfer Sheet surrounding your rectangle, as well as weed away your child's name. Leaving the rectangle with the name cut out behind on the clear plastic backing. For your child's name you will want to weed away the Infusible Ink Transfer Sheet surrounding your child's name leaving just the name behind on the clear plastic backing.

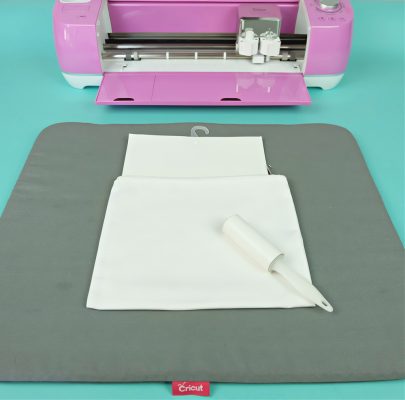
- Set the temperature of your Cricut EasyPress 2 to 385F and the timer to 60 seconds. Lay out your EasyPress Mat and lay your Cricut Infusible Ink Cosmetic Bag on top of it. Slip a piece of cardstock inside the bag to catch any Infusible Ink that may transfer through the front of your zippered pouch. Use your lint roller to remove any dust or lint from your tote. Don’t skip this step, it’s an important one to make sure your design infuses into the tote properly.

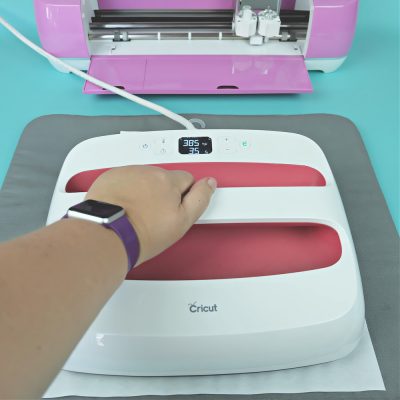
- Use your Cricut EasyPress 2 to press your tote bag for 15 seconds. This is also a very important step that you don’t want to skip because it removes any moisture from your bag that would keep the Infusible Ink from working properly.
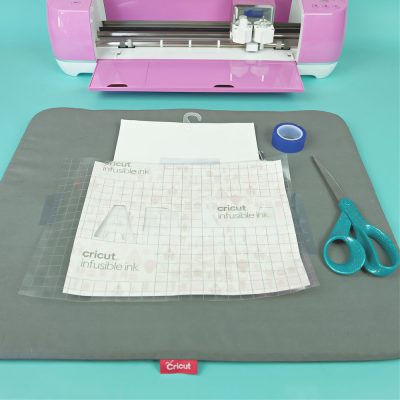
- Lay your rectangle designs down on your cosmetic bag with the ink down, plastic liner up. You may want to use heat resistant tape to secure it into place so that the pieces don’t shift.

- Cover your design with butcher paper and then press using your EasyPress 2 for 60 seconds, keeping the press still for the entire time applying even light pressure (do not slide it around). When the timer beeps carefully lift your EasyPress trying not to shift the butcher paper or design. Allow too cool. Once the cosmetic bag is cool enough to touch, carefully lift the butcher paper and then lift the liner with design. If any design remains on the bag lift it carefully using tweezers (don’t use your fingers because this could cause ghosting effects). Repeat with the name, lining up the letters in the area where the name was cut out of the rectangle.
- And there you have it! A super fun pencil pouch that took just 10 minutes to make.

Equipment
- Cricut Infusible Ink Transfer Sheet (in your favorite designs)
- Lint Roller
- Butcher Paper
- Card Stock
And there you have it! A super fun, personalized DIY pencil pouch! And it only took 10 minutes to make!
Tell me… Have you used Cricut Infusible Ink yet? Have you made any DIY school supplies?
Like this 10 Minute Cricut Infusible Ink Pencil Pouch? I would love for you to pin it for later to help others discover it too!
Like this project? Make sure you check out our Cricut section and our SVG section for more DIY and crafts you’ll love!


I just ordered the Maker yesterday as a Mother’s day gift for my mom. Of course I will get to use it too, so I’m really excited to start making all sorts of fun projects!