


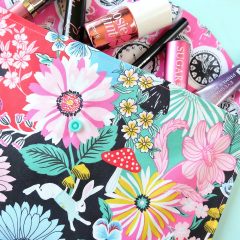
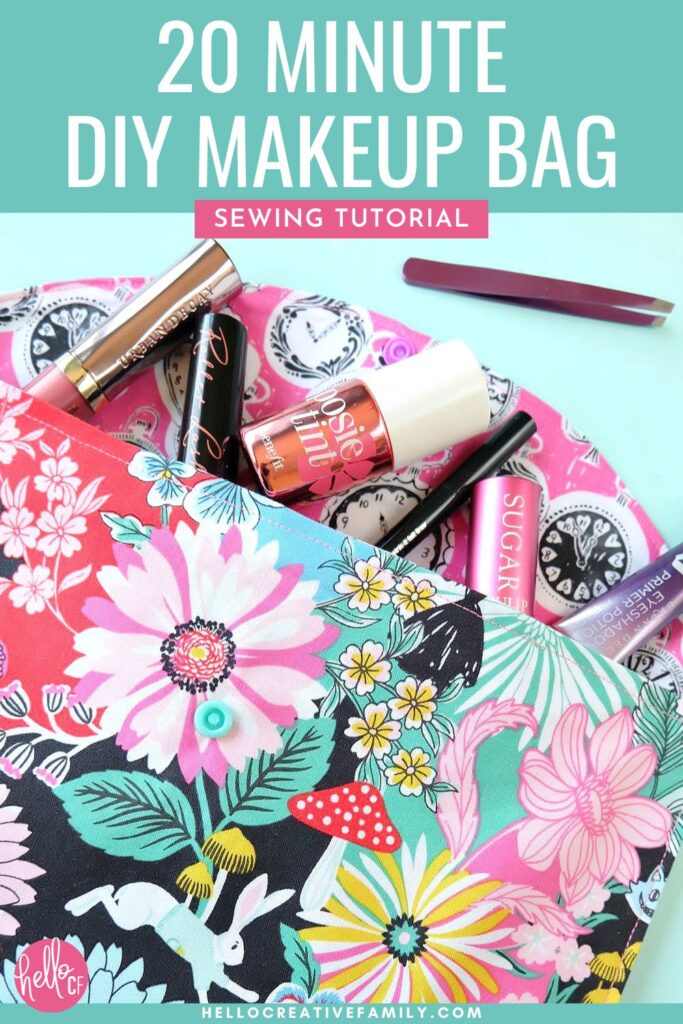
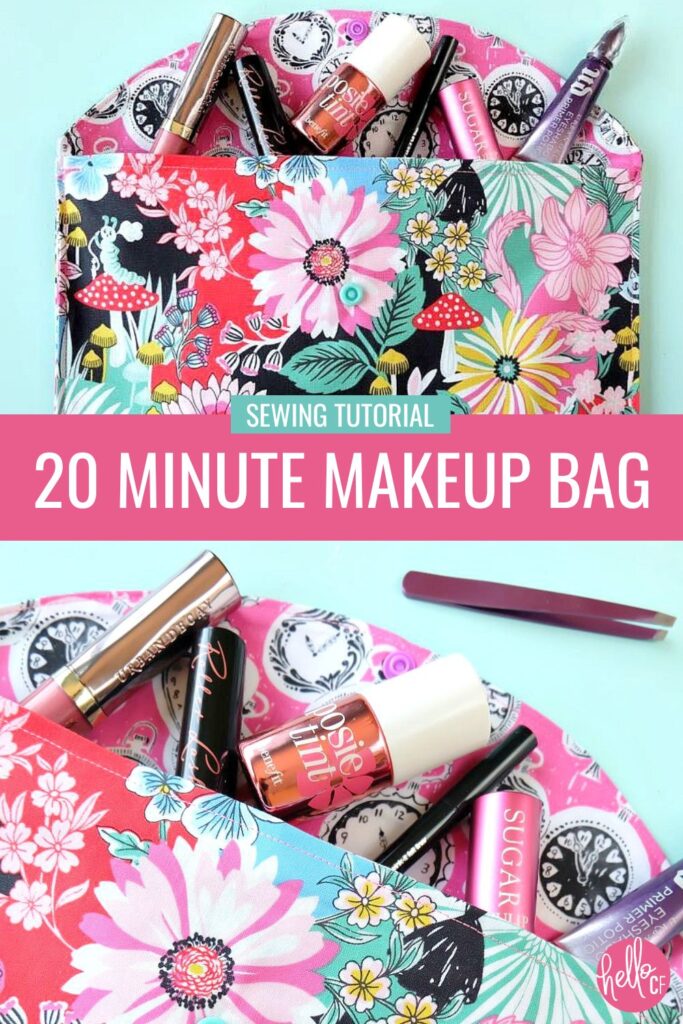
20 Minute Makeup Bag Sewing Tutorial- Perfect For Teens, Tweens & Beginners
This post and the photos within it may contain Amazon or other affiliate links. If you purchase something through the link, I may receive a small commission at no extra charge to you.
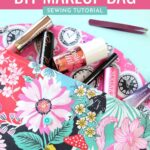
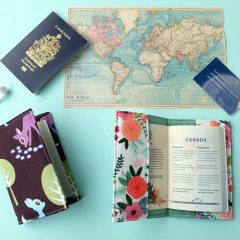
Looking for a quick and easy sewing project? This 20 minute makeup bag sewing tutorial is perfect for beginners, teens, and tweens! Learn how to sew a makeup bag without a zipper—ideal for gifts or personal use!

A Fun & Easy Makeup Bag Sewing Project For Beginners
Hi crafty friends!
Let me tell you a little secret—I love sewing, I love sewing, but when it comes to reading traditional patterns… well, let’s just say I prefer to do things my own way!
If you’re anything like me, instructions with dozens of steps and diagrams can feel overwhelming. That’s why every sewing tutorial I share on Hello Creative Family is simple, approachable, and beginner-friendly.

Today’s project completely fits that bill! It’s a 20 minute makeup bag sewing tutorial that’s perfect for beginners, teens, and tweens.
How I Created This Easy DIY Makeup Bag Project

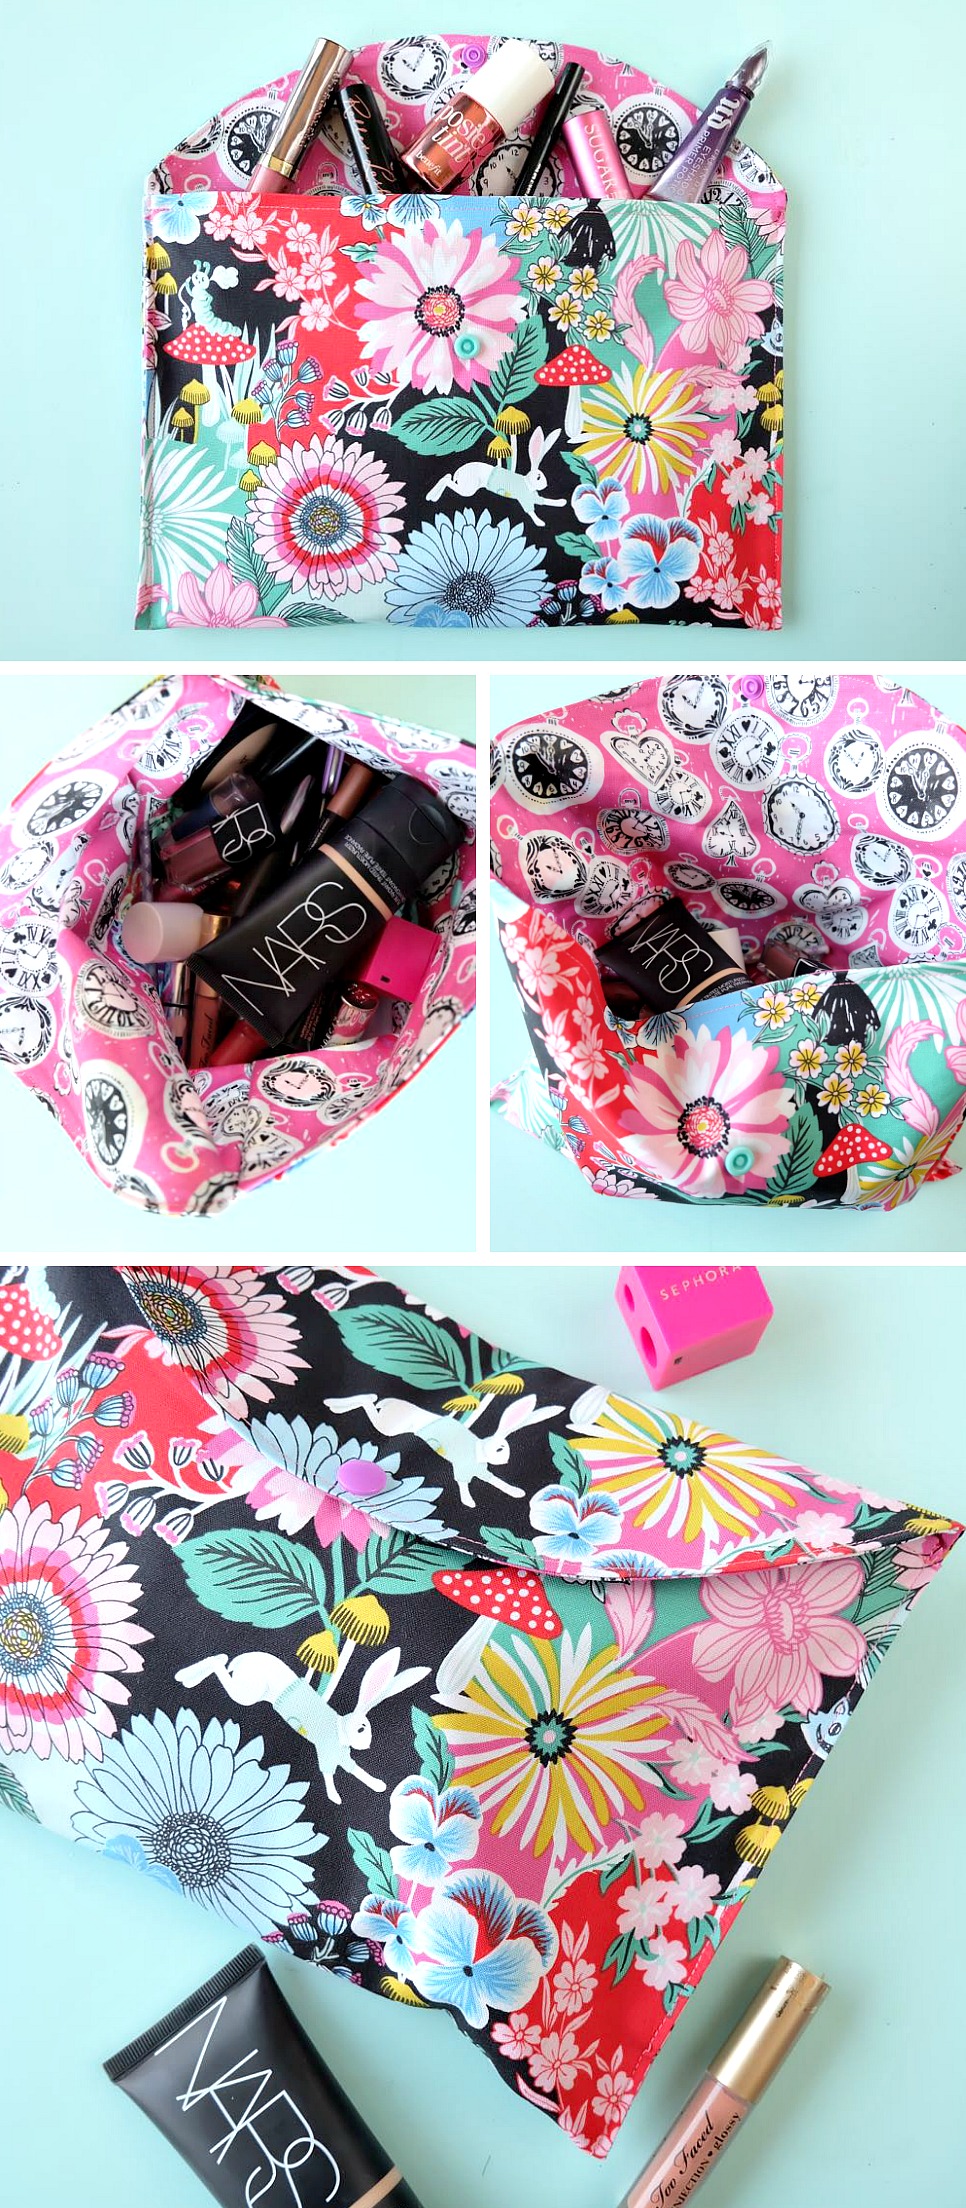
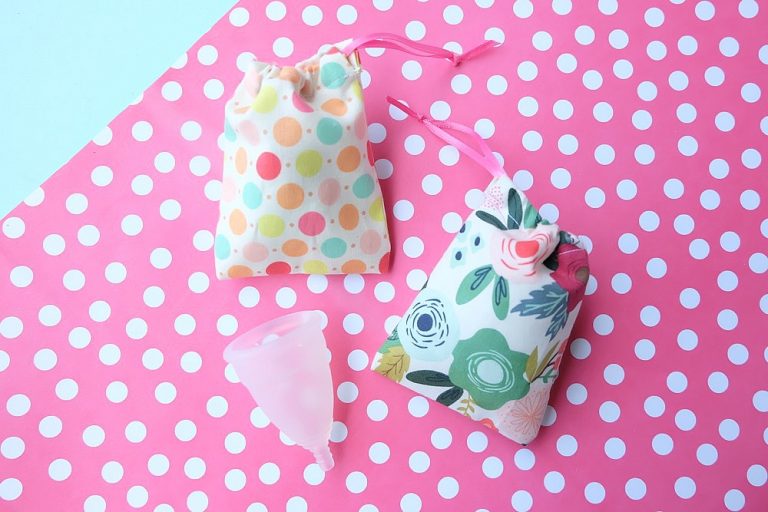
This makeup bag sewing project was born when my favorite travel pouch mysteriously vanished. (Spoiler: my daughter “borrowed” it!) With no zipper on hand—and zero desire to sew one—I created a simple pouch with a curved flap and easy snap closure. It’s a great introduction to sewing and can be completed in just 20 minutes!
Whether you’re making one for yourself or creating gifts for friends, this easy makeup bag sewing project is designed to be quick, fun, and frustration-free—no zippers required!
Why You’ll Love This DIY Makeup Bag
Learning how to sew a makeup bag is a great way to build confidence with your sewing machine.
This cosmetics bag project is:
- Quick (just 20 minutes!)
- Beginner-friendly
- Perfect for using up fabric scraps or fat quarters
- A thoughtful handmade gift idea
Have a teen or tween at home? This is a wonderful project to sew together. Creating something by hand is such a rewarding experience—and once they see how easy it is, they’ll want to make a makeup bag for every friend they know!
How To Choose Fabric That Sparks Joy
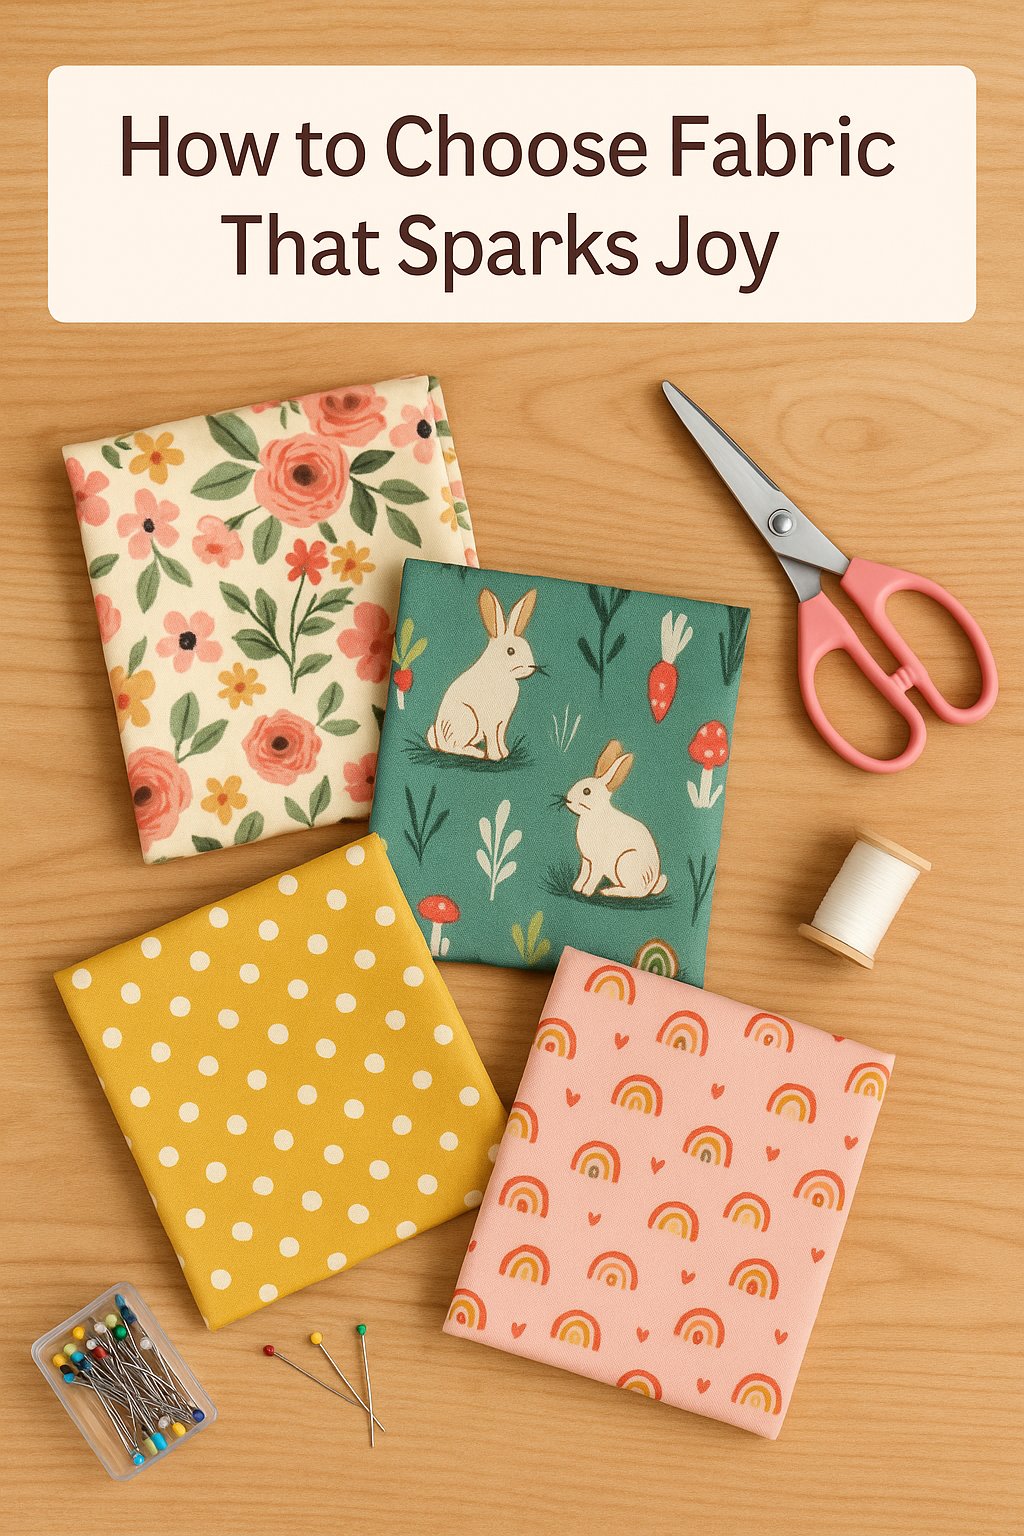
One of the best parts of any sewing project? Picking out the fabric! Your makeup bag sewing project should reflect your personality.
Here are a few tips for choosing fabric that truly sparks joy:
- Go Bold: Bright colors and playful patterns make for eye-catching makeup bags.
- Mix & Match: Choose two coordinating fabrics—one for the main fabric outside and one for the inside lining that adds a pop of fun every time the bag is opened. Remember those inner fabric pieces are just as much of a statement as the outside of the bag!
- Think About Use: If this will be a travel makeup bag, consider using cotton fabric and adding fusible interfacing for extra durability.
- Think about the recipient. Are you making this for yourself or someone special? Let their personality guide your choices.
- Pick a color or print you love. Florals, animals, stripes, or solids—anything that makes you smile!
- Pre-wash your fabric. This helps avoid shrinkage and makes cutting easier.
Let your creativity lead the way!
Choosing fabric is one of the most exciting parts of sewing. Your fabric can turn a simple bag into a personalized treasure!
Pro Tip: Lay out your fabric before cutting to ensure the design is positioned exactly where you want it on your finished bag!
Build Sewing Confidence—One Stitch at a Time
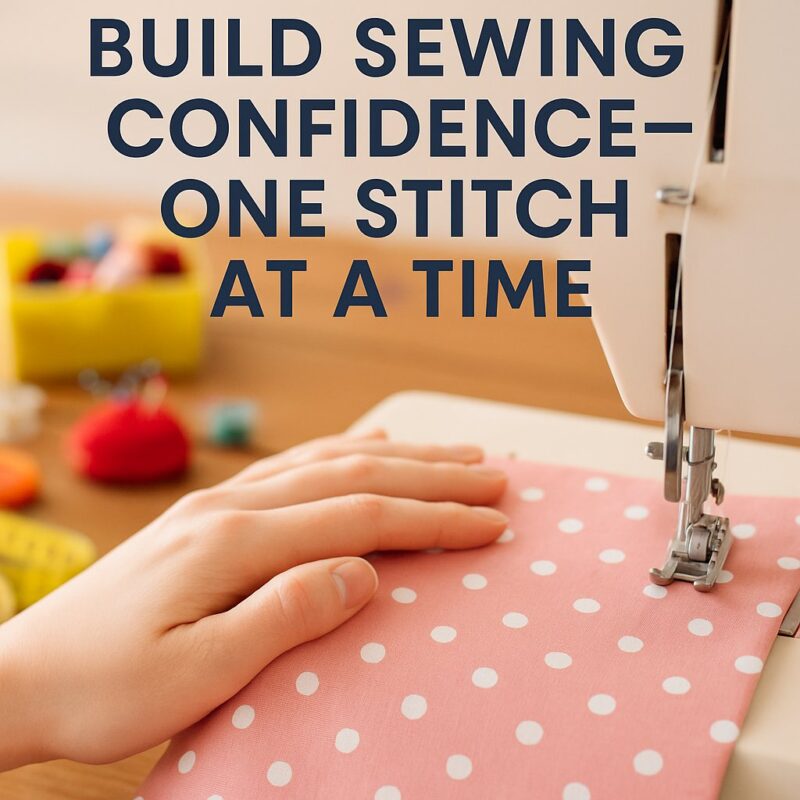
If sewing machines feel a little intimidating, you’re not alone! Many crafters leave their machines tucked away, unsure where to start. But here’s the good news—this makeup bag sewing tutorial is designed to help you overcome that fear with a simple, satisfying project.
At Hello Creative Family, we believe creativity is meant to be shared. I learned to sew alongside my mom on a vintage Singer we found at a garage sale and had refurbished.
Those early moments—threading the needle, figuring out the basics—turned into lifelong memories (and a lifelong love of sewing).
That’s why small, quick projects like this are perfect for beginners. You’ll get familiar with your machine without feeling overwhelmed by complicated patterns or techniques.
Have a teen or tween at home? Invite them to join you!
Sewing together is a wonderful way to bond, pass on a creative skill, and make something custom and useful. Plus, once they see how fast and fun this makeup bag sewing project is, they’ll want to stitch up extras for friends, gifts, or even start their own DIY collection!
Now, let’s gather those materials and get sewing!
20 Minute Makeup Bag Sewing Project

You need minimal materials and equipment for this 20 Minute Makeup Bag Sewing project. At it’s very basic; all you need is fabric, thread, a needle, scissors and button snaps or velcro.
The other tools listed below will help make things easier for curved lines and sewing.
Materials For Makeup Bag
- Fabric in your choice of pattern (2 fat quarters works perfectly for this project)
- Thread
- Iron
- Sewing machine
- Pins or Wonder clips
- Compass or large circular object (alternatively use a pencil, thumbtack and string with this method to make your curve)
- Fabric ruler
- Fabric scissors
- Snap press with snaps (I use Kam Snap Press Pliers and Snaps), or velcro
Directions: 20 Minute Makeup Bag Sewing Tutorial
Follow this helpful step by step tutorial to learn how to make this adorable makeup bag!
Measure & Cut
Step 1: Cut Your Fabric
Cut two pieces of fabric to 12″ x 19″. Pay attention to the fabric direction and design placement—center any special features or characters.

Step 2: Check Fabric Orientation
Lay your fabric the way it will appear as a finished bag. If your fabric has a direction, outer fabric should be upside down; lining should be right side up.
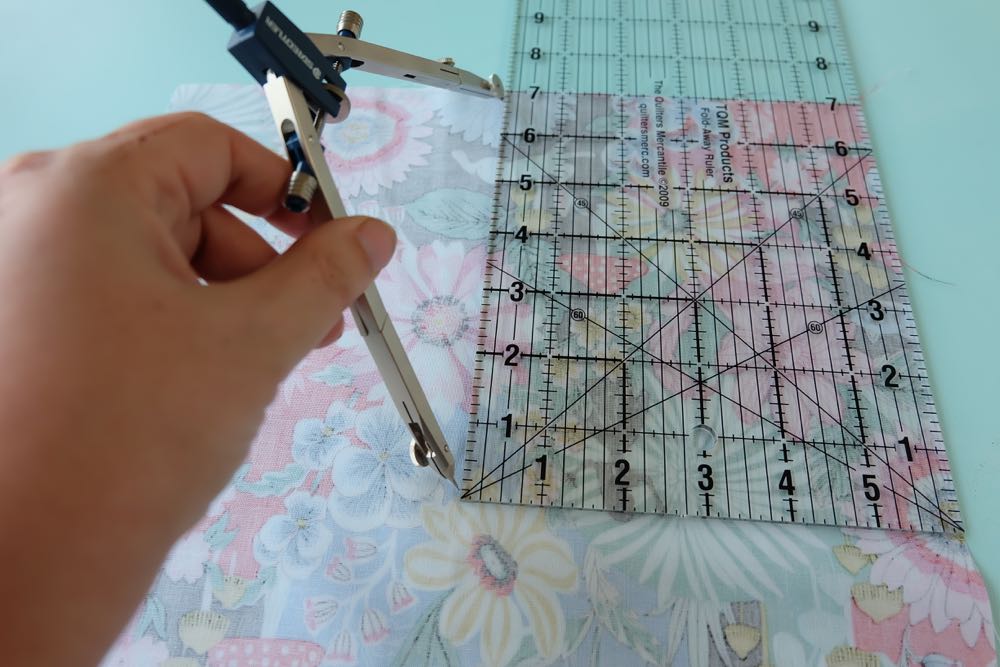
Step 3: Draw the Curve
Find the center point of your fabric at 6″, then measure 7″ down and mark a point. Set your compass to 7″ and put the pointy end at the point you marked. Draw the curve that will be turned into the top flap of your bag. If you don’t have a compass, use this method to make your curve. You can also find something large and rounded like a container lid to trace the curve. Repeat on your second piece of fabric.
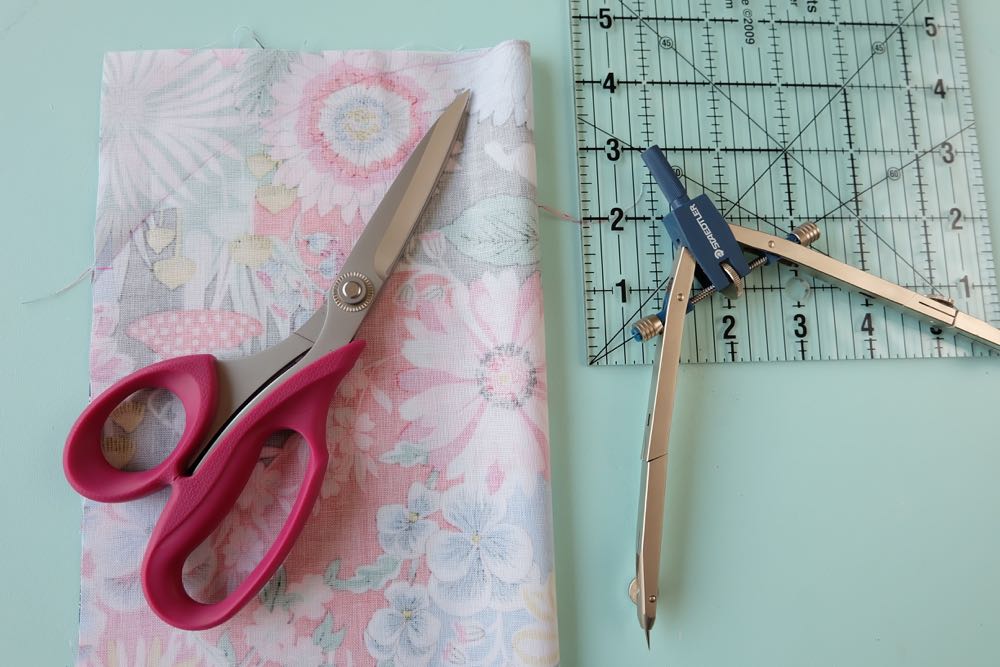
Step 4: Cut the Curve
Fold the fabric in half and cut along the curved line you drew. Repeat on your second piece of fabric.
Pin and Sew:
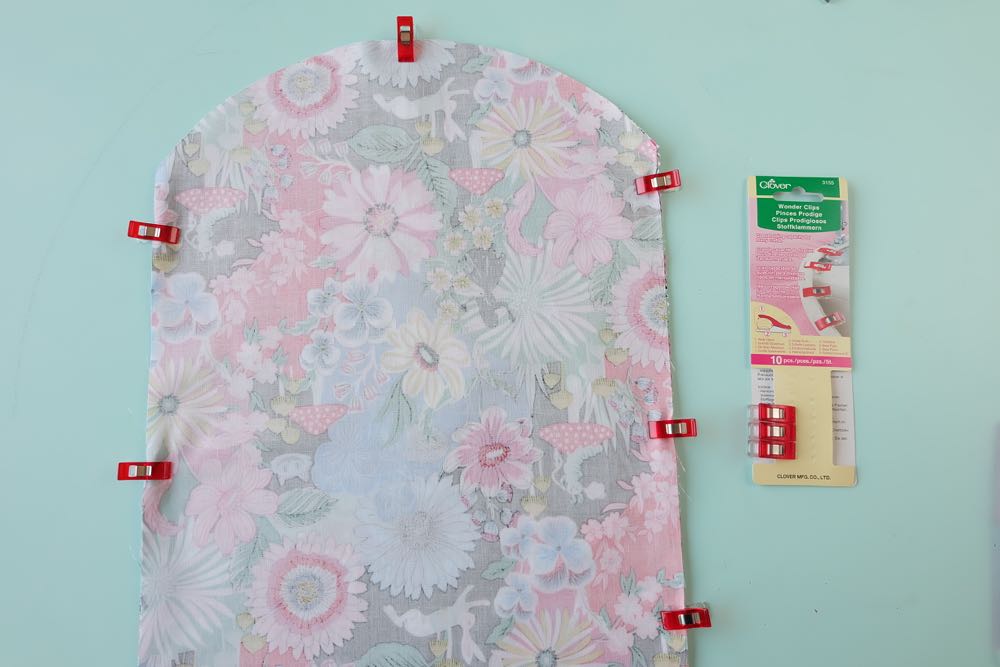
Step 5: Pin your fabric
Place fabric pieces right sides together (wrong side facing out). Line up the edges of your outer fabric and lining fabric and pin or wonder clip in place.
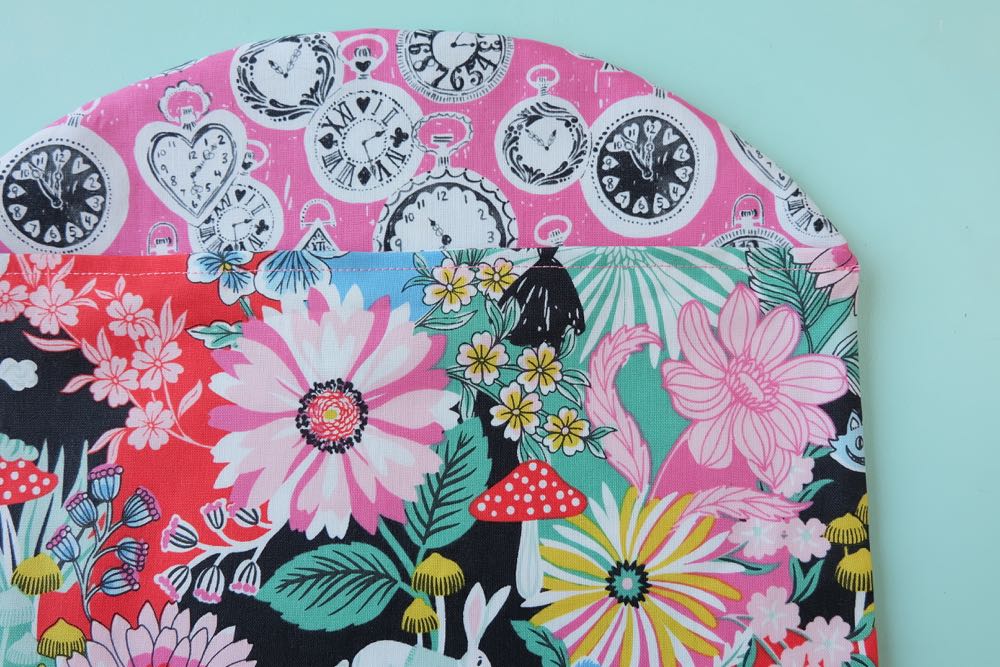
Step 6: Sew the Curve
Using a 1/3 inch seam allowance, sew from the bottom of one side, around the curve, to the other side—leaving the bottom raw edge open.

Step 7: Turn and Press
Turn the bag right side out. Use an iron (and maybe a chopstick) to press the seams flat and smooth out the curve.

Step 8: Close the Bottom
Fold the bottom edge inward by ½”, press, and topstitch with a ¼” seam to close the opening.
Step 9: Fold and Pin the Bag
Fold the bag up and pin so that the bottom reaches the base of the curved flap.

Step 10: Sew the Sides and Top Of the Bag
Sew up the sides and around the curve using a ¼” seam allowance.

Add a closure
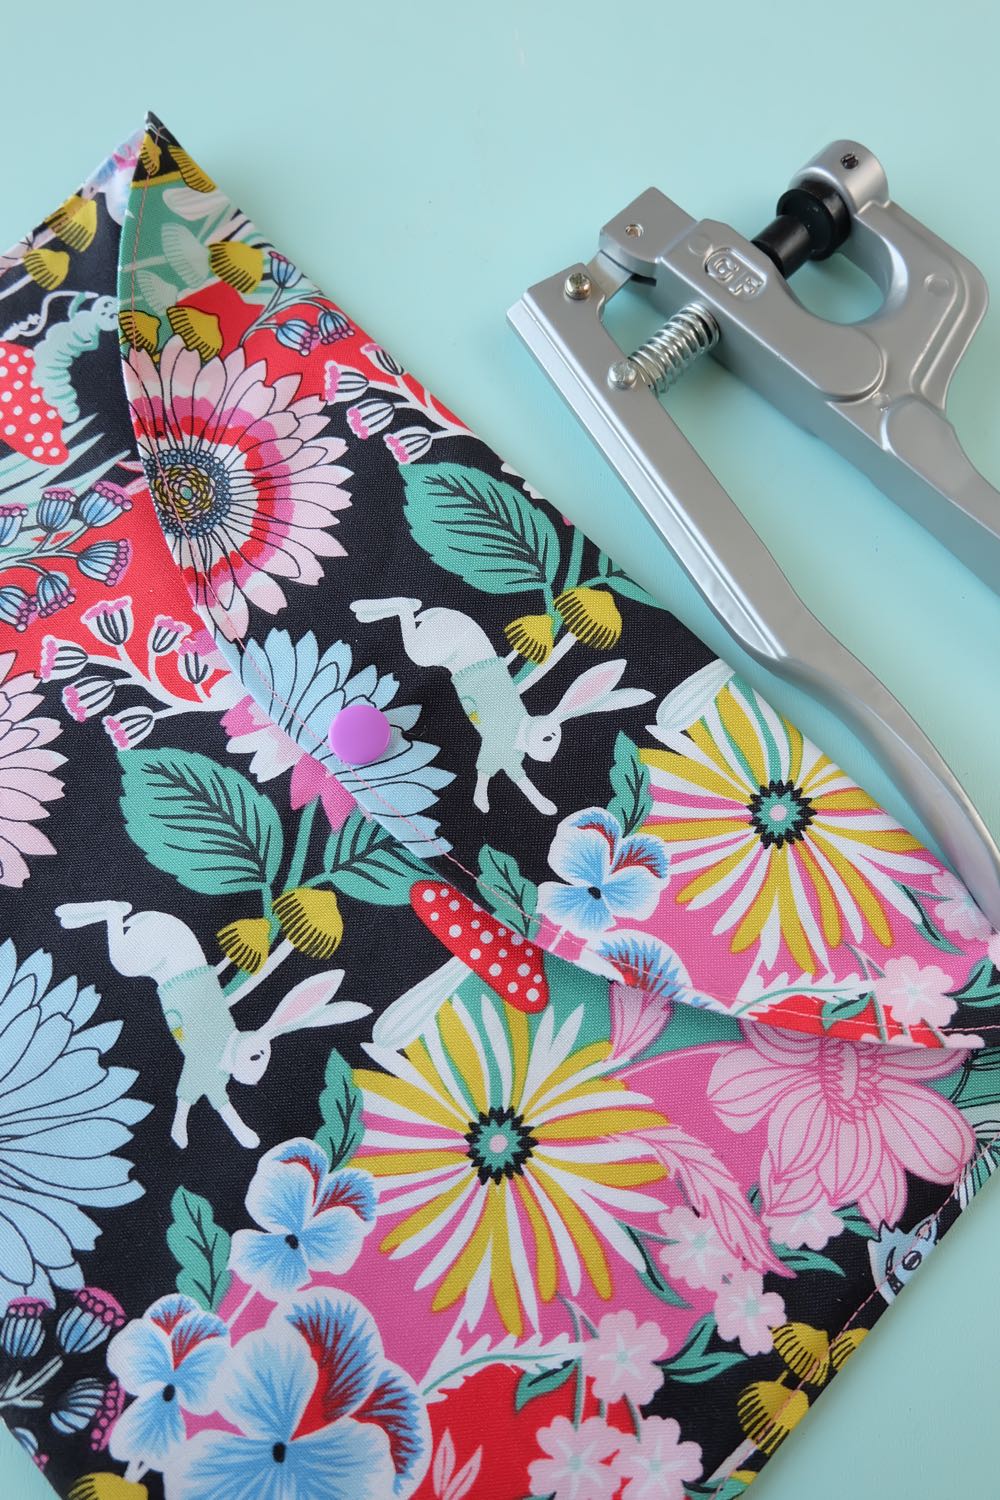
Step 11: Add the Closure
Attach snaps using a snap press, or sew on a piece of velcro to keep the bag securely closed.
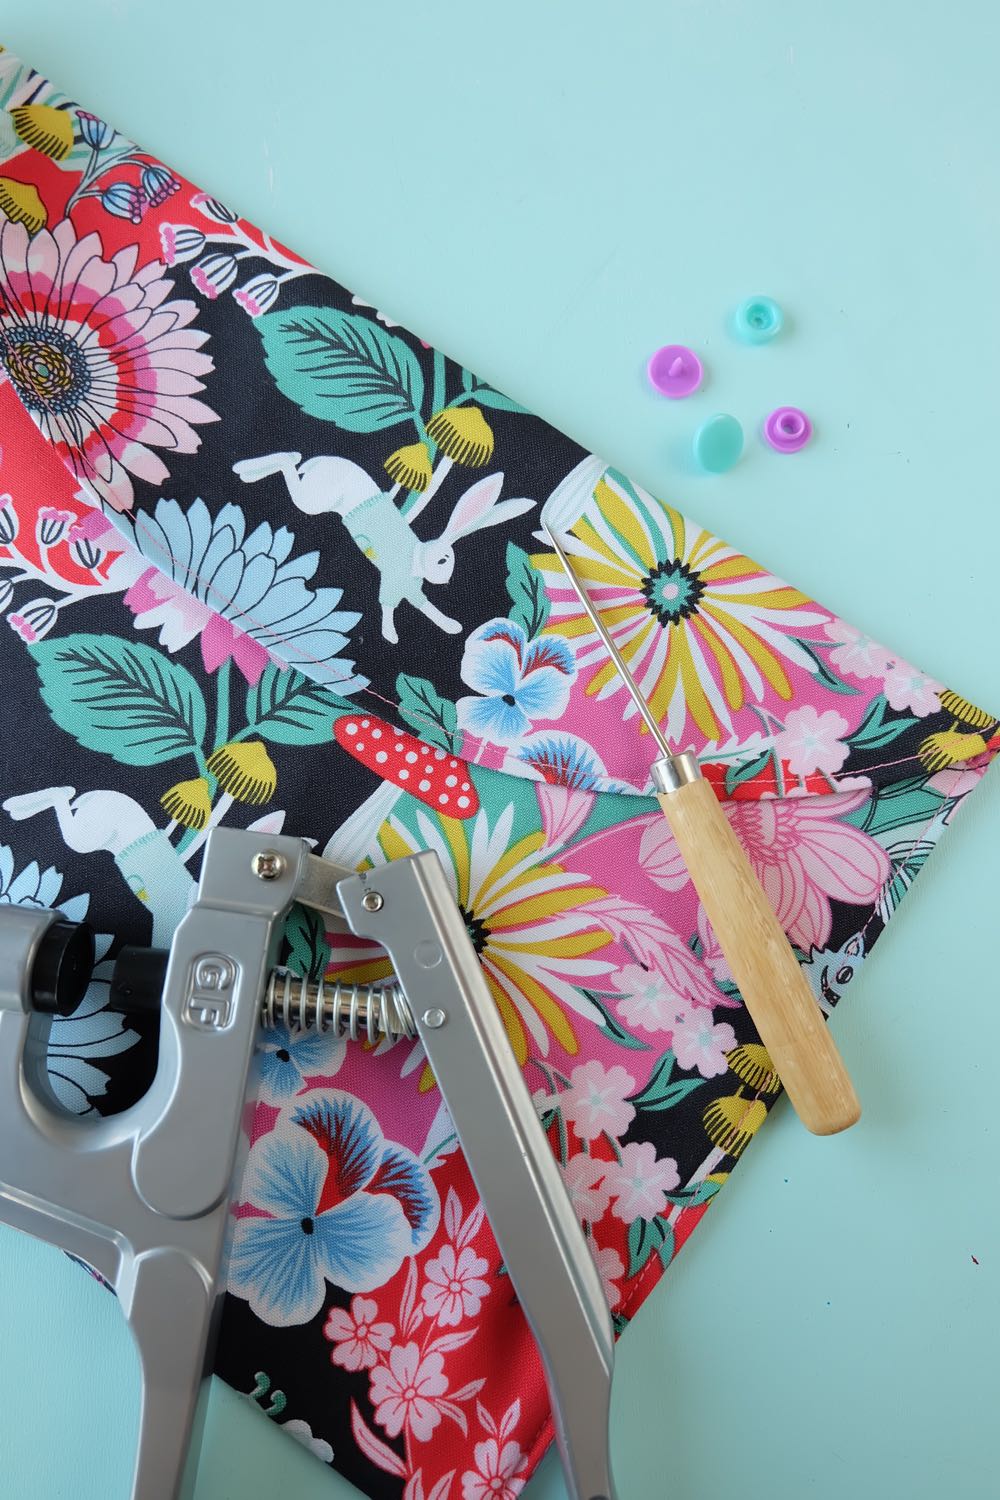
If using snaps, choose colors that compliment the colors in your fabric.
And That’s It!
You’ve just completed a makeup bag sewing project in just 20 minutes! This little pouch is perfect for makeup, toiletries, travel supplies, or even as a clutch or pencil case. It also makes a thoughtful handmade gift—especially for Mother’s Day, birthdays, or bridal showers.
Want to level up your skills? You can use a Cricut to cut fabric for this project—great if you’re making multiple bags. Check out my Cricut-friendly version here.
Let’s Keep Sewing Together!
What kind of fabric would you choose for your bag? Who would you make it for? I’d love to hear your ideas in the comments!
Want more sewing ideas? Visit our sewing section for fun and beginner-friendly tutorials!
Like this post? Pin it for later and share it with a crafty friend!


I would love some new threads and some Tula Pink fabric!
I would get one of the quilt kits so I can make my daughter a quilt. I am not sure which design because I would let her pick if if win.
I would buy The Good Life collection by Bonnie & Camille when it comes in.
If I won I think I would buy some “I Spy” layer cakes so I could make a picnic quilt for my granddaughters. What fun to imagine what I would get!
I have been eyeing a couple of Lori Holt’s fat quarter bundles for the Bee Happy quilt along.
lots of fabric starting with the super adorable must have need at least 5 yards of Minny Muu Blue Lovebirds Yardage SKU# 40558L-70
I would buy the Moda 30s Playtime 2017 fat quarter bundle.
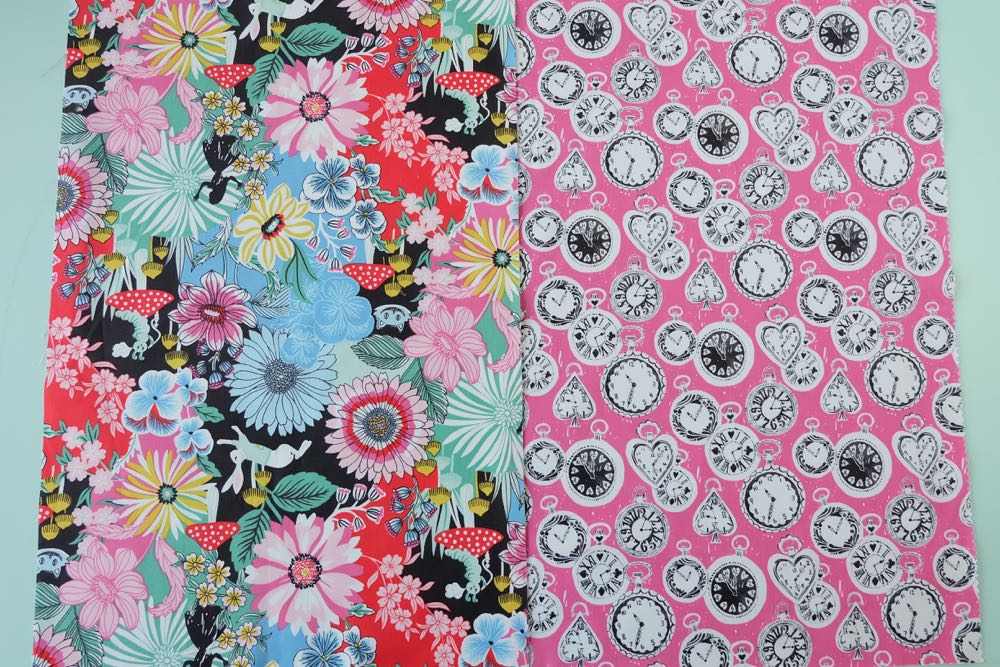
Ooh! This looks like a great project to do with my daughter this summer! I LOVE the Alice themed prints ?
I would get the alice in wonderland fat quarter bundle.
Fabric, fabric & more fabric!!! hahaha
Would buy some fabric!
I would love to buy bright florals and sweet polka dots. I am obsessed with clothes for my dailughters dolls and hair accessories. I am going to try this tutorial too. Can’t have enough little makeup bags. I know my 11 year old would love it.
I love the magical moments silver on mauve-dots-yardage an the color daze raspberry pink panel so cute
My daughter wants to give out some makeup goodies for her 13th birthday and I think this would be perfect to put them in!
I am a beginner and just got a sewing machine. I am a senior citizen and retired and decided that if I didn’t learn to sew now then I never would. I think this make-up bag would be a perfect project for me. Thank you for posting the directions!
Very comprehensive post and I would like to buy Glamper-licious Fat Quarter Bundle.
Brilliant work!!! Just amazing. Wonderful tutorial. I will try to make this today. Thanks for sharing this nice skill.
I made the cosmetic pouch with one modification. I couldn’t mark a symmetrical curve to save my life, so I cut a triangle at the top. That, I could do with a ruler. So it is an envelope style, but still looks quite nice.