


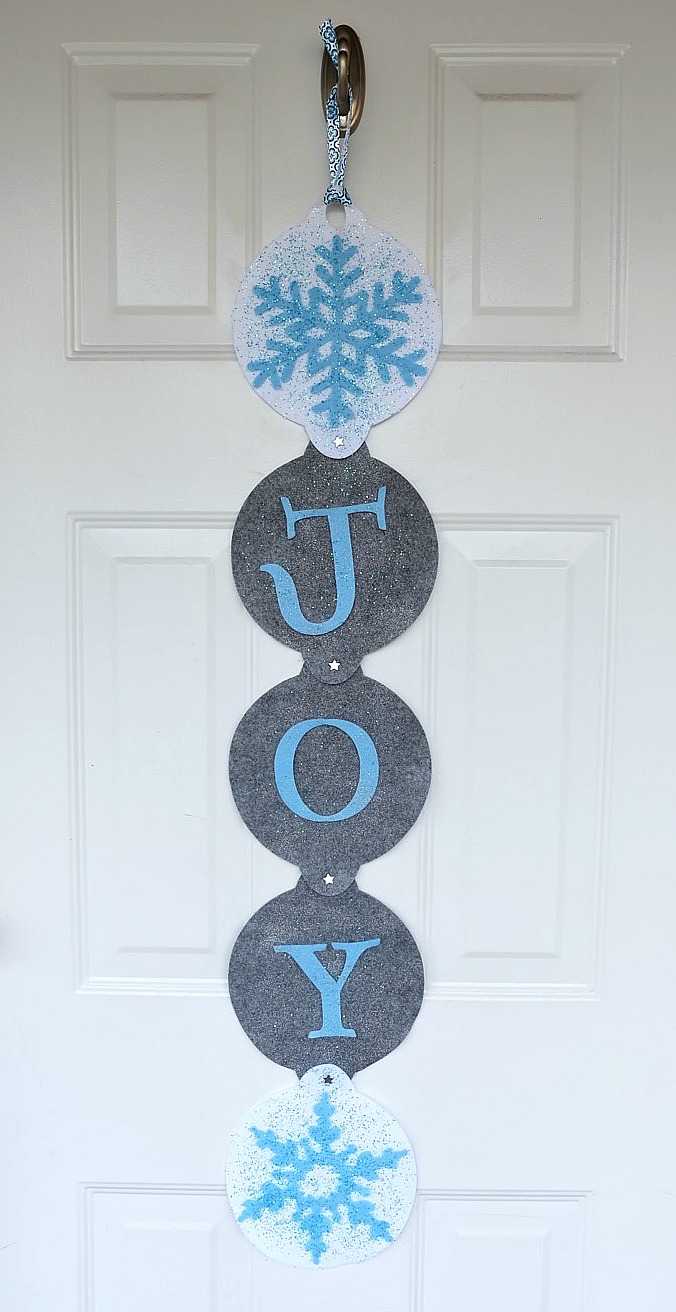
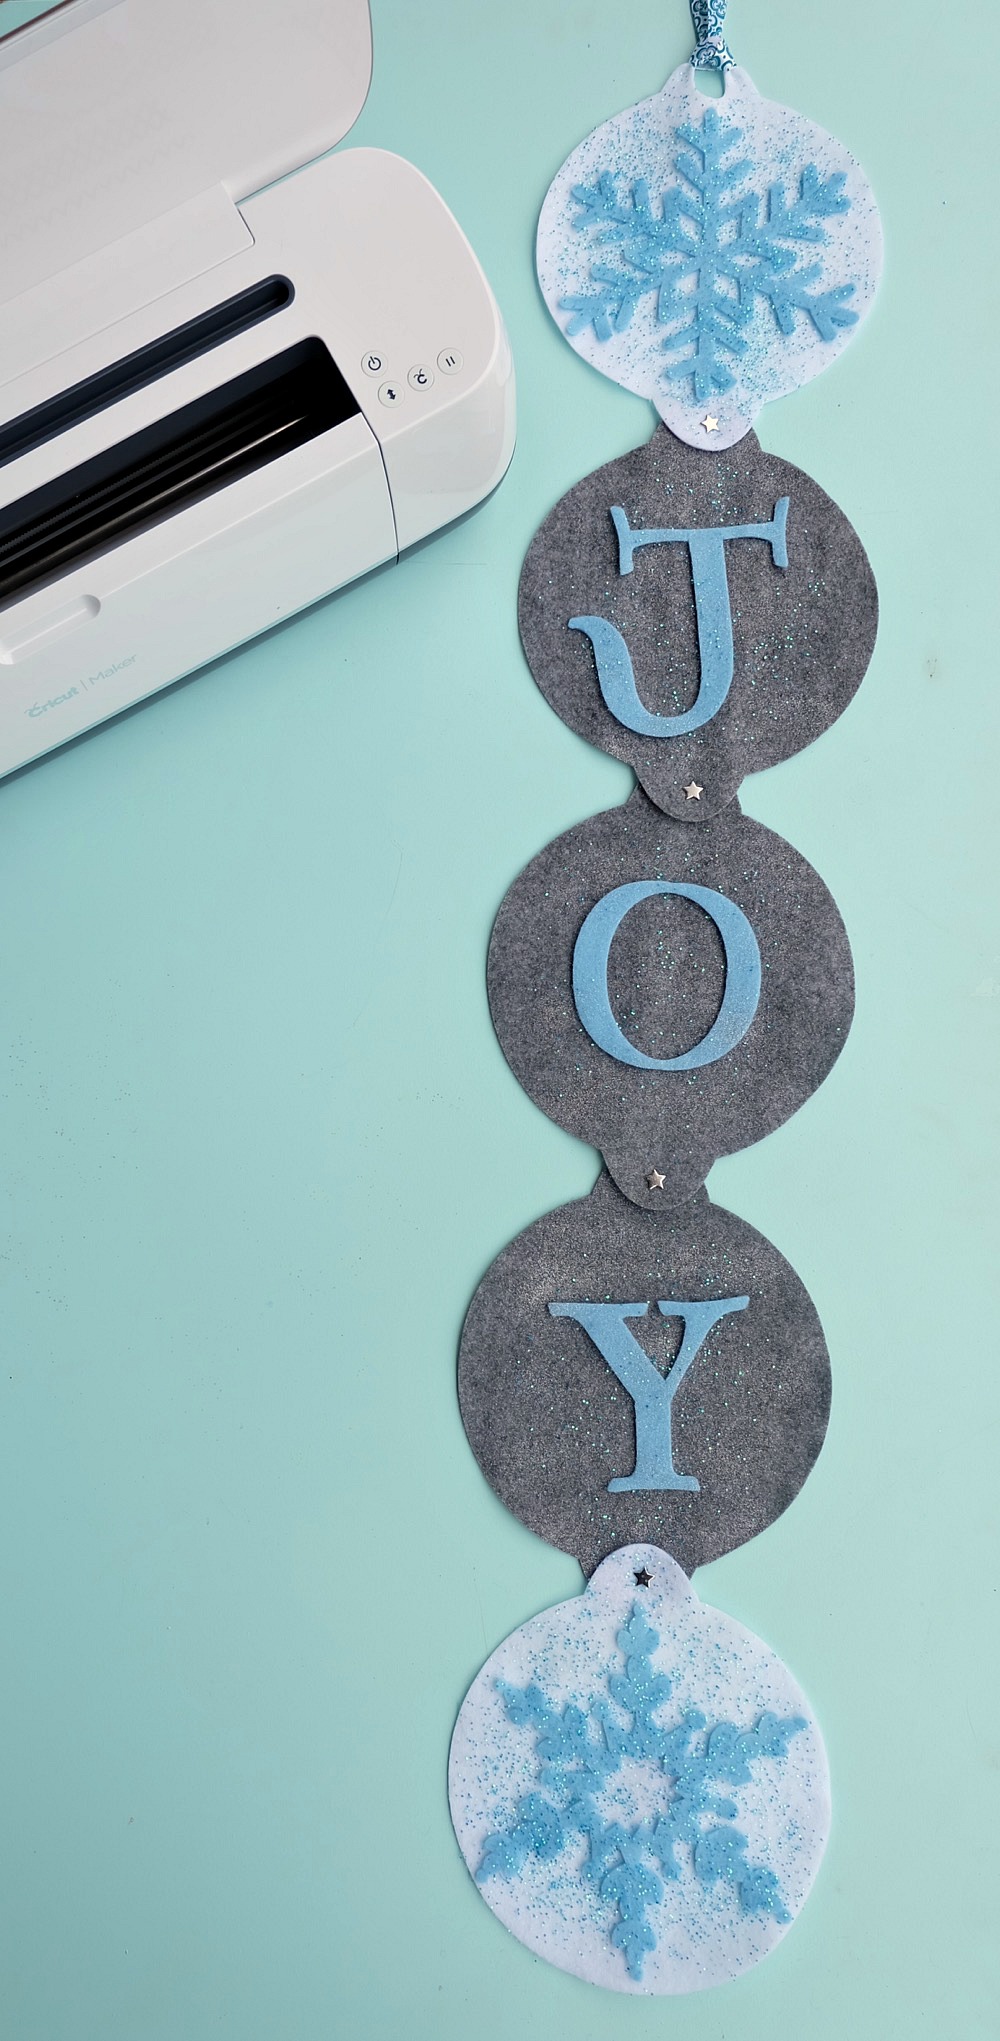
DIY “Joy” Felt Winter Door Decoration + Cricut Maker Giveaway
This post and the photos within it may contain Amazon or other affiliate links. If you purchase something through the link, I may receive a small commission at no extra charge to you.
Make sure to read to the bottom of this post for your chance to win a Cricut Maker!

Some of you observant readers have probably noticed that Hello Creative Family’s tagline is handmade. homemade. heart-made. Not only is that my motto for my website, it’s also a motto that I try to live my life by. I consider myself a creative person and I’m doing my best to raise my kids to be creative individuals too.
While I do my best to live a handmade, homemade, heart-made life, 365 days a year, Christmas is one of my favorite times to celebrate the “triple h” life! From making handmade gifts, to buying goods from local artists, to baking Christmas goodies, to decorating my home and my tree with handmade ornaments and decorations– there are so many areas where handmade is a natural fit for Christmas.
Last year, around this time, I shared this image:

It got some flack for point number 1 (if I were to redo the image I’d definitely put it as point #5), but for the most part it really spoke to people. I like to think that when I give someone a handmade gift it makes them feel like I really spent time and thought about them. I think the same thing goes when people see your home decorated with handmade decorations and ornaments– it makes people think that you put in that little bit of extra effort.
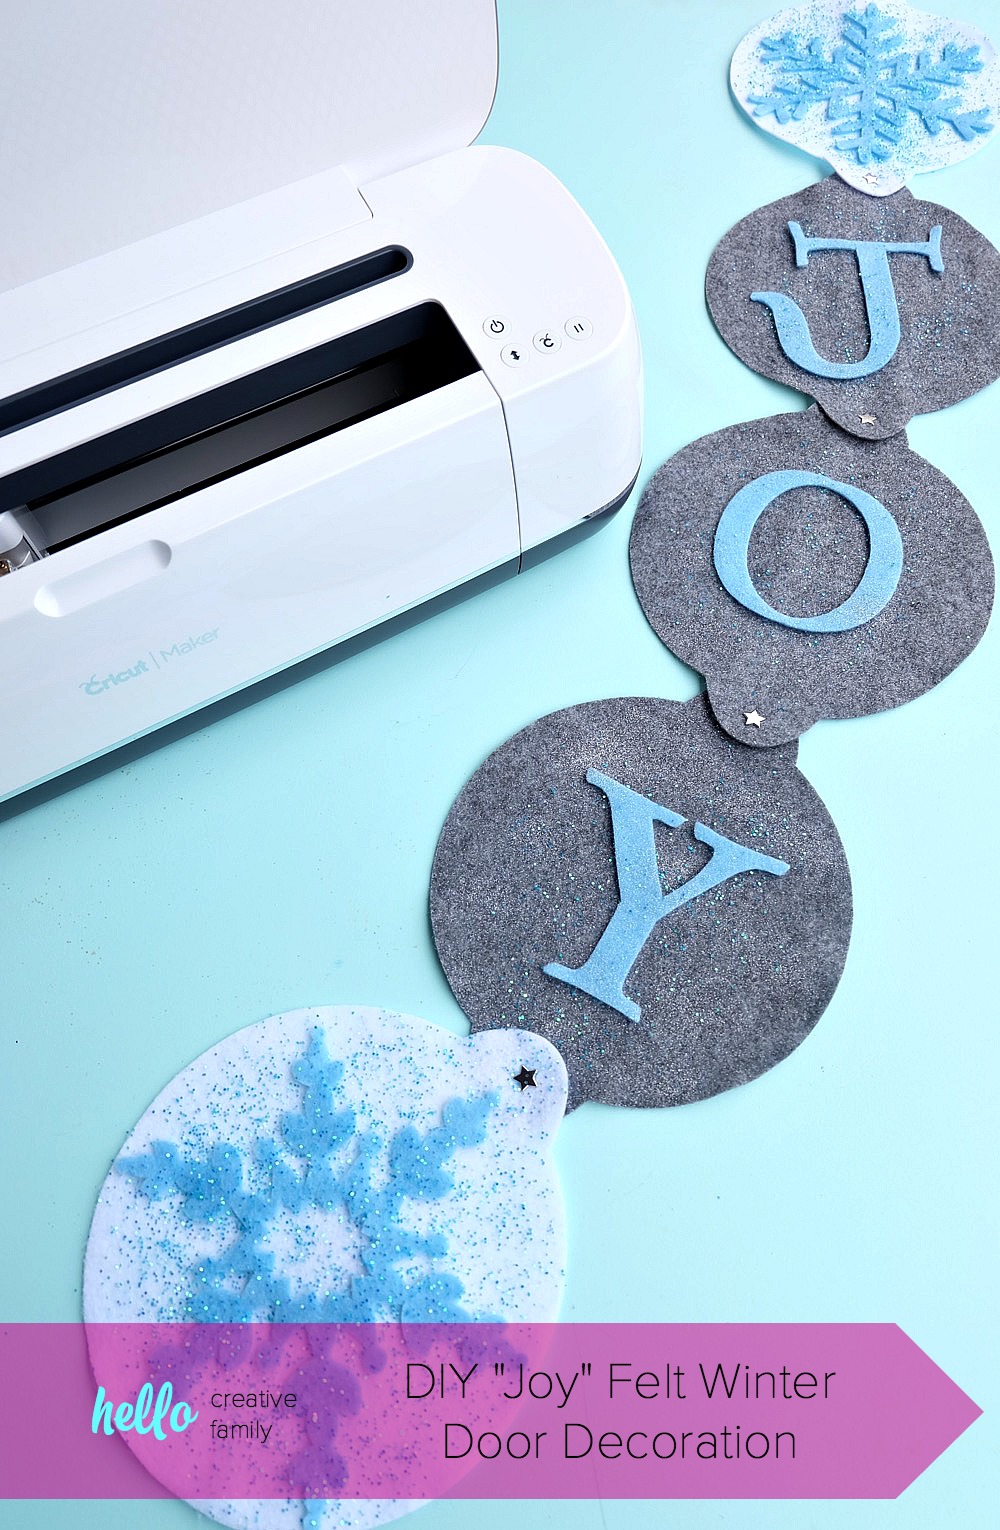
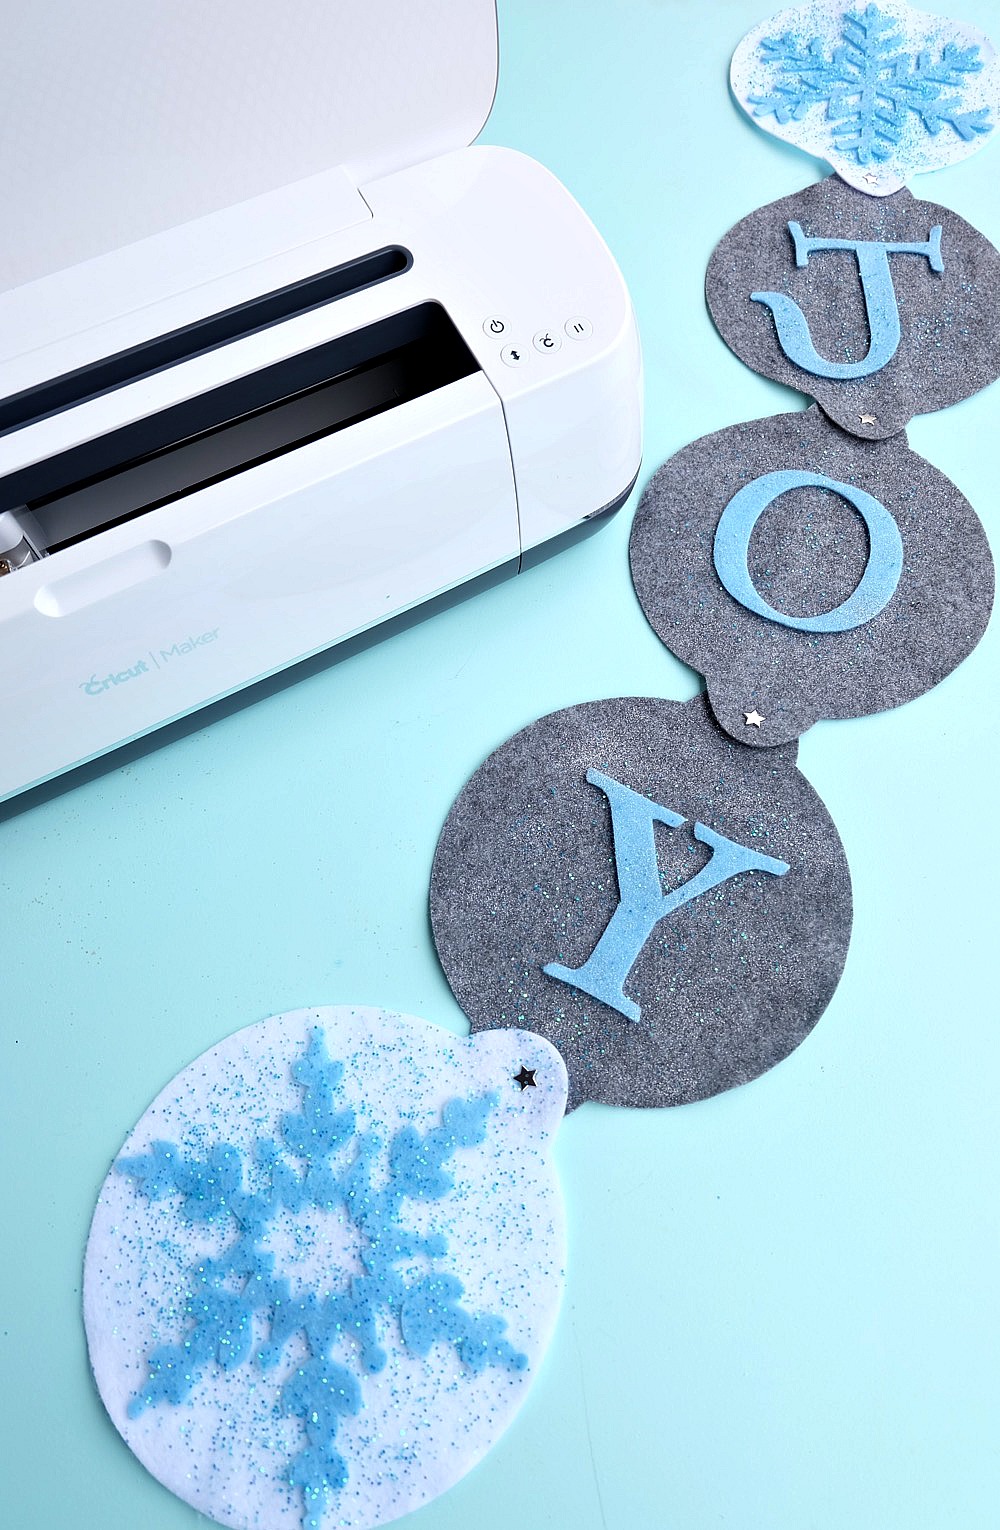
I love the first thing that people see when they come to my front door to be a handmade door hanging or wreath. I have one for each season/holiday. I’ve hung a DIY embroidery hoop snowman on my front door for the past few years at Christmas time, so this year I decided to change it up a bit and make a new door hanging.
I’ve told you all many times now how excited I was to hear that the new Cricut Maker had a rotary cutter. When I was sitting at the Cricut product launch in Salt Lake City in August I immediately started fantasizing about all of the things I would make and cut with my Cricut Maker and one of the things I dreamed about cutting was felt!
The Cricut Rotary Blade and Cricut Fabric Grip Adhesive Cutting Mat make cutting felt a breeze. Seriously! The blade cuts through the felt like it’s butter! I was worried that the snowflake design would be too intricate for the blade, but nope! It cut it out beautifully! Most of the fabric I’ve cut with my maker so far has been a thinner material like quilting cotton so I was really excited to test it out with something heavier like felt.
Can you imagine all of the possibilities this opens up? Felt ornaments? Felt storyboards? Felt stuffed animals? I am so excited!
This project was so easy to design and uses all elements from within Cricut Design Space. You know how I love the slice and weld tool! I used it to make the circular globes. The snowflakes were in the library of over 60,000 images in design space and the font was there too! Easy peasy!
The Cricut Maker is amazing. You are definitely going to want to add it to your Christmas wishlist if you haven’t already.
Ready to learn how to make my DIY “Joy” Felt Winter Door Decoration and for your chance to enter to win a Cricut Maker? Read on!
DIY “Joy” Felt Winter Door Decoration
Cut files:
- Find my Joy Felt Winter Door Decoration Cut File Here.
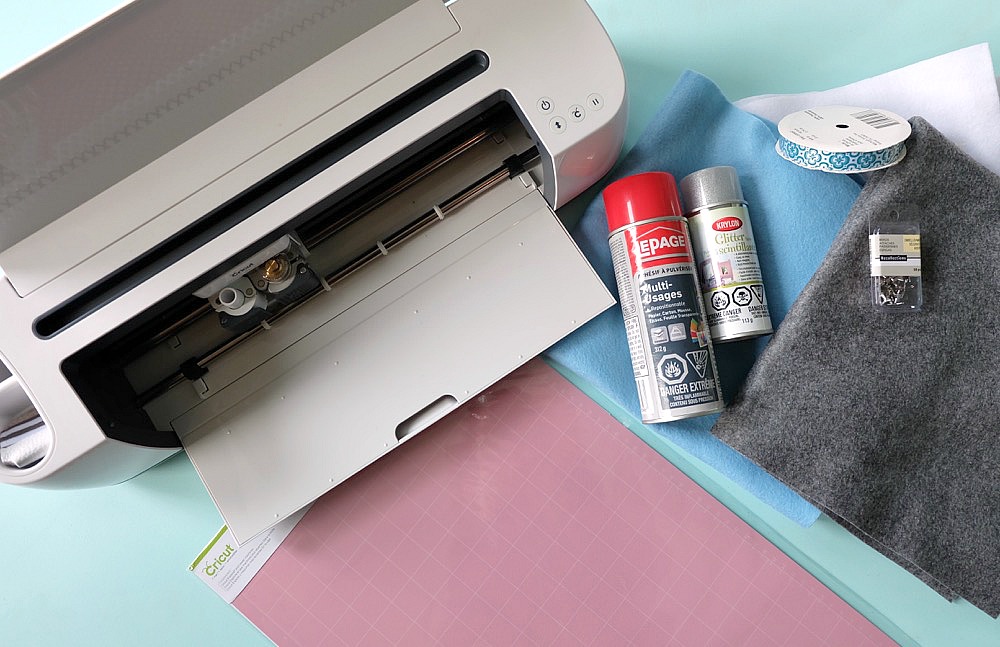
Materials:
- Cricut Maker
- Cricut Fabric Grip Adhesive Cutting Mat
- Cricut Rotary Blade
- 1 piece of 12 inch by 21 inch white felt (or 2 pieces of 12 by 12 felt)
- 1 piece of 12 inch by 21 inch blue felt (or 2 pieces of 12 by 12 felt)
- 1 piece of 12 inch by 21 inch grey felt (or 2 pieces of 12 by 12 felt)
- Glue that works on fabric (we used LePage spray adhesive)
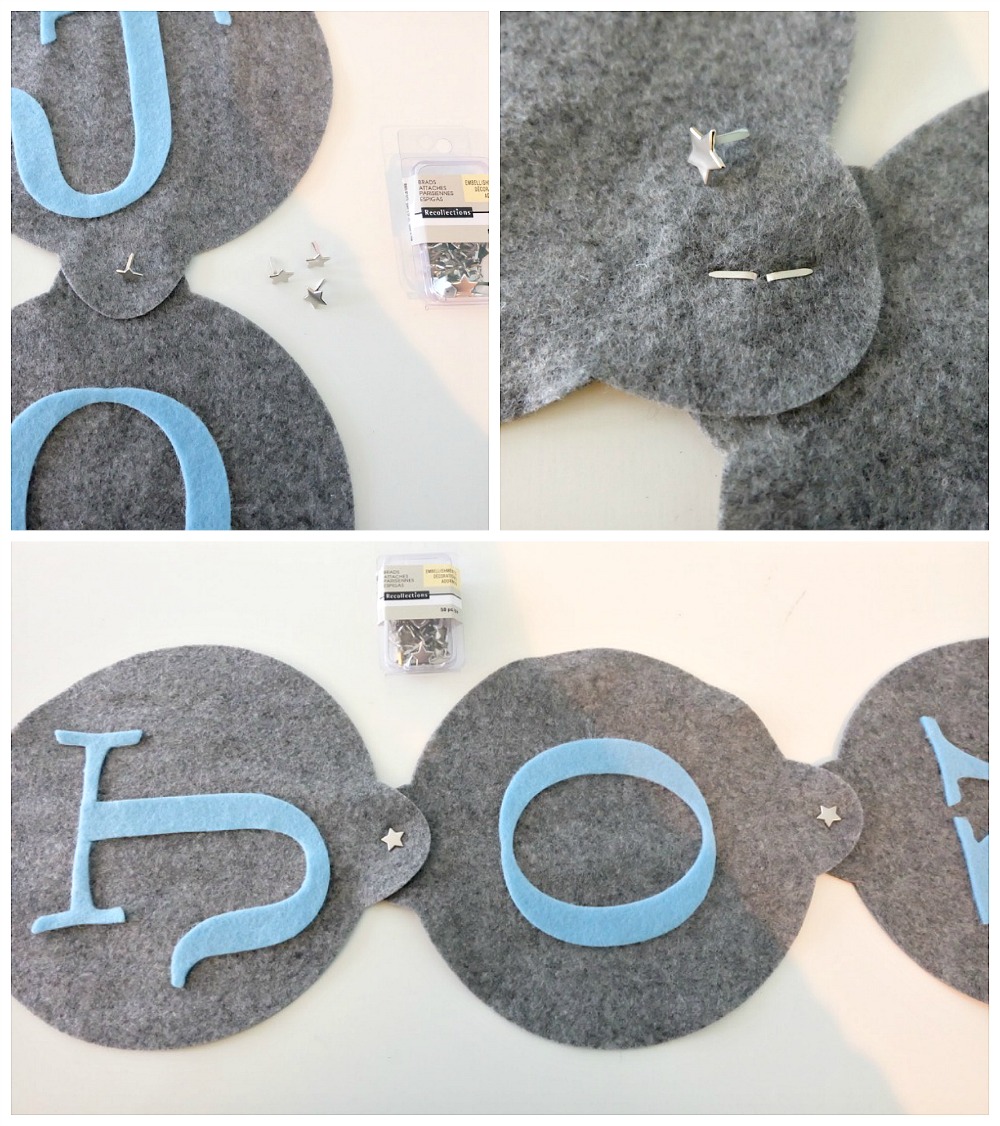
- Brads (we used star shaped brads)
- A needle or sharp object for poking holes in the fabric to attach the brads
- Optional- Glitter or glitter spray paint
Directions:
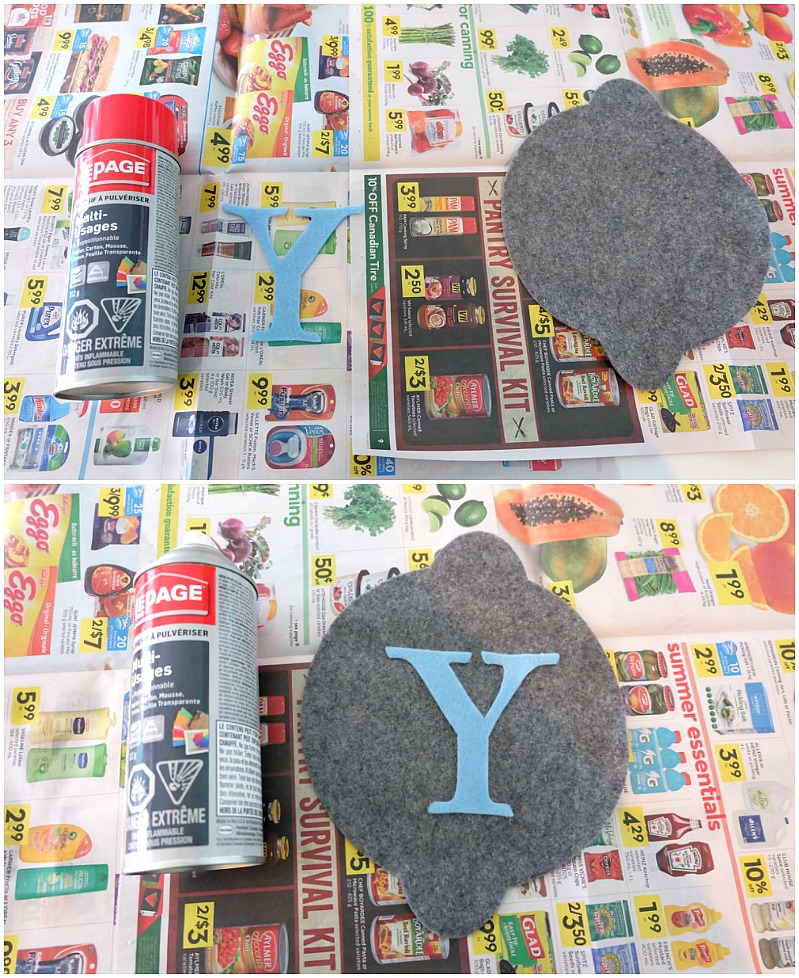
Step 1: Cut your snowflakes, letters and globes using my cut file and the Cricut Maker. I used my rotary cutter to cut the designs and set my fabric type as fusible fleece. The Cricut Maker cut the felt like it was butter!
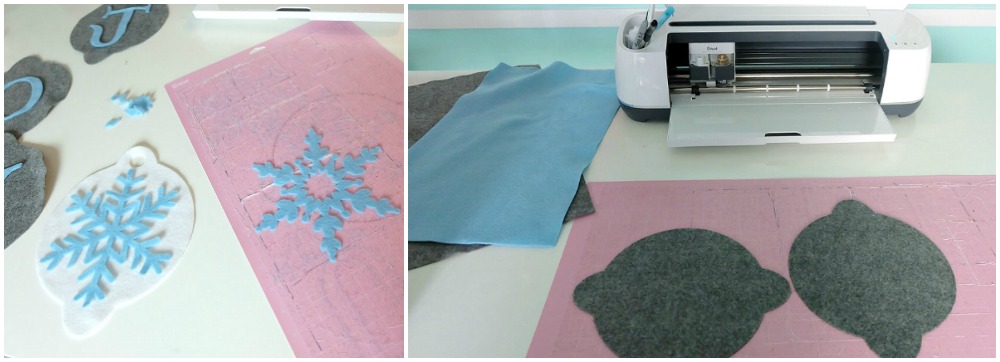
Step 2: Adhere the letters and snowflakes to the “globes” using glue or a spray adhesive. If using spray adhesive make sure to do this in a well ventilated area and lay down newspaper to avoid a mess. Follow the instructions on the bottle.
Step 3: Lay your project out and poke a hole through the felt where it overlaps. Stick a brad through the hole and open up the back of the brad so that the pieces of felt are secured to each other.
Step 4: Optional- For an extra sparkly project, spray with glitter spray paint or spray with spray adhesive and lightly sprinkle glitter on top. Allow to dry.

Step 5: Tie a ribbon to the circle at the top of the project and hang on your door! Enjoy your DIY “Joy” Felt Winter Door Decoration!
Ready for your chance to win a Cricut Maker of your own? Enter below! Tell me… What is the first thing you would make with a Cricut Maker?
Enter below for a chance to win:
Disclosure: Thank you to Cricut for working with us on this project. As with every article on Hello Creative Family all thoughts and opinions are 100% our own.
Like this post? Check out our other Cricut posts here.
Here are a few we think you’ll like!

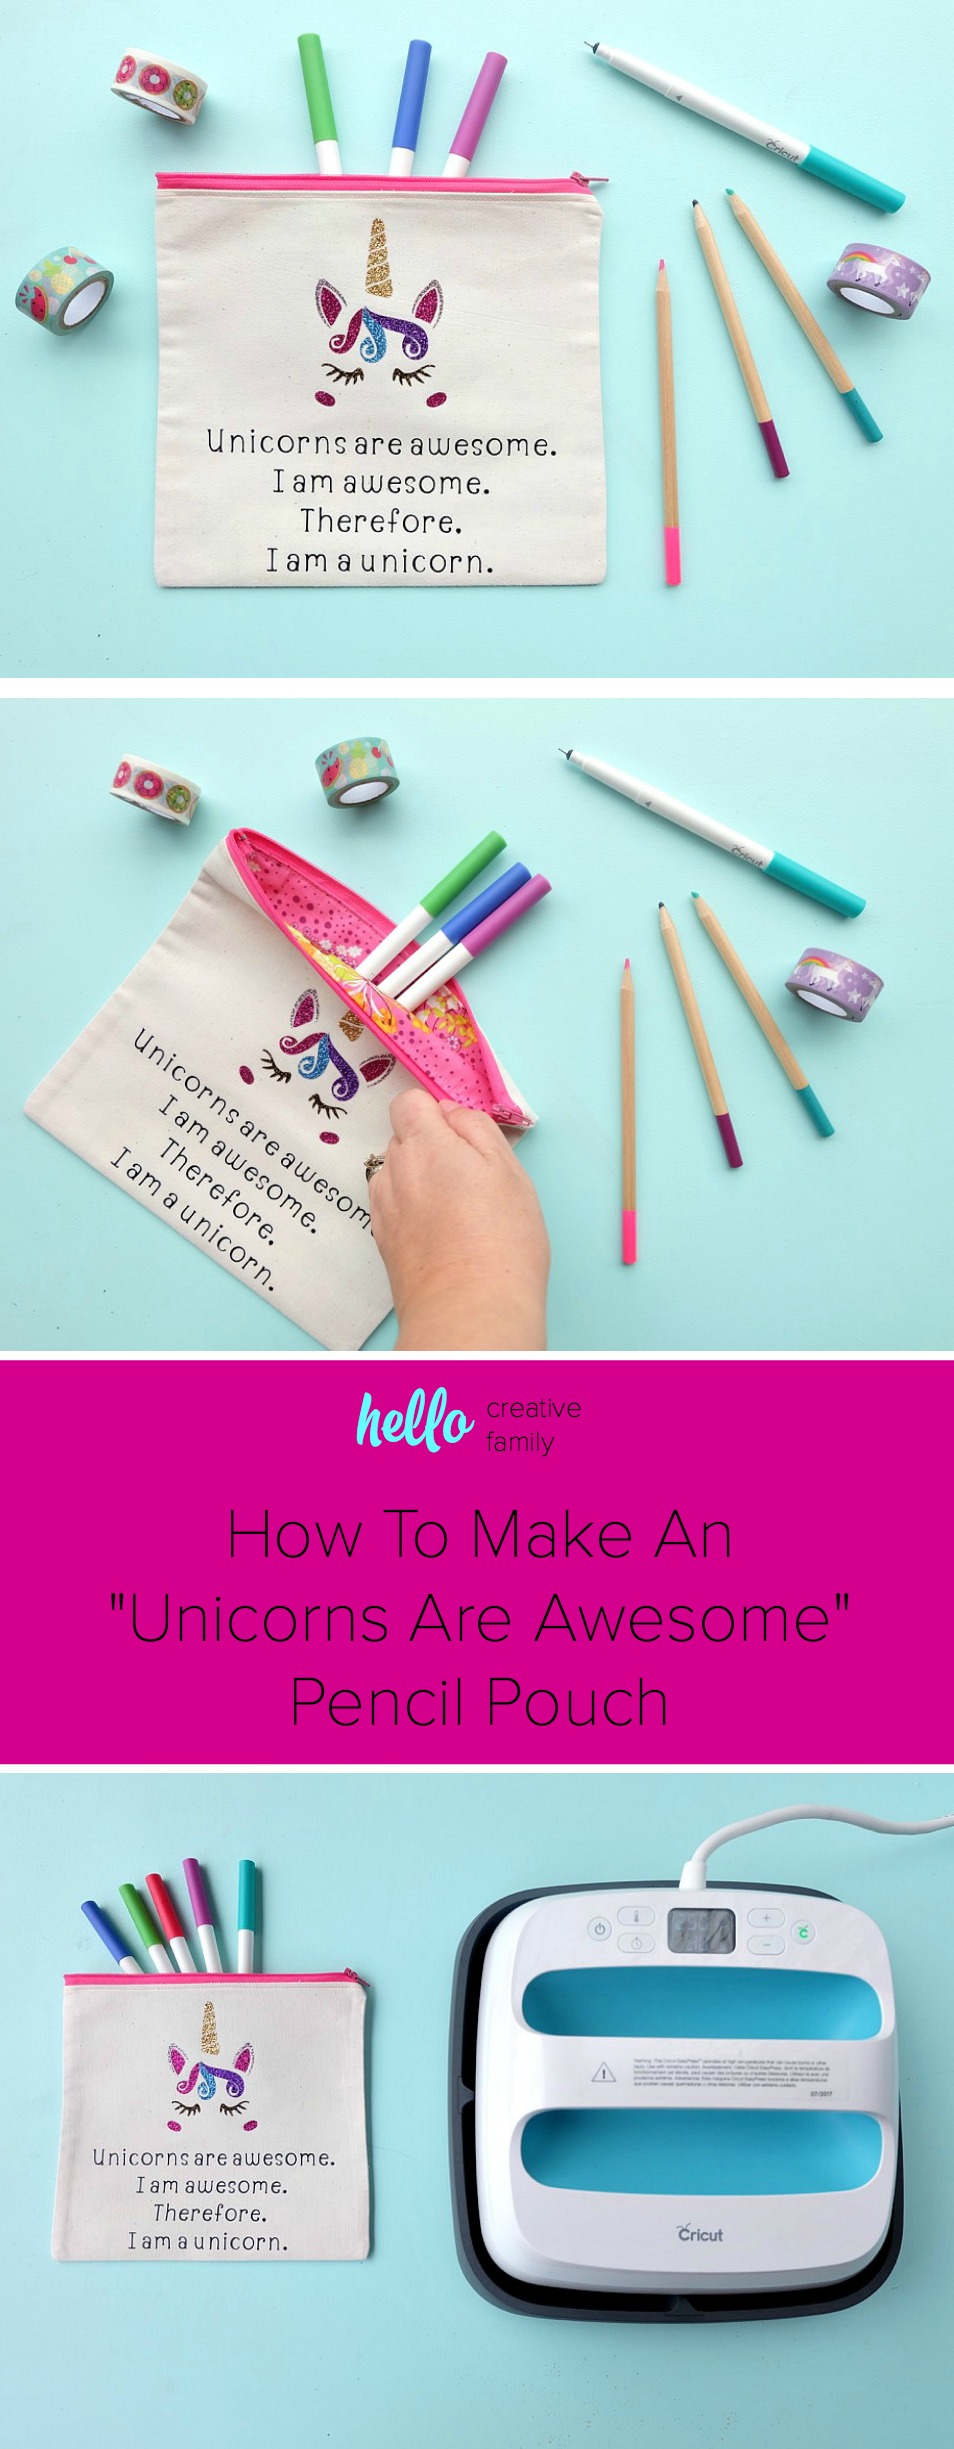
DIY Unicorns Are Awesome Pencil Pouch
This is a sponsored conversation written by me on behalf of Cricut. The opinions and text are all mine.


I’d make a door decoration. Yours is so pretty! angielovesgary2 atgmail dotcom
I’ve wanted a Cricut machine for so long! My first project would be to make lettering for an outdoor sign to put on my porch!
I would make a tote bag!
I would make decorations for Christmas, homemade gifts and everyday home decorations ?!
Gorgeous ! It’s easy to remake at home. No need for a lot of supplies.
Thanks for diy for winter door decoration.
I would make a door decoration for mi kids. They will love it.
I’ve wanted one forever to make stencils for my projects…but I’d probably make something for my son’s bedroom door first!!
I have been wanting this Cricut machine for the longest time, I can not wait to own one…..I have been patiently saving for one…I sit and imagine of all of the projects that I could create, and all of the pretty tees that I could make for my grand baby….
I love the look of fancy cursive font, and my penmanship is definitely not where it needs to be, so I’d made a beautiful sign on a tray I’ve made!
I would make door decorations with my grandkids.
,
I would use vinyl to make signs! I have been wanting a cricut for awhile now and am saving up! They rock!
This would be for my daughter in law who loves doing this kind of thing and she is so good at it.
The circut is my dream machine. I would make lots of clothes for my son and home decorations. It would also just boost my love of art and DIYs. Thanks for the chance to win!
I would make christmas decorations
I would make personalized stocking for My family.
I have been eyeing this for while but I don’t have a computer so I don’t know if it is something that I can use a tablet or a phone to operate. Any ideas if it would work?
Hi Lisa,
Yes! There is a Cricut App that you can use on smart phones and tablets. 🙂
Best Wishes,
Crystal
I would love to make Christmas stockings
I think the better question would be: What wouldn’t I make?! 😉 I love making stuffies as gifts, and cutting out all those intricate details would be a breeze! My daughters love to hand sew as well, so I could see the new fabric feature being so much fun for them! I also love crafting with leather. I am starting to imagine all the amazing possibilities! XX
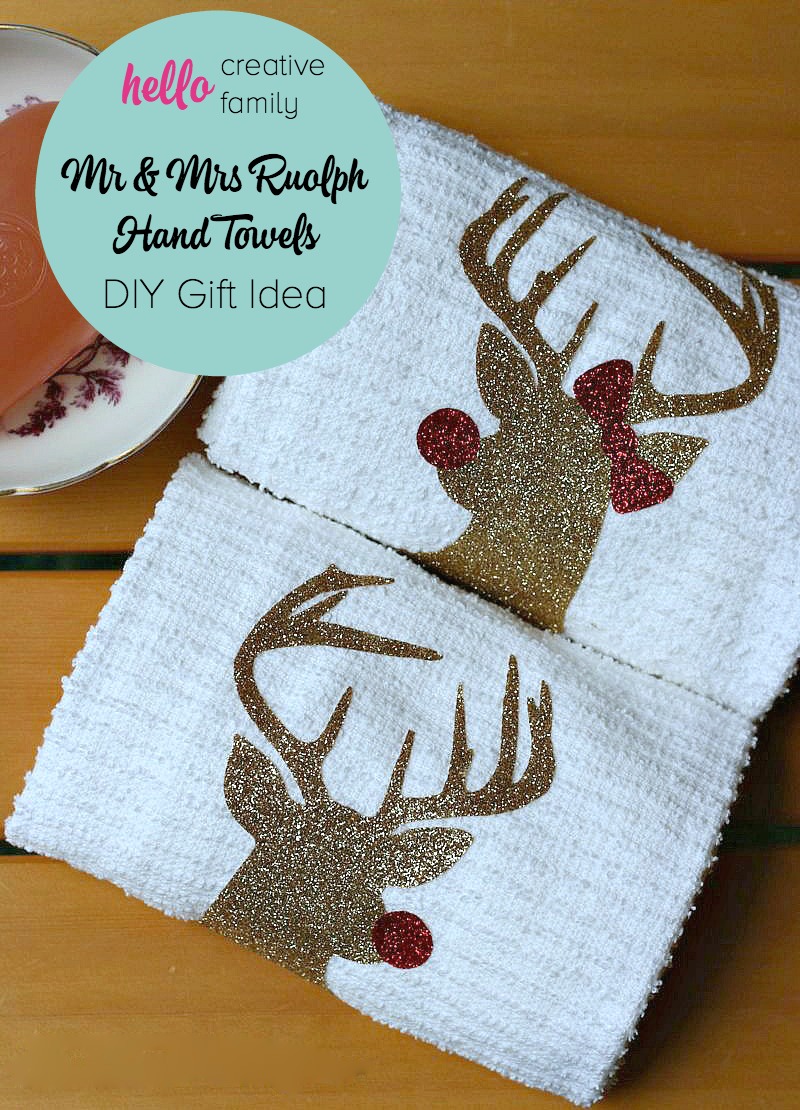
I would start with some M/M Rudolph tea towels, so cute!
I would make custom tee shirts for my family for our upcoming family reunion. That would be for our six children, their spouses, and our fourteen grandchildren. Thank you for the chance to win such an awesome prize!