DIY Colored Marbled Easter Eggs Using Whipped Cream Tutorial
This post and the photos within it may contain Amazon or other affiliate links. If you purchase something through the link, I may receive a small commission at no extra charge to you.

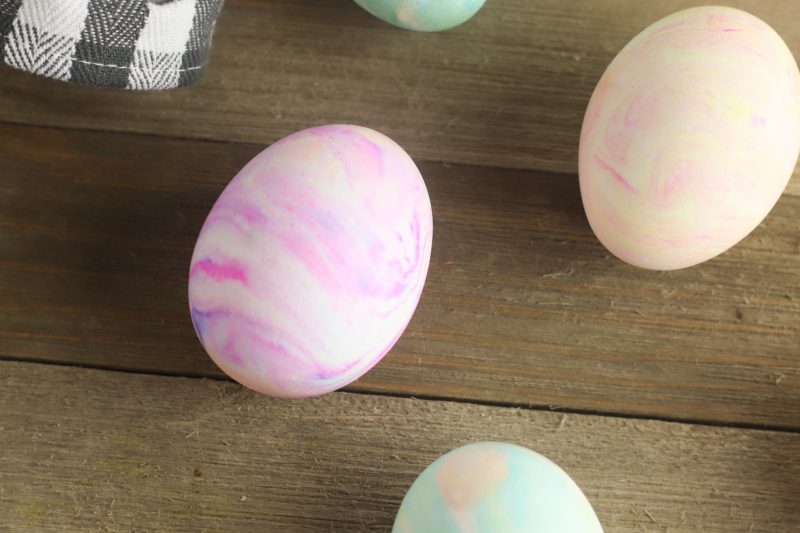
These colored marbled Easter eggs are a hit every Easter! This family and kid-friendly tutorial shows you a super easy way to dye eggs and uses all natural ingredients so not only do you get colorful eggs, you get a healthy Easter snack!

Hi Crafty Friends!
My quest for fun Easter projects continues with my latest tutorial– How to make easy colored marbled easter eggs using whipped cream! This Easter activity is a fun project that the whole family can enjoy together.
The marble effect is stunning – it’s like a work of art! While the effect is incredible, this simple Easter egg decorating process is surprisingly easy!
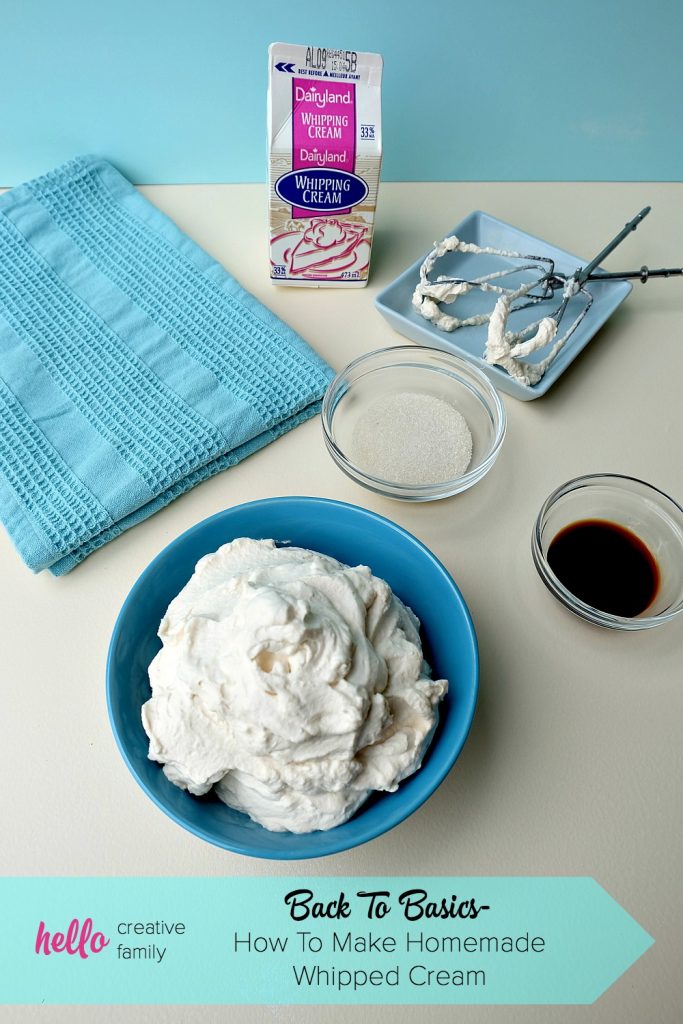
You can use store bought whipped cream from your fridge, or save yourself a bit of $ and make the whipped cream from scratch using my whipped cream recipe!
If you don’t have whipped cream, you can also use shaving cream, but note that if you use shaving cream I wouldn’t recommend that you eat the eggs afterwards. Using whipped cream makes them 100% safe to eat. When you use shaving cream there is the risk of the chemicals leaching through the porous egg shells making them unsafe to eat.
The History of Dyeing Easter Eggs
Easter egg dyeing has been around for centuries, with roots in various cultures and traditions.
Ancient civilizations, such as the Persians and Egyptians, decorated eggs as symbols of fertility and renewal.
In Christianity, dyed eggs became a symbol of Jesus’ resurrection, representing new life.
Many cultures have unique egg-dyeing traditions, from the intricate Ukrainian pysanky eggs to the red-dyed eggs of Greek Orthodox Easter.
Why Use Whipped Cream for Marbled Easter Eggs?

Traditional Easter egg dyeing methods involve vinegar and food coloring, but using whipped cream creates a fun, hands-on experience with a beautiful marbled effect.
This method is perfect for kids and crafters who love experimenting with colors. Plus, it’s a great alternative to shaving cream dyeing, making it safe and edible.
Benefits of using whipped cream:
- Creates a stunning marbled effect with vibrant colors
- Safe and edible, unlike shaving cream
- Fun and sensory-friendly for kids
- Easy cleanup compared to liquid dyes
How To Dye Marbled Easter Eggs With Whipped Cream

Ready to learn how to make these pretty eggs? Read on for our Whipped Cream Marbled Easter Eggs Tutorial!
Materials
- 3 cups whipped cream or Cool Whip (Shaving cream can work too if you don’t plan on eating the eggs)
- Muffin pan or several small cups an egg can fit in
- Gel food dye in various colors
- Stick or knife
- Gloves
- Hard-boiled eggs
- Paper towel
Instructions
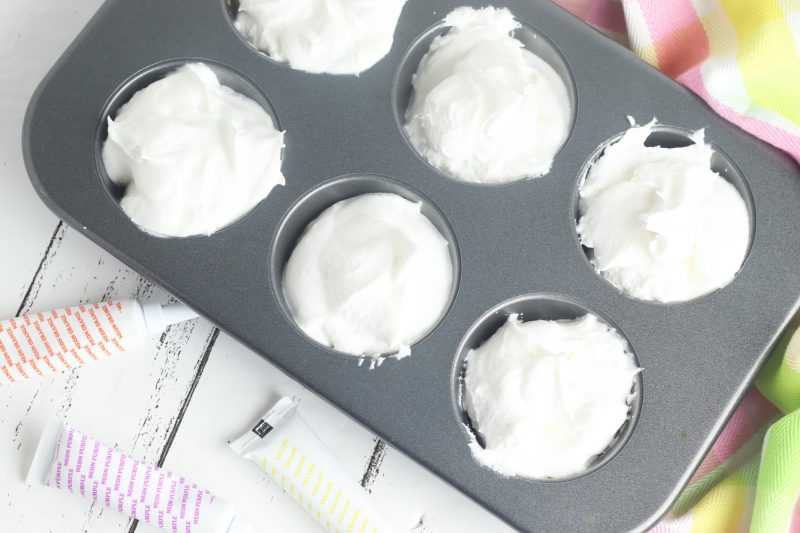
Step 1: Fill each muffin container or cup with about half a cup of whipped cream.
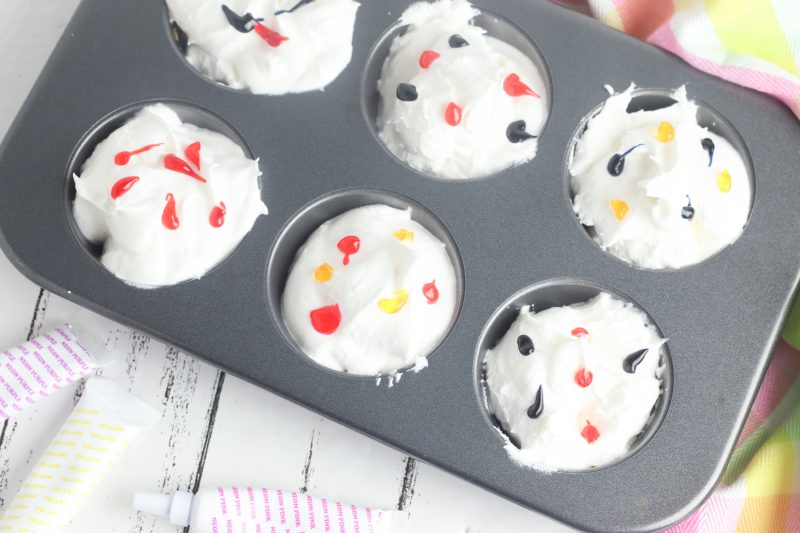
Step 2: Add a few drops of food coloring to each section of whipped cream. Experiment with different color combinations for maximum fun! But I suggest no more than two or three colors otherwise the it can turn really dark and black.
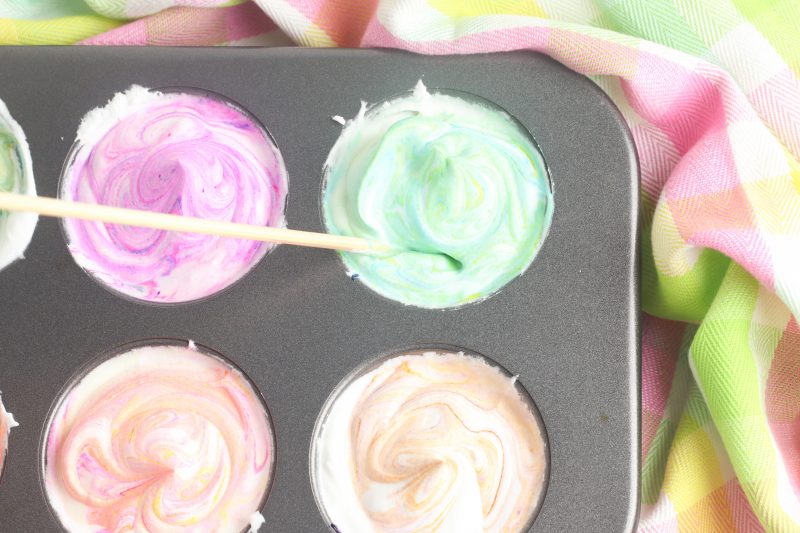
Step 3: Use a stick or knife to swirl the food coloring into the whipped cream.
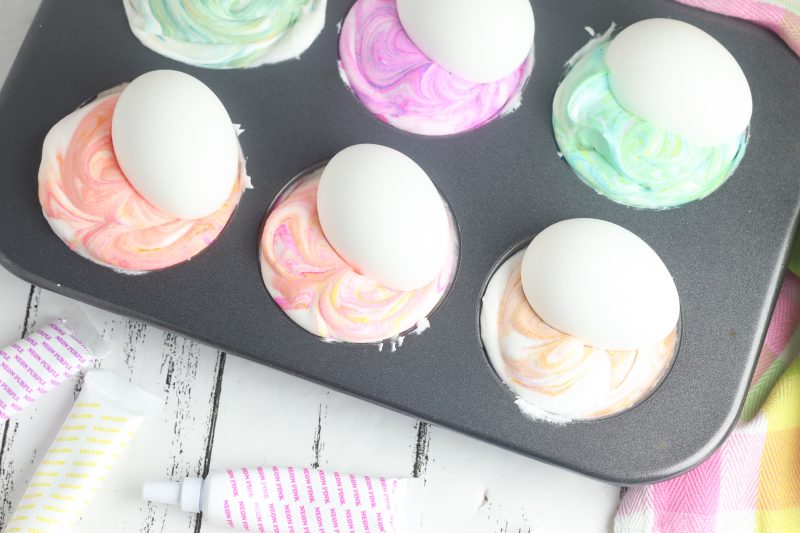
Step 4: Put on the gloves and place eggs in each muffin cup mixture. Roll egg around in the whipped cream until it is fully covered.
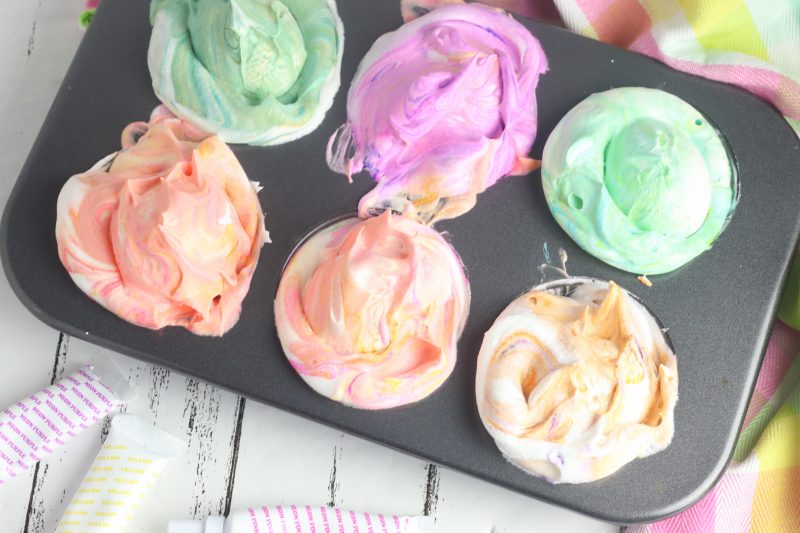
Step 5: Allow the eggs to sit in the whipped cream for at least 15 minutes. The longer the eggs sit the brighter the colors and the greater the marbleized effect on the eggshell.
Step 6: Remove eggs from whipped cream and rinse with cold water. Towel dry with paper towel.
Step 7: Your beautiful eggs are done! Store in the refrigerator until ready to hide or use as decorations.
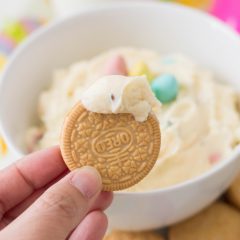
Bonus Step 7a: Use the leftover whip cream on your favorite cookie, cupcake, ice cream, hot chocolate, or coffee snack!
Tips for the Best Marbled Easter Eggs
- Use gel food coloring: Gel dyes are more vibrant and don’t make the whipped cream too watery.
- Let the eggs sit longer: The longer they sit in the dye, the more vibrant the colors will be. Aim for 15-30 minutes.
- Experiment with colors: Try layering different colors for a unique effect.
- Roll gently: Avoid overmixing to maintain a clear marbled pattern.
How to Store and Display Your Marbled Easter Eggs
Once your eggs are dry, here are some ways to store or showcase them:
- For eating: Keep dyed eggs in the refrigerator and eat within a week.
- For display: Arrange eggs in a decorative basket, egg cups, or a glass vase for a centerpiece.
- For keepsakes: Blow out the eggs before dyeing so you can save them for future decorations.
Creative Easter Egg Variations to Try
Looking to add even more creativity? Here are some fun twists on the marbled egg technique:
- Gold Flecked Eggs: Once the marbled eggs dry, use a fine paintbrush to dab gold leaf or metallic edible paint for an elegant touch.
- Pastel Ombre Eggs: Blend similar shades like pink and purple for a soft ombre effect.
- Speckled Eggs: After dyeing, flick a paintbrush dipped in brown food coloring for a natural, speckled look.
- Neon Swirls: Use neon food coloring for bright, bold eggs that pop.

Want to decorate your marbled Easter eggs more? Decorate them with temporary tattoos! This post is an oldie but a goodie!

Colored Whipped Cream Marbled Easter Eggs Tutorial Card
Instructions
- Fill each muffin container or cup with about half a cup of whipped cream.
- Add a few drops of food coloring to each section of whipped cream. Experiment with different color combinations for maximum fun! But I suggest no more than two or three colors otherwise the it can turn really dark and black.
- Use a stick or knife to swirl the food coloring into the whipped cream.
- Put on the gloves and place one egg in each muffin cup. Roll the egg around in the whipped cream until it is fully covered.
- Allow the eggs to sit in the whipped cream for at least 15 minutes. The longer the eggs sit the brighter the colors and the greater the marbleized effect on the eggshell.
- Remove eggs from whipped cream and rinse with cold water. Towel dry with paper towel.
- Your beautiful eggs are done! Store in the refrigerator until ready to hide or use as decorations.
- Bonus Step: Use the leftover whip cream on your favorite cookie, cupcake, ice cream, hot chocolate, or coffee snack!
Equipment
- 3 cups whipped cream or Cool Whip (shaving cream will work in a pinch if you don’t plan on eating the eggs)
- Muffin pan or several small cups an egg can fit in
- Gel food coloring various colors
- Stick or knife
- Gloves
- Hard boiled eggs
- Paper Towel
More Fun Easter Decoration Ideas and Activities!
Here are a few more Easter ideas we think your family will love!


Tell me… Do you decorate Easter eggs with your kids? What’s your favorite method for decorating them?
Like Whipped Cream Marbled Easter Eggs Tutorial? We’d love for you to pin it for later!