


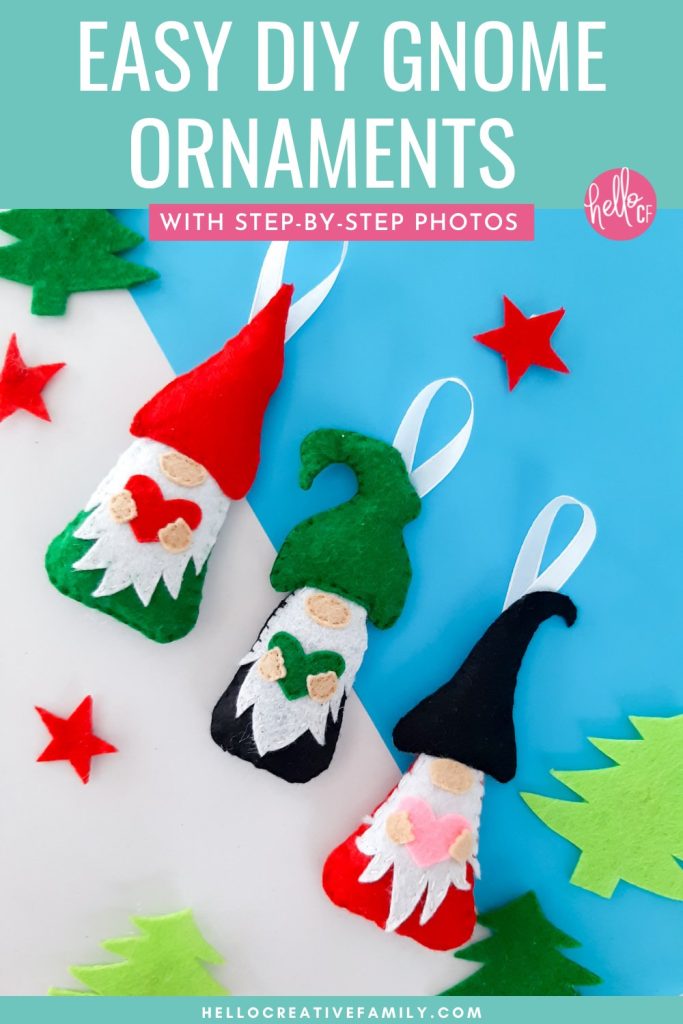
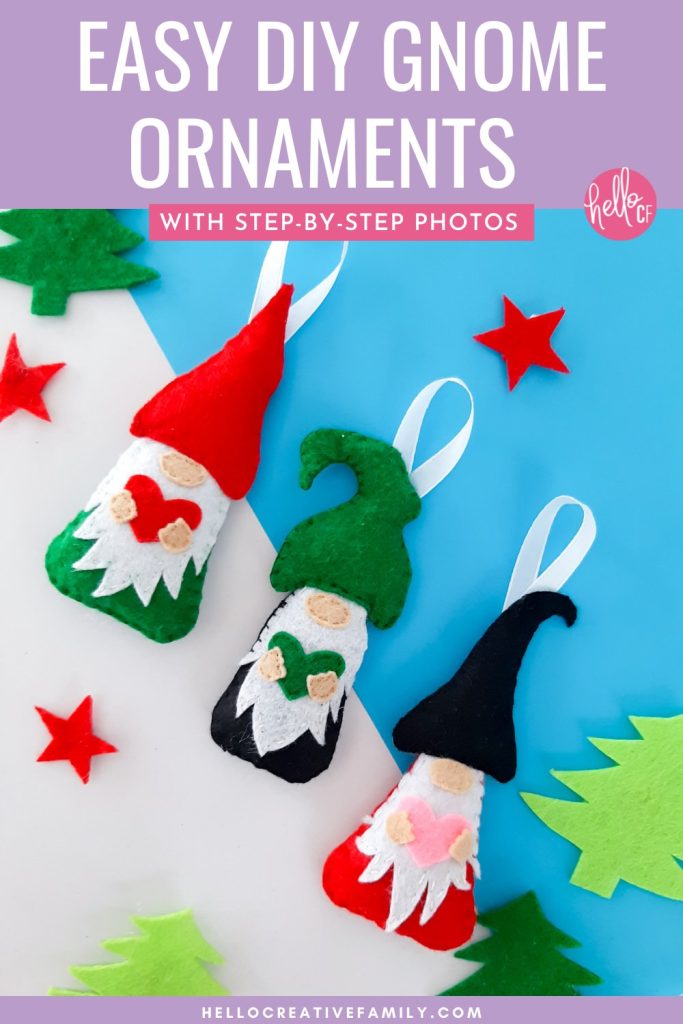
Easy DIY Gnome Ornaments- With Step By Step Photos and Free Pattern
This post and the photos within it may contain Amazon or other affiliate links. If you purchase something through the link, I may receive a small commission at no extra charge to you.

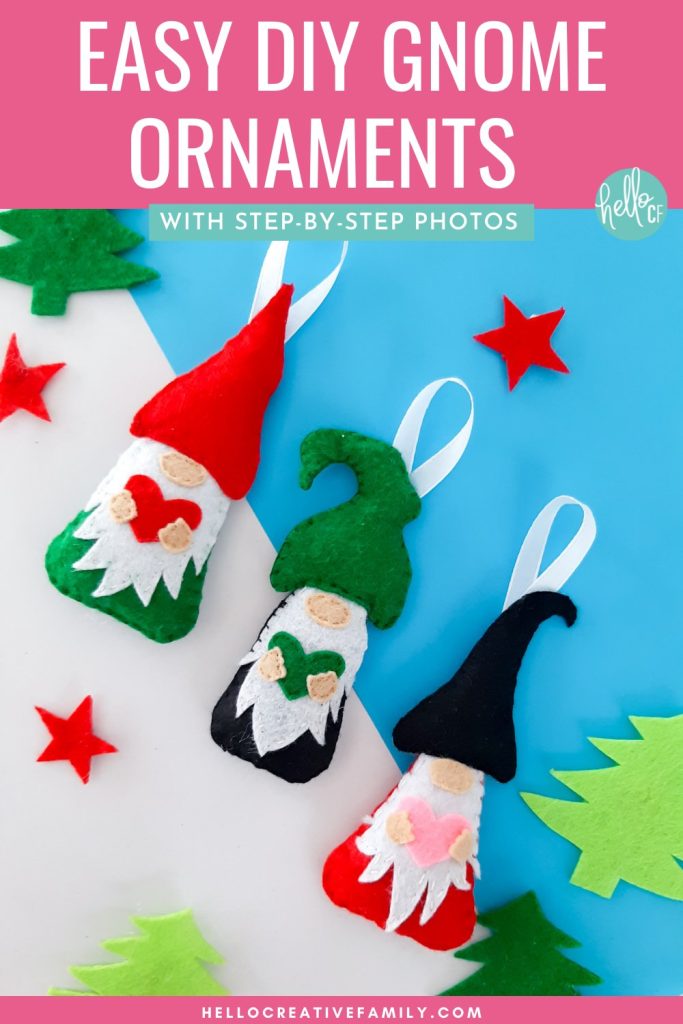
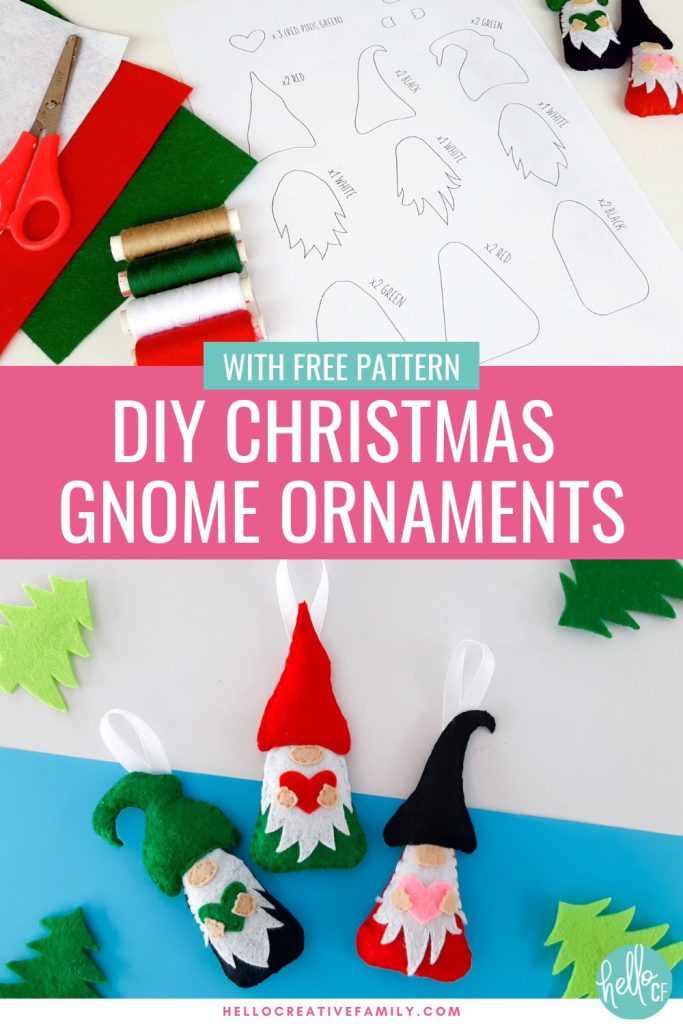
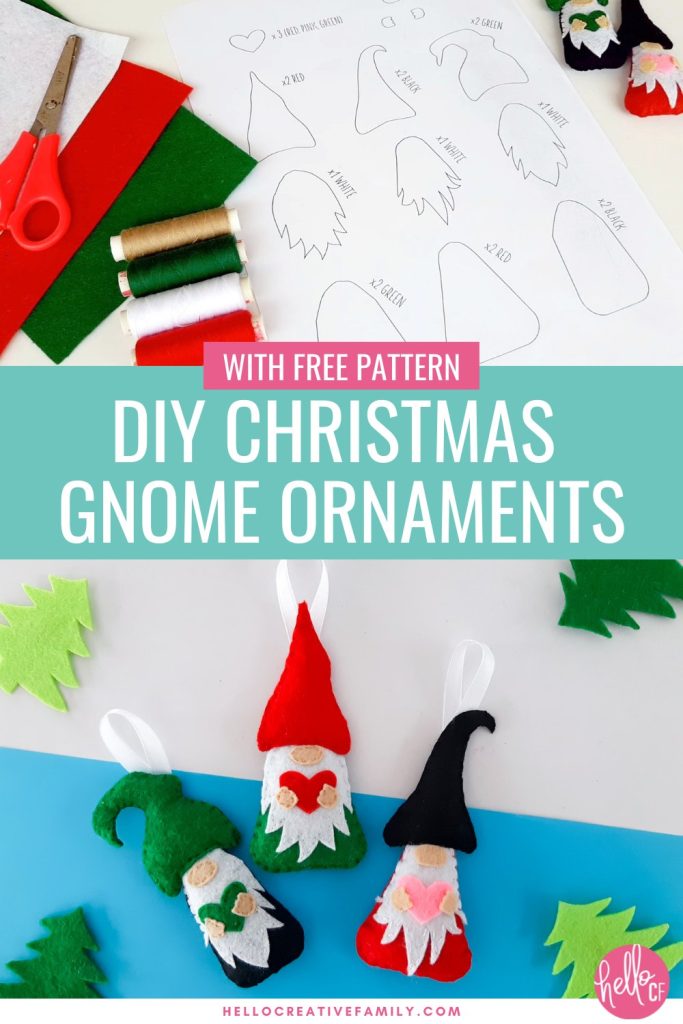
Bring a burst of cheerfulness to your home by making these cute and easy DIY gnome ornaments. This sweet sewing project is perfect for beginners. Includes a free printable pattern template and step by step photos. Not into sewing? Make this a no-sew Christmas project with a bit of glue!
Hi Crafty Friends!
Our Christmas crafting fun continues with another super fun holiday craft here on Hello Creative Family!
When I was in elementary school, my school name was Geneva and our mascot was gnomes so we were the Geneva Gnomes. Ever since my first day of kindergarten I have been in love with gnomes. From their cute little gnome beard, to their brightly colored hats and clothing– I think gnomes are just the cutest!
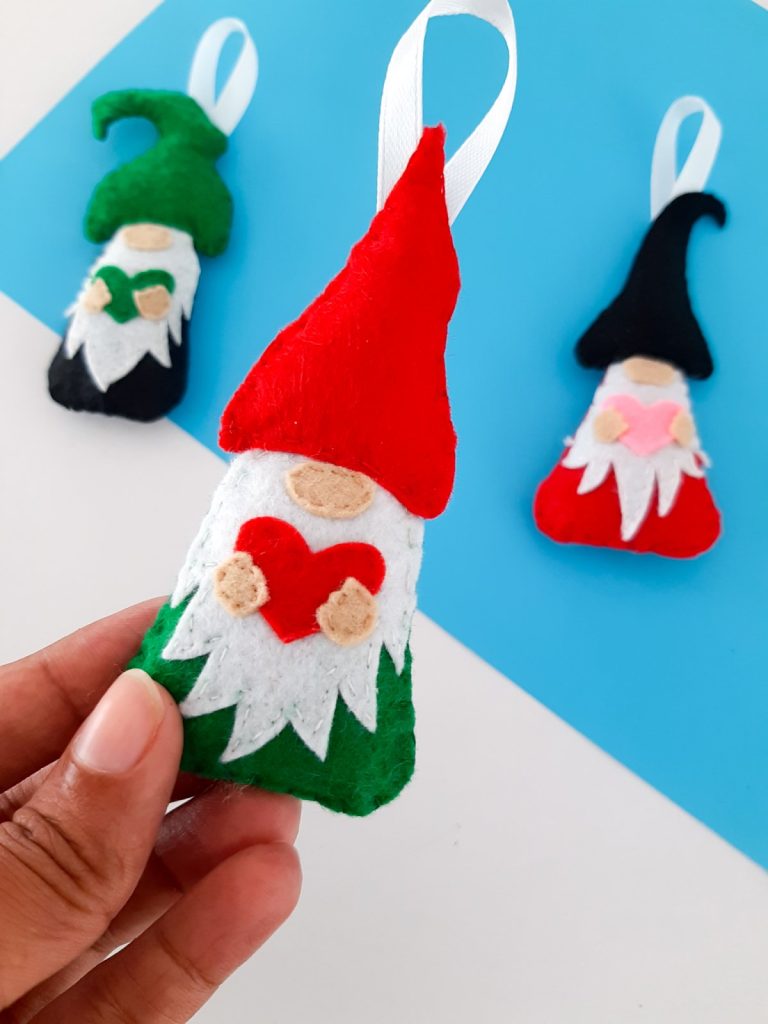
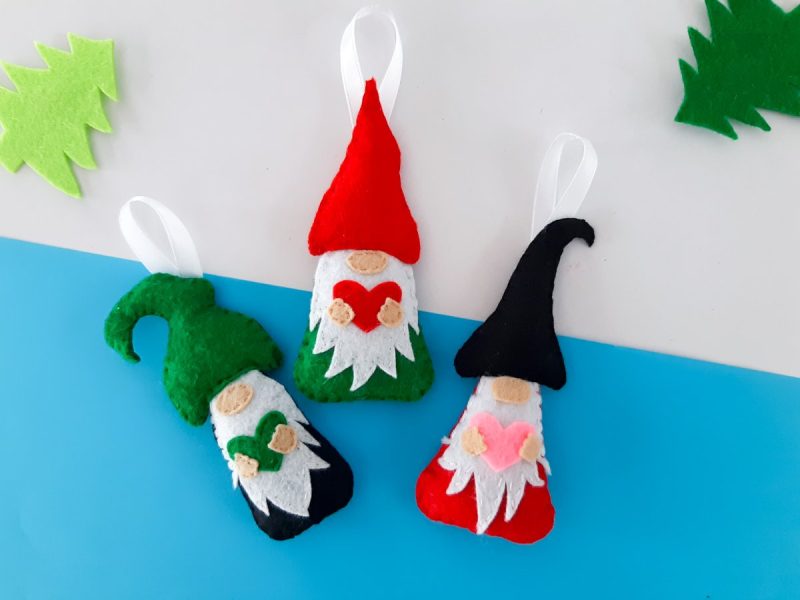
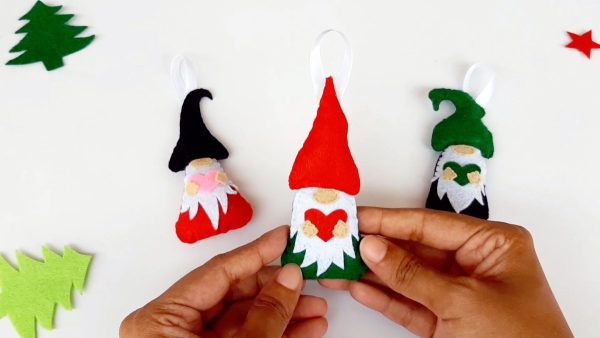
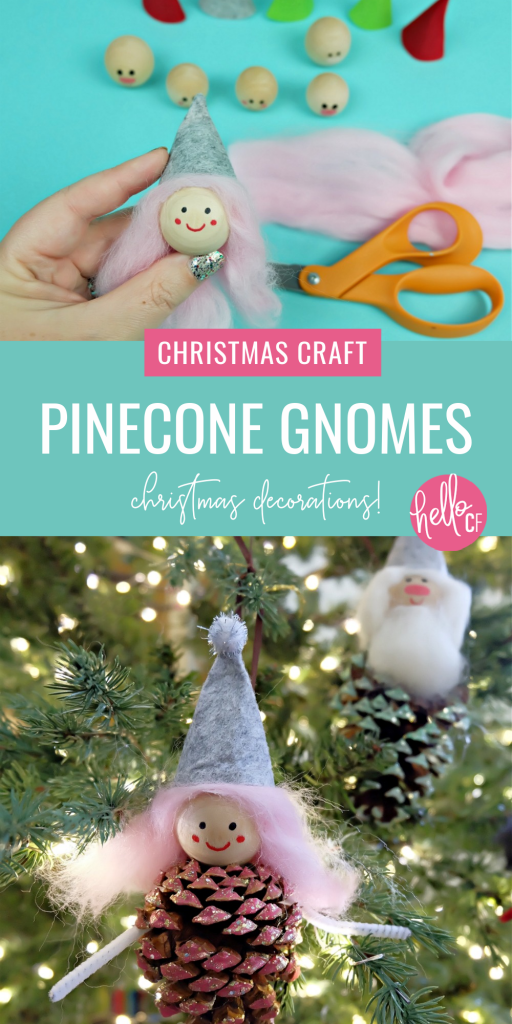
I have given you my take on gnomes a few of times here on Hello Creative Family with my Merry Christmas Gnome SVG file, my DIY Pinecone Gnome Christmas Decorations, and my Construction Paper Gnome Puppets but in my latest version we are making easy DIY Gnome Ornaments! These adorable plush ornaments are made with felt and are simply adorable.
I’m giving you the base pattern but you could embellish these any way you want! They’d look so cute with a little pom-pom, mini tassel, bell, wooden beads or decorative buttons on the front of the hat, or you could trim their beards to different lengths to give them each their own unique look. You could also use different brightly colored pieces of ribbon, yarn or even twine to hang these gnomes on your Christmas tree with!
Free Gnome Christmas Ornament Sewing Pattern
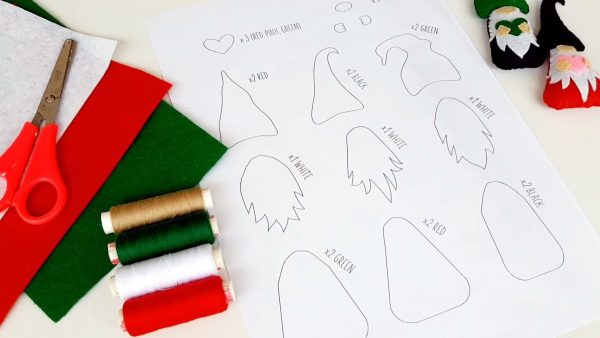
I’m giving you a free printable template that you can cut out and use for tracing and cutting all of your ornament pieces.
Cut out your pattern pieces from colorful felt, stuff them with Poly-fil and hand sew them shut with embroidery thread. Don’t worry if sewing isn’t your thing, you can also glue these ornaments closed.
Want to grab this free printable? Enter your name and email address into the box below and we’ll send it straight to your email! Signing up for one of our free printables subscribes you to our enewsletter where we send you a ton of free stuff straight to your inbox. Don’t worry if you’ve already signed up once, you’ll only be subscribed once per email address.
Please remember this printable is for personal use only.
- This file can be used in part or in whole for your personal projects.
- Digital reselling, sharing, redistributing of the files is NOT allowed. If you would like to share, please direct friends to the original blog post where you found this printable file
Holiday Gnome Felt Ornaments
Supplies
Ready to learn how to make these adorable magical creatures?
- Printed Template (Download by entering name and email address in box above)
- Craft felt in your favorite gnome colors
- Ribbon
- Matching embroidery floss
- Poly-fil Stuffing
- Embroidery needle
- Scissors
- Hot glue gun and hot glue sticks
Stitches Used
- Running Stitch (on layering pieces)
- Blanket Stitch (used around the outside edge while joining two pieces together)
Instructions
1. Print gnome pattern pieces on heavy card stock paper.

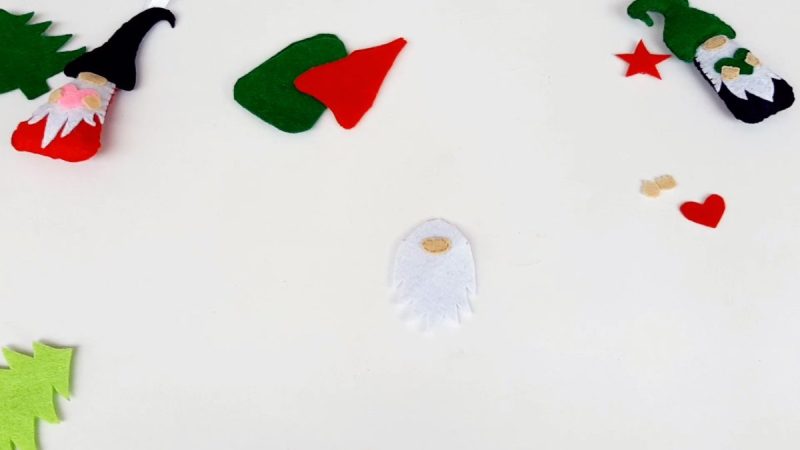
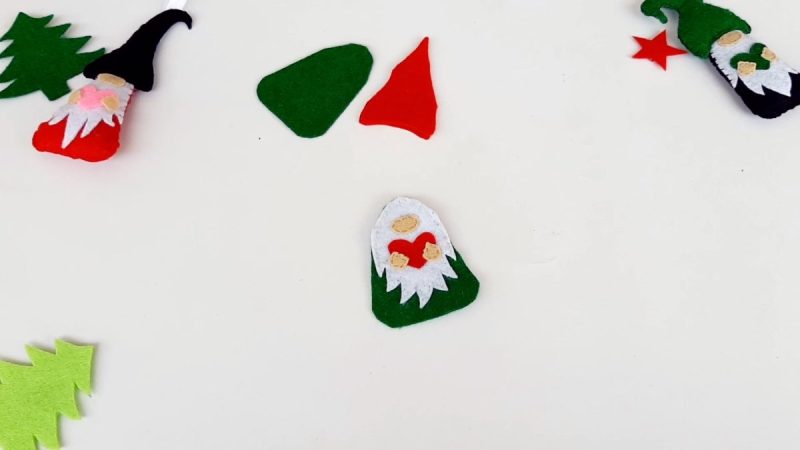
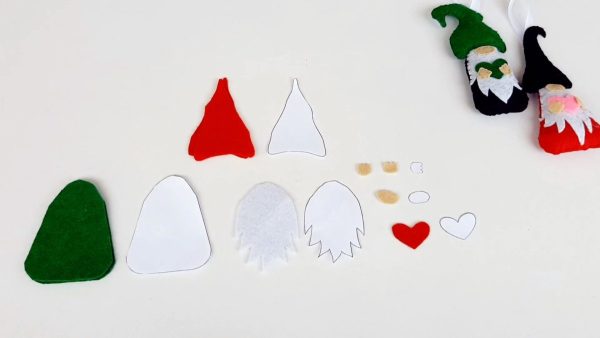
2. Cut out the gnome hat pattern pieces, the gnome beard pattern pieces and the gnome body pattern pieces. Use them as templates to trace and cut out the appropriate color felt pieces as noted.
MAKE THE BODY
1. Sew the nose, heart and hands onto the beard using embroidery floss and a running stitch.
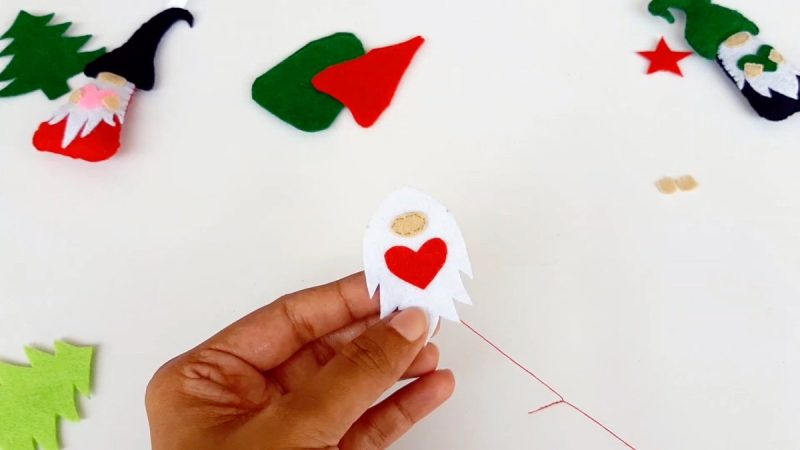
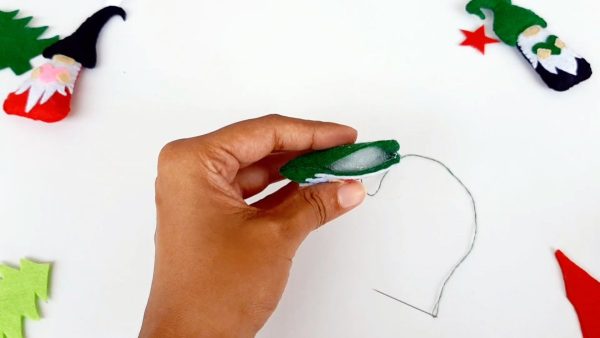
2. Attach the beard to one body piece, also using a running stitch around the outer edge of the beard.
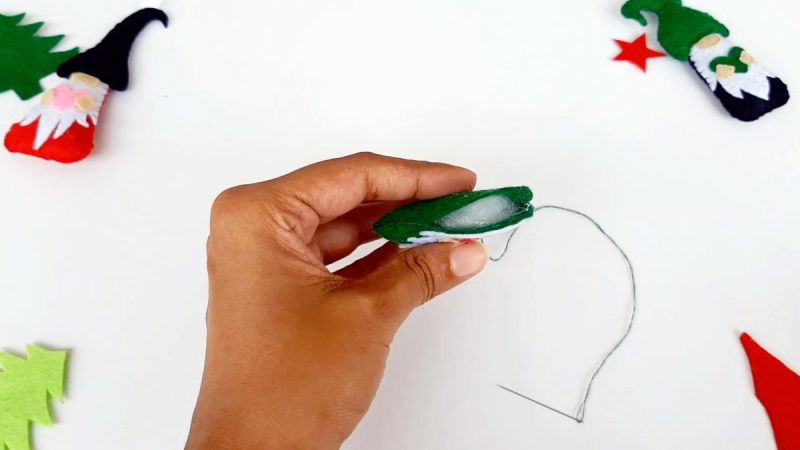
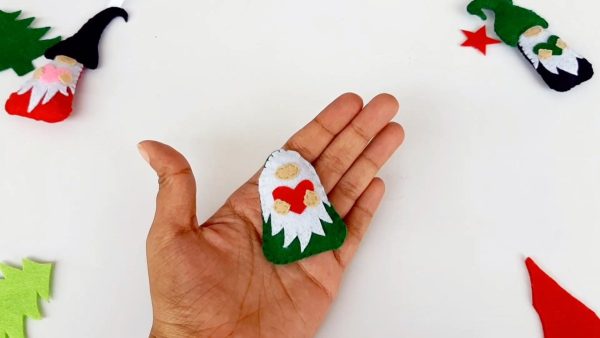
3. Place the second body piece behind the first. Cut a long strand of embroidery floss and sew them together along the outside using a blanket stitch. Leave a small opening and stuff it using poly-fil. You may want to use a pencil, chopstick or small wooden dowel to make sure the poly-fil fills the gnomes body firmly. Stitch closed and finish with a tight knot.

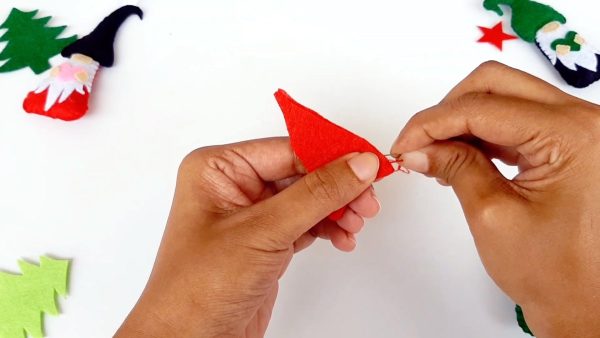
MAKE THE HEAD/HAT
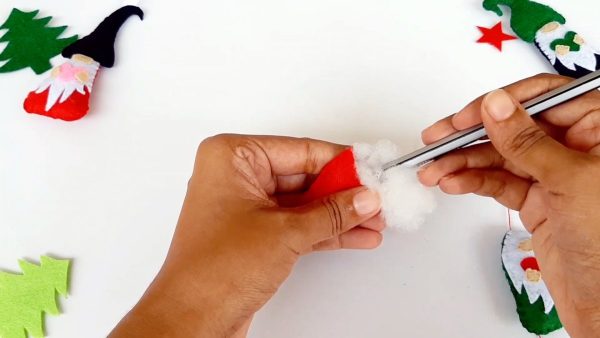
1. Begin sewing the two hat pieces to form the head. Use a blanket stitch to start at one side and stop at the other side so that you leave the entire bottom (where the head goes) open.
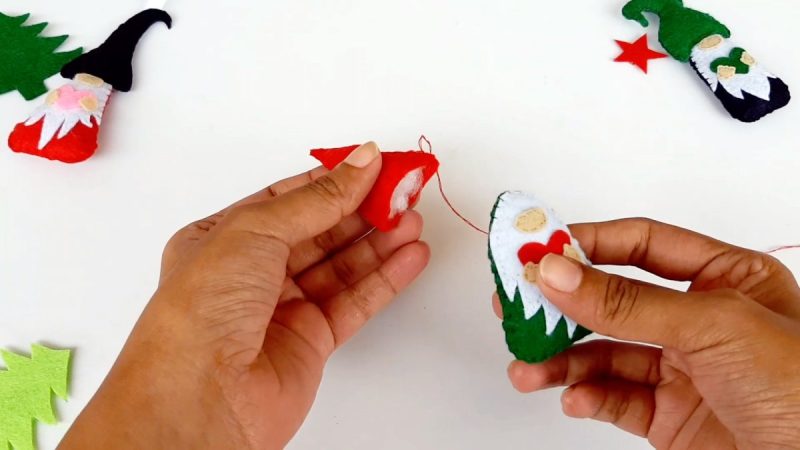
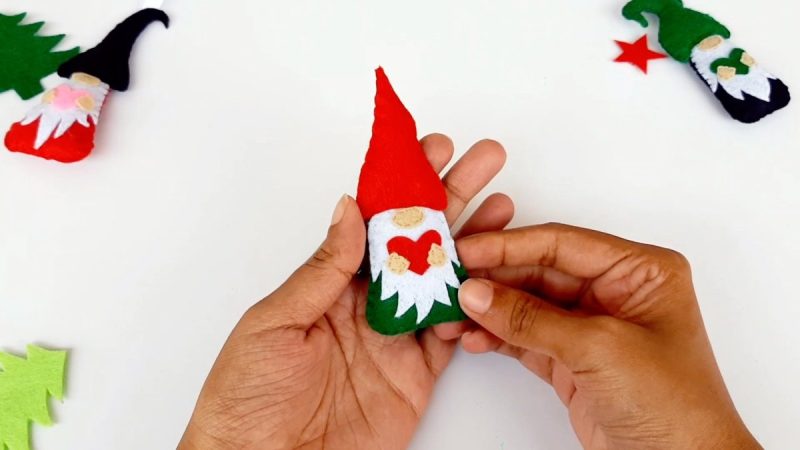
2. Use this hole to stuff and then place it onto the body, aligning it just above the nose.

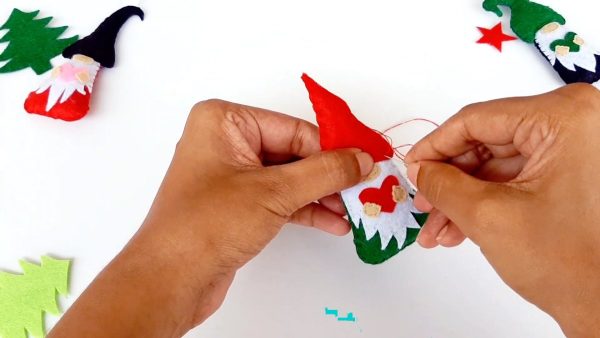
3. Continue sewing across the bottom edge of the hat but now going through all pieces to attach the hat to the body. Finish off.
FINISH YOUR ORNAMENT
Fold a piece of ribbon, yarn or piece of twine in half and use a hot glue gun to glue the ends to the back of the gnome’s hat near the top.
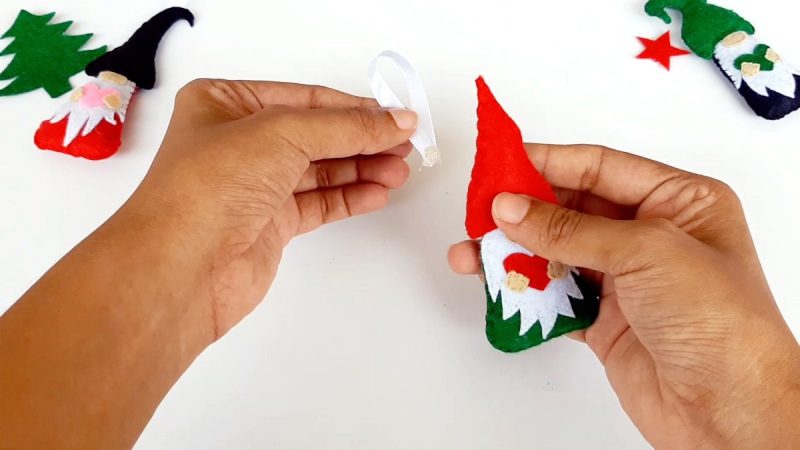
*You could also sew the loop into the top of the hat by simply placing it where you would like while sewing the front and back hat pieces together.

NOTES
TIP: You can tack down smaller pieces with a very small amount of glue if you find they move around on your while trying to sew.
You can also make this a no sew project simply by using a thin, solid line of glue for everything in place of stitches!
Easy DIY Gnome Ornaments Instructions Card
Instructions
Preparation
- Print gnome pattern pieces on heavy card stock paper.

- Cut out the gnome hat pattern pieces, the gnome beard pattern pieces and the gnome body pattern pieces. Use them as templates to trace and cut out the appropriate color felt pieces as noted.
Make The Body
- Sew the nose, heart and hands onto the beard using embroidery floss and a running stitch.
- Attach the beard to one body piece, also using a running stitch around the outer edge of the beard.
- Place the second body piece behind the first. Cut a long strand of embroidery floss and sew them together along the outside using a blanket stitch. Leave a small opening for stuffing.
- Stuff with Poly-fil. You may want to use a pencil, chopstick or small wooden dowel to make sure the poly-fil fills the gnomes body firmly. Stitch closed and finish with a tight knot.


Make the Head/Hat
- Begin sewing the two hat pieces to form the head. Use a blanket stitch to start at one side and stop at the other side so that you leave the entire bottom (where the head goes) open.
- Use the hole to stuff the head with Poly-fil.
- Place it onto the body, aligning it just above the nose.
- Continue sewing across the bottom edge of the hat but now going through all pieces to attach the hat to the body. Finish off.

Finish Your Ornament
- Fold a piece of ribbon, yarn or piece of twine in half and use a hot glue gun to glue the ends to the back of the gnome’s hat near the top. *You could also sew the loop into the top of the hat by simply placing it where you would like while sewing the front and back hat pieces together.
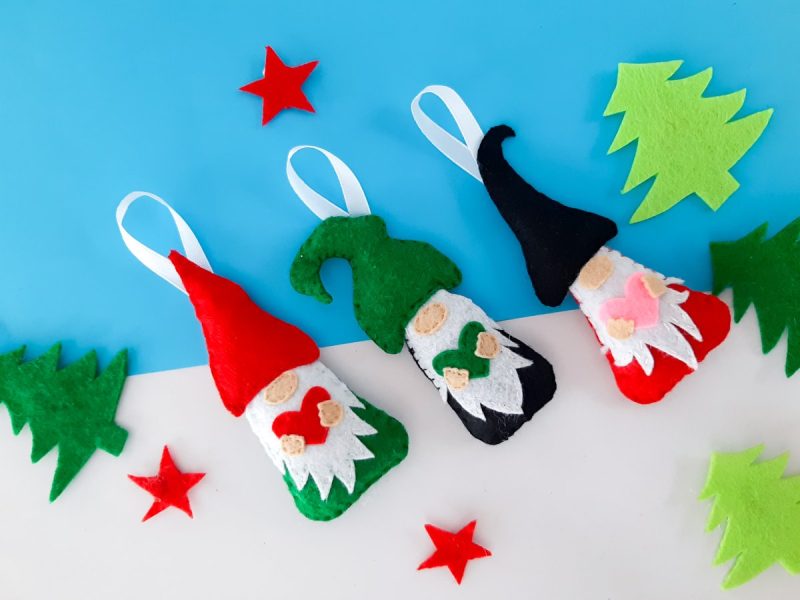
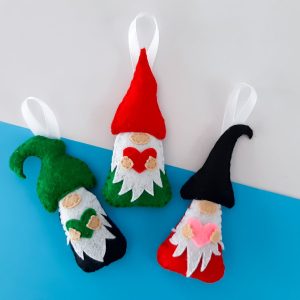
- Admire your adorable DIY Gnome Christmas Tree Ornaments.

Notes
Equipment
- Craft felt
- Ribbon
- Matching embroidery floss
- Poly-fil Stuffing
- Embroidery needle
- Scissors
- Hot glue sticks
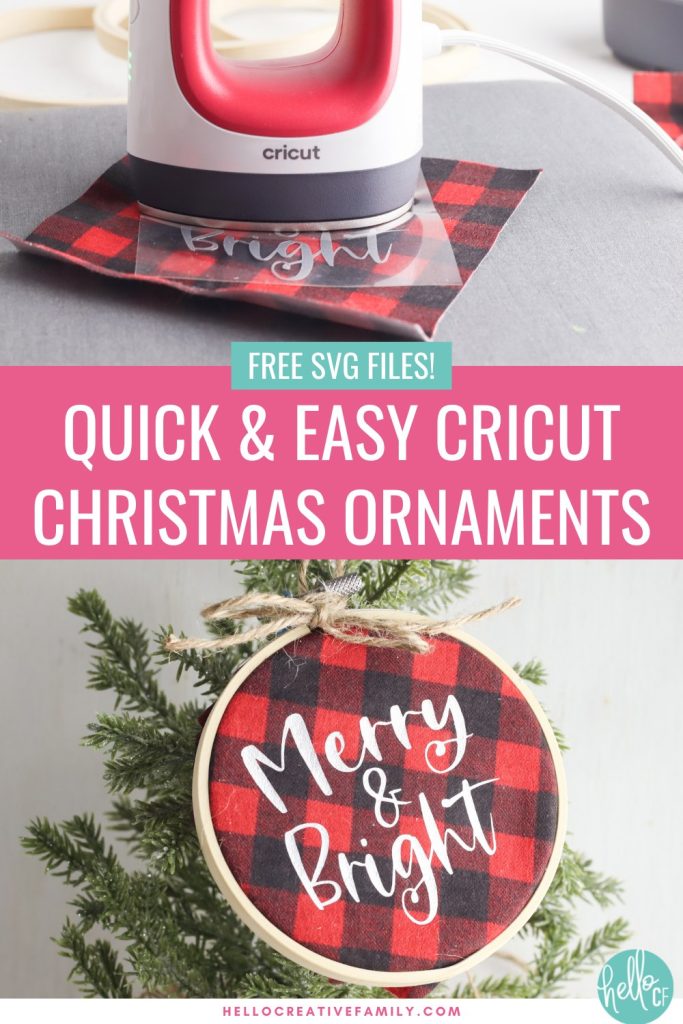
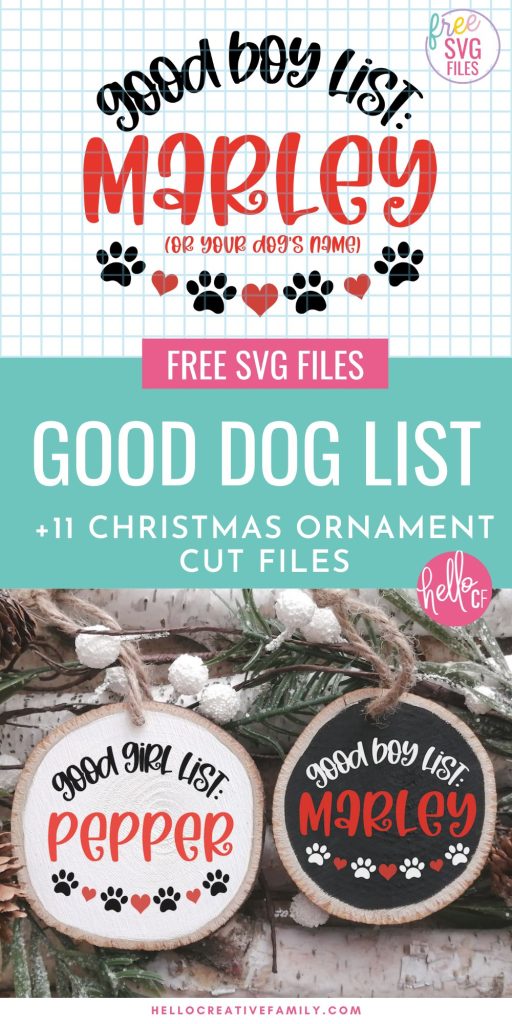
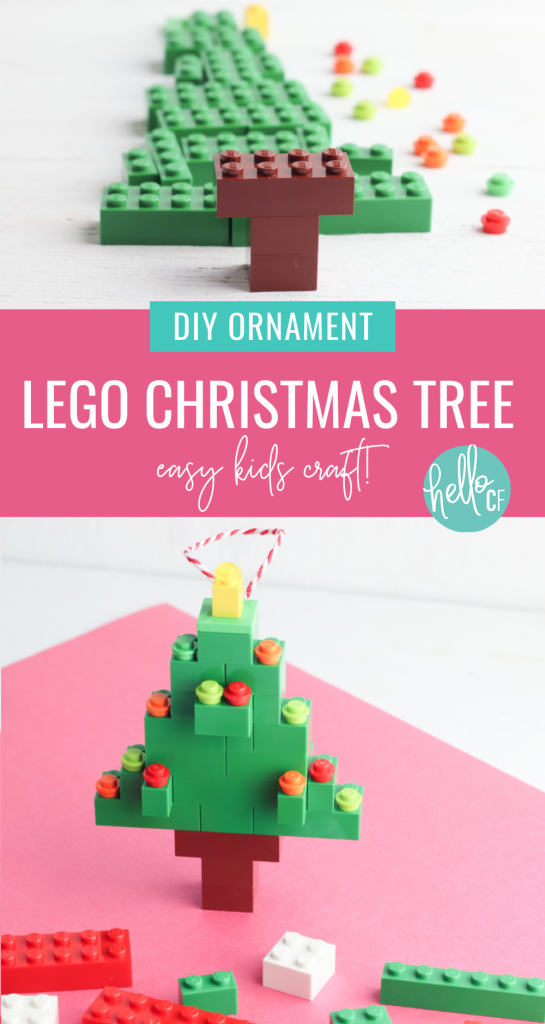
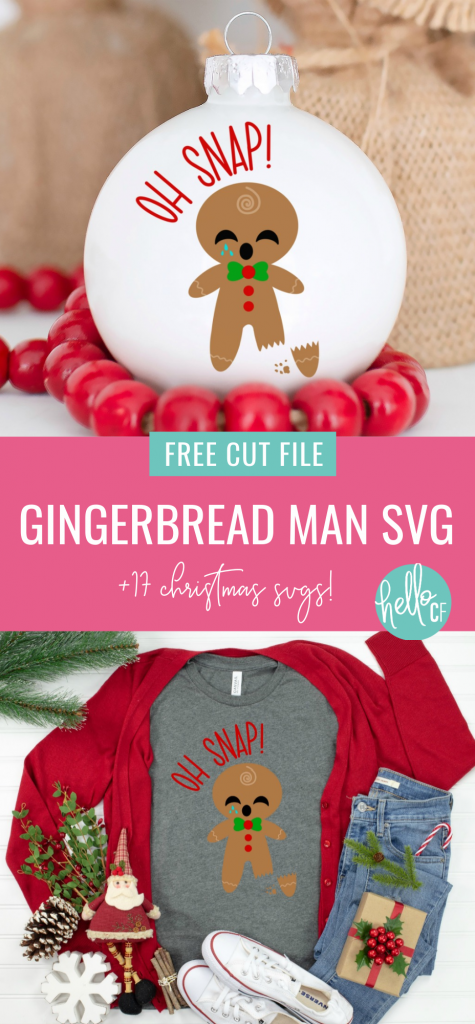
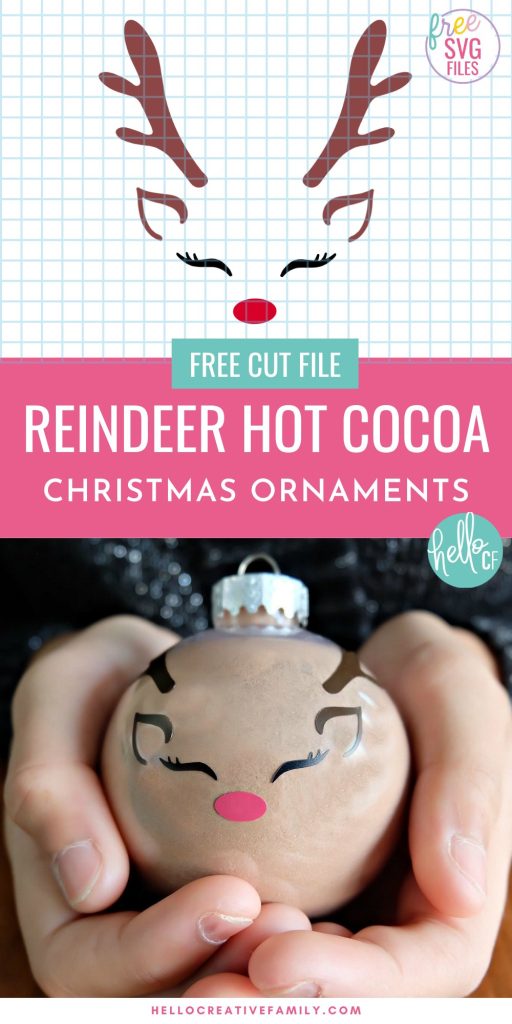
Looking for more DIY Christmas Ornaments?
We’re all about Christmas here at Hello Creative Familly! Here are some more holiday projects you might enjoy! Make sure to check out our holiday section for more!

Tell me… Do you love Christmas the way I do? Do you DIY Christmas gifts, decor, ornaments and more for your home?
If you like our Gnome Ornaments I would love for you to pin it to Pinterest! It helps others discover our content which helps us bring you more awesome content like this!


I love these Gnome Ornaments. I have my grandchildren this weekend and we can work on these together. Thank you very much. Do you by chance a snowman like this. God’s blessings to you. You are so talented and amazing.